

TL;DR: Dashboard → Profile Icon → Account Settings. Manage your profile and account preferences from one central location.
AND
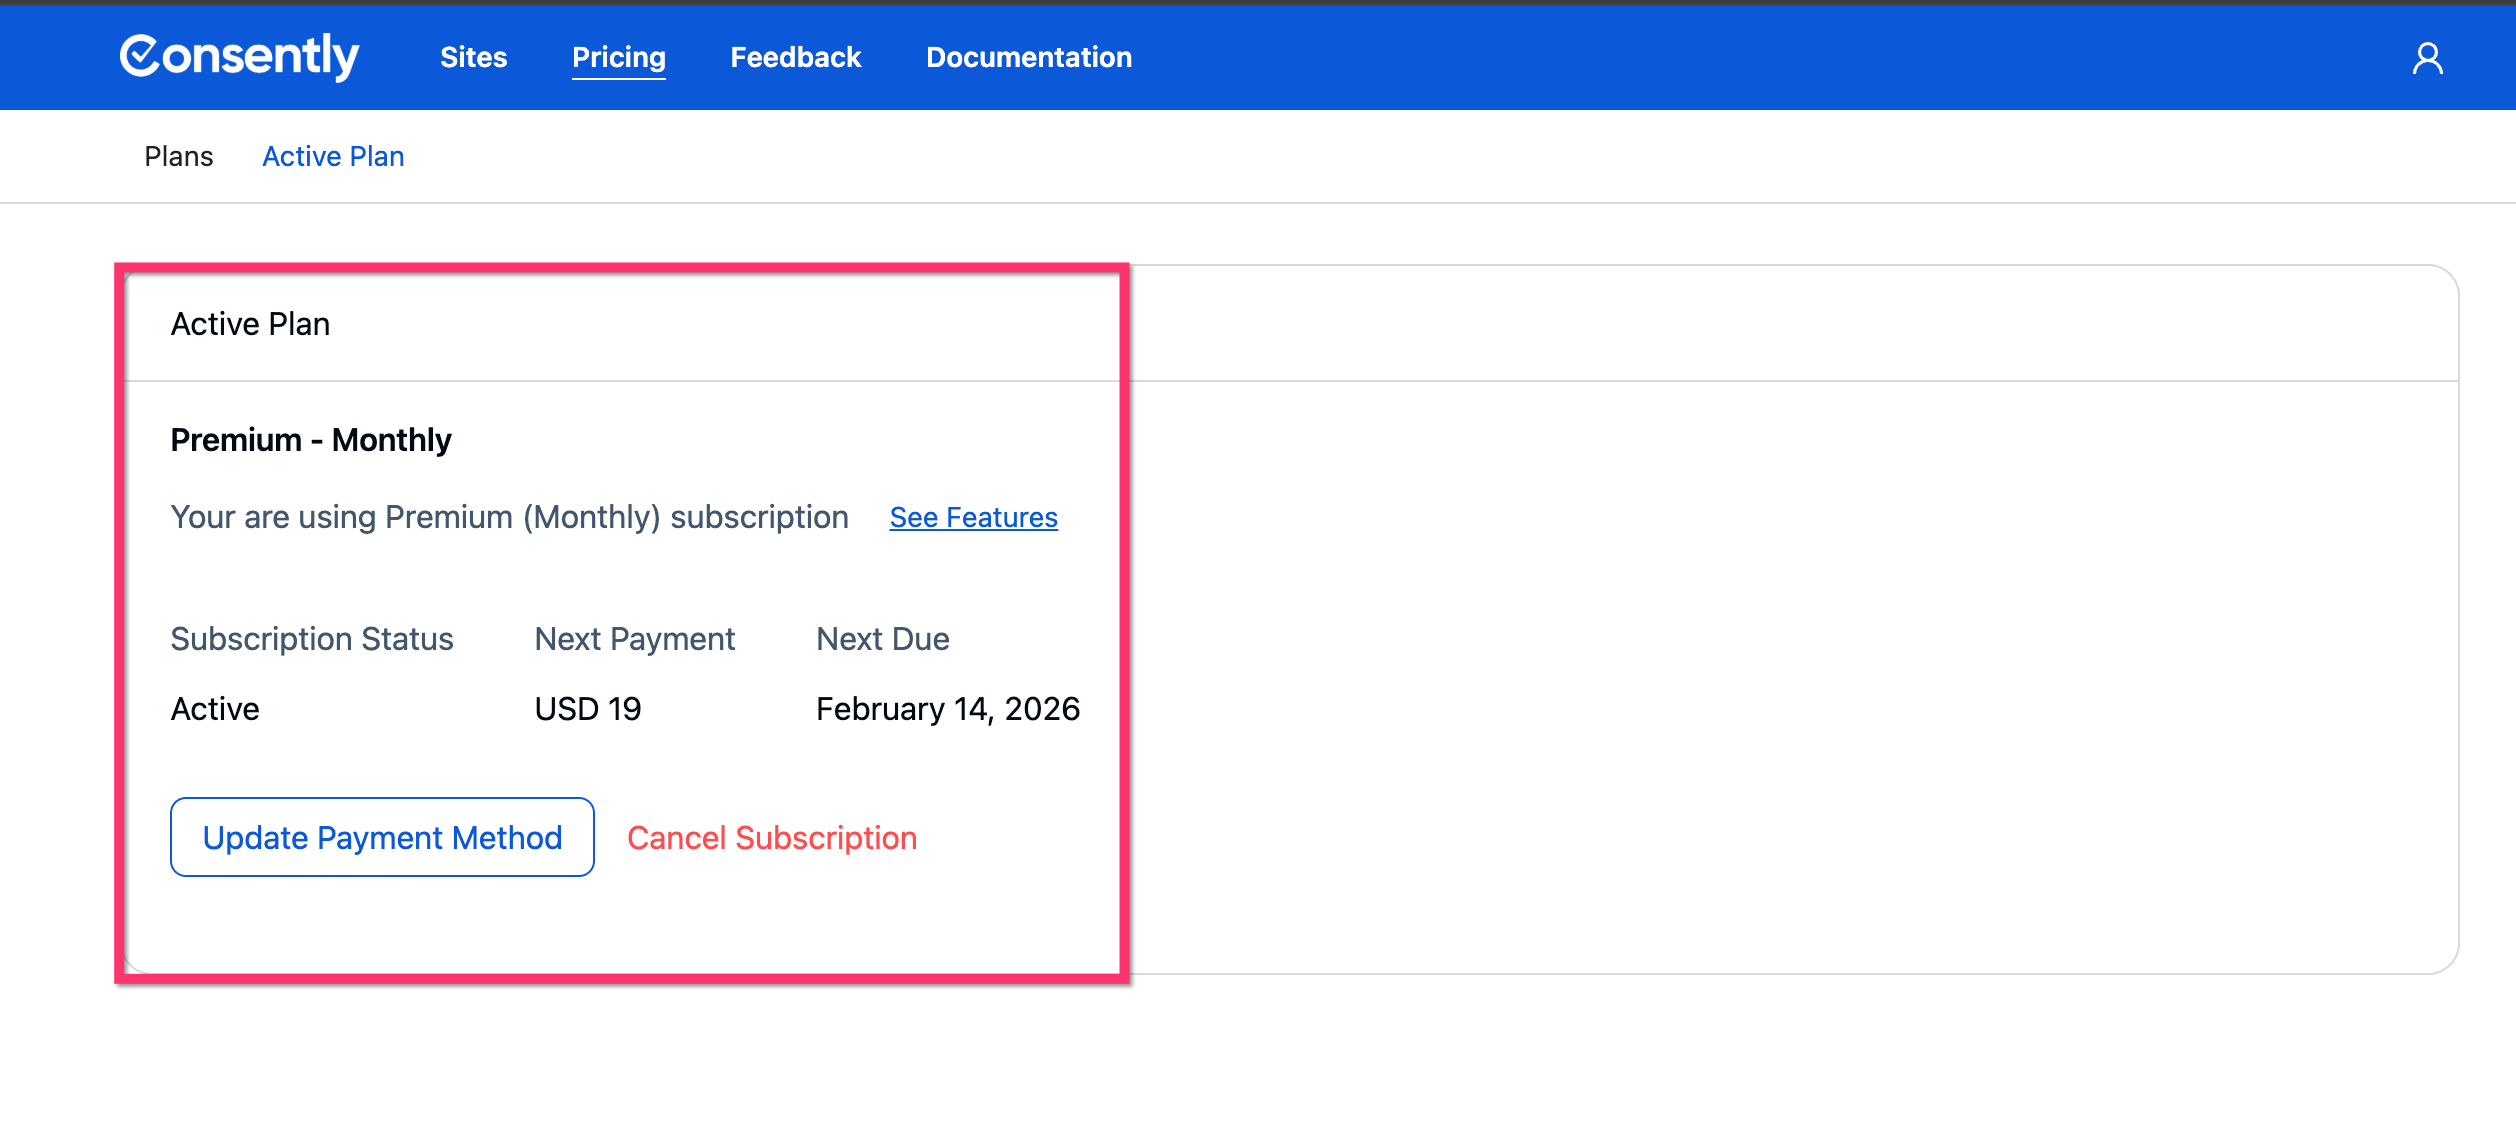
Dashboard → Pricing → My Plans. Check your active plan, subscription status and features, Update Payment Method, Manage subscription.
Overview
Account & Billing Management lets you control your Consently account settings and subscription details. You can update your personal information, manage payment methods, view your billing history, and configure your account preferences.
Before You Begin
Make sure you have:
Admin access to your Consently account
Payment information is ready if updating billing details
Time required: About 5 minutes
How to Access Account Settings
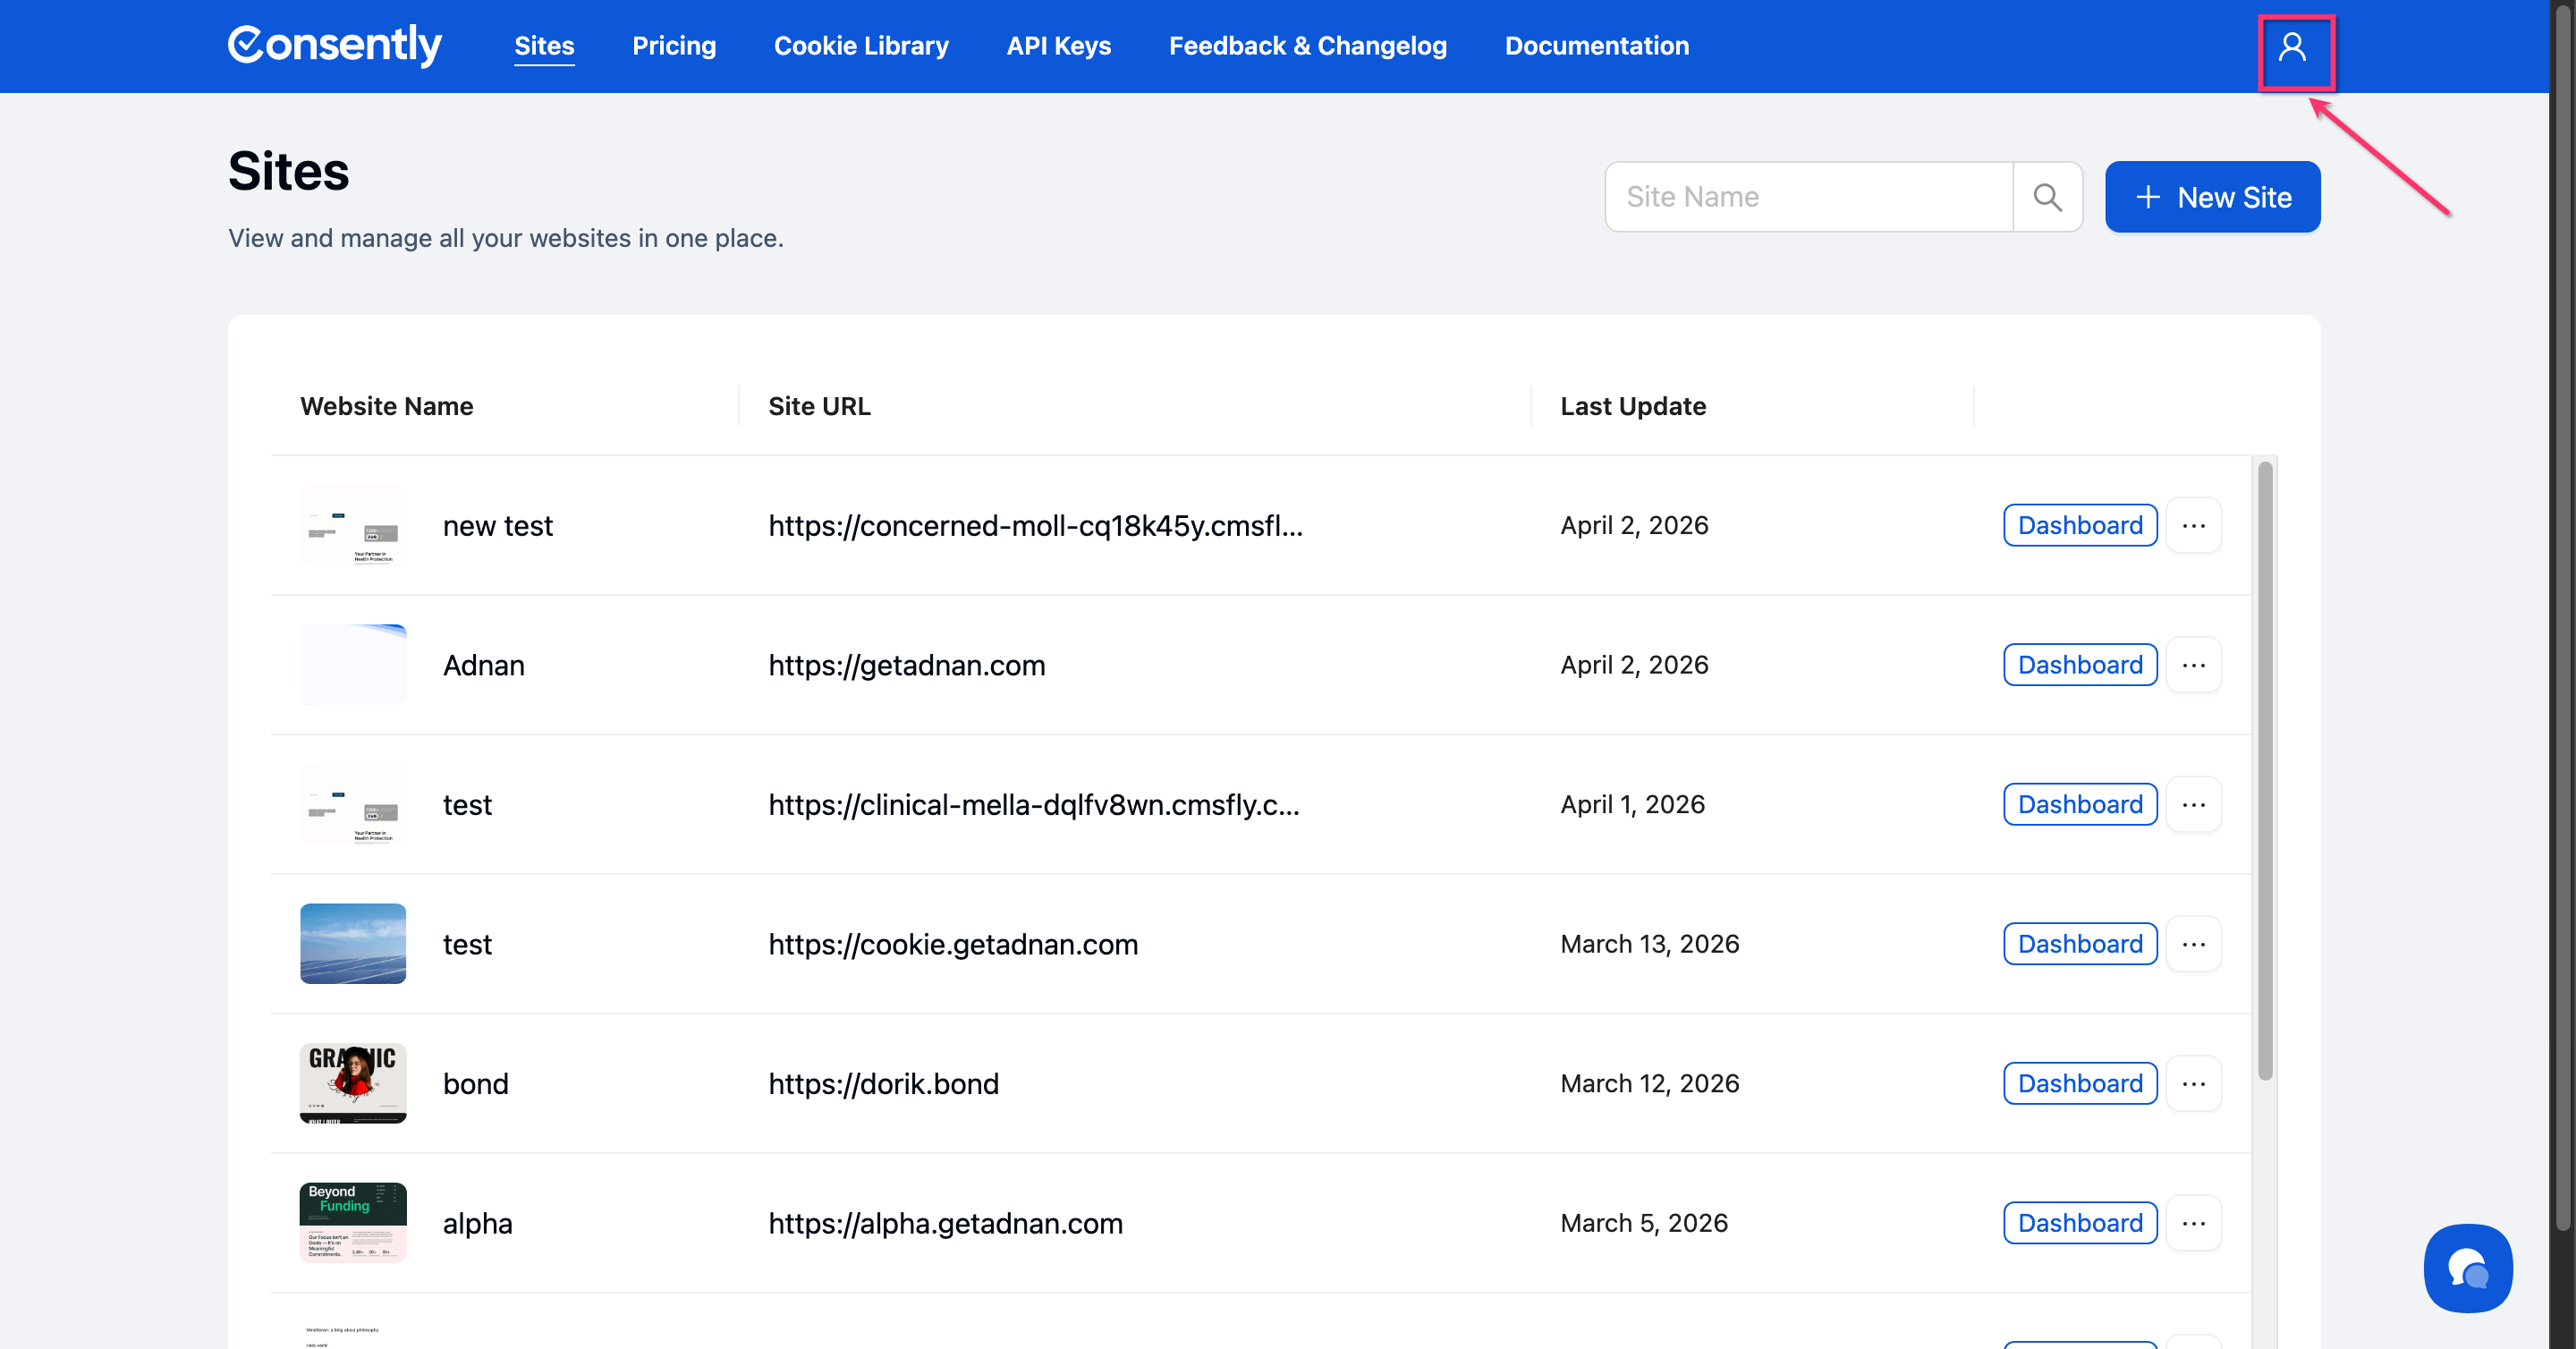
Step 1: Open your account menu
Click your profile icon in the top-right corner of the dashboard.
Step 2: Navigate to Settings
Select Edit Profile from the dropdown menu.

Managing Your Profile
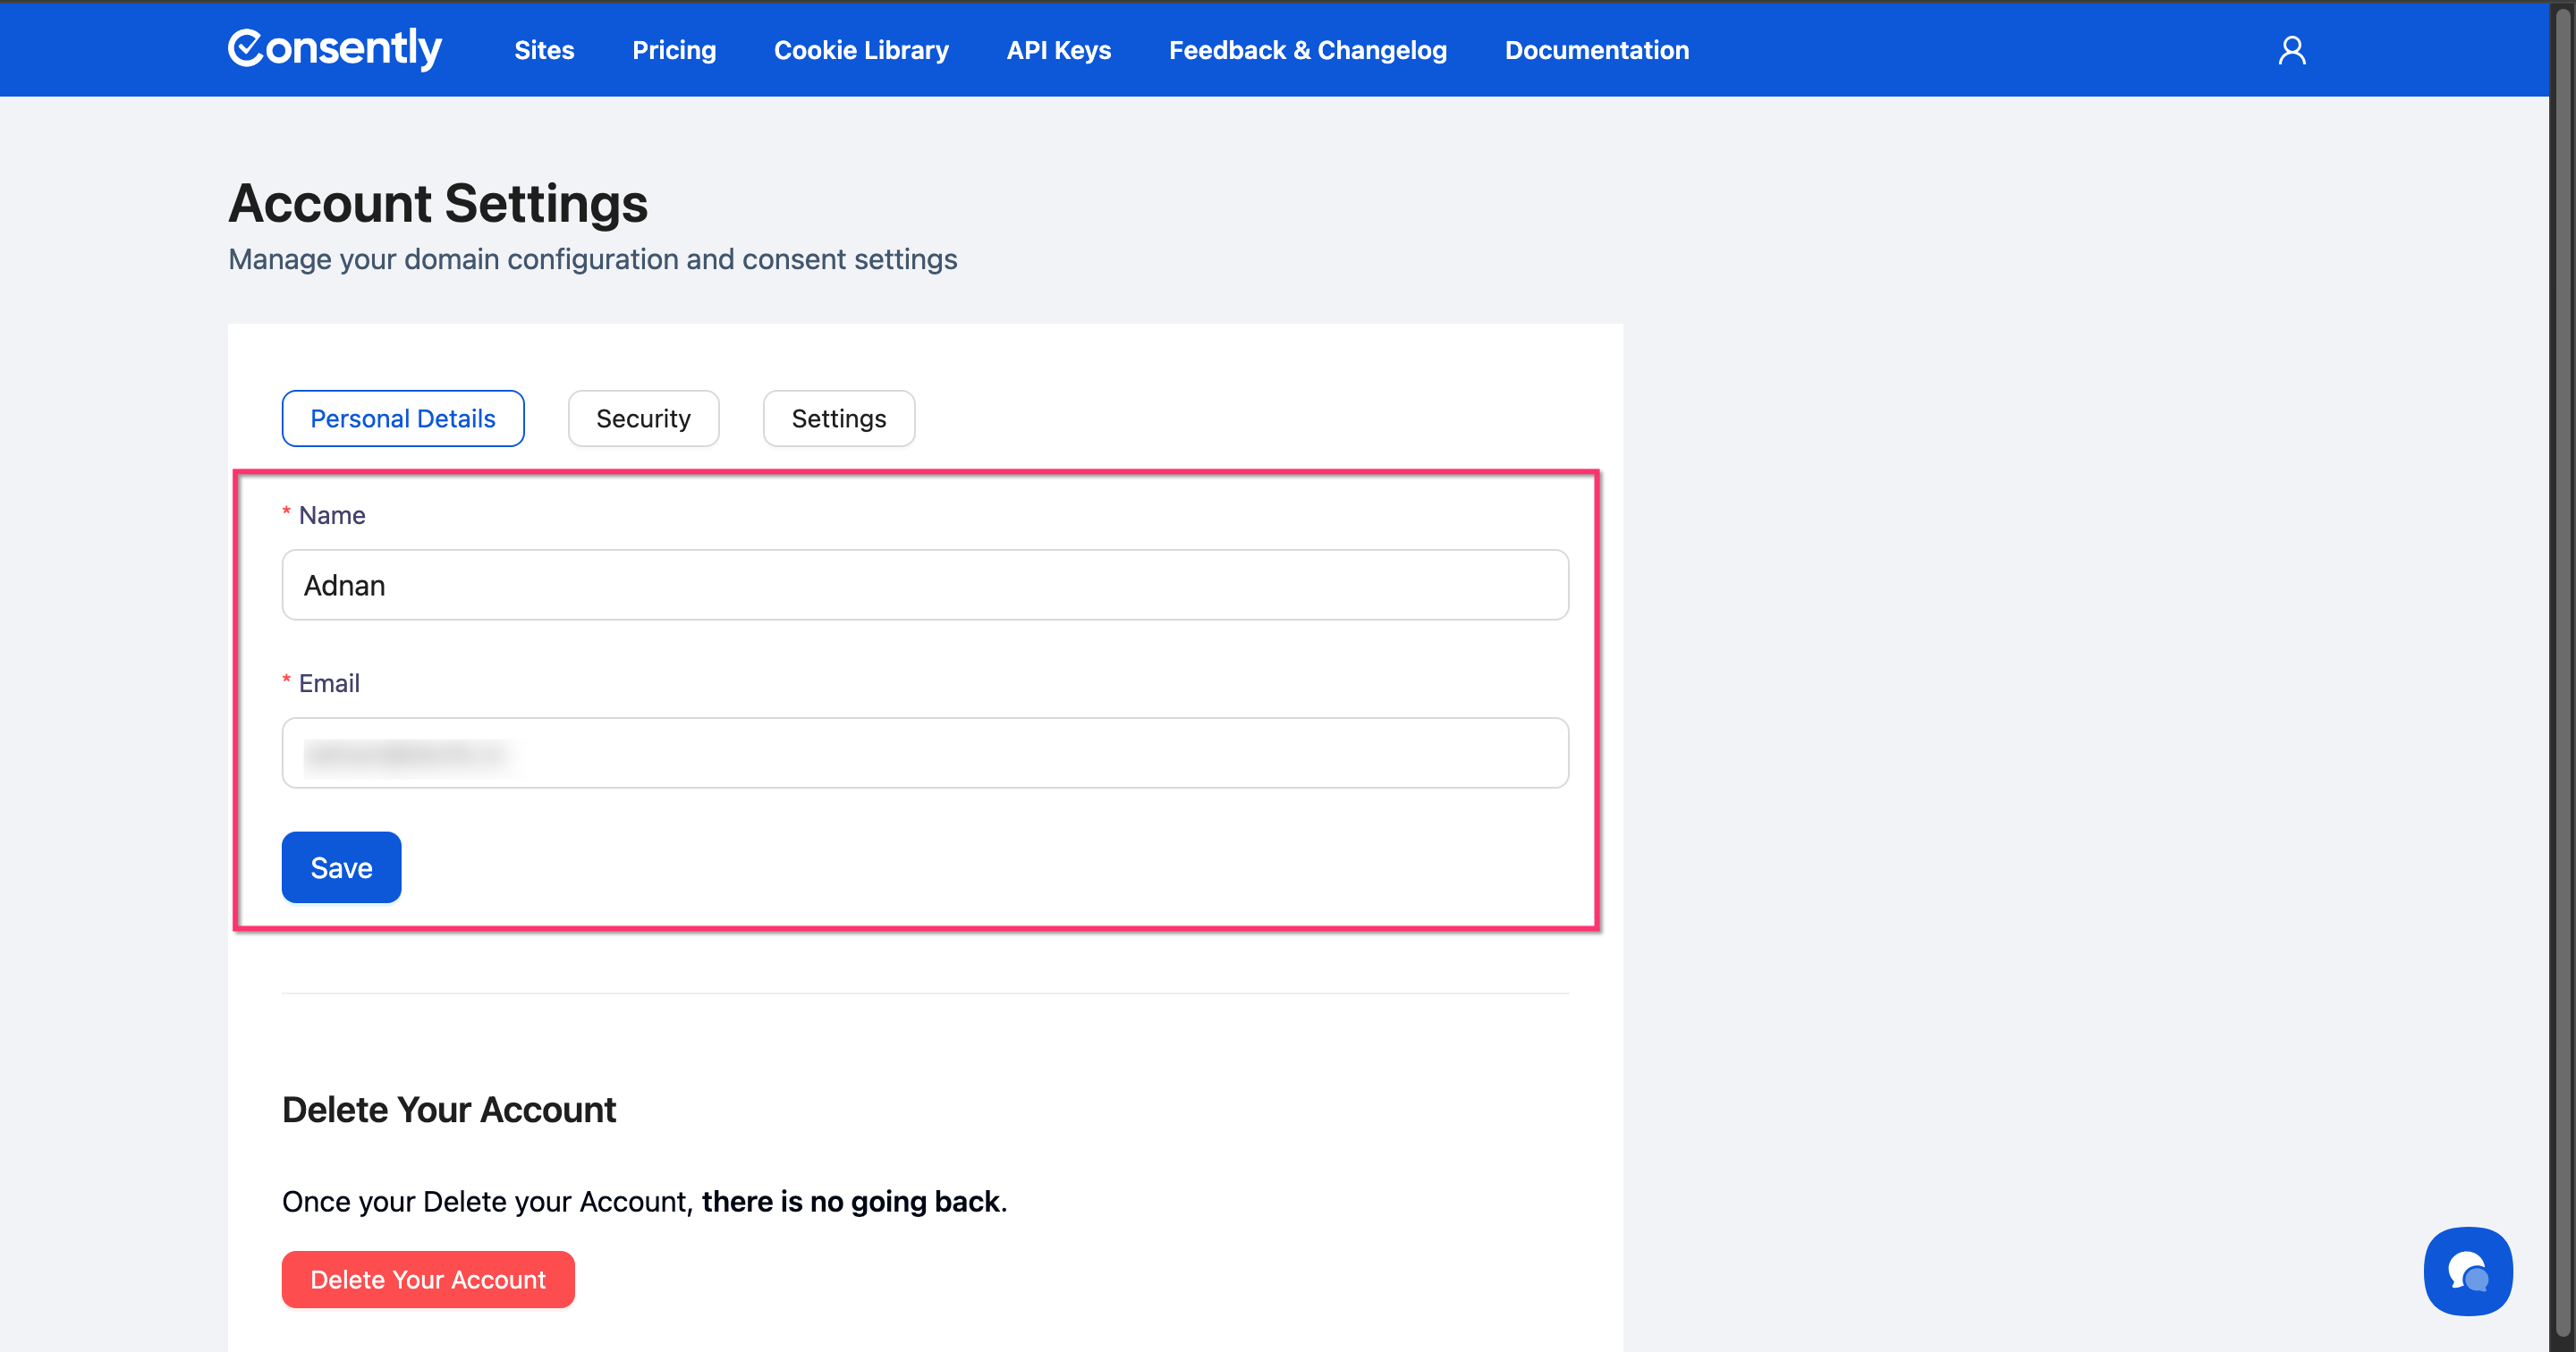
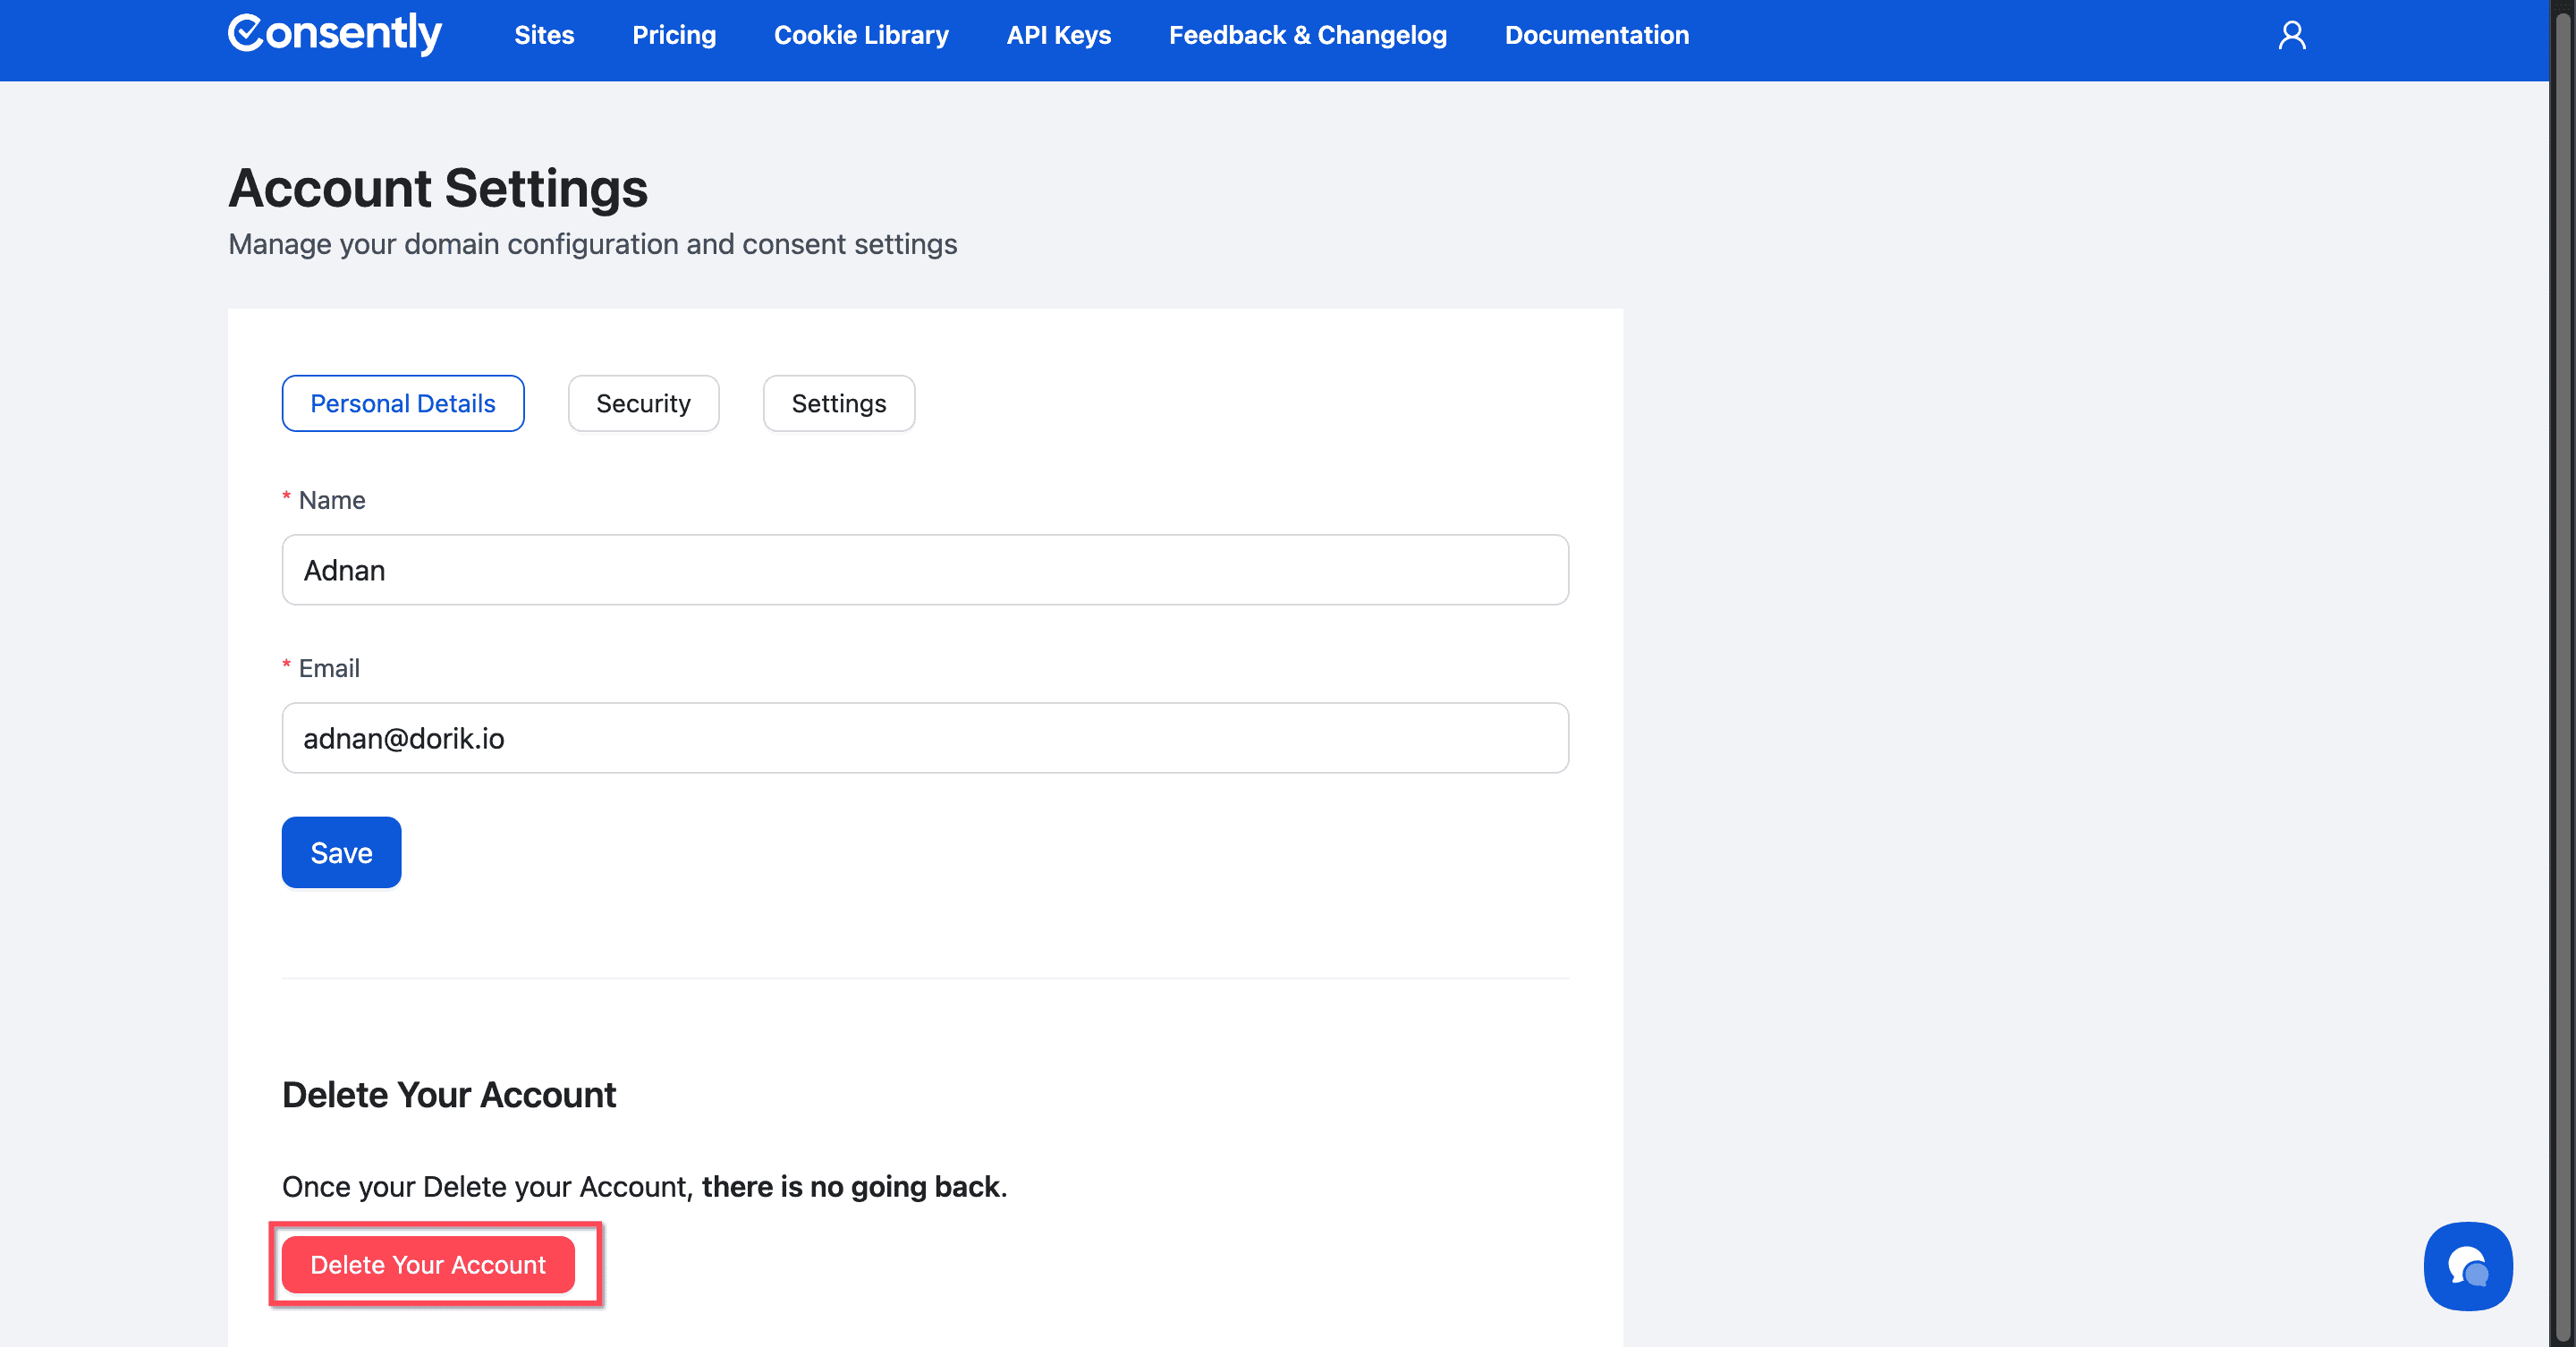
Step 1: Locate the Personal Details section
In Account Settings, find the Personal Details section at the top of the page.
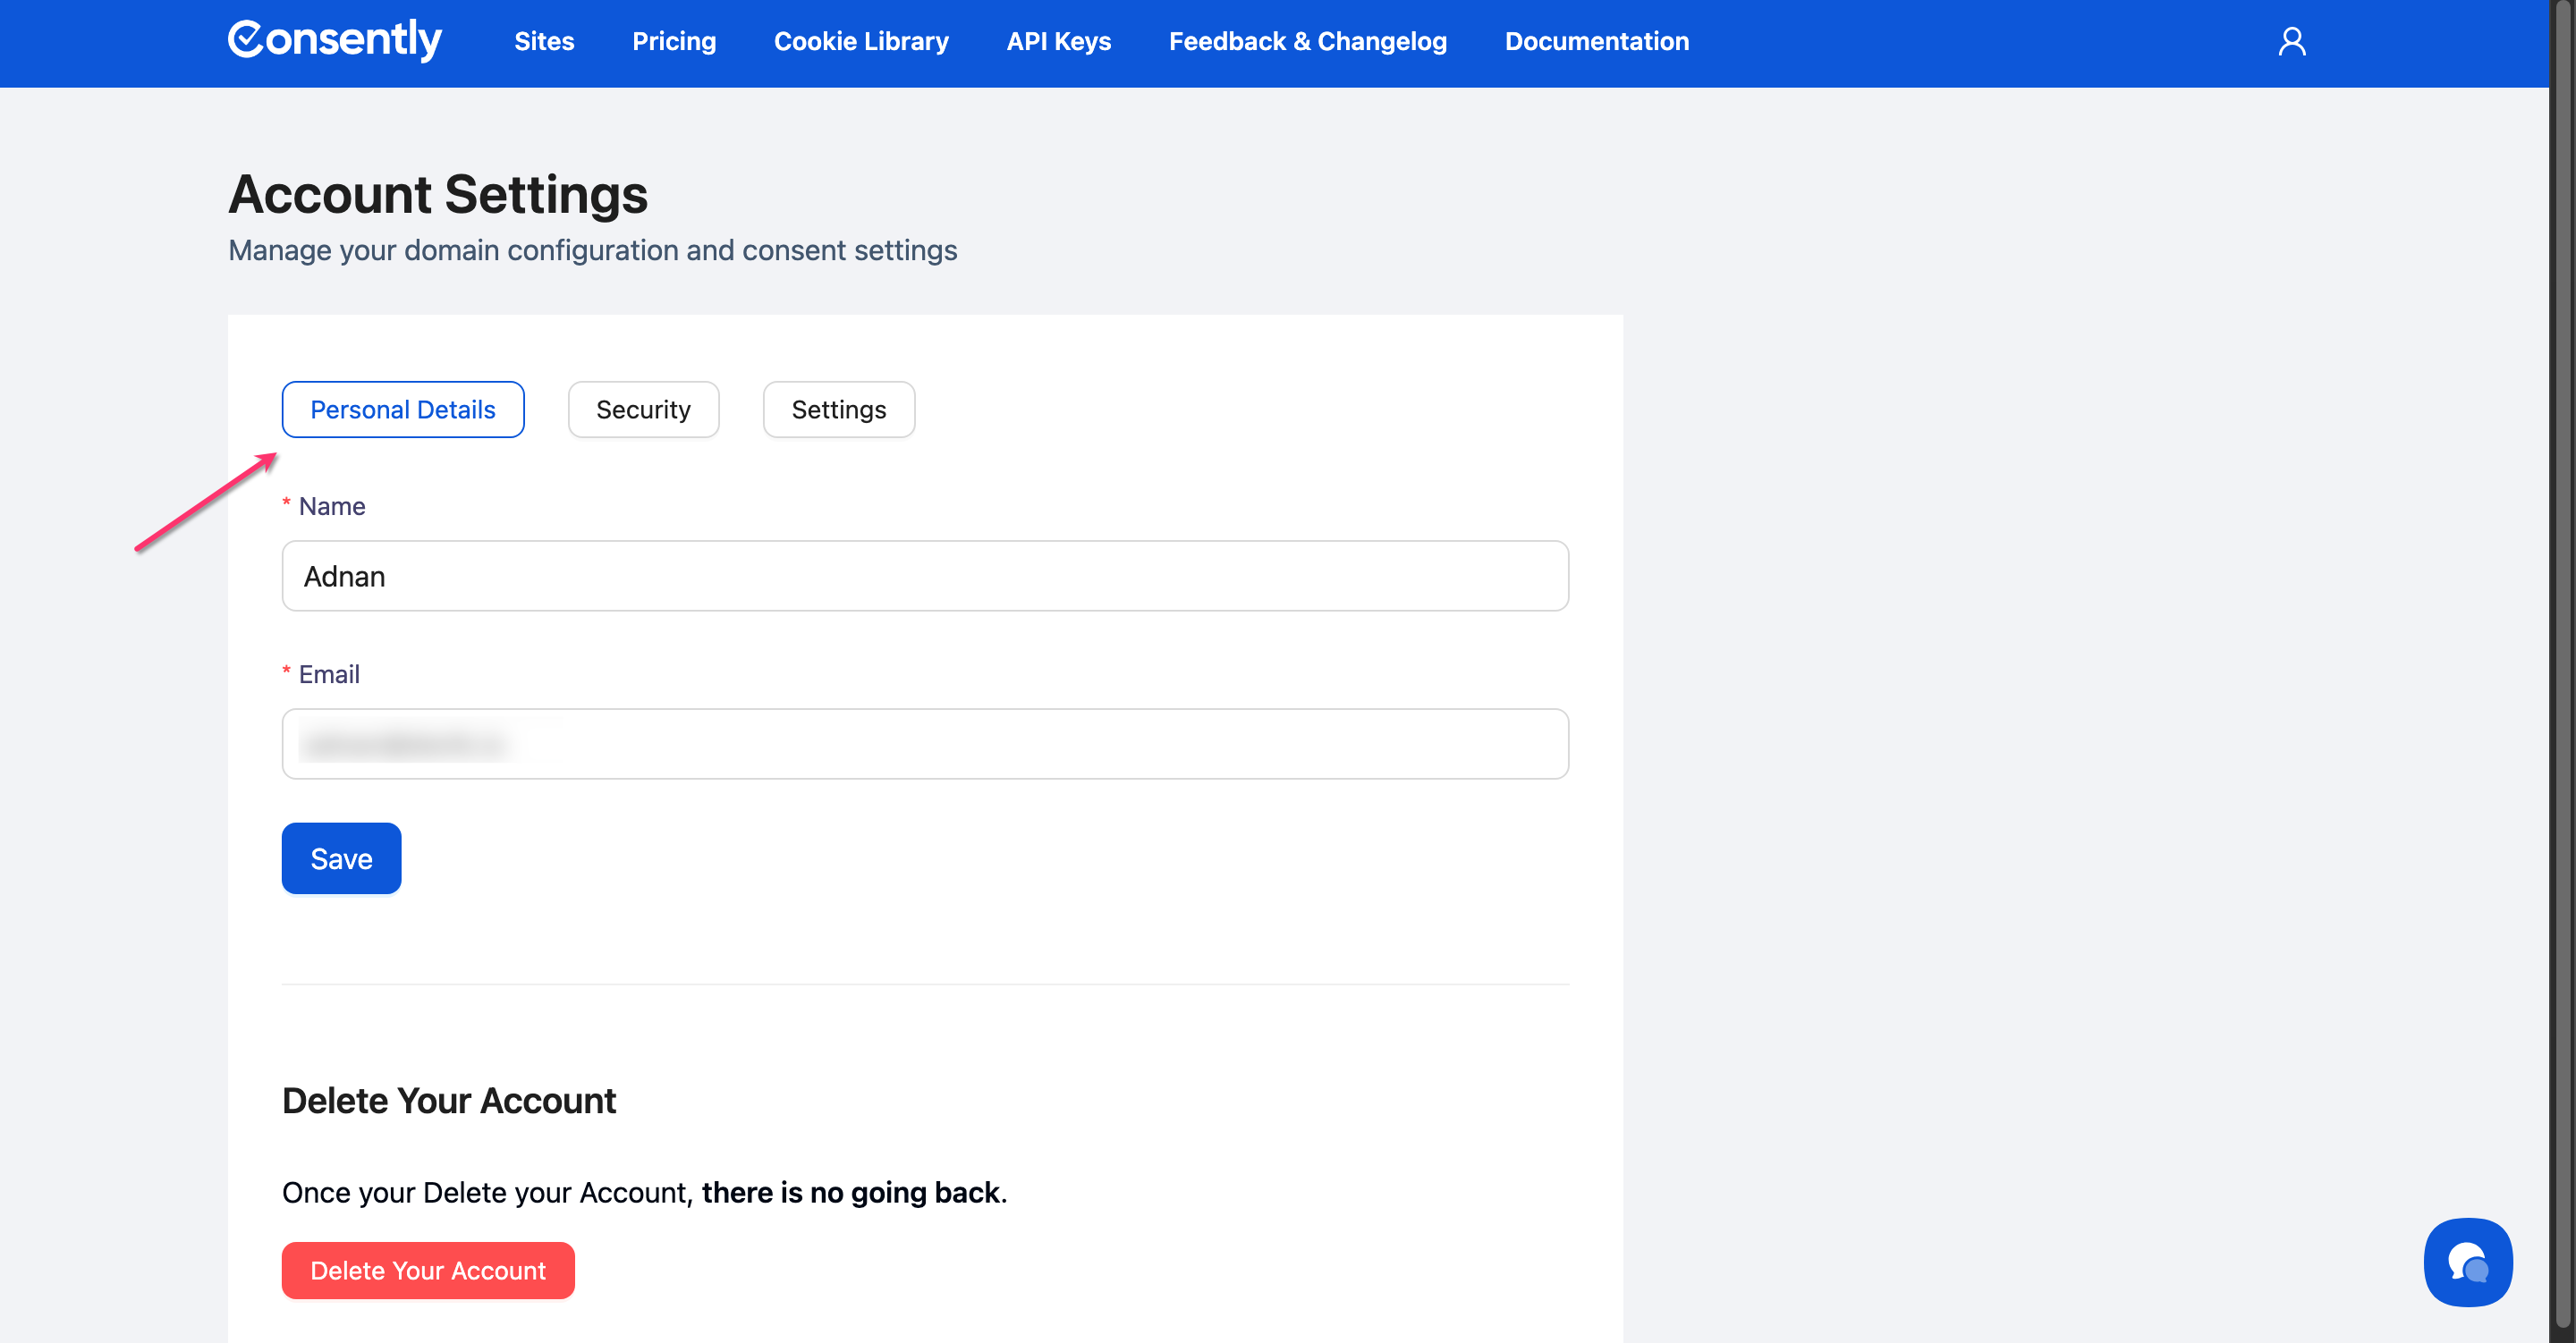
Step 2: Update your information
Edit your name, email address, or other profile details as needed.
Note: If you signed up using a regular email account, you can change your email address anytime.
If you signed in using Google login, your email address cannot be changed. In this case, the email input field will be disabled.
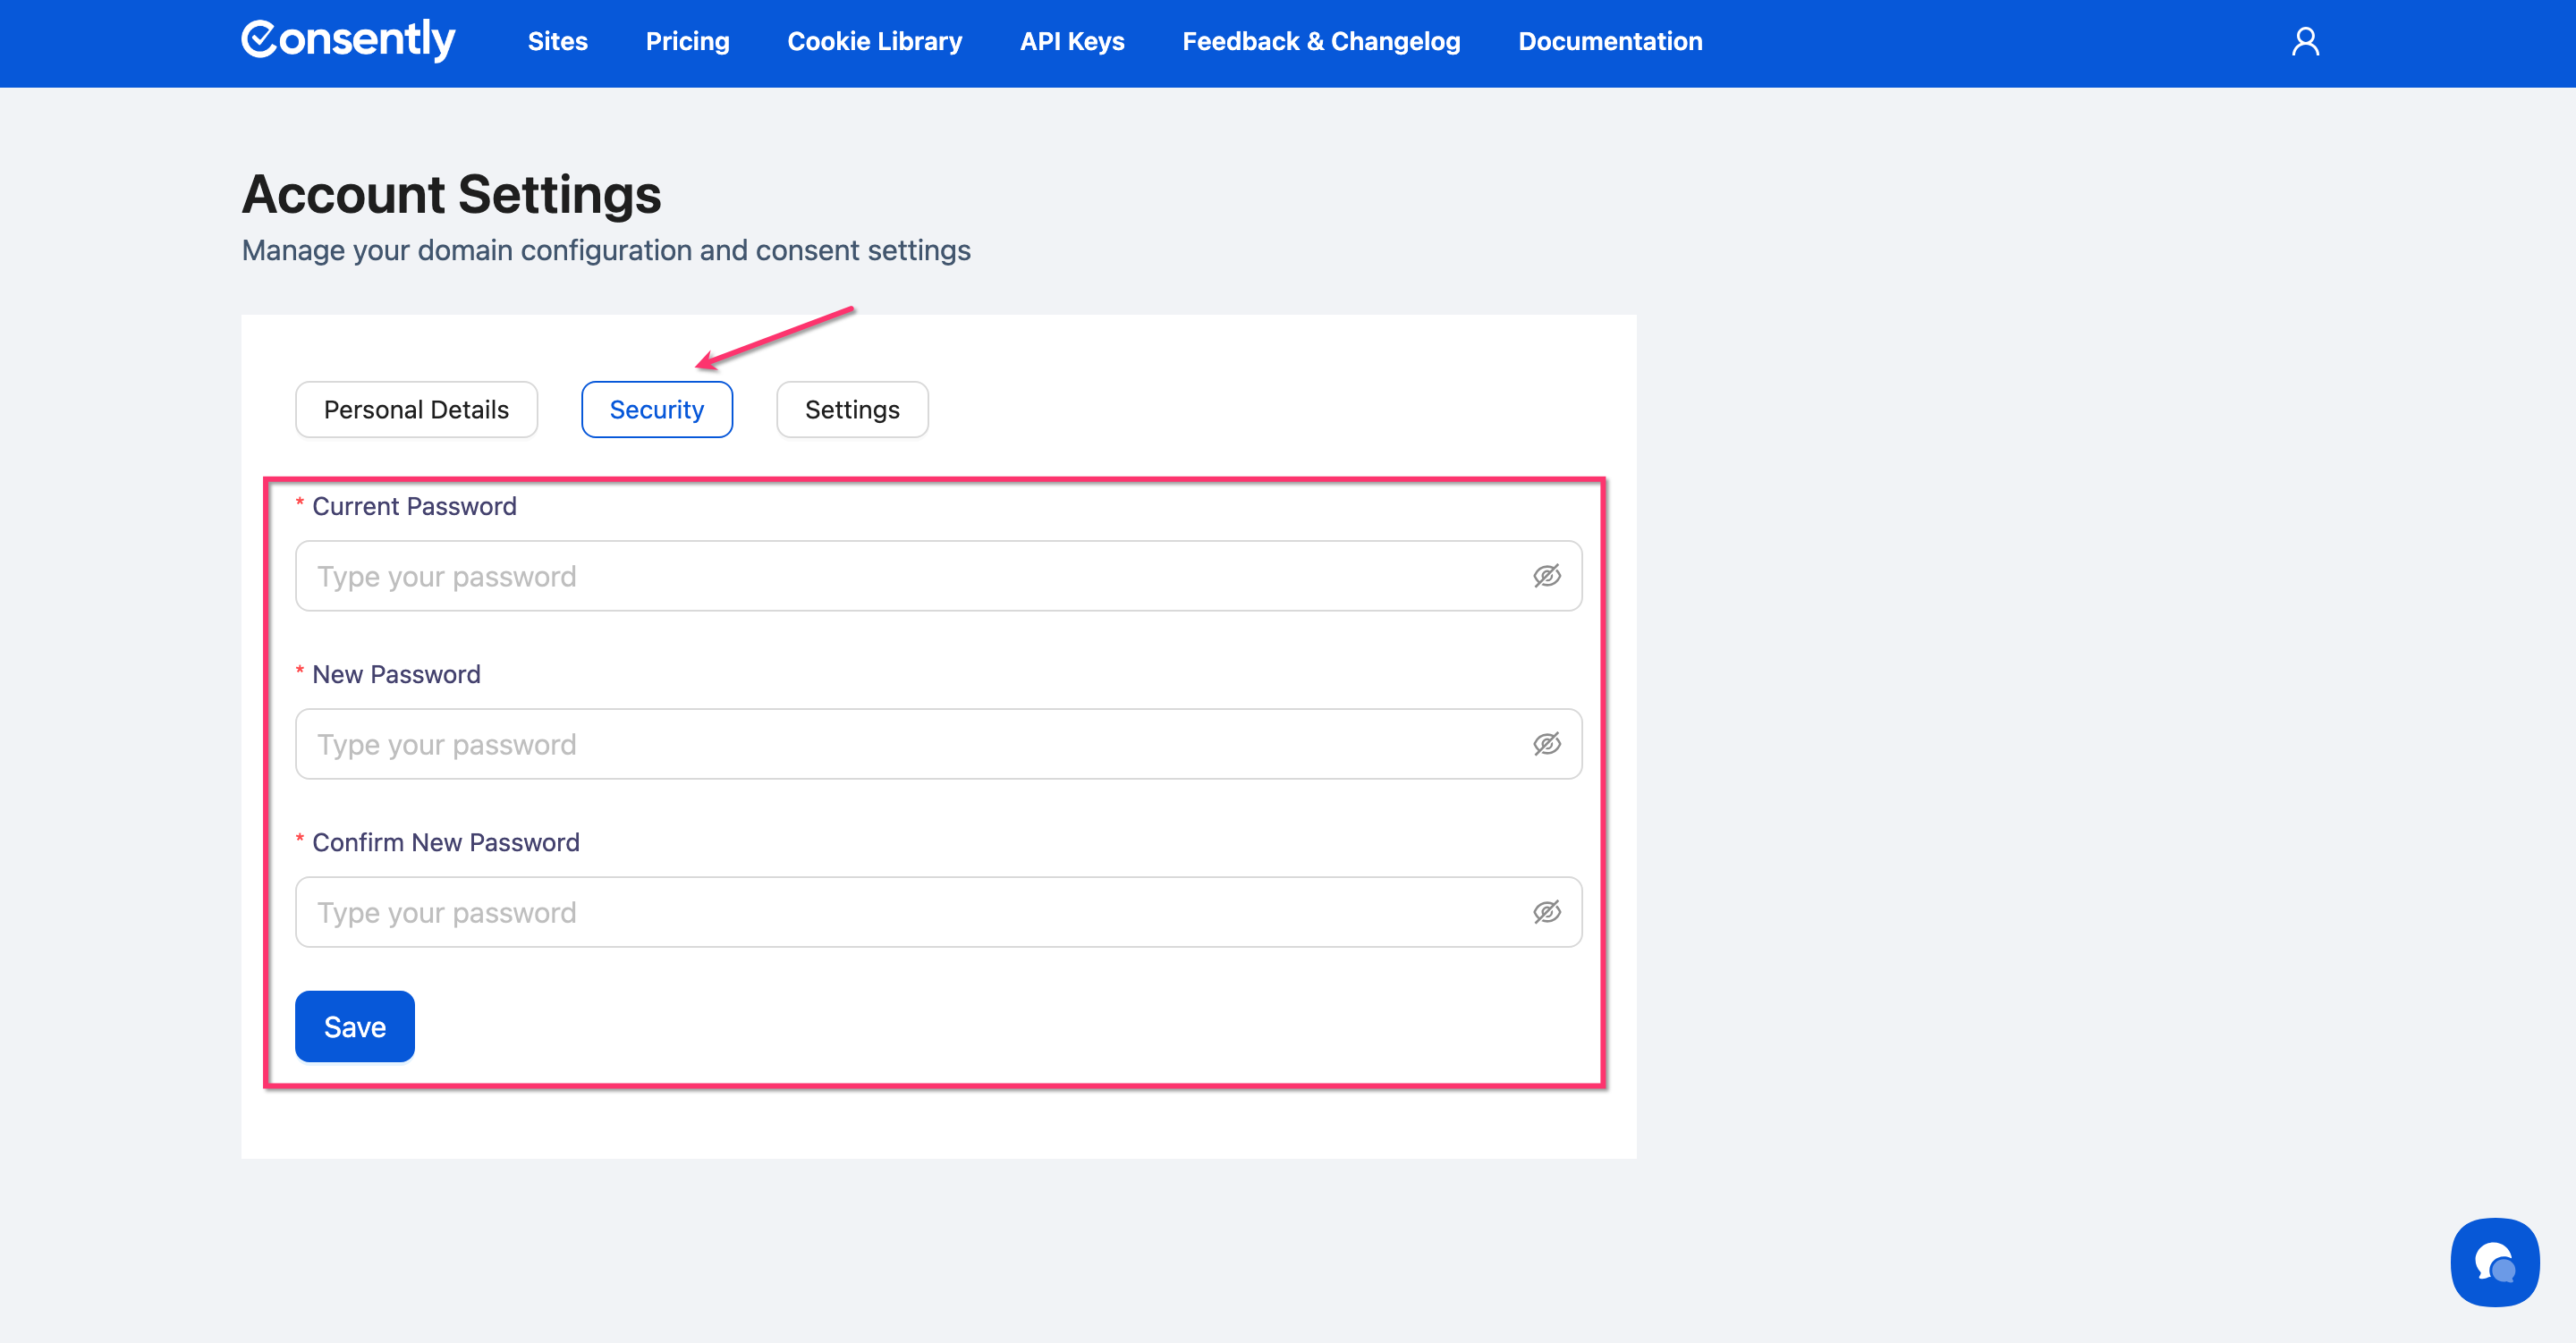
Step 3: Change your password
Click the Security tab, enter your current password, then enter and confirm your new password.
💡 Tip: Use a strong password with at least 8 characters, including uppercase, lowercase, and numbers.
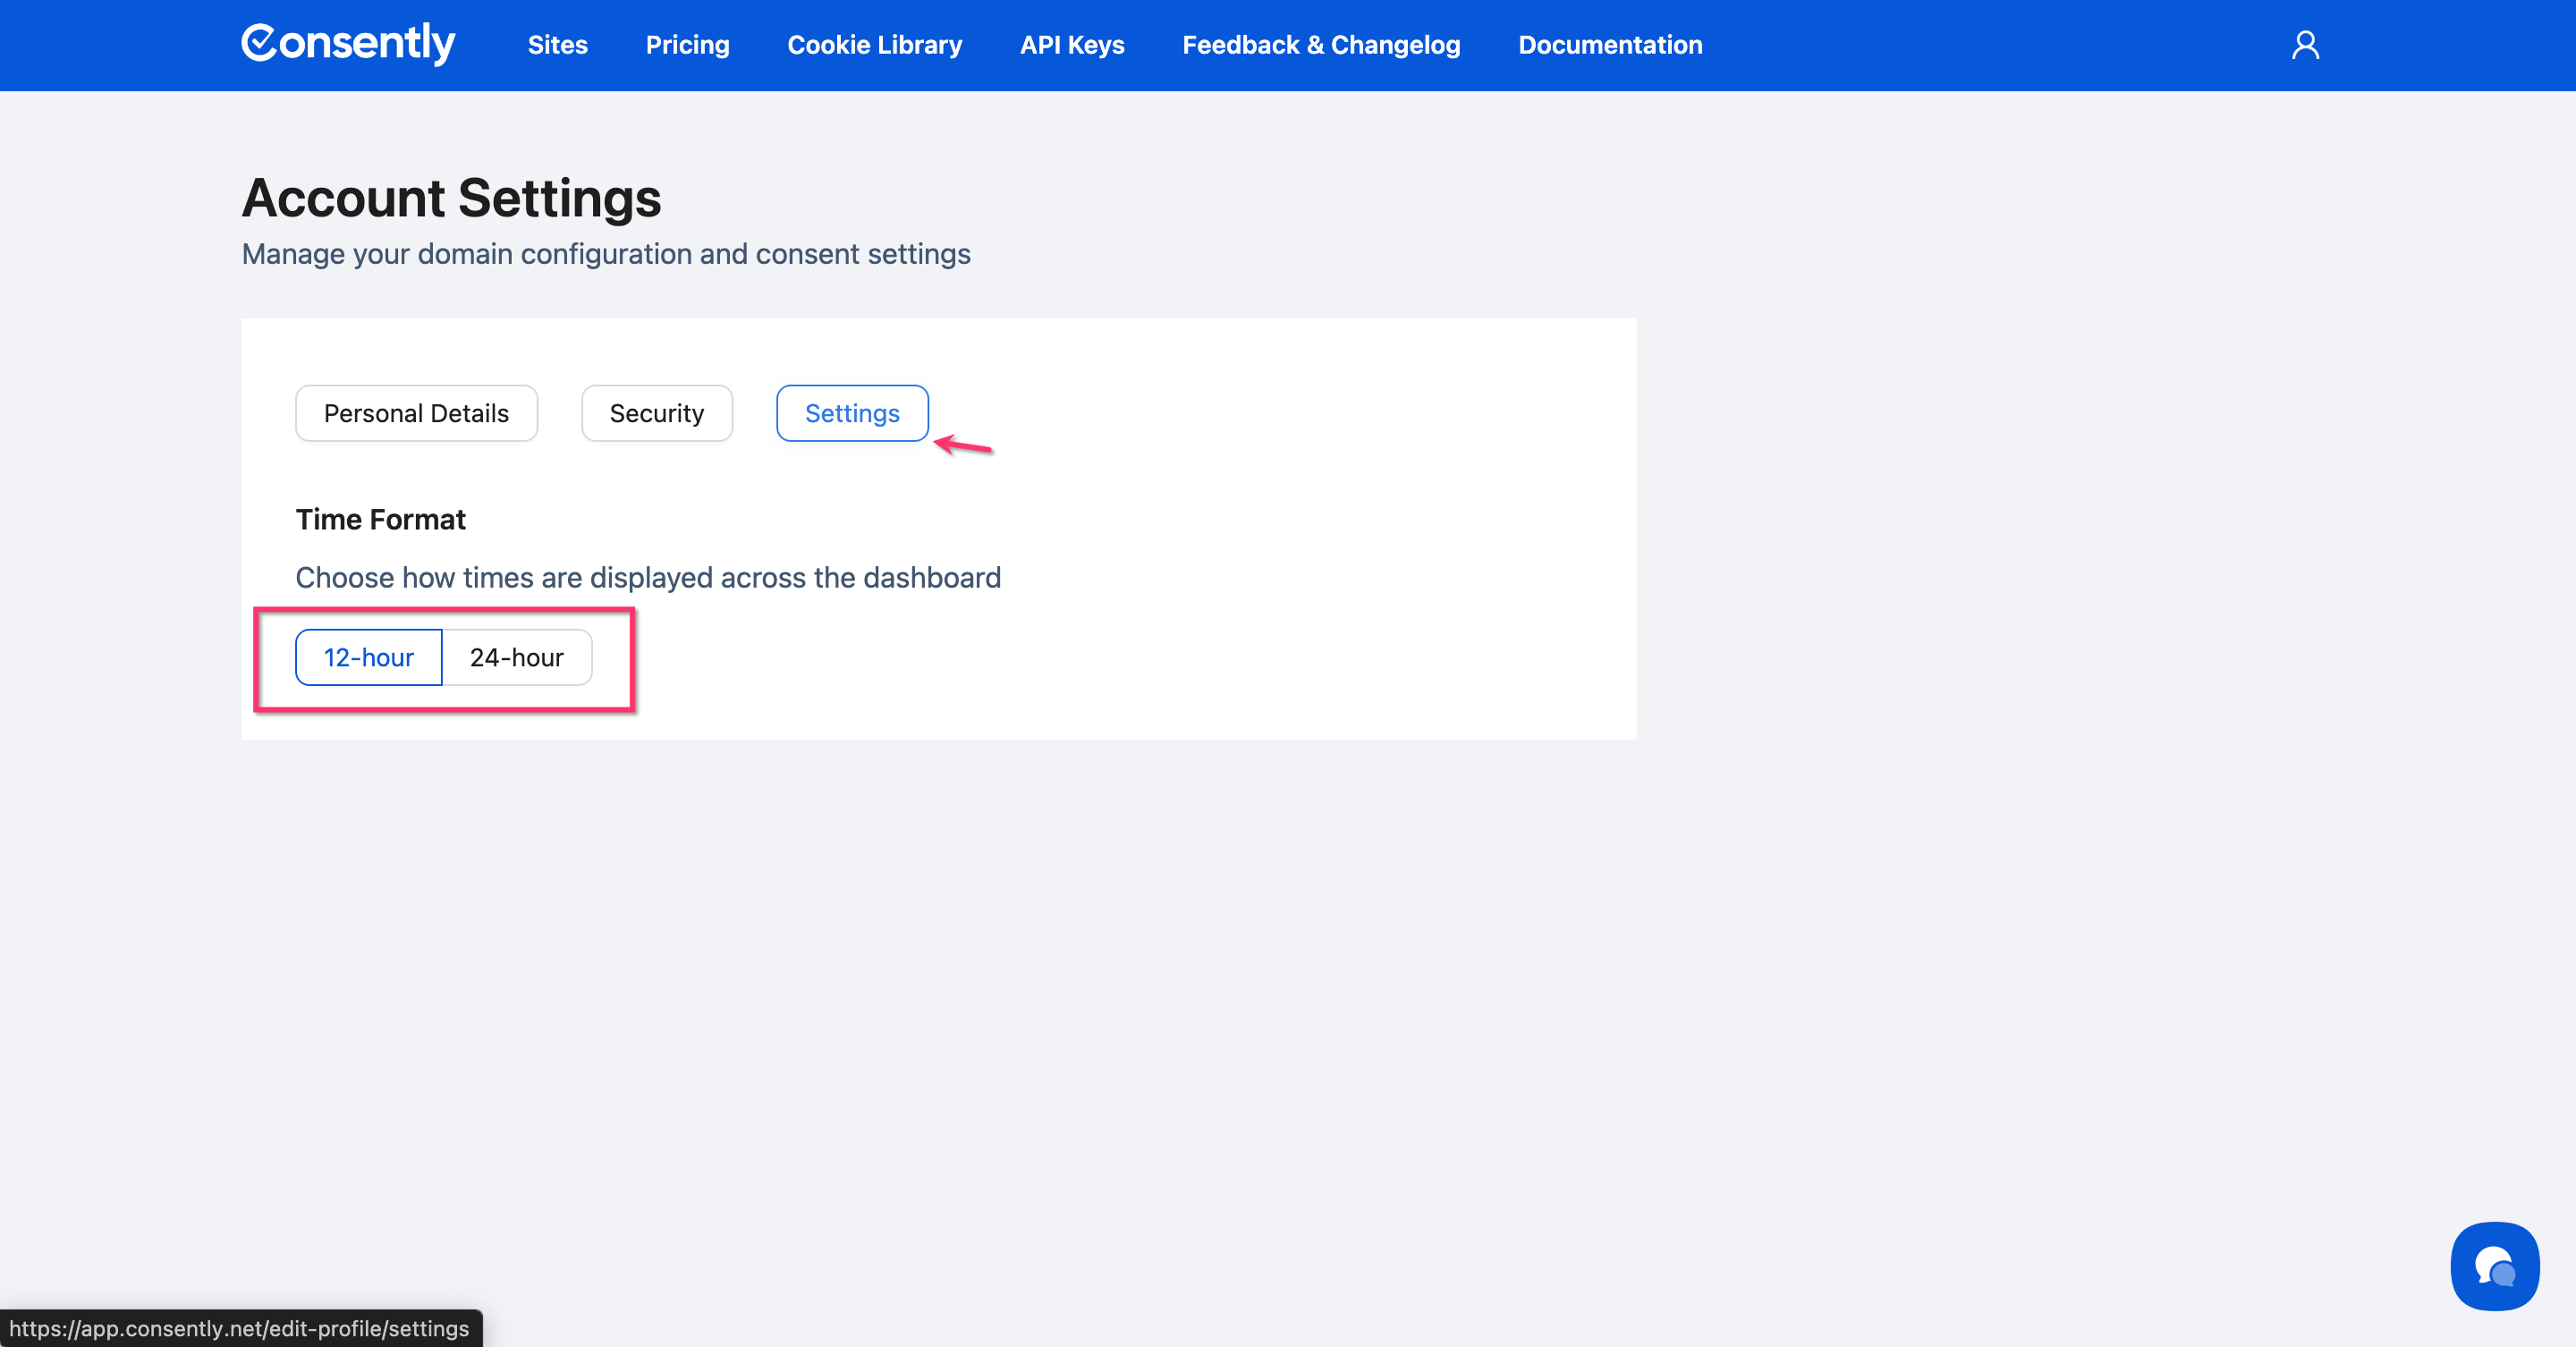
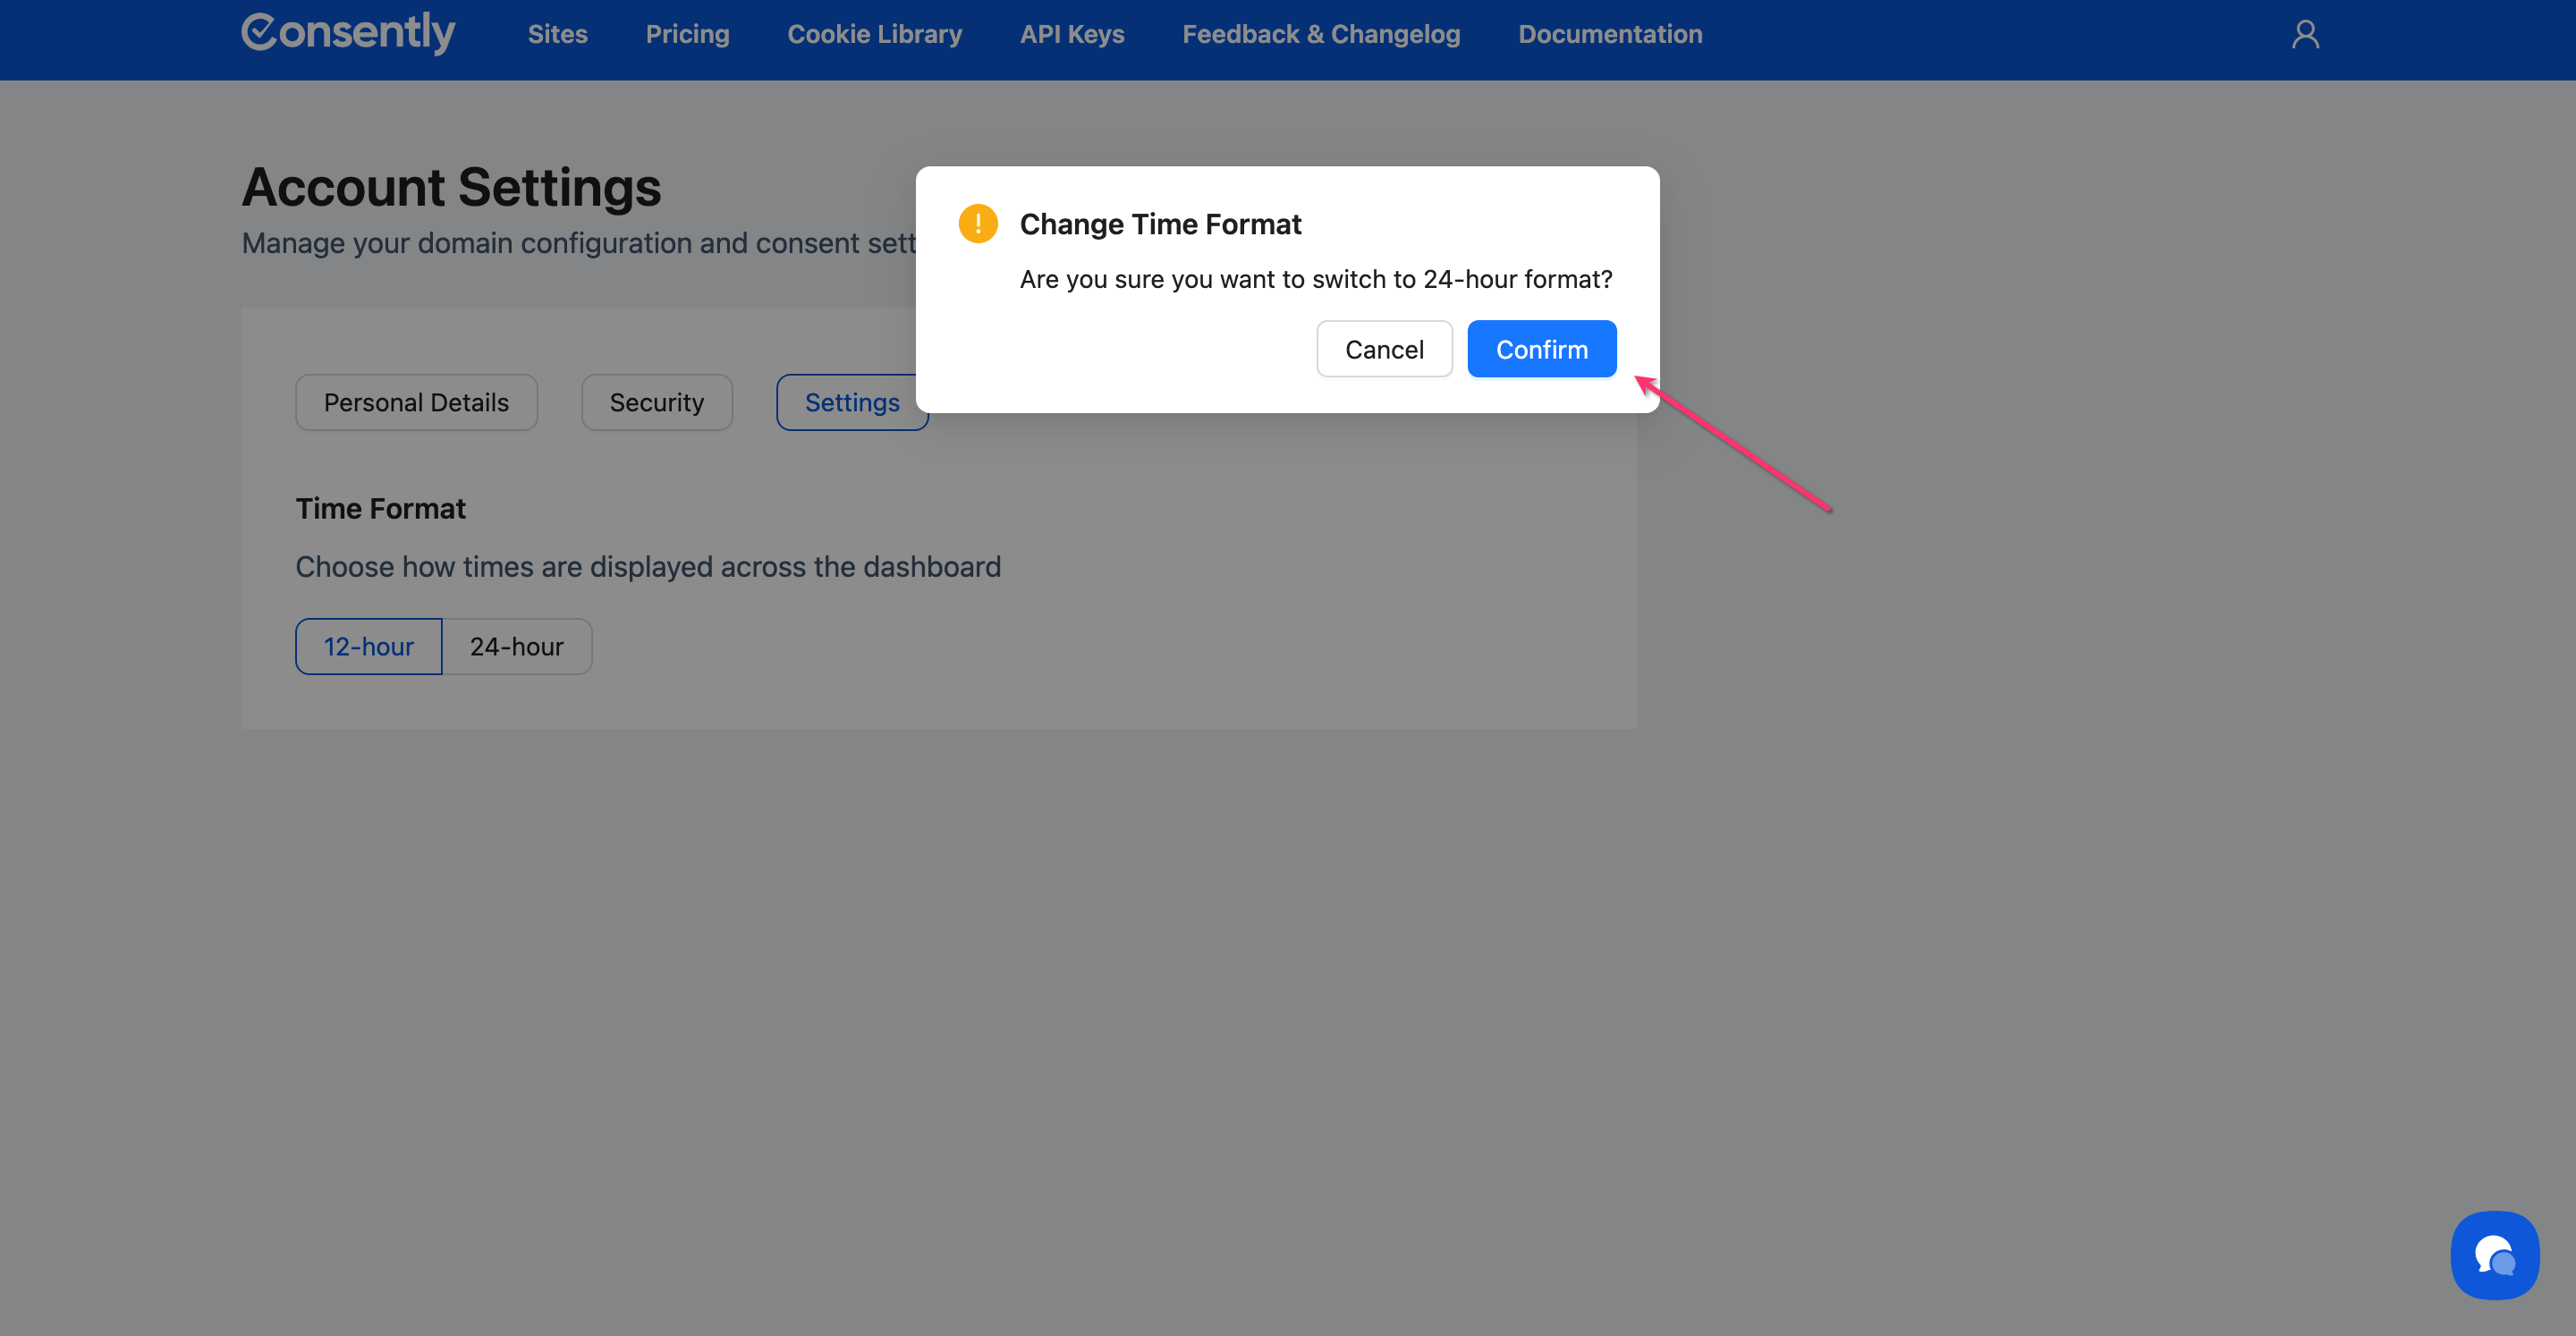
Step 4: Change Time Format
Under Time Format, select either 12-hour or 24-hour display.
Then click the Confirm button in the pop-up dialog to apply the new time format.
Done!
Deleting Your Account
Step 1: Navigate to Account Settings.
Follow the instructions mentioned above to navigate to the Accounts Settings page.
Step 2: Delete your Account
Click the Delete Your Account button
⚠️ Important: Account deletion is permanent and irreversible. Please confirm that you fully understand this before continuing.
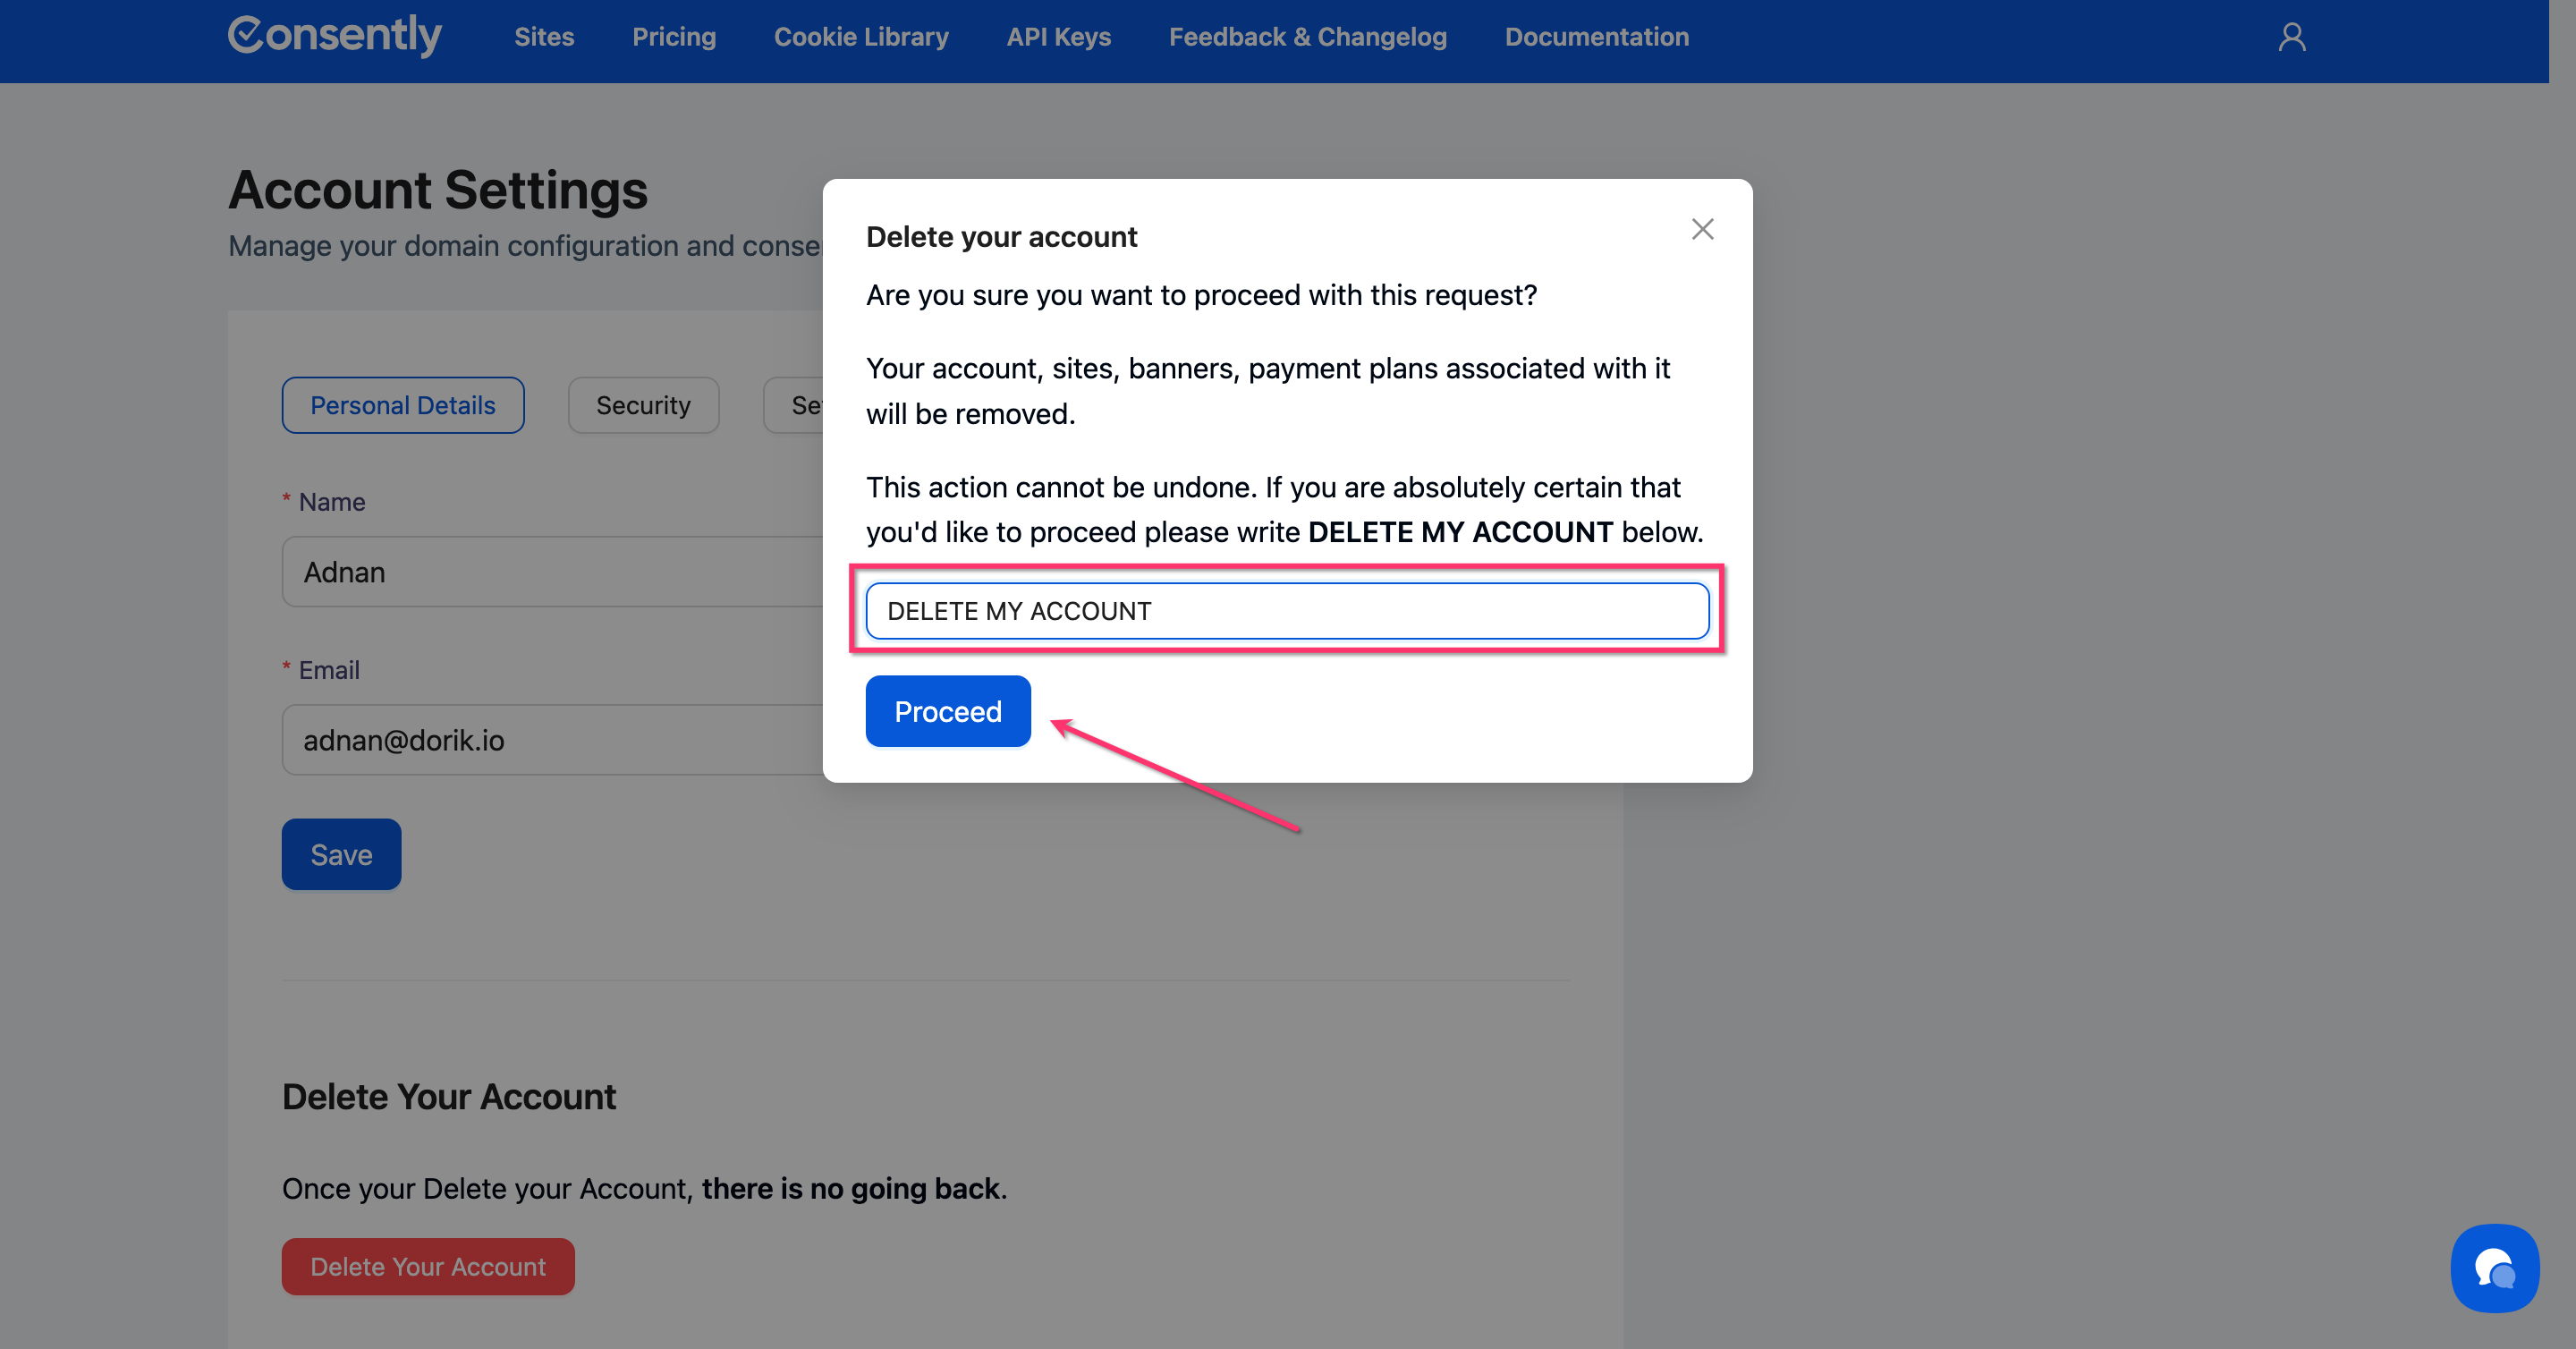
Step 3: Confirm your Action
A pop-up window will open when you click the Delete your Account button. Please type DELETE MY ACCOUNT in the input box and then click on the Proceed button.
⚠️ Important: The Proceed button is disabled by default. To continue, you must type DELETE MY ACCOUNT in ALL CAPS to confirm your action.
Done!
Your account was successfully deleted.
✅ Success indicator: You’ll receive a confirmation showing "User deleted successfully".
Managing Billing & Payment Methods
Step 1: Access the Billing section
Navigate to the Pricing → Active Plan section from the Dashboard.
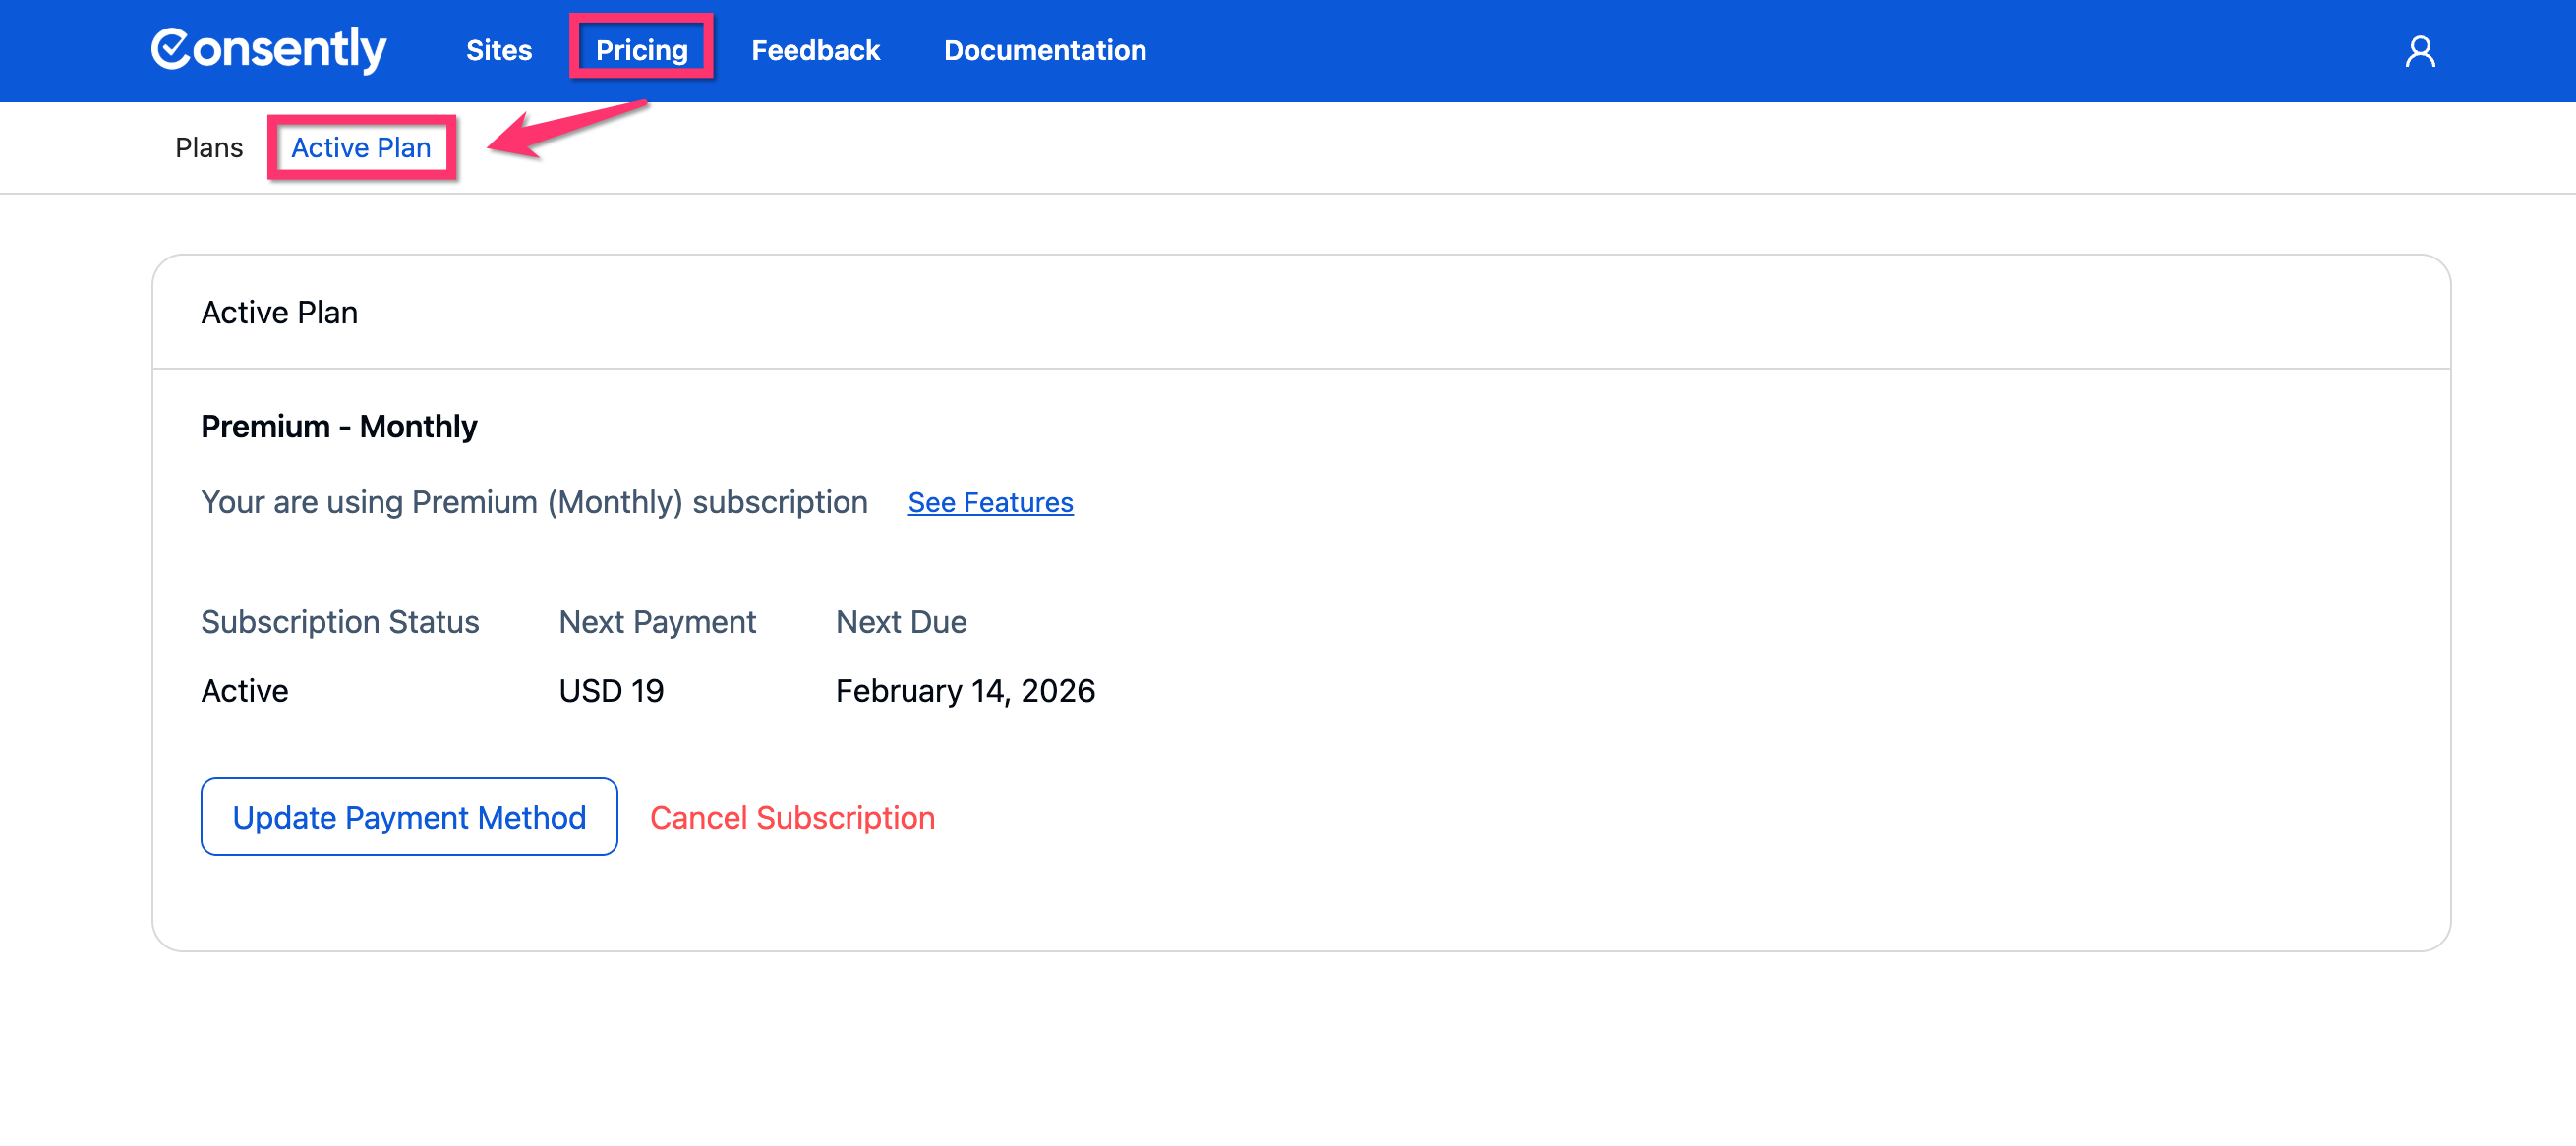
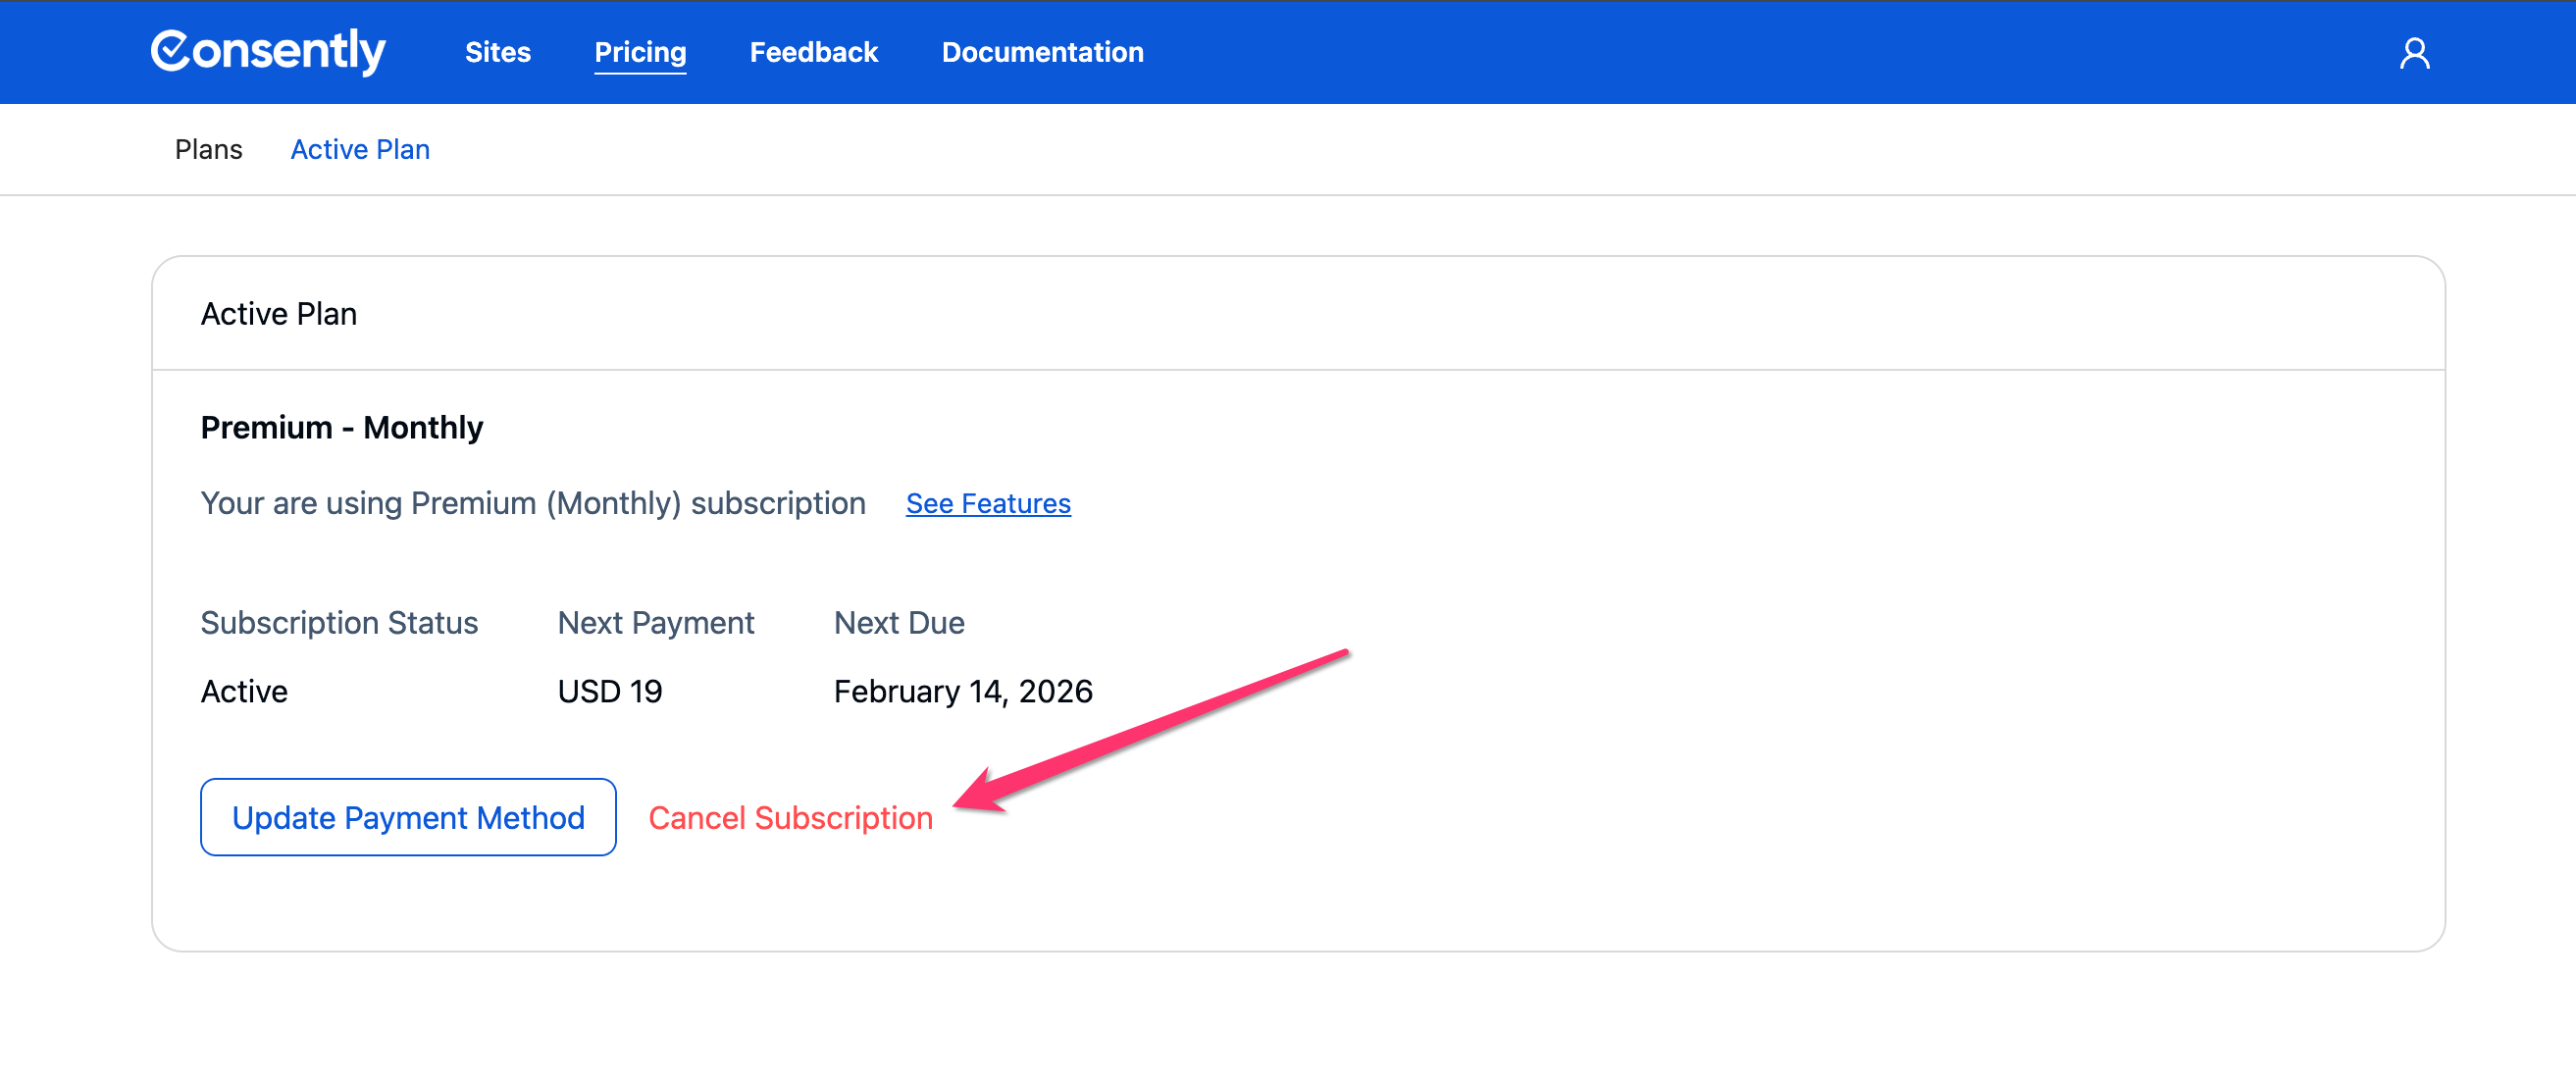
Step 2: View your current plan
Your active subscription displays:
Plan name (Basic, Premium, or Enterprise)
Billing cycle (monthly, annual, or Lifetime)
Next Payment
Next Due
Check active plan features
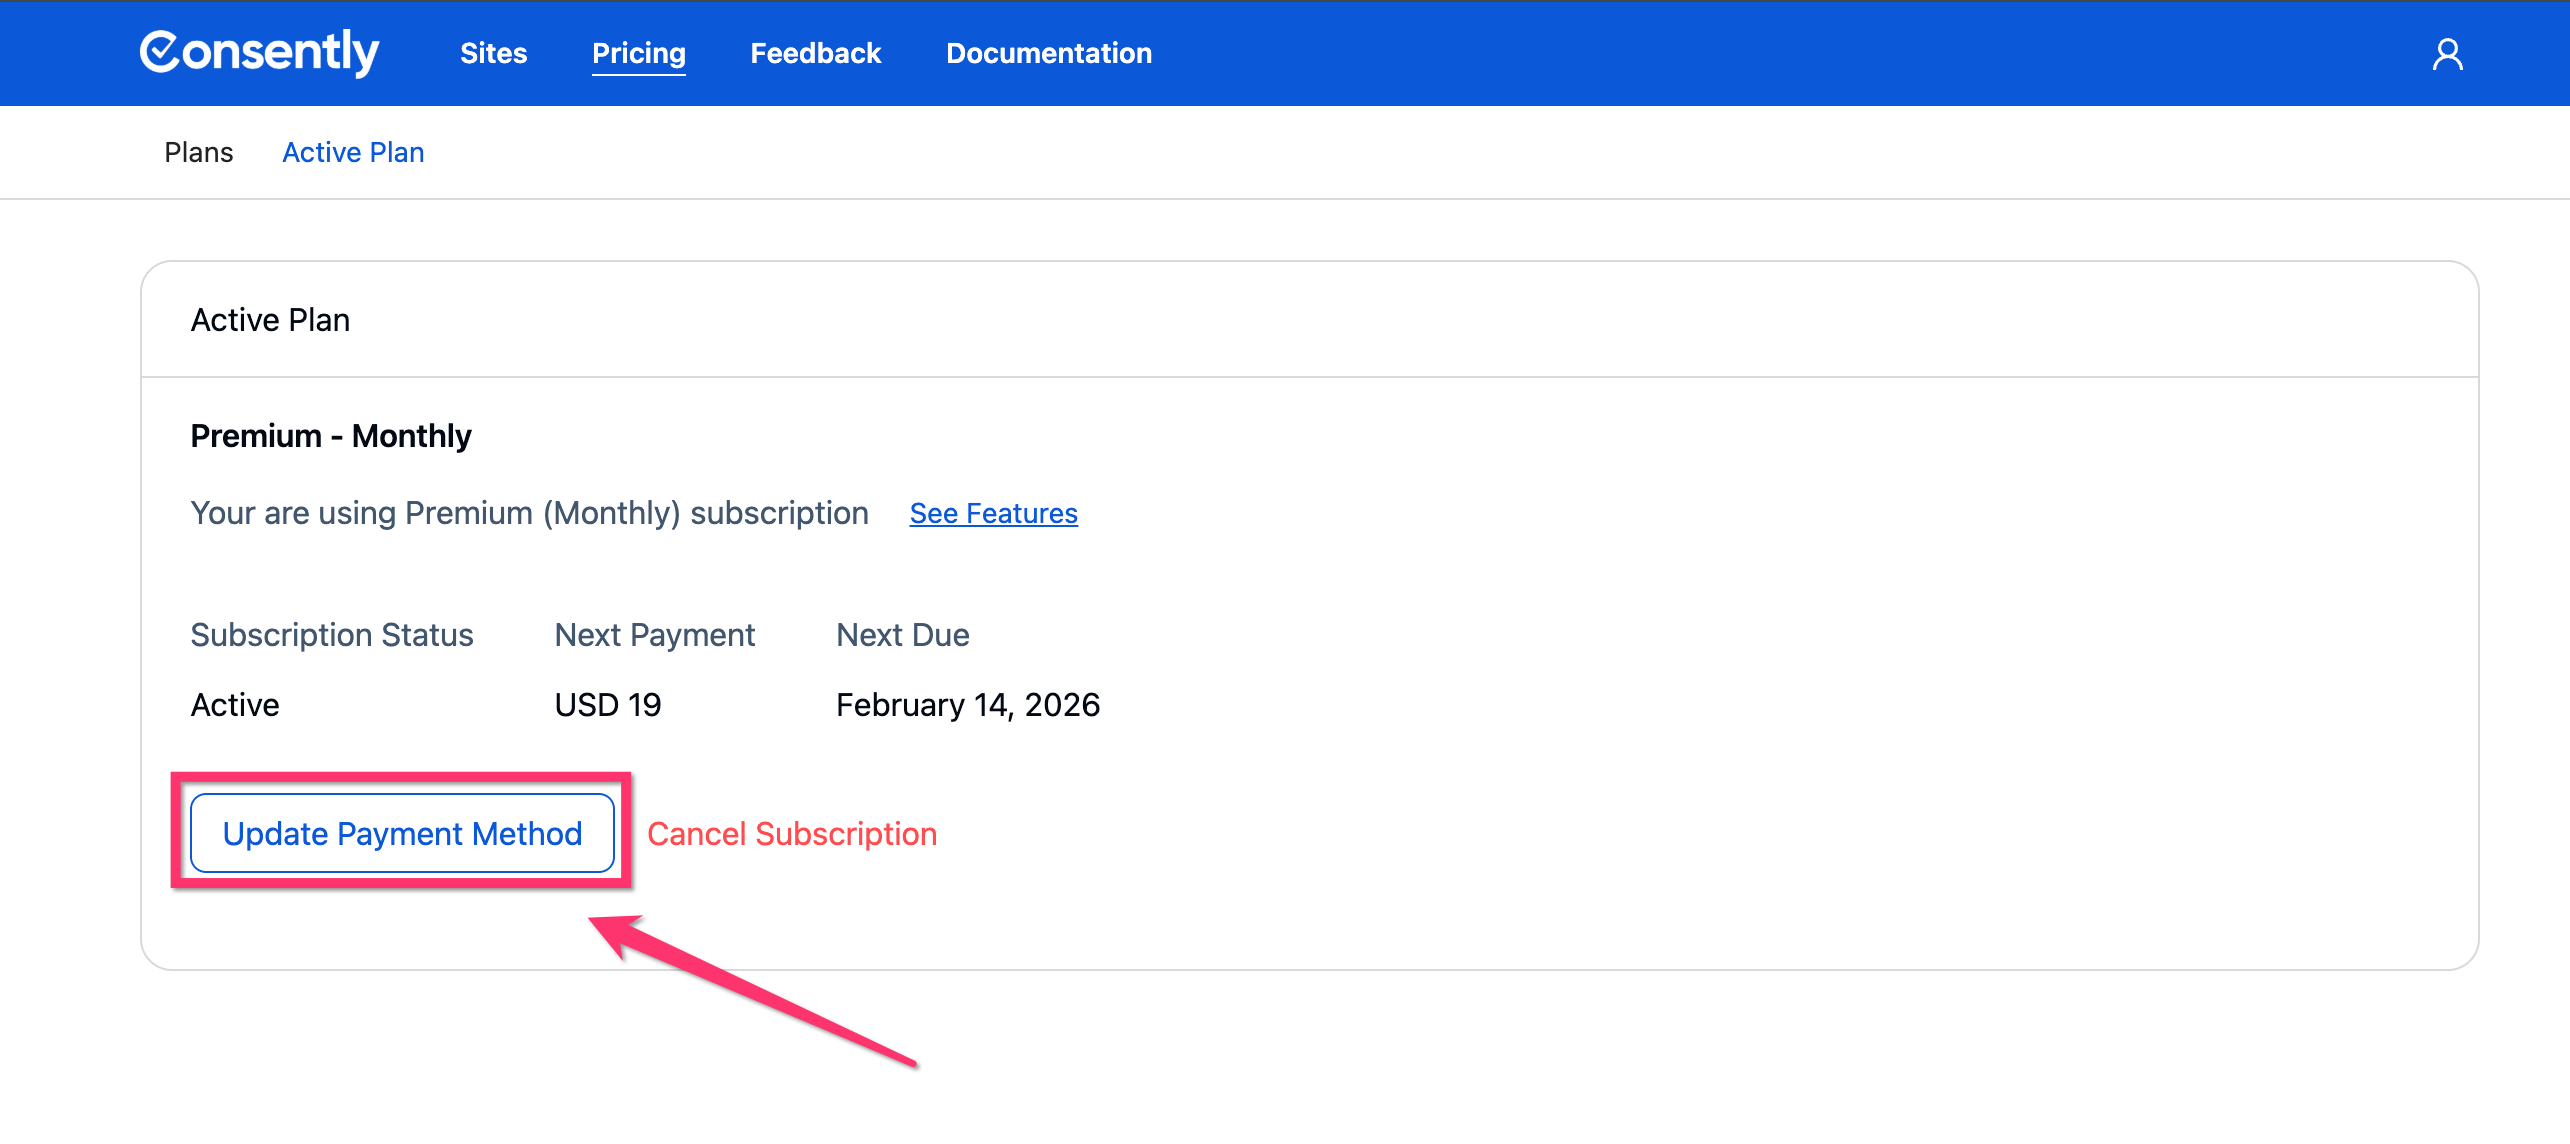
Step 3: Update payment method
Click Update Payment Method to change your billing information.

Step 4: Enter new payment details
You will be redirected to the Paddle Customer Portal, where you can provide your credit card or PayPal information, then click Update Payment Method.
⚠️ Important: Your new payment method will be used for the next billing cycle.

Viewing Billing History & Invoices
Step 1: Open billing history
You can view your billing history and next payment details on the Paddle Customer Portal by clicking Update Payment Method.
Step 2: Review past invoices
Once you are at the Paddle Customer Portal, click Payments from the left Sidebar navigation

Click on any specific transaction
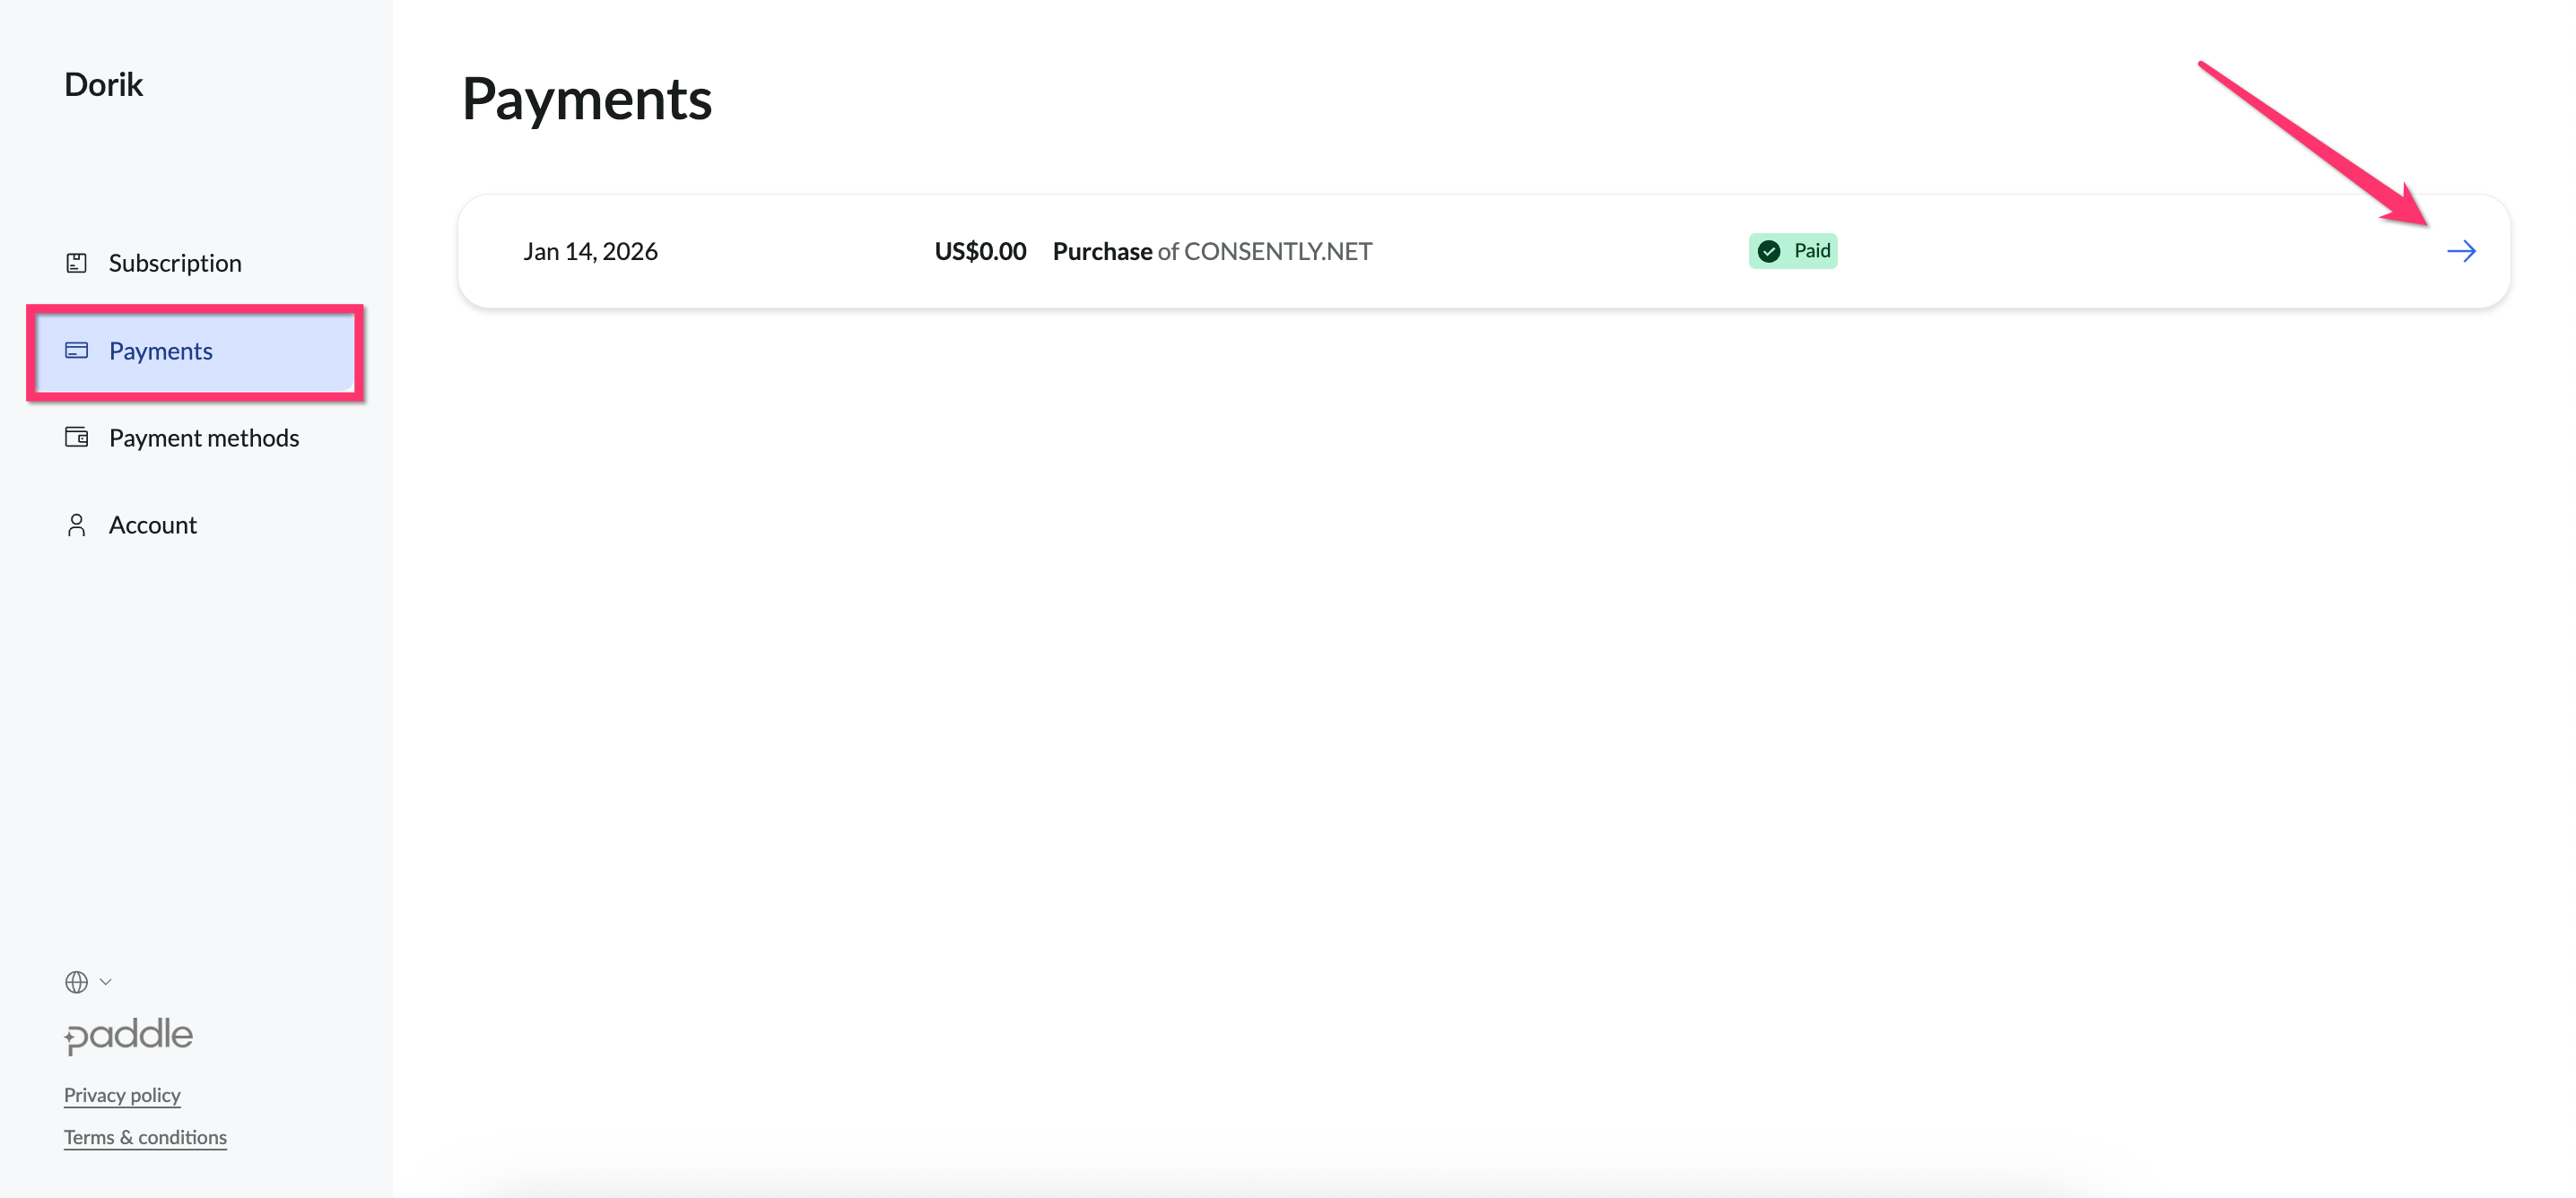
Click on the View Invoice button
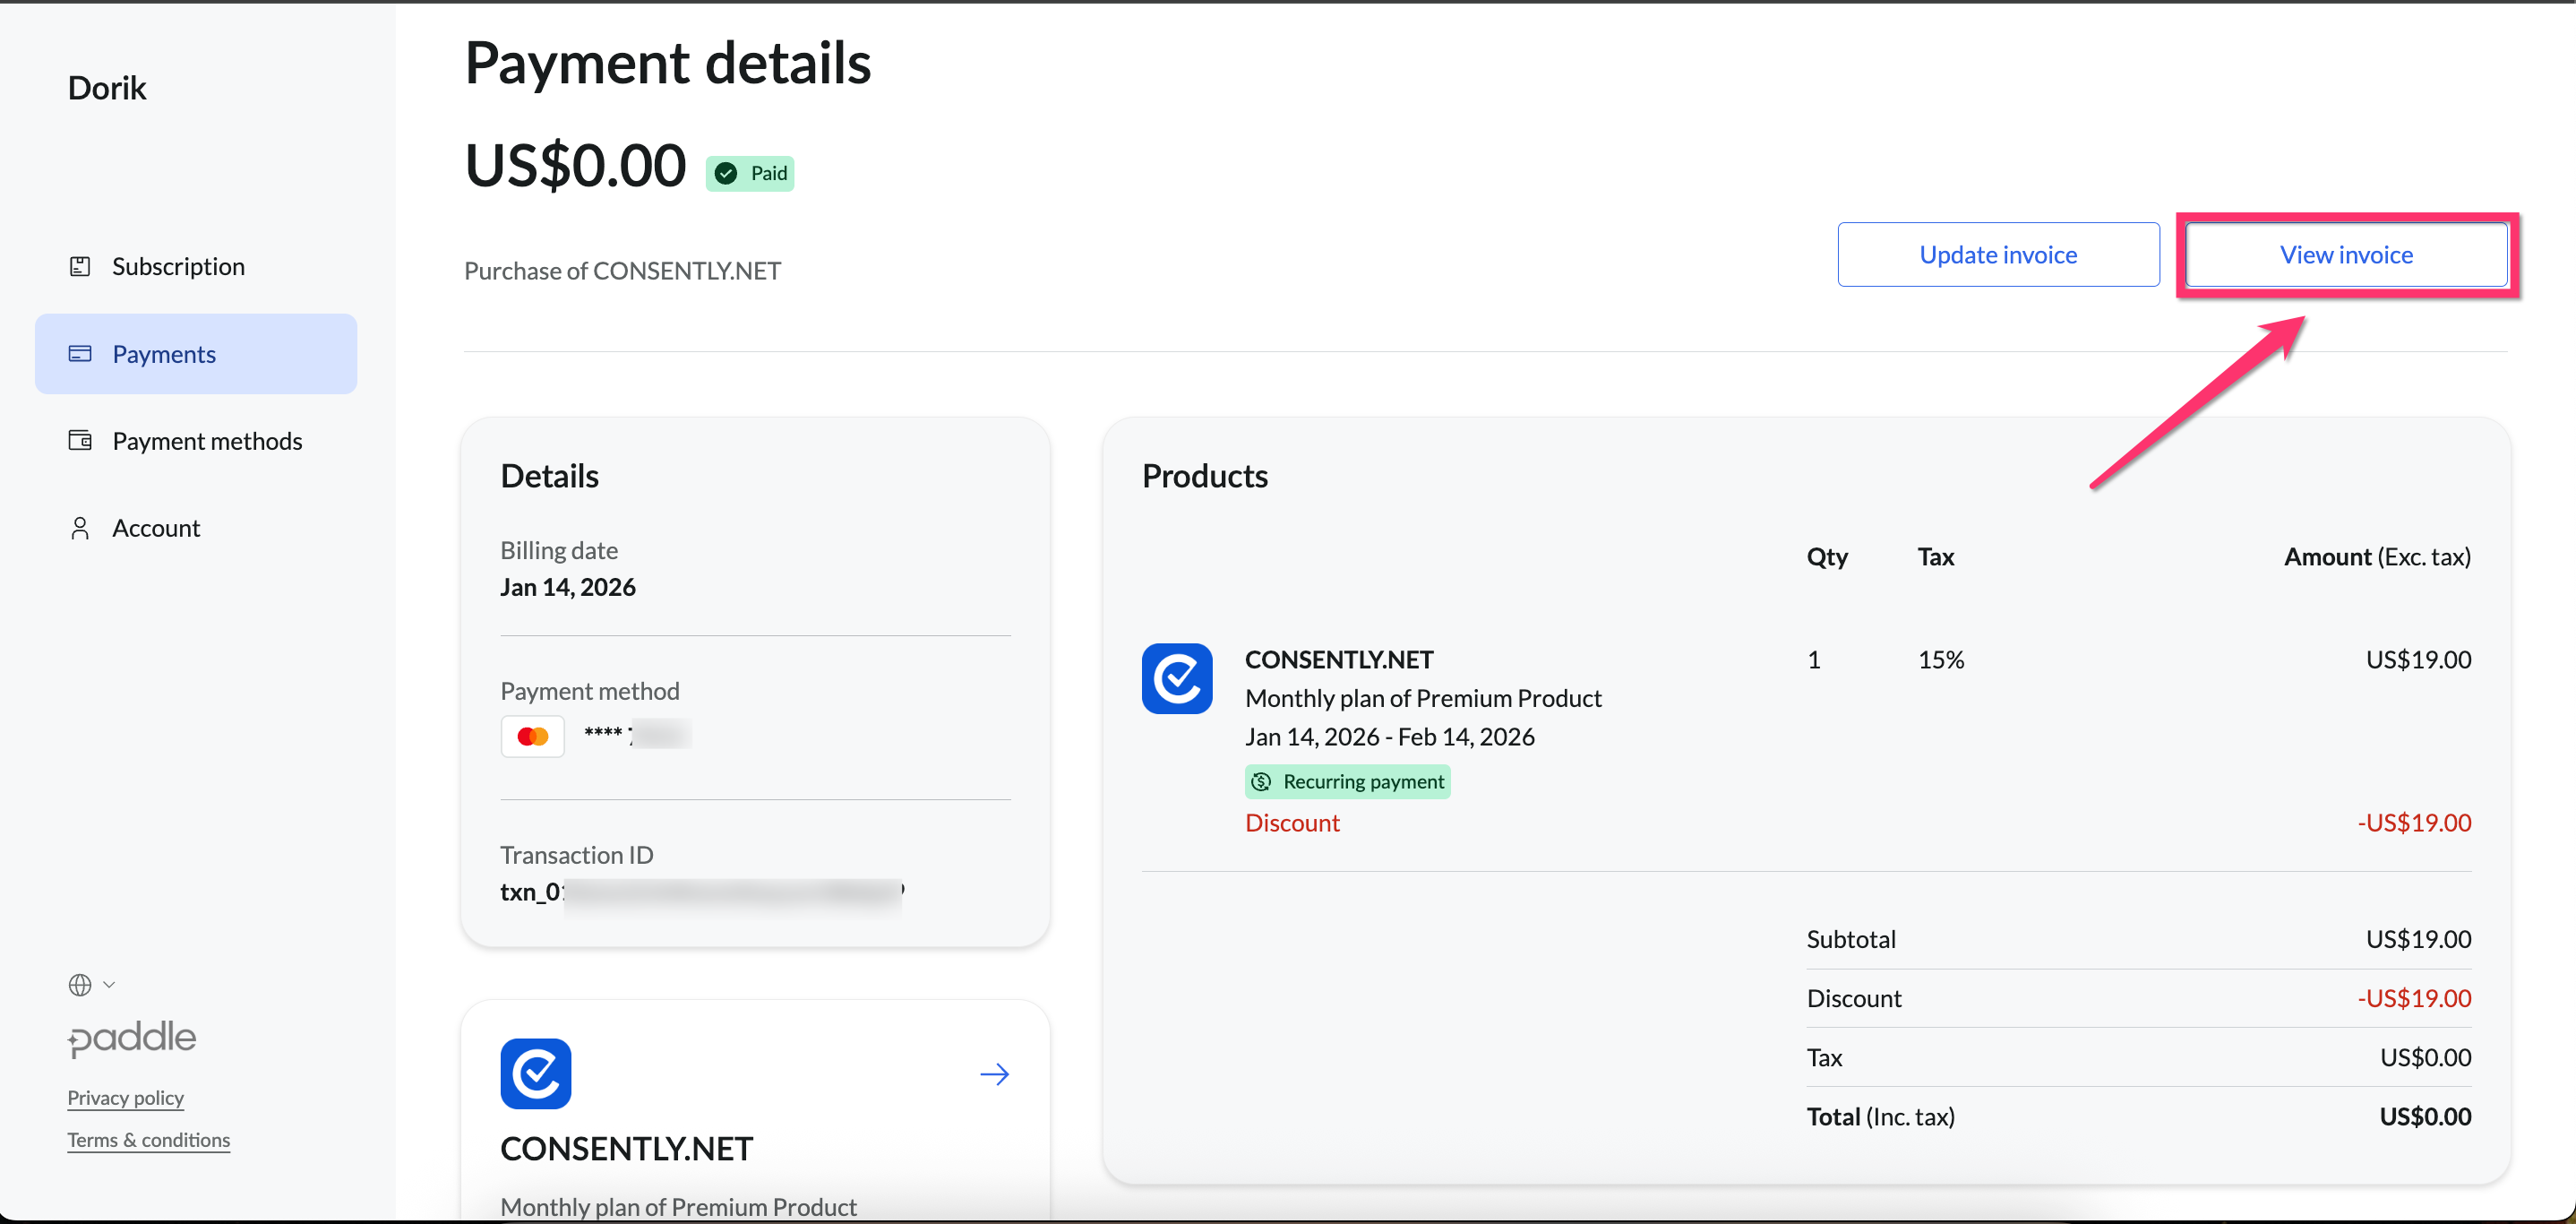
A new tab will open showing your invoice
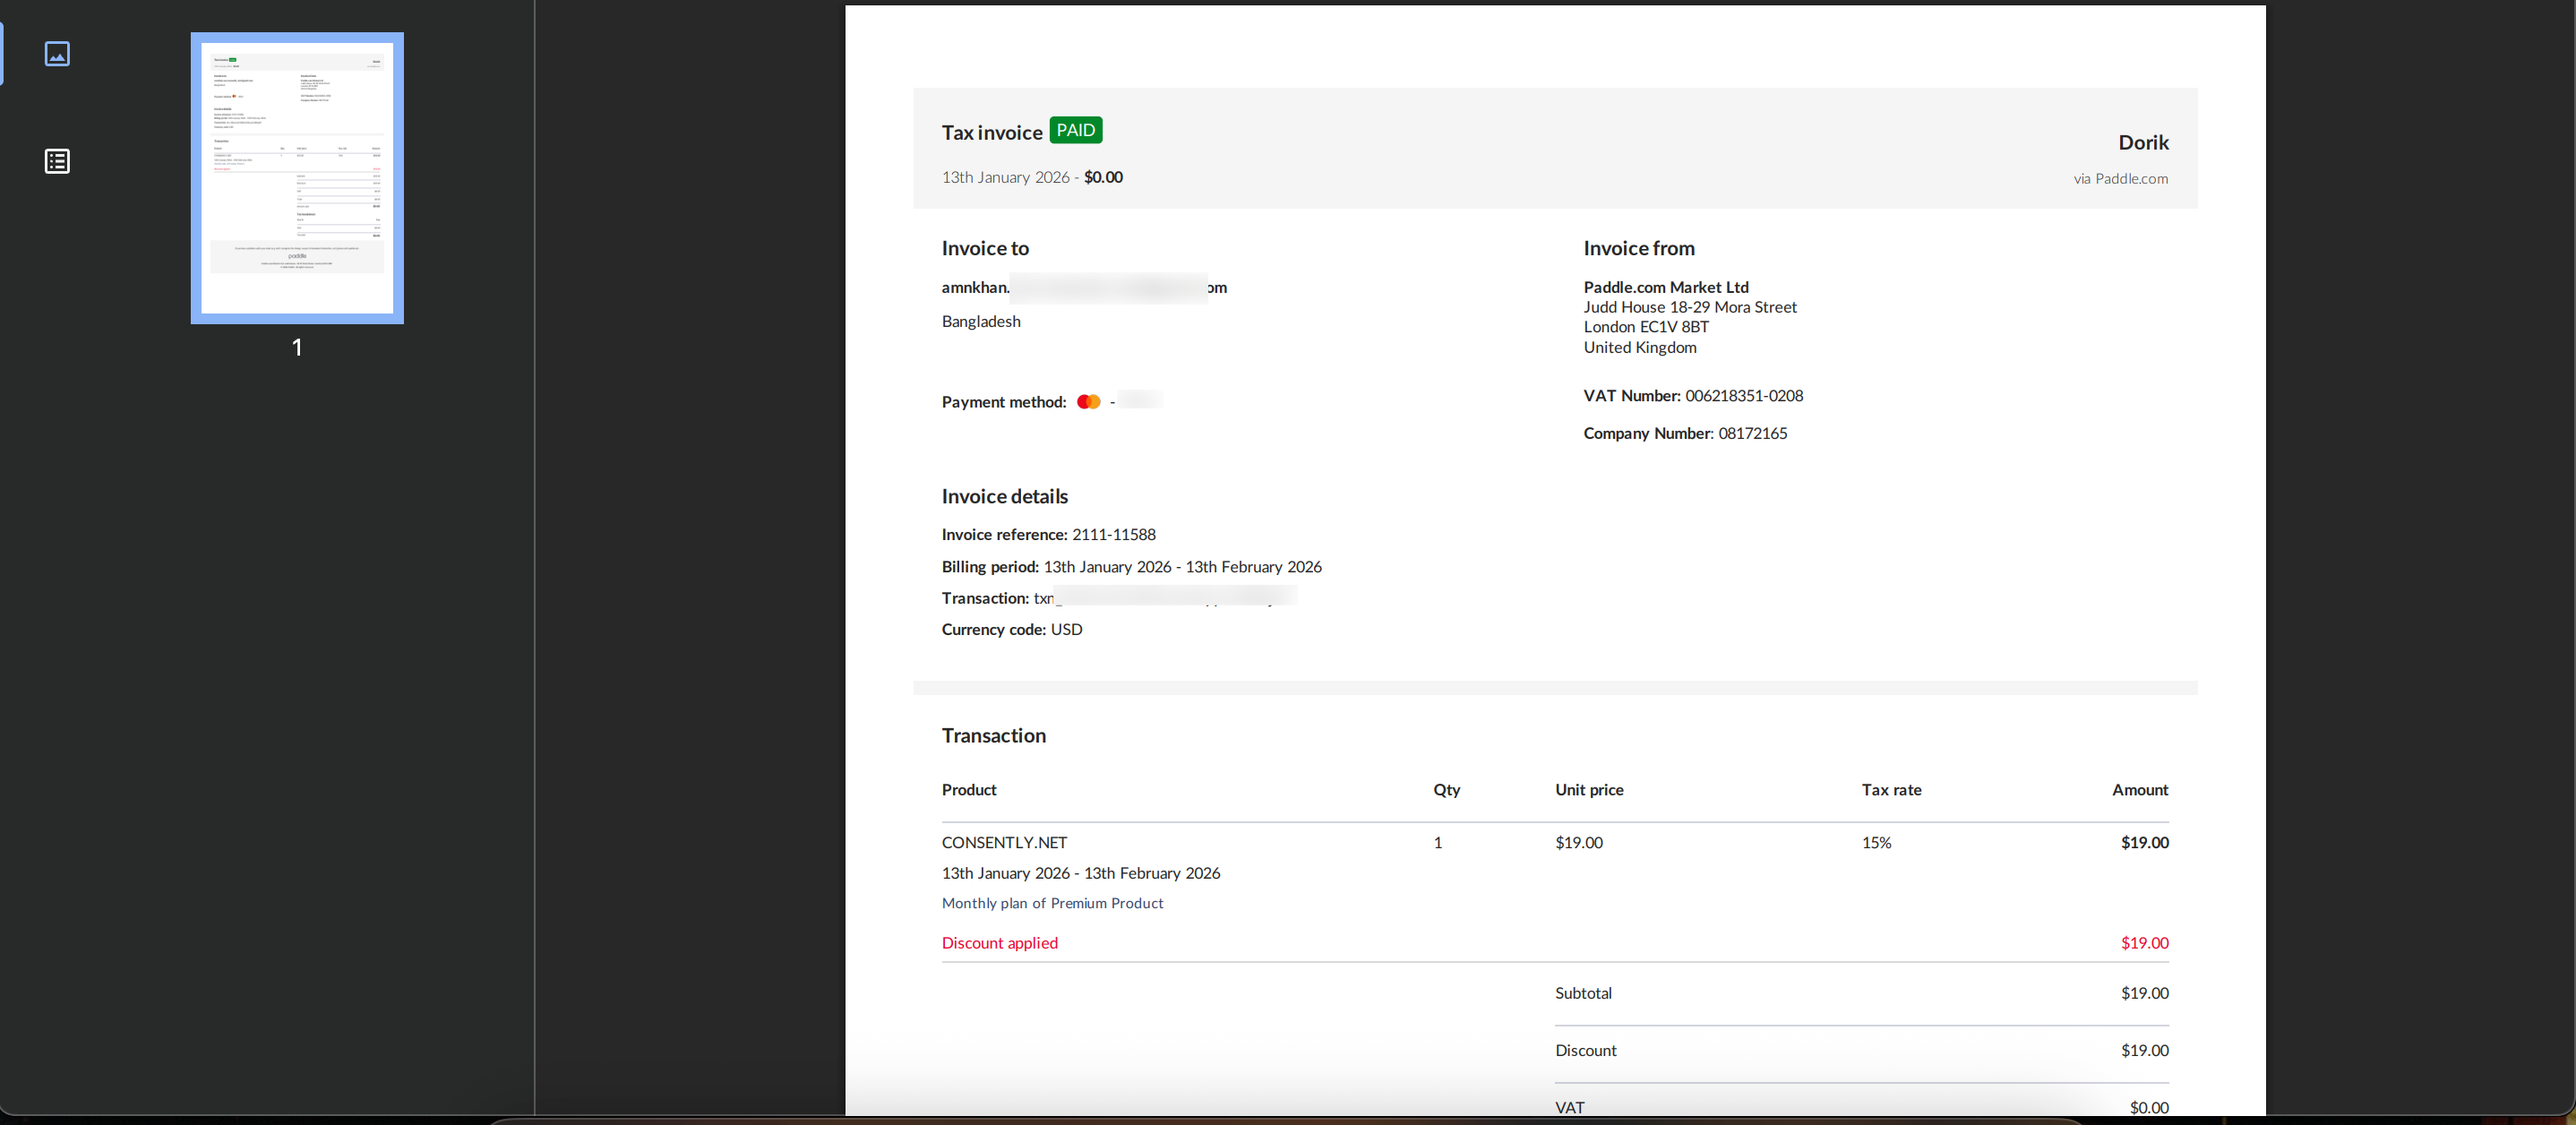
Step 3: Download an invoice
Click the download icon next to any invoice to save a PDF copy.
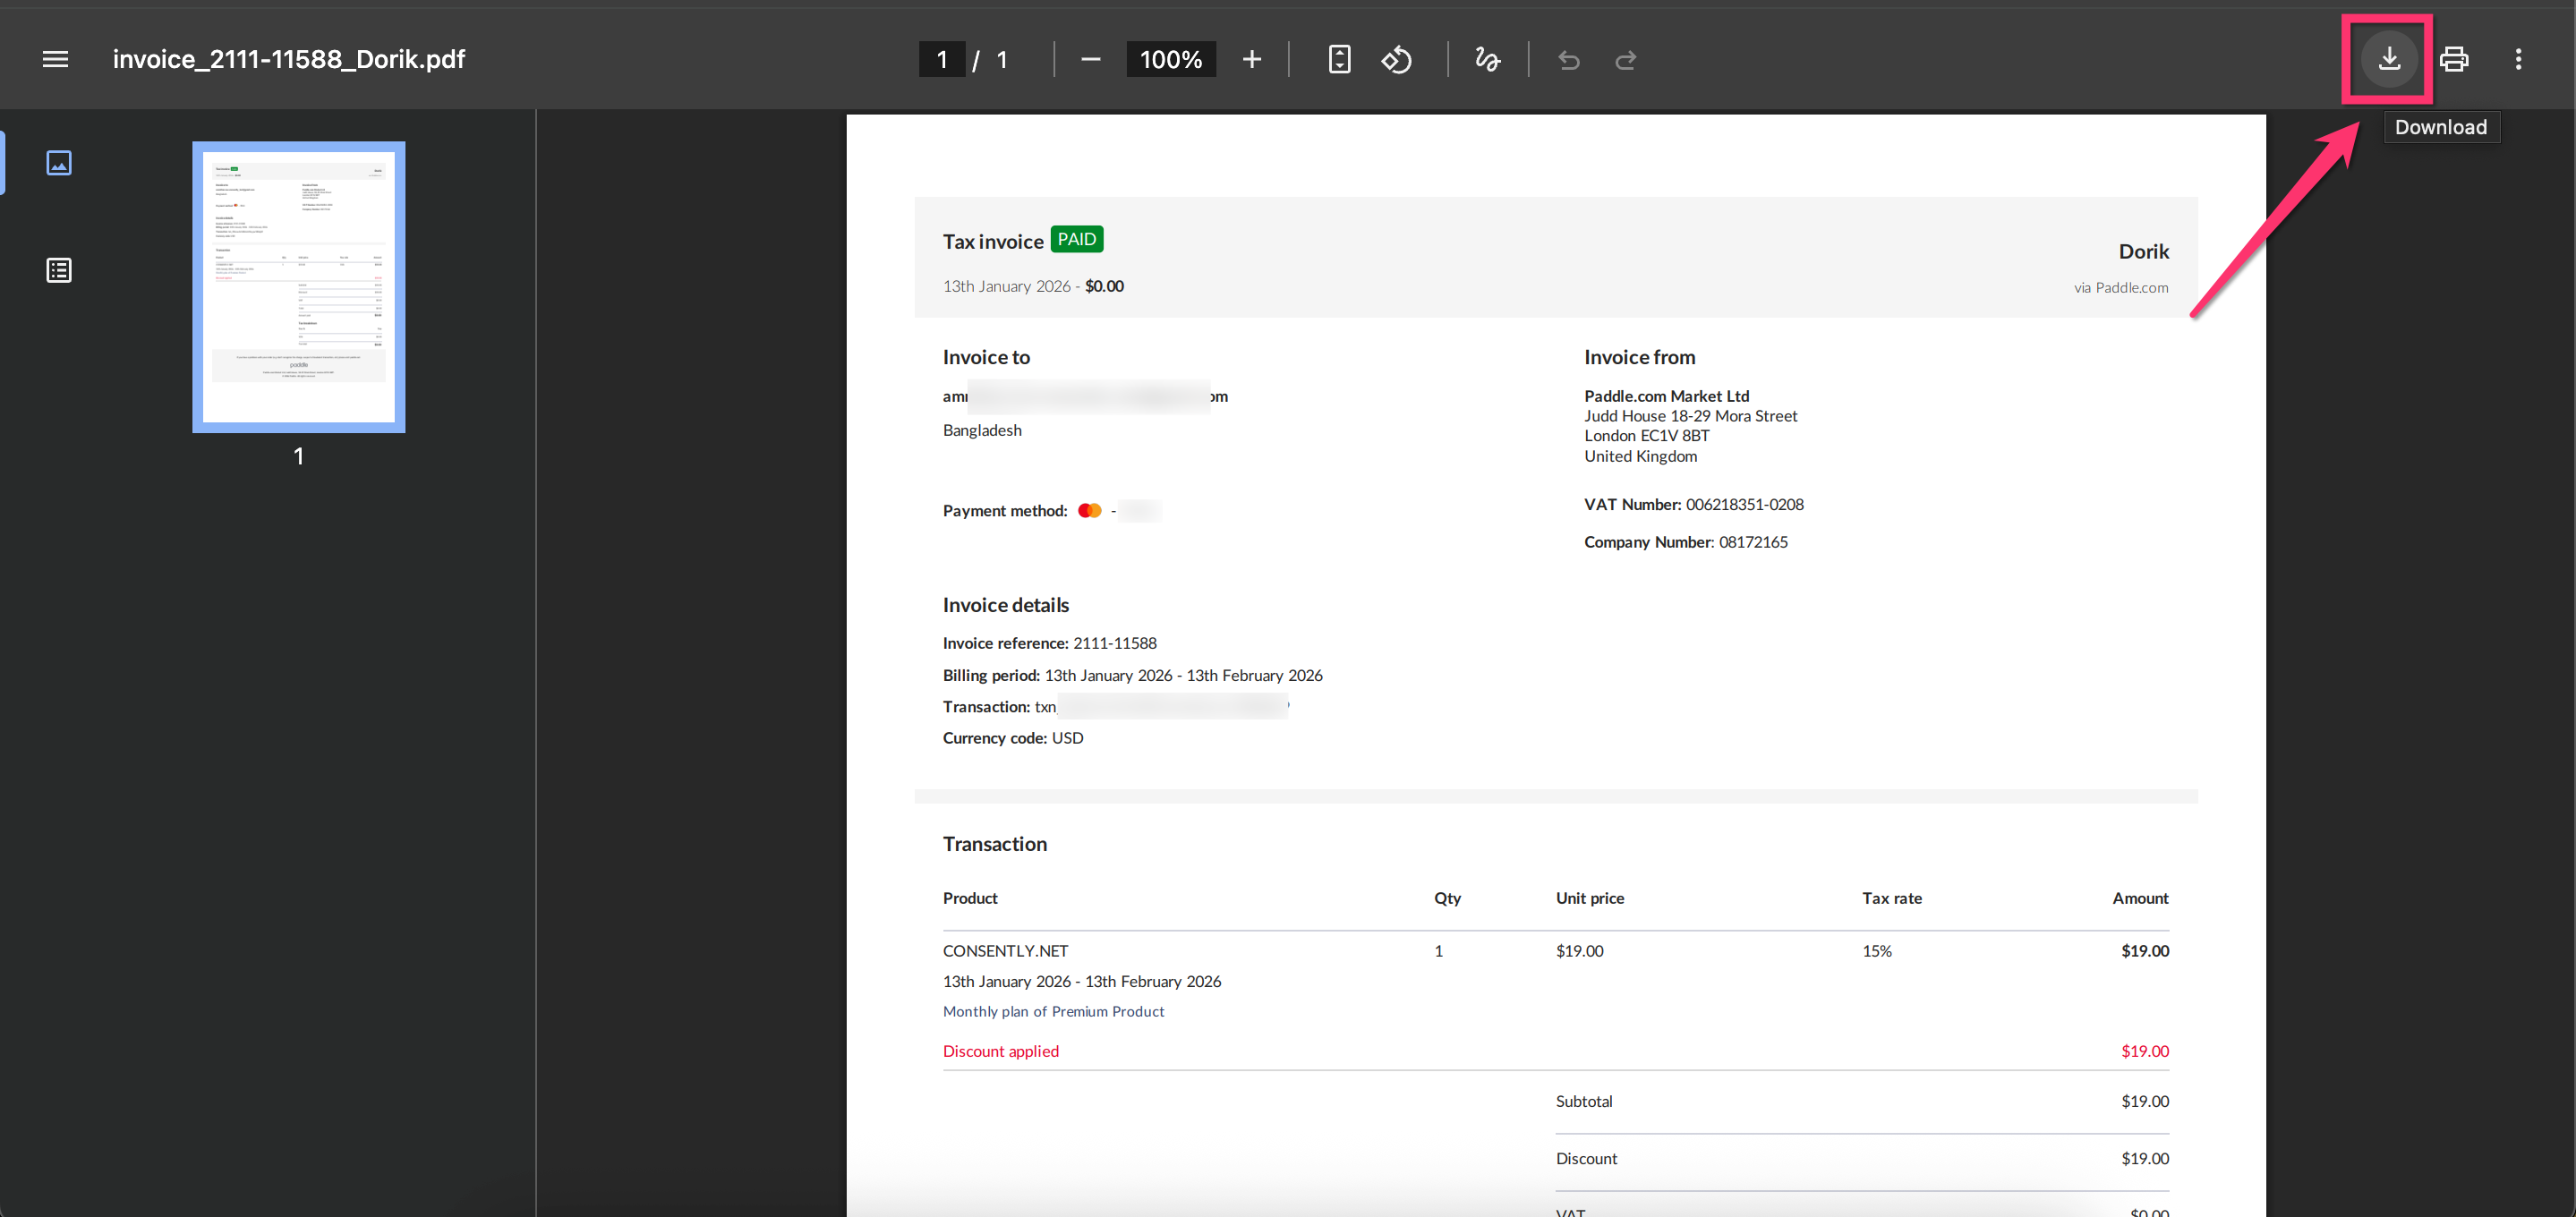
Done!
✅ Success indicator: Your browser will automatically start downloading the invoice in PDF format.
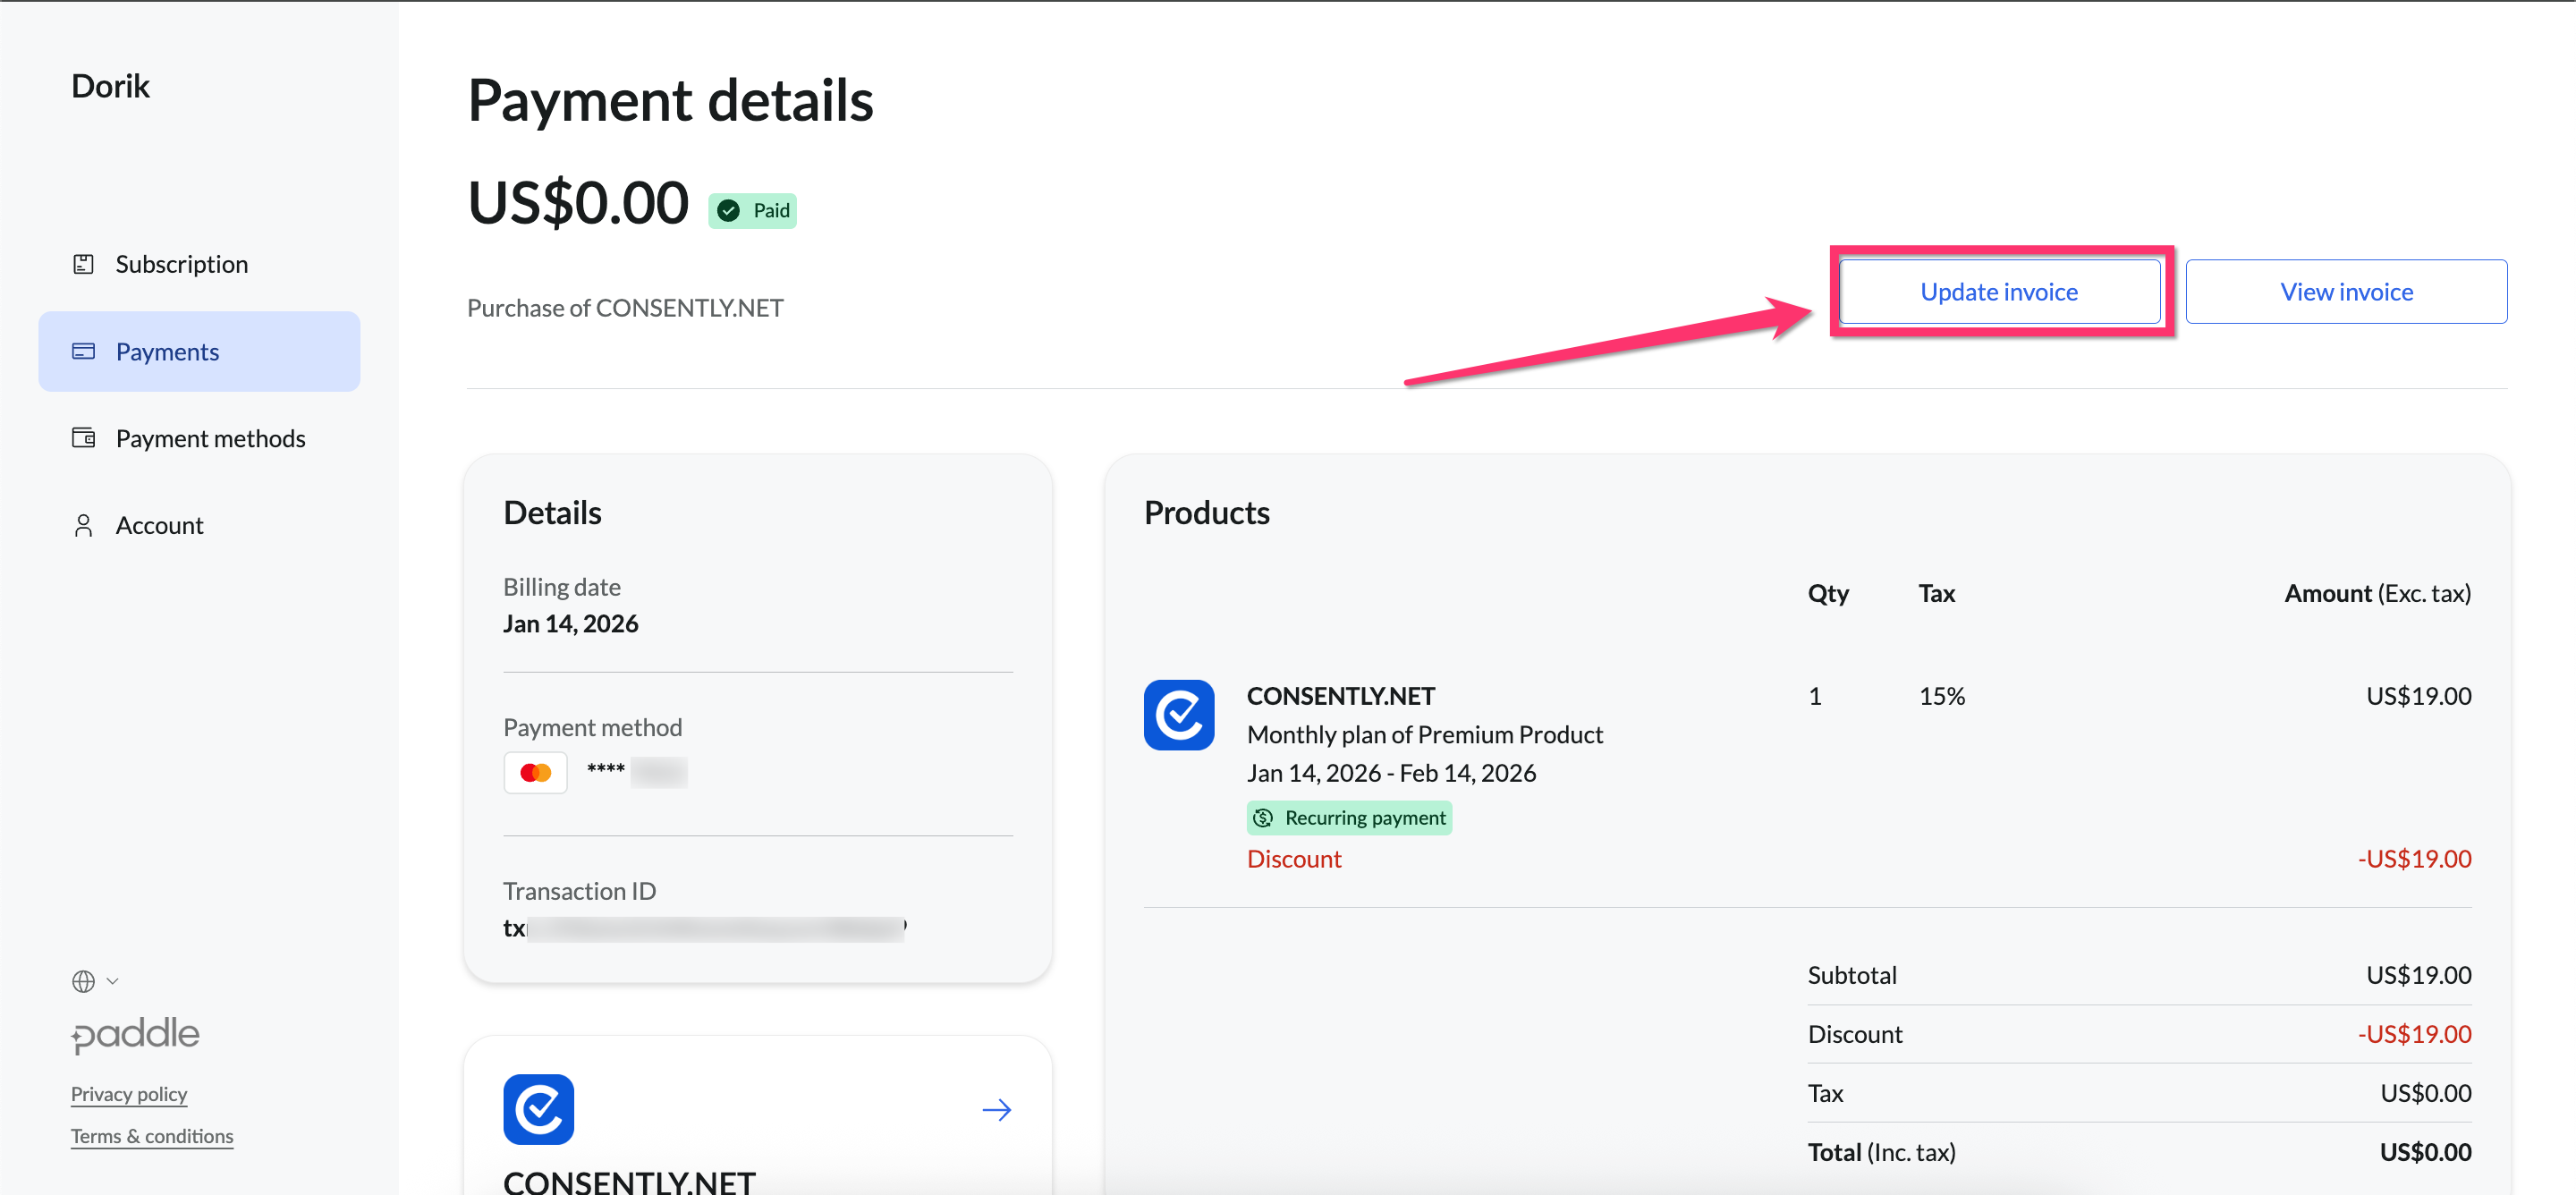
Updating your invoice
Step 1: Paddle Customer Portal Invoice Section
Once you are at the Paddle Customer Portal → Payments → Payment Details, you can click the Update Invoice button.
⚠️ Warning: You can edit this invoice only once, so please ensure all necessary fields are updated before proceeding.
Step 2: Edit your Invoice details
You can update your Full name, Company name, Tax ID, First Line of address, Second Line of address, City, Region/State, etc.
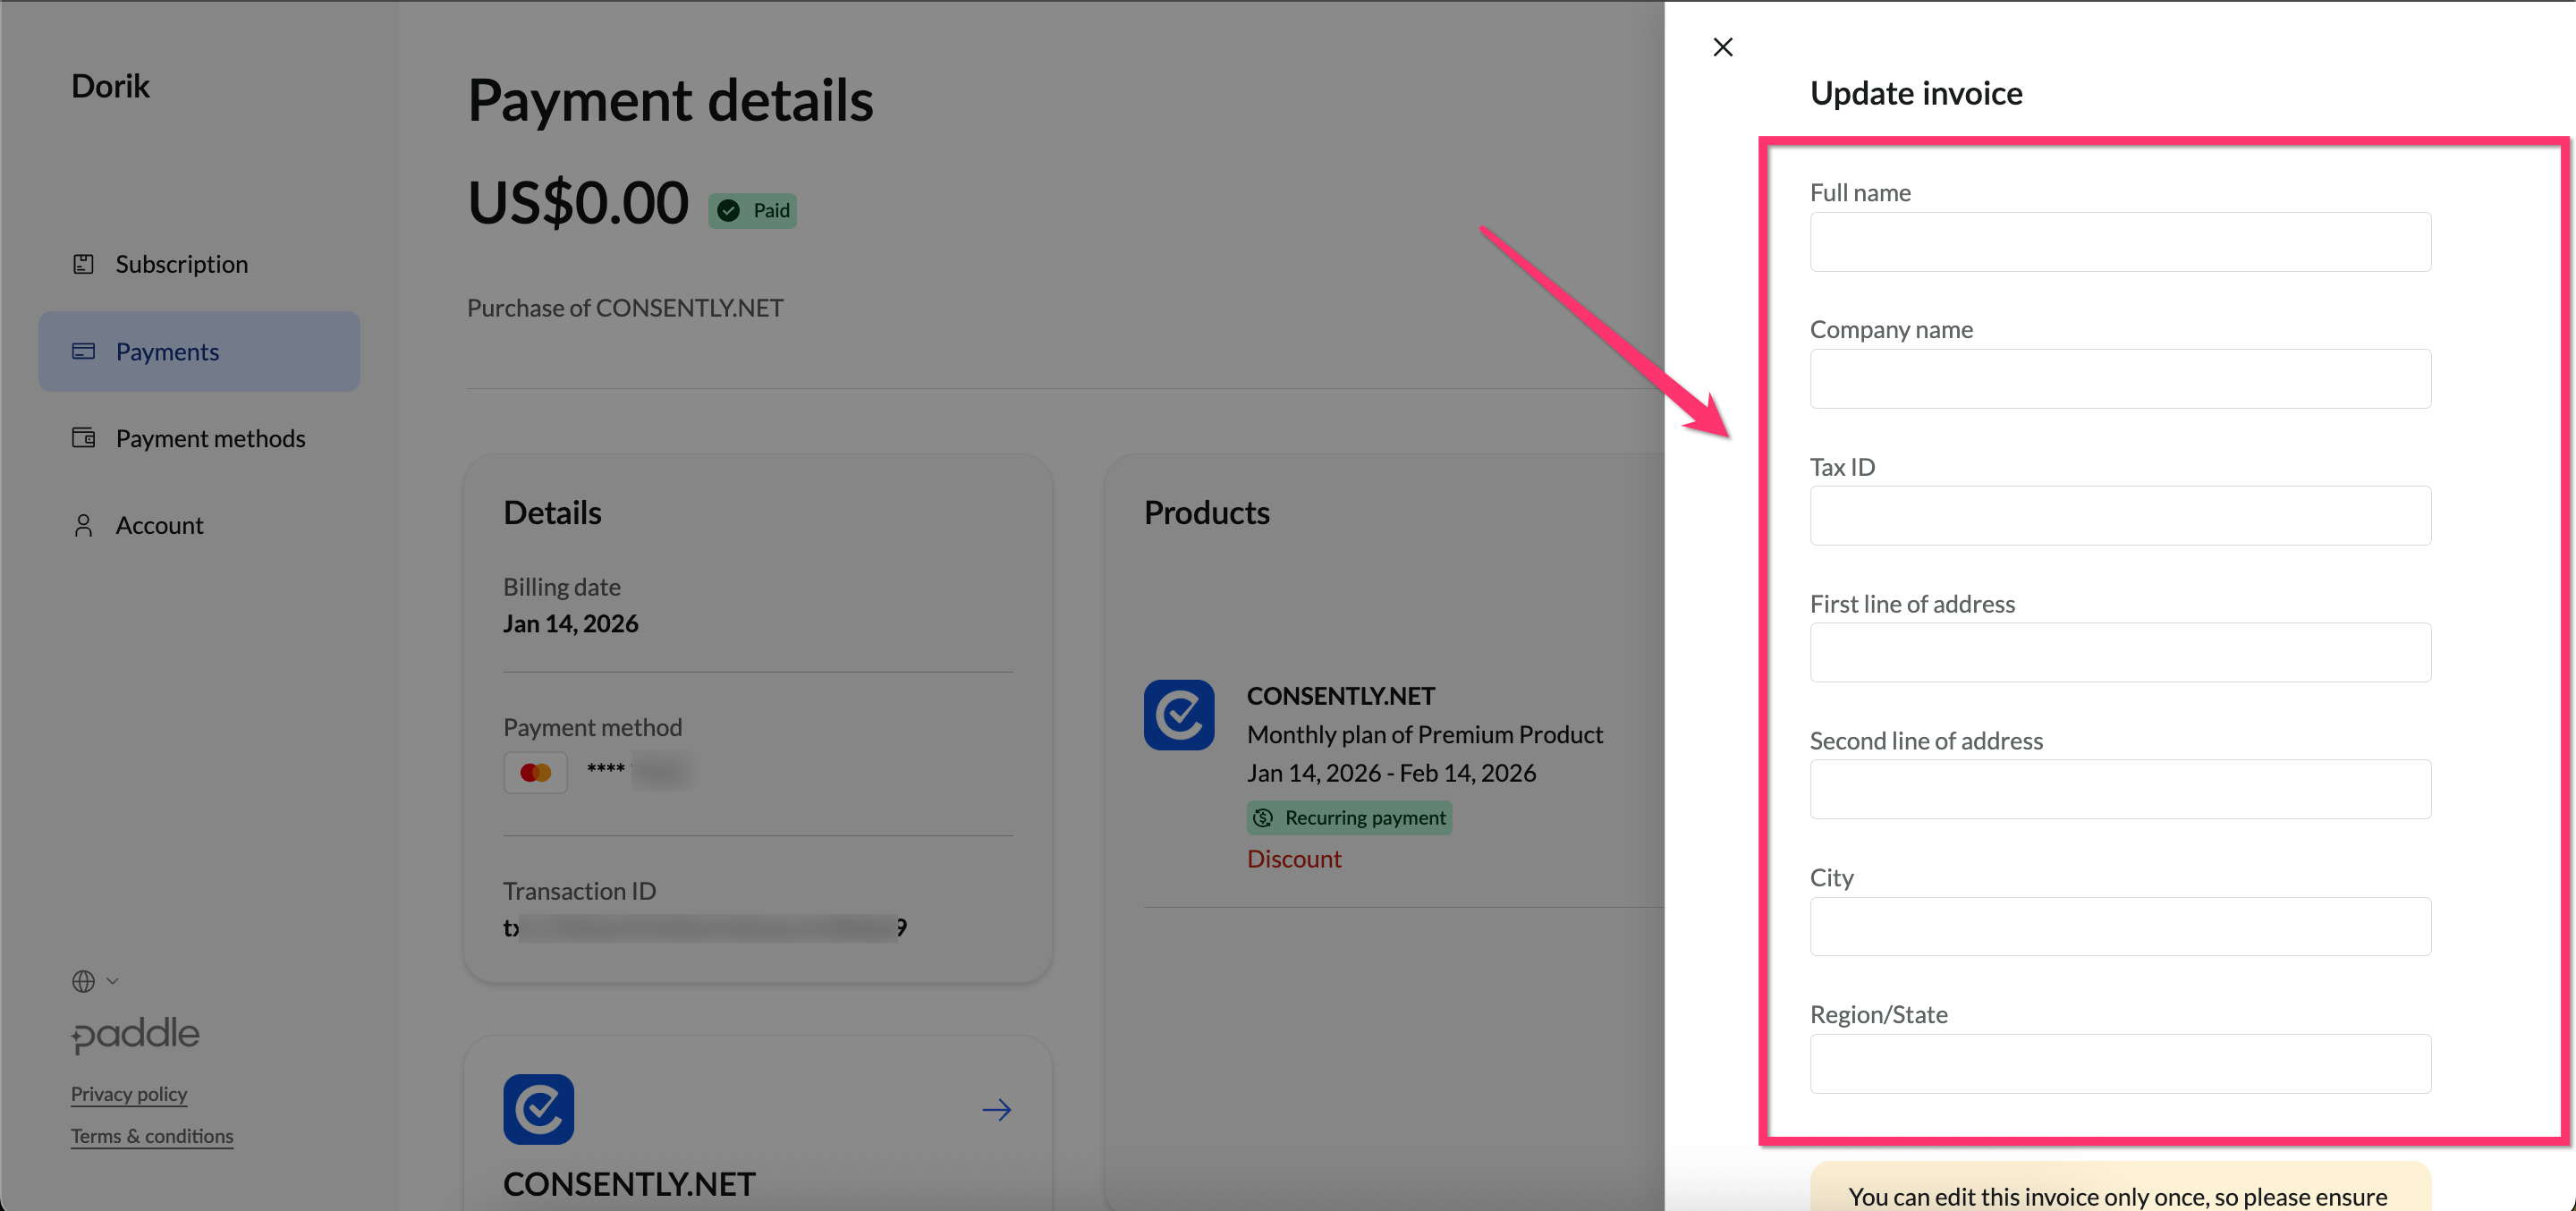
Step 3: Confirm updating your invoice
Finally, click on the Update Invoice button
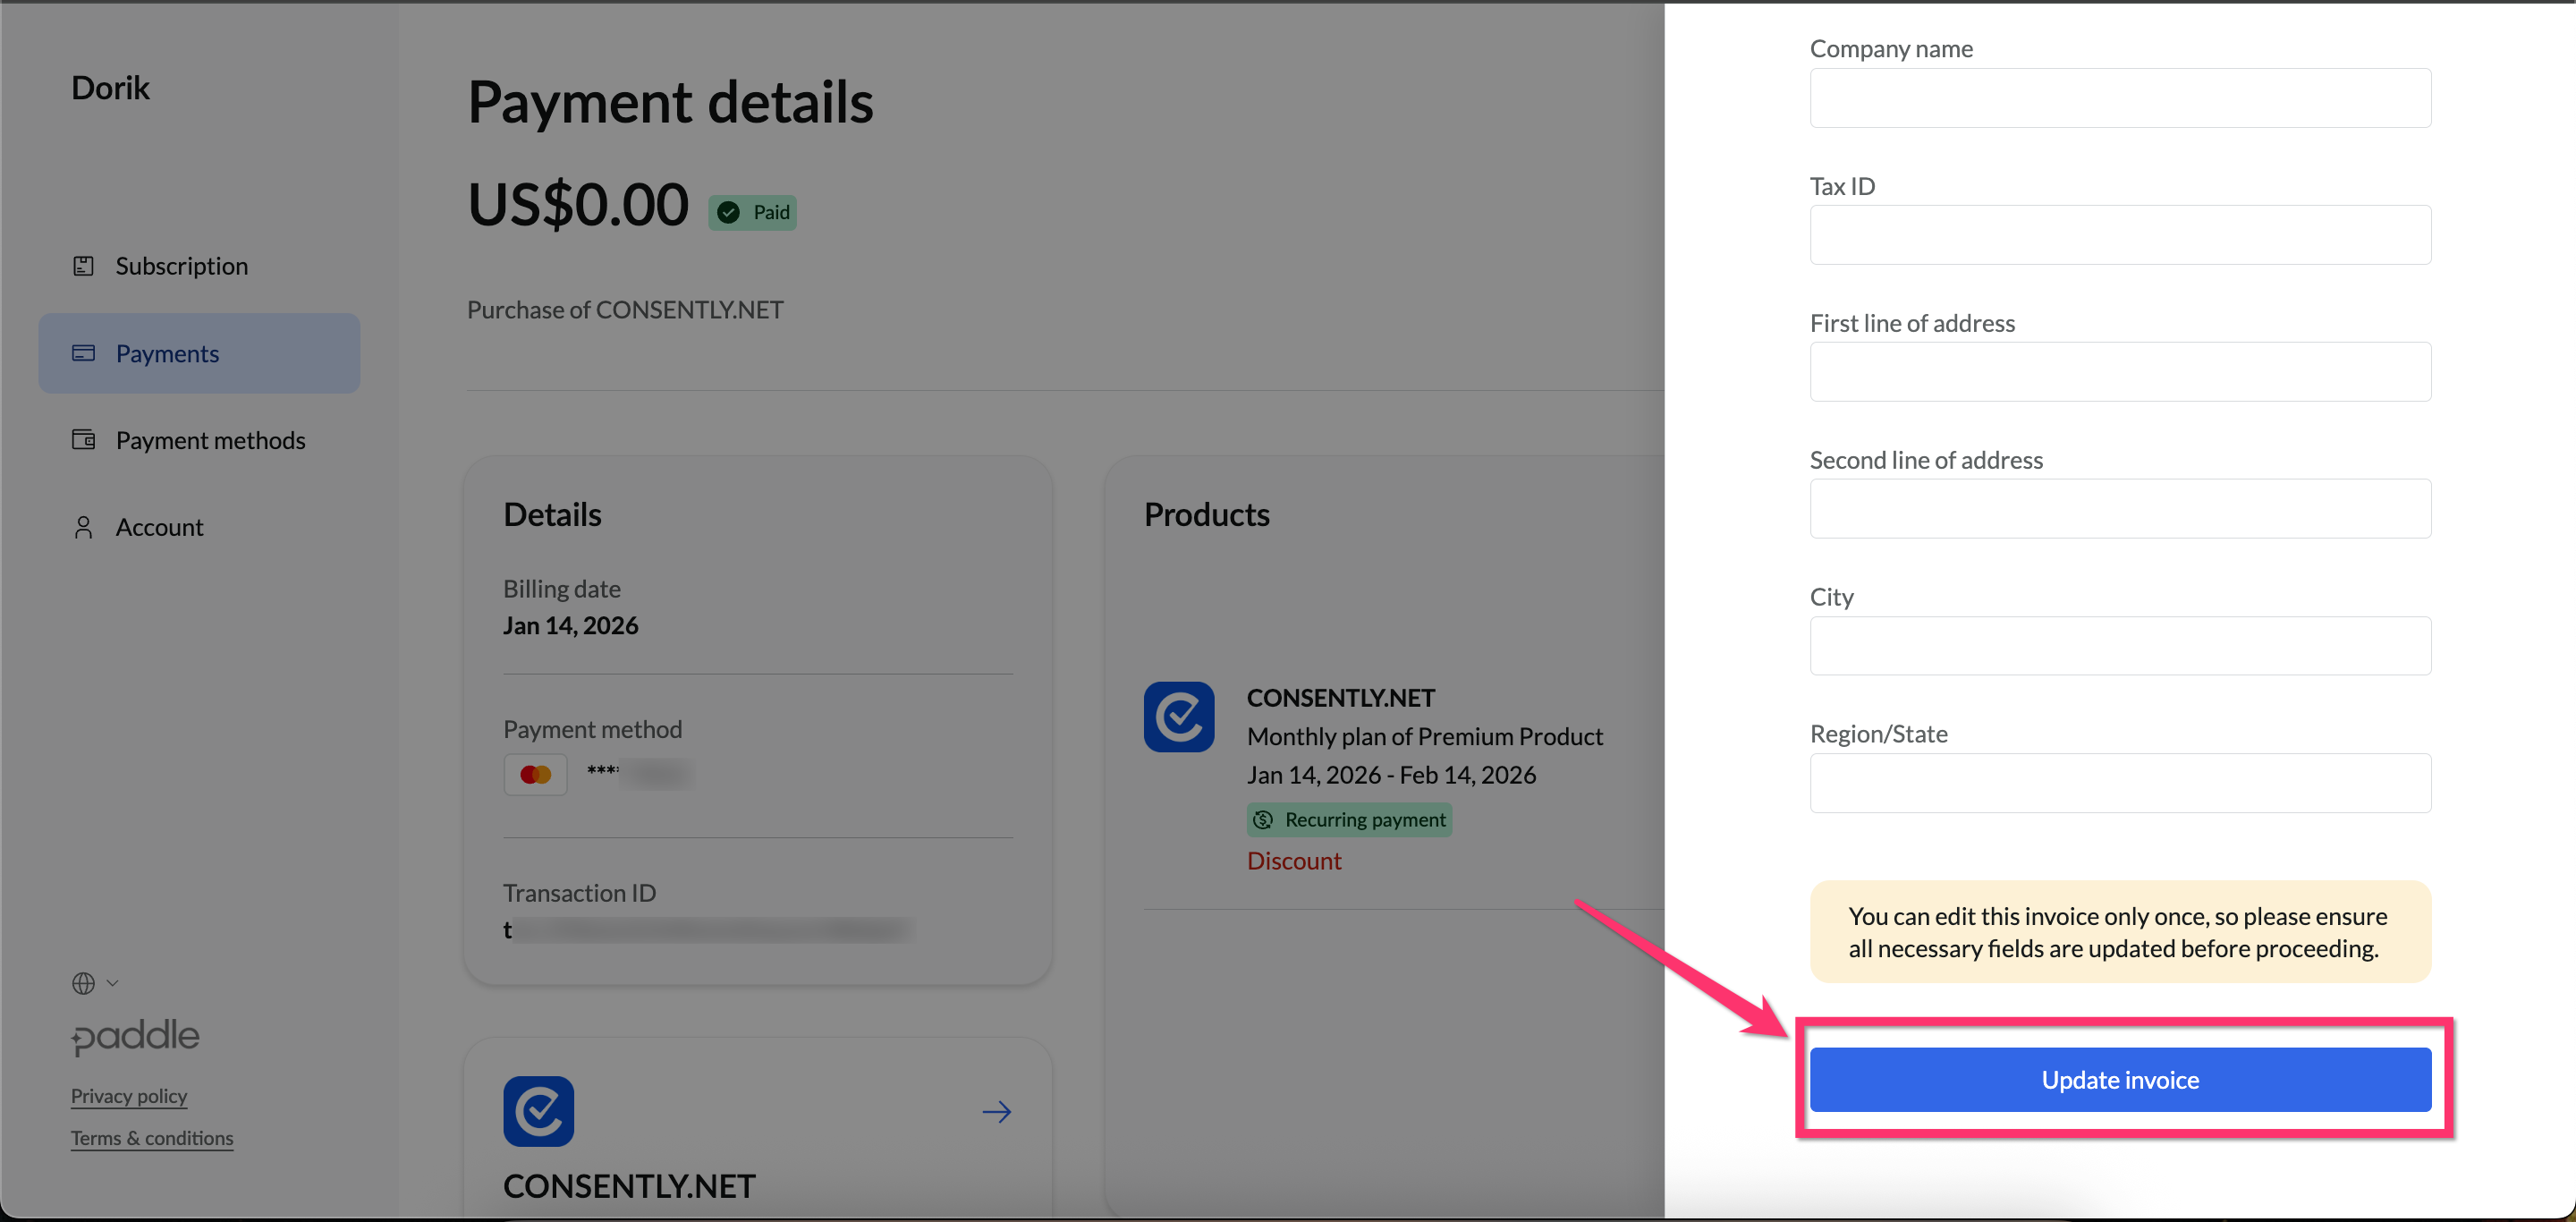
Done!
✅ Success indicator: You’ll see a success notification when the invoice is updated
Canceling Your Subscription
Step 1: Locate the cancellation option
You can cancel your subscription anytime. Just click on the Dashboard → Pricing → Cancel Subscription button.
⚠️ Warning: Your subscription will remain active until the end of the current billing period. You will continue to have access until then.
Step 2: Confirm cancellation
You will be redirected to the Paddle Customer Portal. A confirmation pop-up will be shown—continue only if you are sure, then click Cancel Subscription

Done!
Your subscription remains active until the end of your current billing period.
✅ Success indicator: You’ll receive a confirmation email about your cancellation.
Managing your license at AppSumo
If you purchased your plan through AppSumo, you can manage your subscription directly from your AppSumo account:
Upgrade your plan.
Downgrade your plan.
Cancel your subscription.
Request a refund.
All changes and requests must be processed through your AppSumo account.
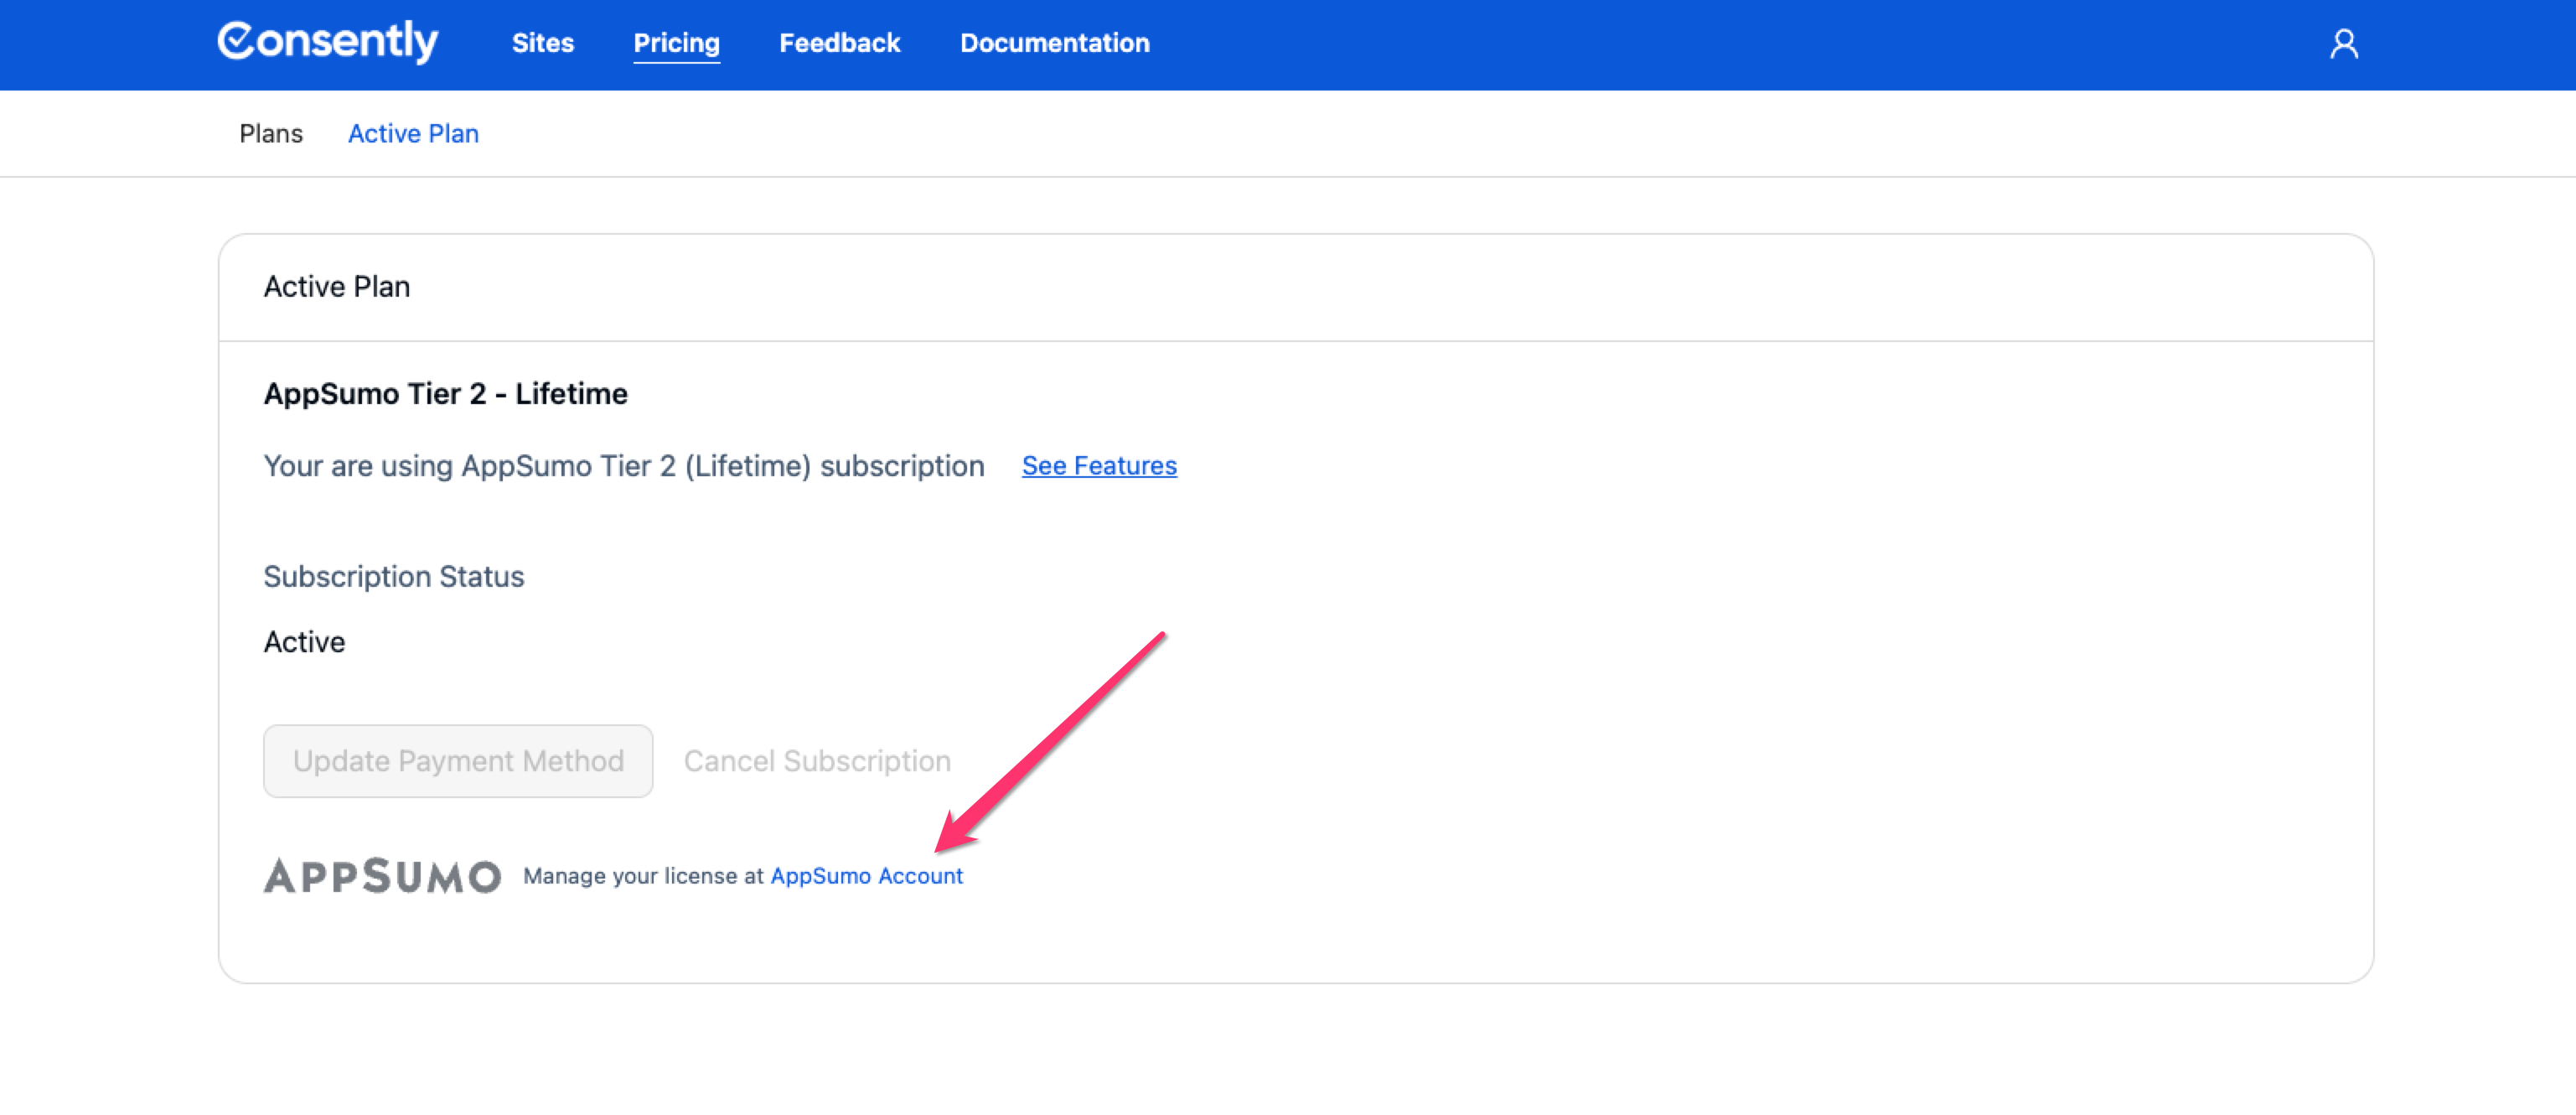
Step 1: Check if your license was purchased via AppSumo
Go to your Dashboard.
Navigate to Pricing → Active Plan.
Look for the AppSumo logo.
If the logo is visible, your license was purchased through AppSumo.
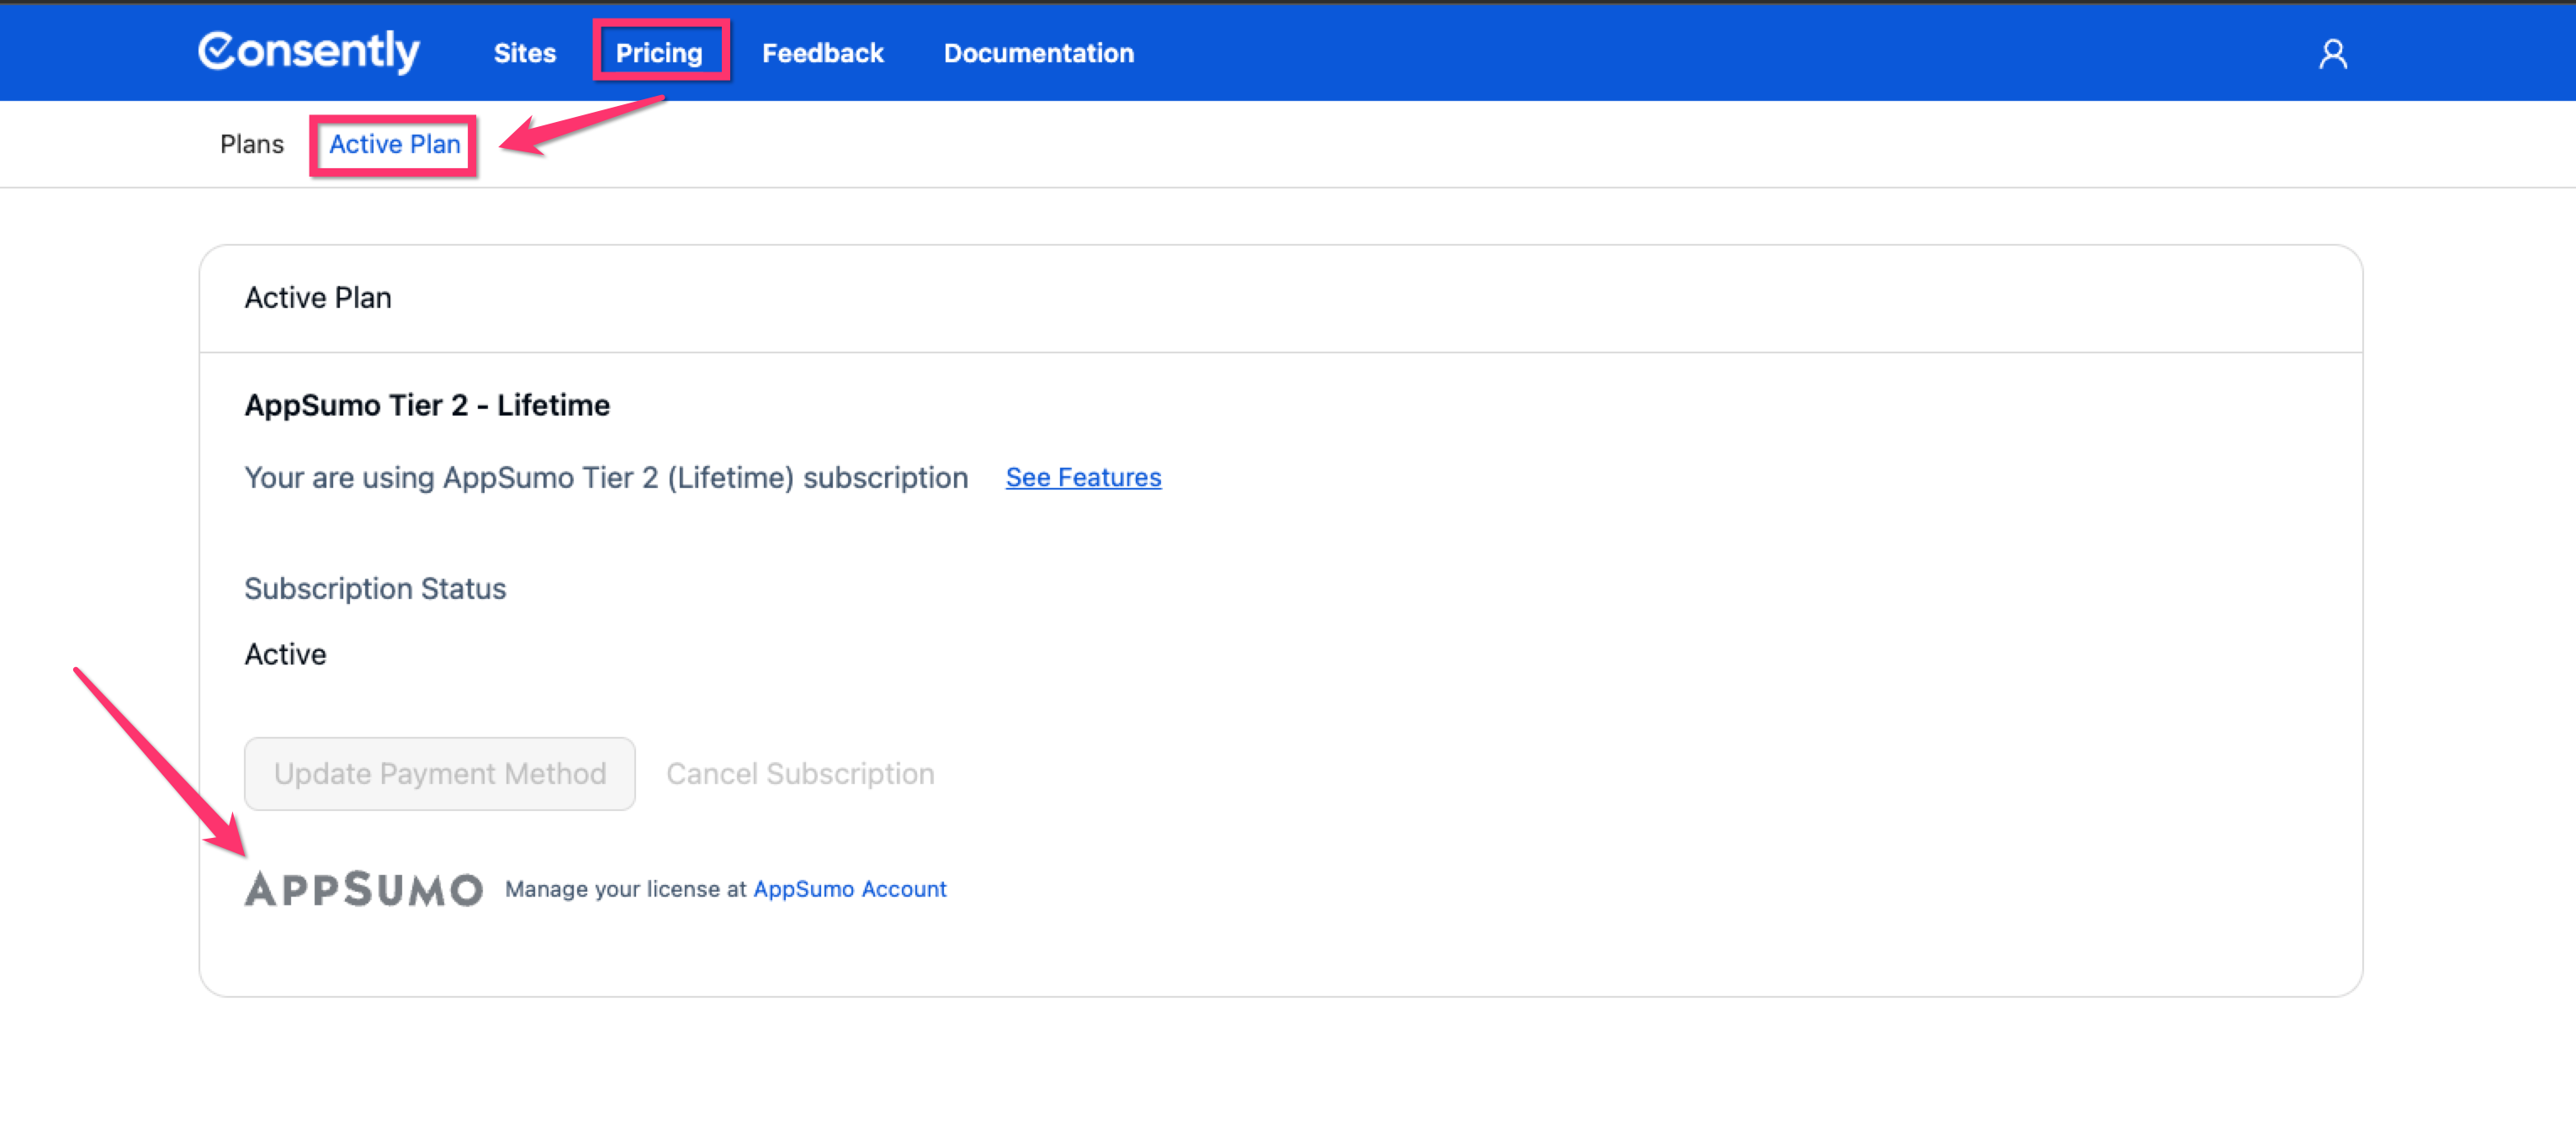
Step 2: Open your AppSumo account
Click on the AppSumo Account link to open your AppSumo account.
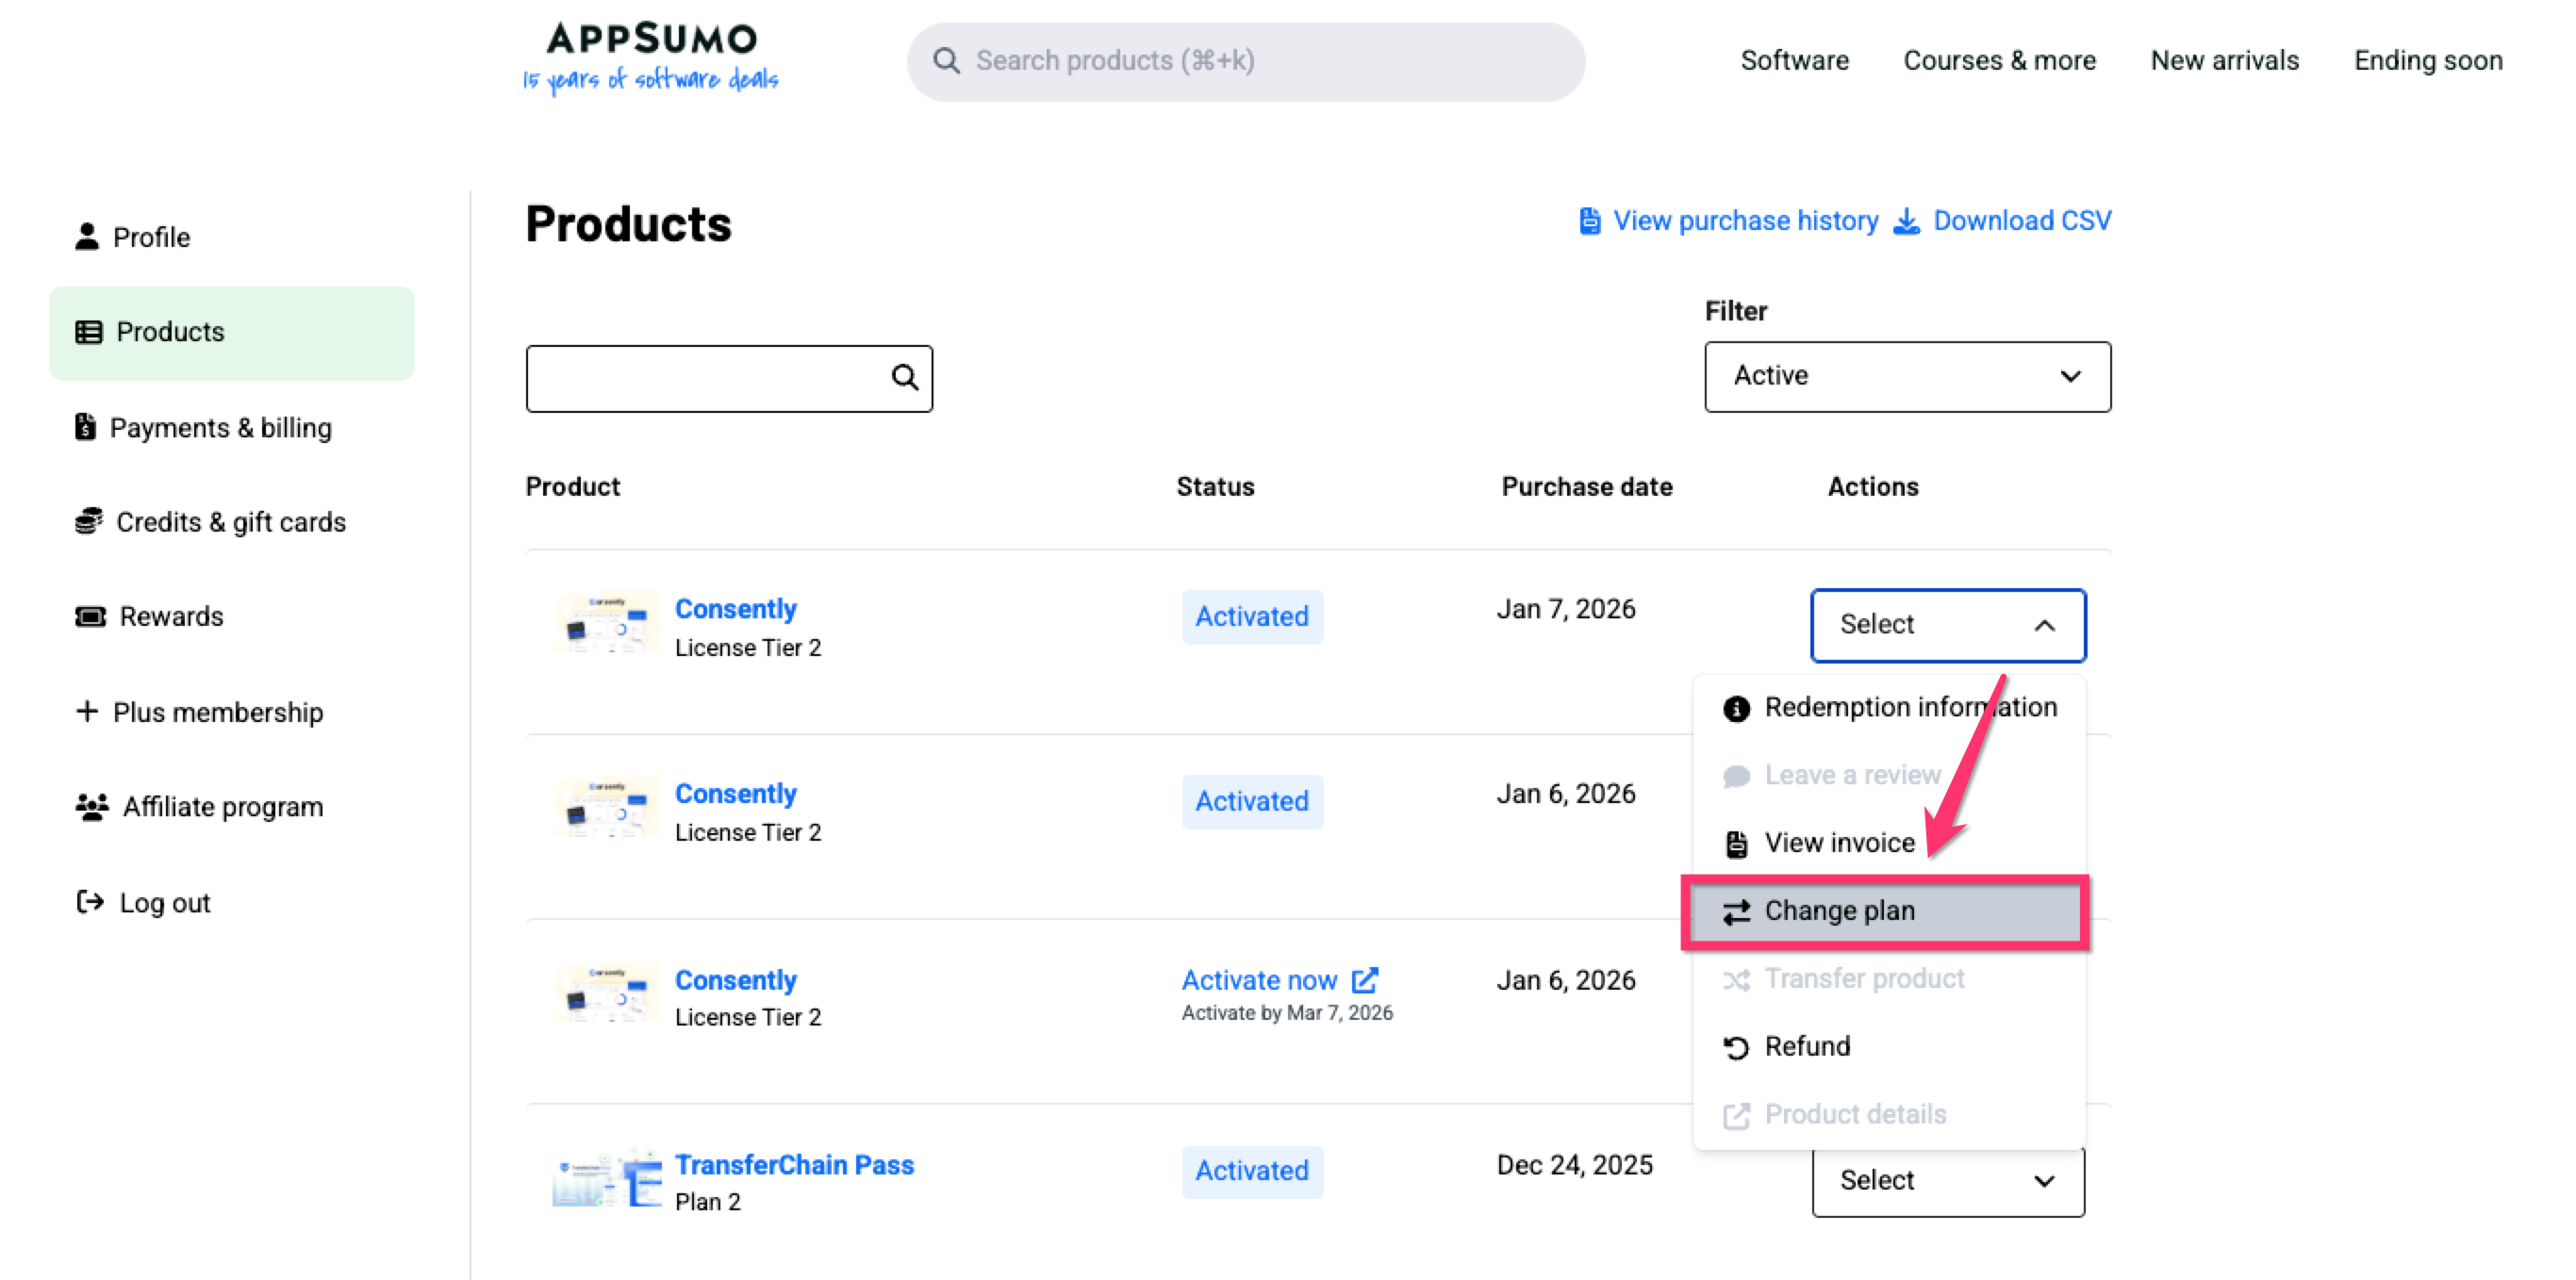
Step 3: AppSumo product Dashboard
Once you click the link, you should be redirected to your AppSumo product page.
Where you can:
View redemption information
View invoice
Change plan
Request a refund
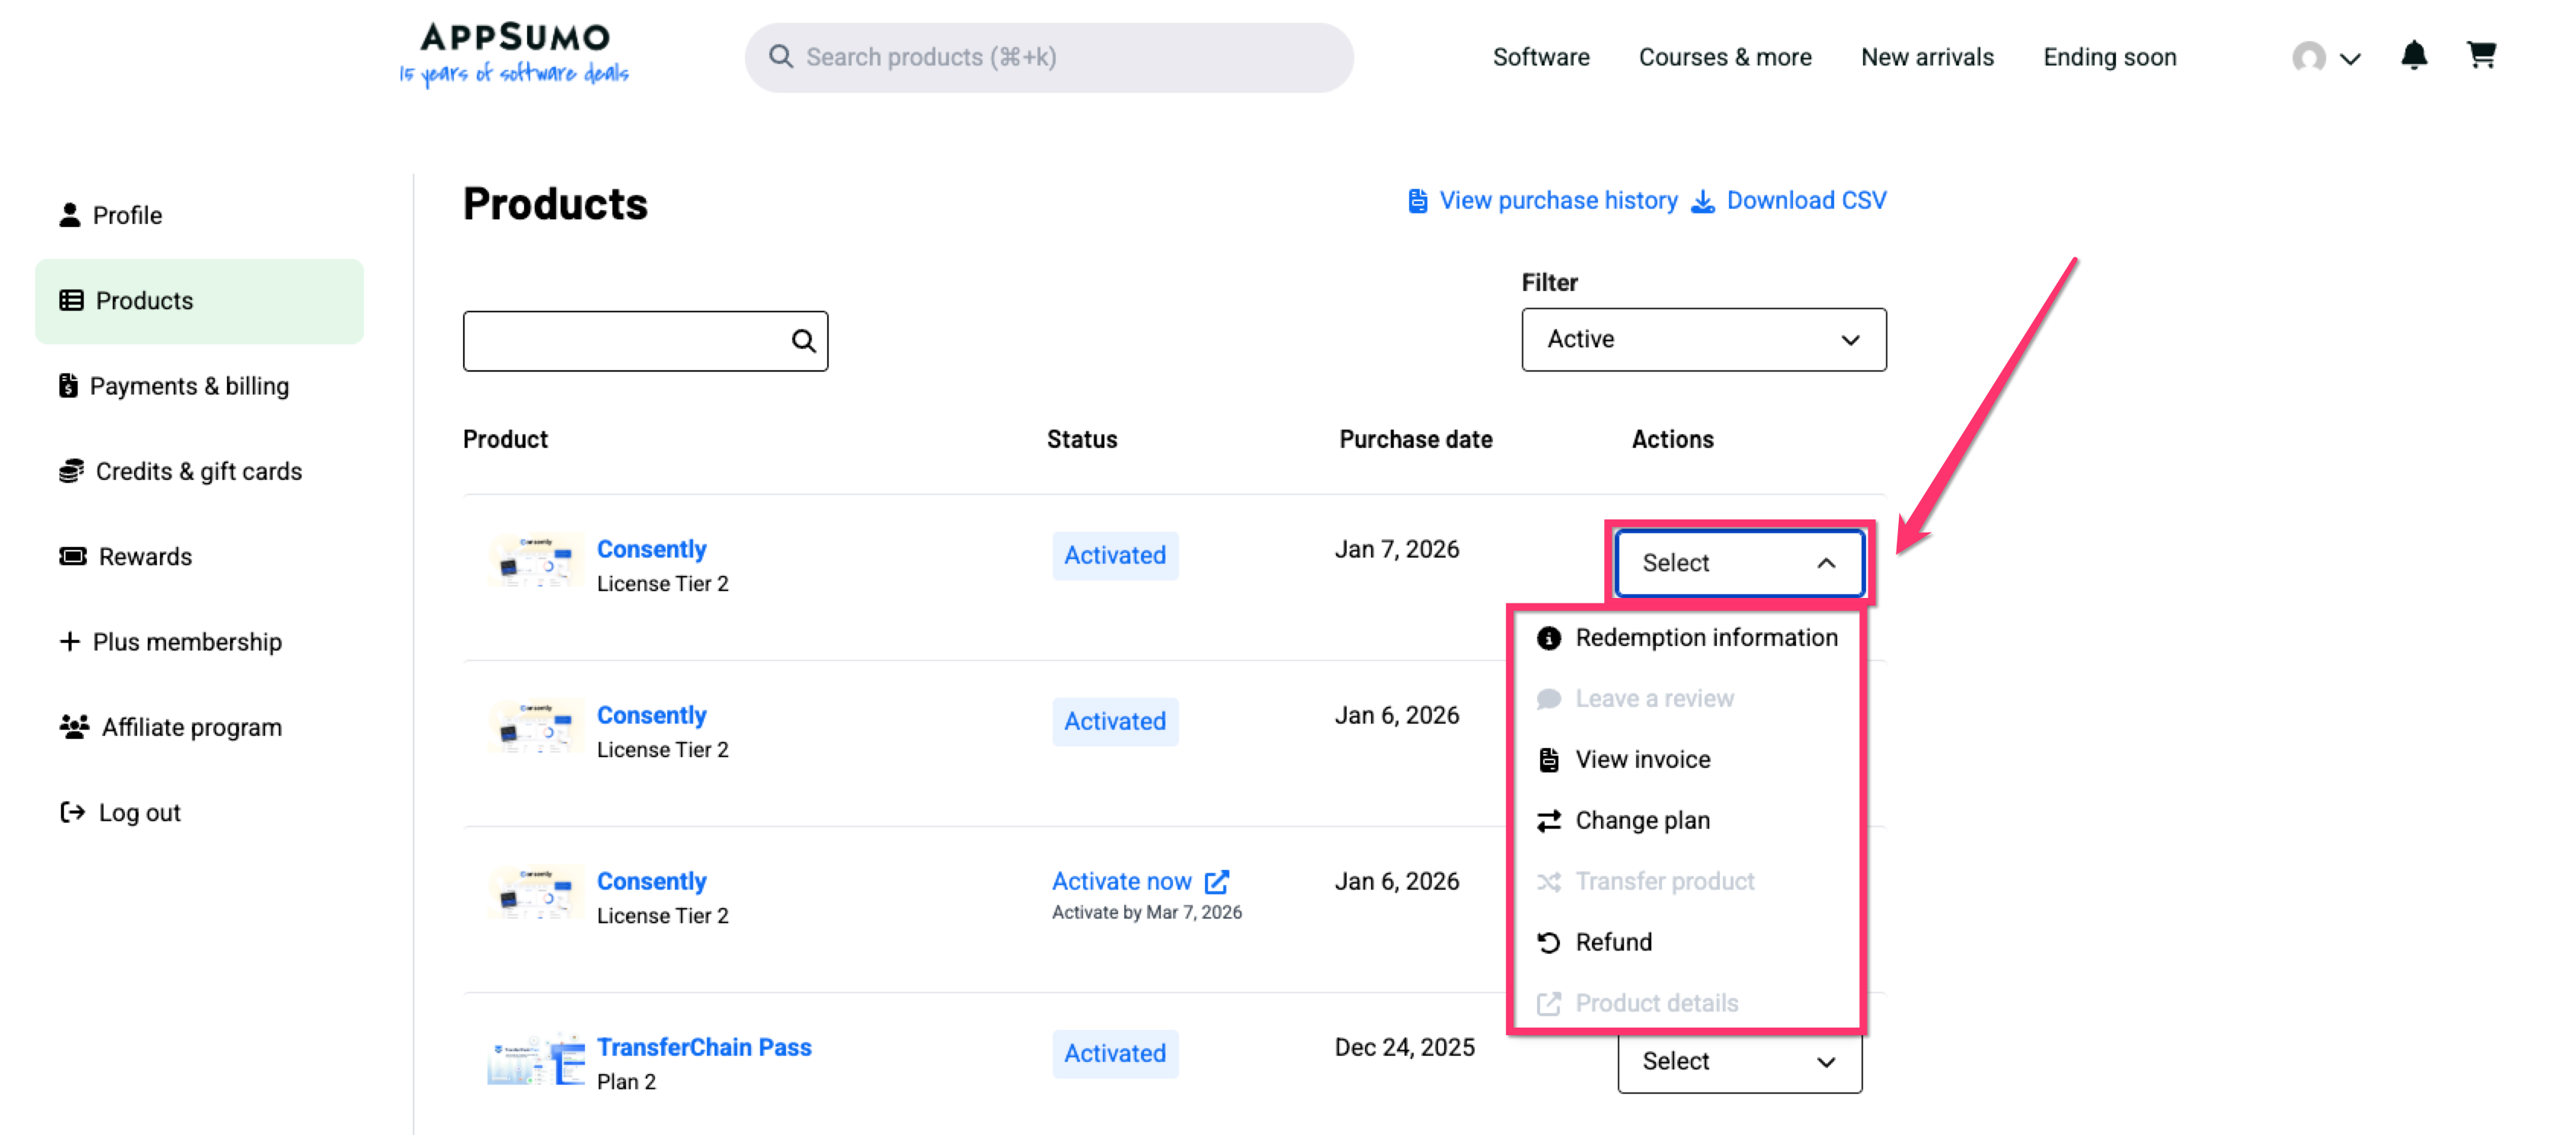
Step 5: View Redemption Information
Select the Consently Product from your AppSumo Products Dashboard, choose Select, and then click Redemption Information. It will take you to the redemption page, where you can view your Invoice, check your current plan, change your plan, contact support, and initiate a refund.

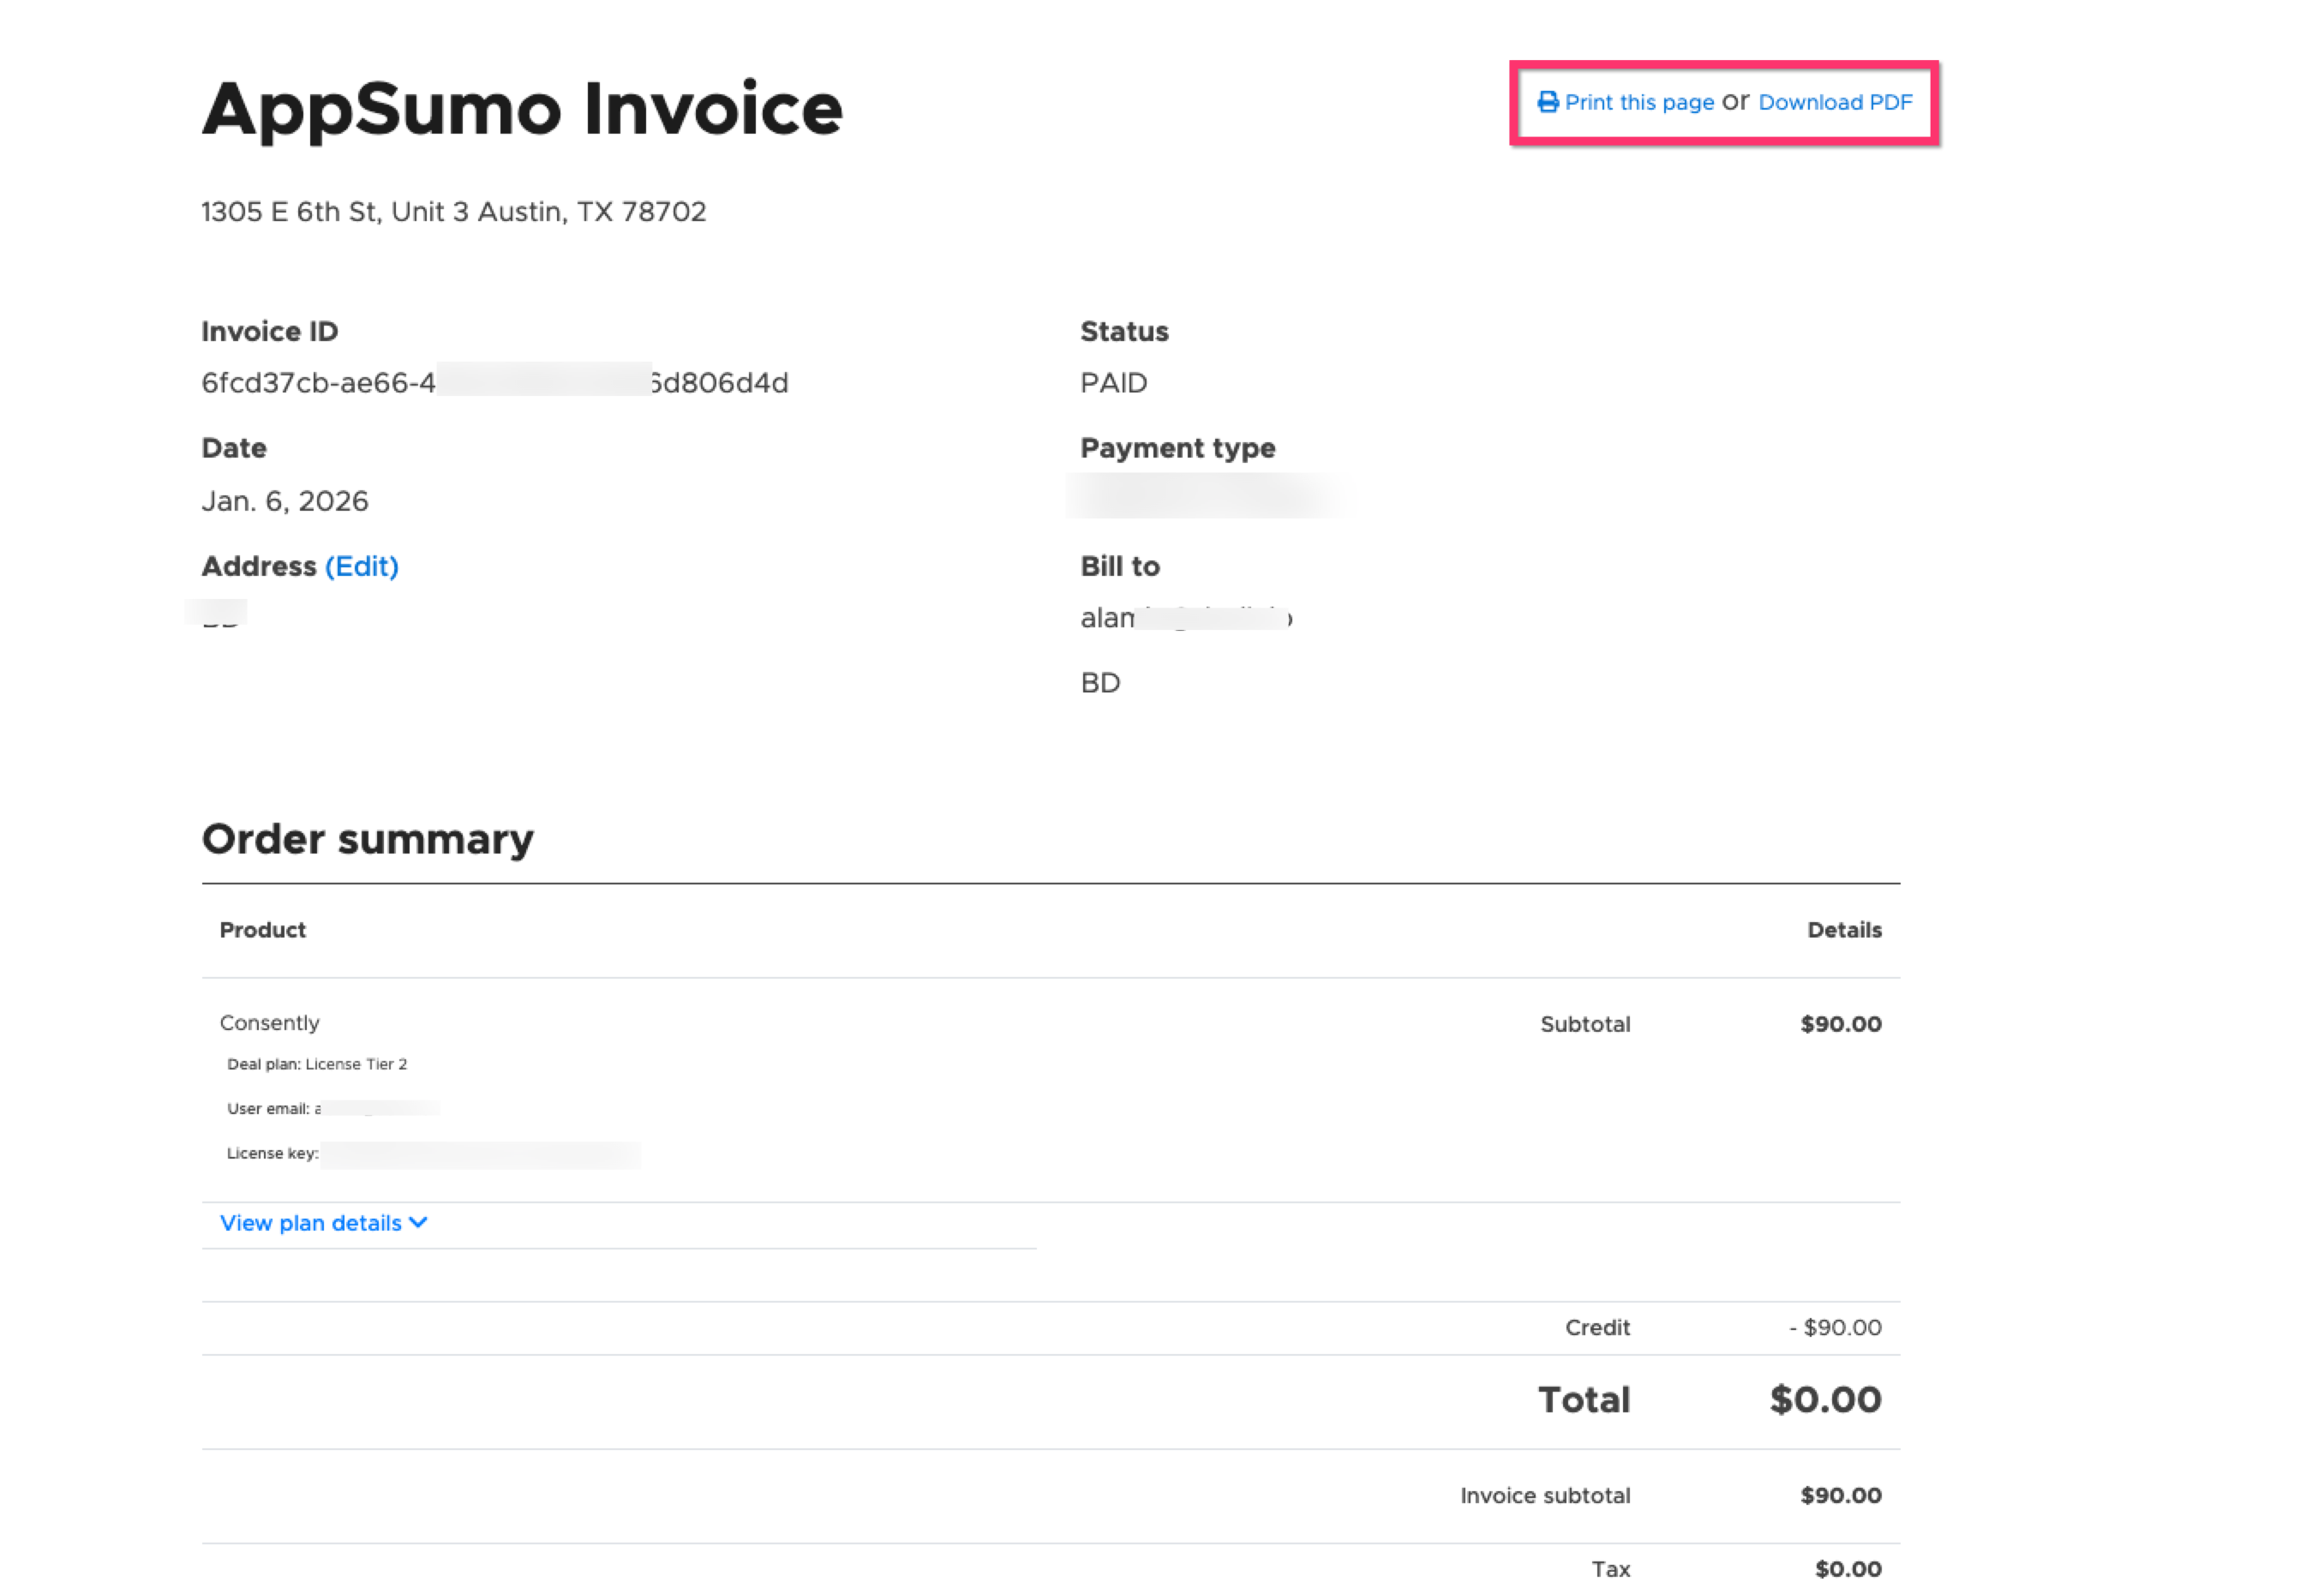
Step 6: View invoice on AppSumo
You can easily view and download your invoice from AppSumo.
From the Select dropdown menu, click on View invoice
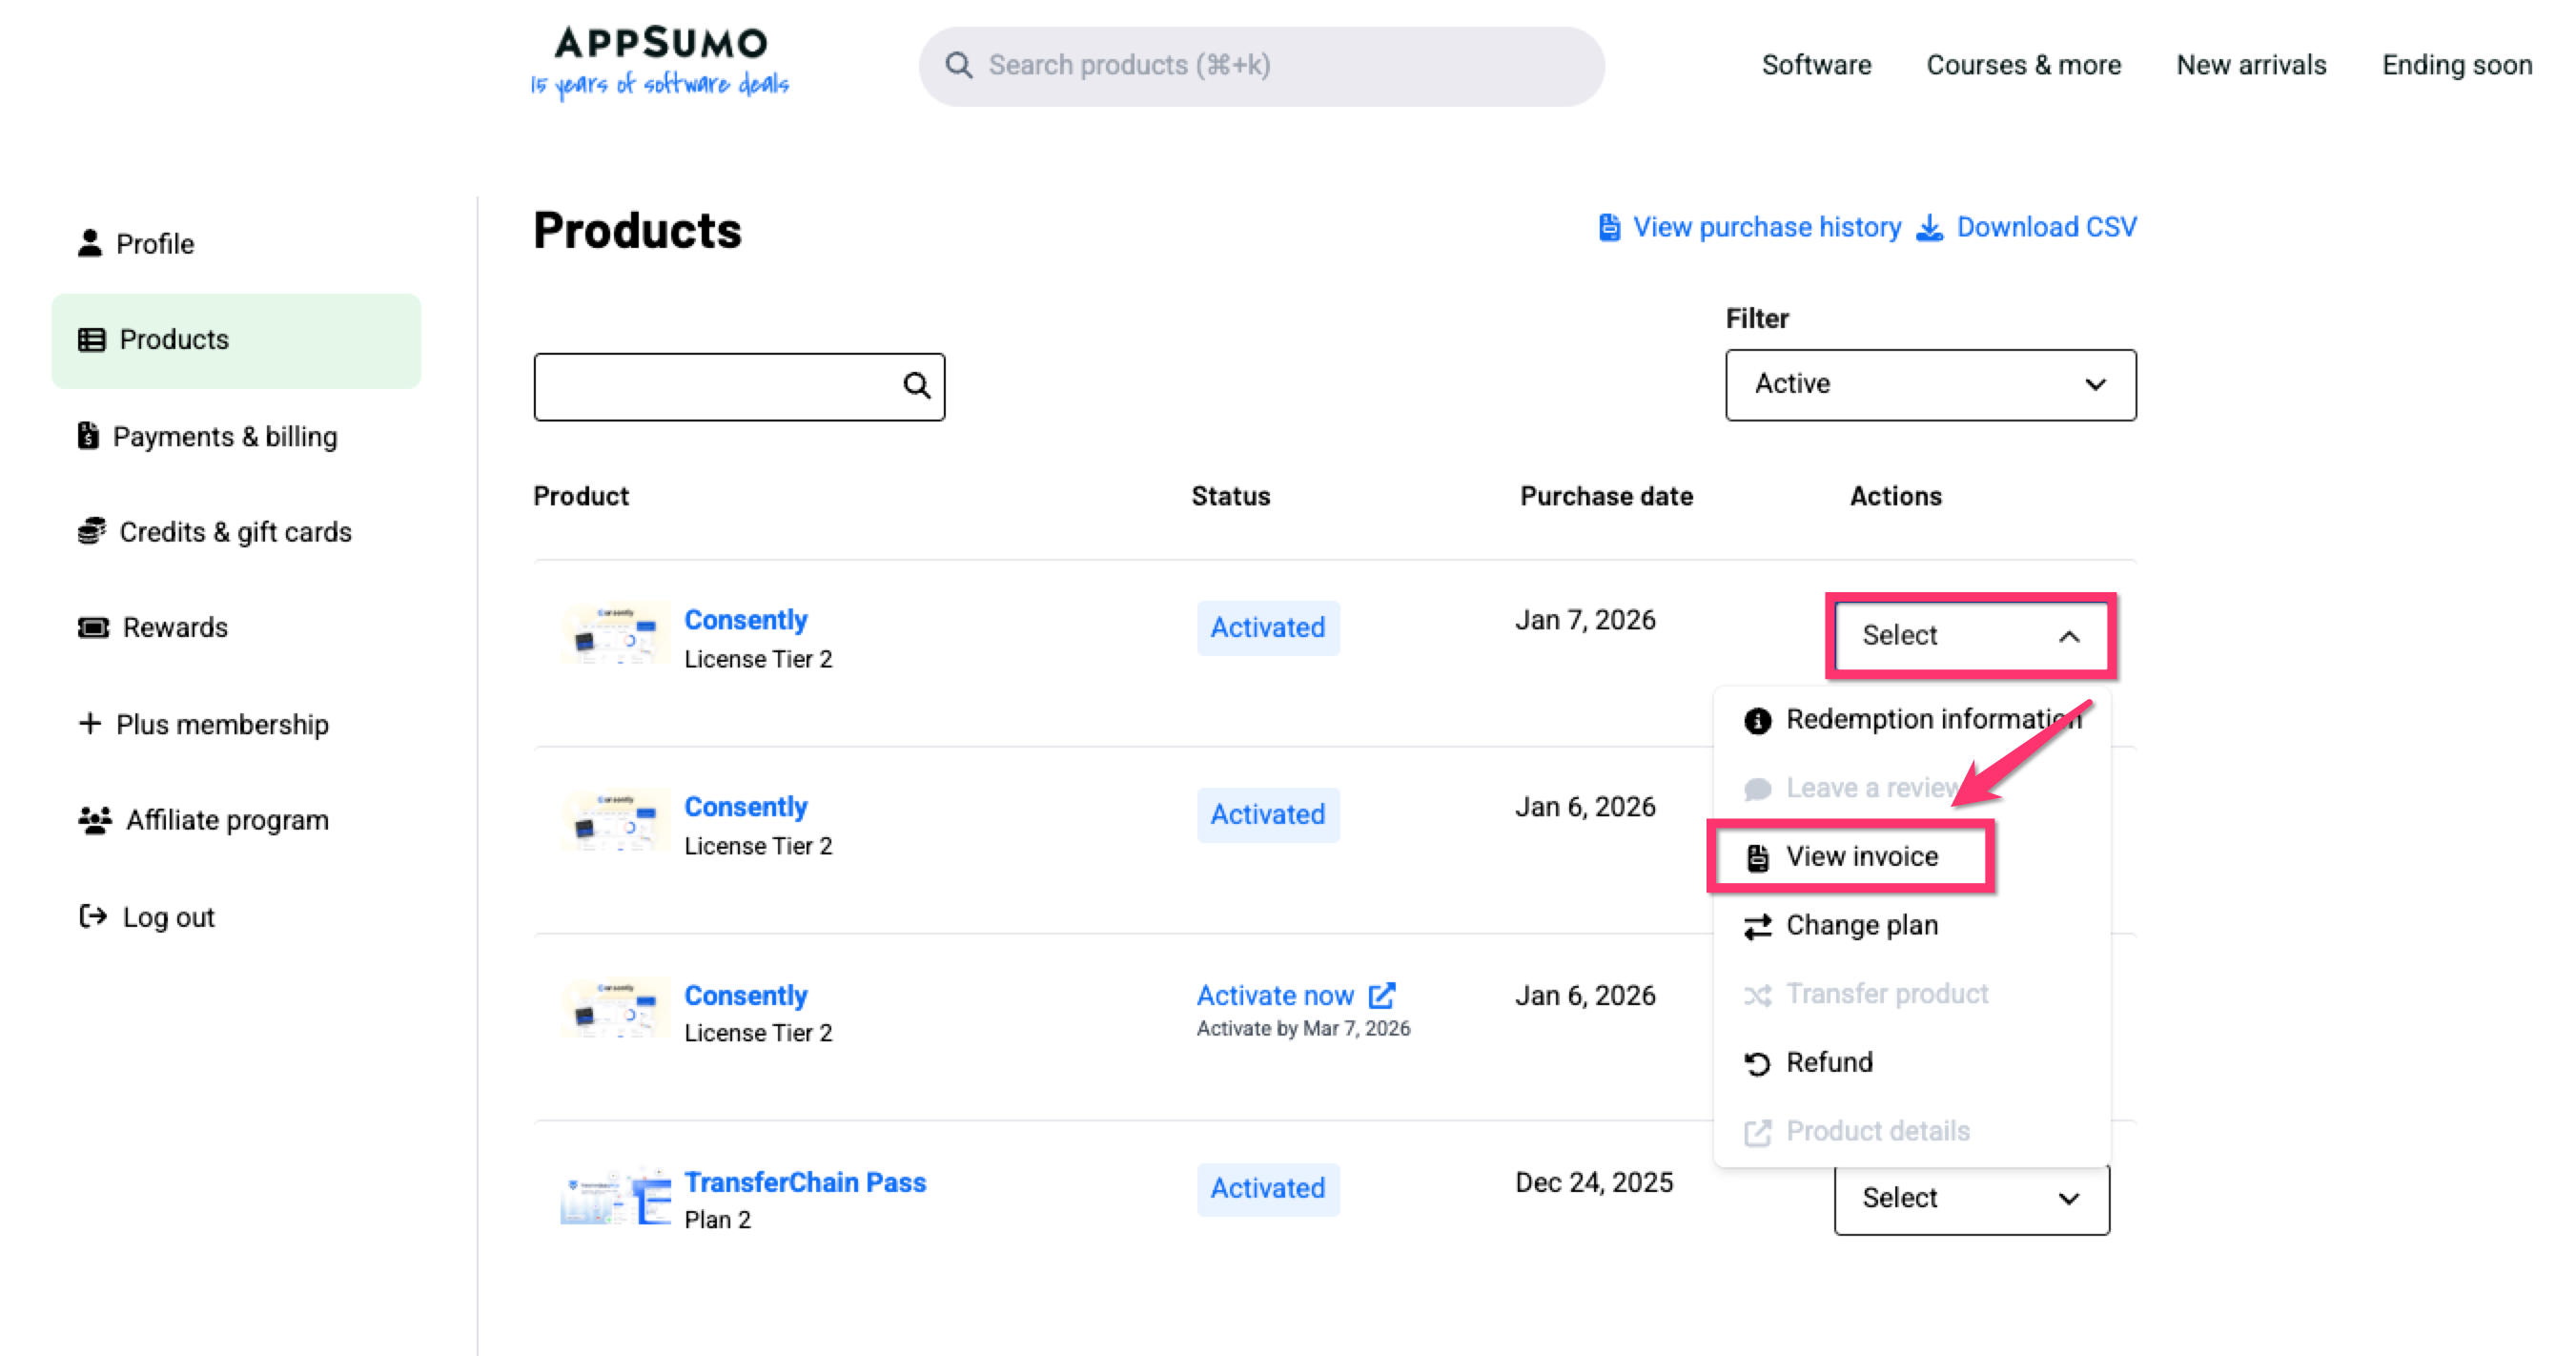
It will open a new window with the Invoice, where you can print or download your invoice as a PDF
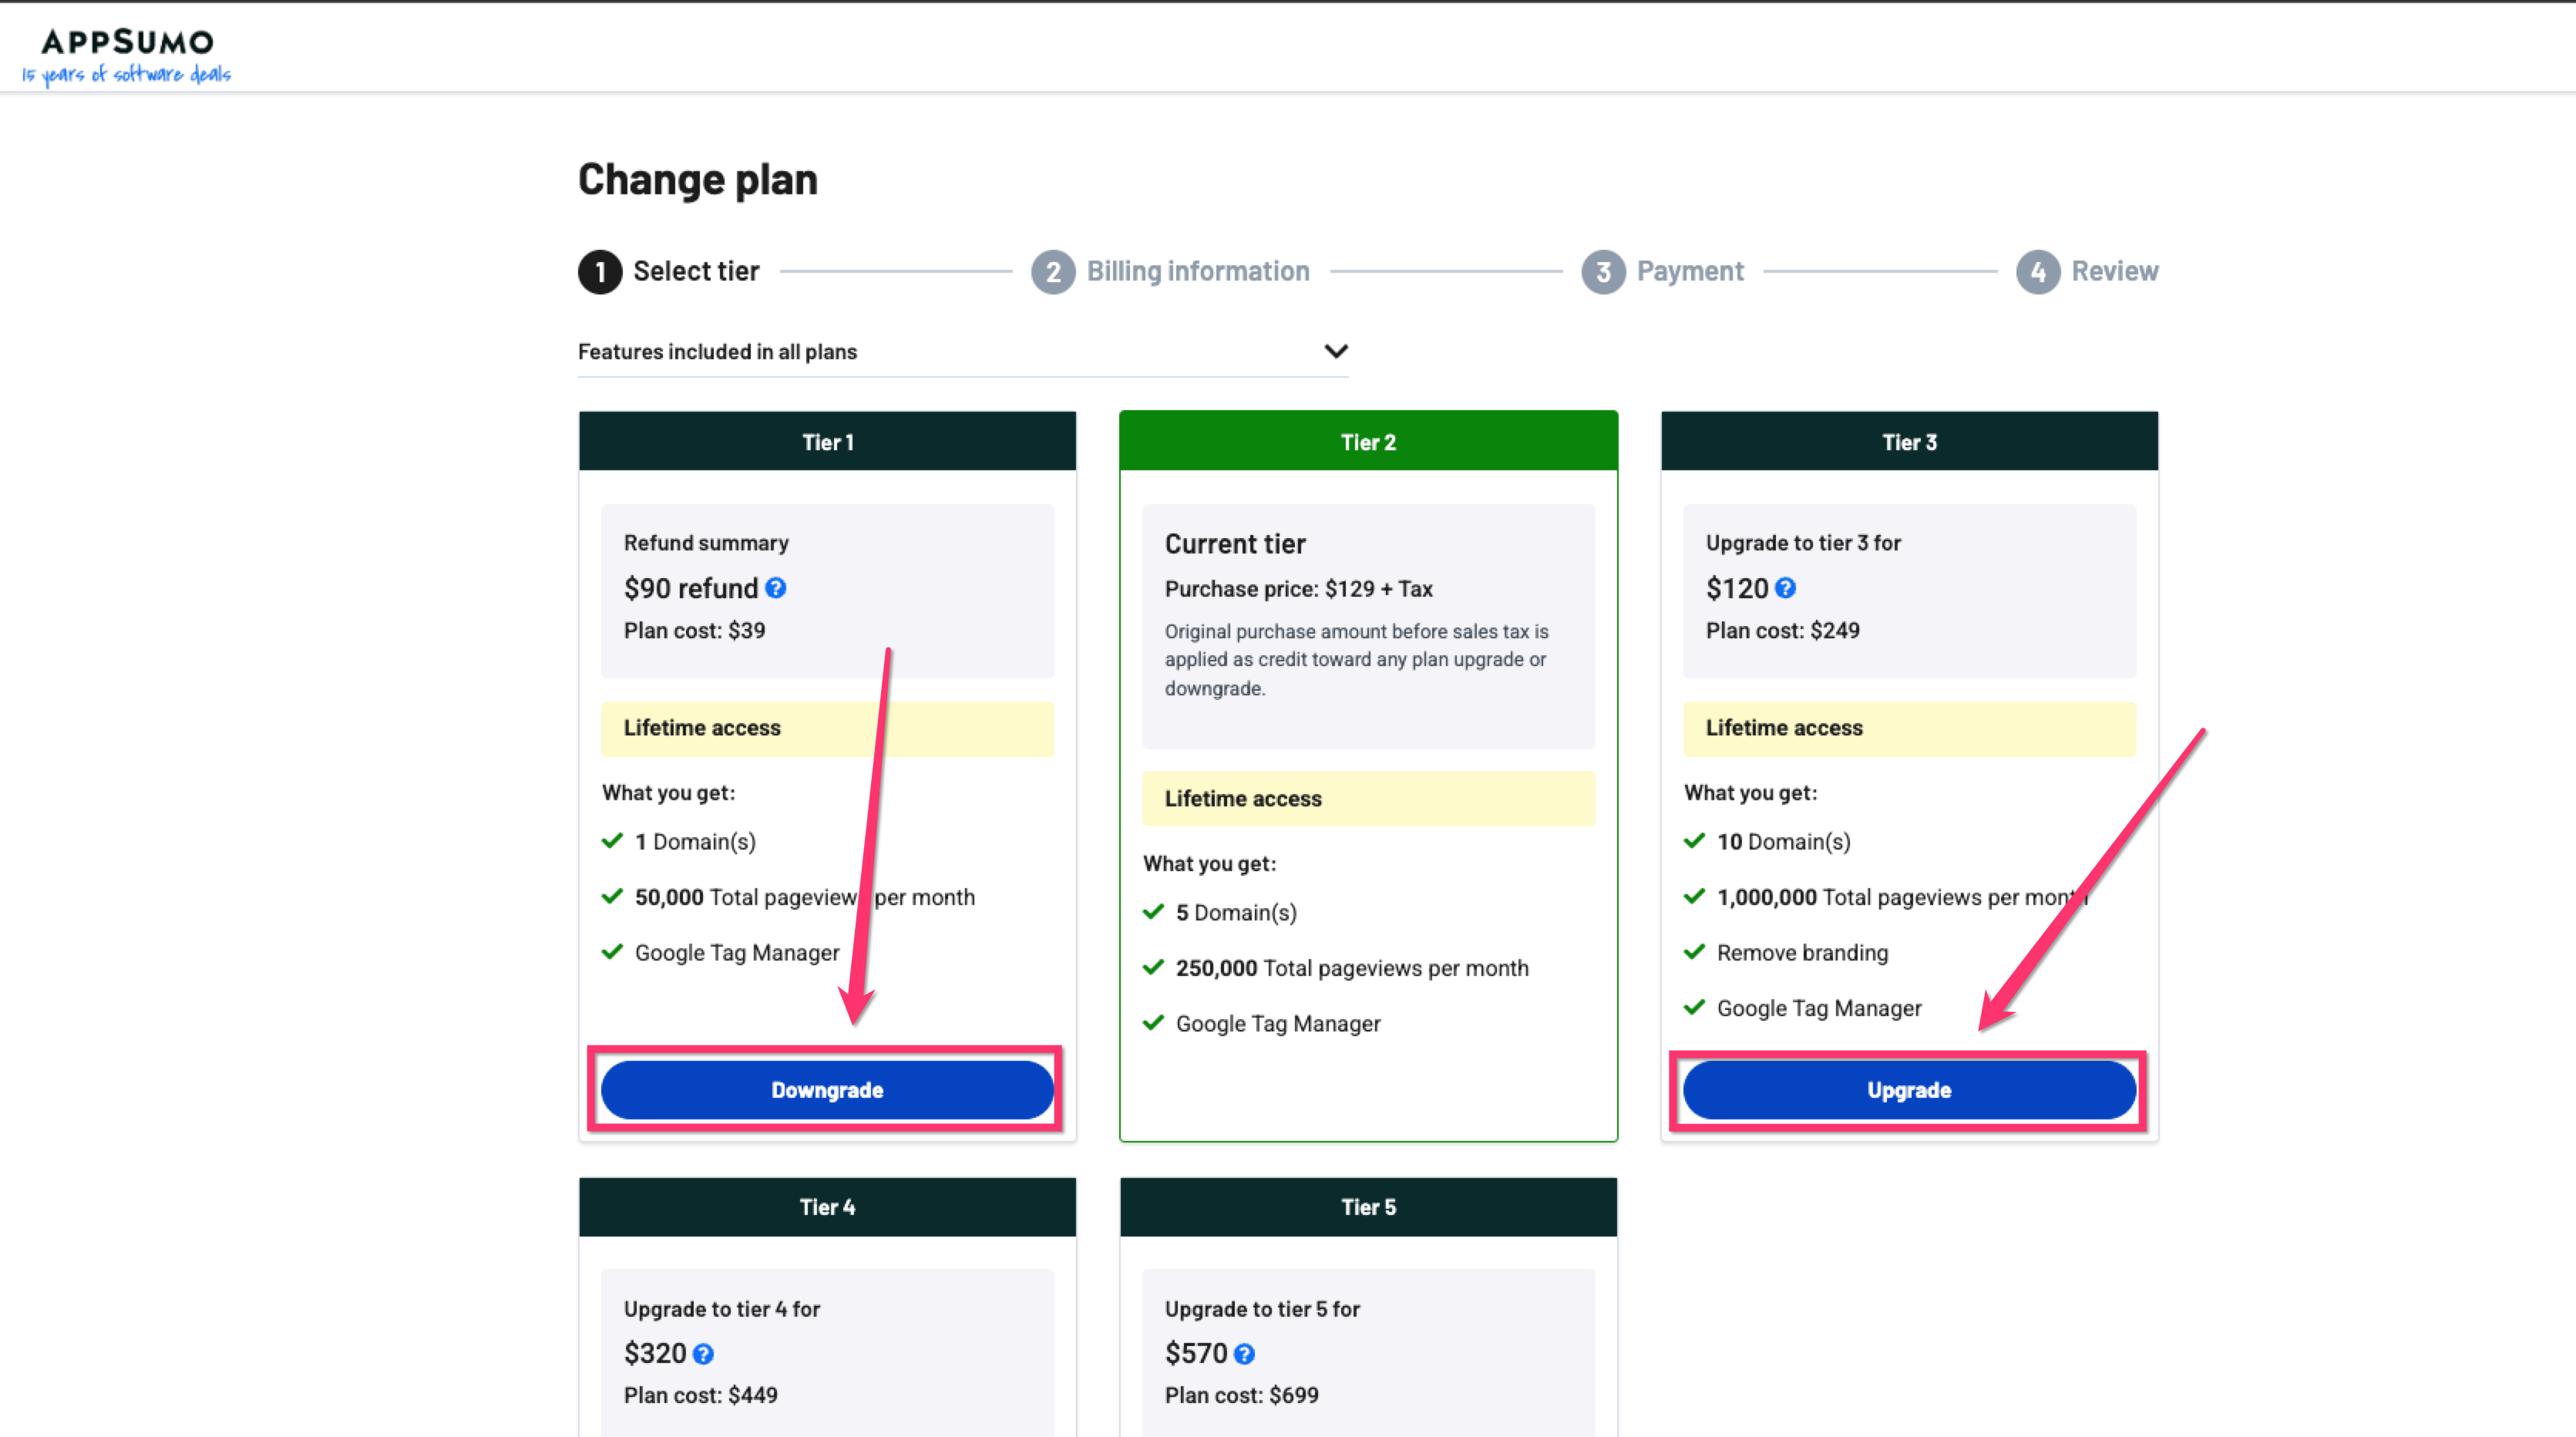
Step 7: Change your subscription plan
You can upgrade or downgrade your subscription plan from your AppSumo Dashboard.
From the Select dropdown menu, choose Change plan.
You will be redirected to the Change plan page, where you can check all the available plans. It allows you to downgrade or upgrade your plan.
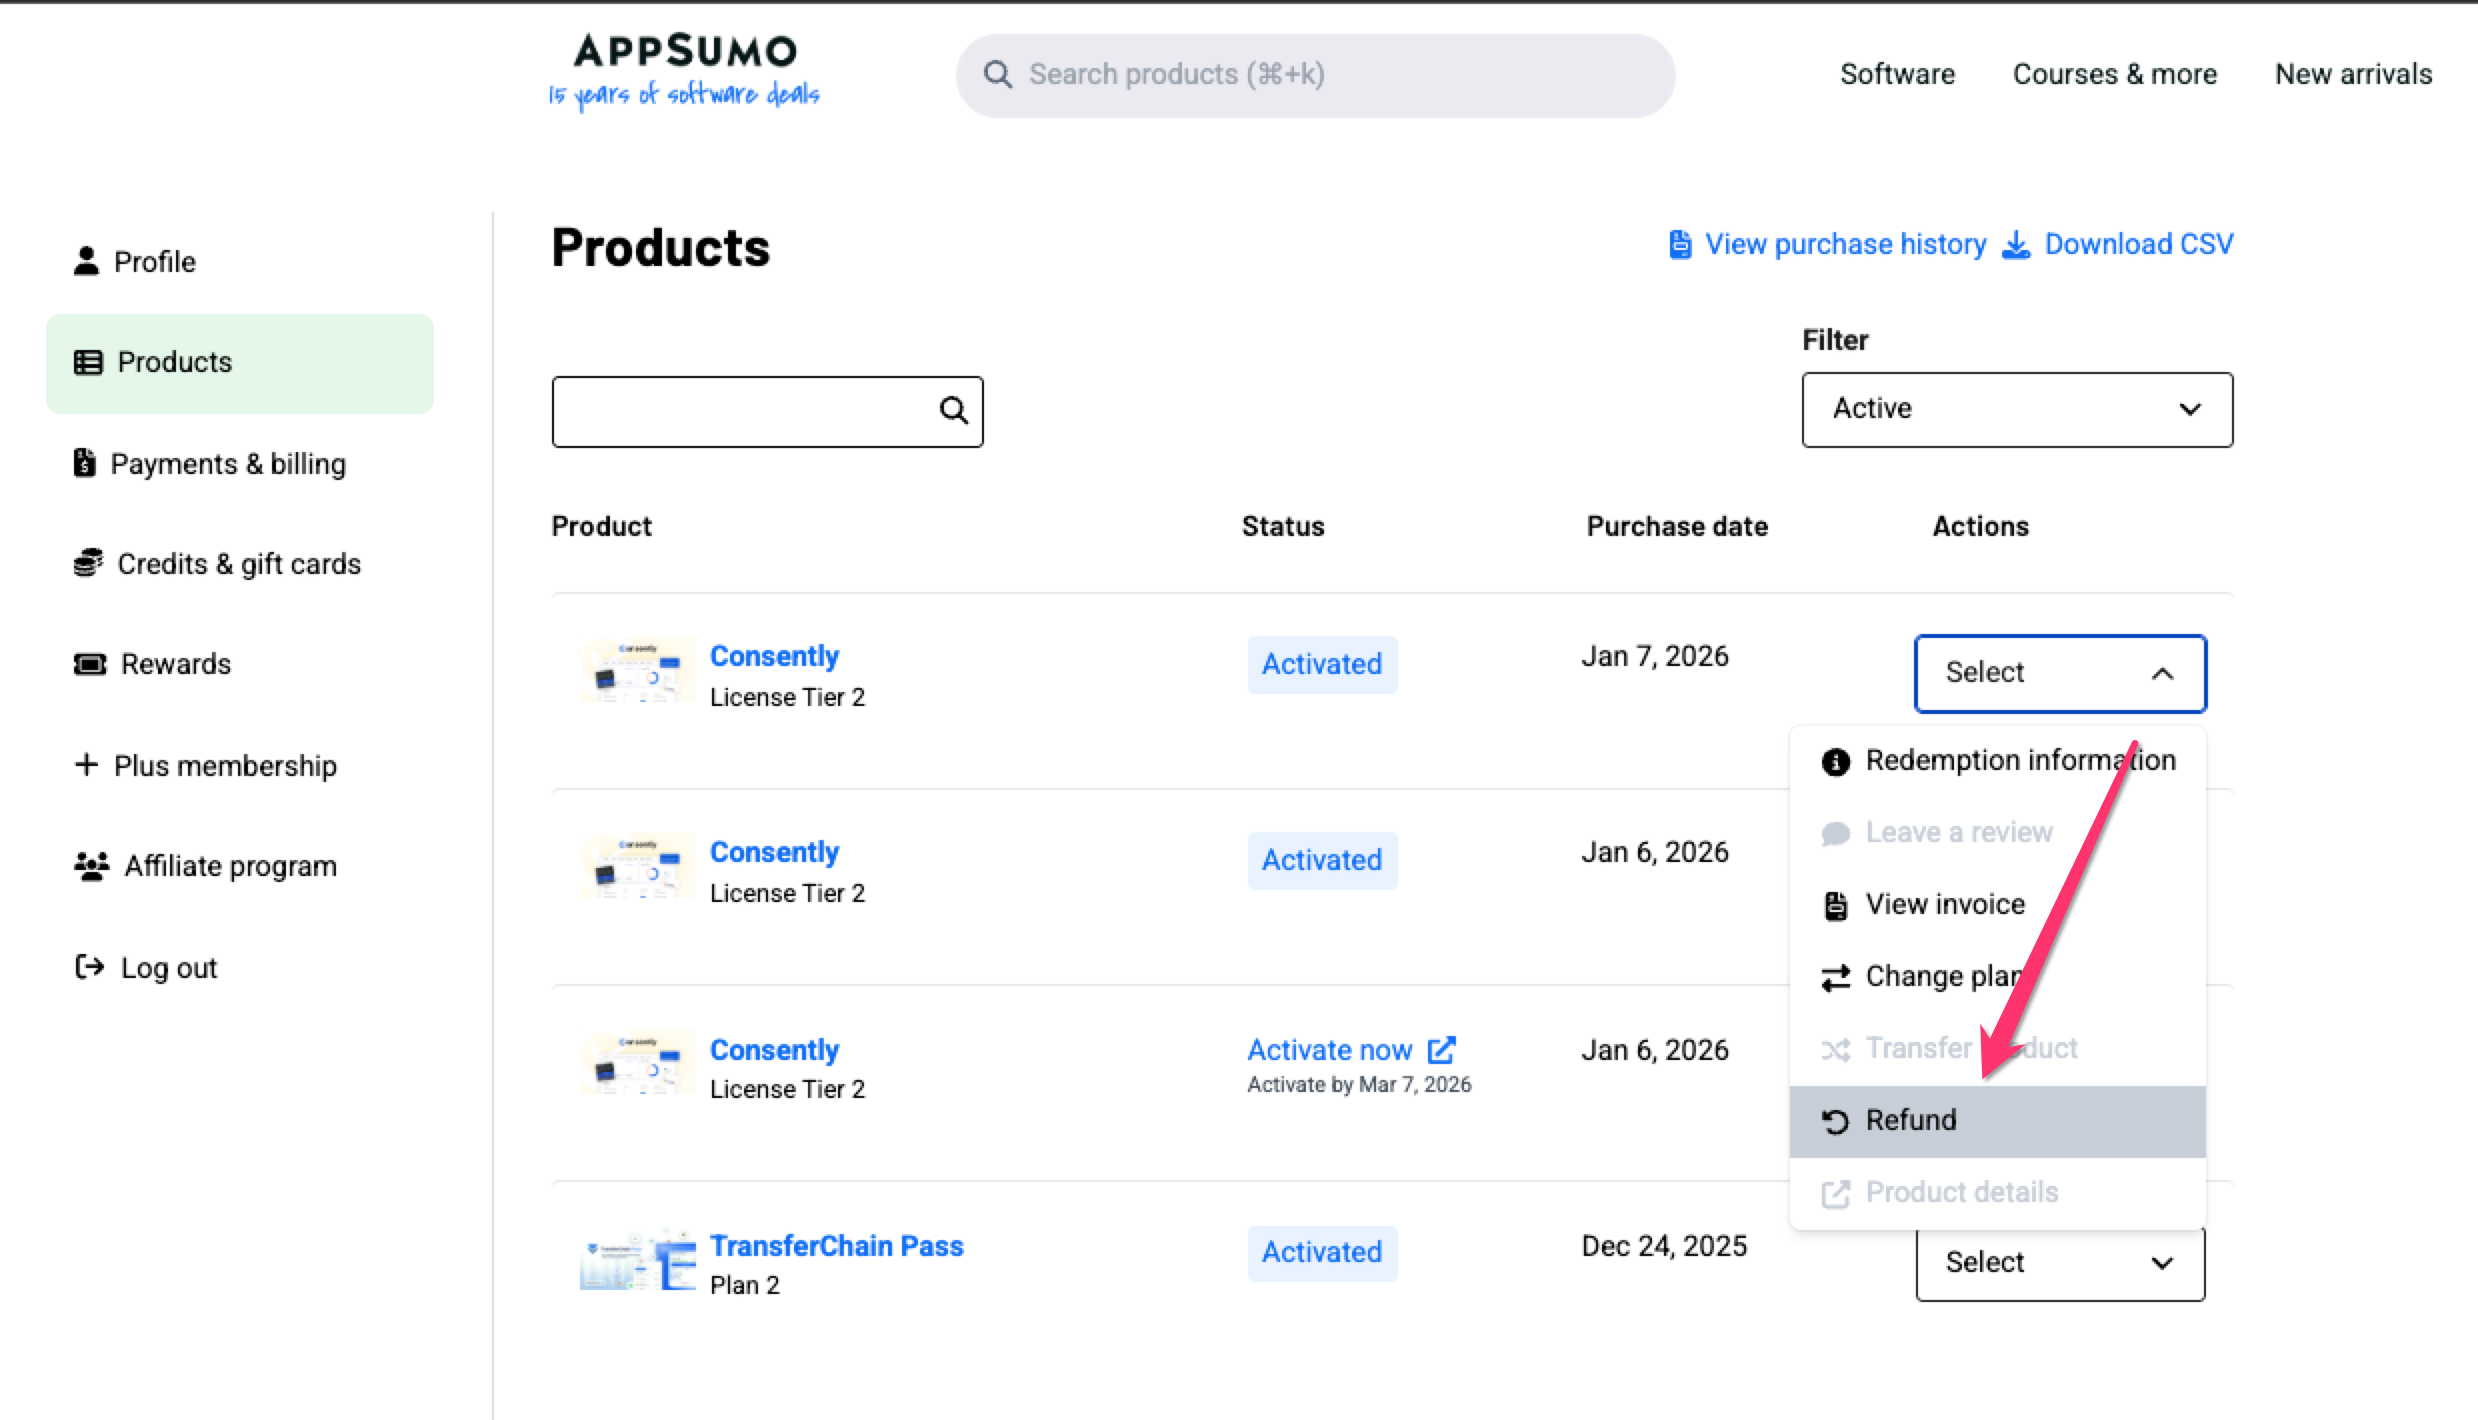
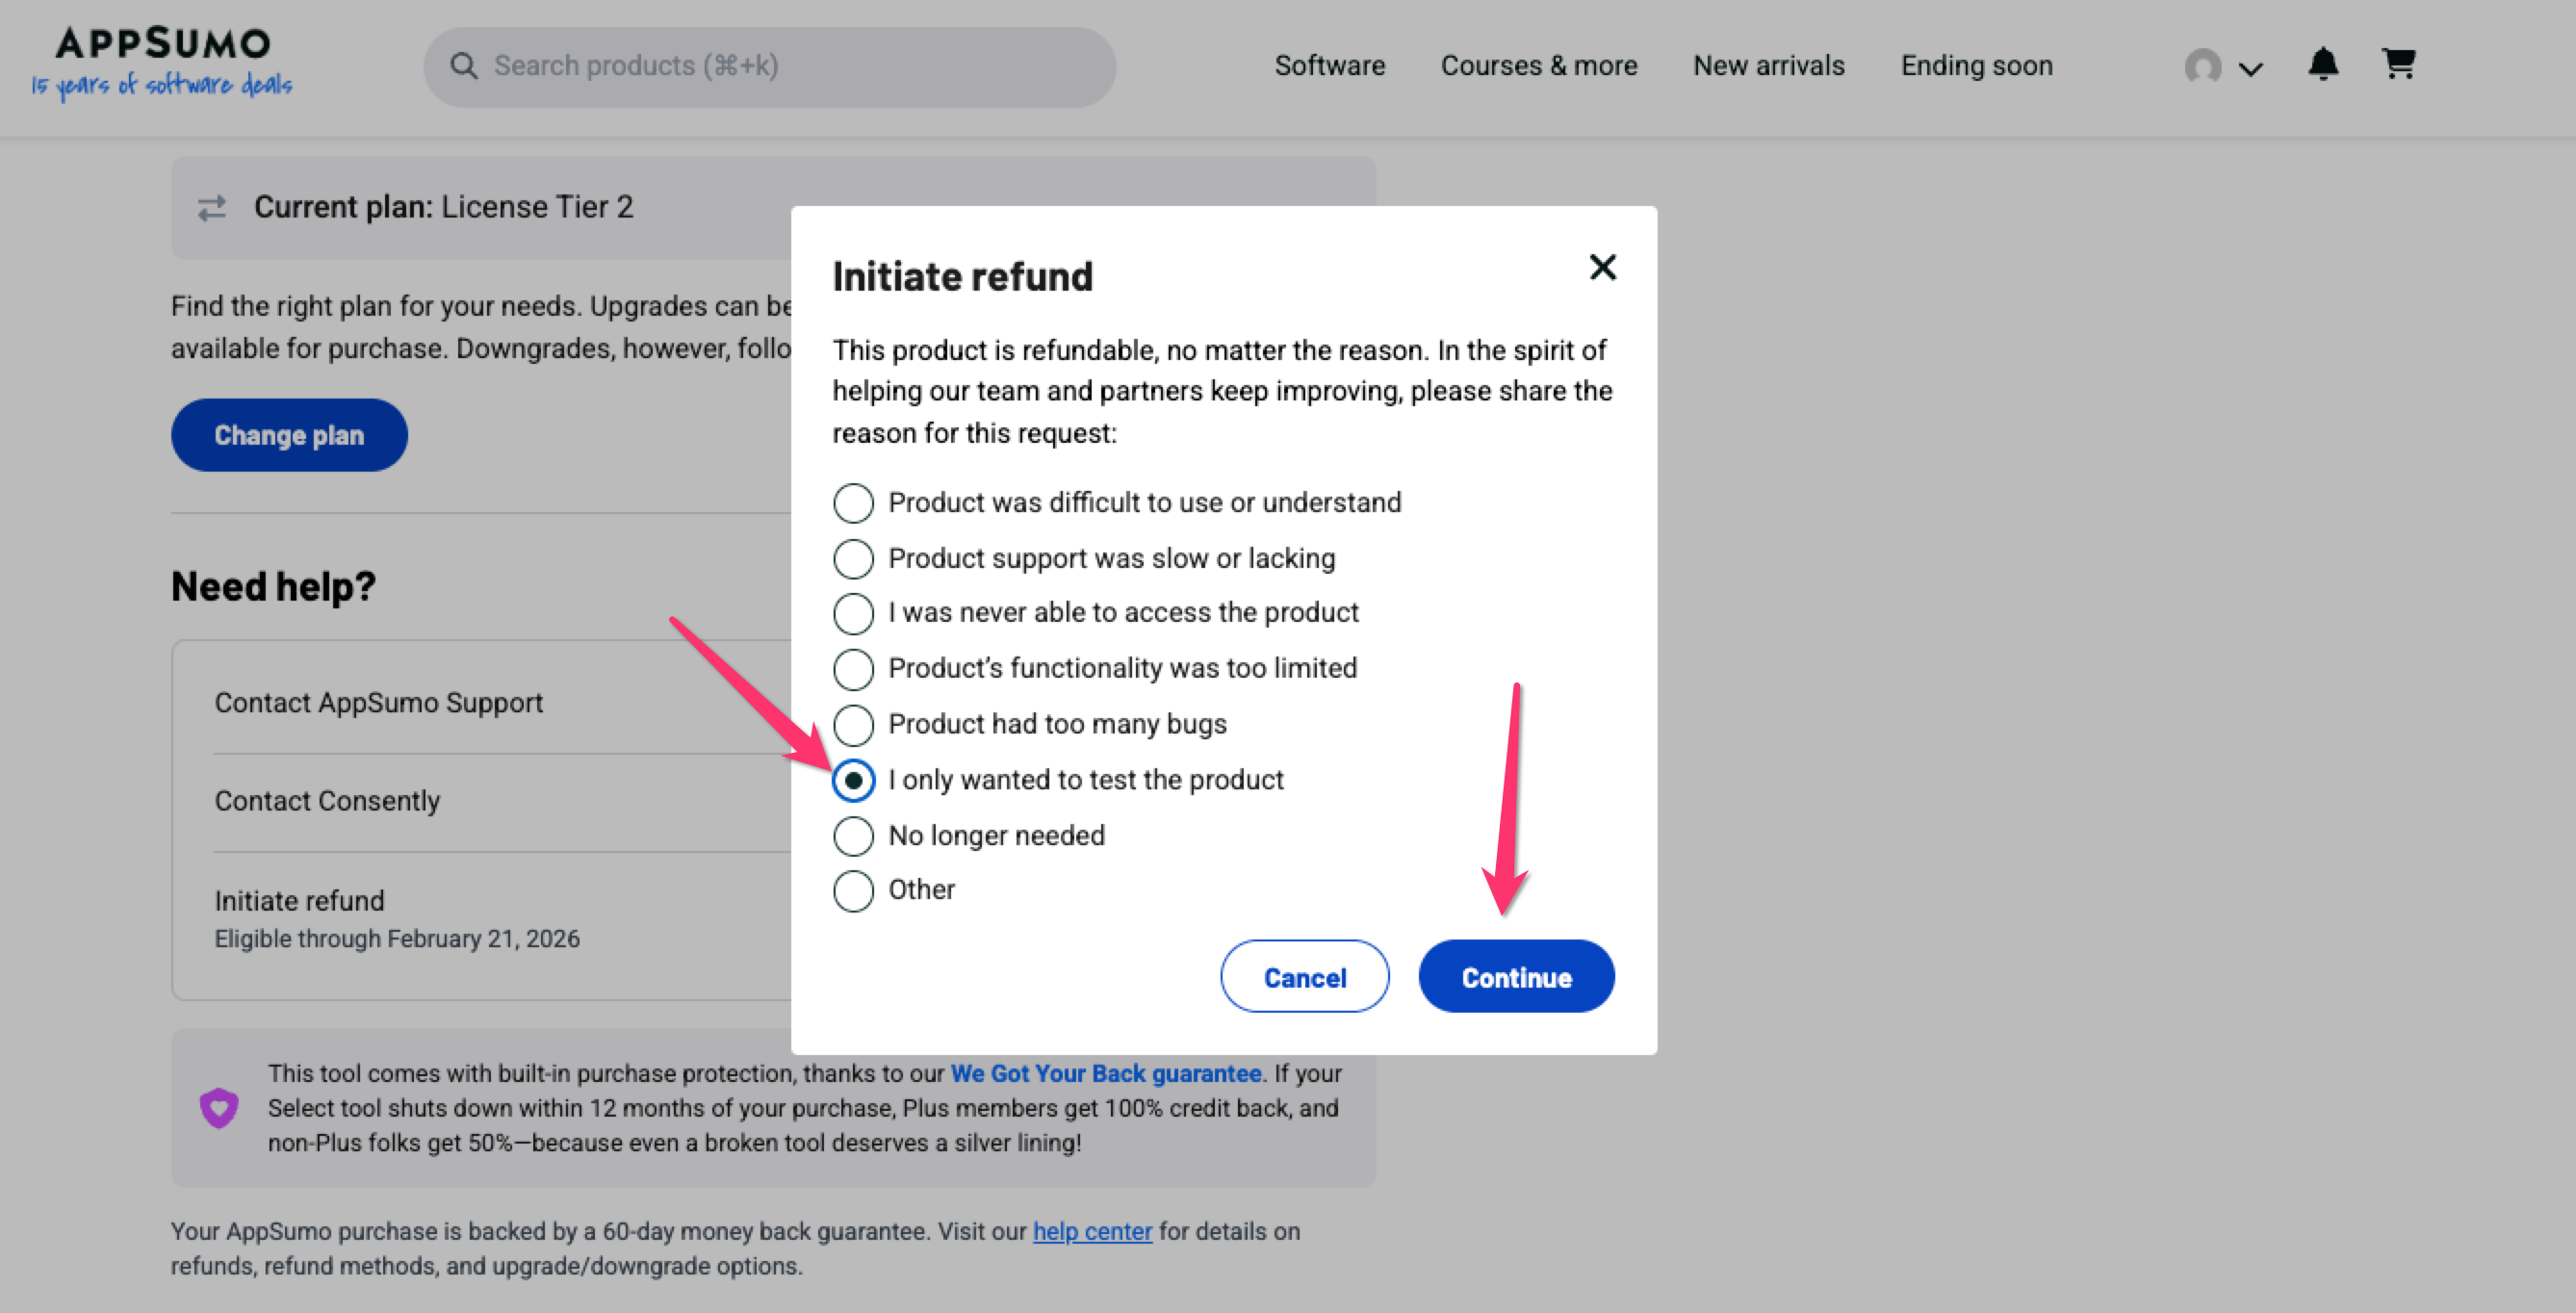
Step 8: Apply for a refund
When you purchase a product through AppSumo, any refund must be processed by them. To request a refund, you need to apply through your AppSumo account, and AppSumo’s refund policy will apply. Currently, AppSumo has a 60-Day refund policy.
Choose Refund from the Select dropdown menu.
Now, click on Initiate refund
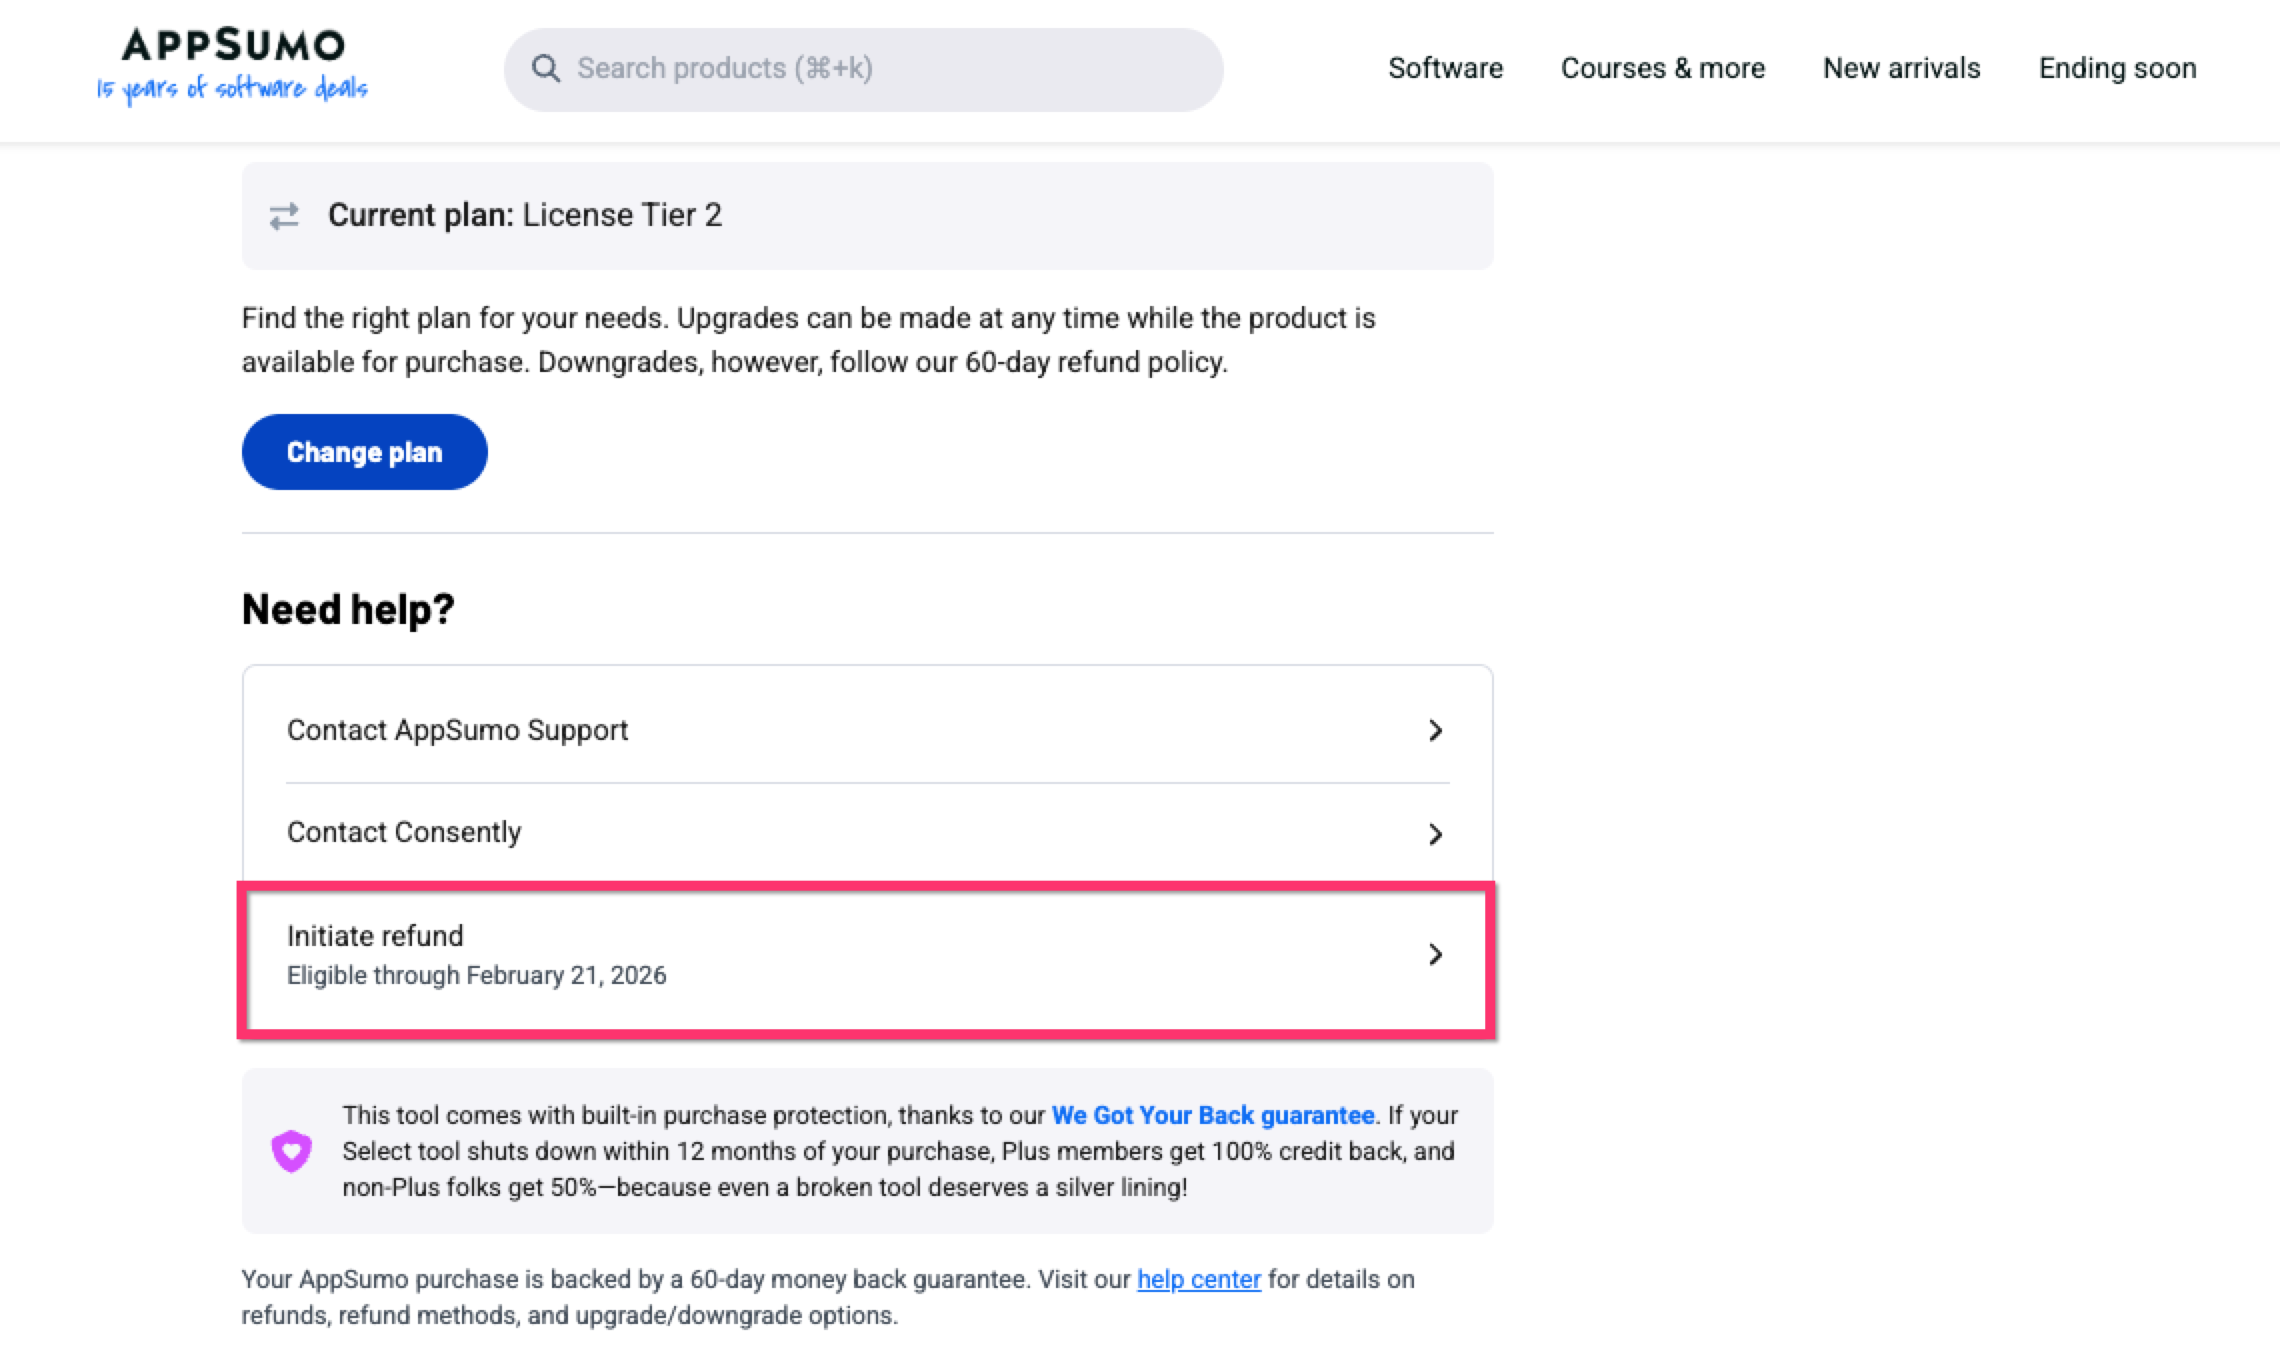
Select a reason for your refund and click on Continue
Review your refund method and click the Continue and Initiate refund button
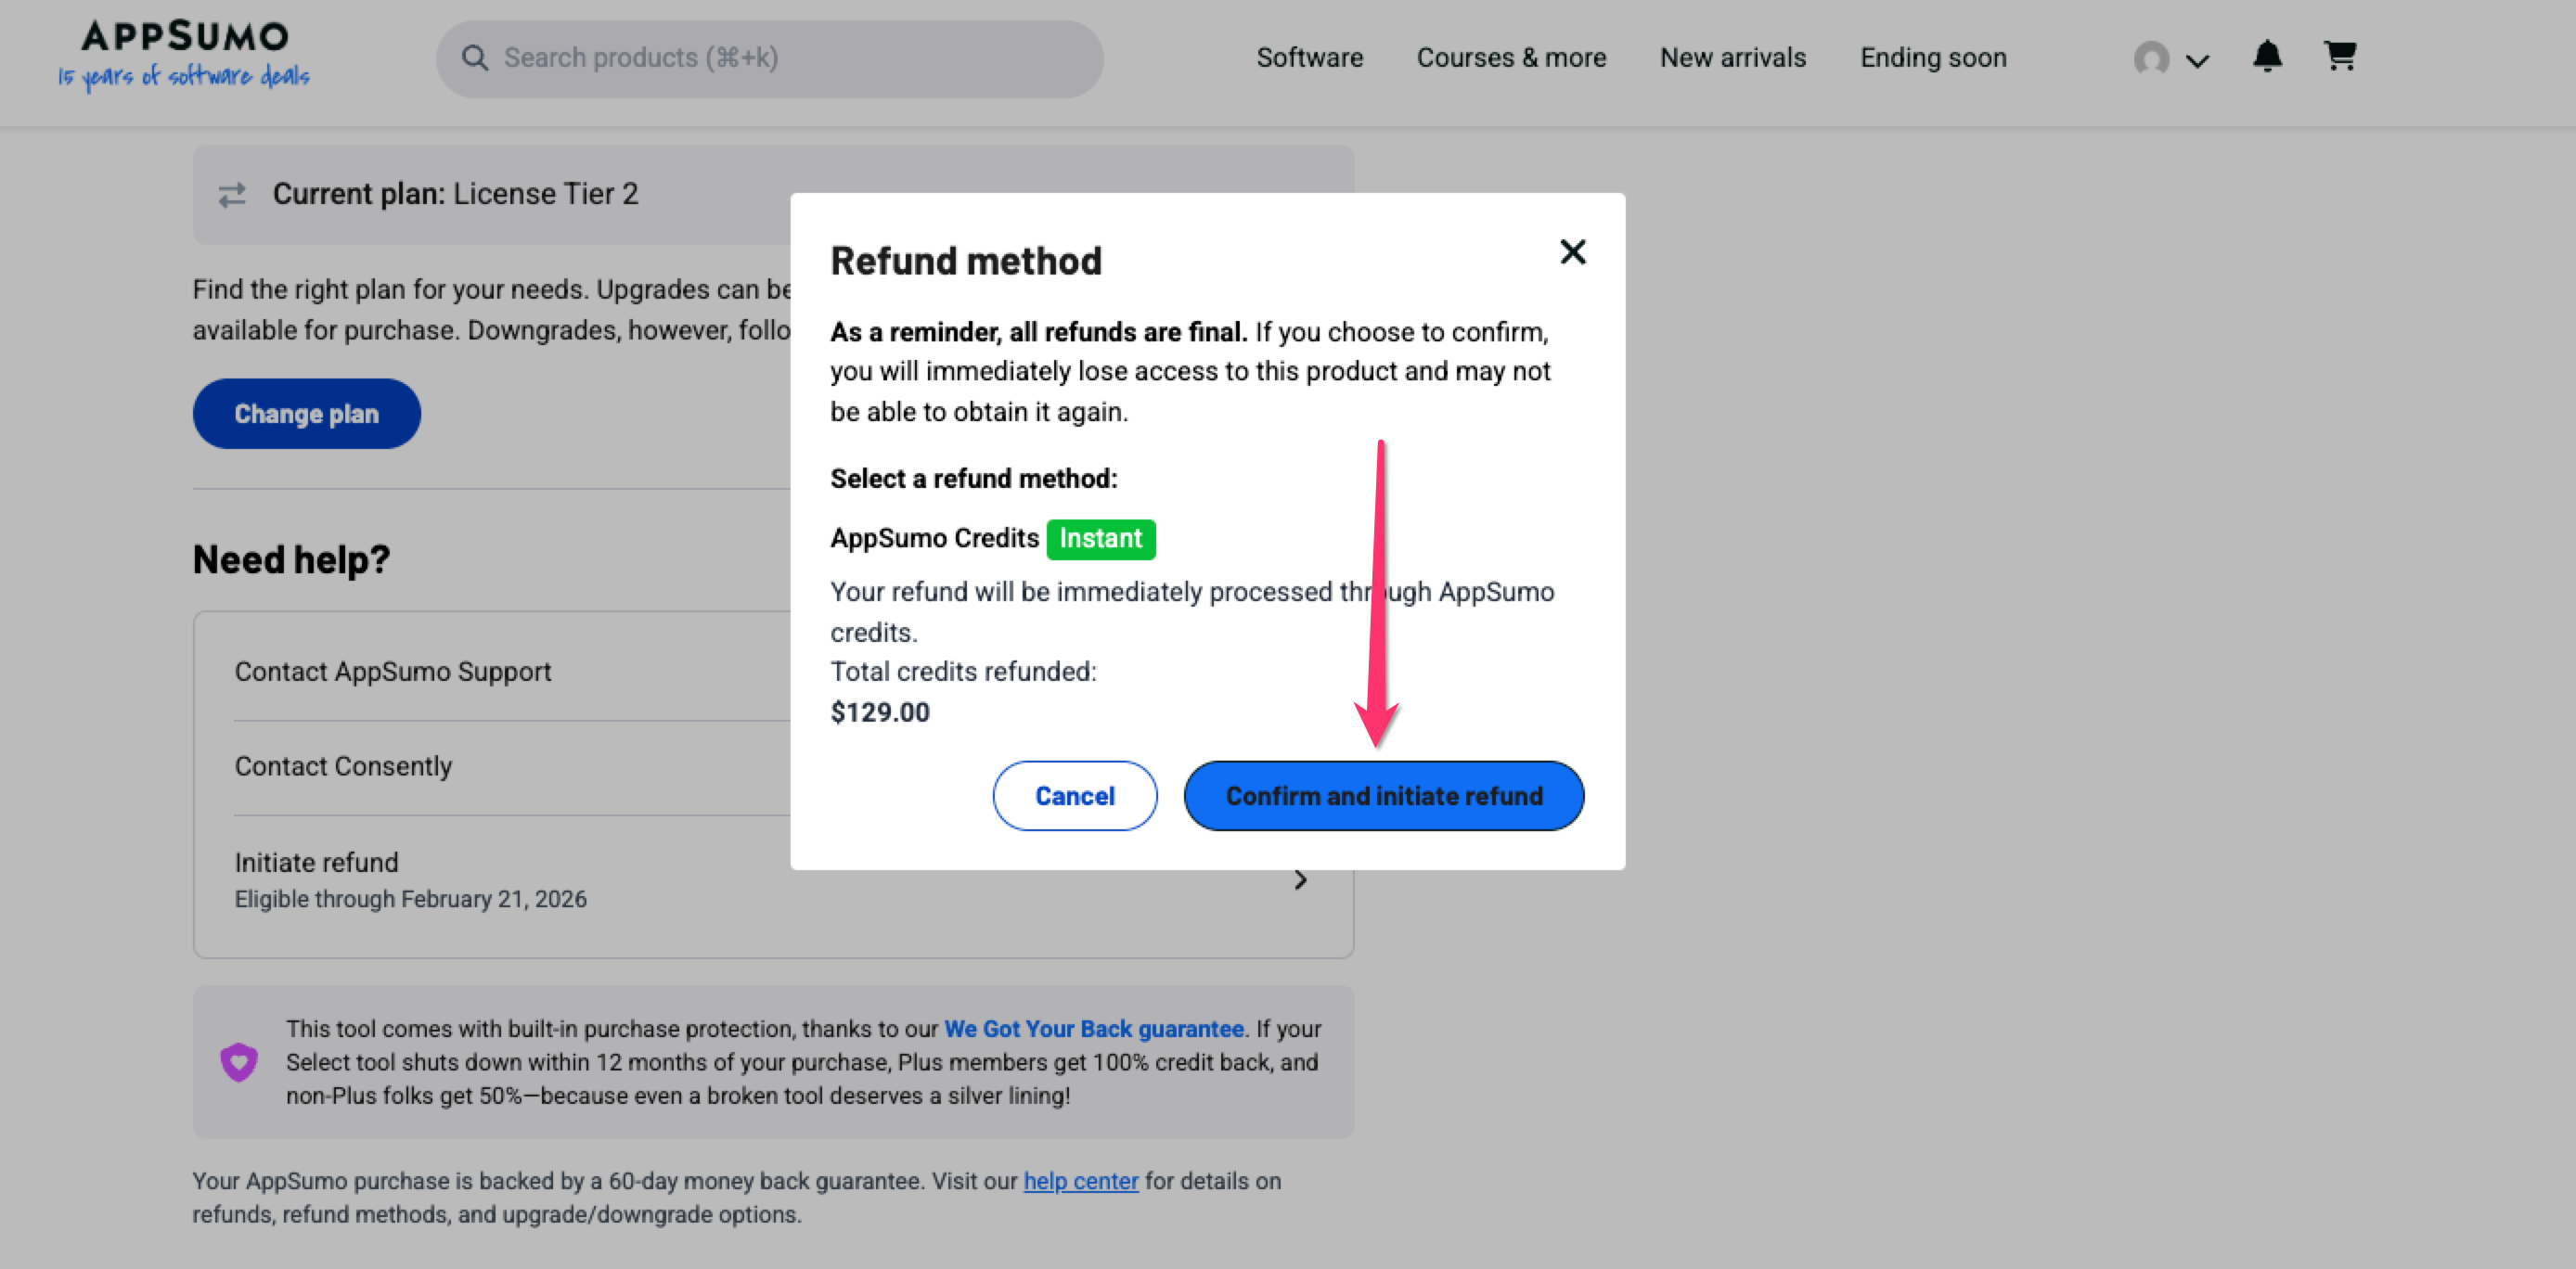
A success message will show with the refund amount.
💡 Tip: For any issues or questions related to refunds, please reach out to support@appsumo.com

What’s Next
Now that you understand account management, consider:
Upgrading to a higher plan if you need more domains or pageviews
Troubleshooting
Payment method won’t update
Why this happens: Browser autofill may interfere with form submission.
Solution:
Clear your browser’s autofill data for Consently
Manually enter payment details without using autofill
Try a different browser (Chrome, Firefox, or Edge) if the issue persists
Invoice download not working
Solution: Check that your browser allows PDF downloads and isn’t blocking pop-ups from consently.net. If the problem persists, contact support at support@consently.net to request a manual invoice copy.
Can’t find billing history
Solution: Billing history only appears after your first payment. If you’re still on a free trial, no billing history exists yet. History will be available after your first charge.
Related Pages
Pricing Plans — Compare subscription tiers and features