

TL;DR: Dashboard → Cookie Manager → Scroll to Scan History table. Review past scan results including dates, status, pages scanned, and cookies found.
Overview
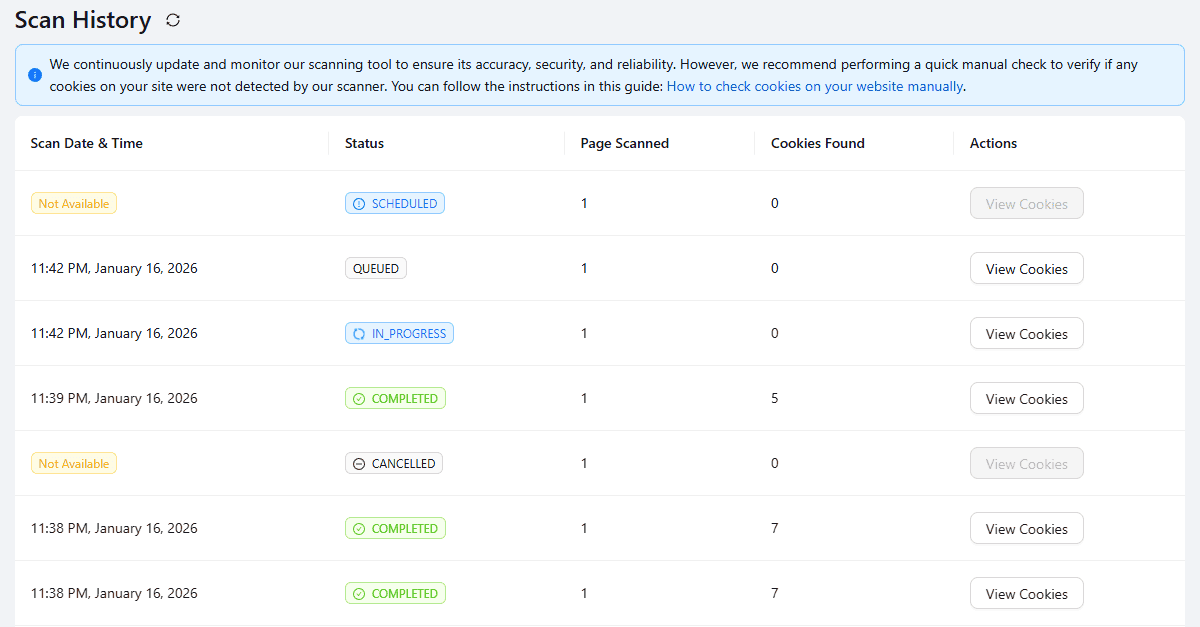
Scan History logs every cookie scan performed on your website. This record helps track when scans occurred, what cookies were discovered, and which scans succeeded or failed.
Understanding the Scan History Table
The Scan History table displays four key columns:
Scan Date & Time — When the scan was executed
Status — COMPLETED, CANCELLED, IN_PROGRESS, QUEUED, SCHEDULED
Pages Scanned — Number of pages the scanner checked
Cookies Found — Total cookies detected during that scan
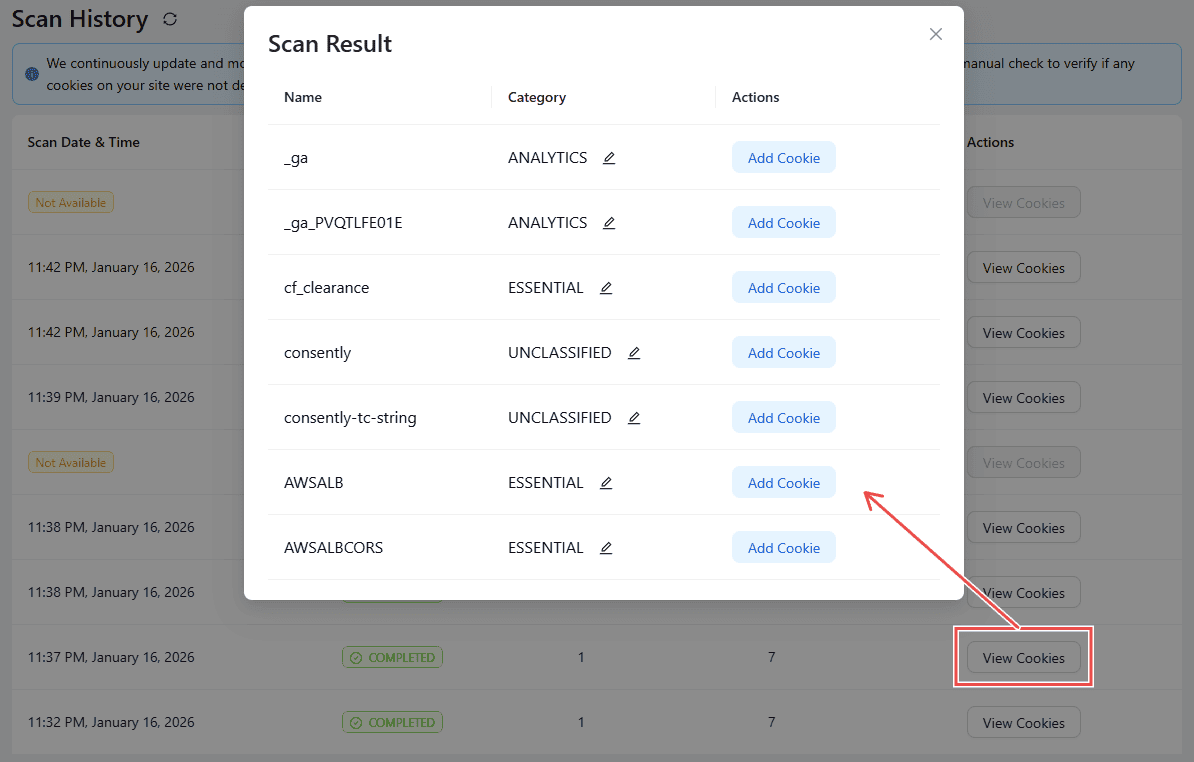
Actions — Options to view details, edit categories, and add cookies
How to View Scan History
Step 1: Navigate to Cookie Manager
Click Cookie Manager in the top navigation bar.
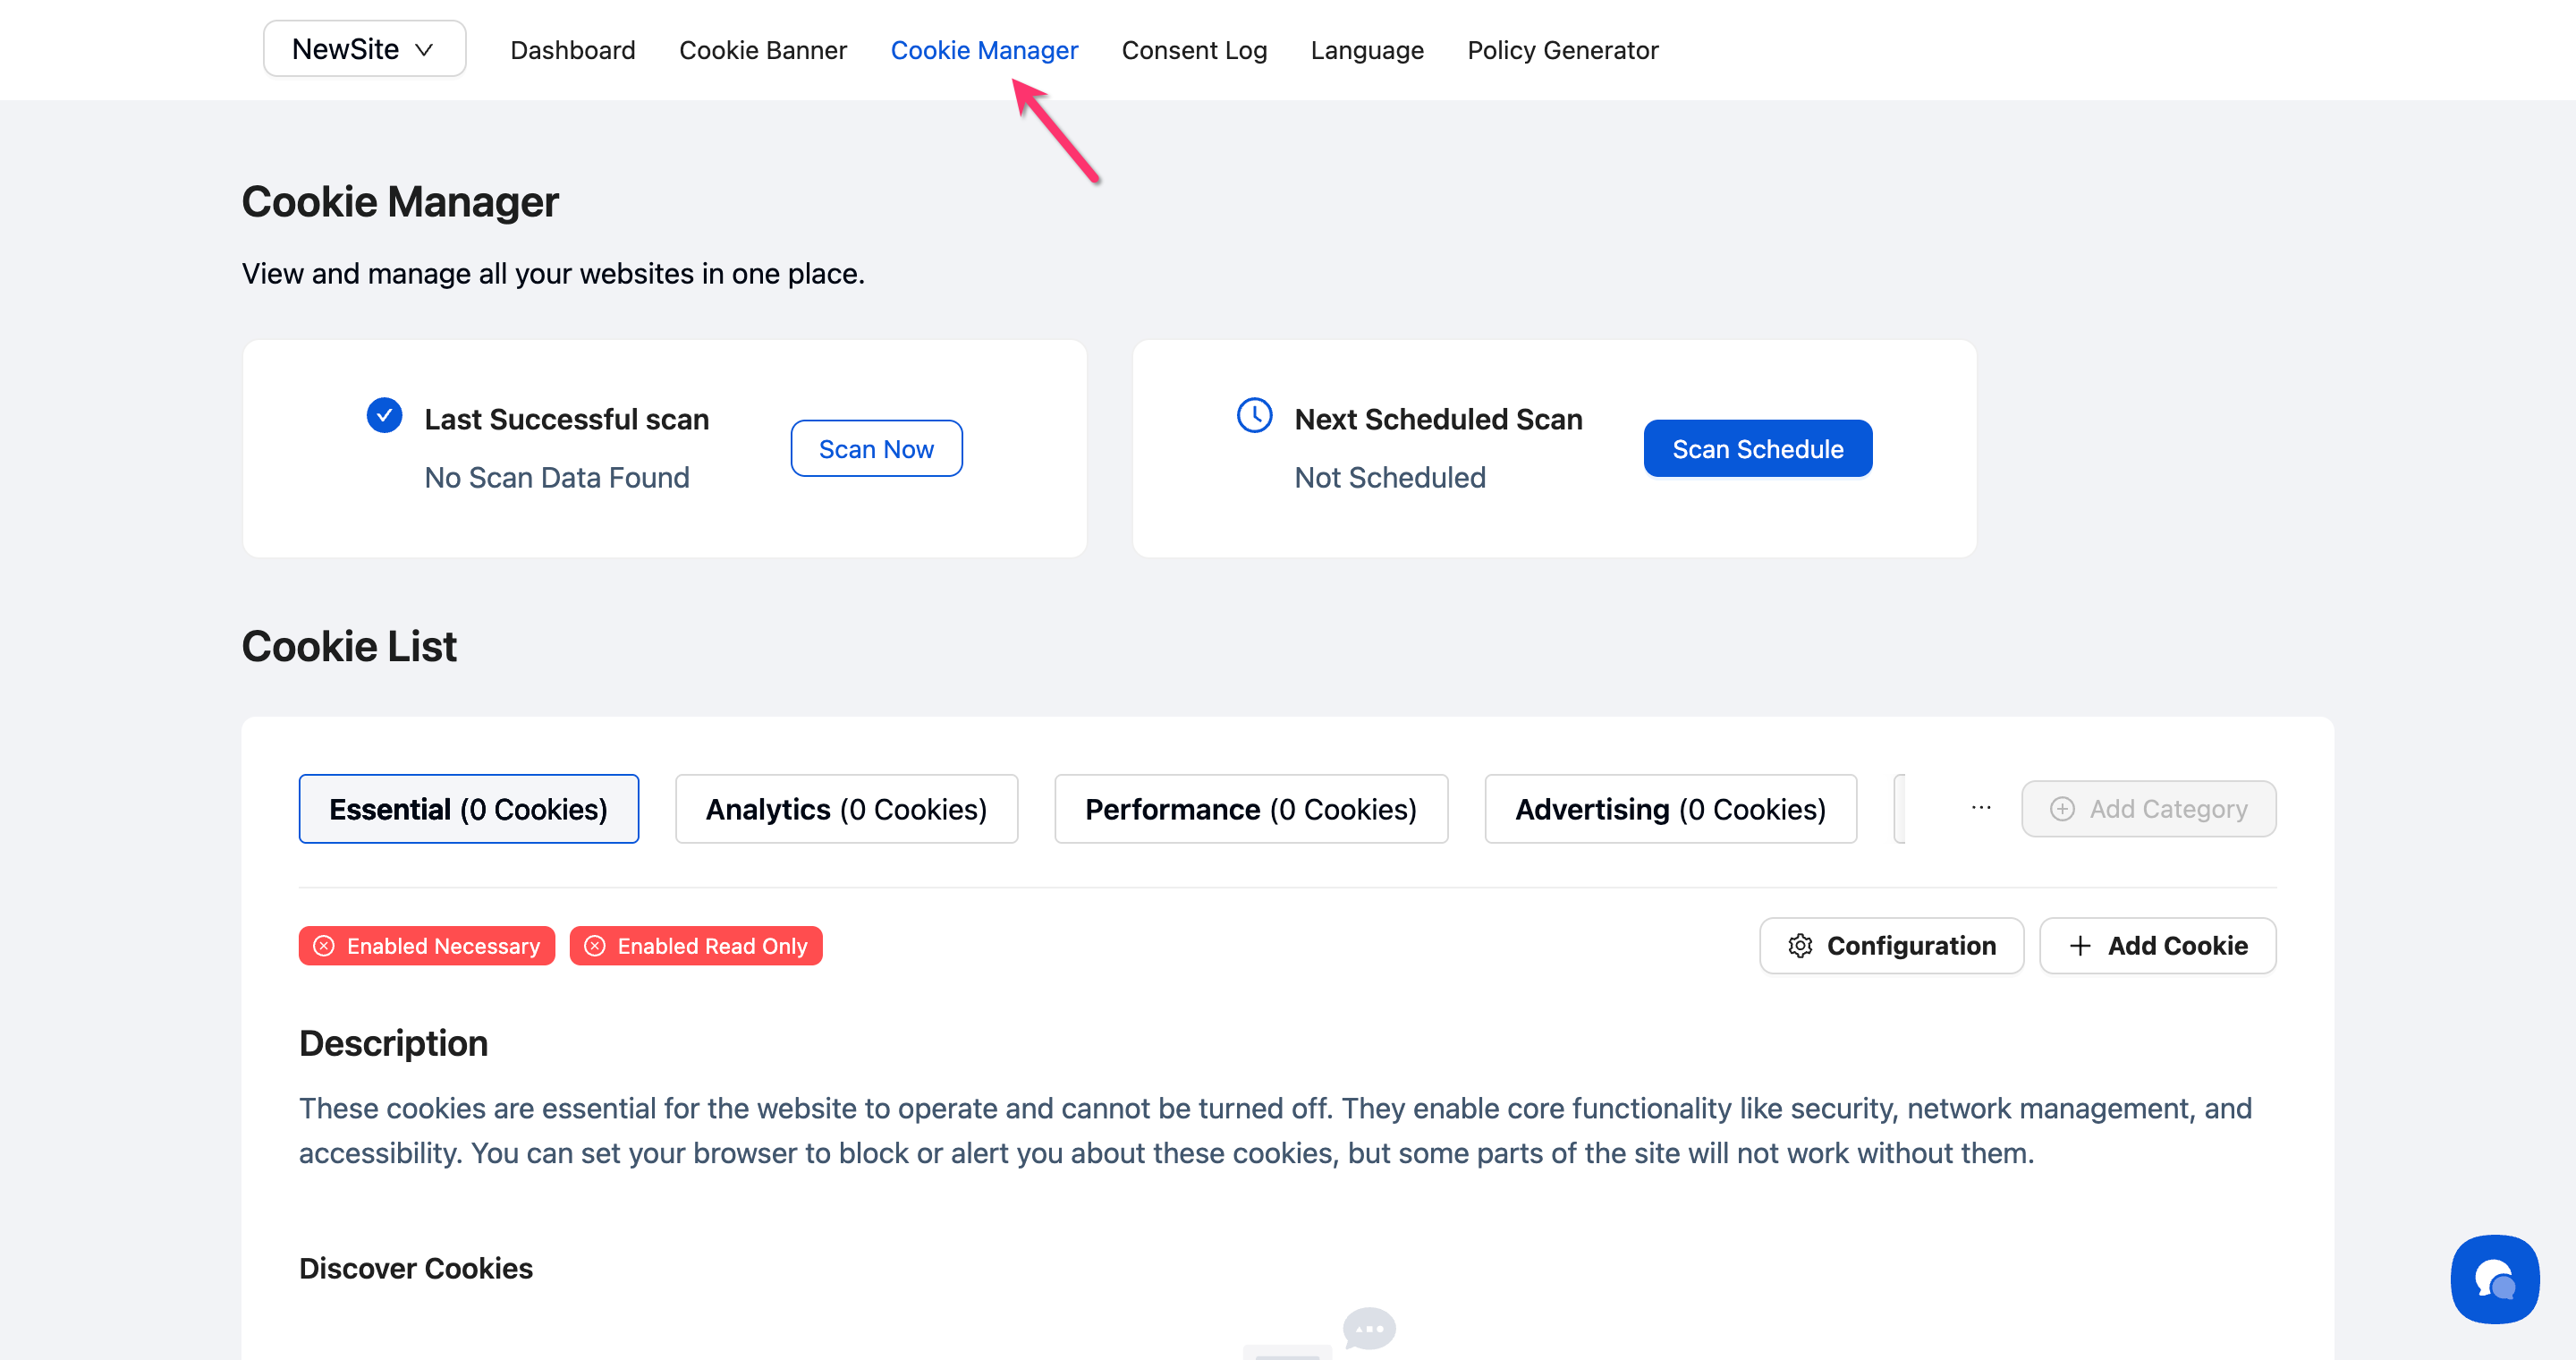
Step 2: Scroll to Scan History
Scroll down past the Cookie List section to find the Scan History table. The table shows all completed scans in reverse chronological order (most recent first).
💡 Tip: If you see "No data," no scans have been performed yet. Run your first scan in Cookie Scanning.
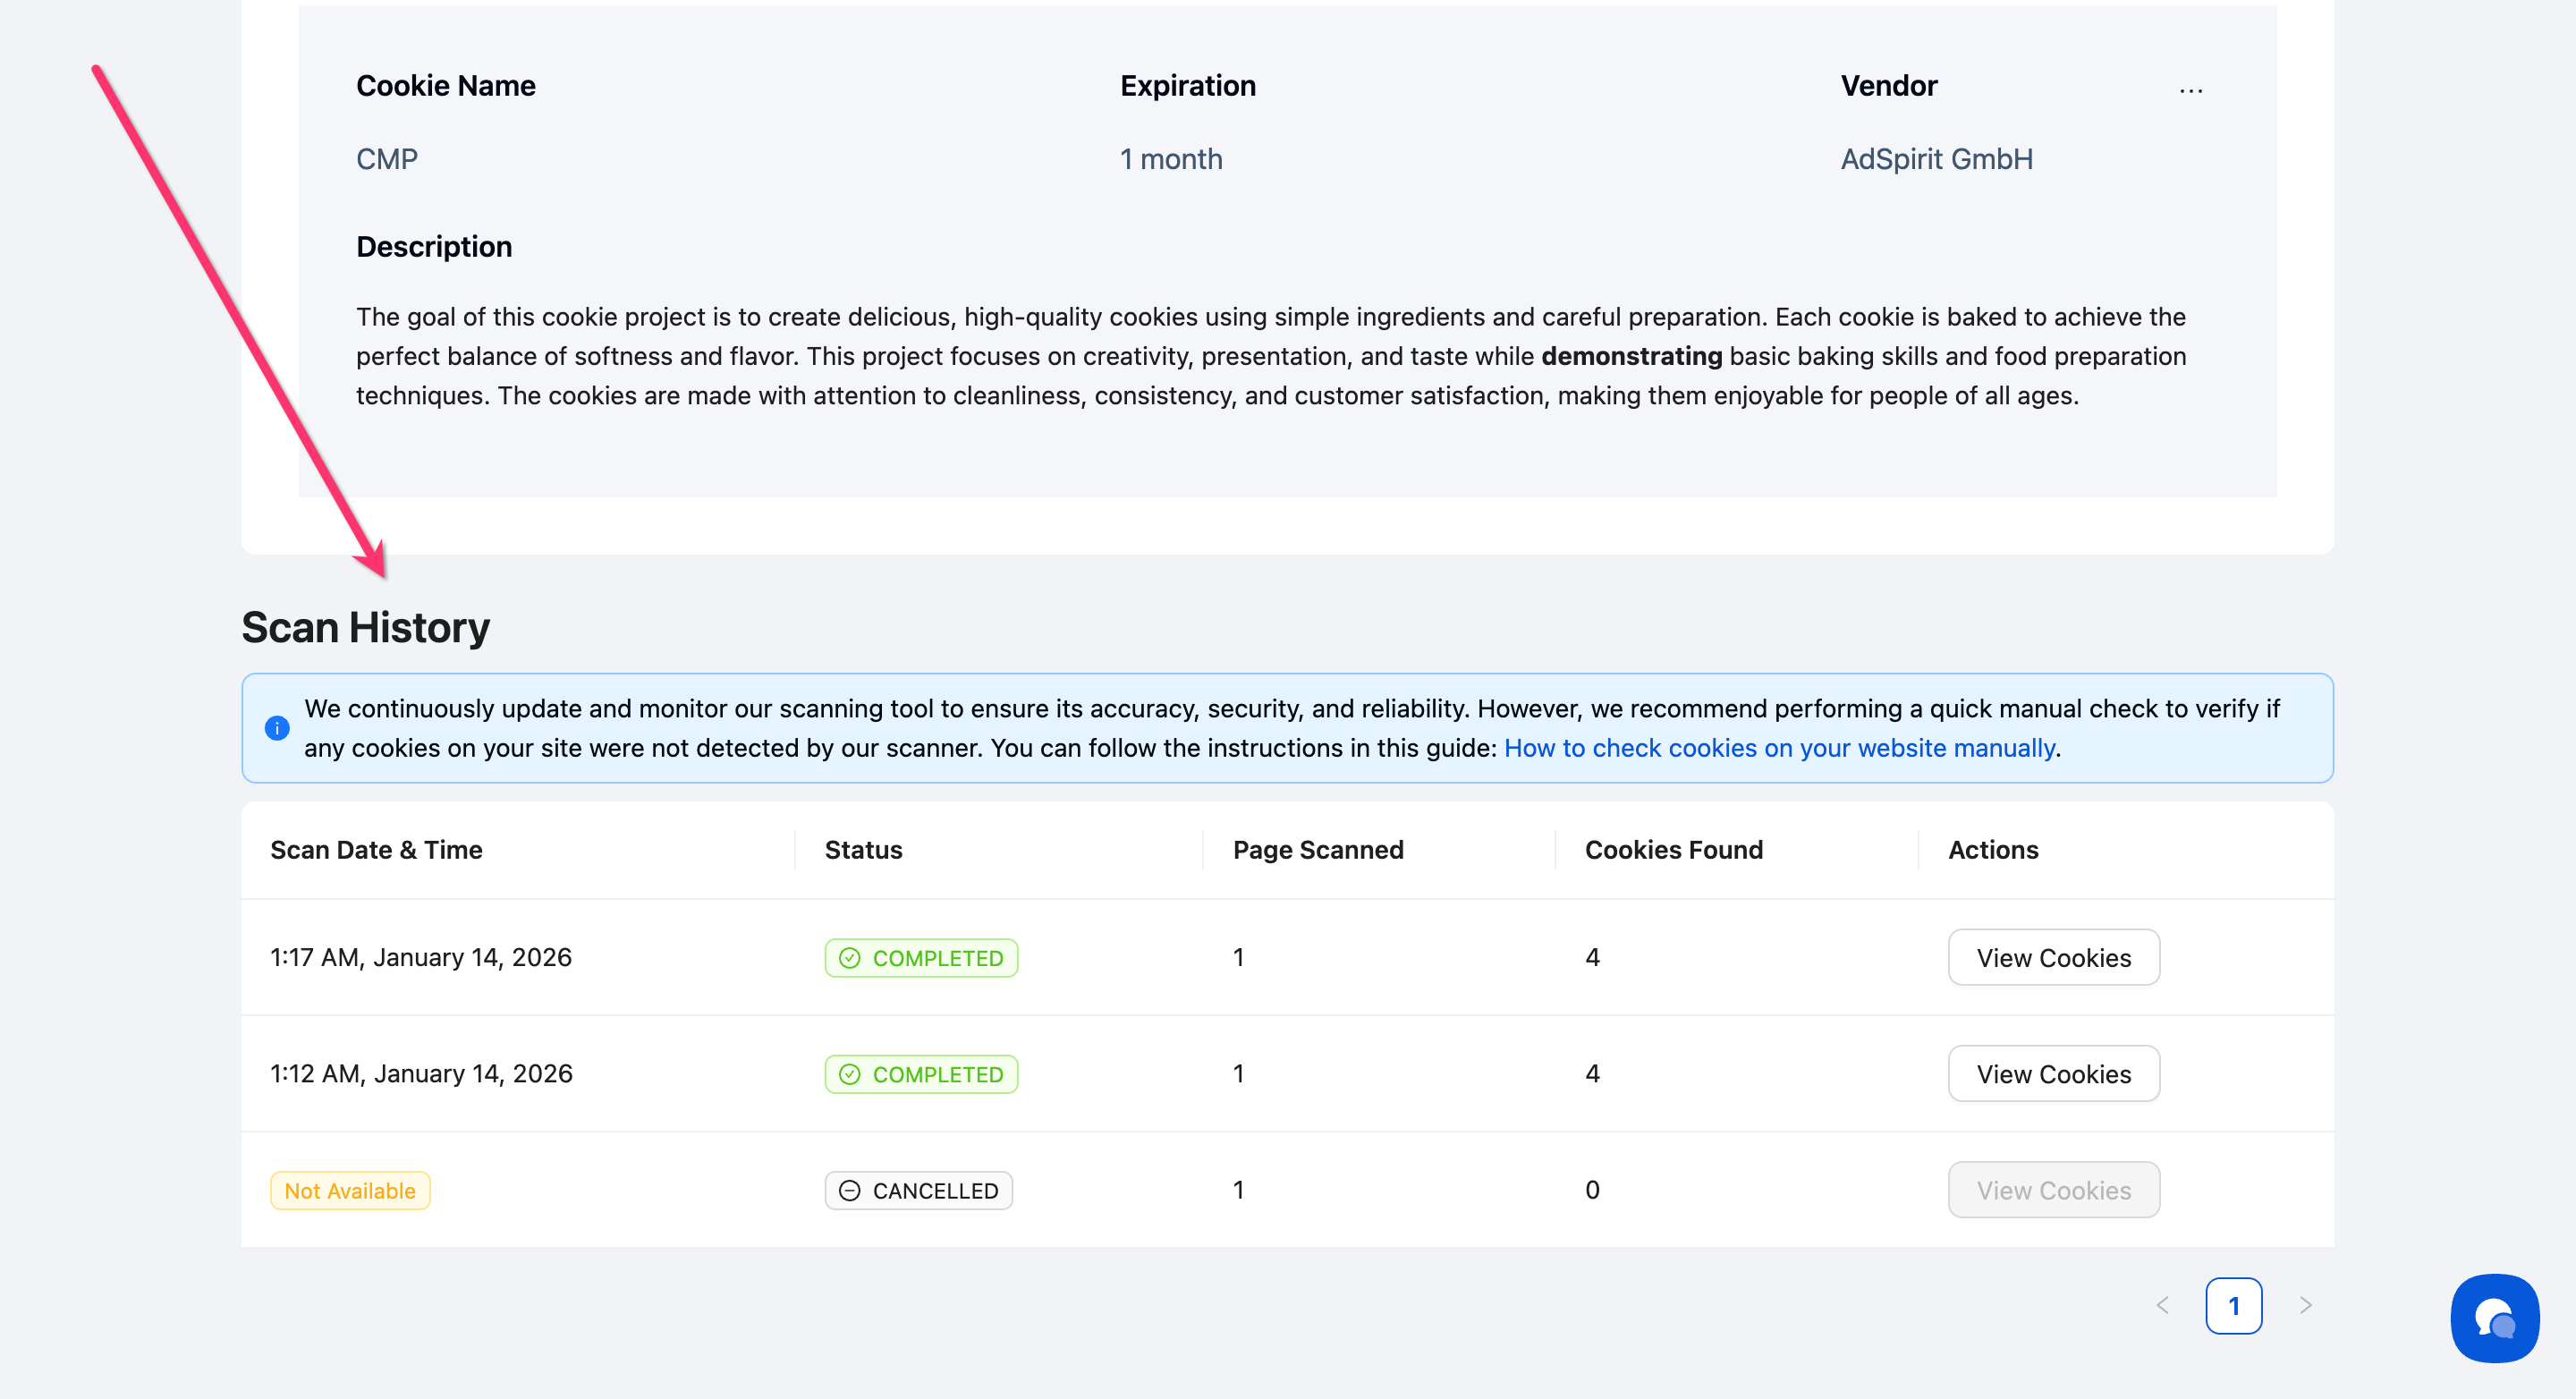
Step 3: Review scan records
View cookie details, edit categories, and add cookies as needed.
Done!
You're now viewing your complete scan history.
Interpreting Scan Results
Status: COMPLETED — The scan finished successfully without any errors.
Status: CANCELLED — The scan was cancelled by the user.
Status: IN_PROGRESS — The scan is currently running.
Status: QUEUED — The scan is in the queue
Status: SCHEDULED — The scan was scheduled by the user
⚠️ Important: Automated scans may not catch all cookies. Consently recommends performing manual verification to ensure complete coverage. Review detected cookies in Managing Cookies and add any missing ones manually.
What's Next
Now that you've reviewed your scan history, you should:
Run a new scan if your last scan is outdated or failed
Review and categorize detected cookies to ensure proper consent handling