

TL;DR: GTM → Tags → New → Custom HTML → Paste Consently script → Trigger: All Pages → Save → Publish. The Consently banner loads through Google Tag Manager instead of direct HTML.
Overview
Google Tag Manager (GTM) lets you manage tracking scripts without editing website code directly. Installing Consently through GTM keeps your consent banner centralized with your other marketing tags and allows non-developers to update the banner configuration.
Before You Begin
Make sure you have:
Added your website to Consently and copied your embed script
A Google Tag Manager account with a container installed on your website
Admin or Publish access to your GTM container
Time required: About 5 minutes
How to Install Consently via Google Tag Manager
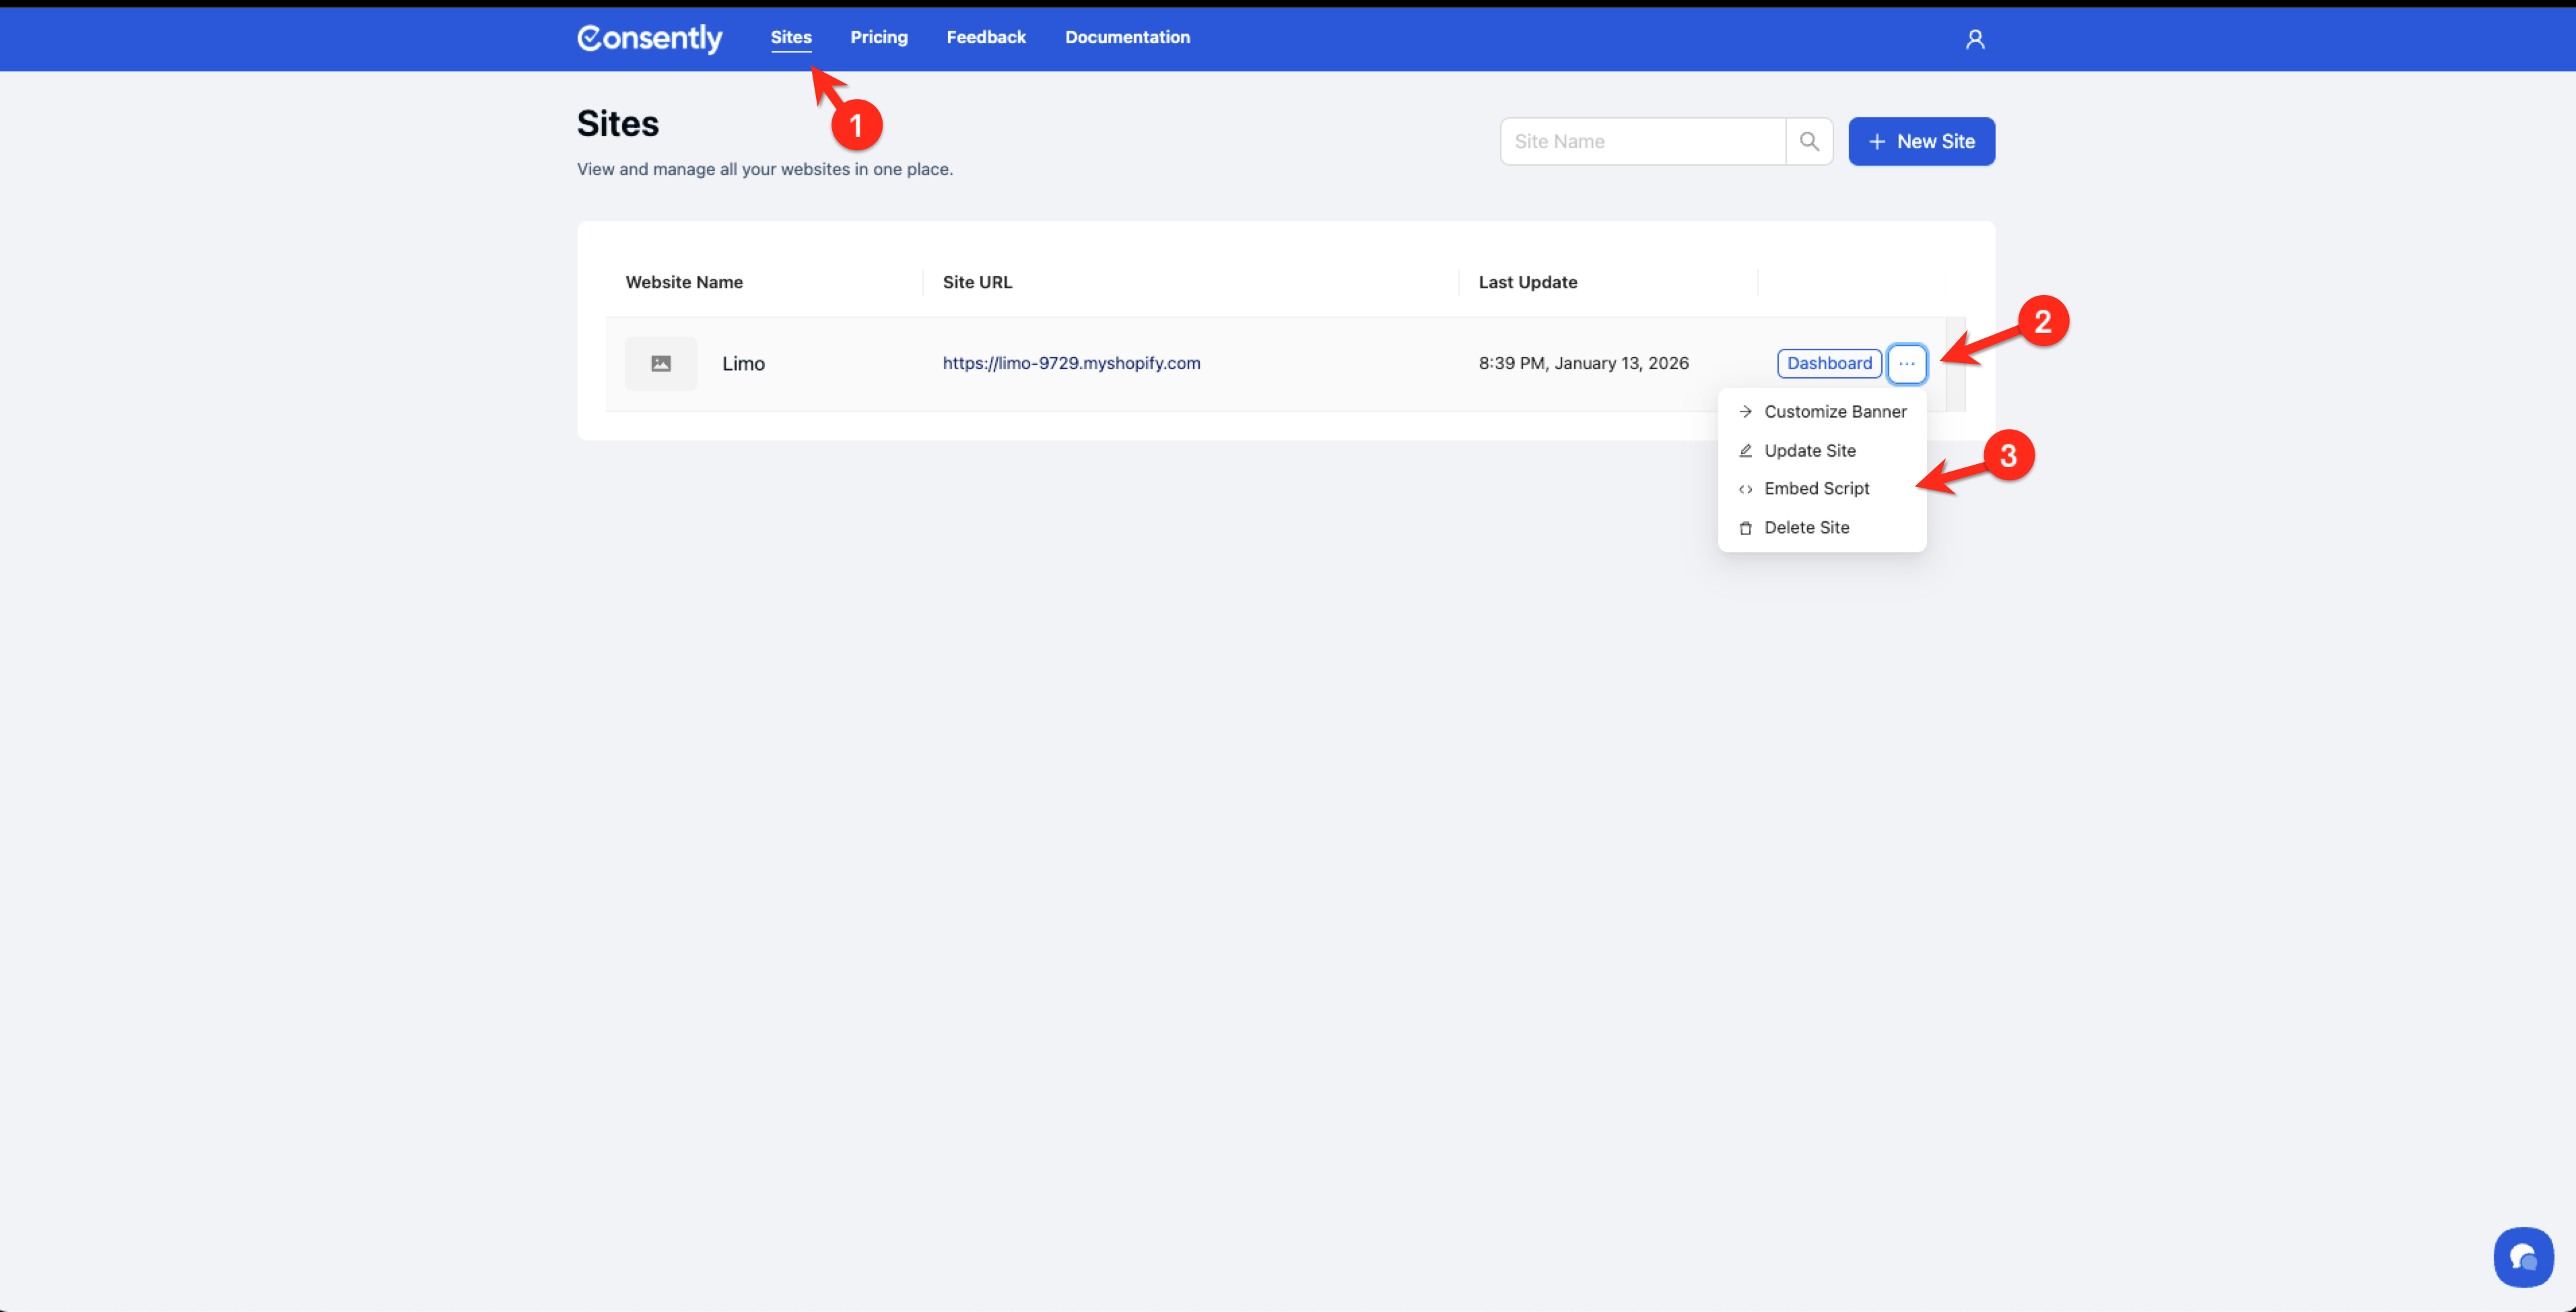
Step 1: Get your Consently embed script
In Consently, navigate to Sites → click the ⋮ menu next to your website → Embed Script.
Step 2: Copy the script
Click the Copy button in the Embed Script modal to copy your unique Consently script to your clipboard.
💡 Tip: The script includes your unique data-bannerid attribute. Don't modify this value or the banner won't load correctly.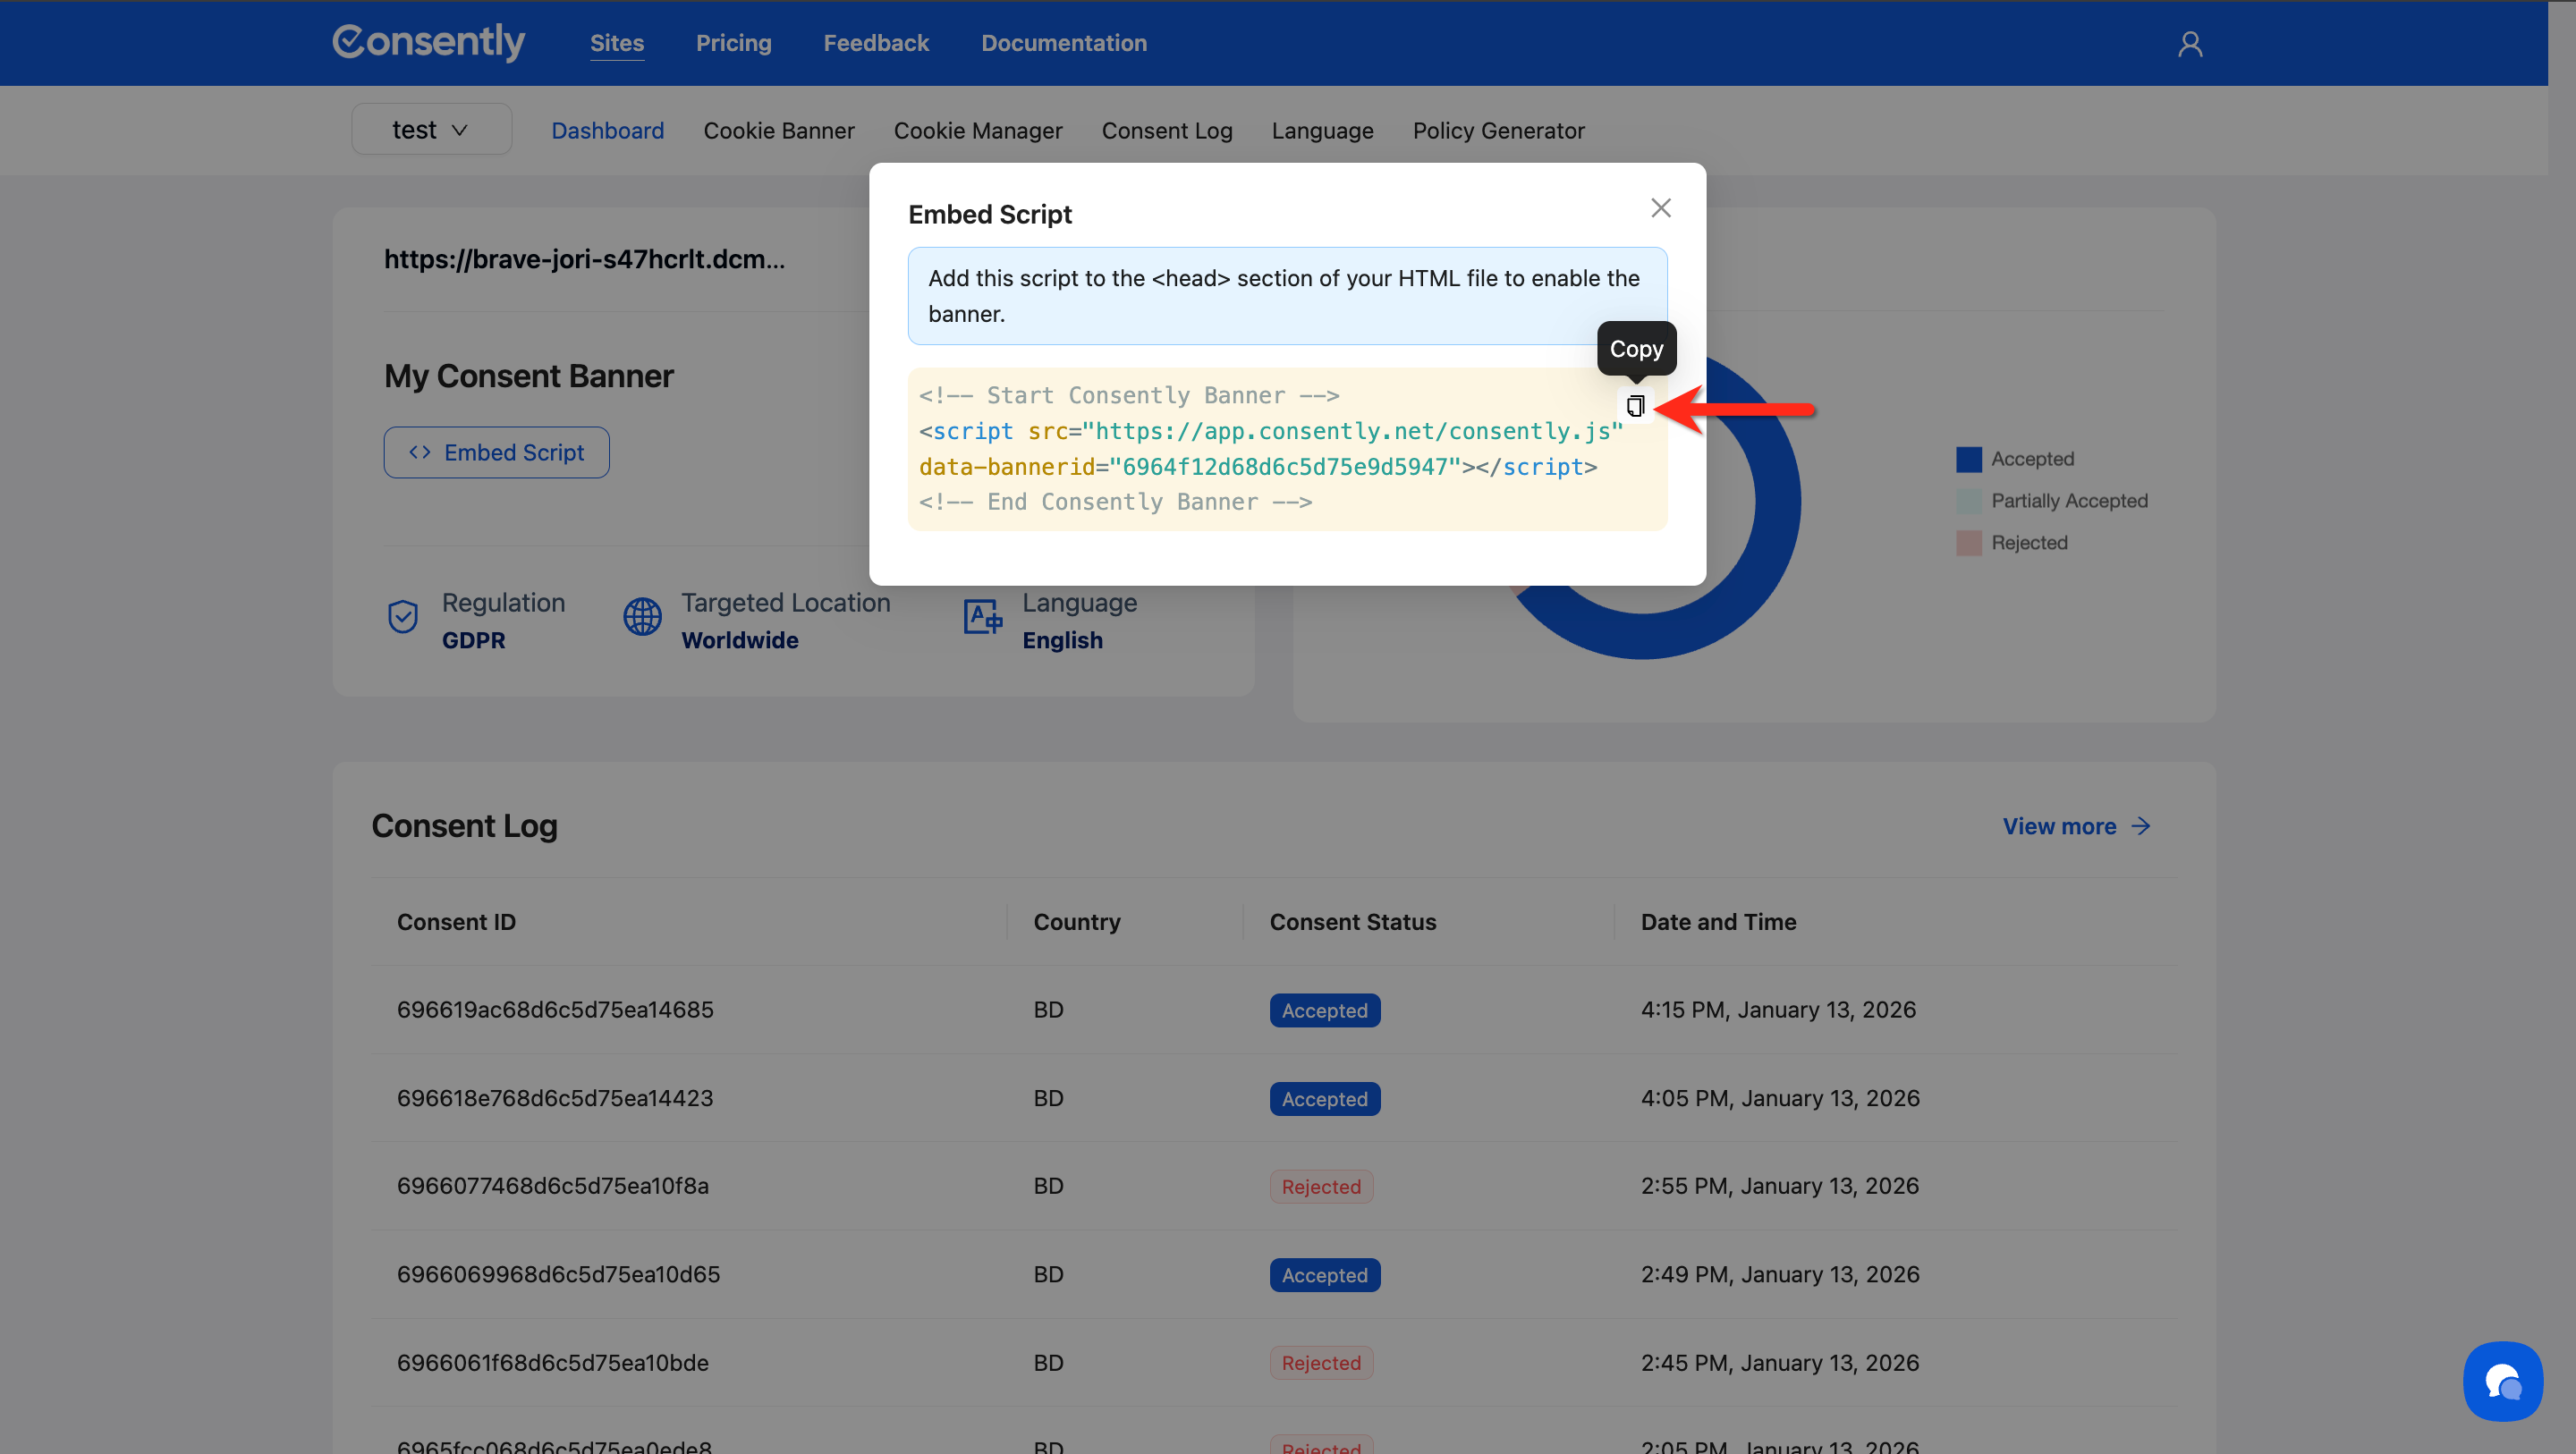
Step 3: Open Google Tag Manager
Go to tagmanager.google.com and select the container for your website.
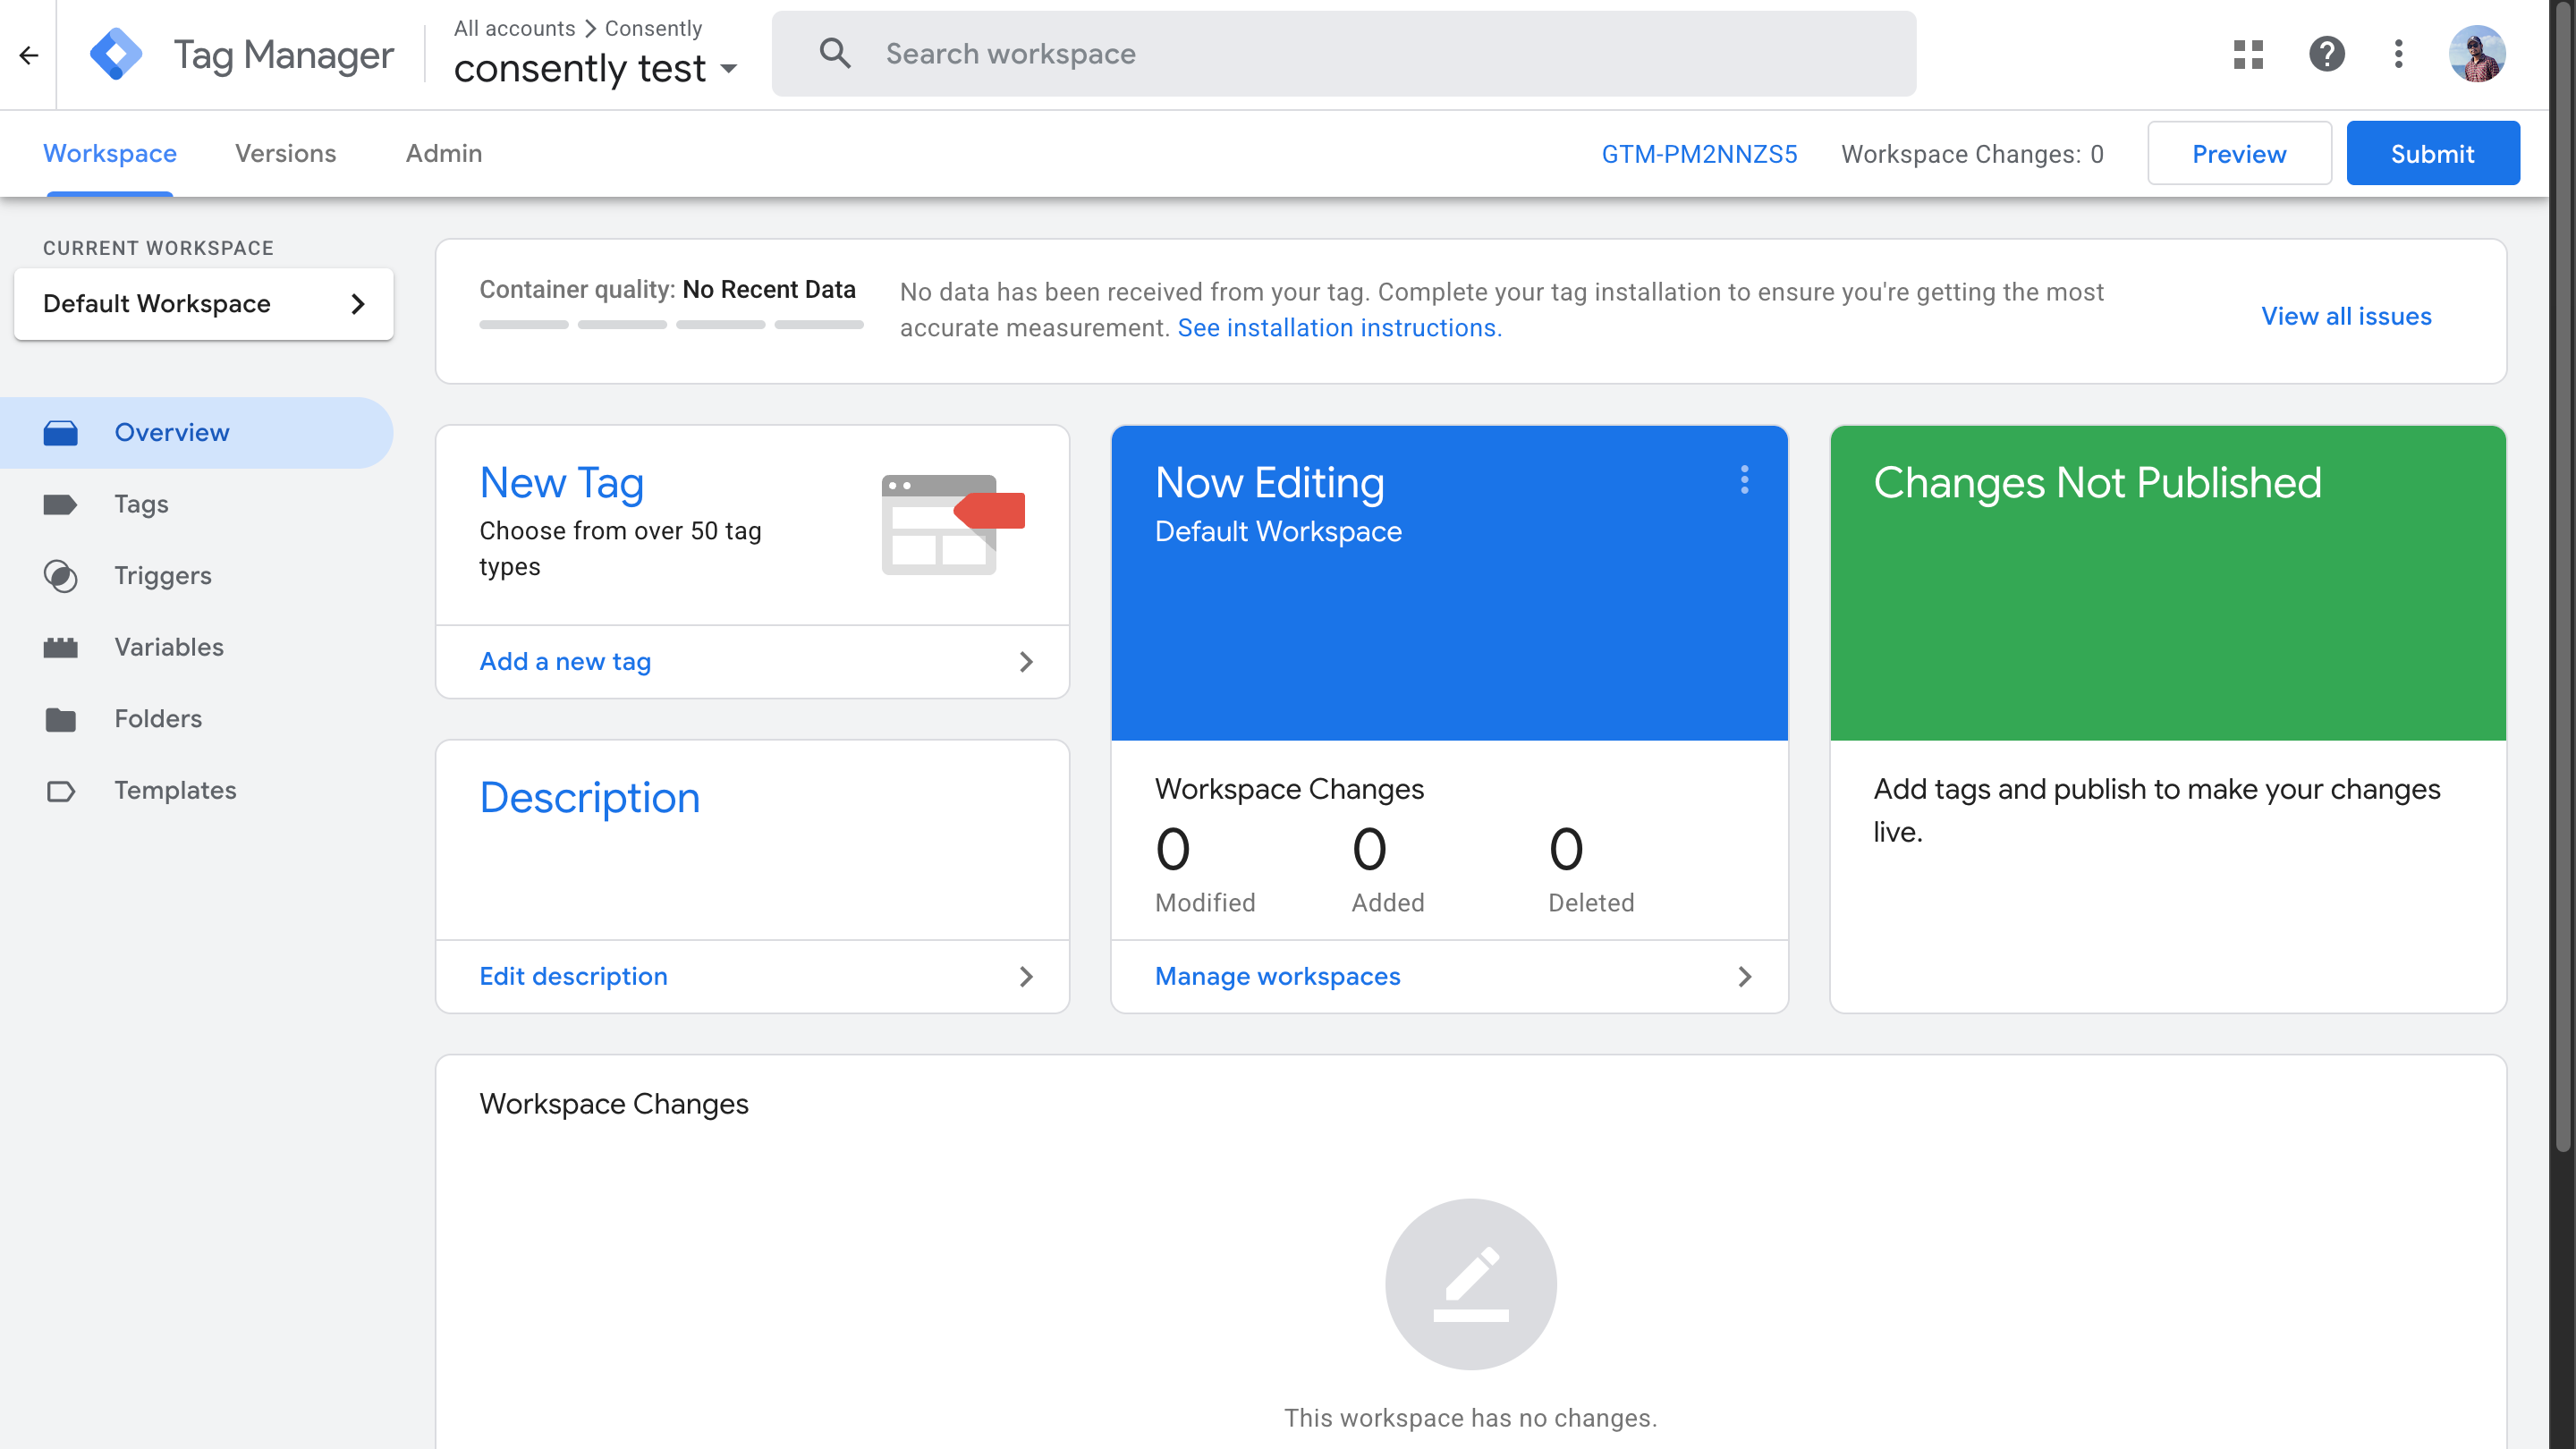
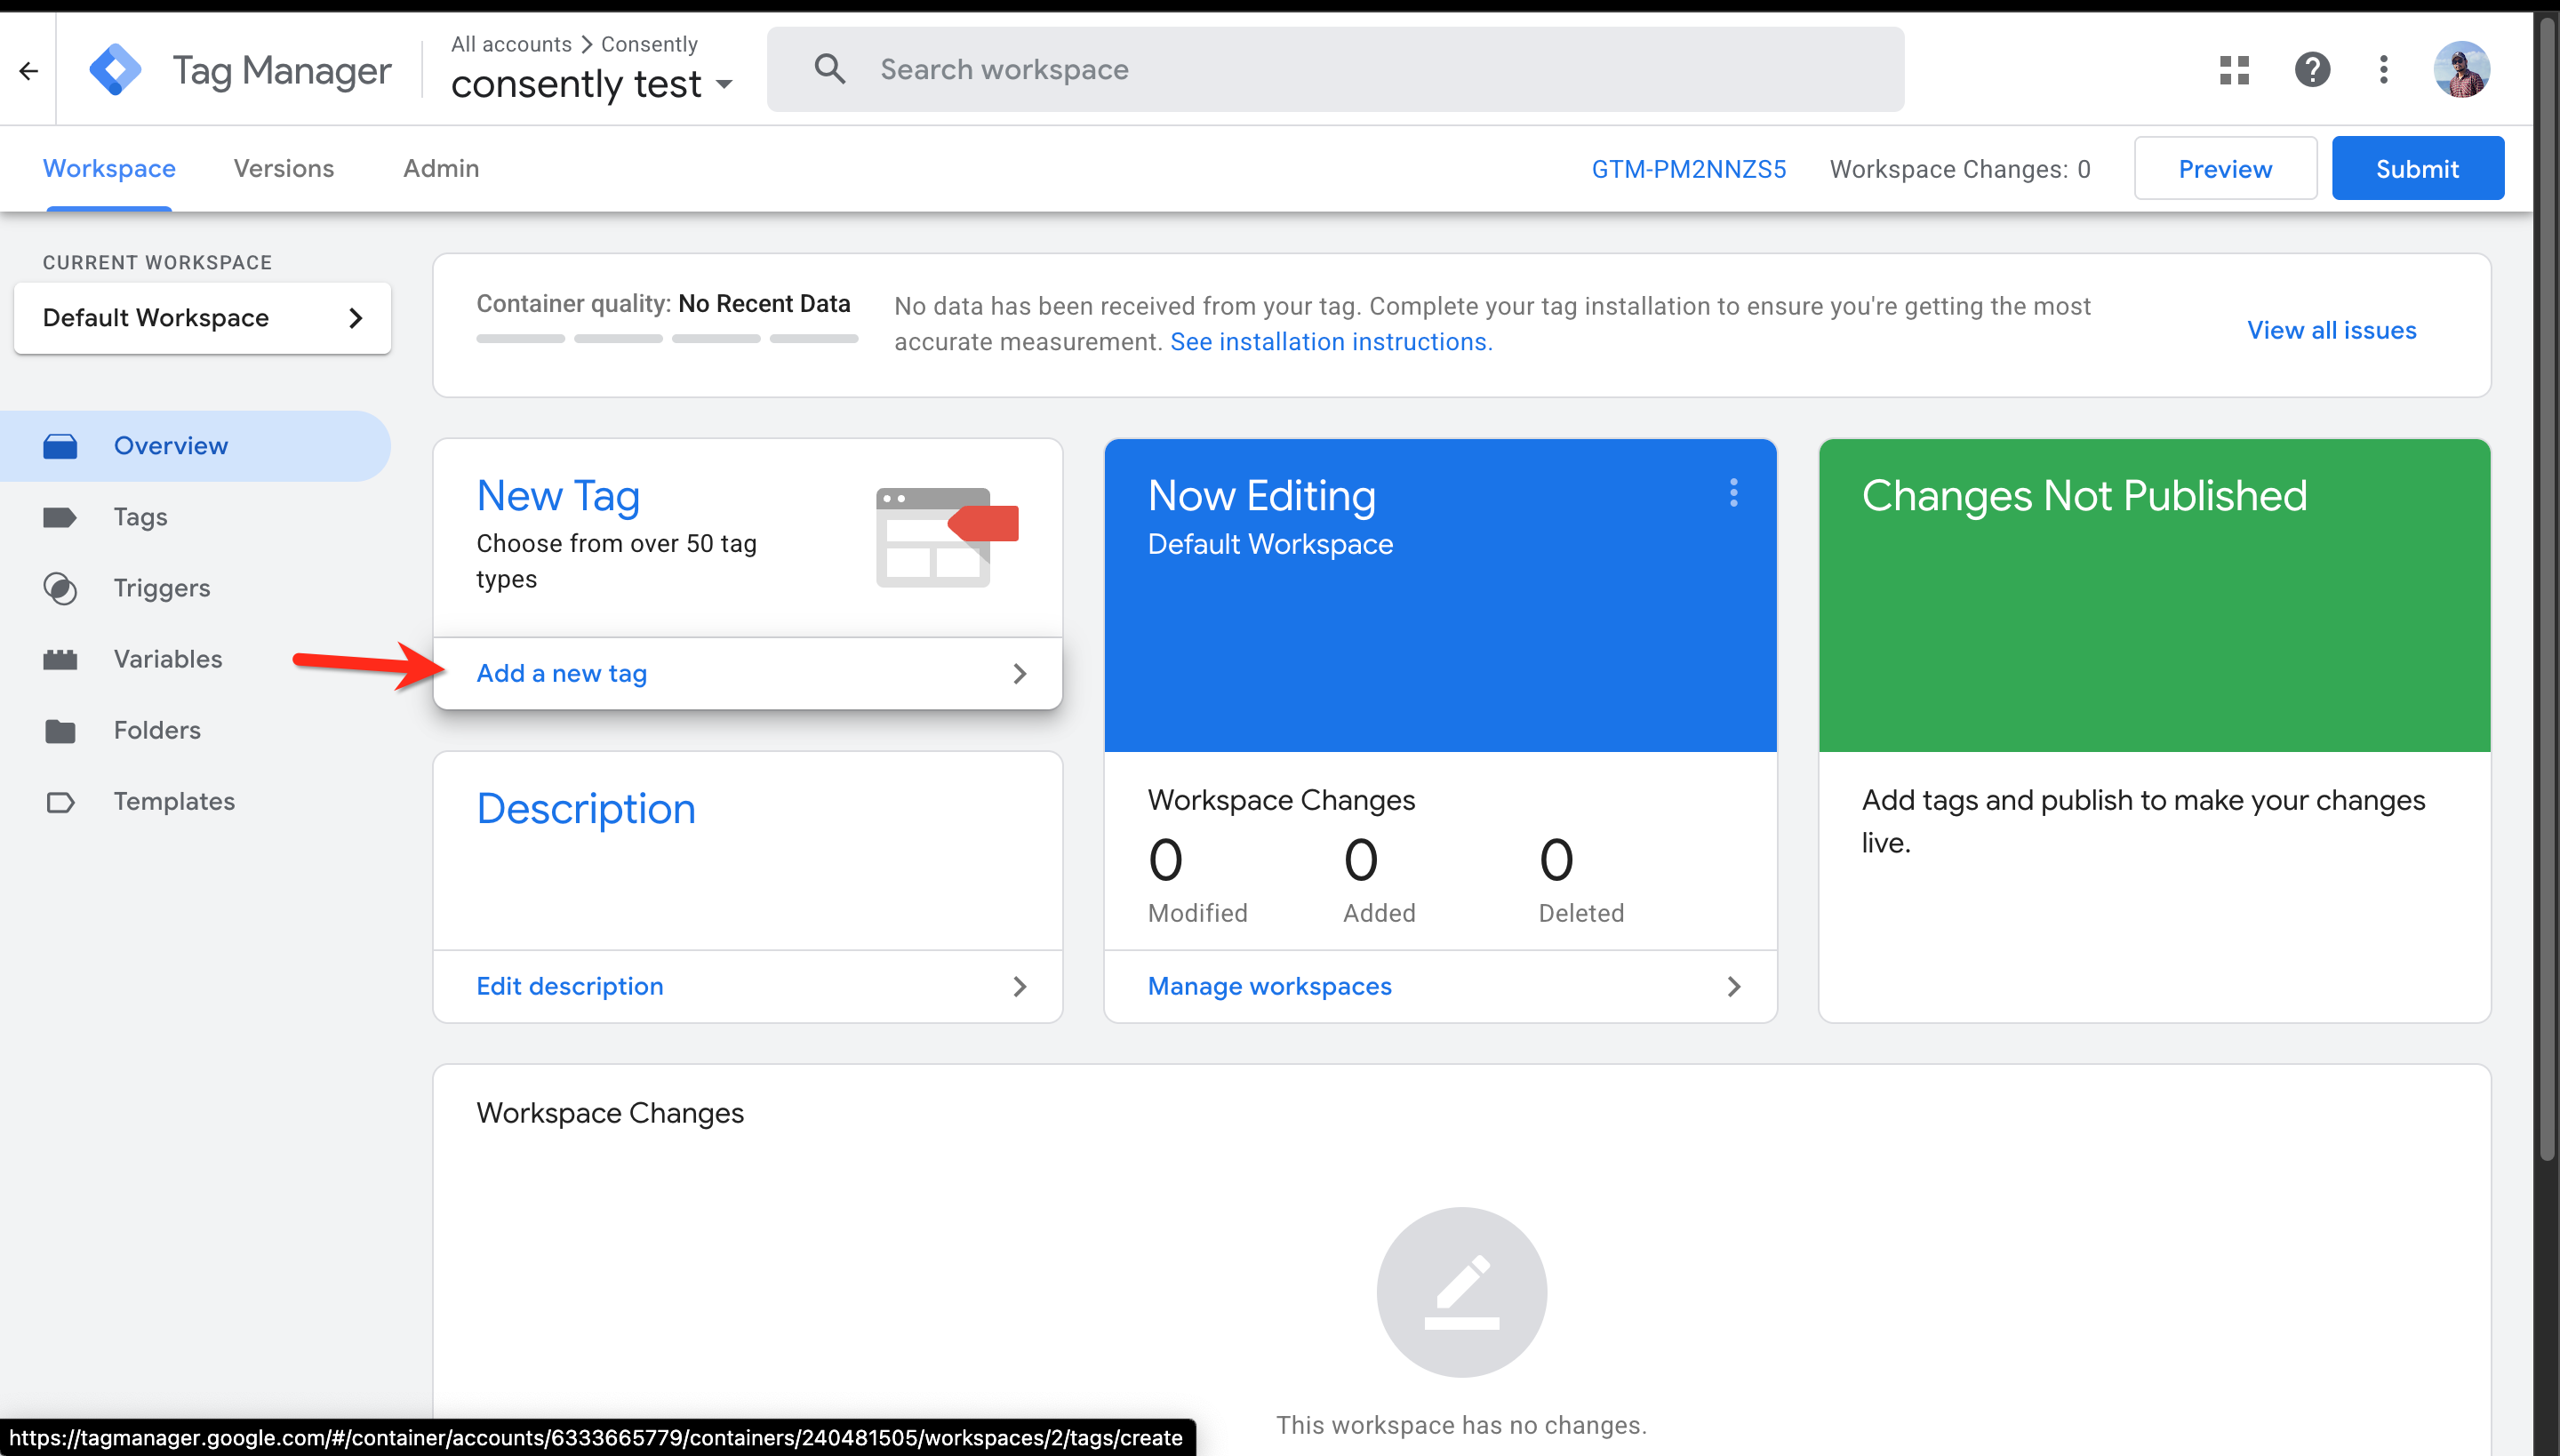
Step 4: Create a new tag
Click Tags in the left sidebar, then click the New button to create a new tag.
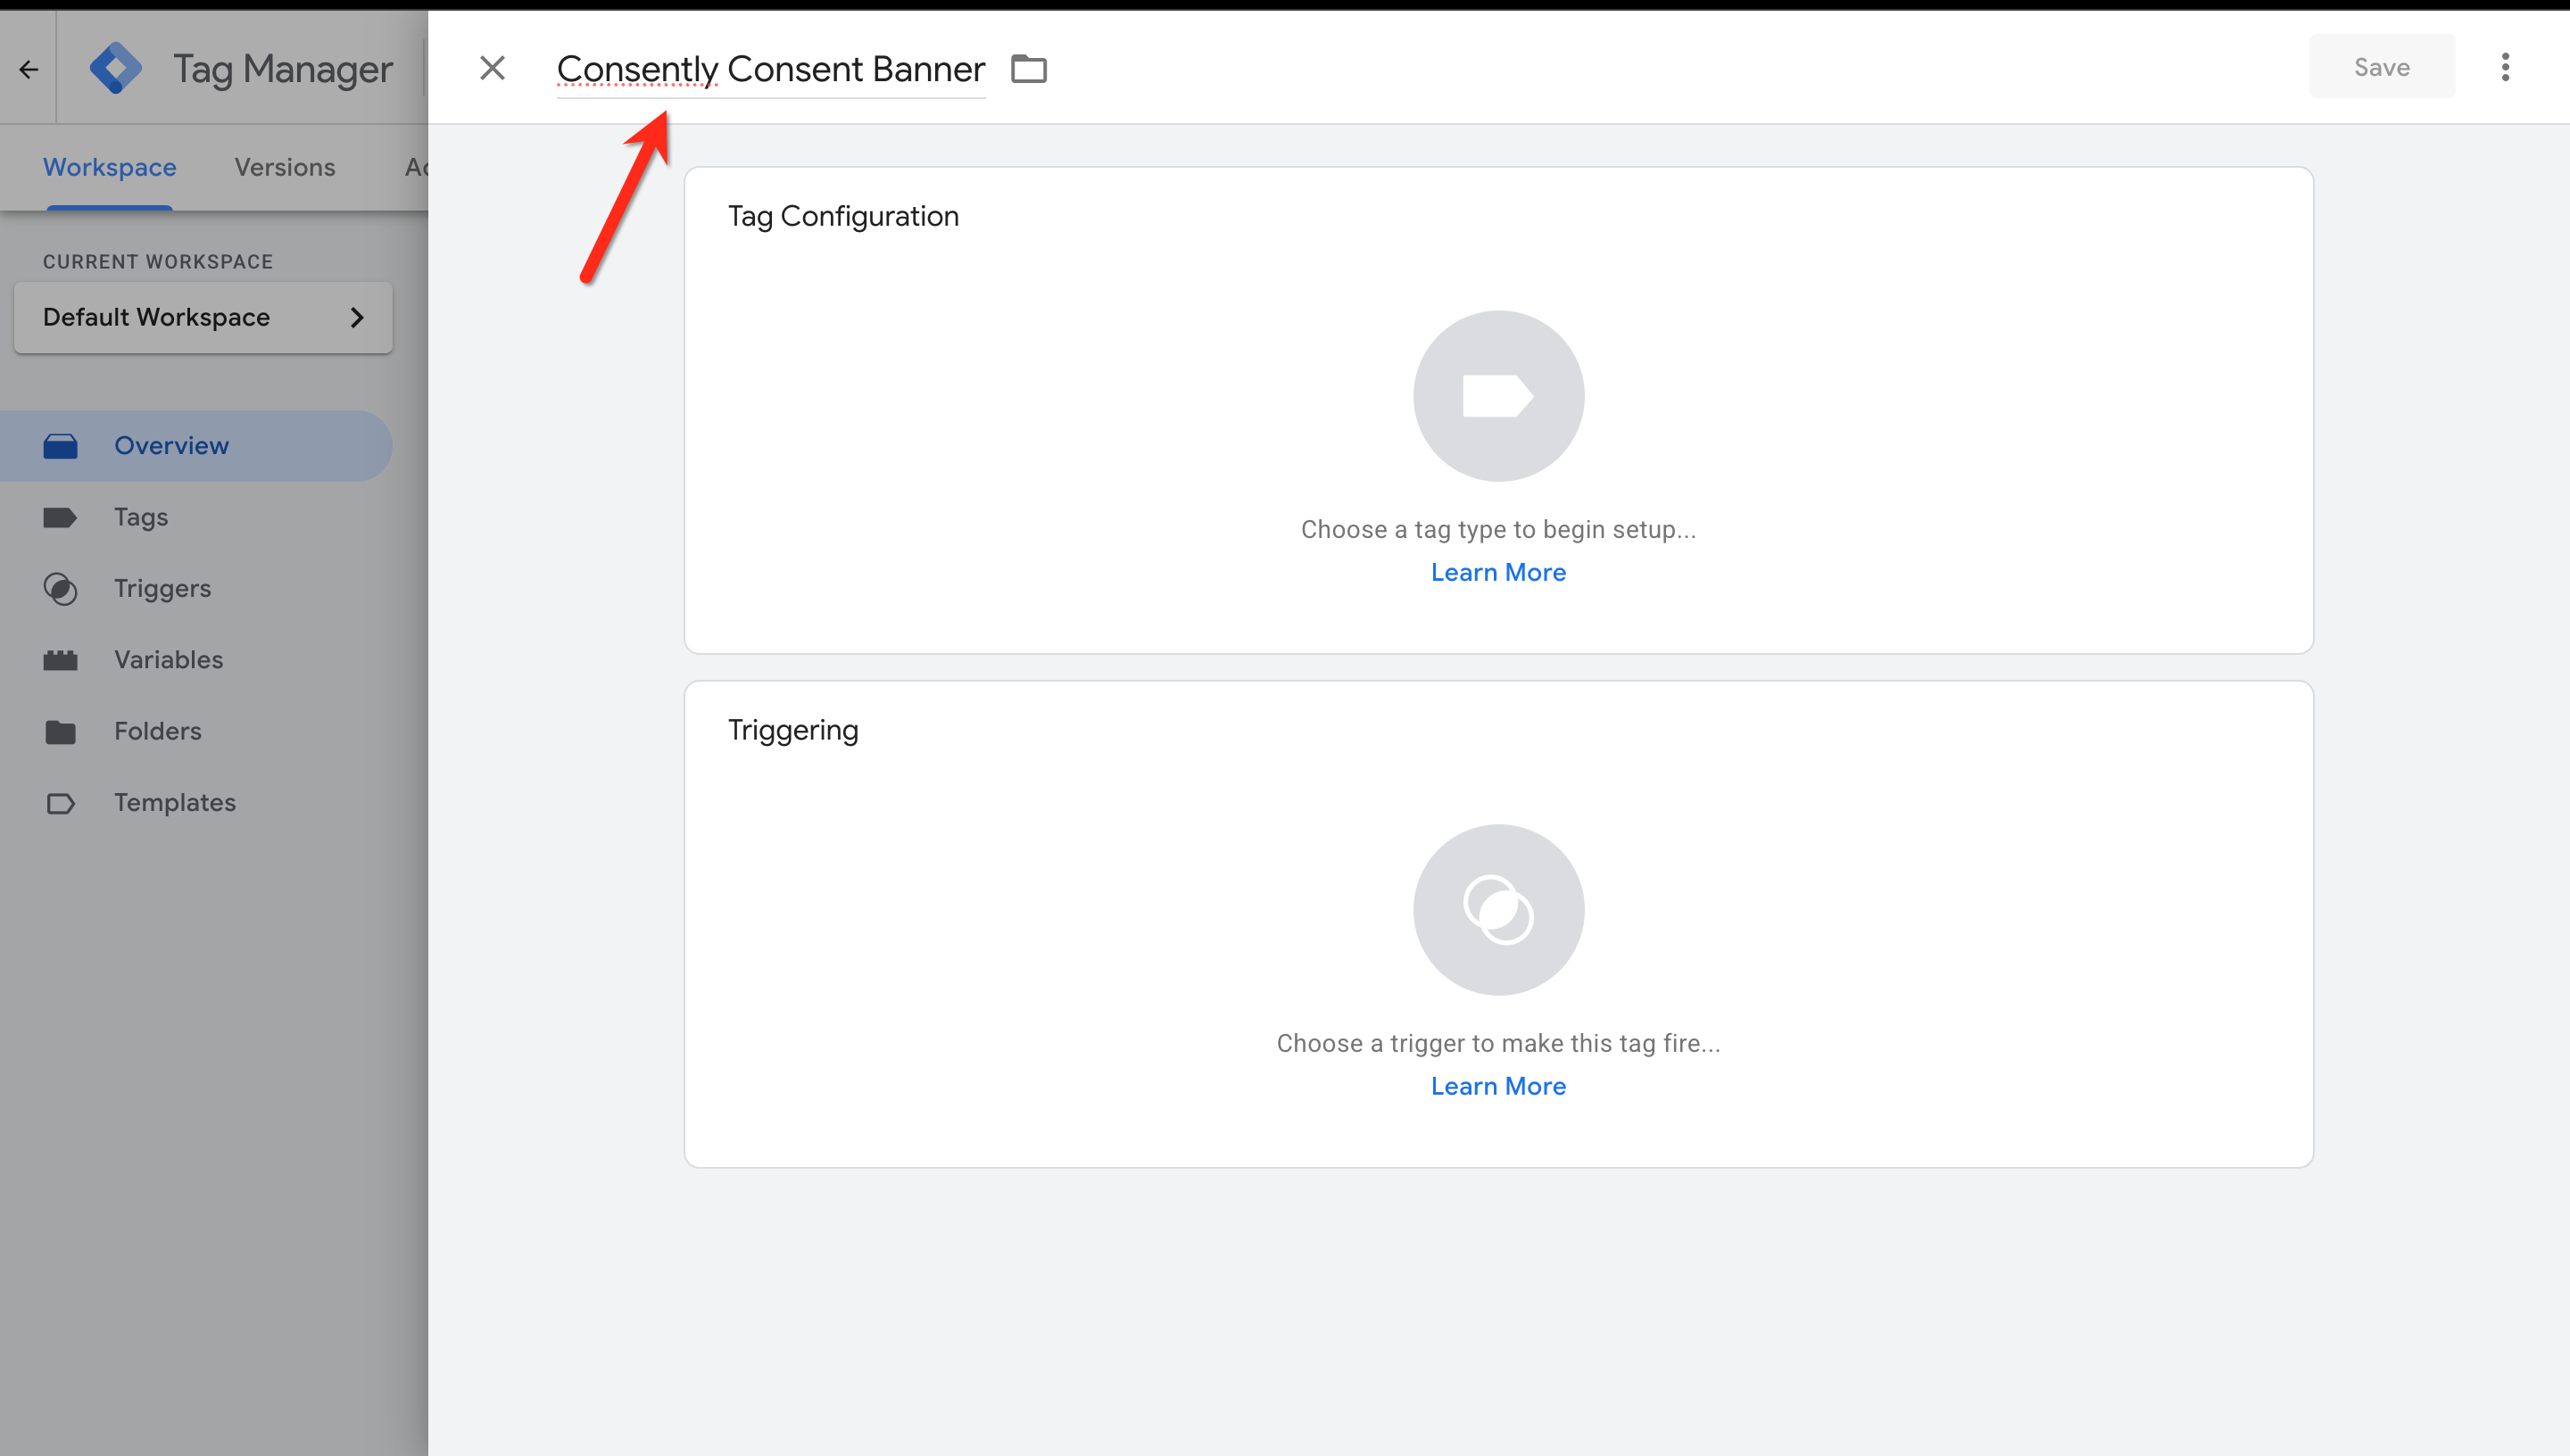
Step 5: Name your tag
Click Untitled Tag at the top and give it a descriptive name like "Consently Consent Banner" or "Cookie Consent - Consently".
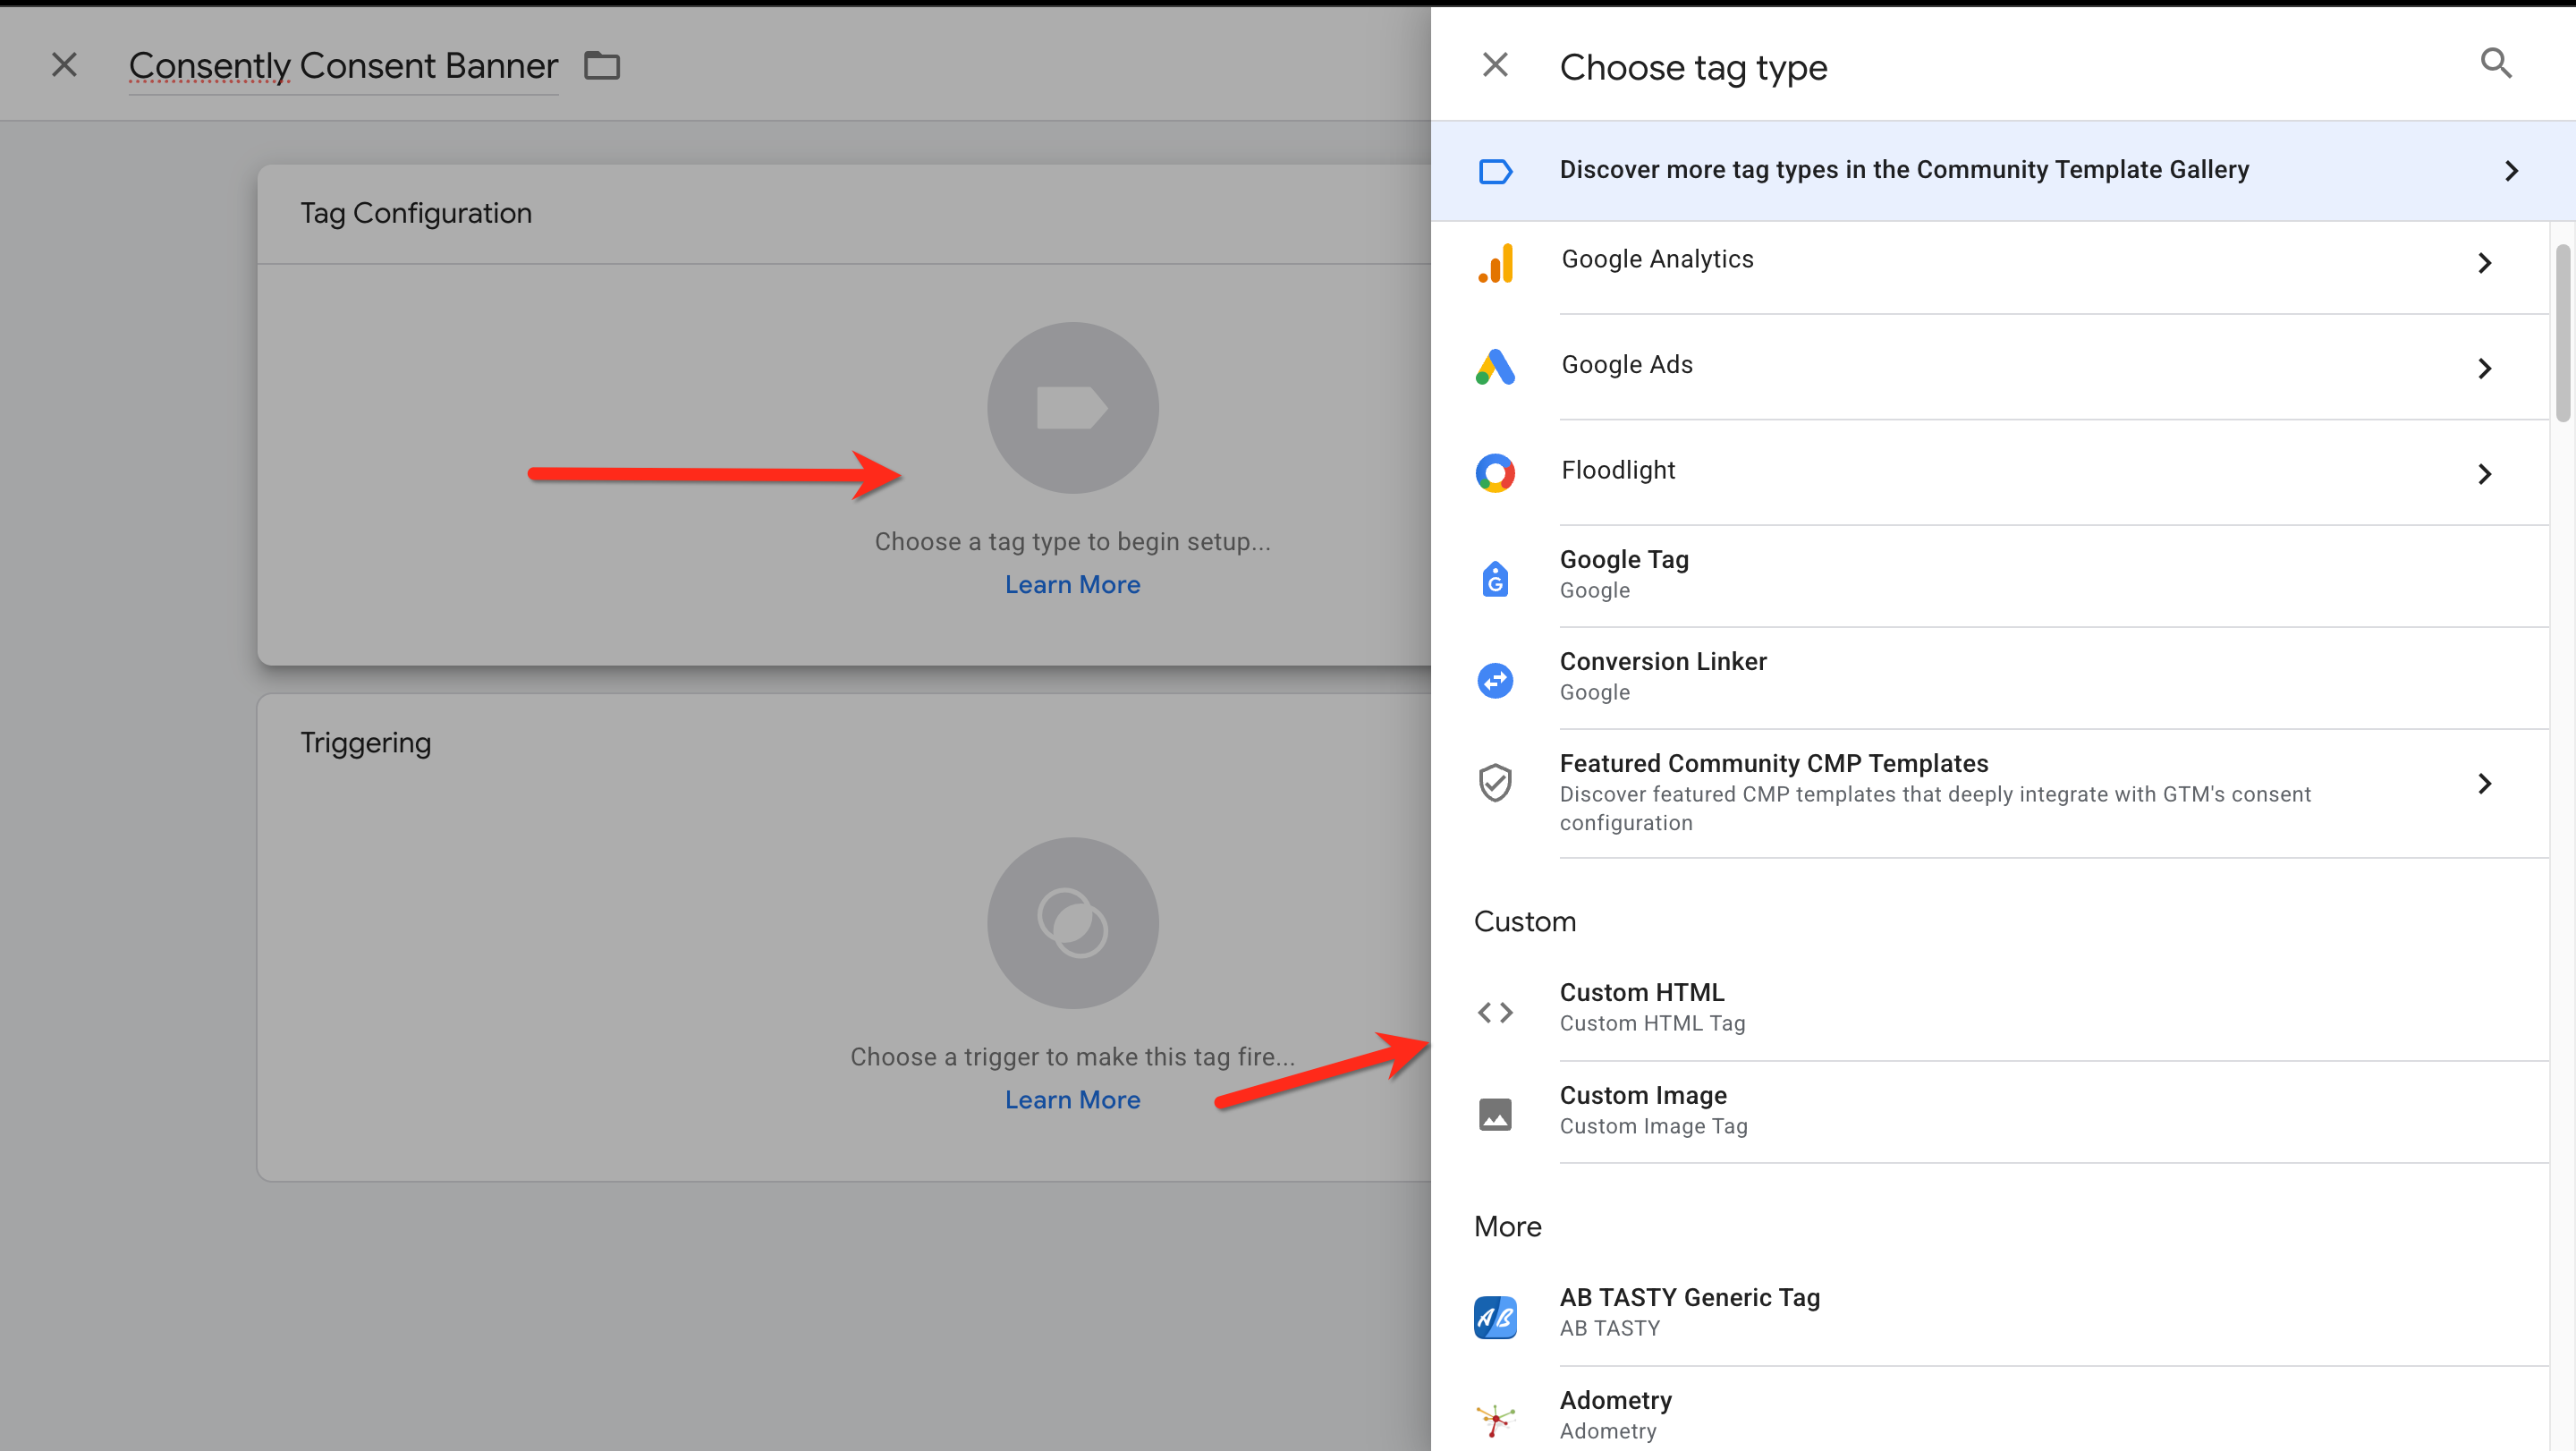
Step 6: Configure the tag
Click the Tag Configuration box and select Custom HTML from the tag type list.
Step 7: Paste the Consently script
In the HTML field, paste the Consently embed script you copied in Step 2.
⚠️ Important: Do NOT remove the<!-- Start Consently Banner -->and<!-- End Consently Banner -->comment tags. While they're optional for direct HTML installation, keeping them helps you identify the tag later in GTM.
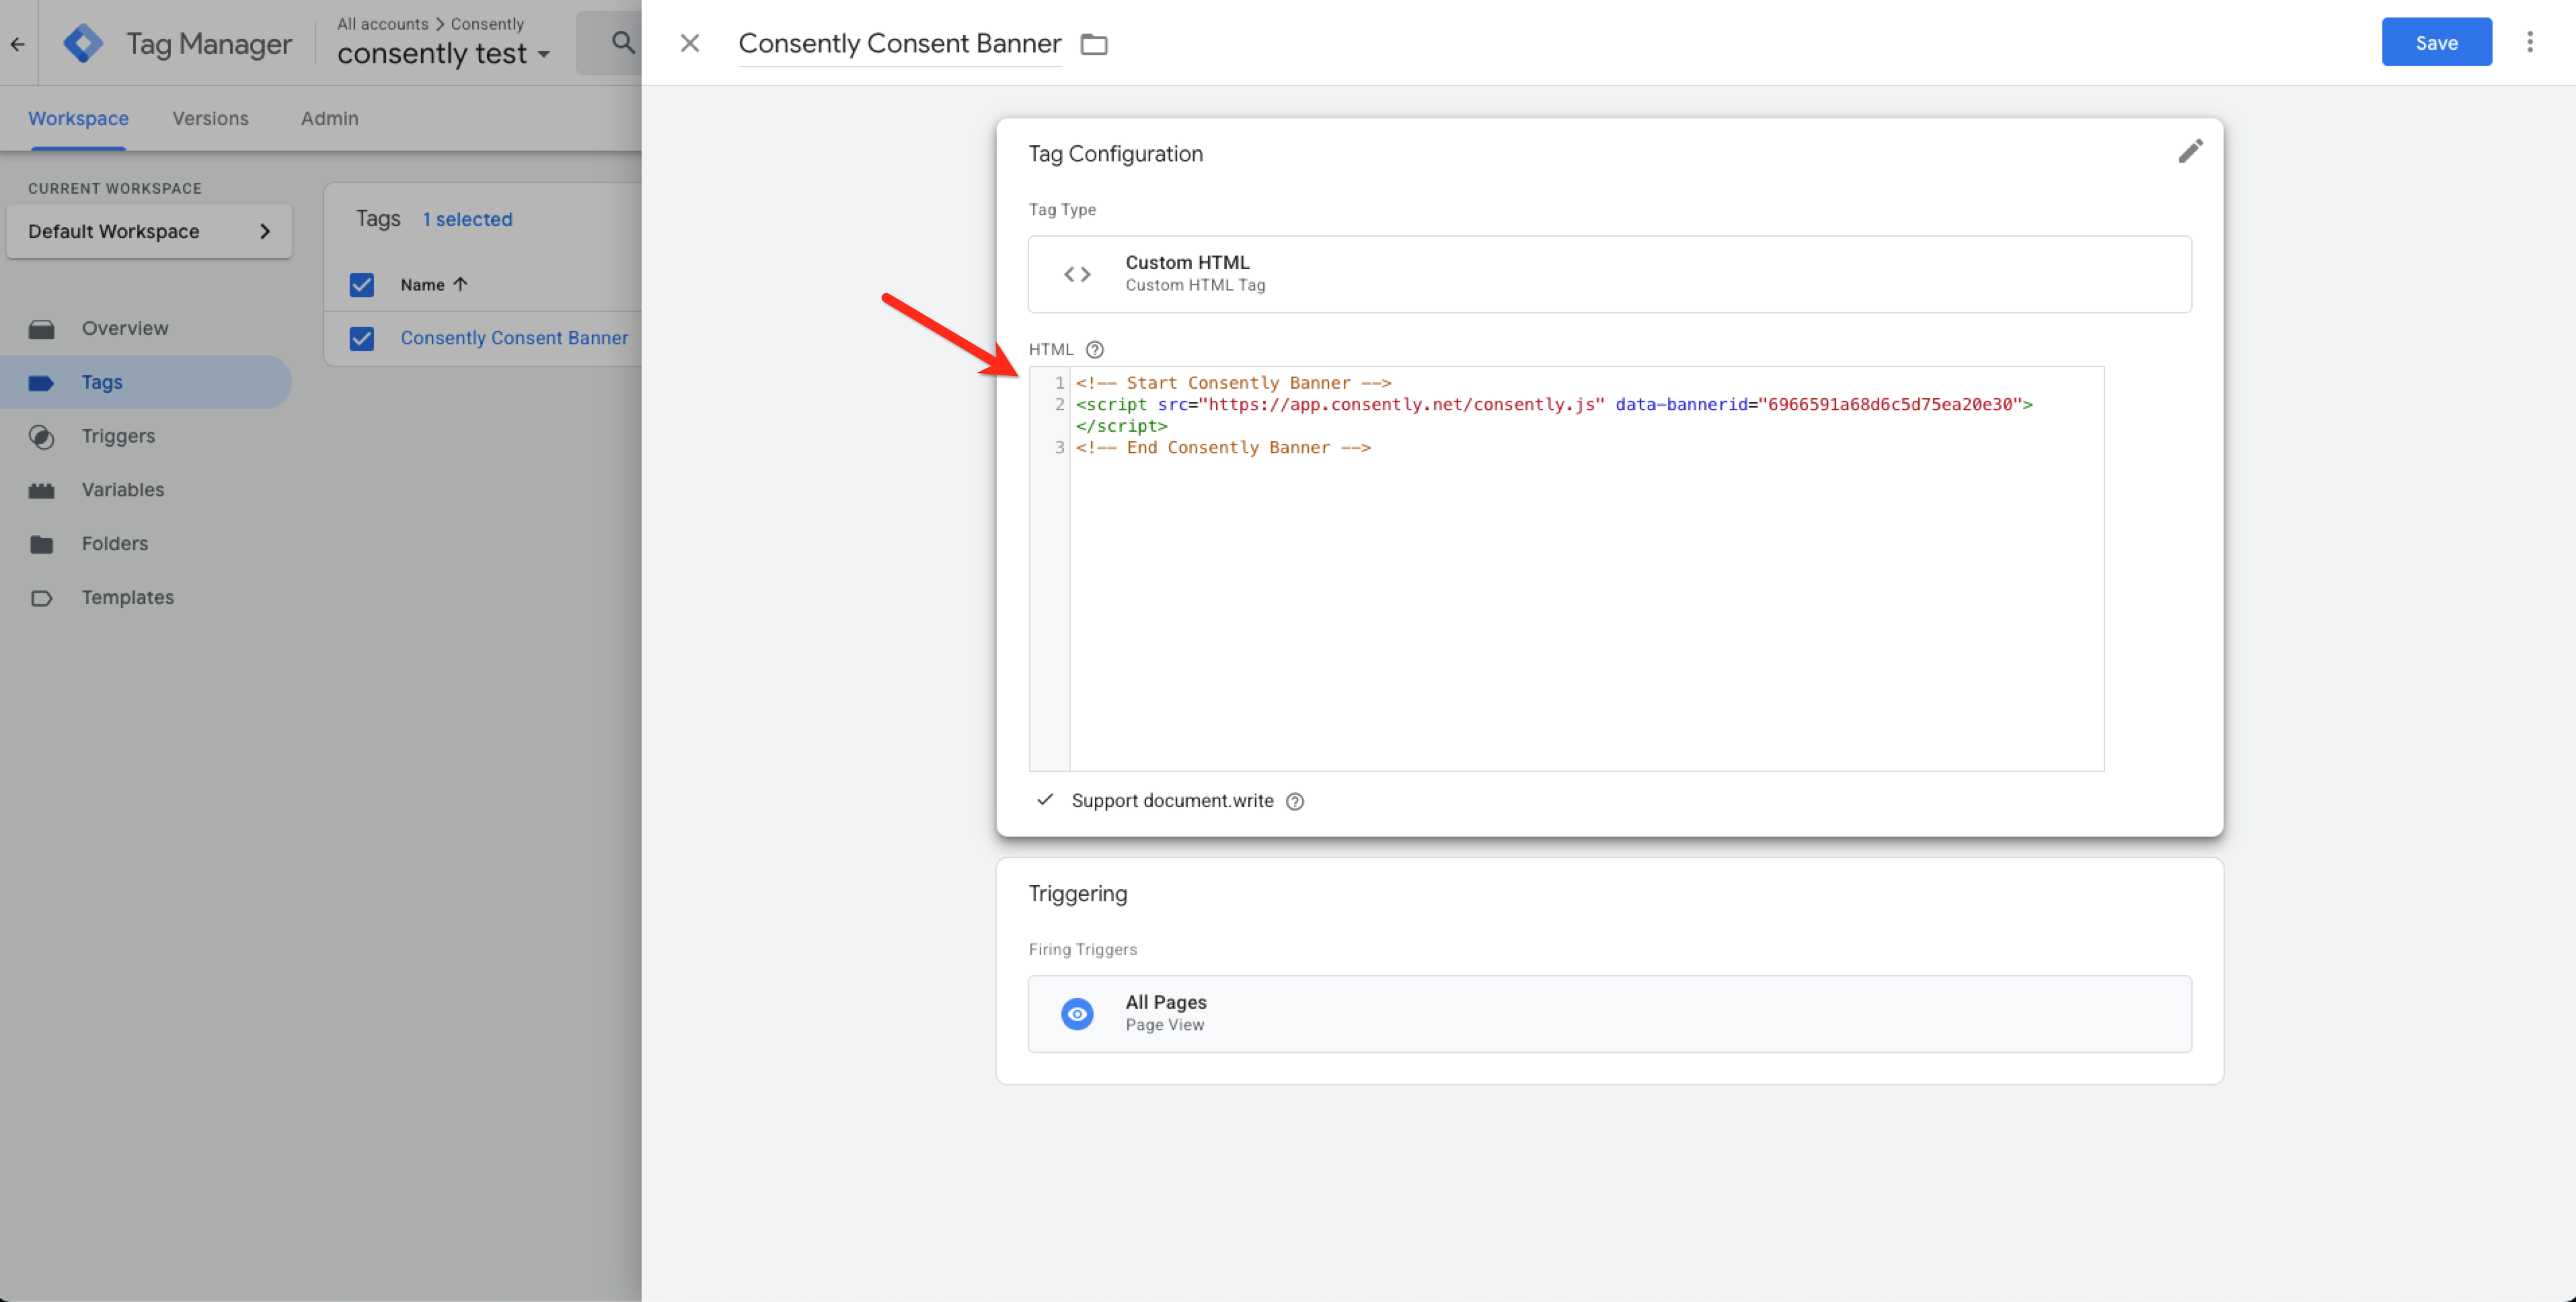
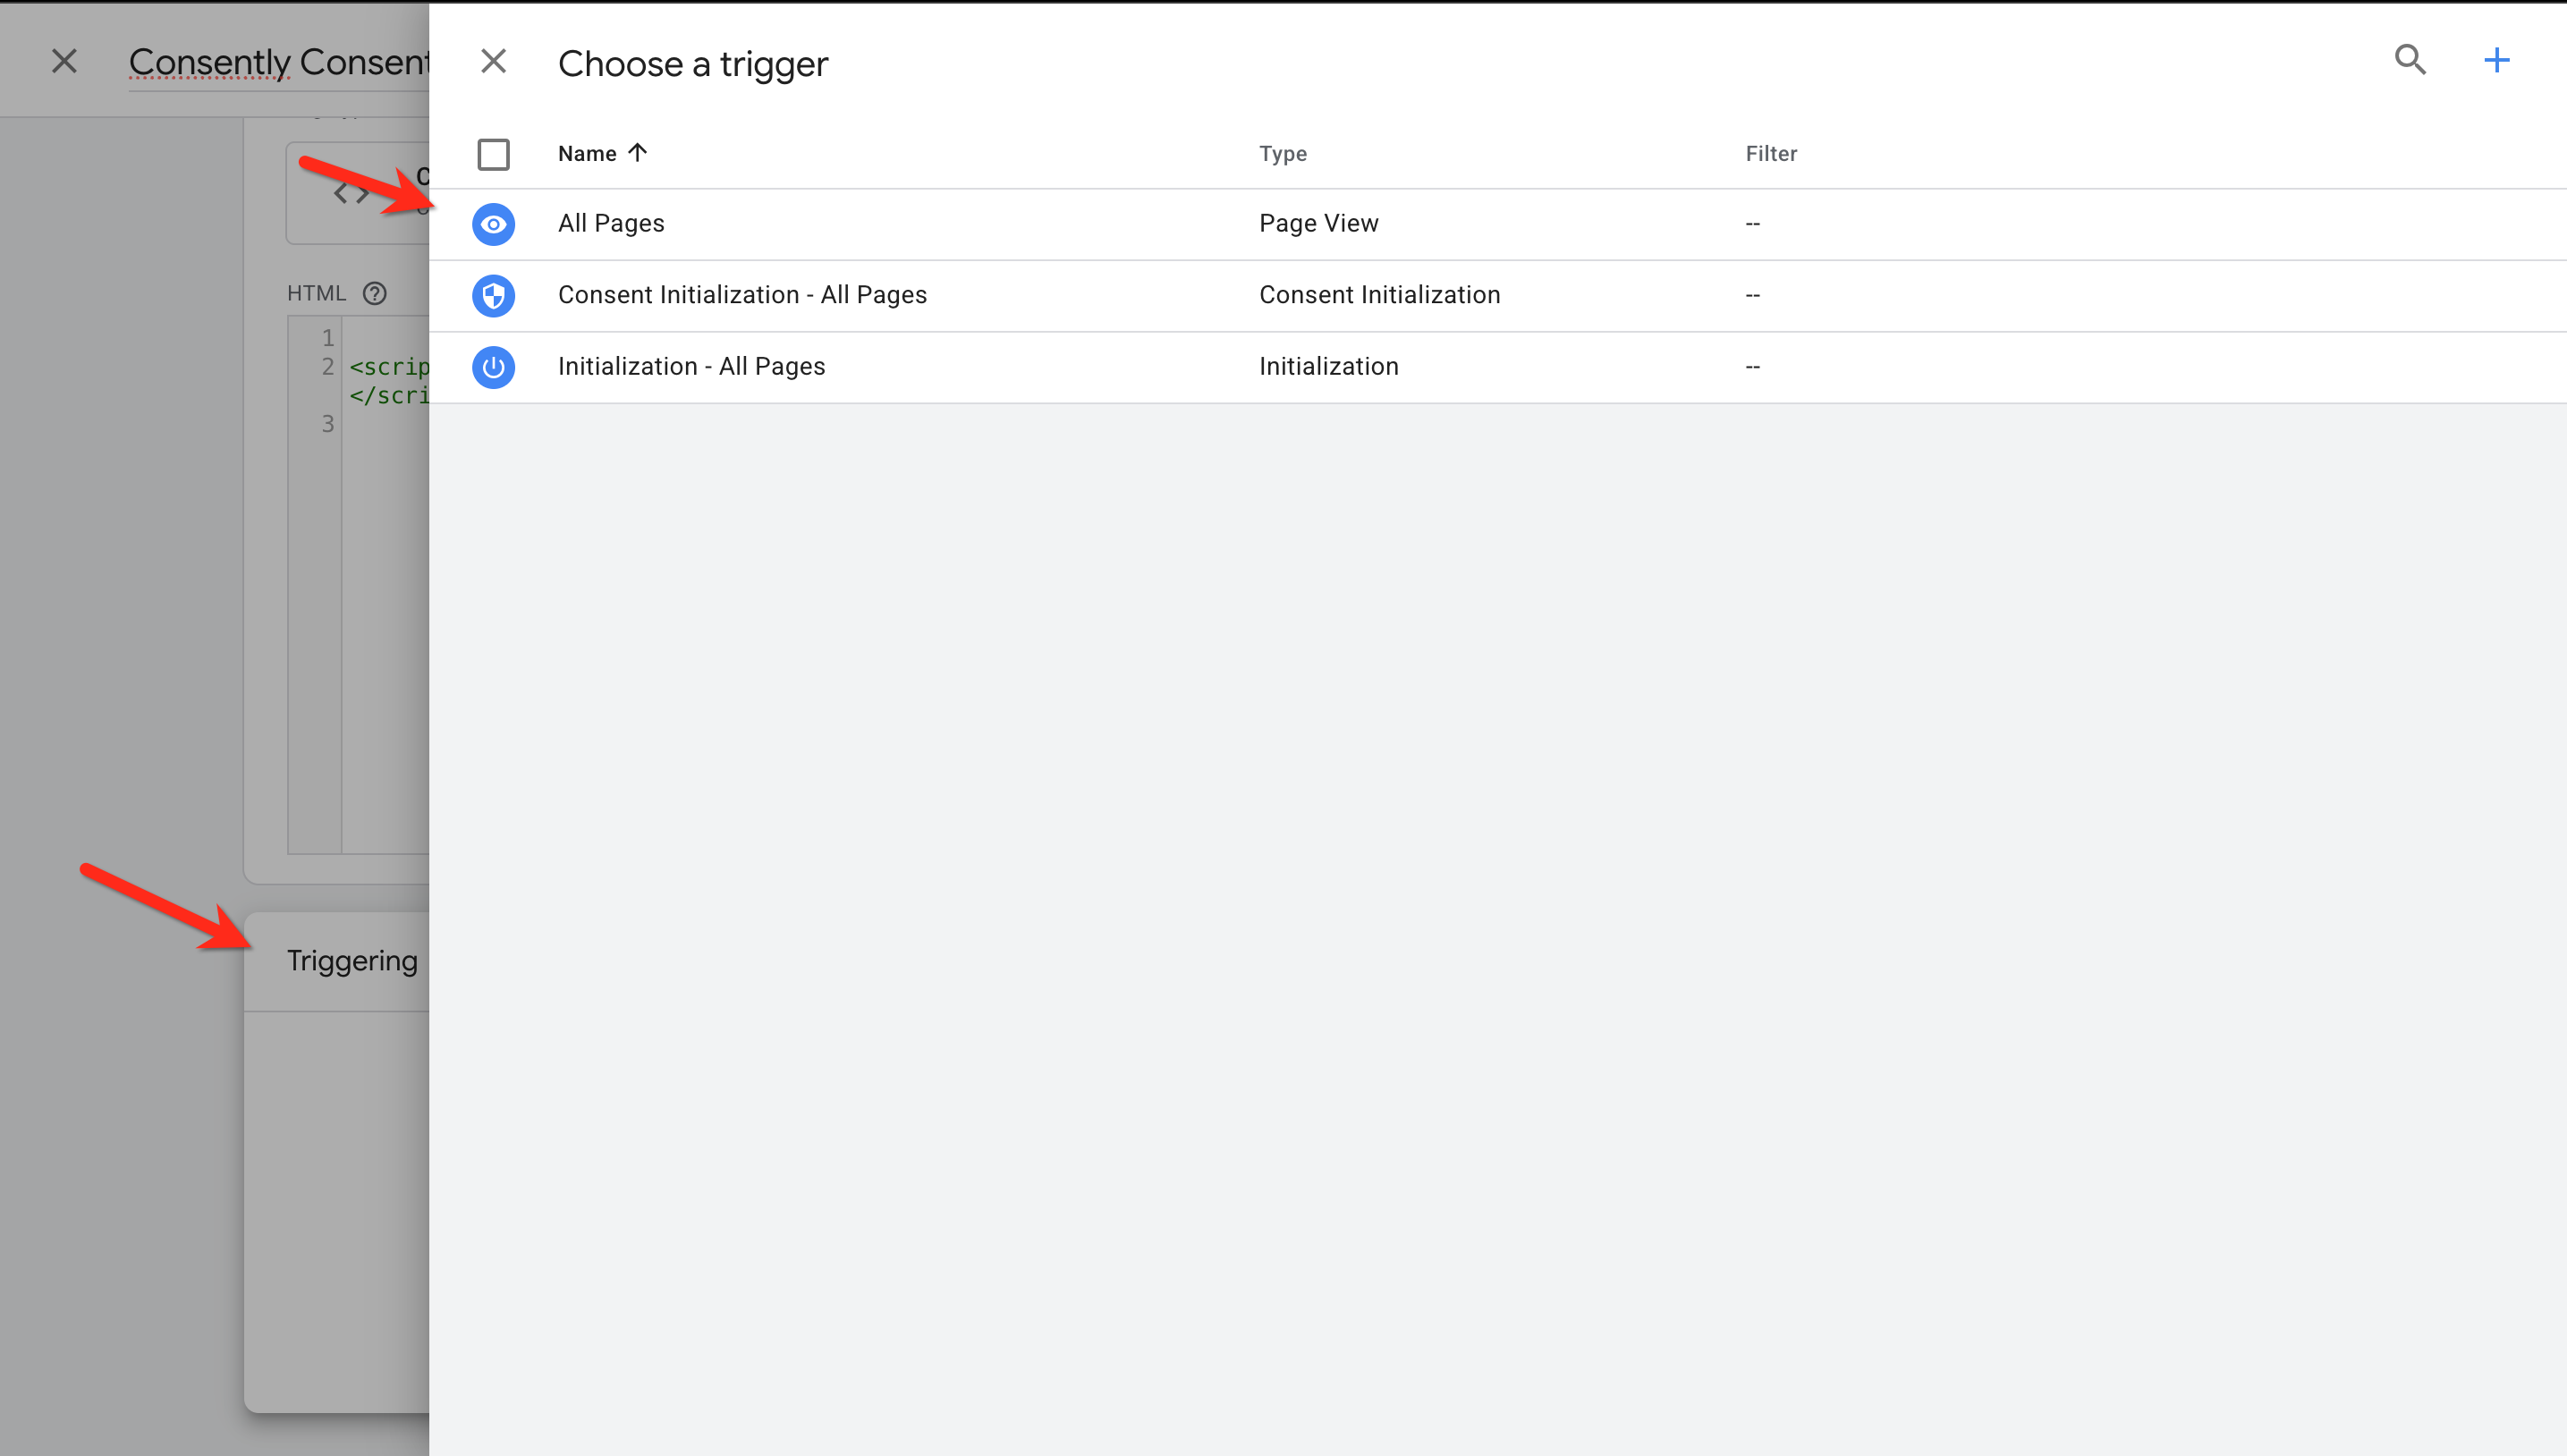
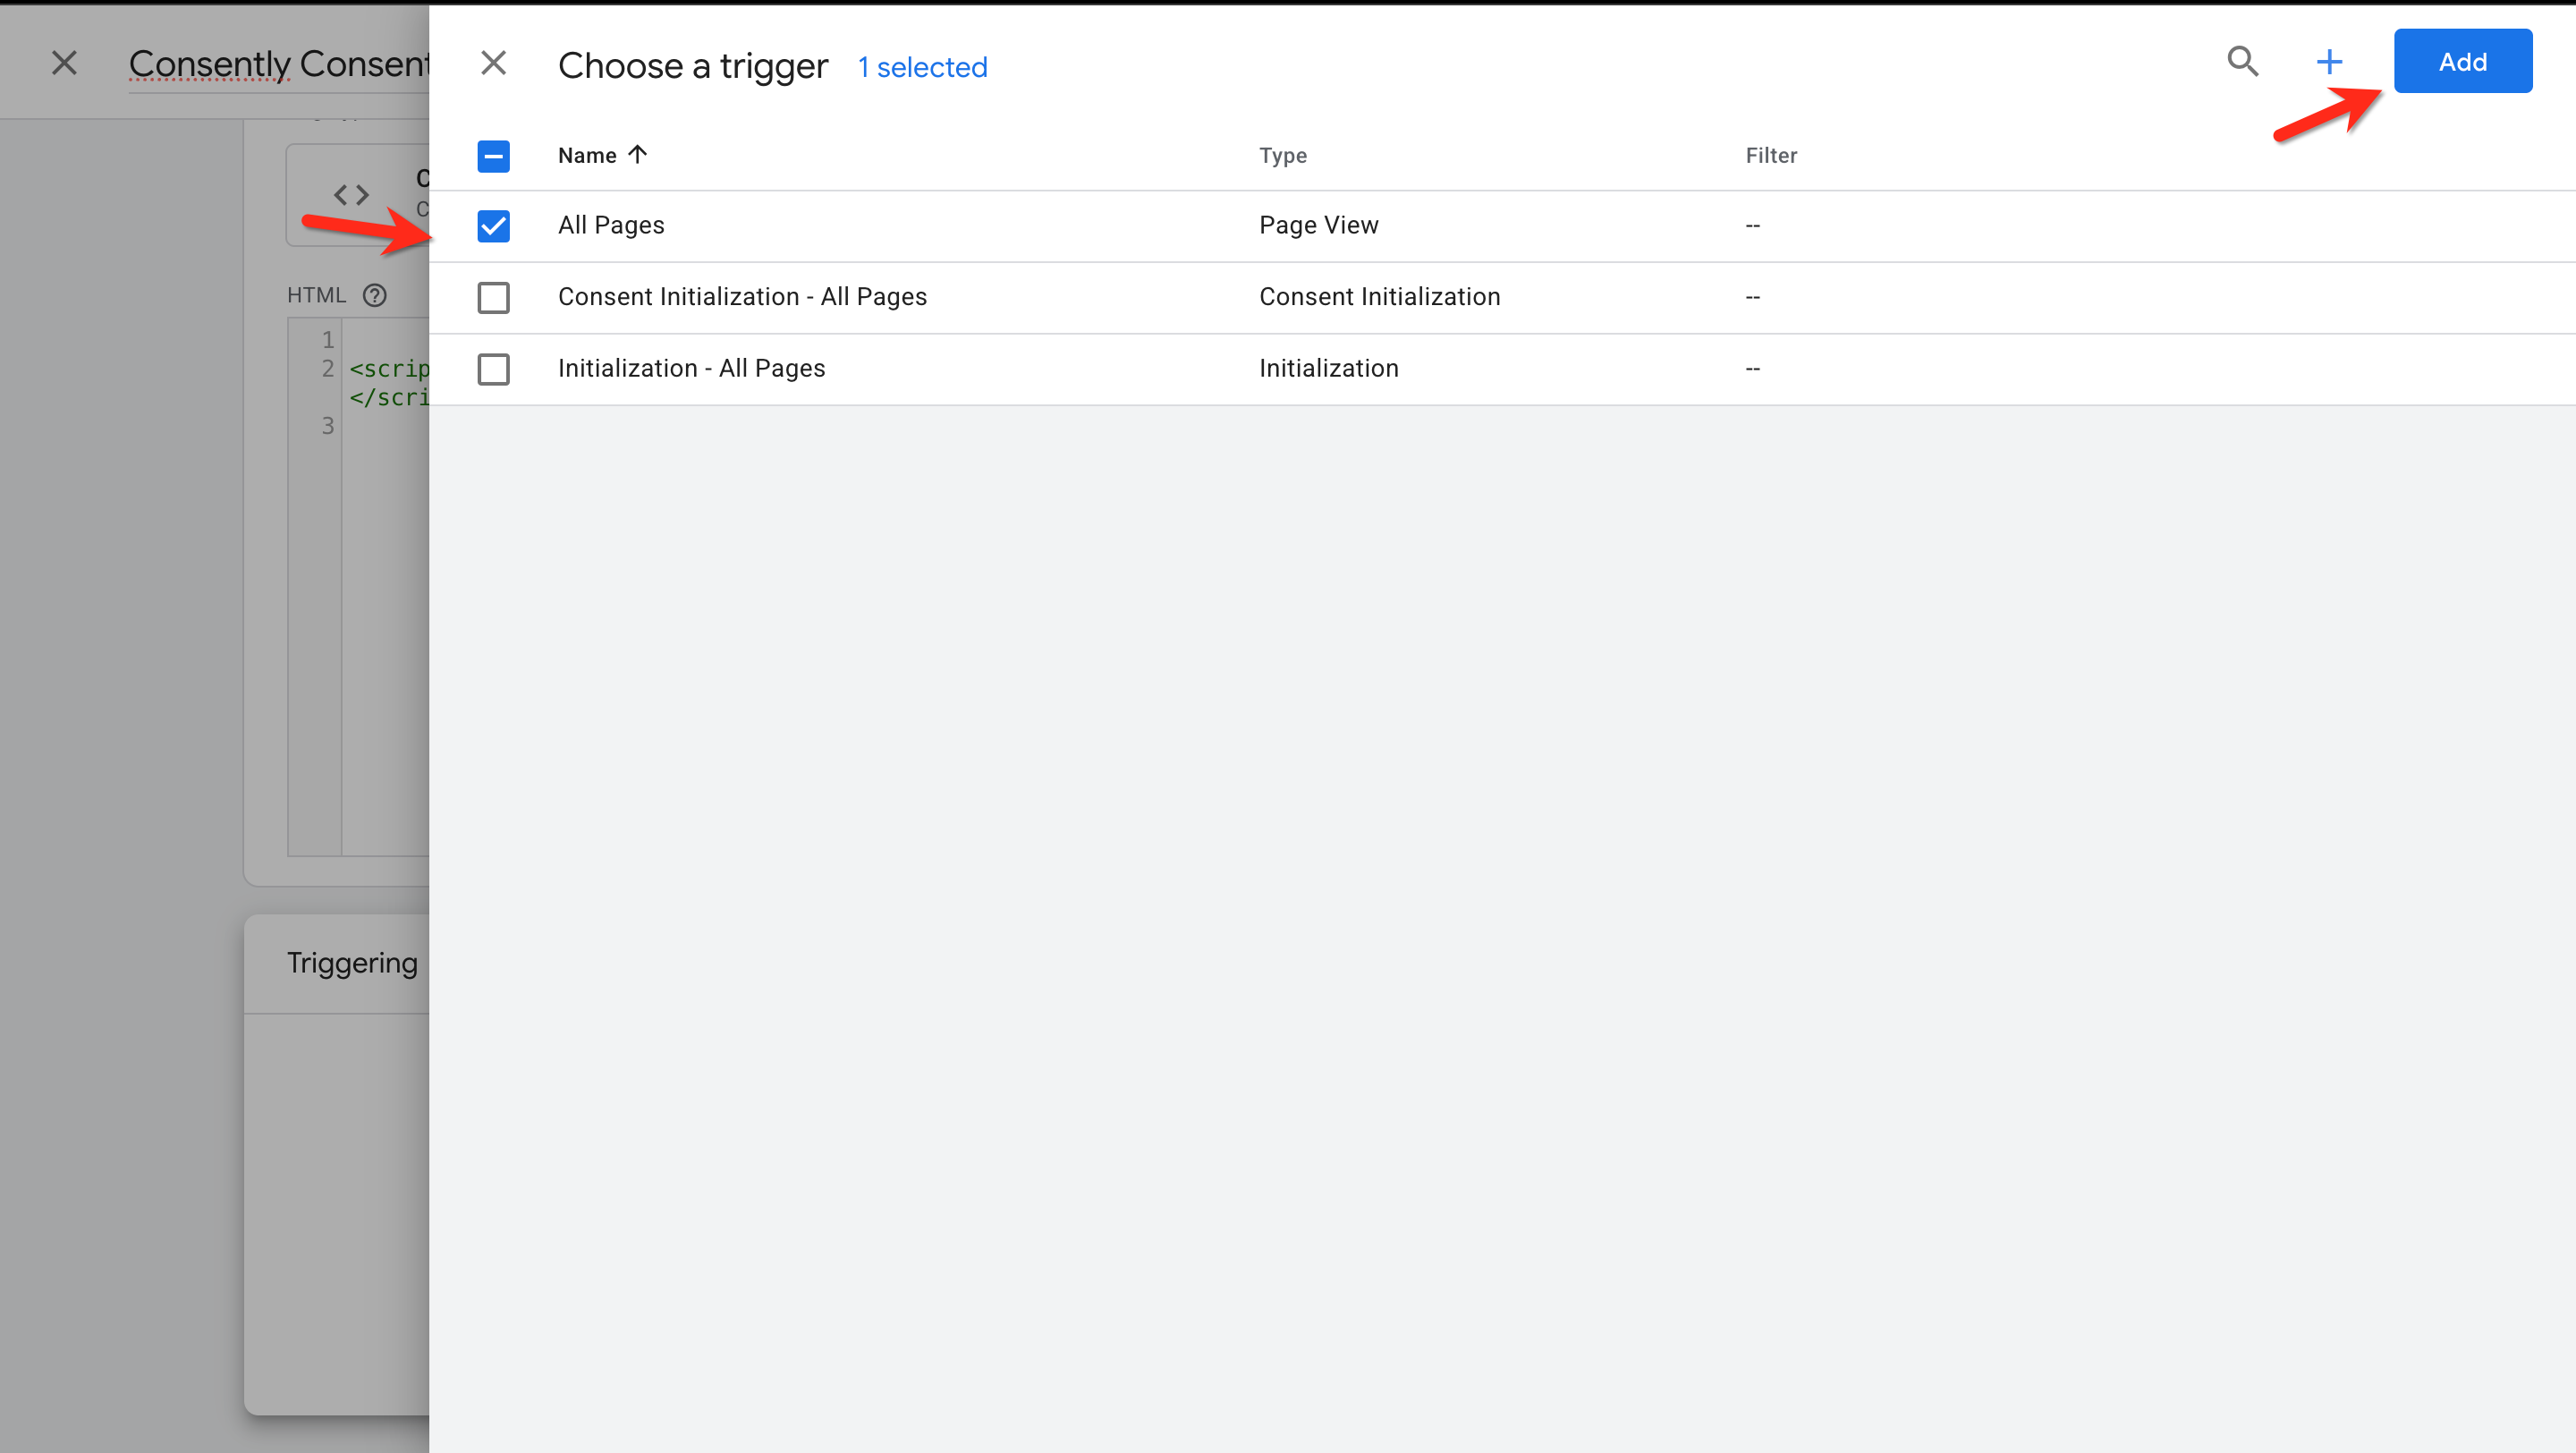
Step 8: Set the trigger
Click the Triggering box and select All Pages from the trigger list. This ensures the consent banner loads on every page of your website.
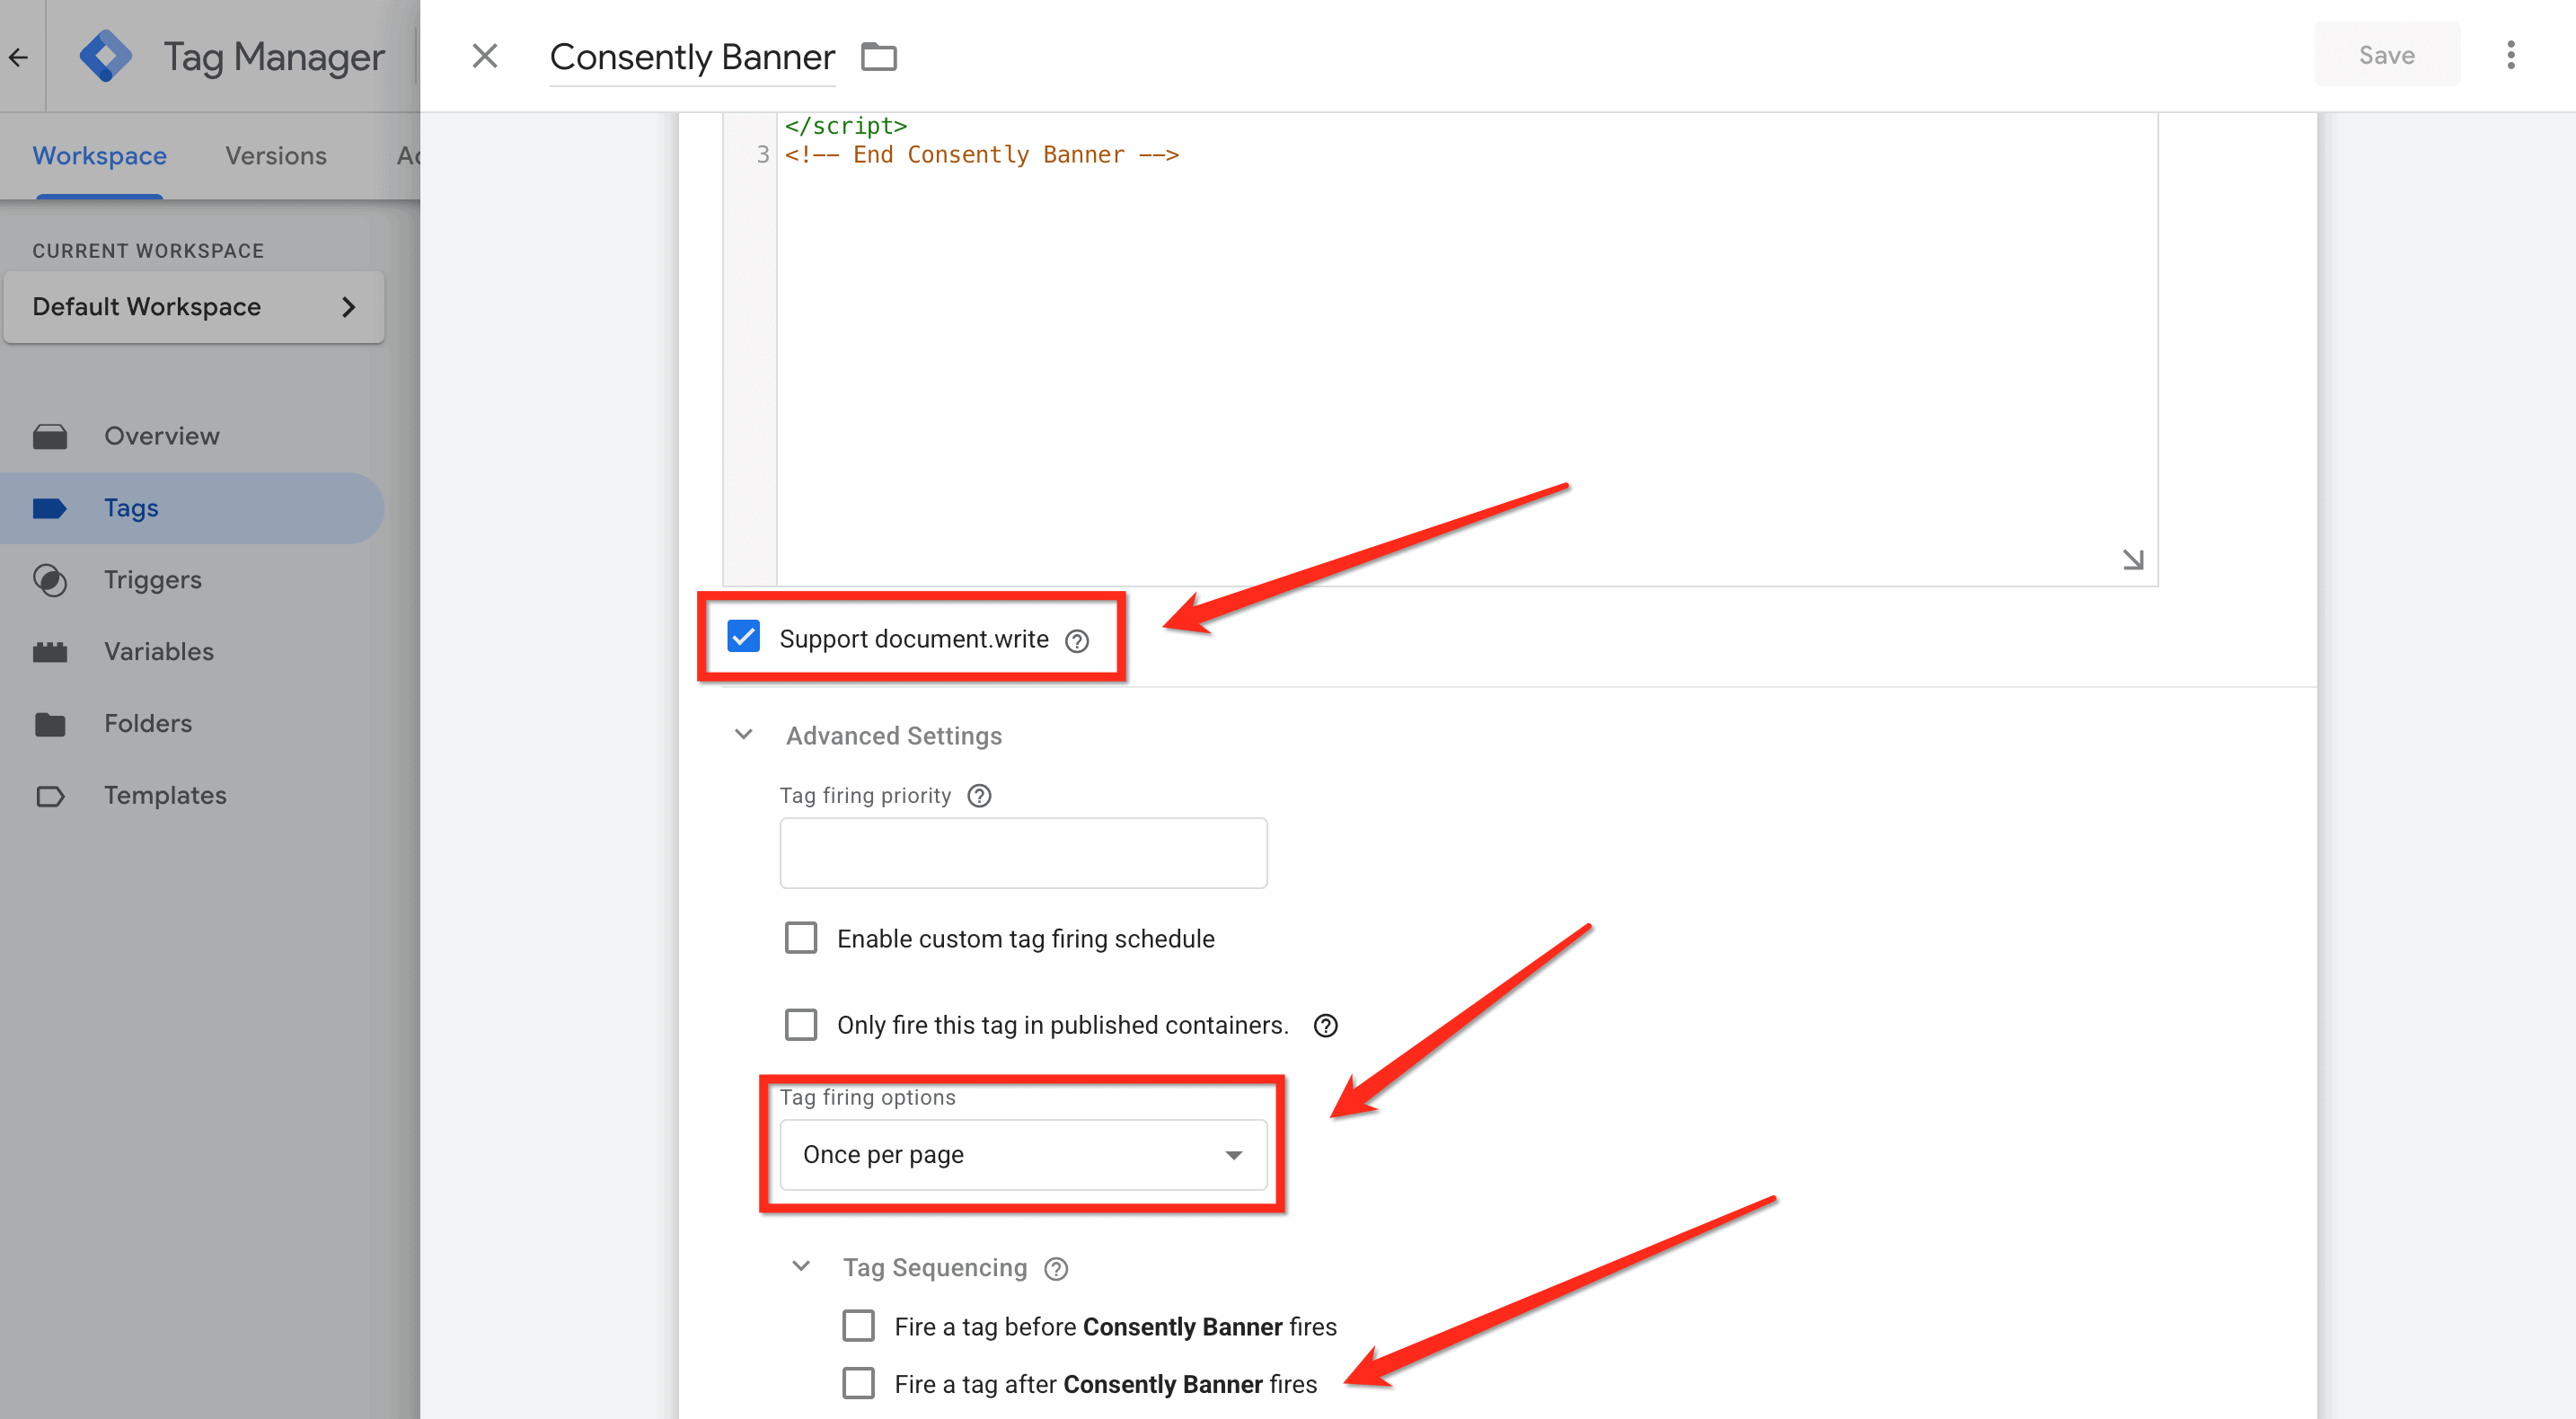
Step 9: Configure advanced settings (critical)
Make sure the Support.document.write option is checked.
Then click Advanced Settings → Tag Sequencing and verify that the Consently tag is set to fire BEFORE any other tracking tags (Google Analytics, Google Ads, Facebook Pixel, etc.).
⚠️ Important: The consent banner must load first so it can block other tracking scripts until visitors grant consent. If other tags fire first, they'll collect data before consent is obtained, violating GDPR and other privacy laws.
If you need other tags to wait for consent, configure them to fire only after the Consently tag completes. This ensures proper consent initialization order.
Step 10: Save the tag
Click Save in the top-right corner to save your Consently tag configuration.

Step 11: Preview your changes
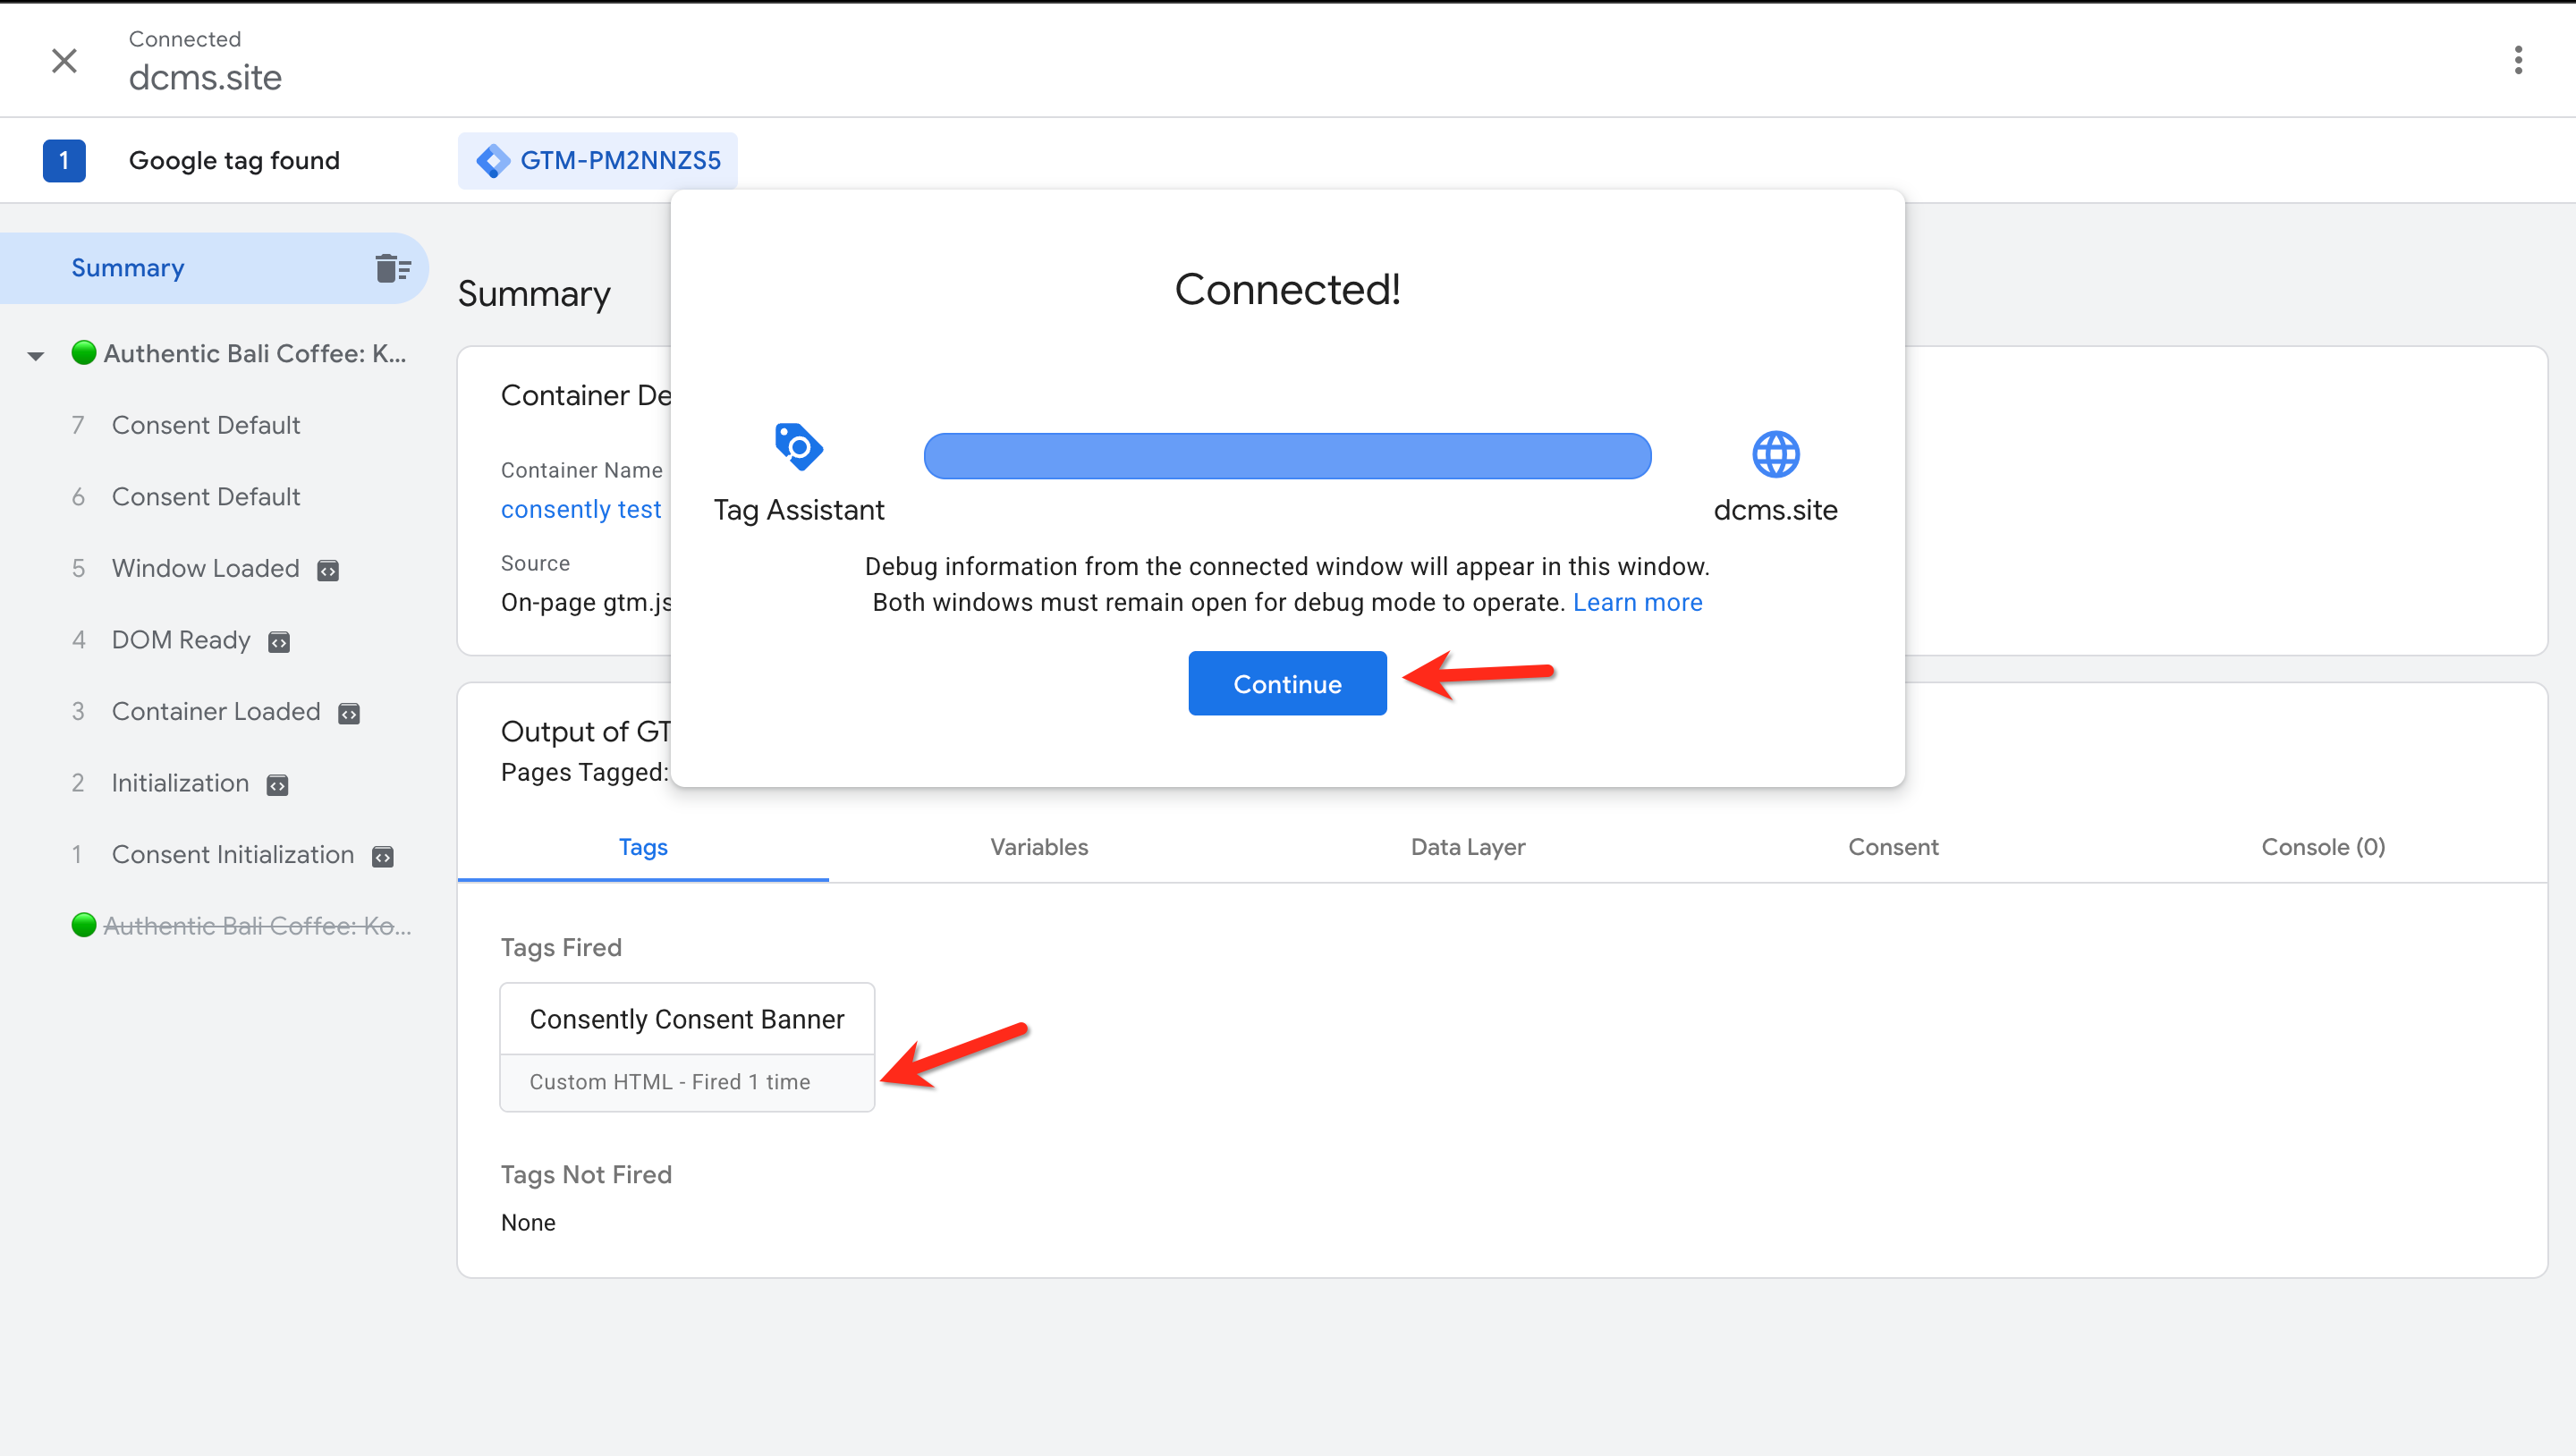
Click Preview in the top-right corner of the GTM interface to enter preview mode. This opens your website with GTM's debug panel.
Step 12: Verify the tag fires
In the GTM debug panel, verify that the Consently Consent Banner tag appears under "Tags Fired" when the page loads. Visit a few different pages to confirm it fires consistently.

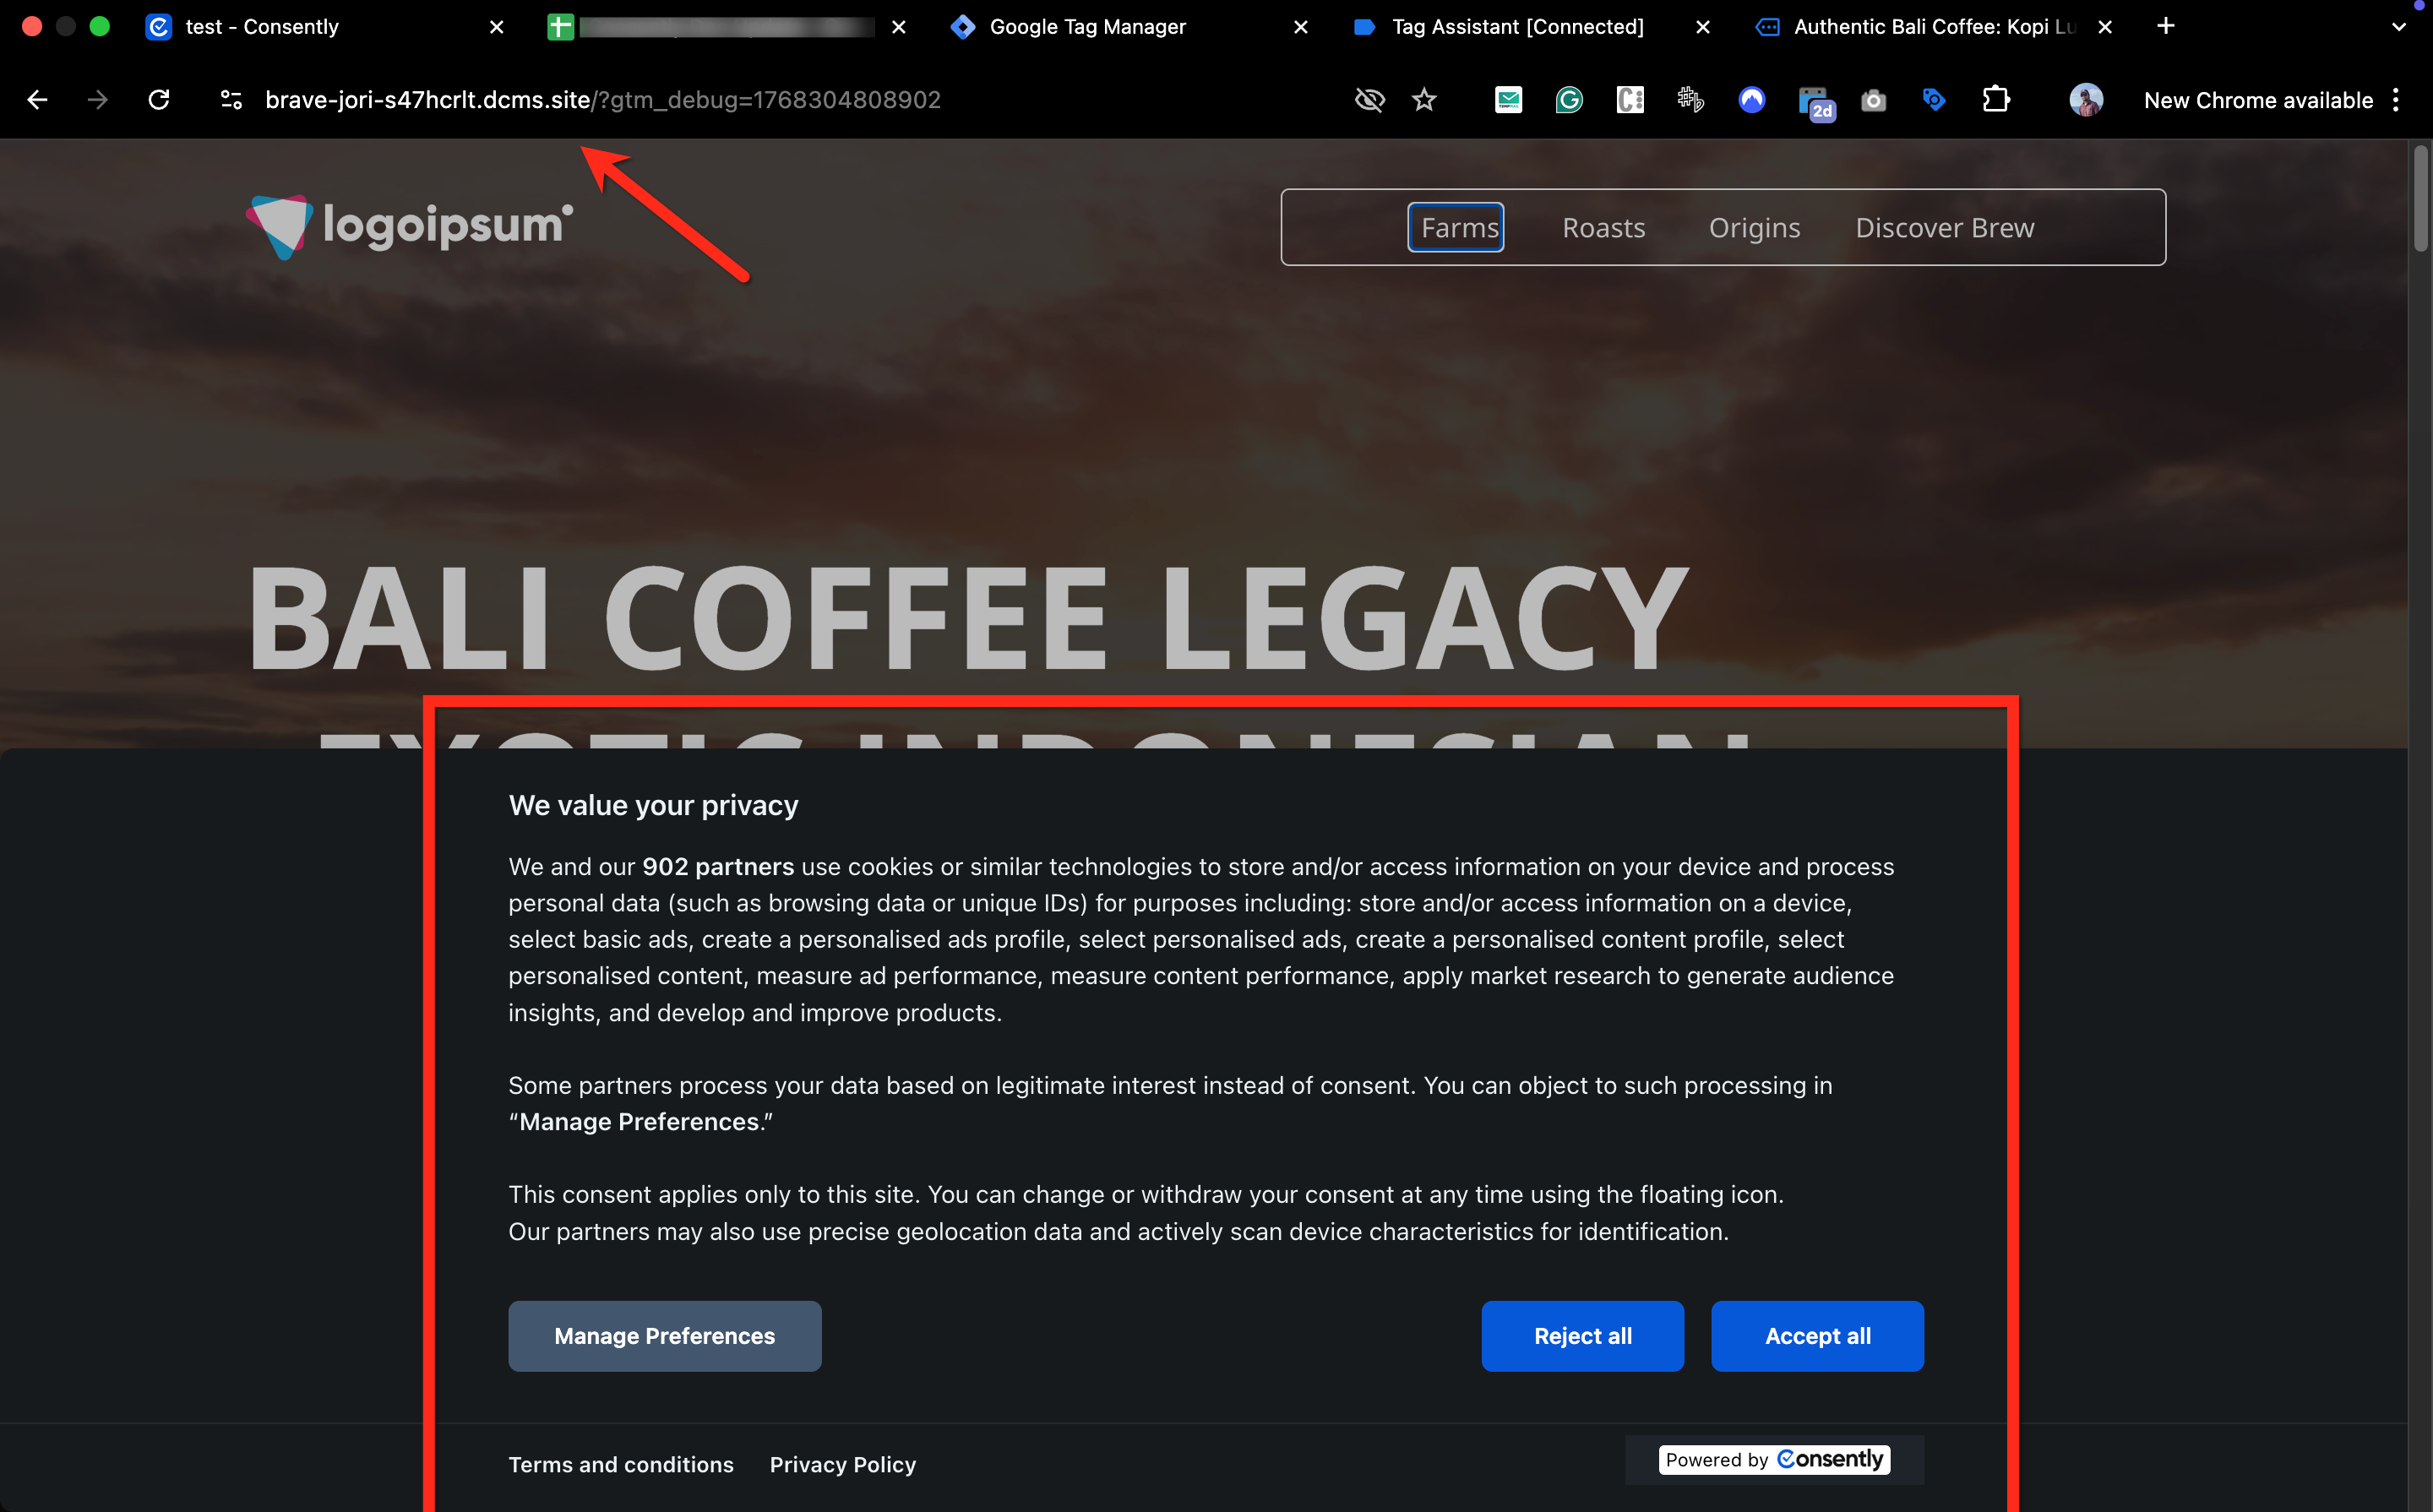
Step 13: Check the banner displays
Look at your website to confirm the consent banner appears correctly. If the banner doesn't show, see the Troubleshooting section below.
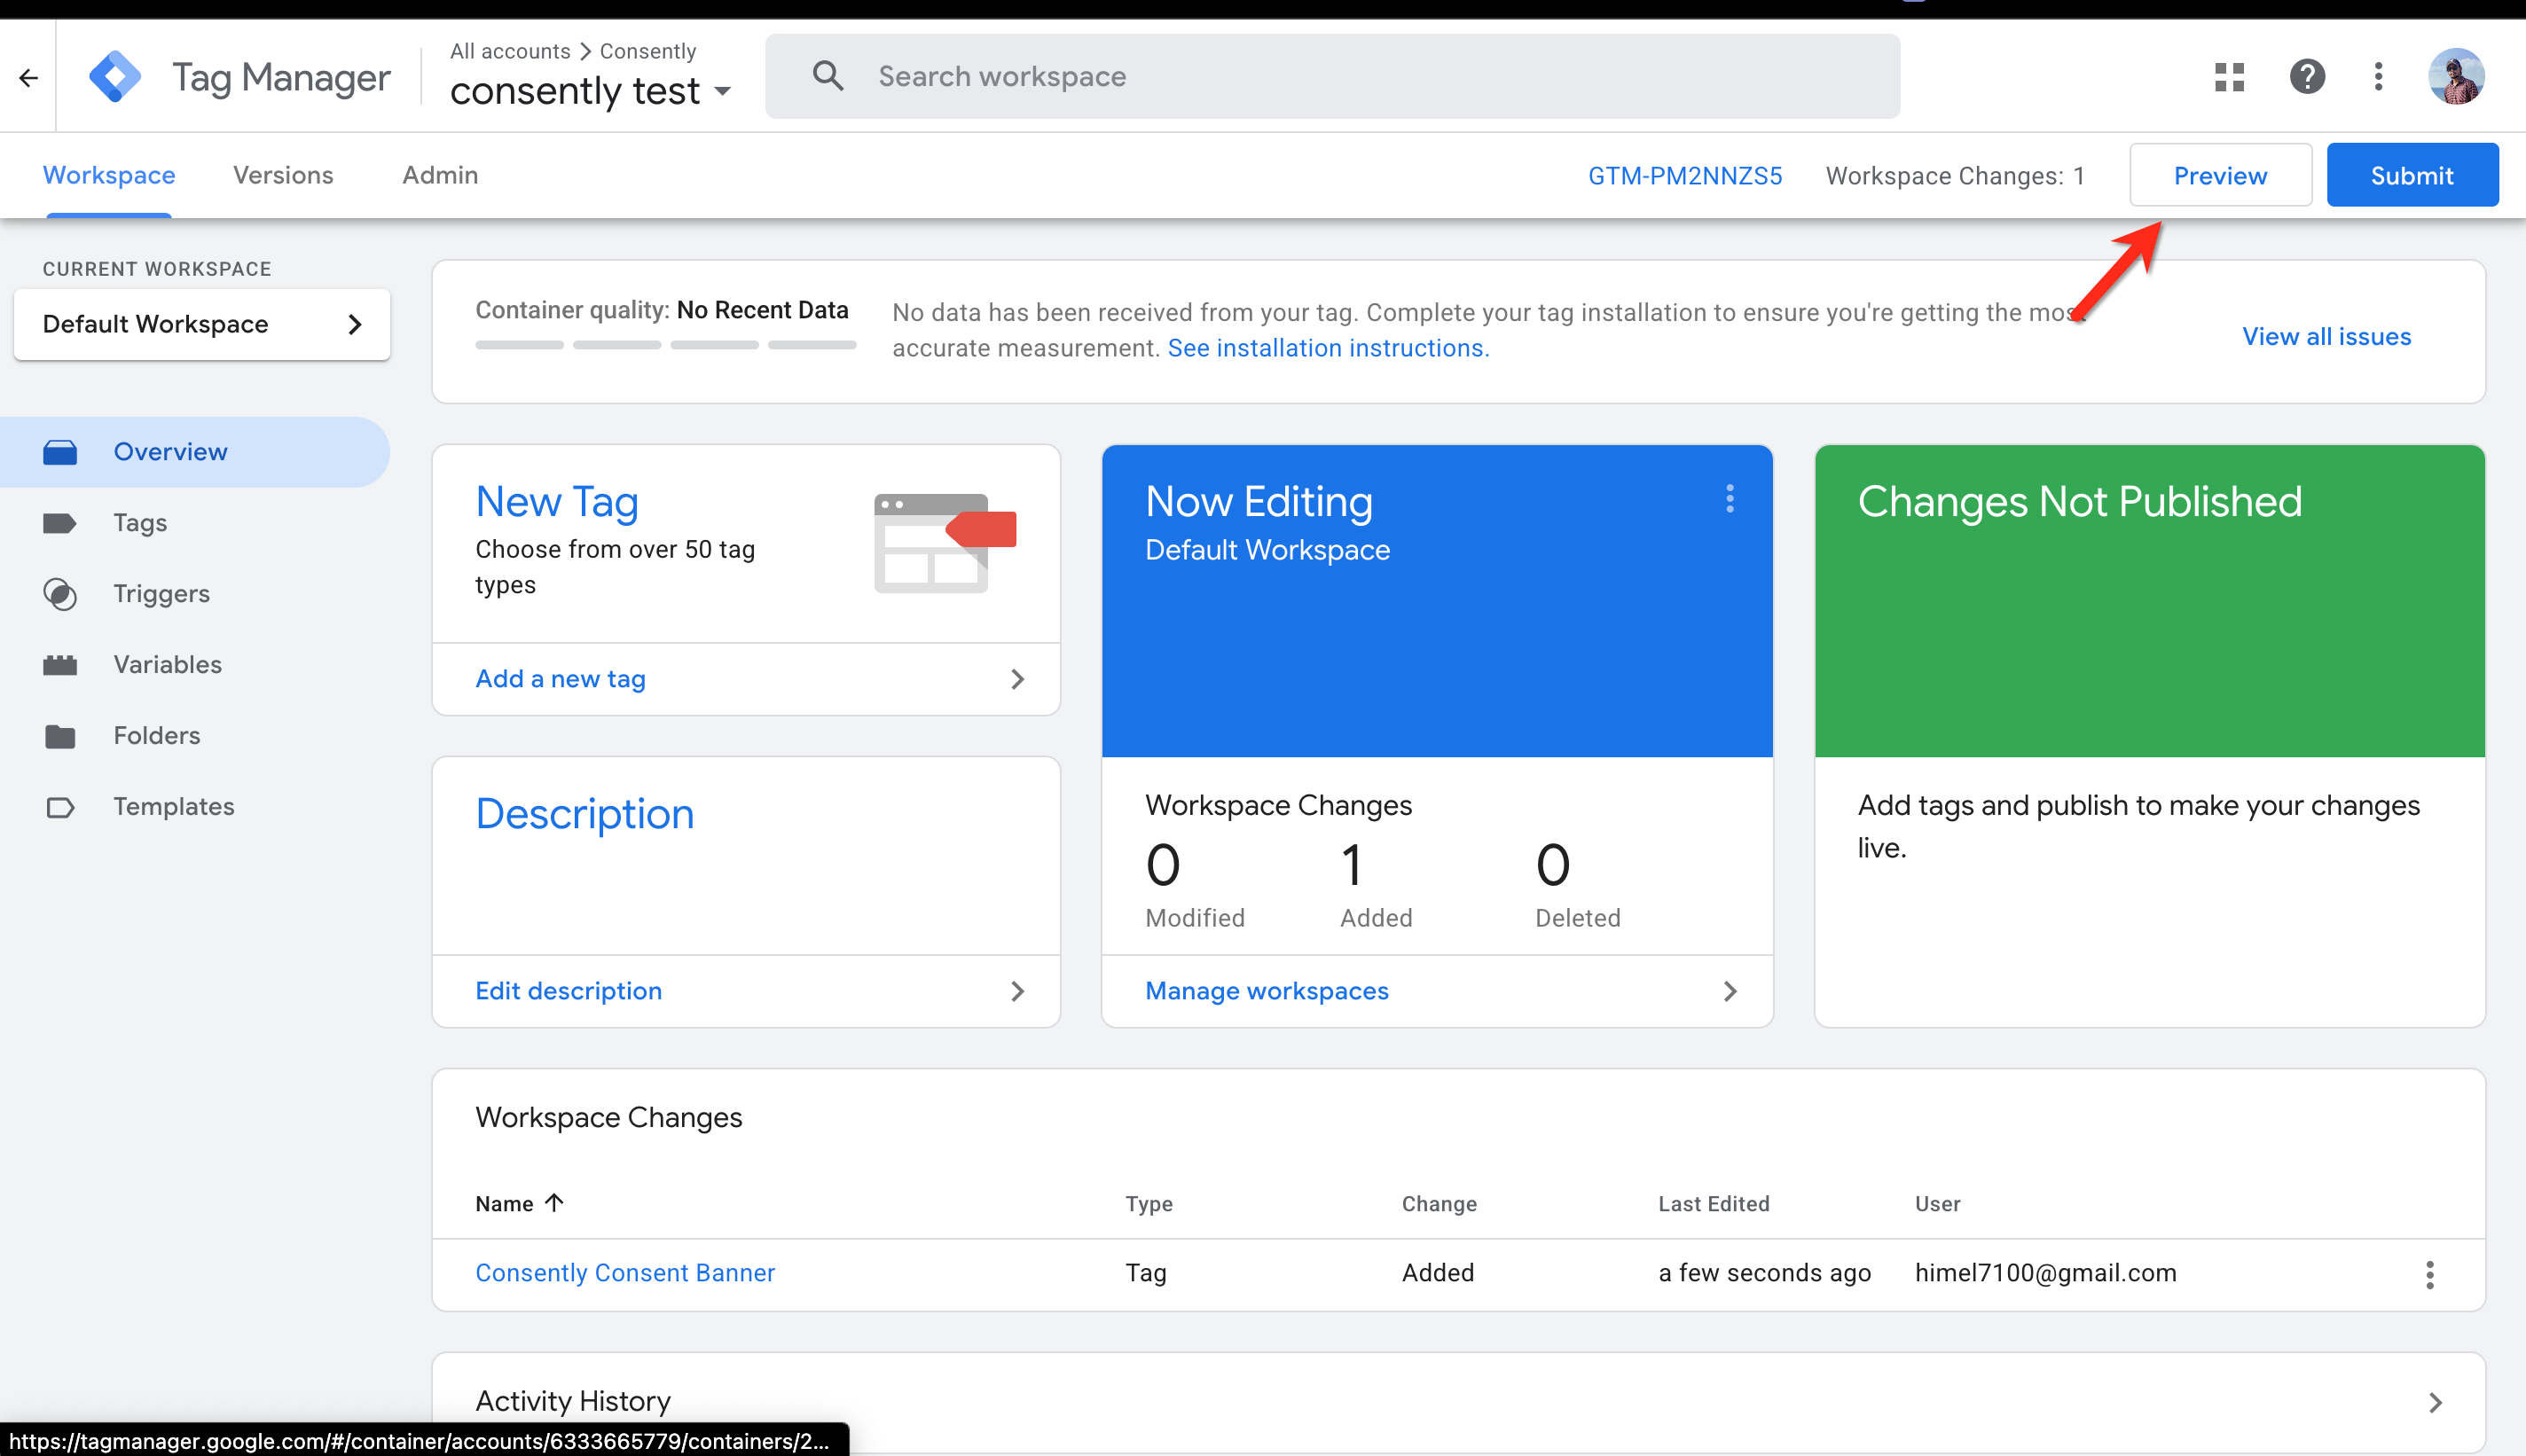
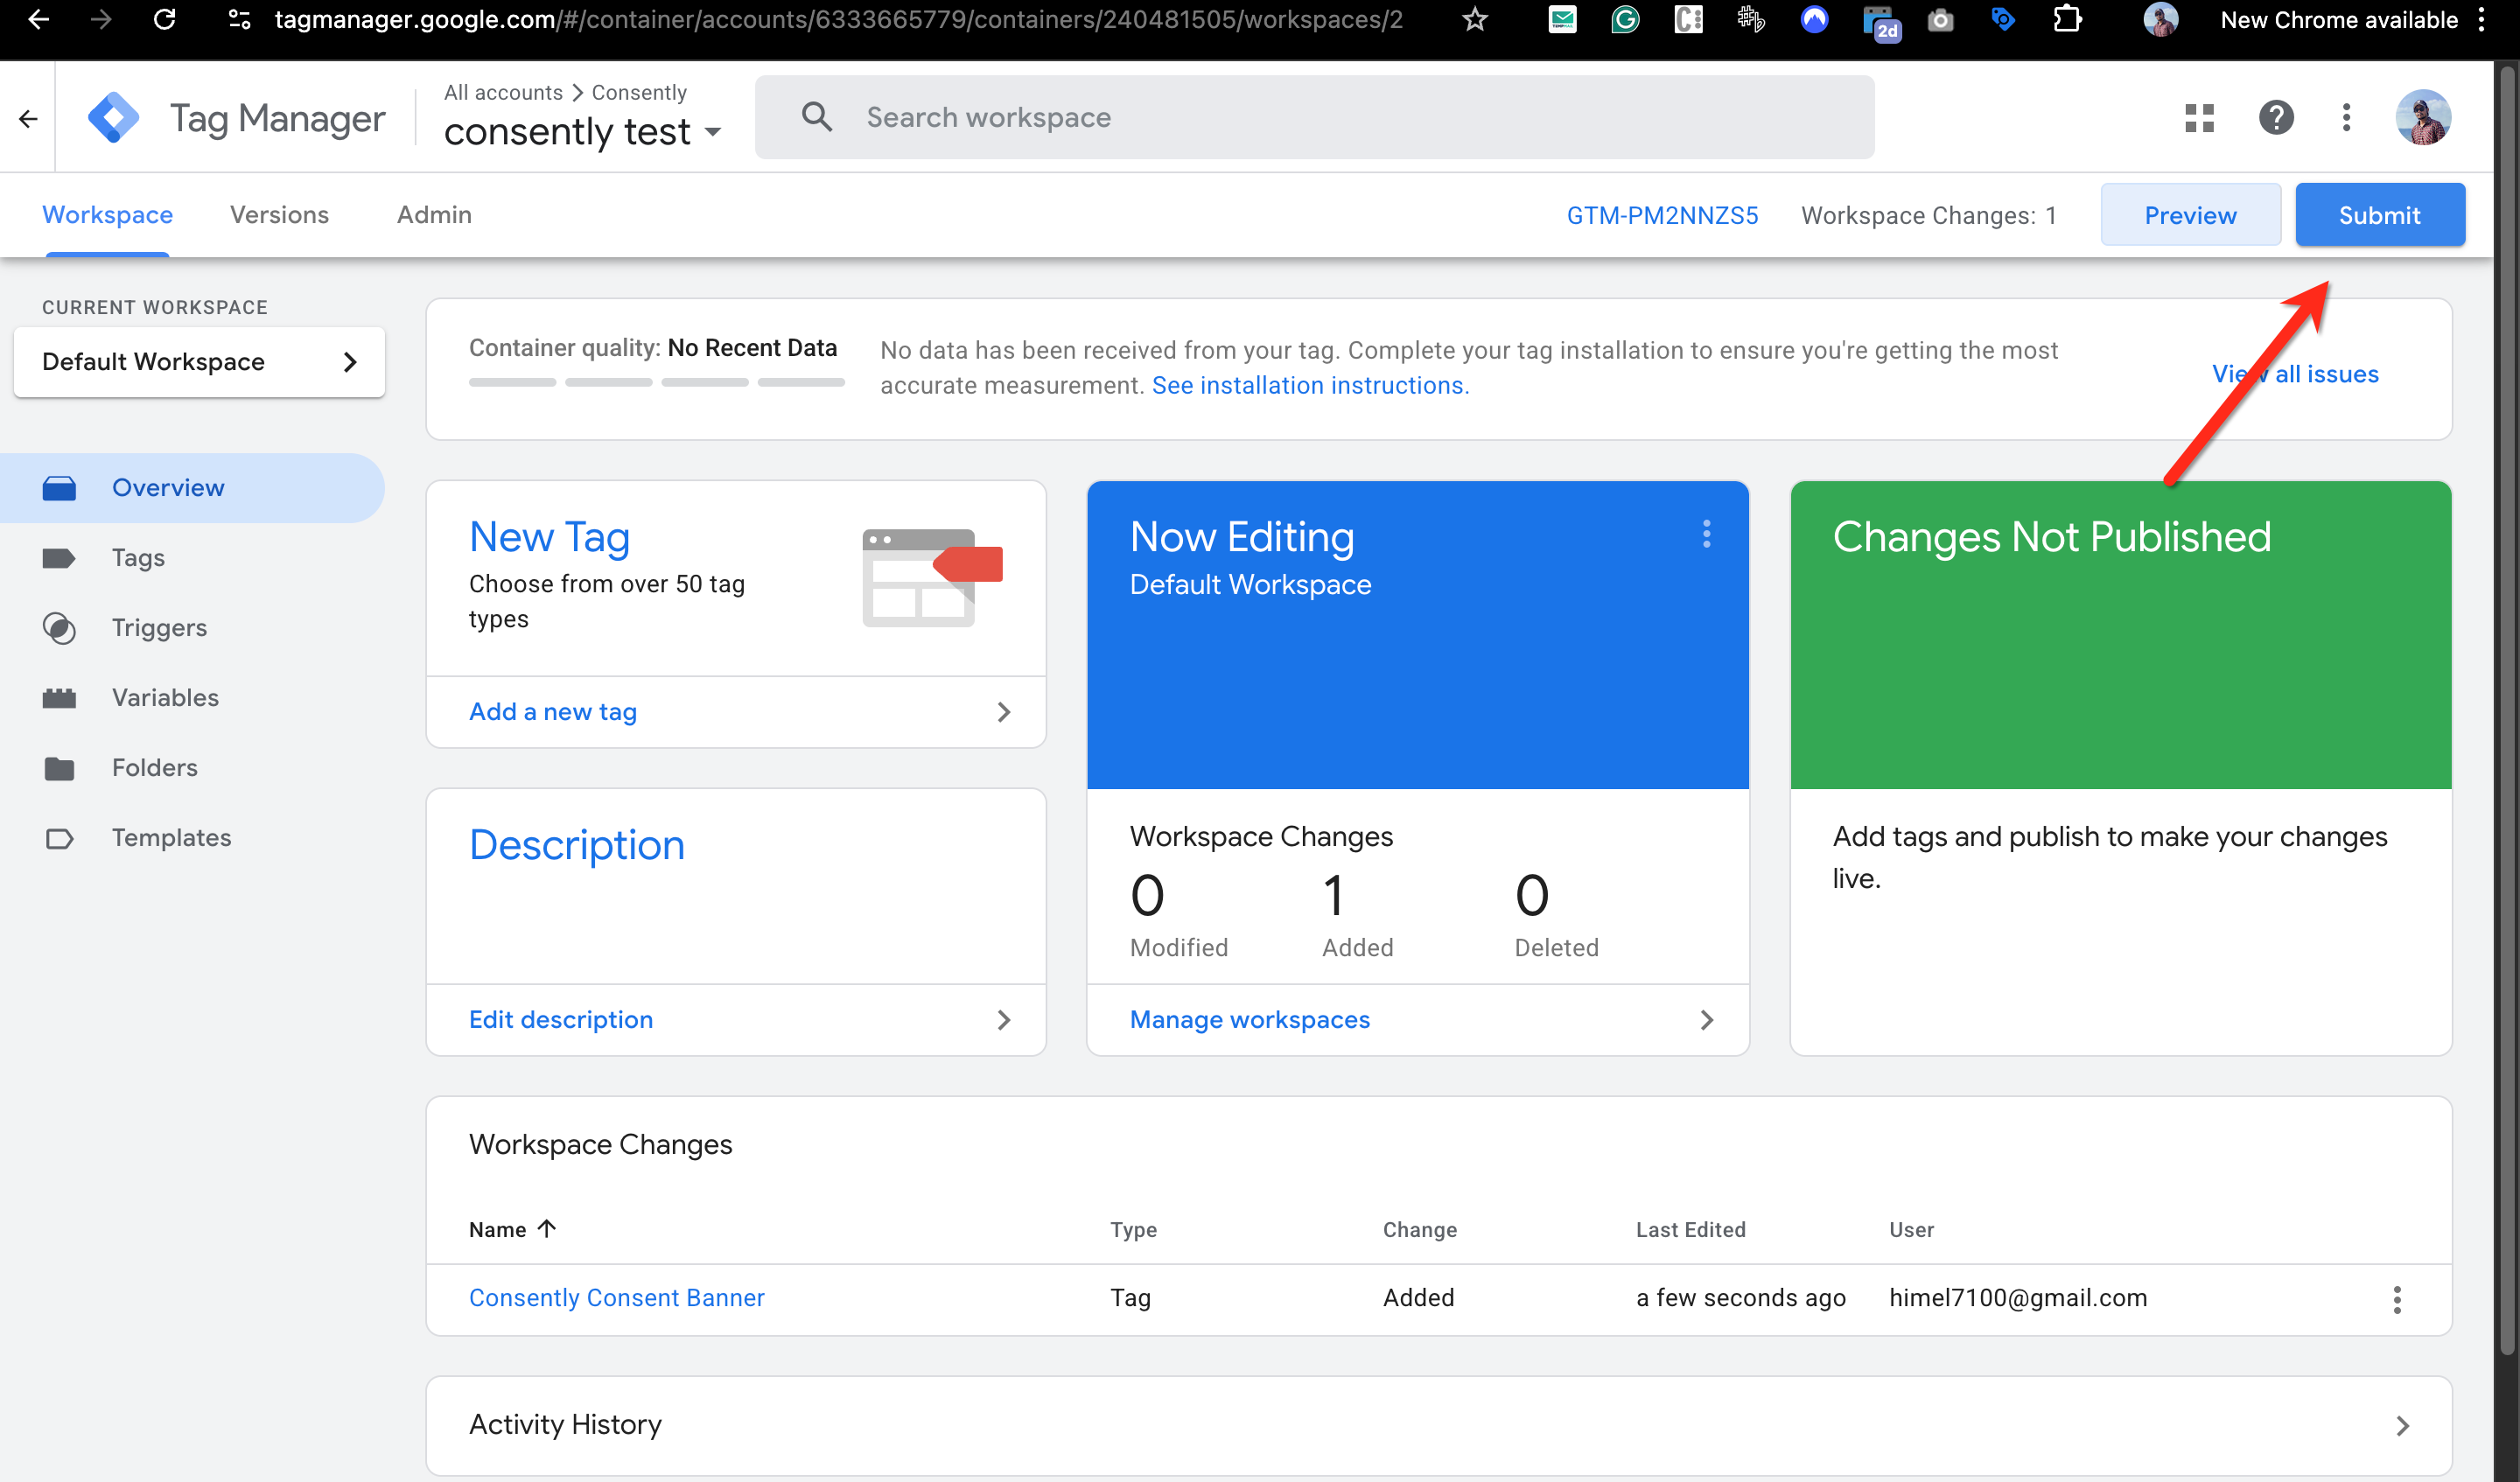
Step 14: Publish the container
Once verified in preview mode, click Submit in GTM, add a version name like "Added Consently consent banner", and click Publish to make the changes live.

Done!
Your Consently banner is now live through Google Tag Manager.
✅ Success indicator: The consent banner appears on all pages of your website, and the GTM debug panel shows the Consently tag firing on page load.
GTM Installation Considerations
Consent Initialization Timing
By default, GTM starts firing tags as soon as the container loads. For consent banners to work properly, the Consently tag must fire first and block other tracking tags until consent is granted.
Two approaches for ensuring proper order:
Option 1: Tag Sequencing (Recommended for Simple Setups) Configure other tracking tags to wait for the Consently tag using GTM's Tag Sequencing feature. In each tracking tag's Advanced Settings, set the Consently tag as a "Setup Tag" that must fire first.
Option 2: Consent Mode Integration (Recommended for Complex Setups) Use GTM's built-in Consent Mode to automatically block tags based on consent status. This requires configuring each tag with appropriate consent requirements (e.g., Google Analytics needs
analytics_storageconsent). Consently automatically updates these consent signals through Google Consent Mode v2.
Page Load Performance
GTM adds a slight delay to page load times compared to direct HTML installation because:
The GTM container script must load first
Then GTM processes and fires your tags
For most websites, this delay is negligible (50-100ms). However, if your website requires the absolute fastest consent banner display, consider direct HTML installation instead.
Multiple Environments
If you use GTM's workspace and environment features for staging and production, remember to publish the Consently tag to all environments where you want the banner to appear.
What's Next
Now that you've installed Consently through GTM, you should:
Test your installation to verify consent collection and cookie blocking work correctly
Configure tag sequencing or consent mode for your other tracking tags
Troubleshooting
The banner doesn't appear on the website
Why this happens: The tag might not be firing, or there's a JavaScript error preventing banner display.
Solution:
Open GTM preview mode and verify the Consently tag appears in "Tags Fired"
If the tag isn't firing, check that the trigger is set to "All Pages"
If the tag fires but the banner doesn't appear, open your browser's JavaScript console (F12 → Console) and look for errors related to
consently.jsVerify your banner is published in Consently—unpublished banners won't display even if the script loads
The banner appears but doesn't block cookies
Why this happens: Other tracking tags are firing before Consently initializes consent controls.
Solution:
Open GTM preview mode and check the tag firing order
The Consently tag should fire first in the tag list
Configure other tracking tags to wait for Consently using Tag Sequencing in their Advanced Settings
Alternatively, implement GTM's Consent Mode to automatically block unconsented tags
Verify cookies are properly categorized in the Cookie Manager—miscategorized essential cookies won't be blocked
The GTM container won't publish
Why this happens: There may be workspace conflicts or permission issues.
Solution:
Check for workspace conflicts if multiple people are editing the container
Verify you have Publish permission in GTM (Admin or Publish role)
Try creating a new workspace if the current one has unresolved conflicts
Contact your GTM administrator if you lack the necessary permissions
Changes in Consently don't appear on the website
Why this happens: GTM may have cached the old script, or you're viewing a cached version of your website.
Solution:
Changes to banner design and content in Consently appear automatically—GTM caching doesn't affect these
If you need to update the script itself (e.g., after changing your banner ID), edit the Custom HTML tag in GTM and republish the container
Clear your browser cache and hard refresh (Ctrl+Shift+R or Cmd+Shift+R) to see updates immediately
Preview mode shows the banner but the live site doesn't
Why this happens: The GTM container hasn't been published yet.
Solution: After testing in preview mode, click Submit in the top-right corner, add a version description, and click Publish to make the changes live.
Consent Mode conflicts with Pixel Manager for WooCommerce
Why this happens:
The Pixel Manager for WooCommerce plugin includes its own implementation of Google Consent Mode v2. When this is enabled alongside Consently’s consent handling, both systems may try to control consent signals at the same time, causing conflicts (such as consent being granted by default or tags firing unexpectedly).
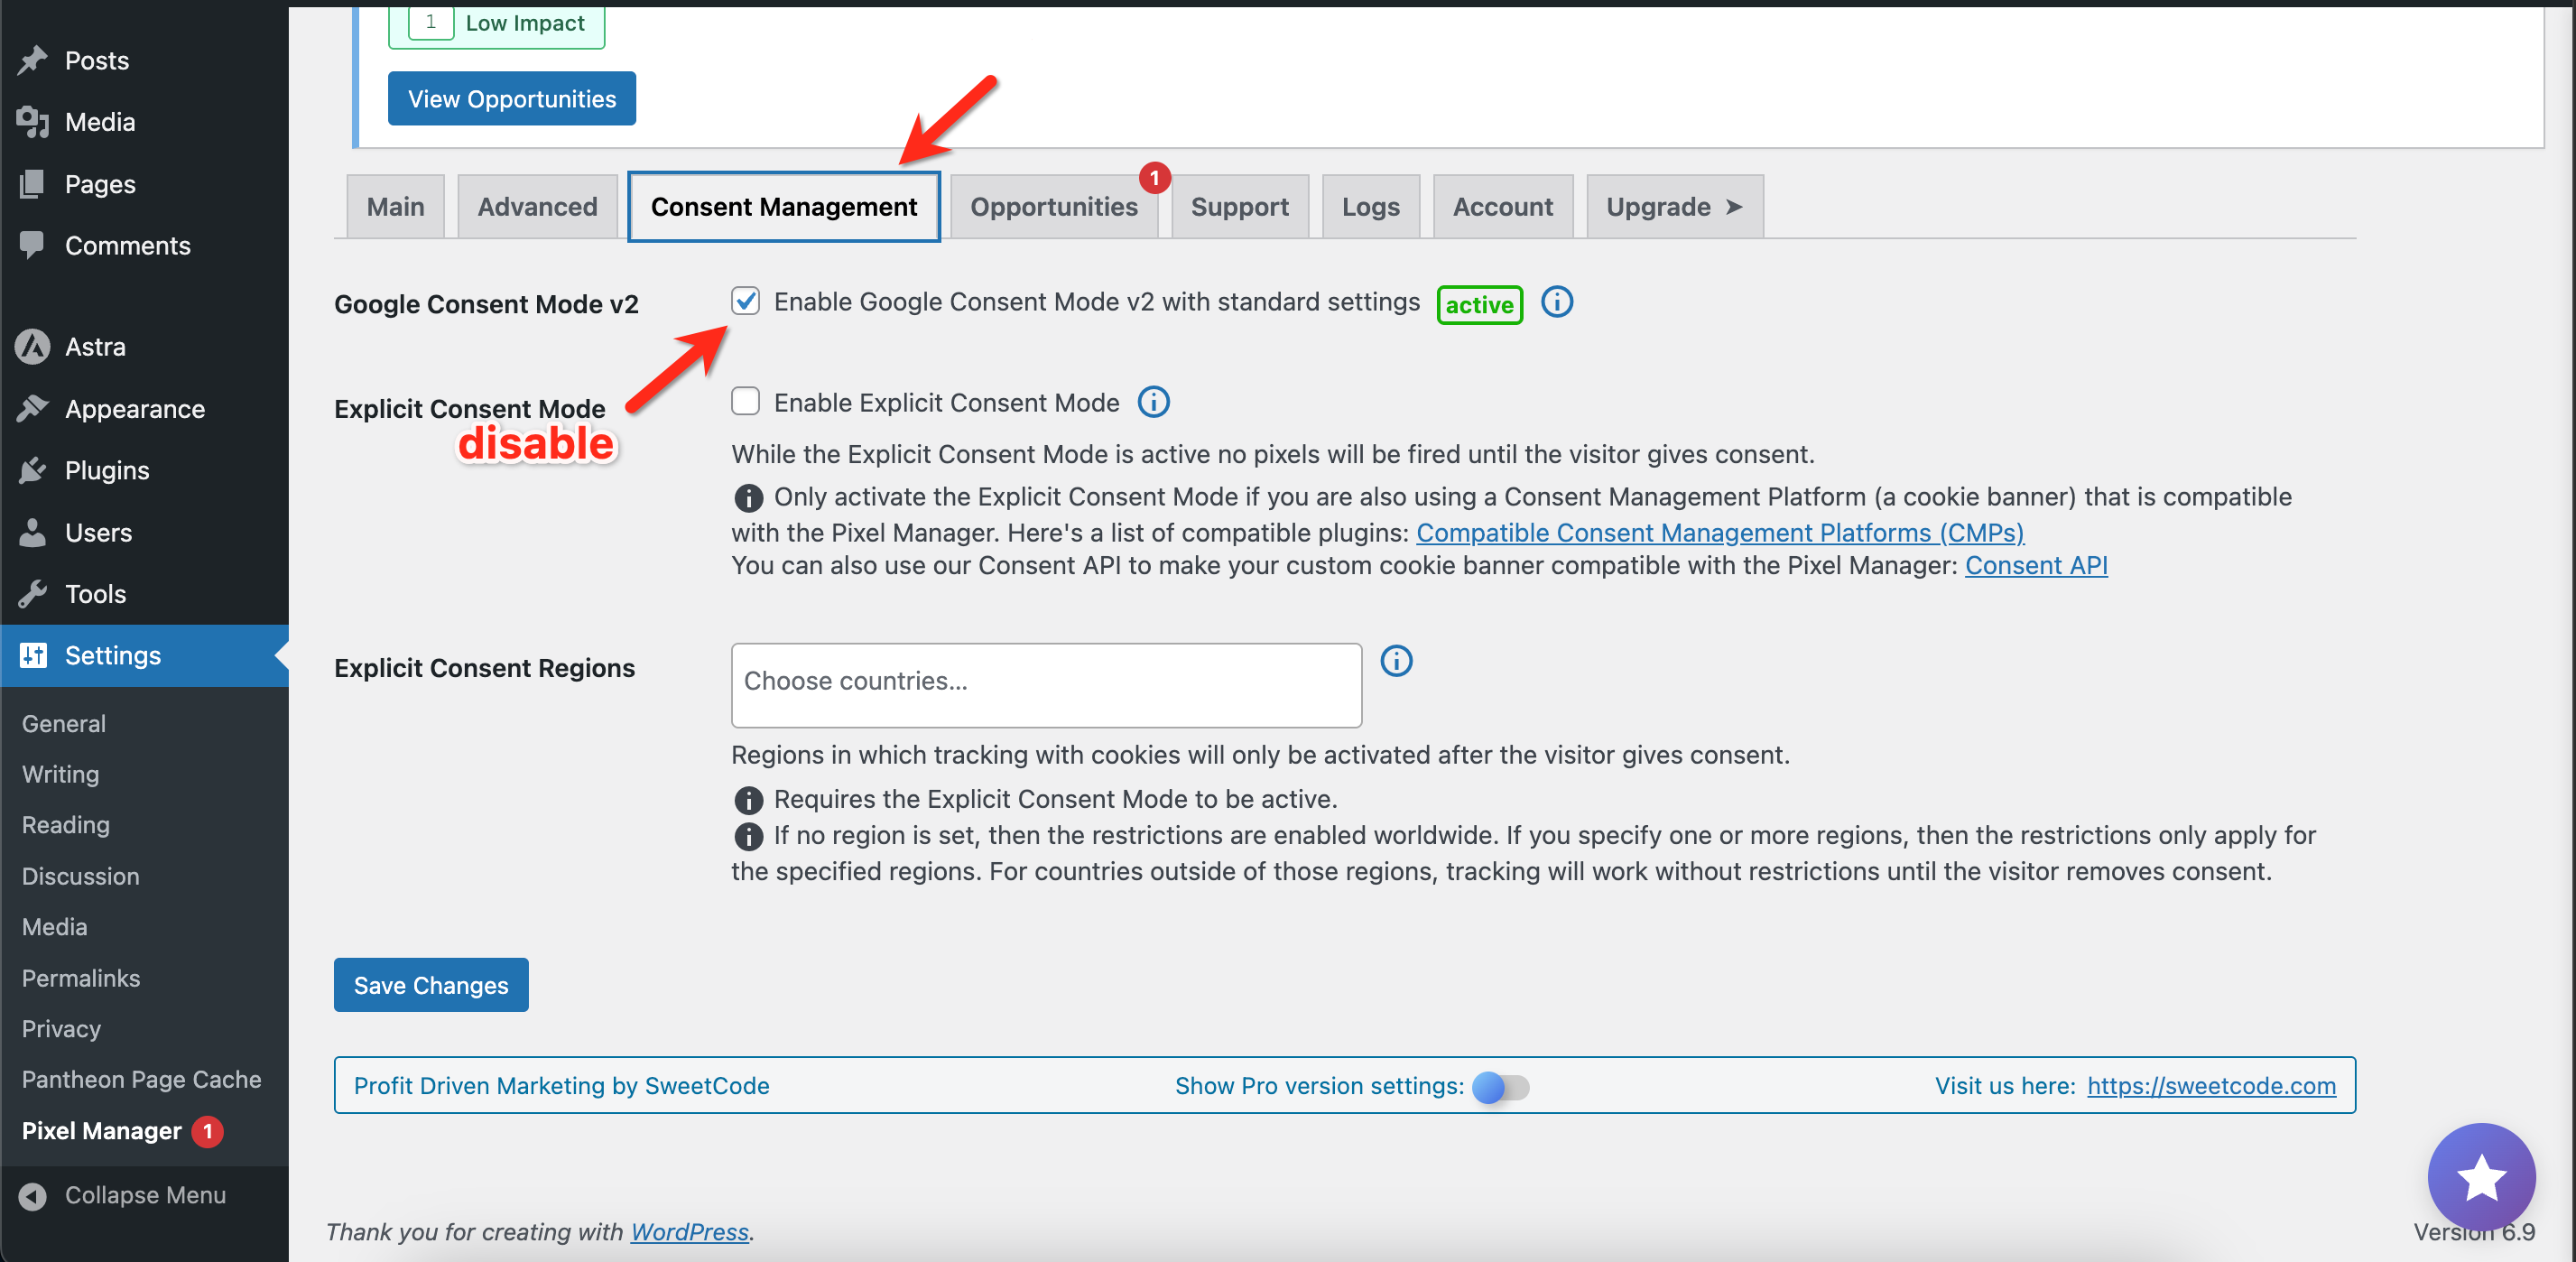
Solution:
If you are using Pixel Manager for WooCommerce, open the plugin settings in WordPress
Locate the Google Consent Mode v2 option
Disable Google Consent Mode v2 (standard settings) within the plugin
Ensure that Consently is the only tool managing consent on the site
Clear any site and plugin caches, then test again in an incognito window
This helps avoid duplicate consent signals and ensures Consently can properly control cookie blocking and consent behavior.
Related Topics
Direct HTML Installation — Alternative installation method with faster load times
Platform Compatibility — Installation guides for specific platforms