

TL;DR: WordPress Dashboard → Appearance → Theme File Editor → header.php → Paste script before </head> → Save.Your consent banner will appear on all pages.
Overview
WordPress offers several ways to add the Consently script to your site. The most common method is editing your theme's header file, though plugins and functions.php alternatives provide safer options for sites with custom themes or frequent updates.
Before You Begin
Make sure you have:
WordPress admin access with theme editing permissions
A backup of your site (recommended before editing theme files)
Time required: About 5 minutes
Method 1: Edit Theme Header File
Step 1: Access the theme editor
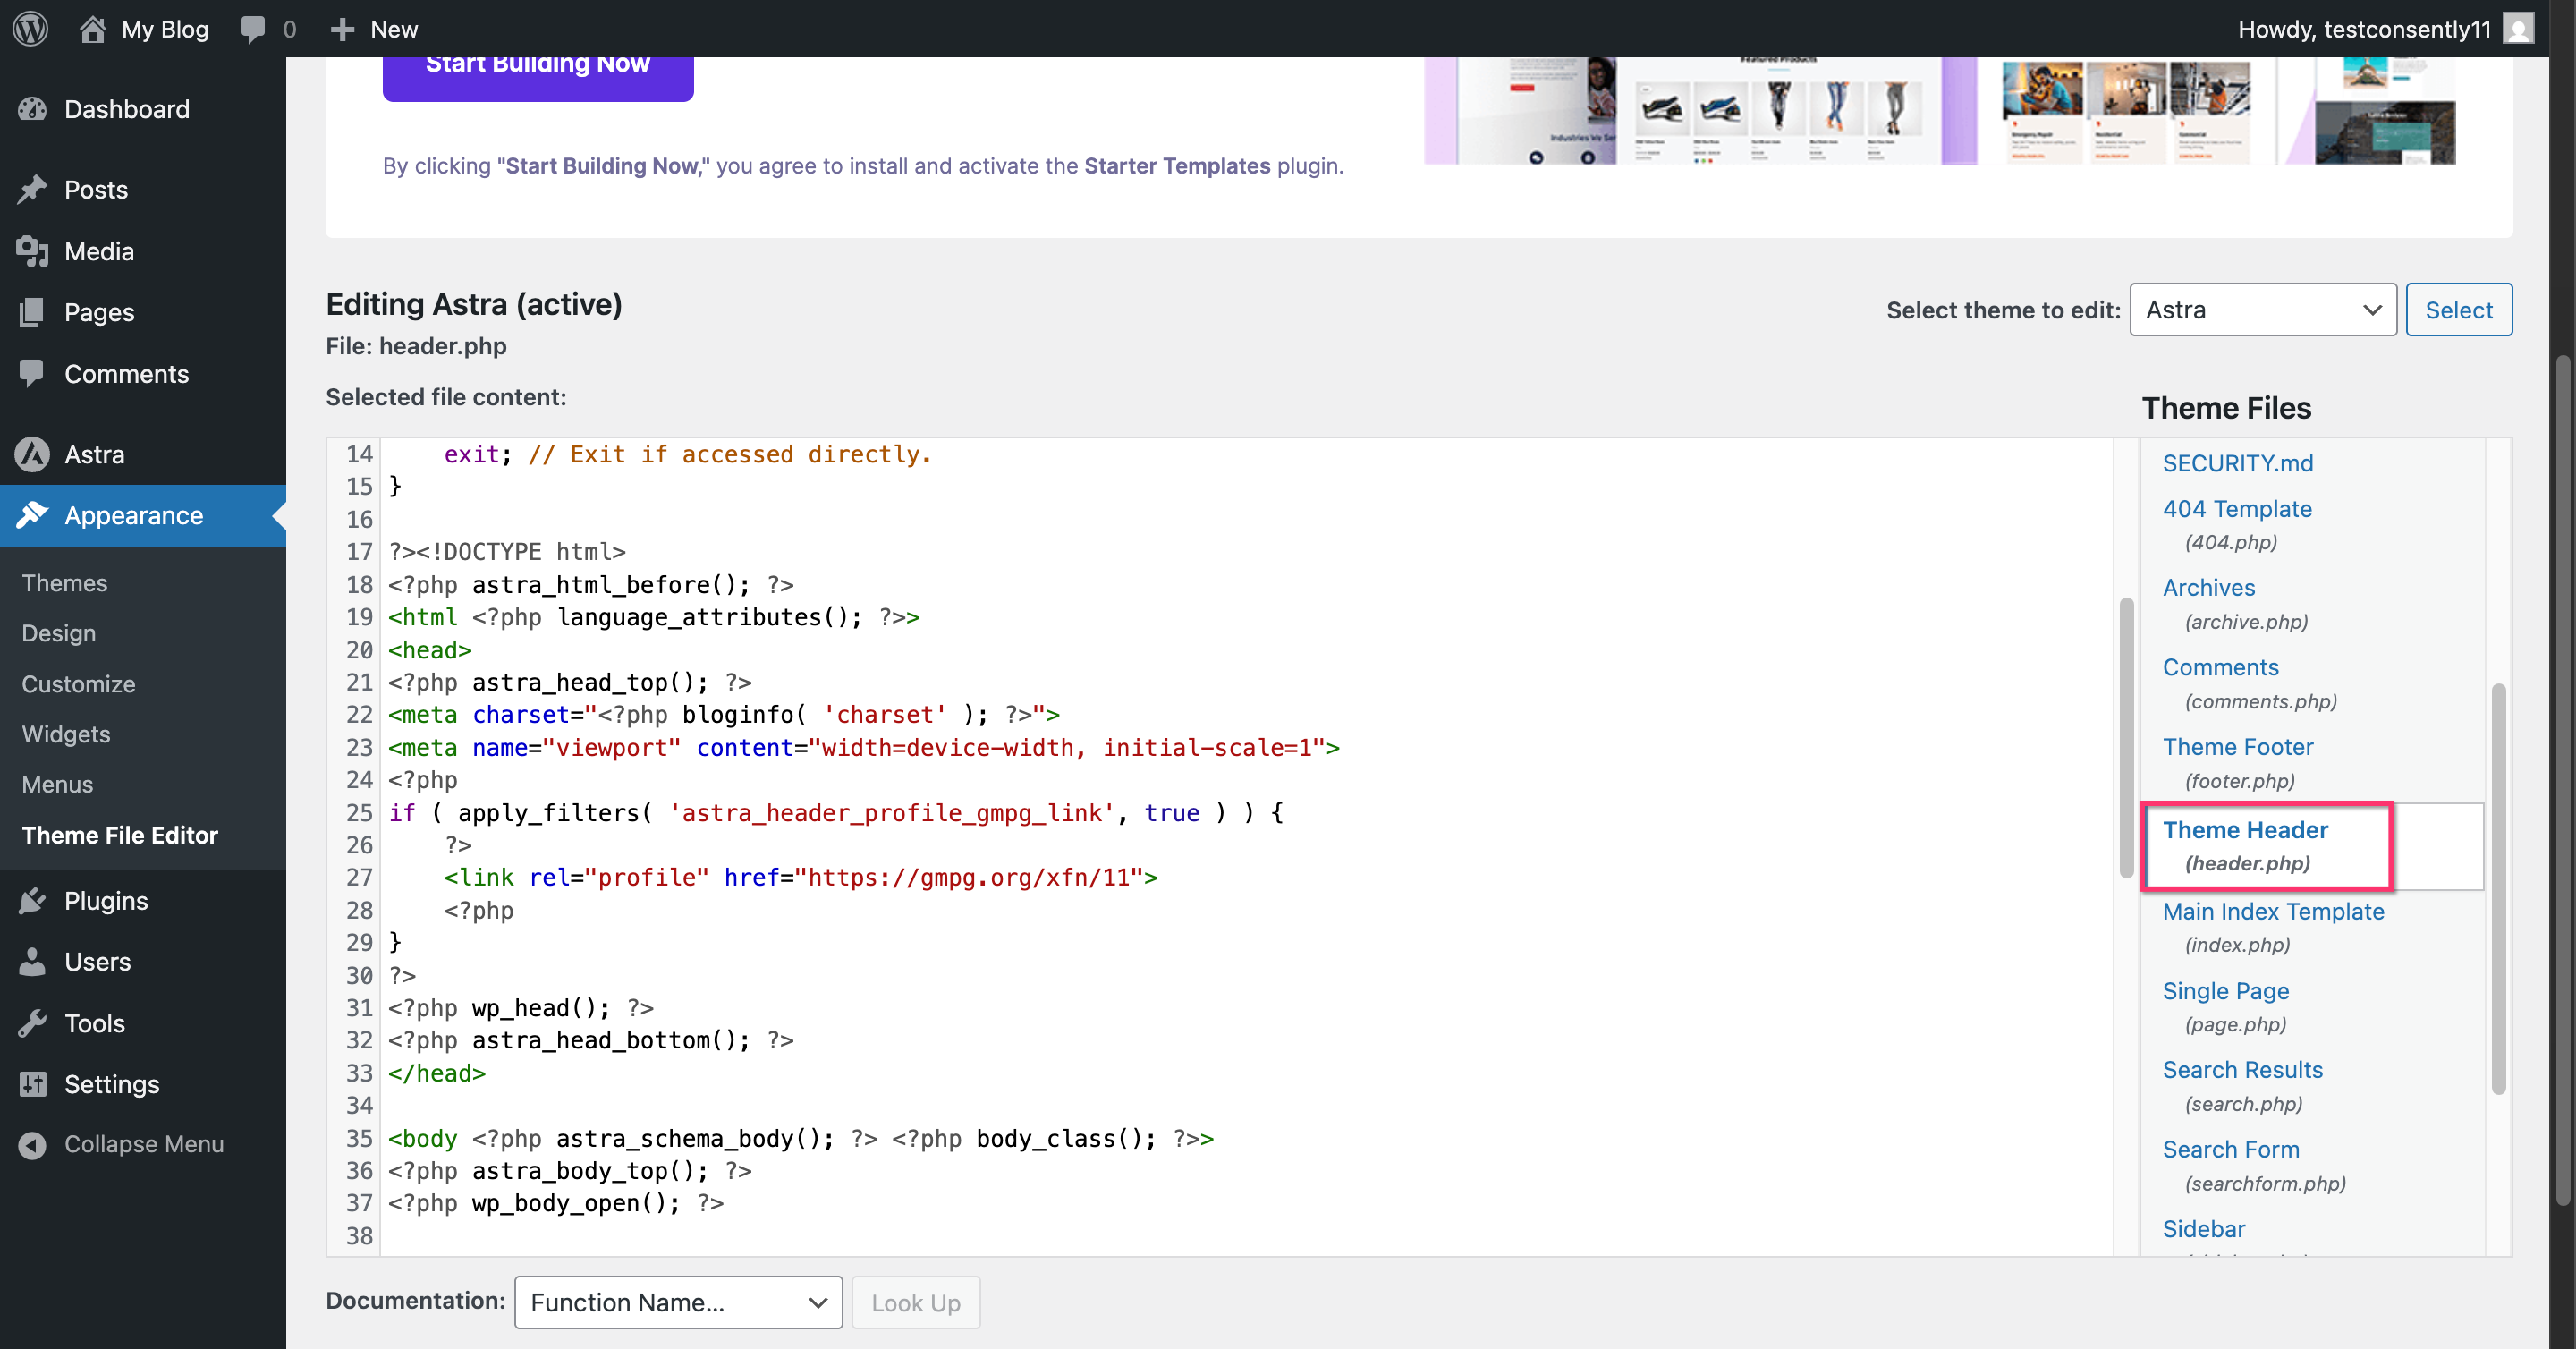
Navigate to Appearance → Theme File Editor in your WordPress dashboard.

⚠️ Important: You may see a warning about editing theme files. This is normal—proceed carefully and make sure you have a backup.
Step 2: Locate header.php
In the right sidebar under "Theme Files," click header.php to open it.
Step 3: Find the closing head tag
Scroll through the header.php file until you find the </head> tag. This is usually near the top of the file.

Step 4: Paste the Consently script
Place your cursor on a new line just before the </head> tag, then paste your Consently embed script.
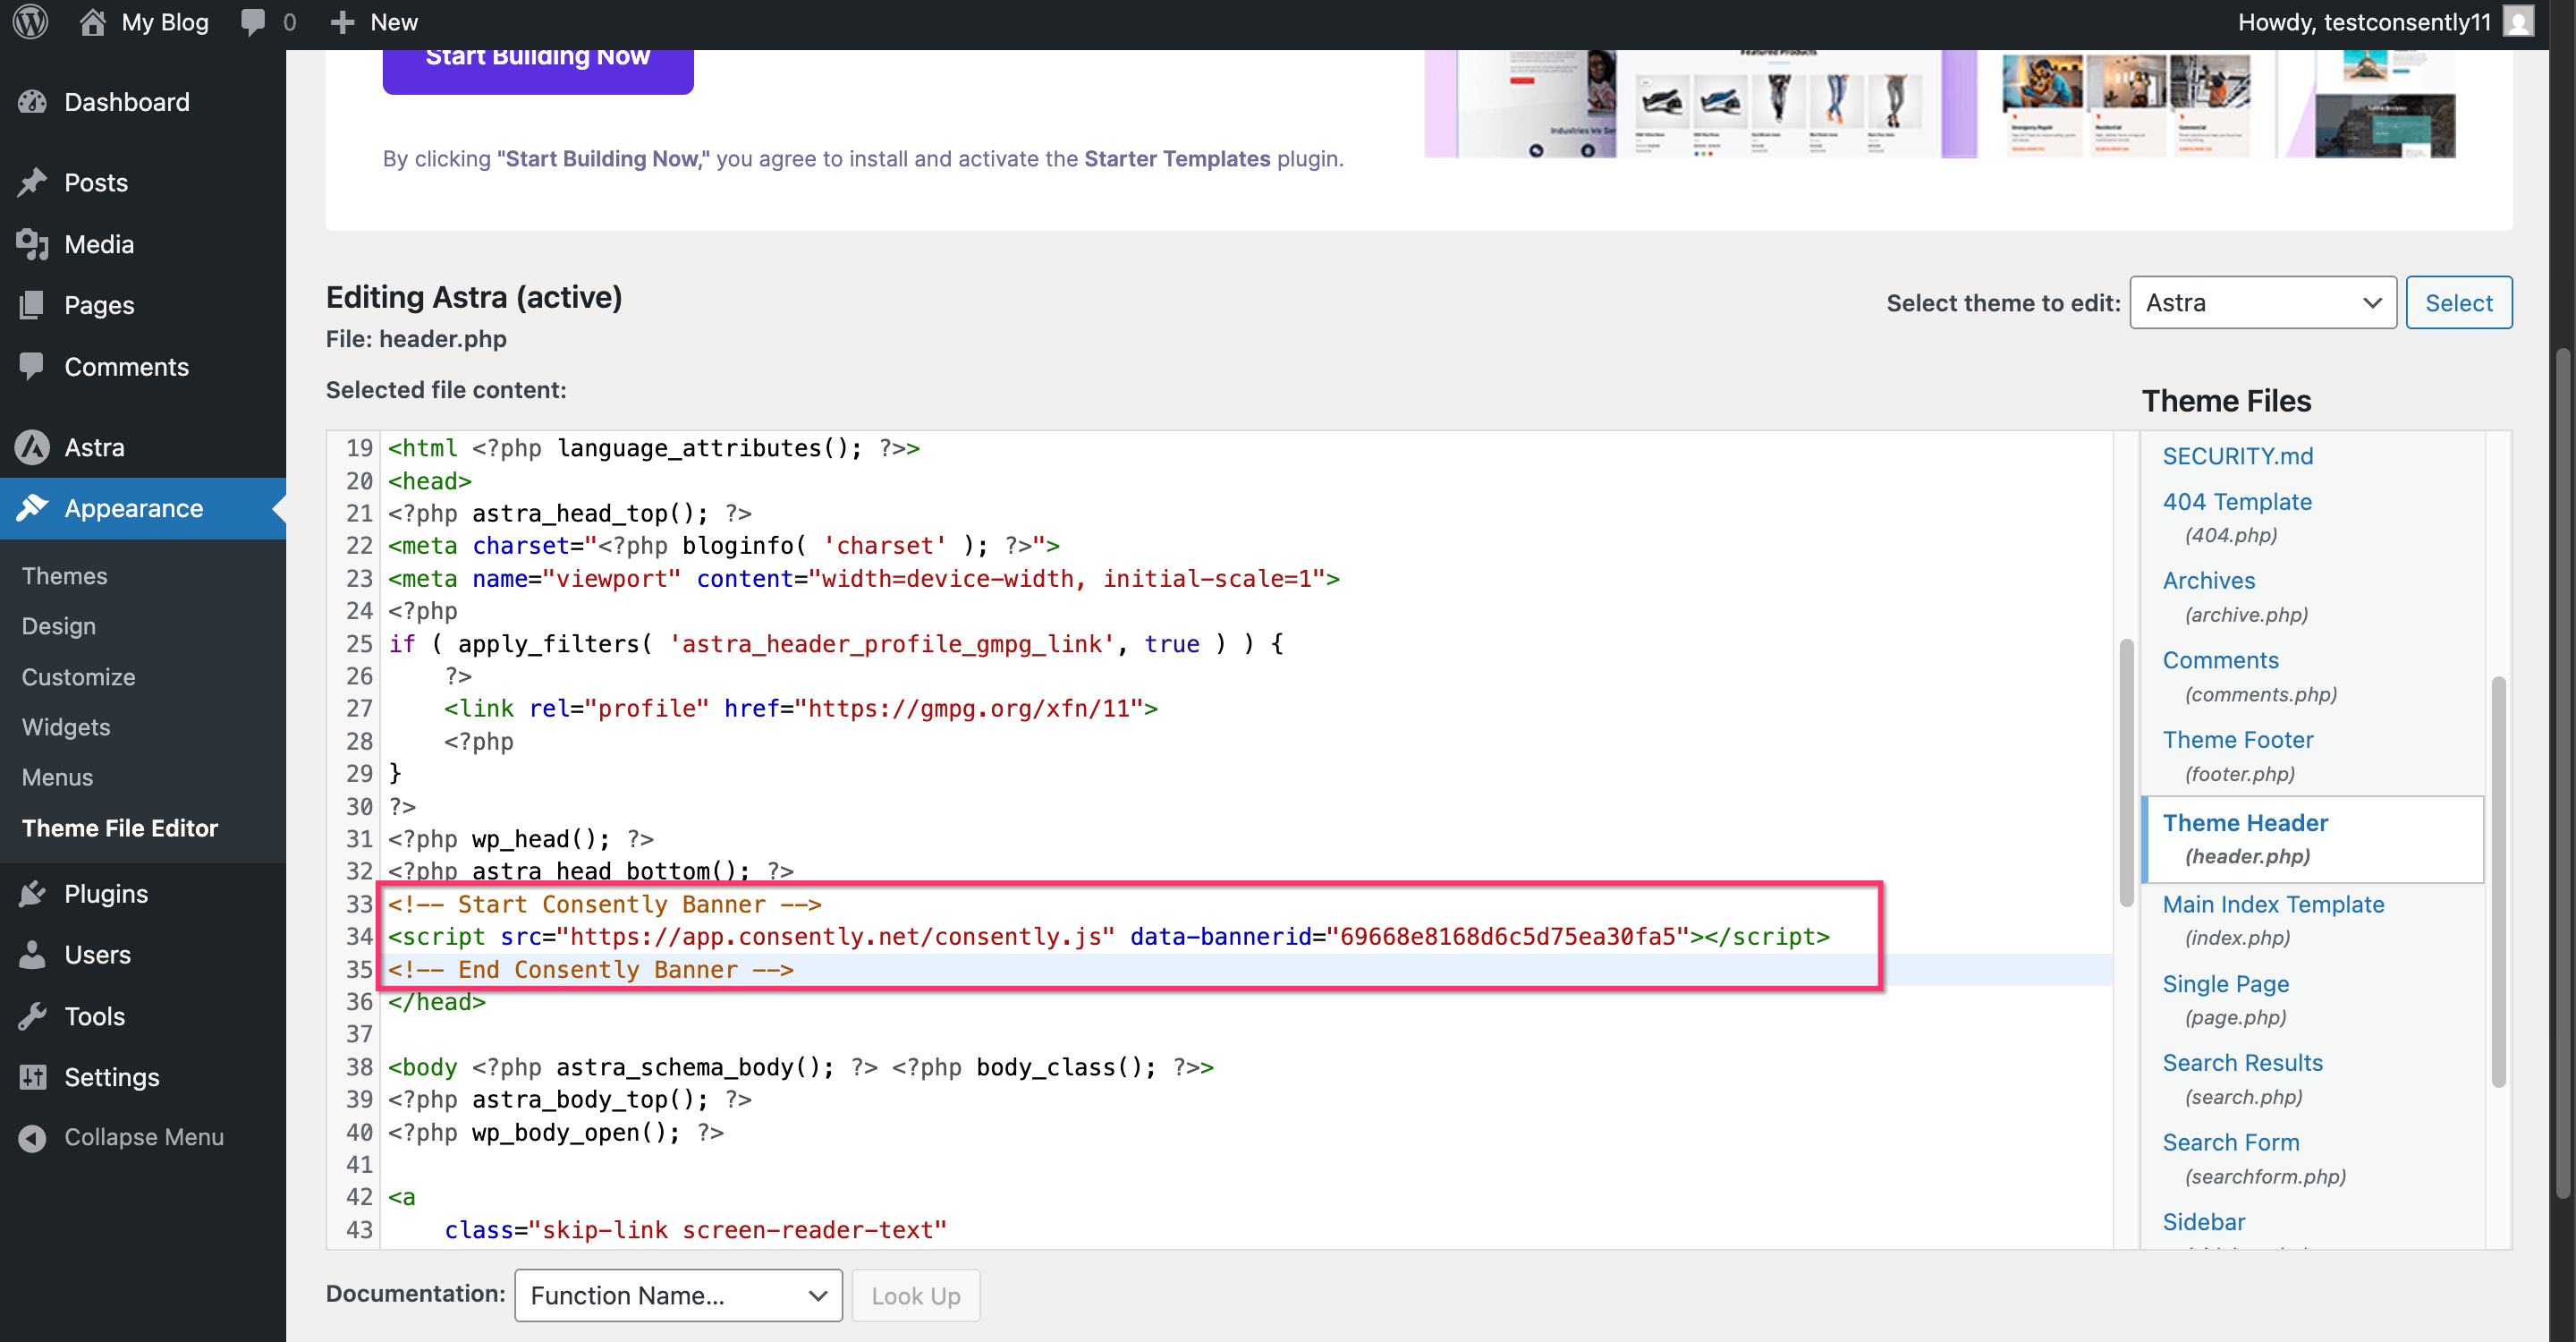
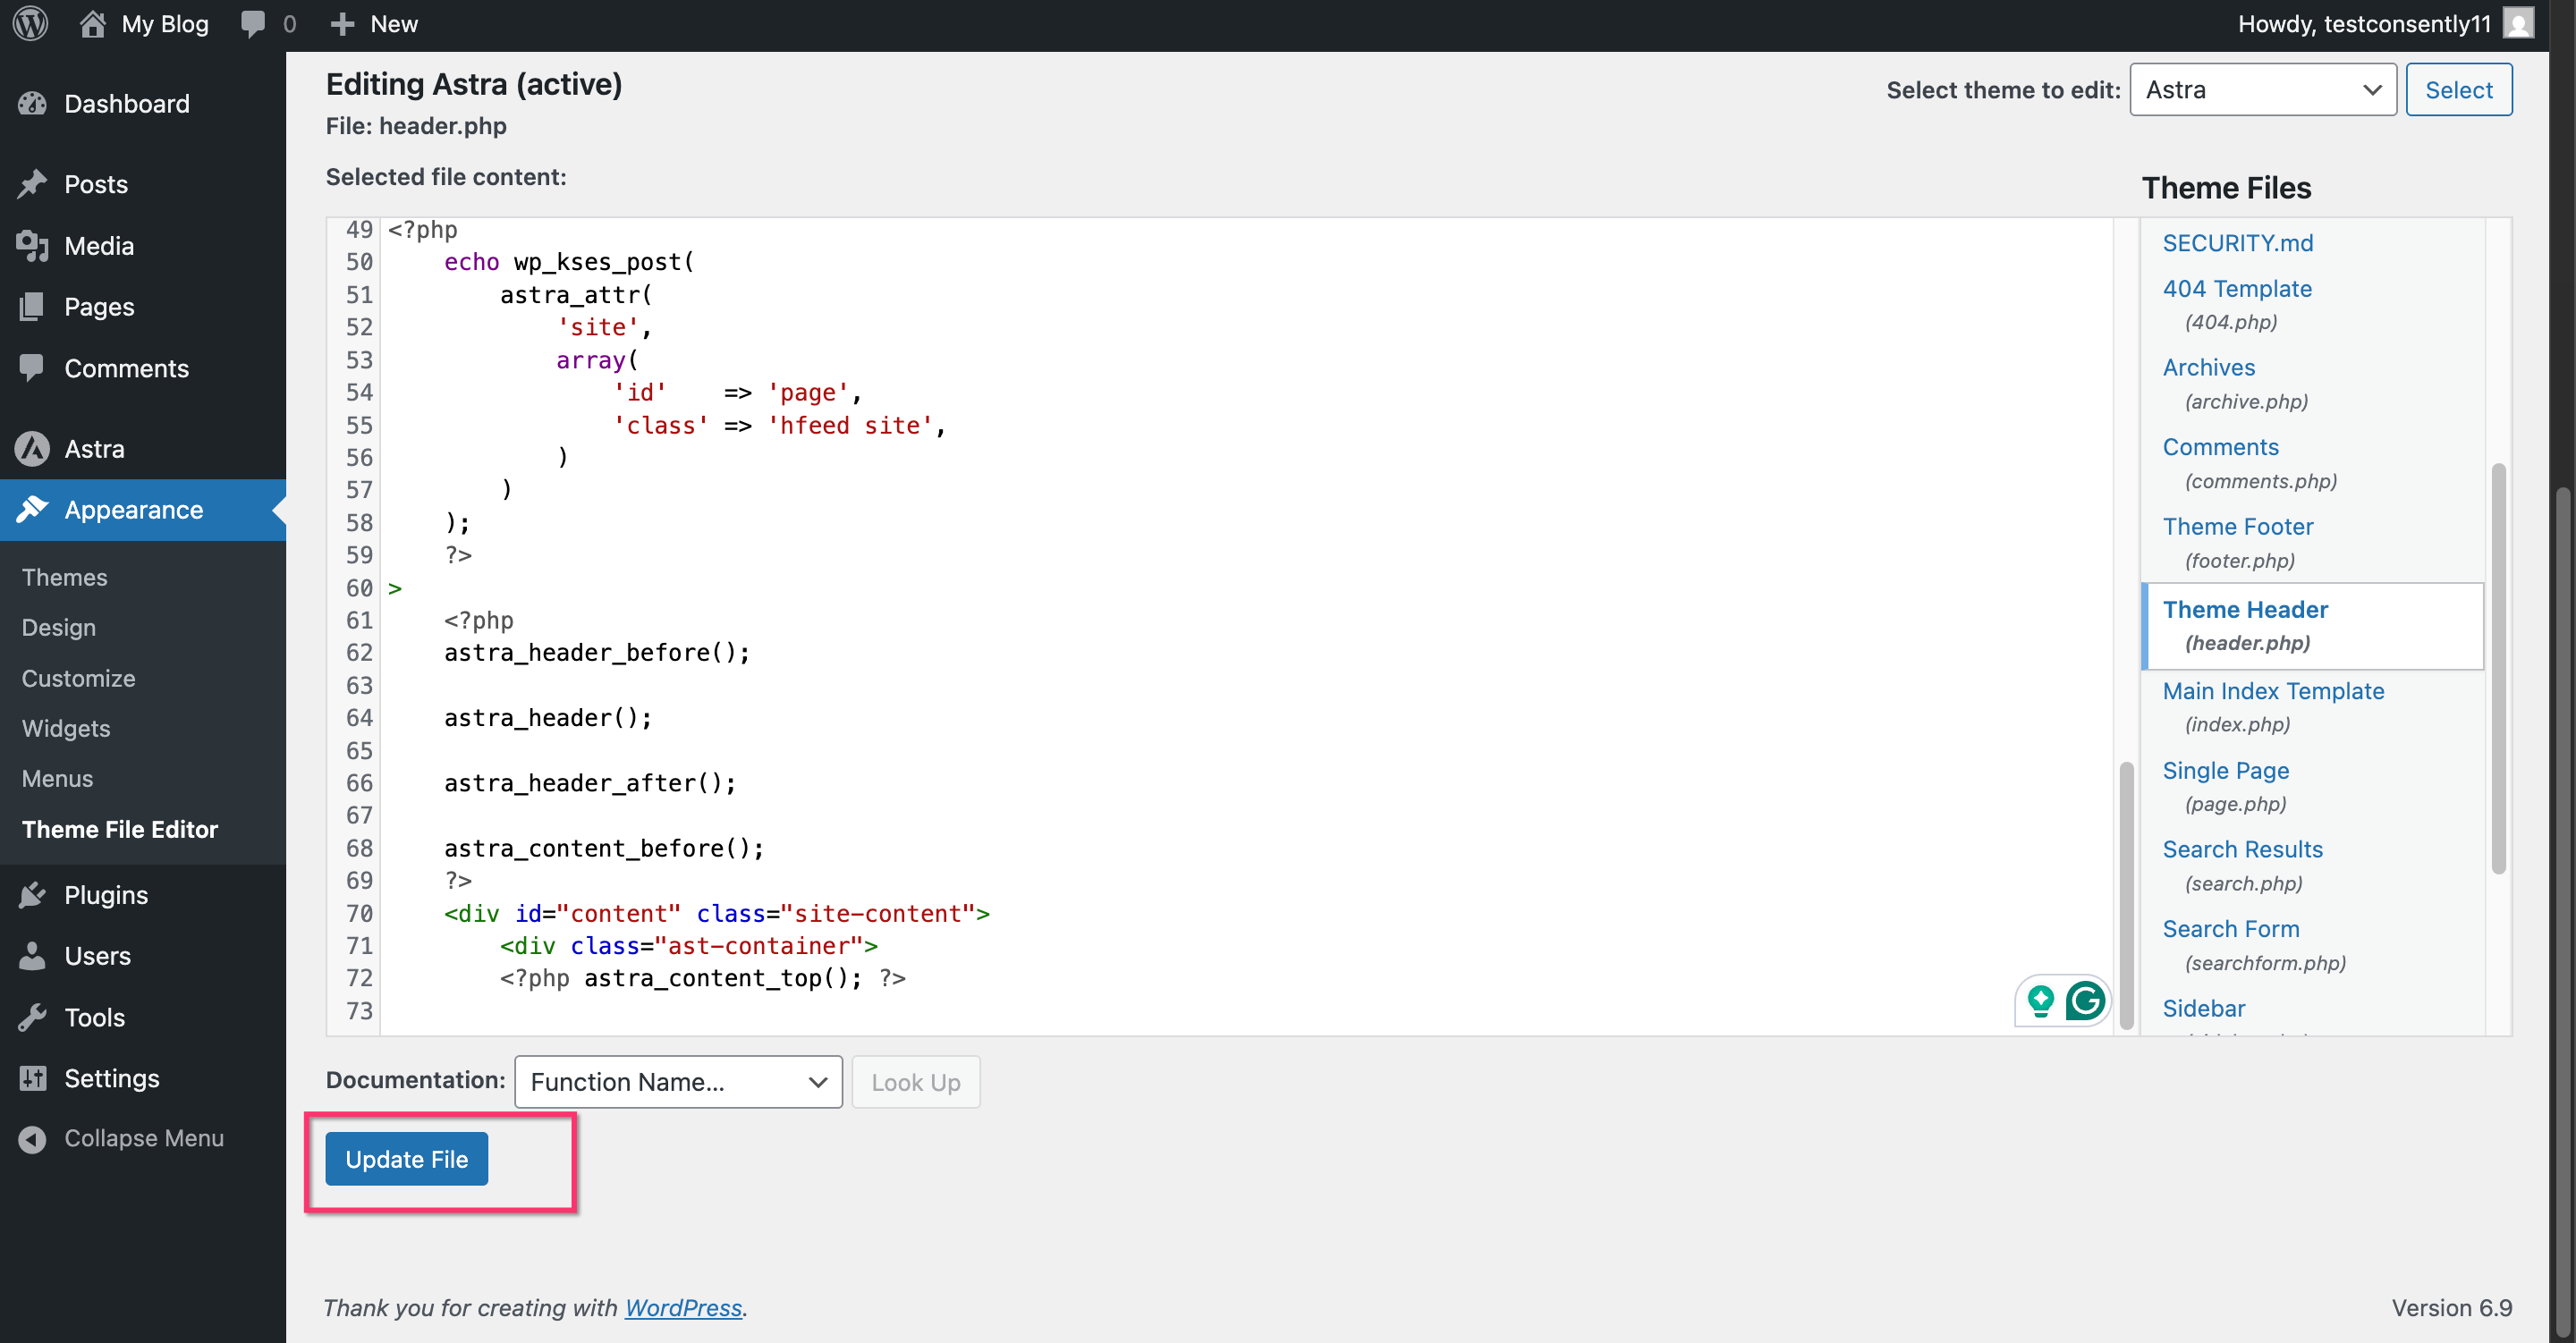
💡 Tip: Add a comment above the script (like <!-- Consently Cookie Banner -->) to make it easy to find later.Step 5: Save the file
Click Update File at the bottom of the page.
Done!
Your consent banner is now installed on all pages of your WordPress site.
✅ Success indicator: Visit your website in a new incognito/private browser window to see the banner appear.
Method 2: Using a Header/Footer Plugin
If you prefer not to edit theme files directly, header/footer plugins provide a safer alternative that survives theme updates.
Step 1: Install a header/footer plugin
Popular options include:
Insert Headers and Footers (by WPBeginner)
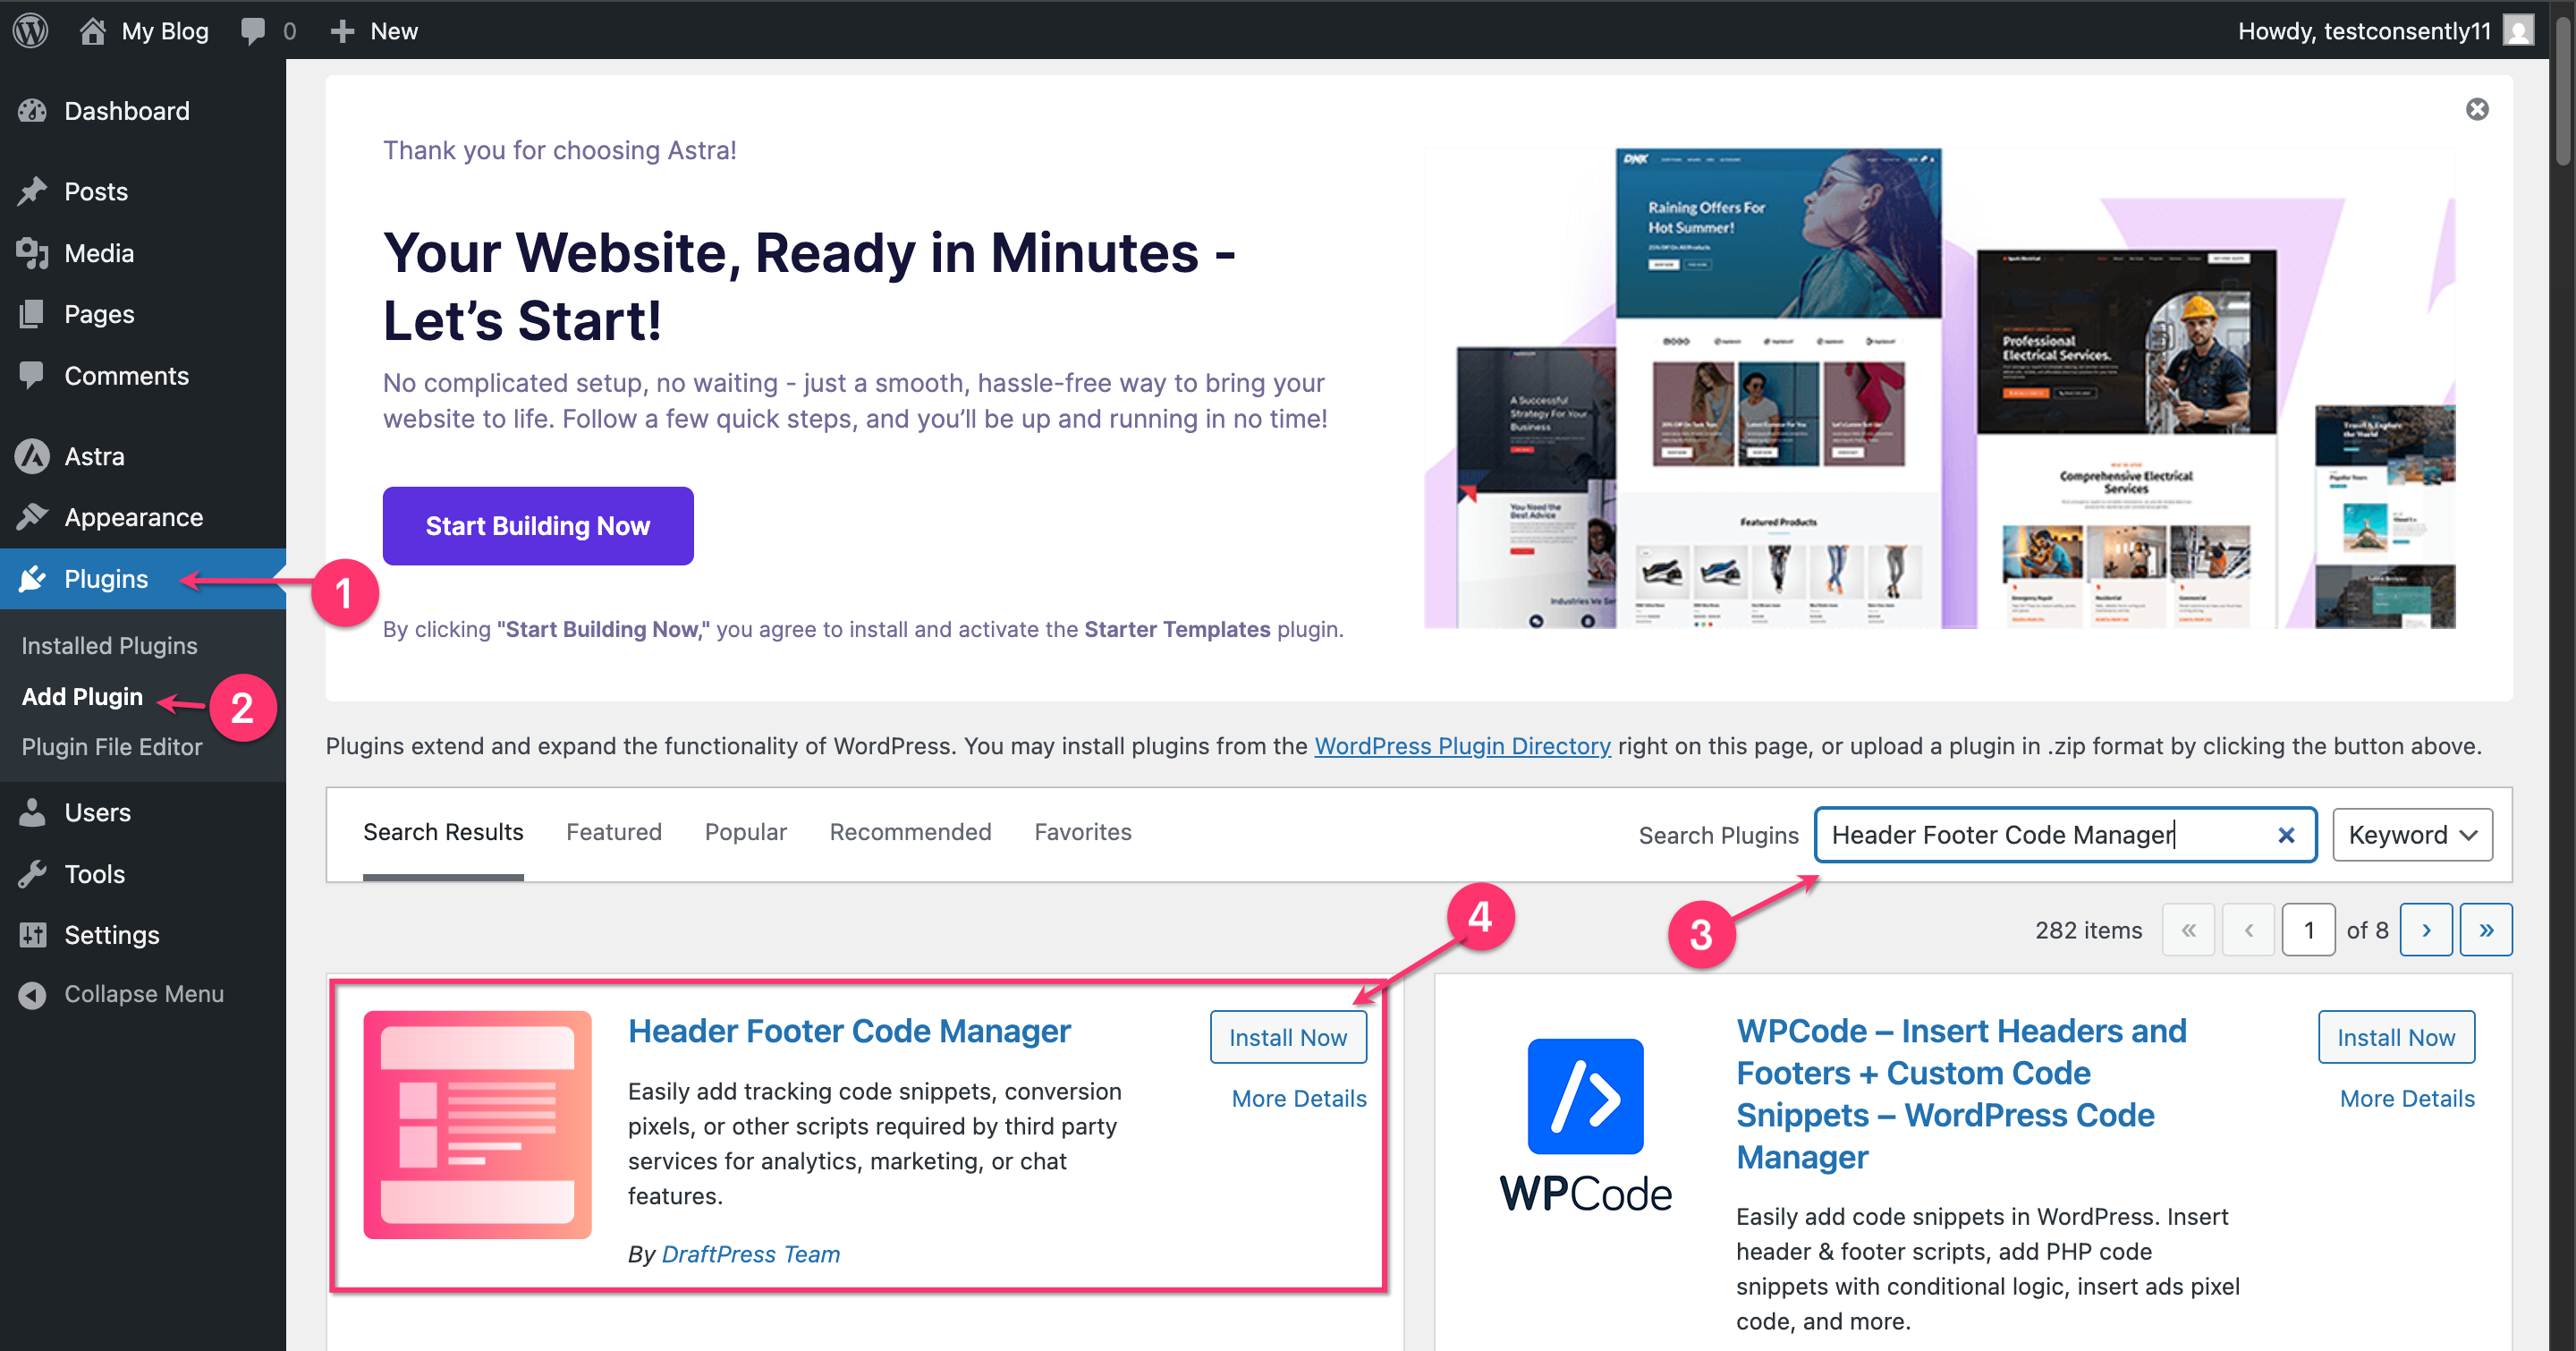
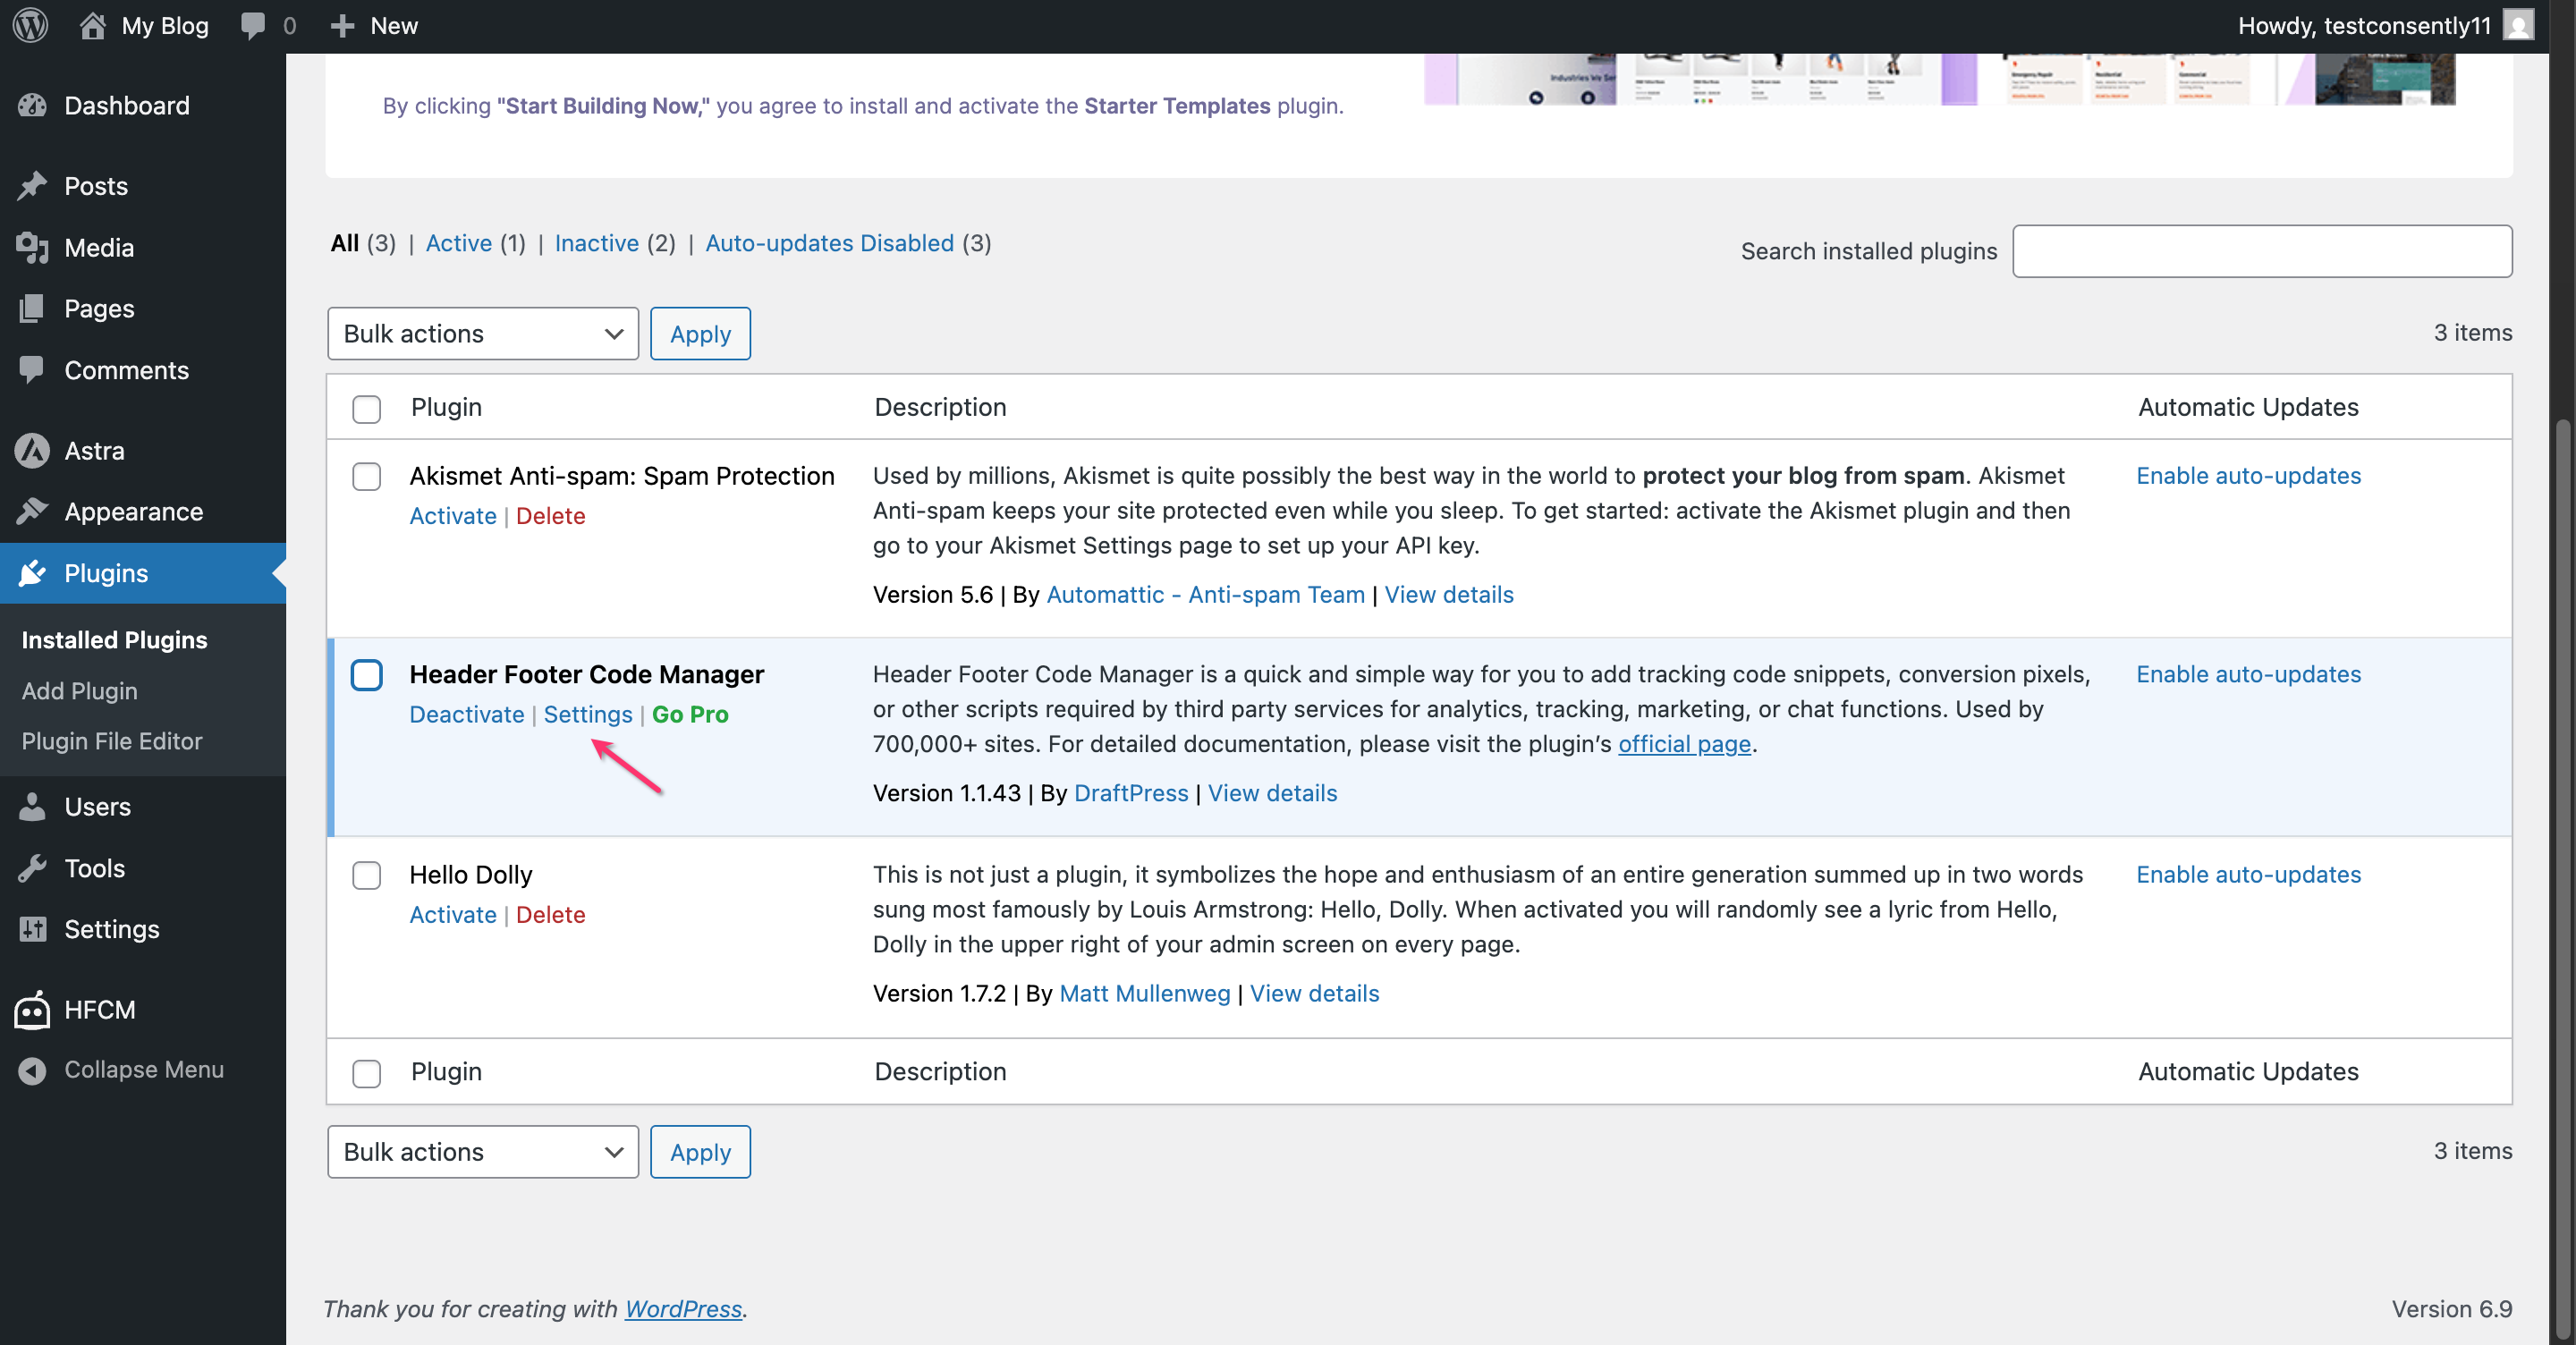
Header Footer Code Manager
Simple Custom CSS and JS
Navigate to Plugins → Add New, search for your chosen plugin, then install and activate it.
Step 2: Access plugin settings
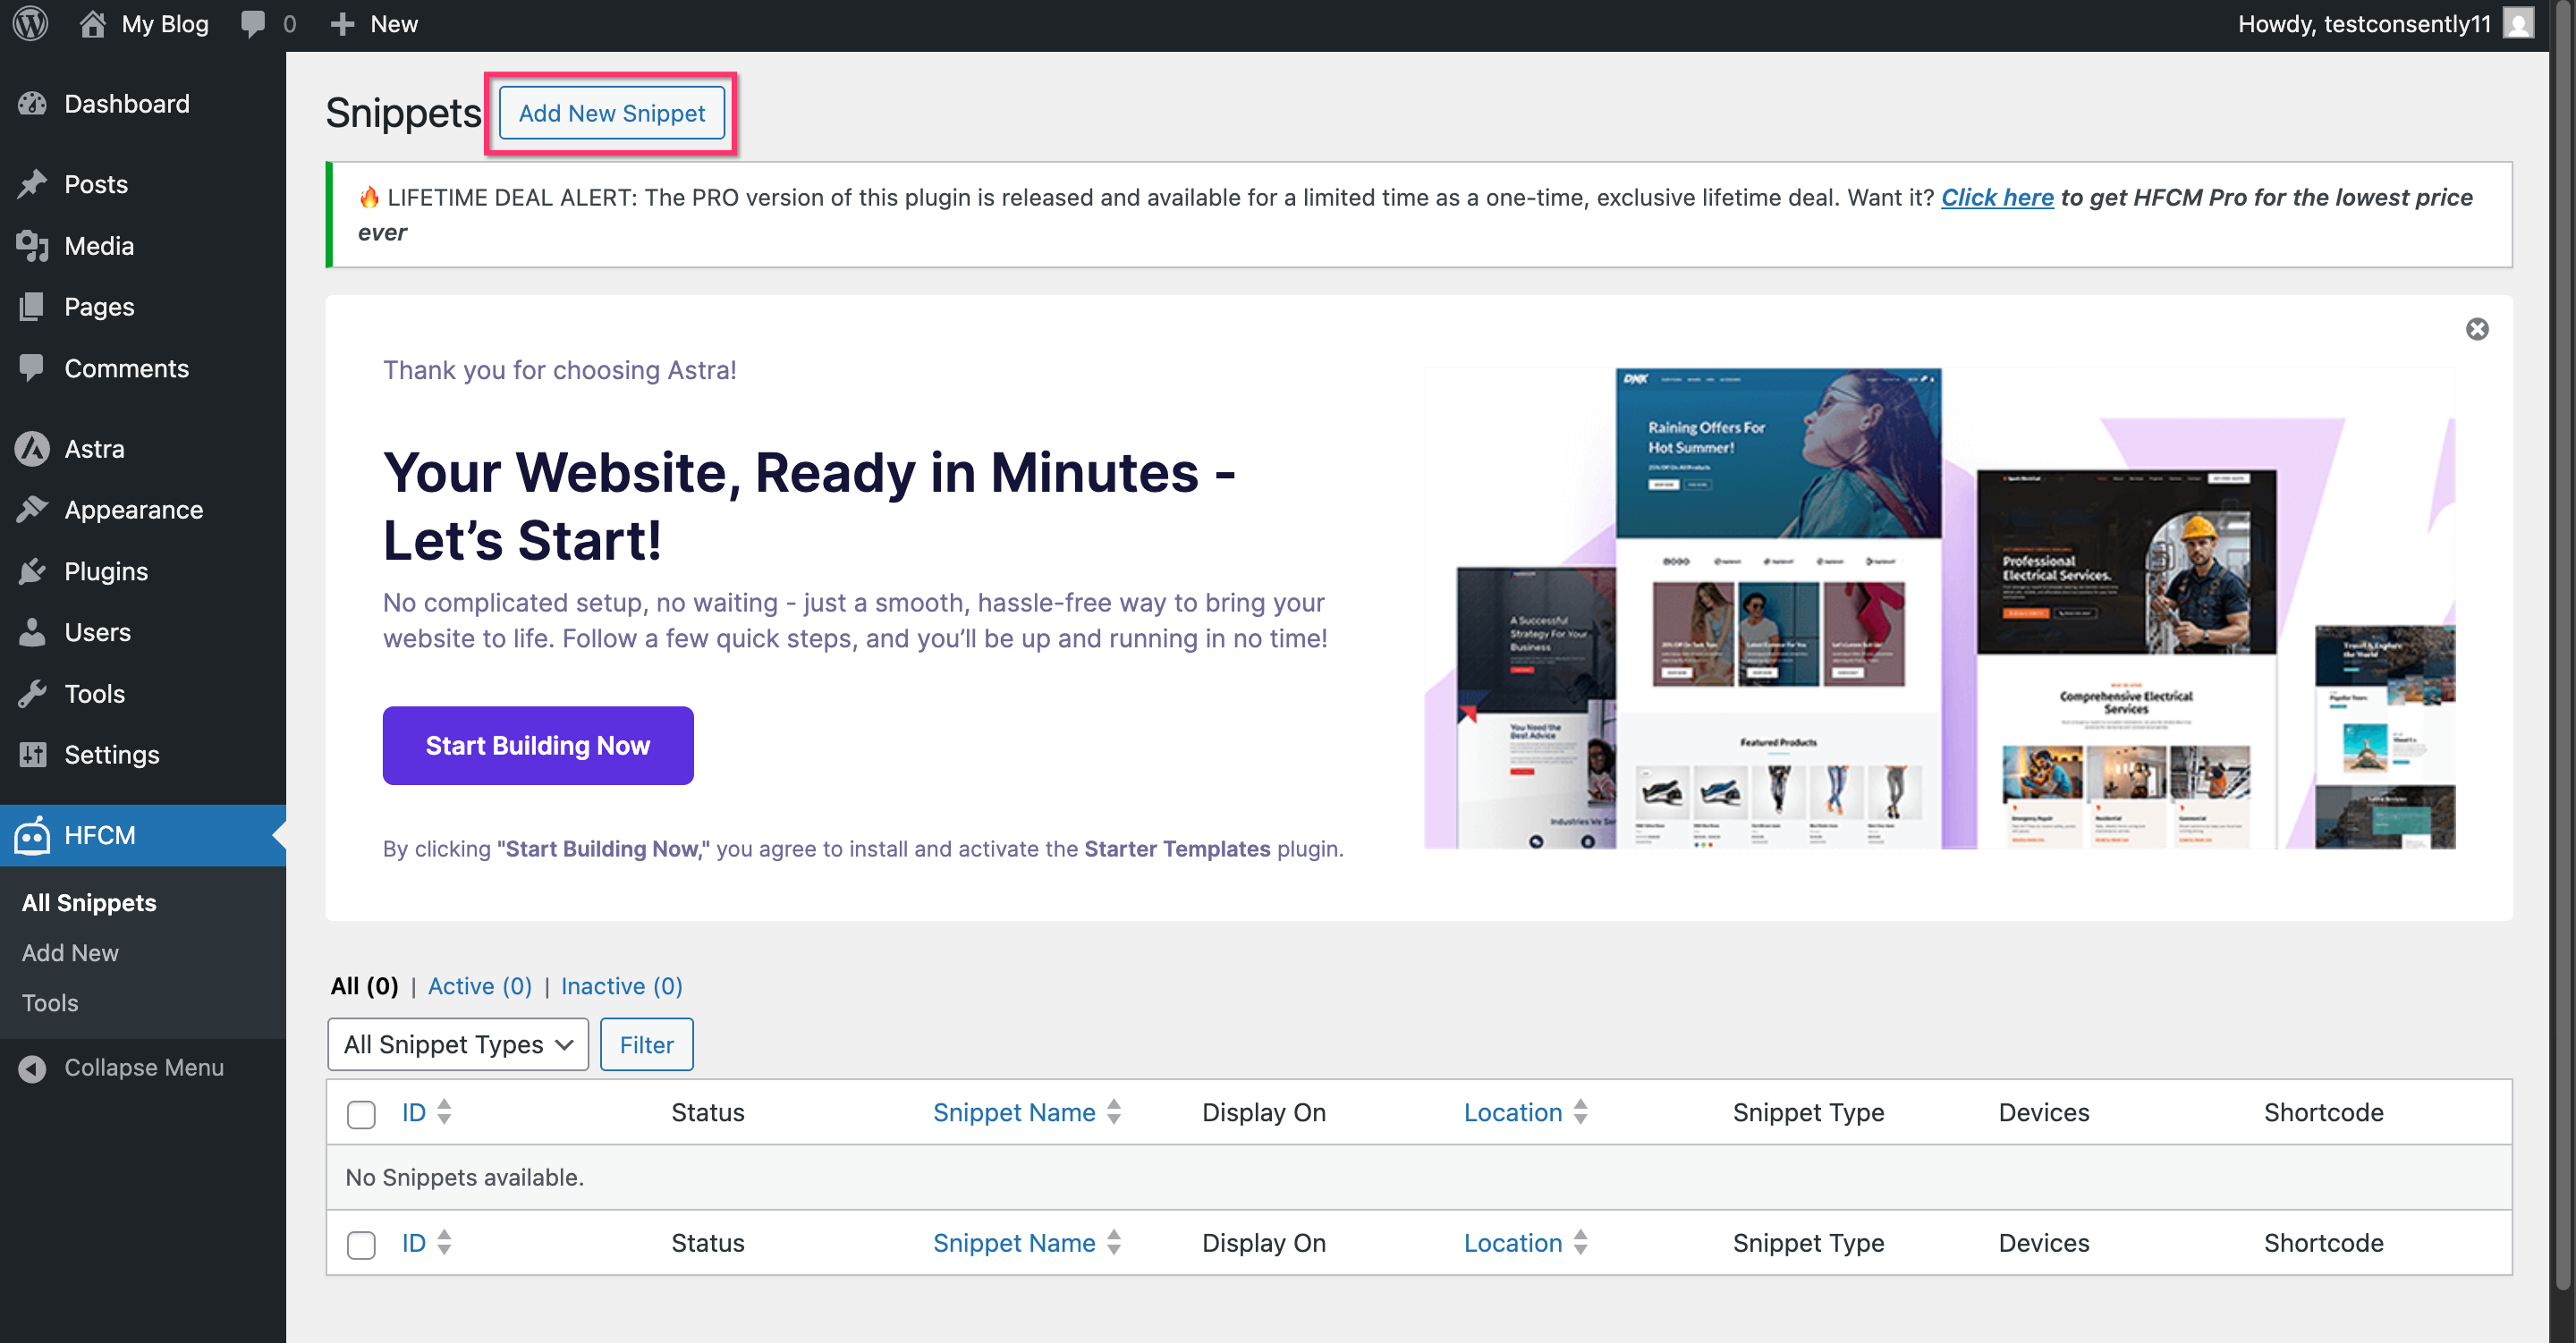
Find the plugin's settings page (usually under Settings or Tools in your dashboard).
Step 3: Paste script in header section
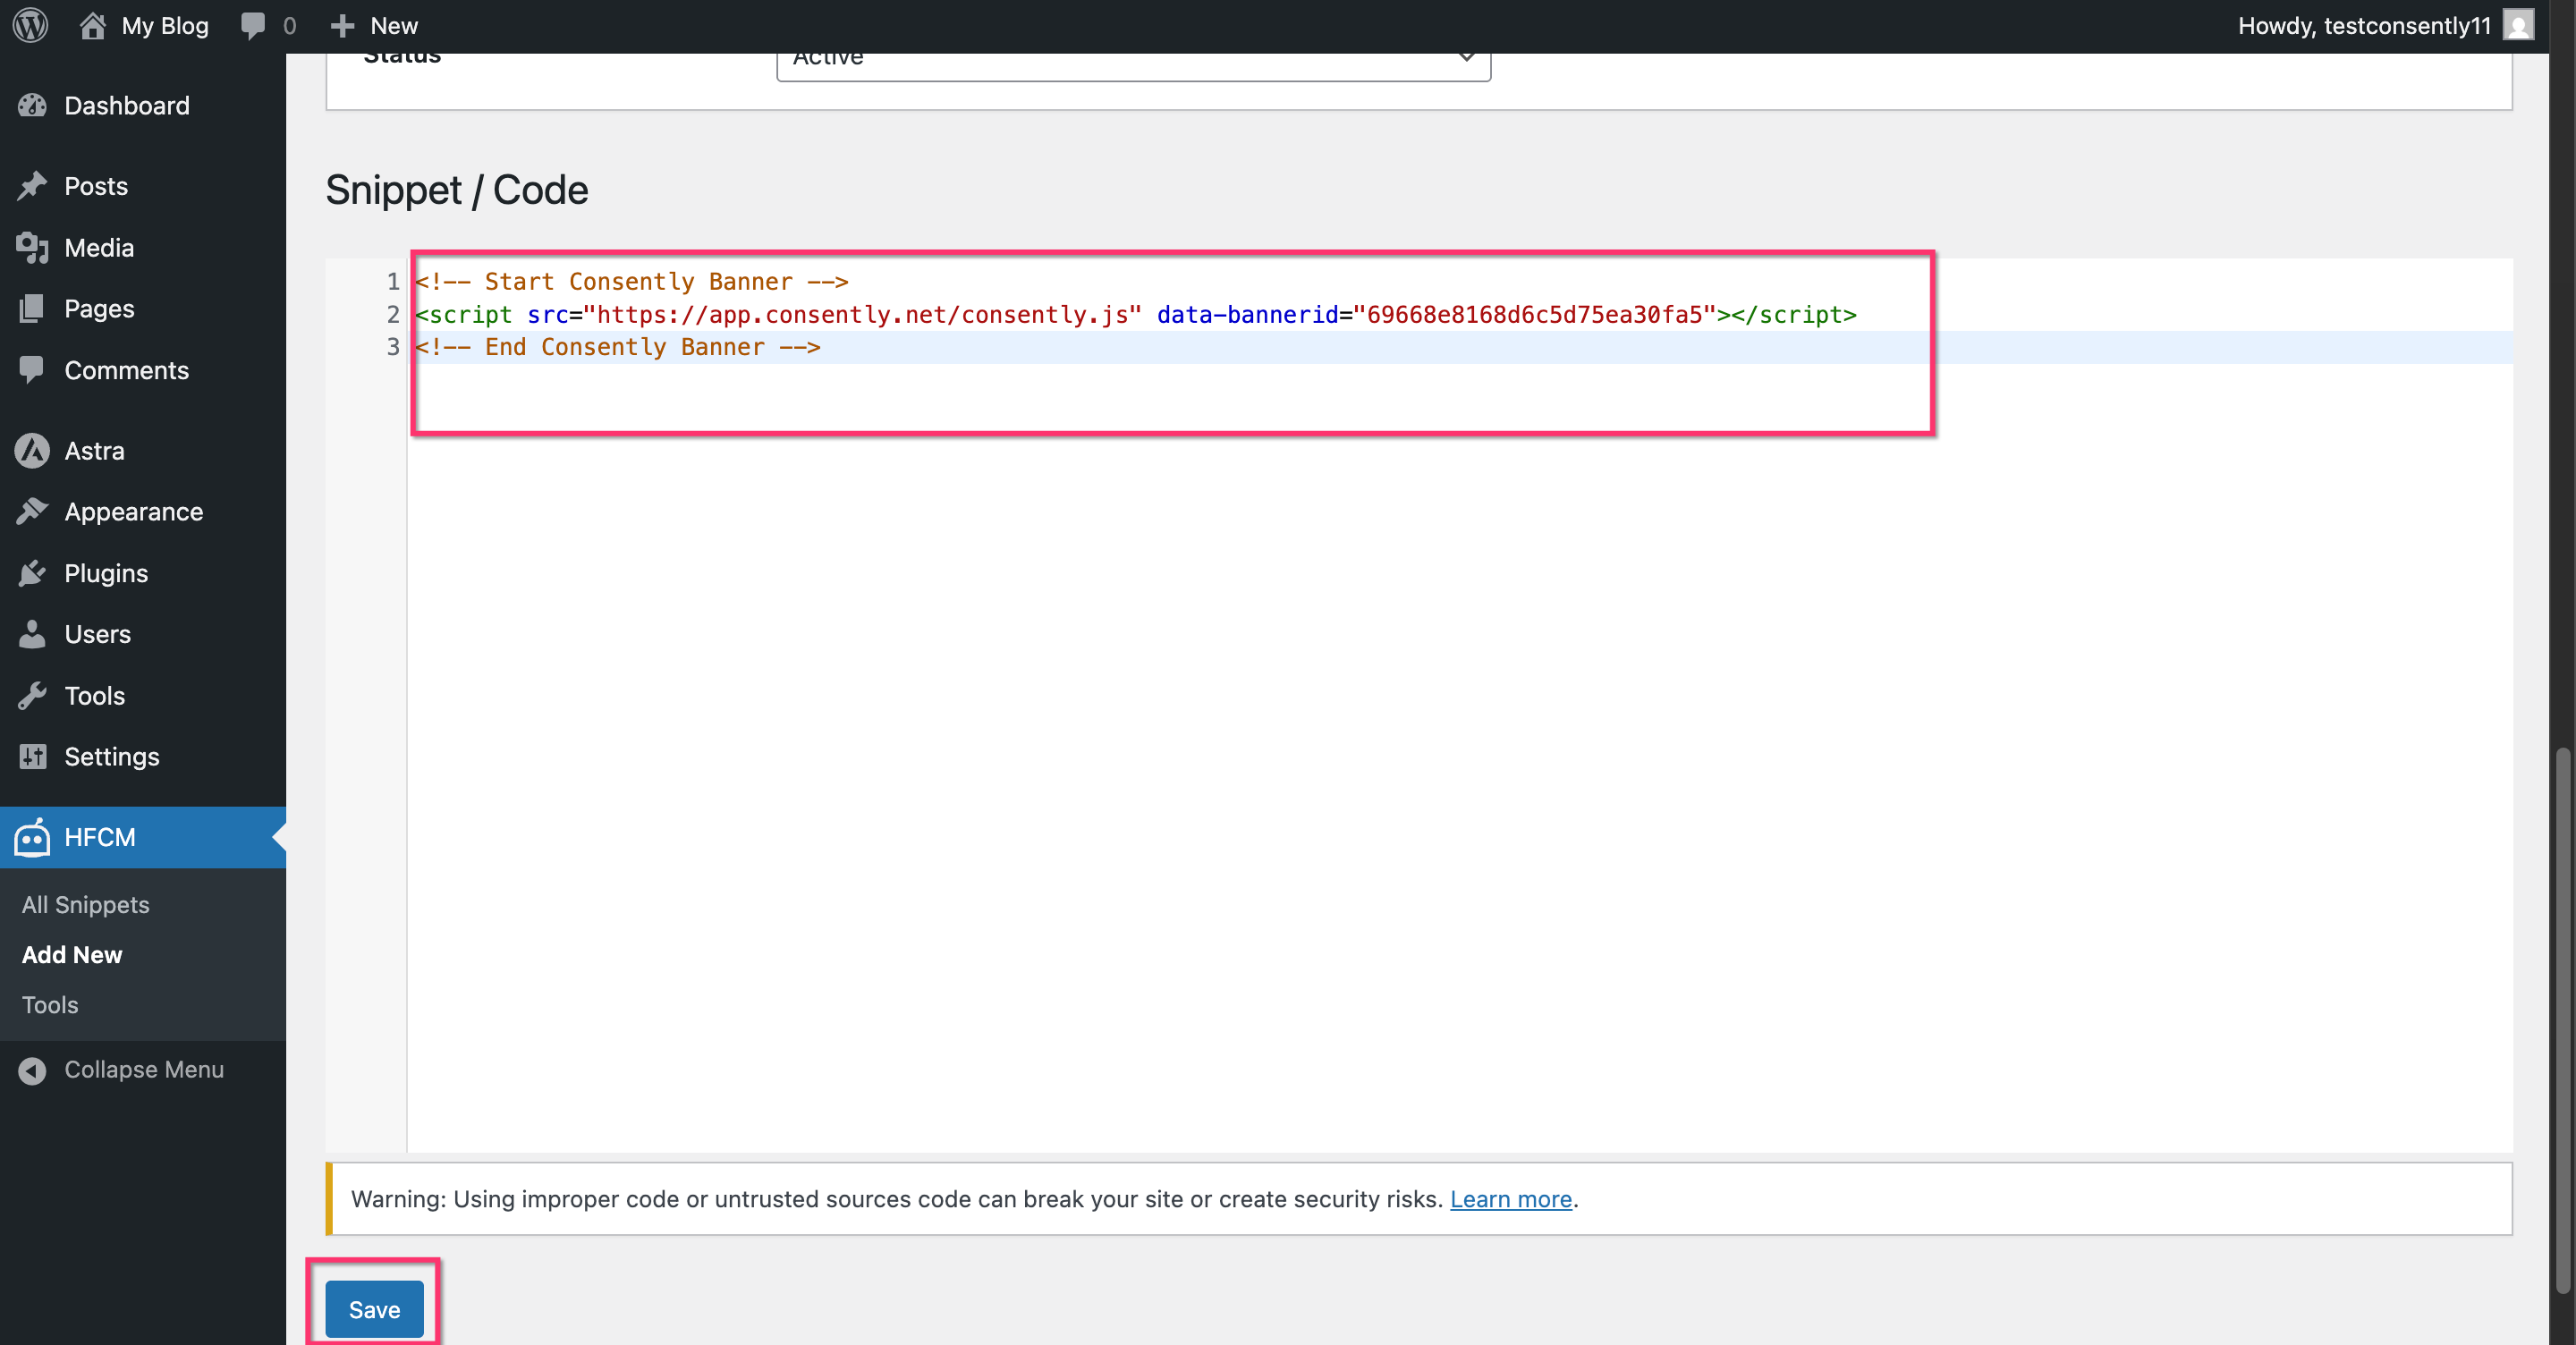
Locate the "Header" or "Scripts in Header" field and paste your Consently embed script.
Step 4: Save changes
Click Save or Update to apply the changes.
Done!
The plugin will automatically add your banner script to every page.
Method 3: Functions.php with wp_head Hook
For developers comfortable with PHP, you can add the script via your theme's functions.php file.
Step 1: Access functions.php
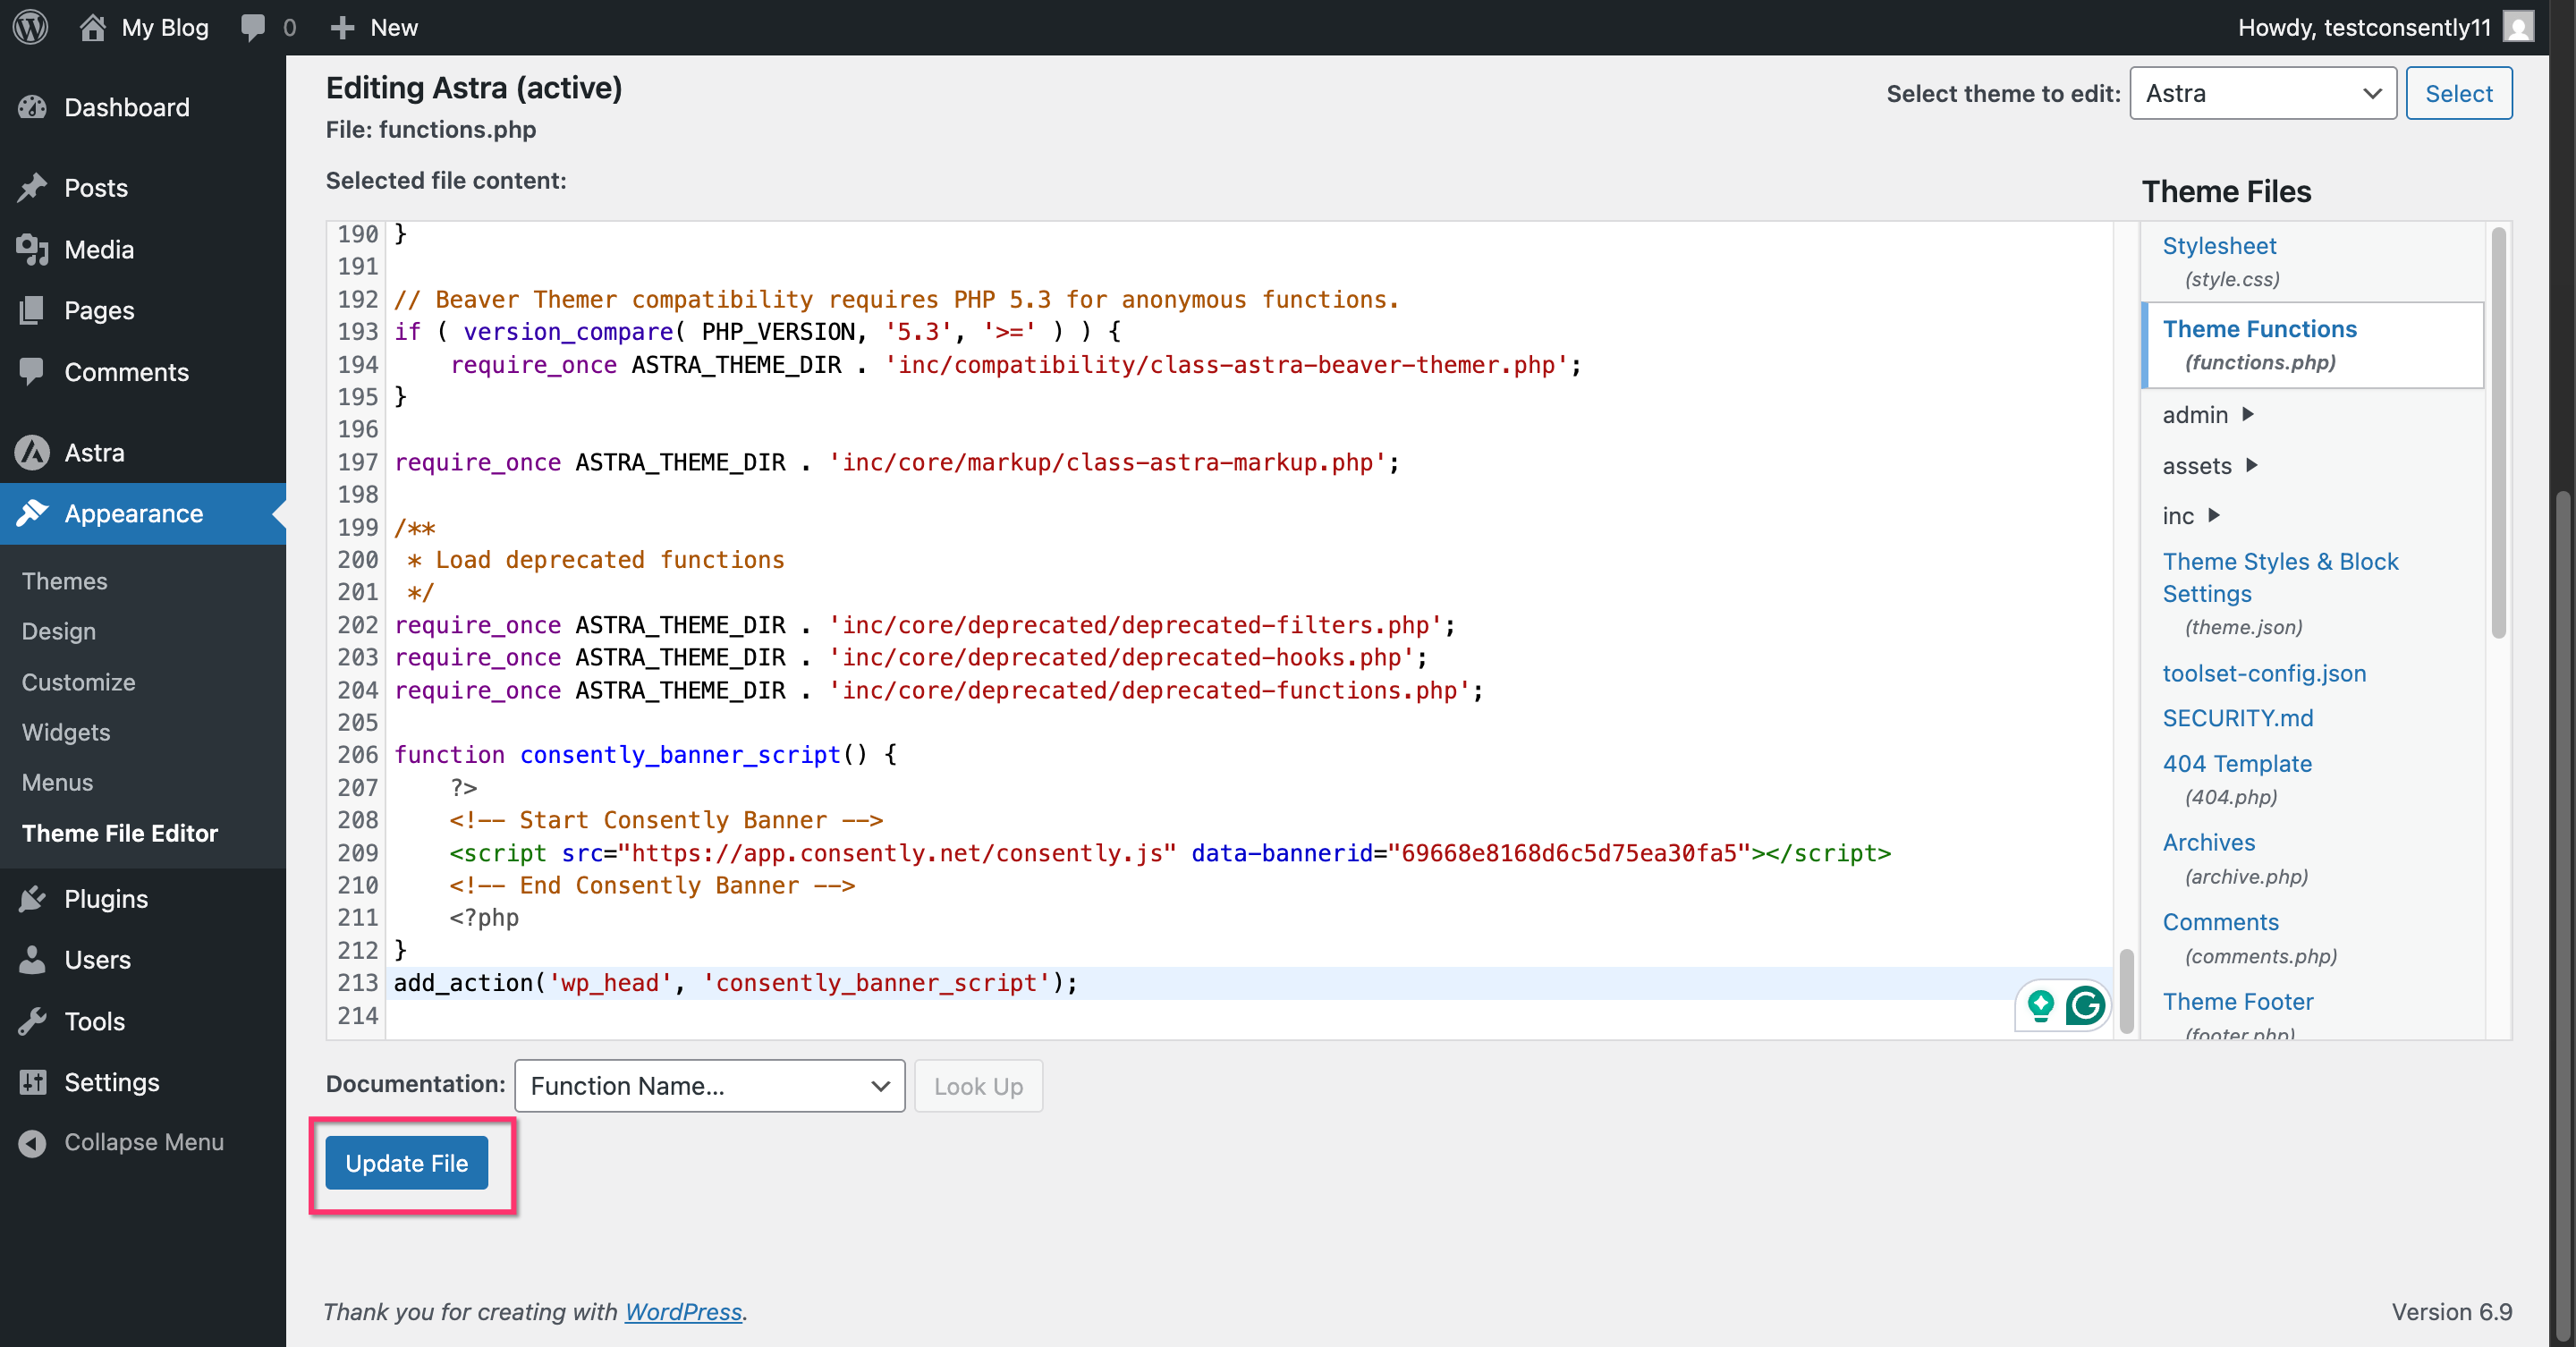
Navigate to Appearance → Theme File Editor → functions.php.

Step 2: Add the code snippet
At the end of the file, add this code (replace with your actual banner ID):
function consently_banner_script() {
    ?>
    <!-- Start Consently Banner -->
    <script src="https://app.consently.net/consently.js" data-bannerid="YOUR_BANNER_ID"></script>
    <!-- End Consently Banner -->
    <?php
}
add_action('wp_head', 'consently_banner_script');
Step 3: Save the file
Click Update File.
Done!
Your consent banner is now installed on all pages of your WordPress site.
Child Theme Considerations
If you're using a child theme, edit the child theme's header.php or functions.php rather than the parent theme's files. This ensures your changes aren't overwritten when the parent theme updates.
💡 Tip: If your child theme doesn't have a header.php file, the functions.php method (Method 3) is your best option.
What's Next
Now that you've installed the script:
Test your installation to confirm the banner appears correctly
Customize your banner design to match your site's branding
Troubleshooting
The banner doesn't appear after saving
Solution:
Clear your WordPress cache (if using a caching plugin like WP Super Cache or W3 Total Cache)
Clear your browser cache or test in an incognito/private window
Check if the script was placed before
</head>and not after
Theme updates removed the script
Why this happens: Editing the parent theme's files directly means changes are lost when the theme updates.
Solution:
Switch to Method 2 (header/footer plugin) to make your installation update-proof
If using a child theme, ensure you edit the child theme files, not the parent theme
I see a PHP error after editing functions.php
Solution:
Check for syntax errors—missing semicolons, unclosed brackets, or mismatched quotes
Ensure you pasted the code after the opening
<?phptag, but didn't add an extra closing?>tag at the endIf the error persists, remove the code you added and use Method 1 or Method 2 instead
The script appears twice on some pages
Solution: You likely installed the script using multiple methods. Check header.php, functions.php, and any header/footer plugins to ensure the script appears only once.
Related Pages
Google Tag Manager Installation — Alternative installation method for WordPress sites using GTM