

TL;DR: Copy your embed script from Consently → Open Dorik Site Settings → Advanced tab → Paste in Header Code → Publish. Your consent banner will appear on all pages of your Dorik site.
Overview
Dorik is a no-code website builder that supports custom code injection. Installing Consently requires adding the banner script to your site's custom code settings, which makes your consent banner appear across all pages.
Before You Begin
Make sure you have:
Access to your Dorik website dashboard
A Dorik site that's ready for publishing
Time required: 3 minutes
How to Install Consently on Dorik
Install through the embed script
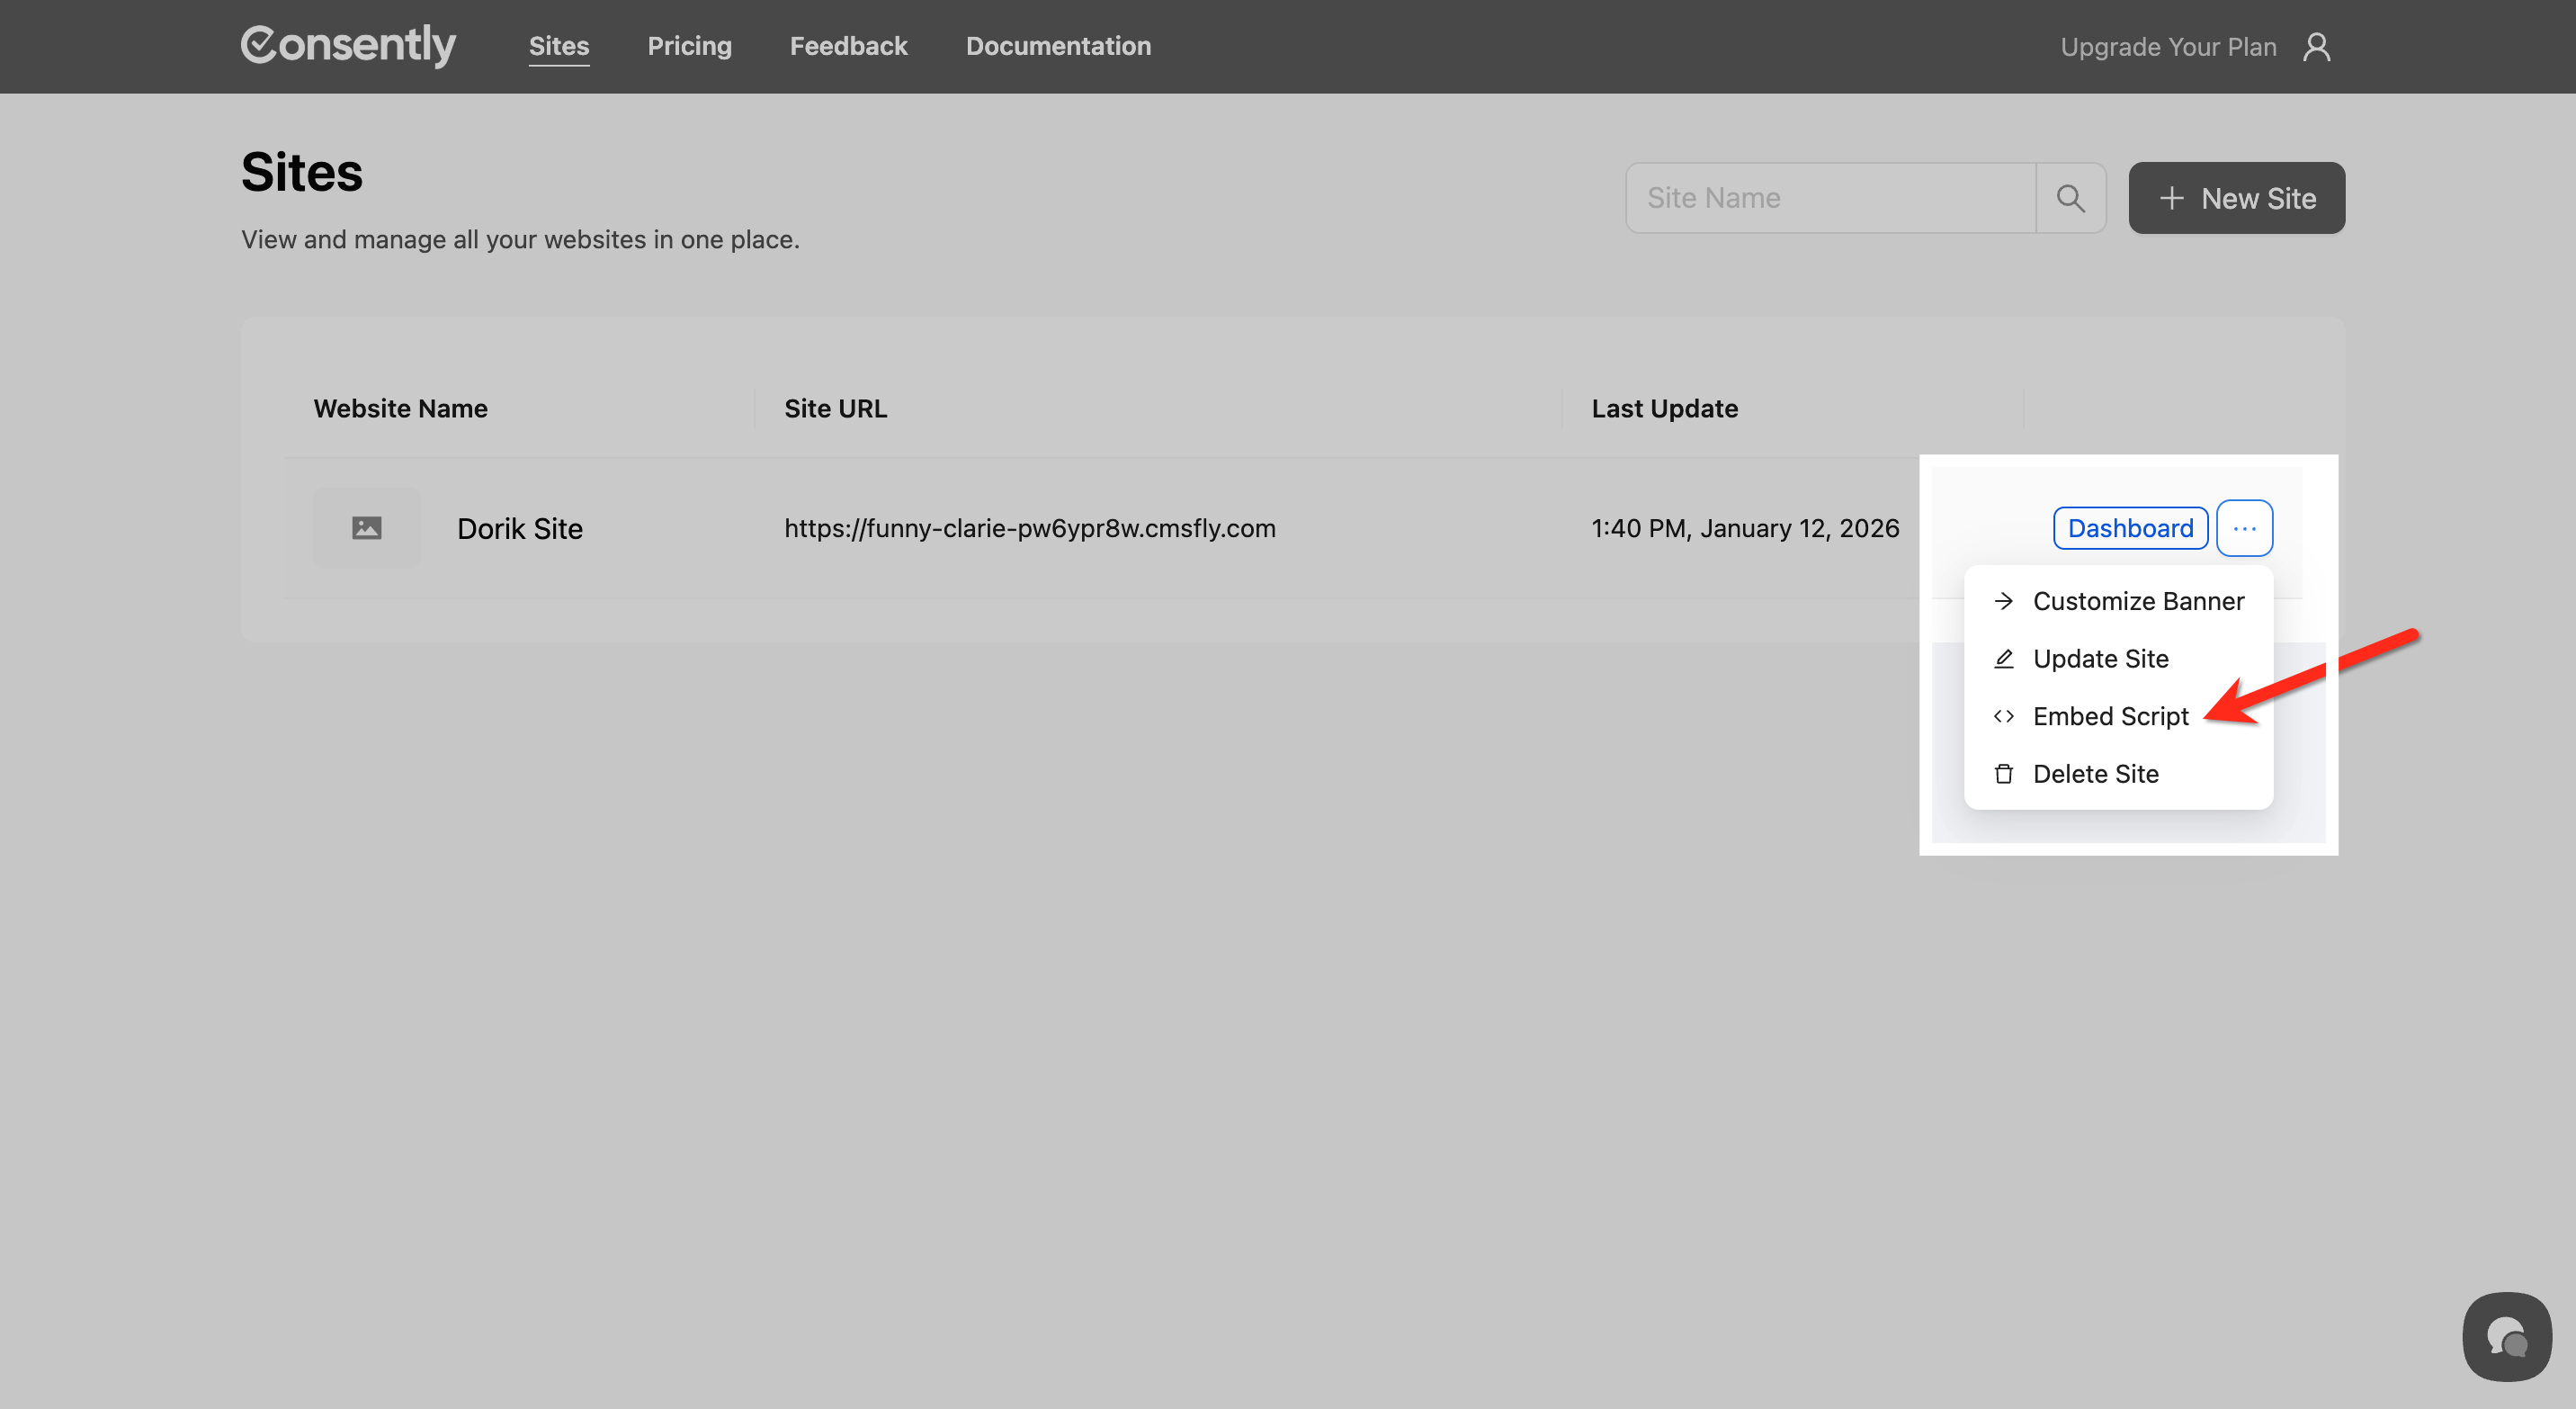
Step 1: Copy your Consently embed script
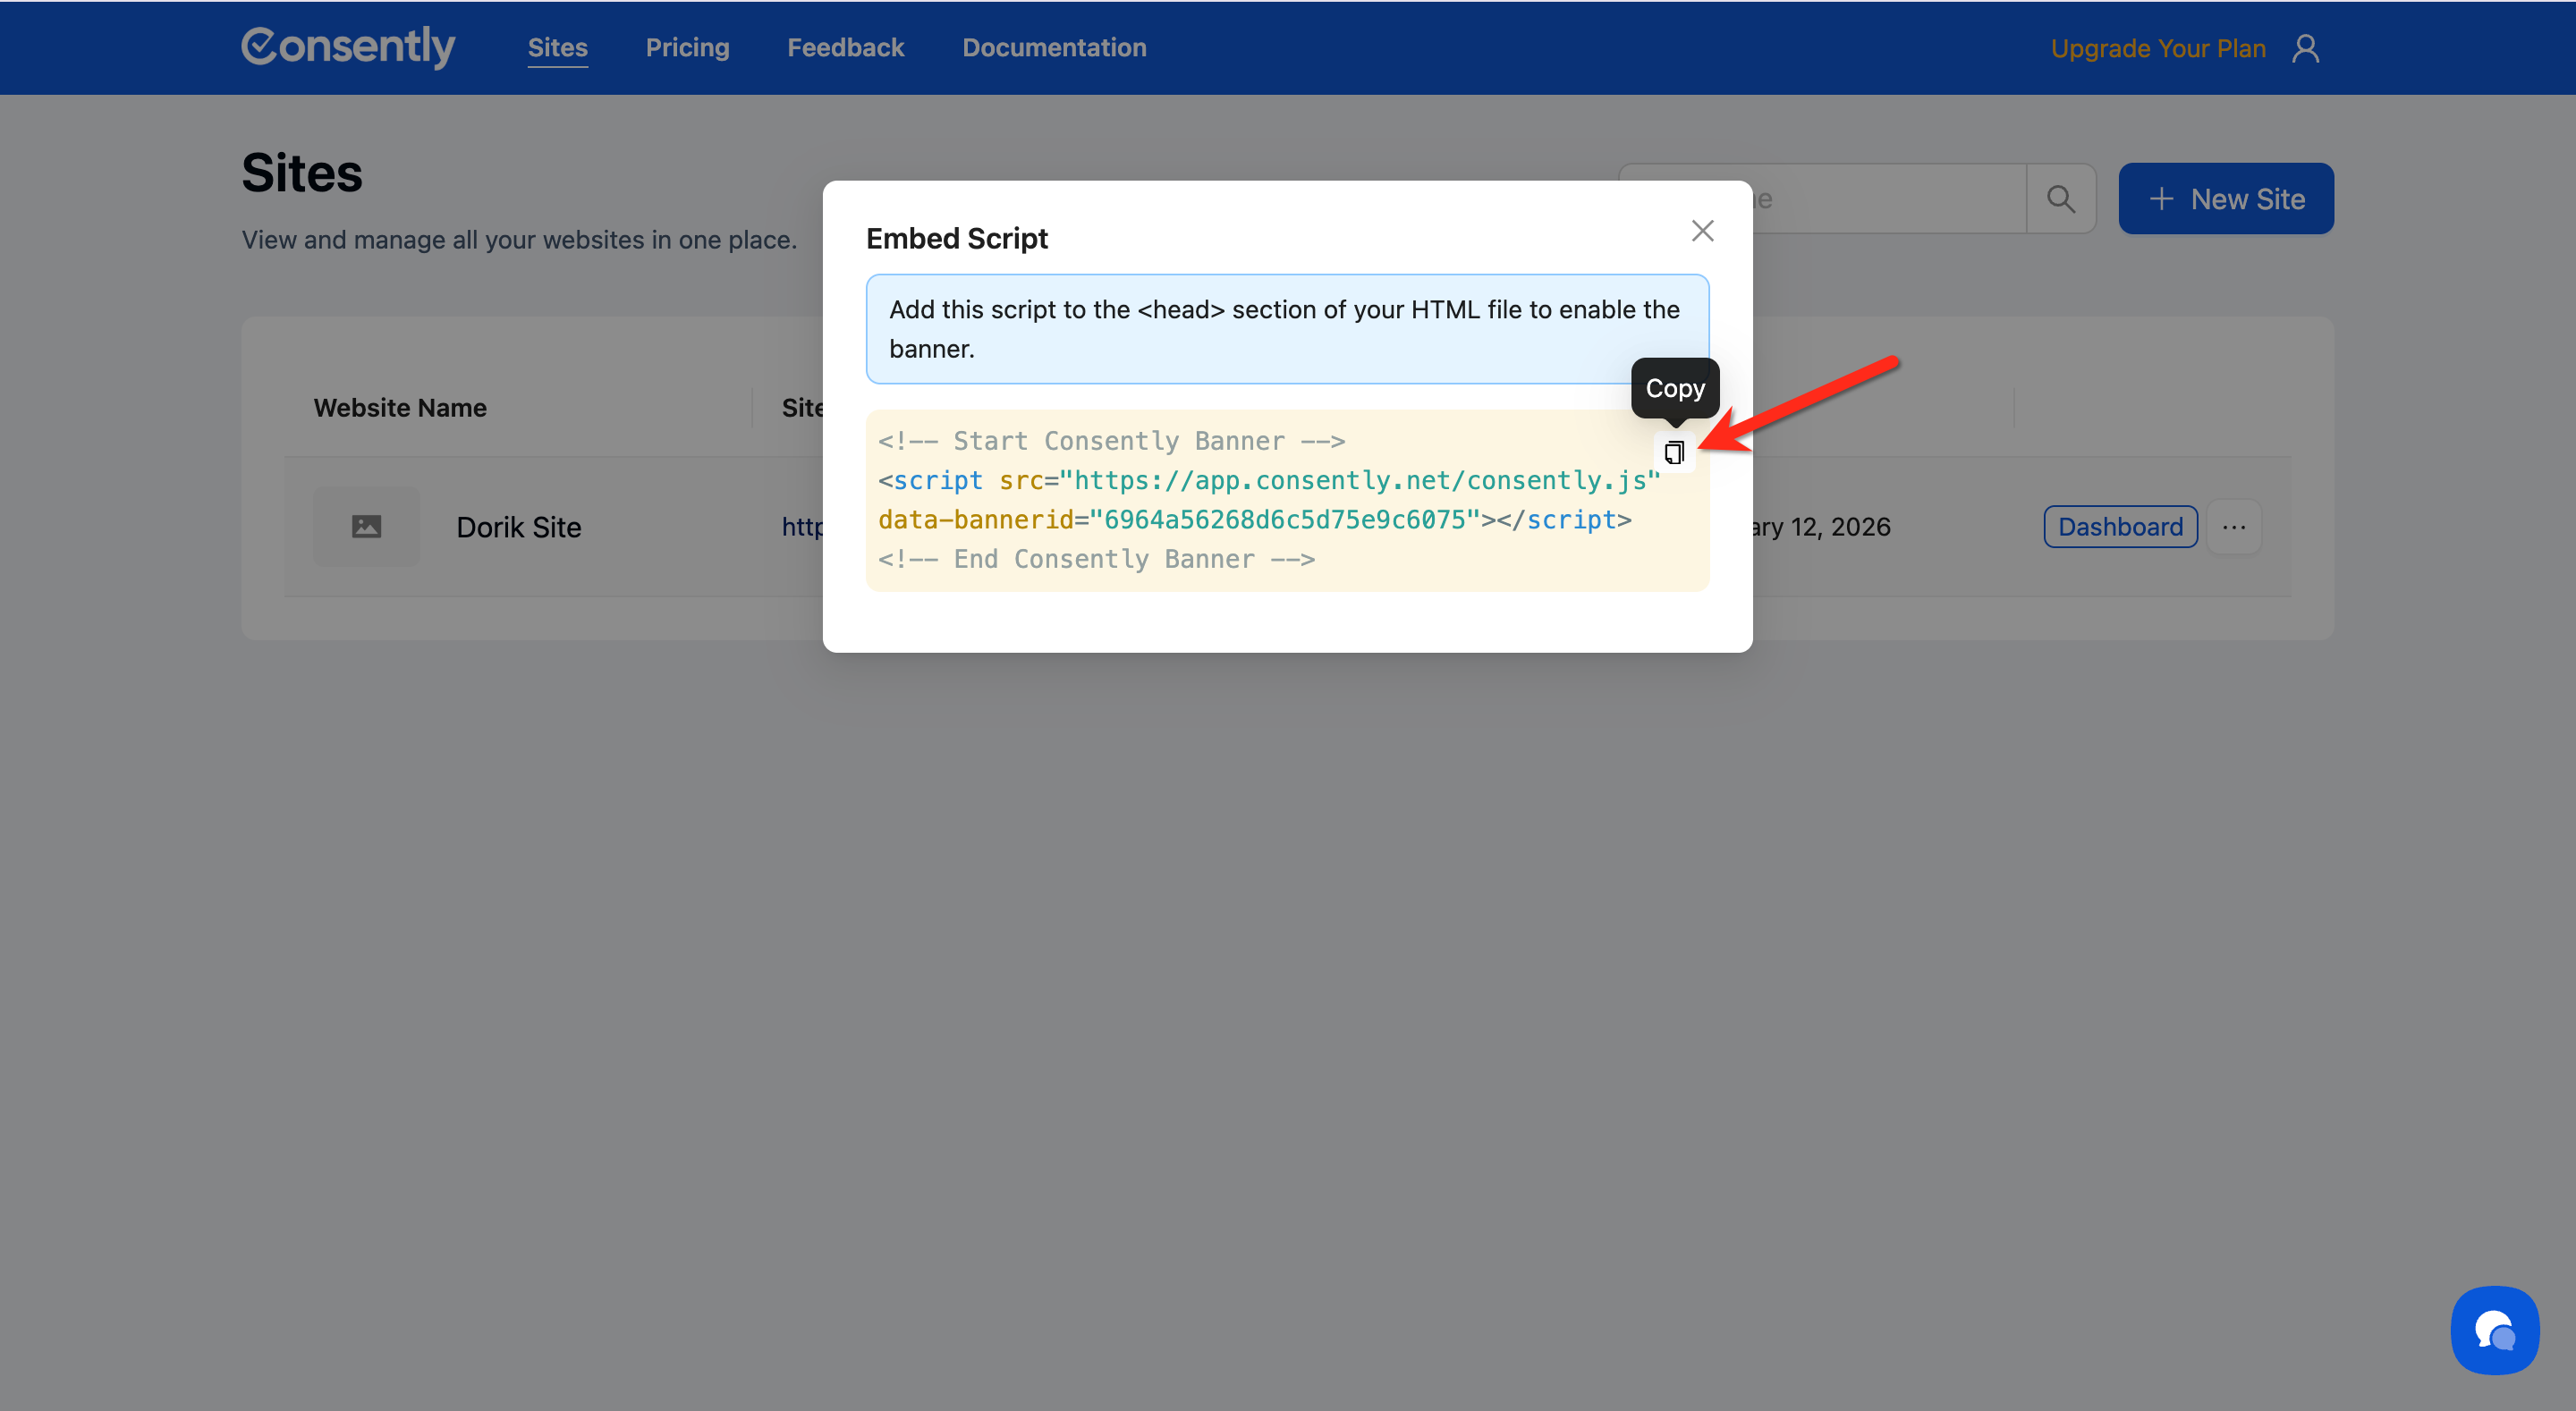
In Consently, go to Sites, click the ⋮ menu next to your site, select Embed Script, and click Copy.
💡 Tip: Keep the Consently tab open while you work in Dorik so you can easily reference your script.
Step 2: Open your Dorik Site Settings
In your Dorik editor, click the ⚙️ (gear icon) in the top-right corner, then select Site Settings from the dropdown.

Step 3: Navigate to the Advanced tab
In the Site Settings panel, click the Advanced tab.
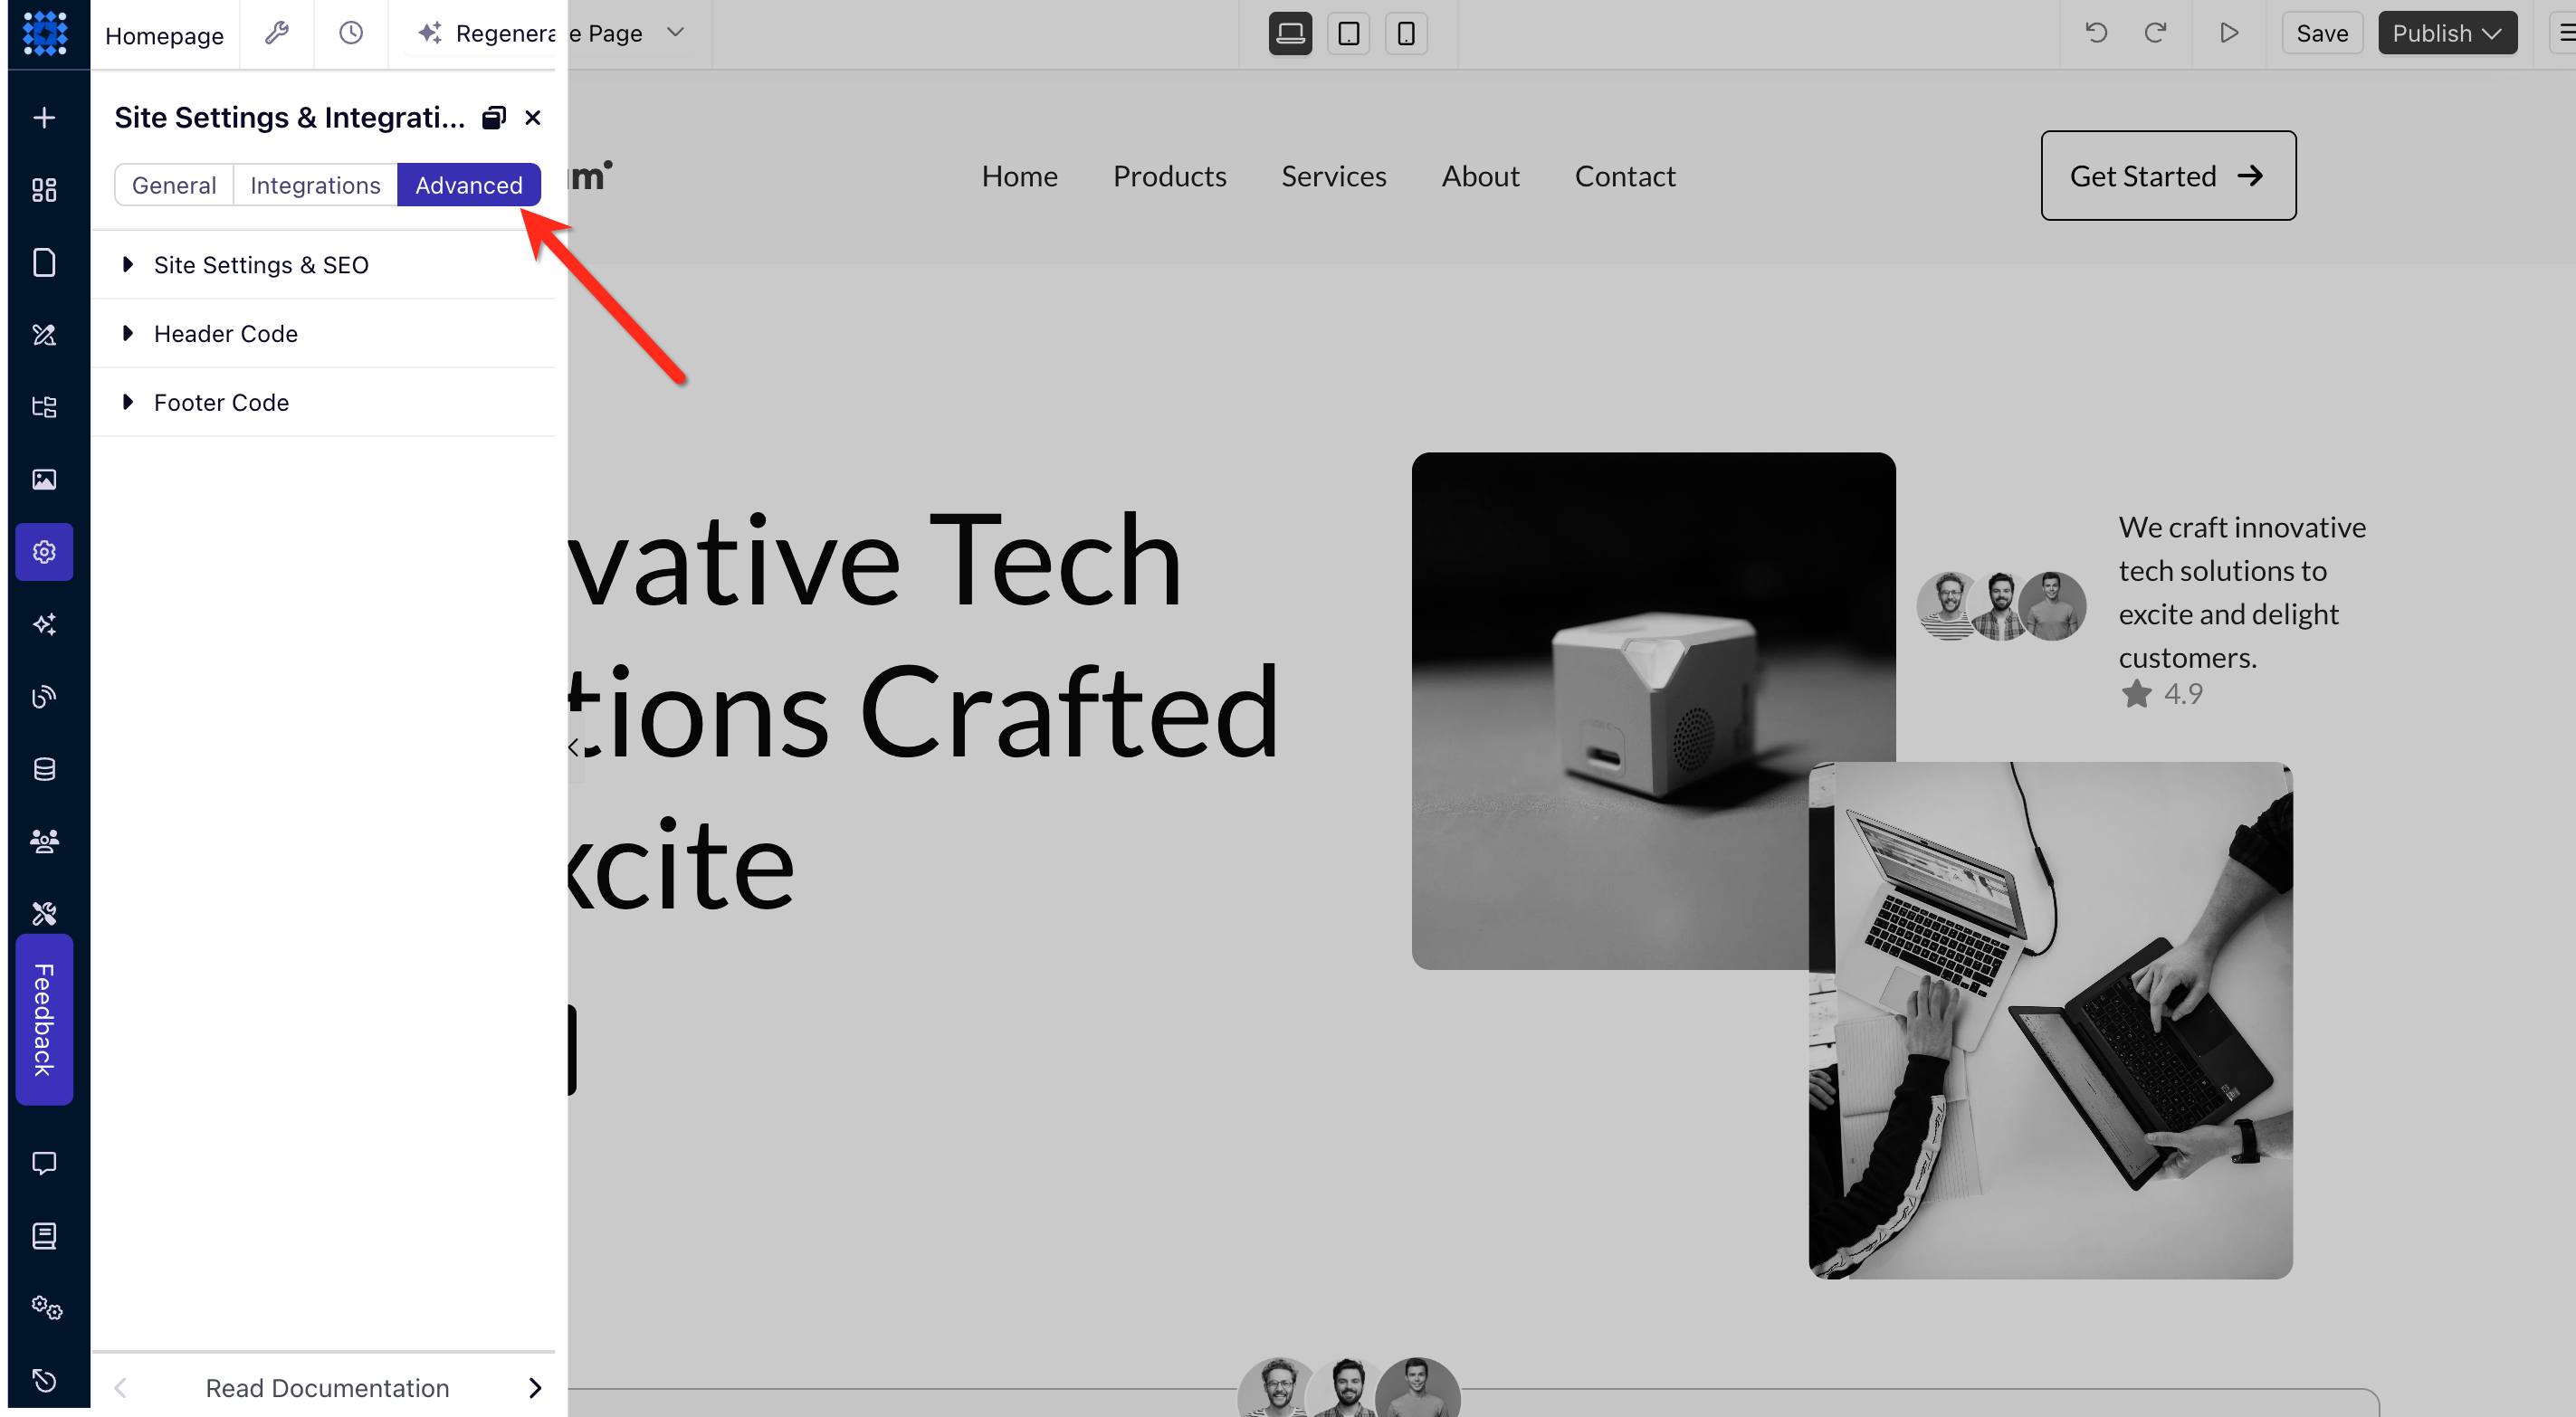
Step 4: Paste your script in Header Code
In the Header Code section, paste your Consently embed script. Make sure you paste it in the Header Code field, not Footer Code.
⚠️ Important: The script must be in Header Code to ensure the banner loads before your page content. Do not use Footer Code for the Consently script.

Step 5: Save and publish your site
Click Save to save your Site Settings, then click Publish in the top-right corner of the editor to make your changes live.

Install through the Consently banner ID
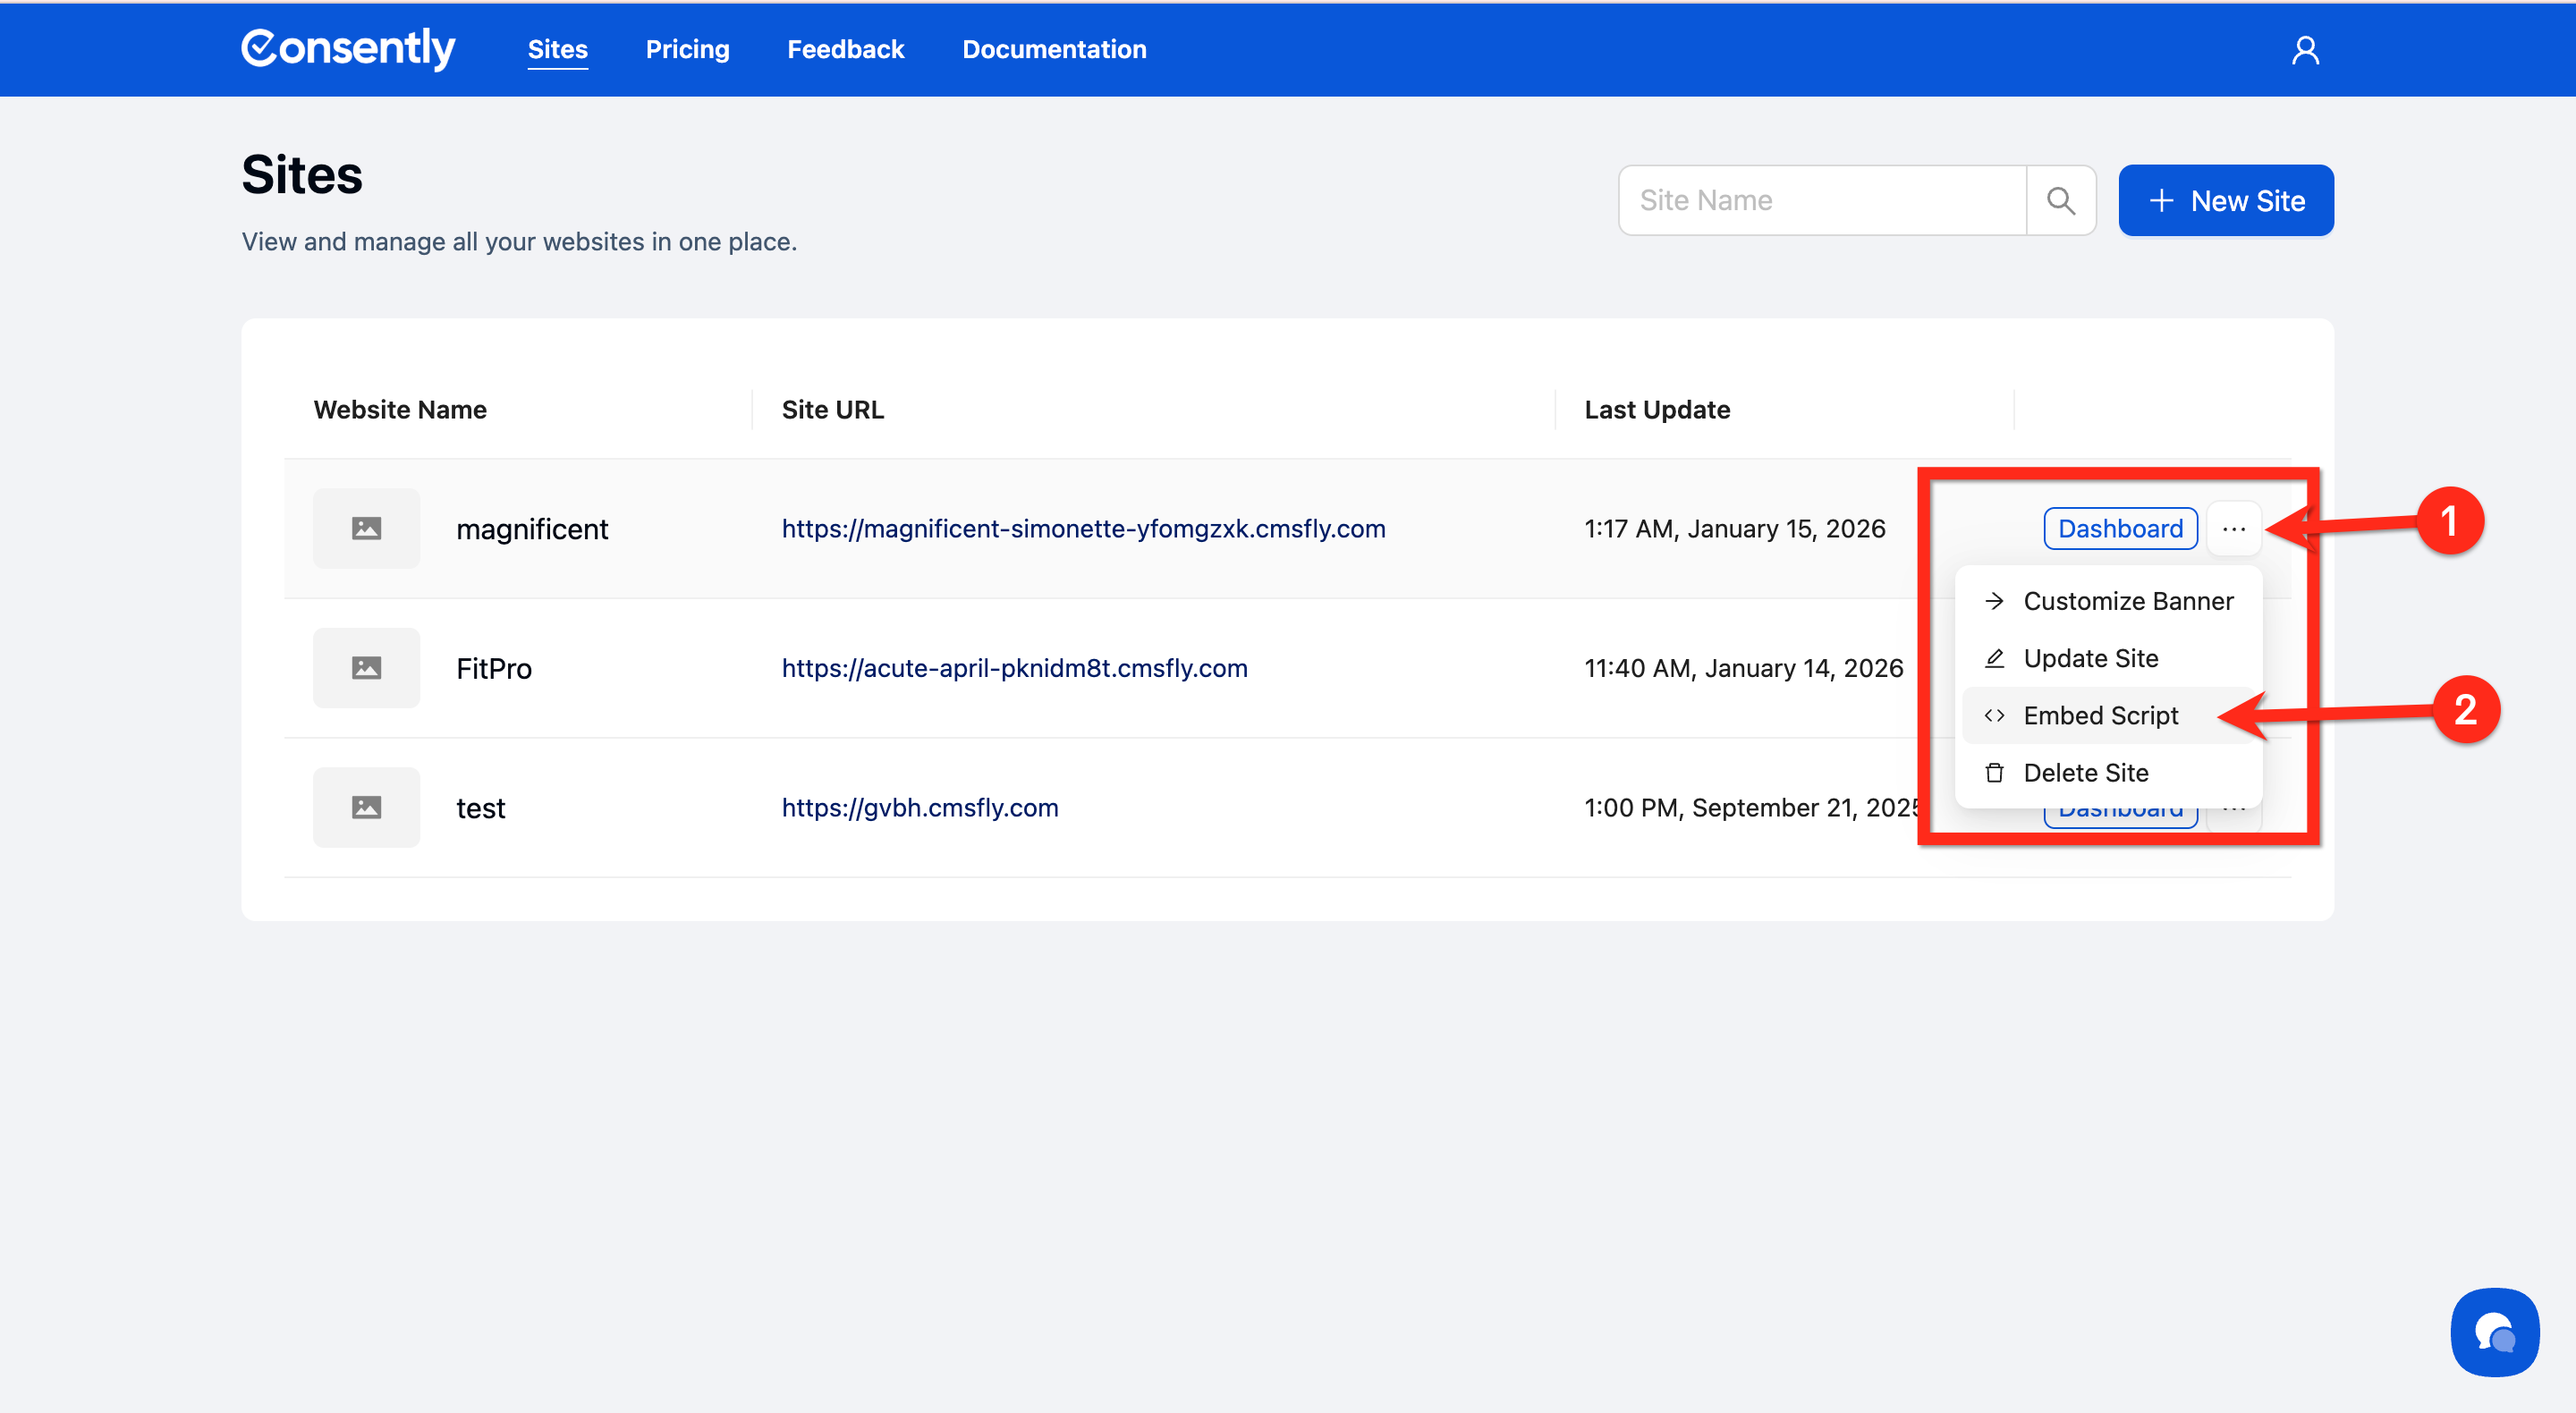
Step 1: Open Embed Script
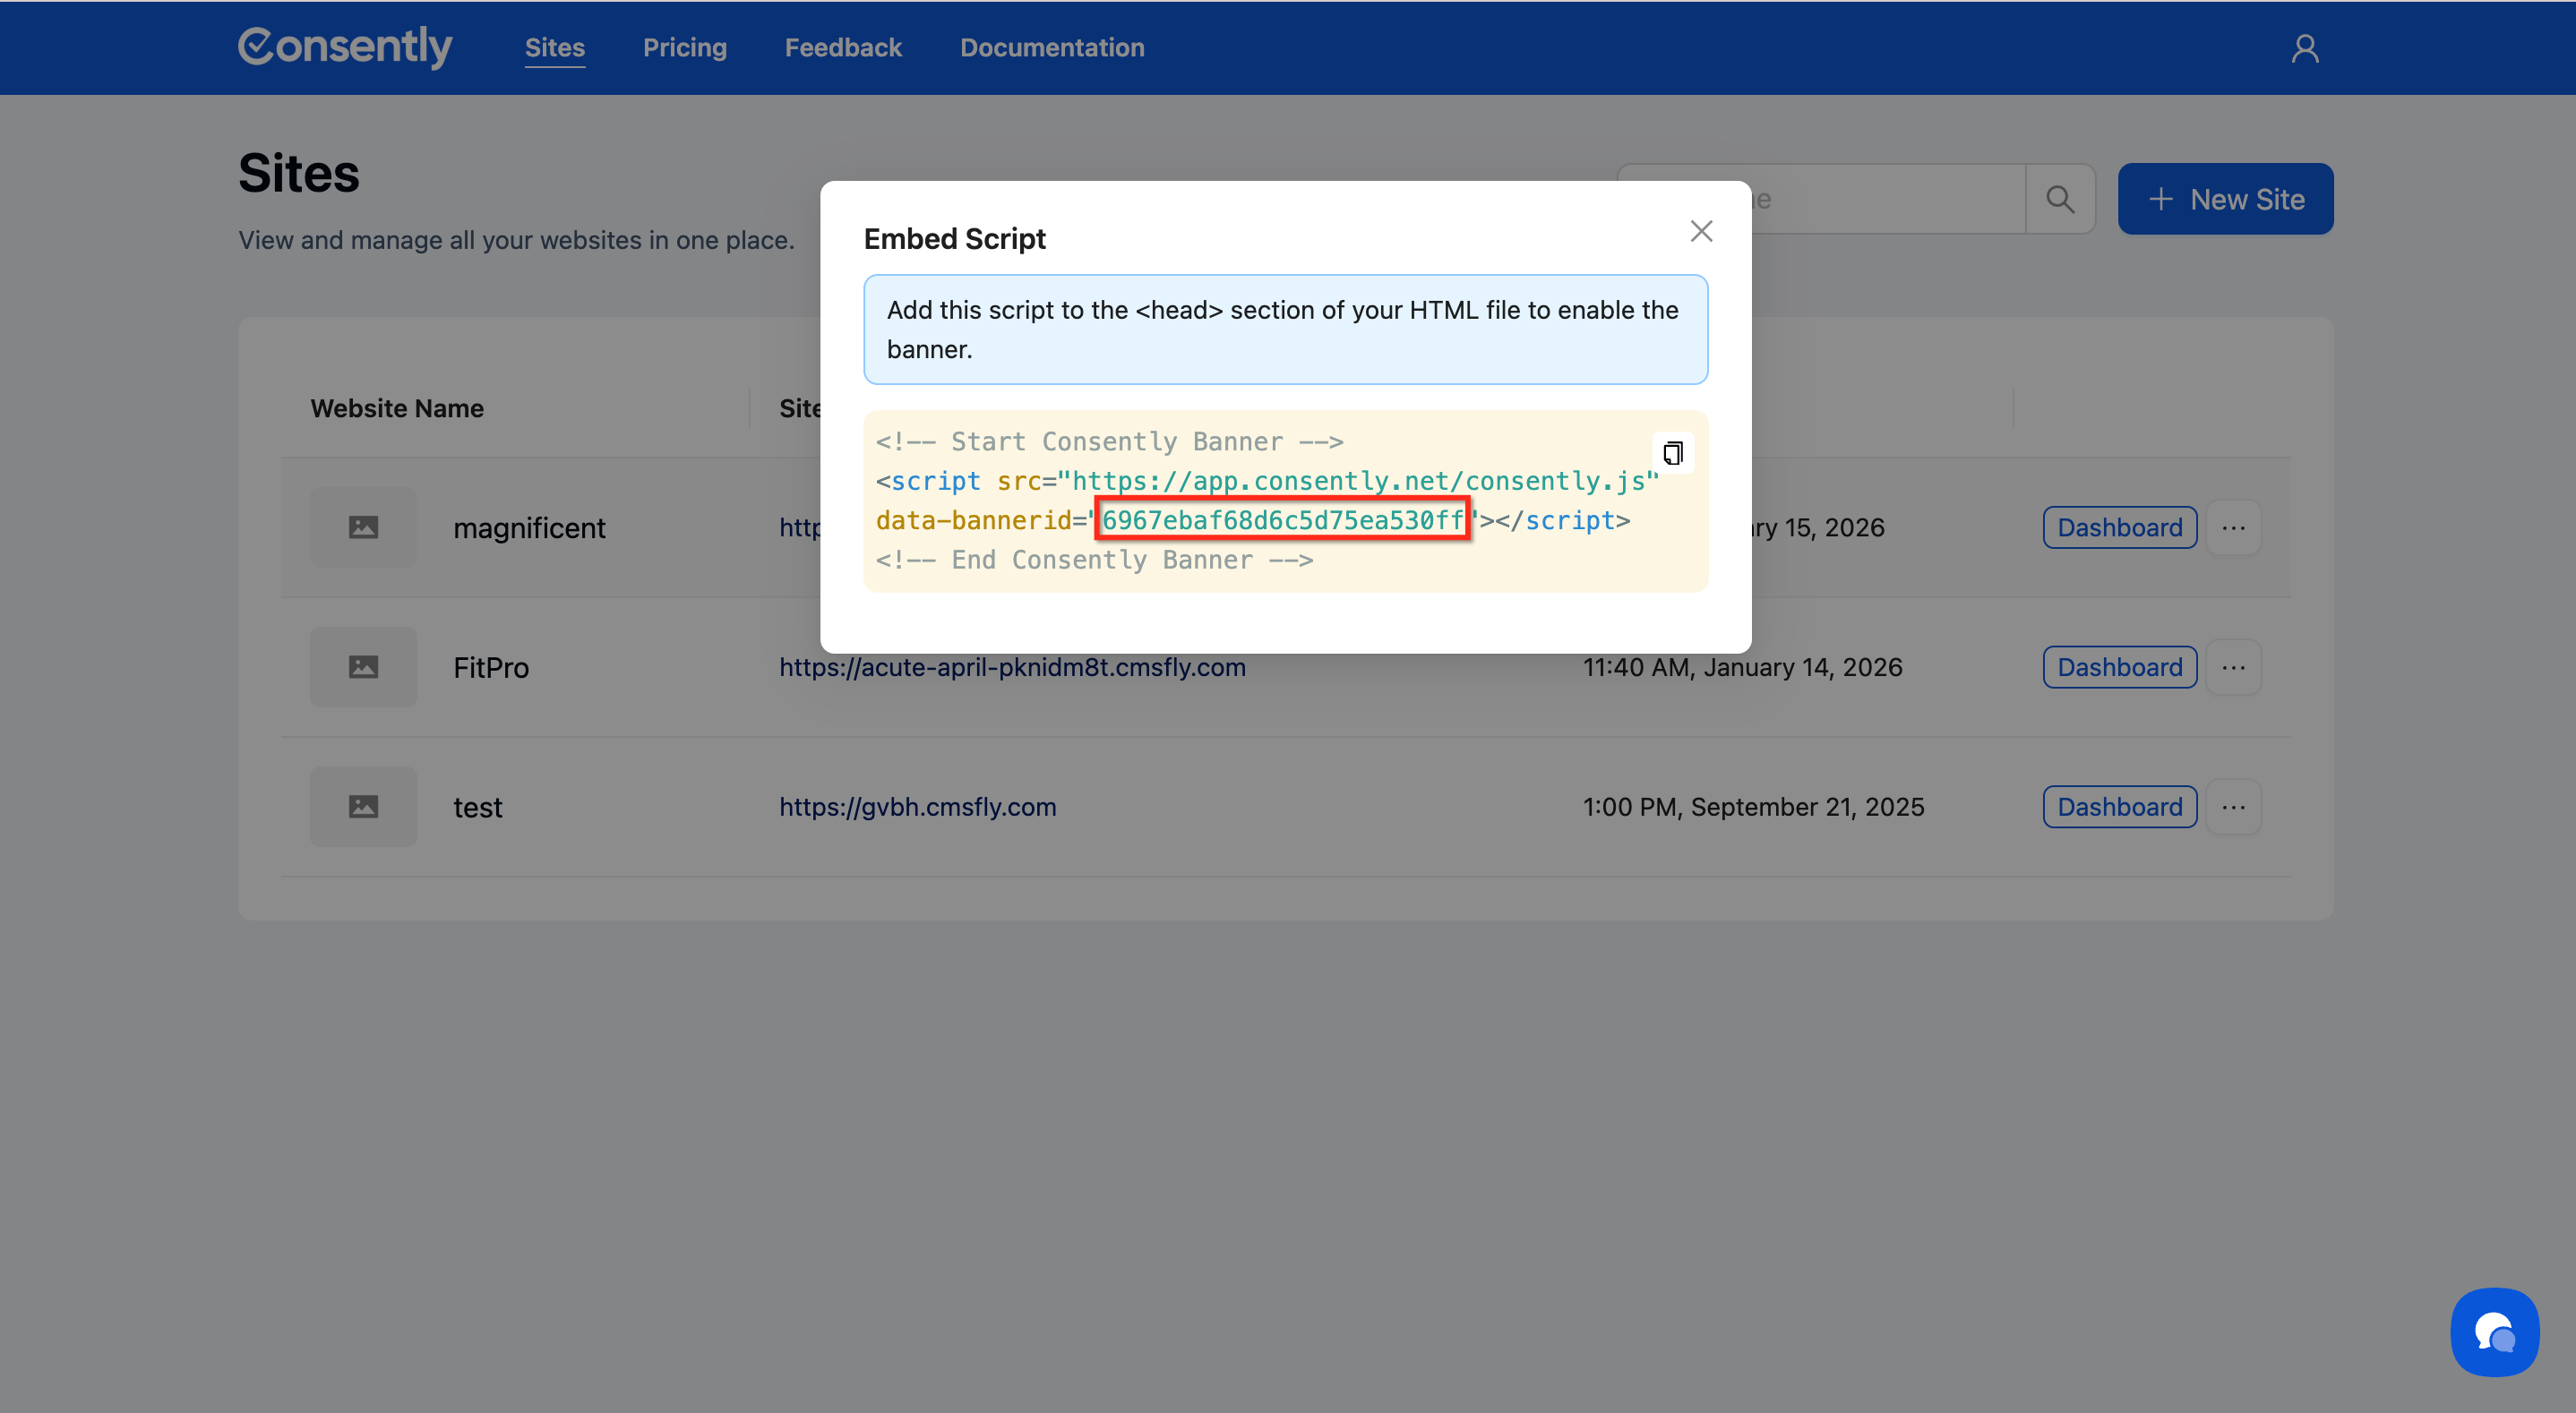
Open the Embed Script option by clicking the ... (three-dot icon) next to your site.
Step 2: Copy the banner ID
From the Embed Script code, copy the data-bannerid value, as shown in the screenshot below.
Step 3: Open your Dorik Site Settings
In your Dorik editor, click the ⚙️ (gear icon) in the top-right corner, then select Site Settings from the dropdown.

Step 4: Navigate to the Integrations tab
In the Site Settings panel, click the Integrations tab.
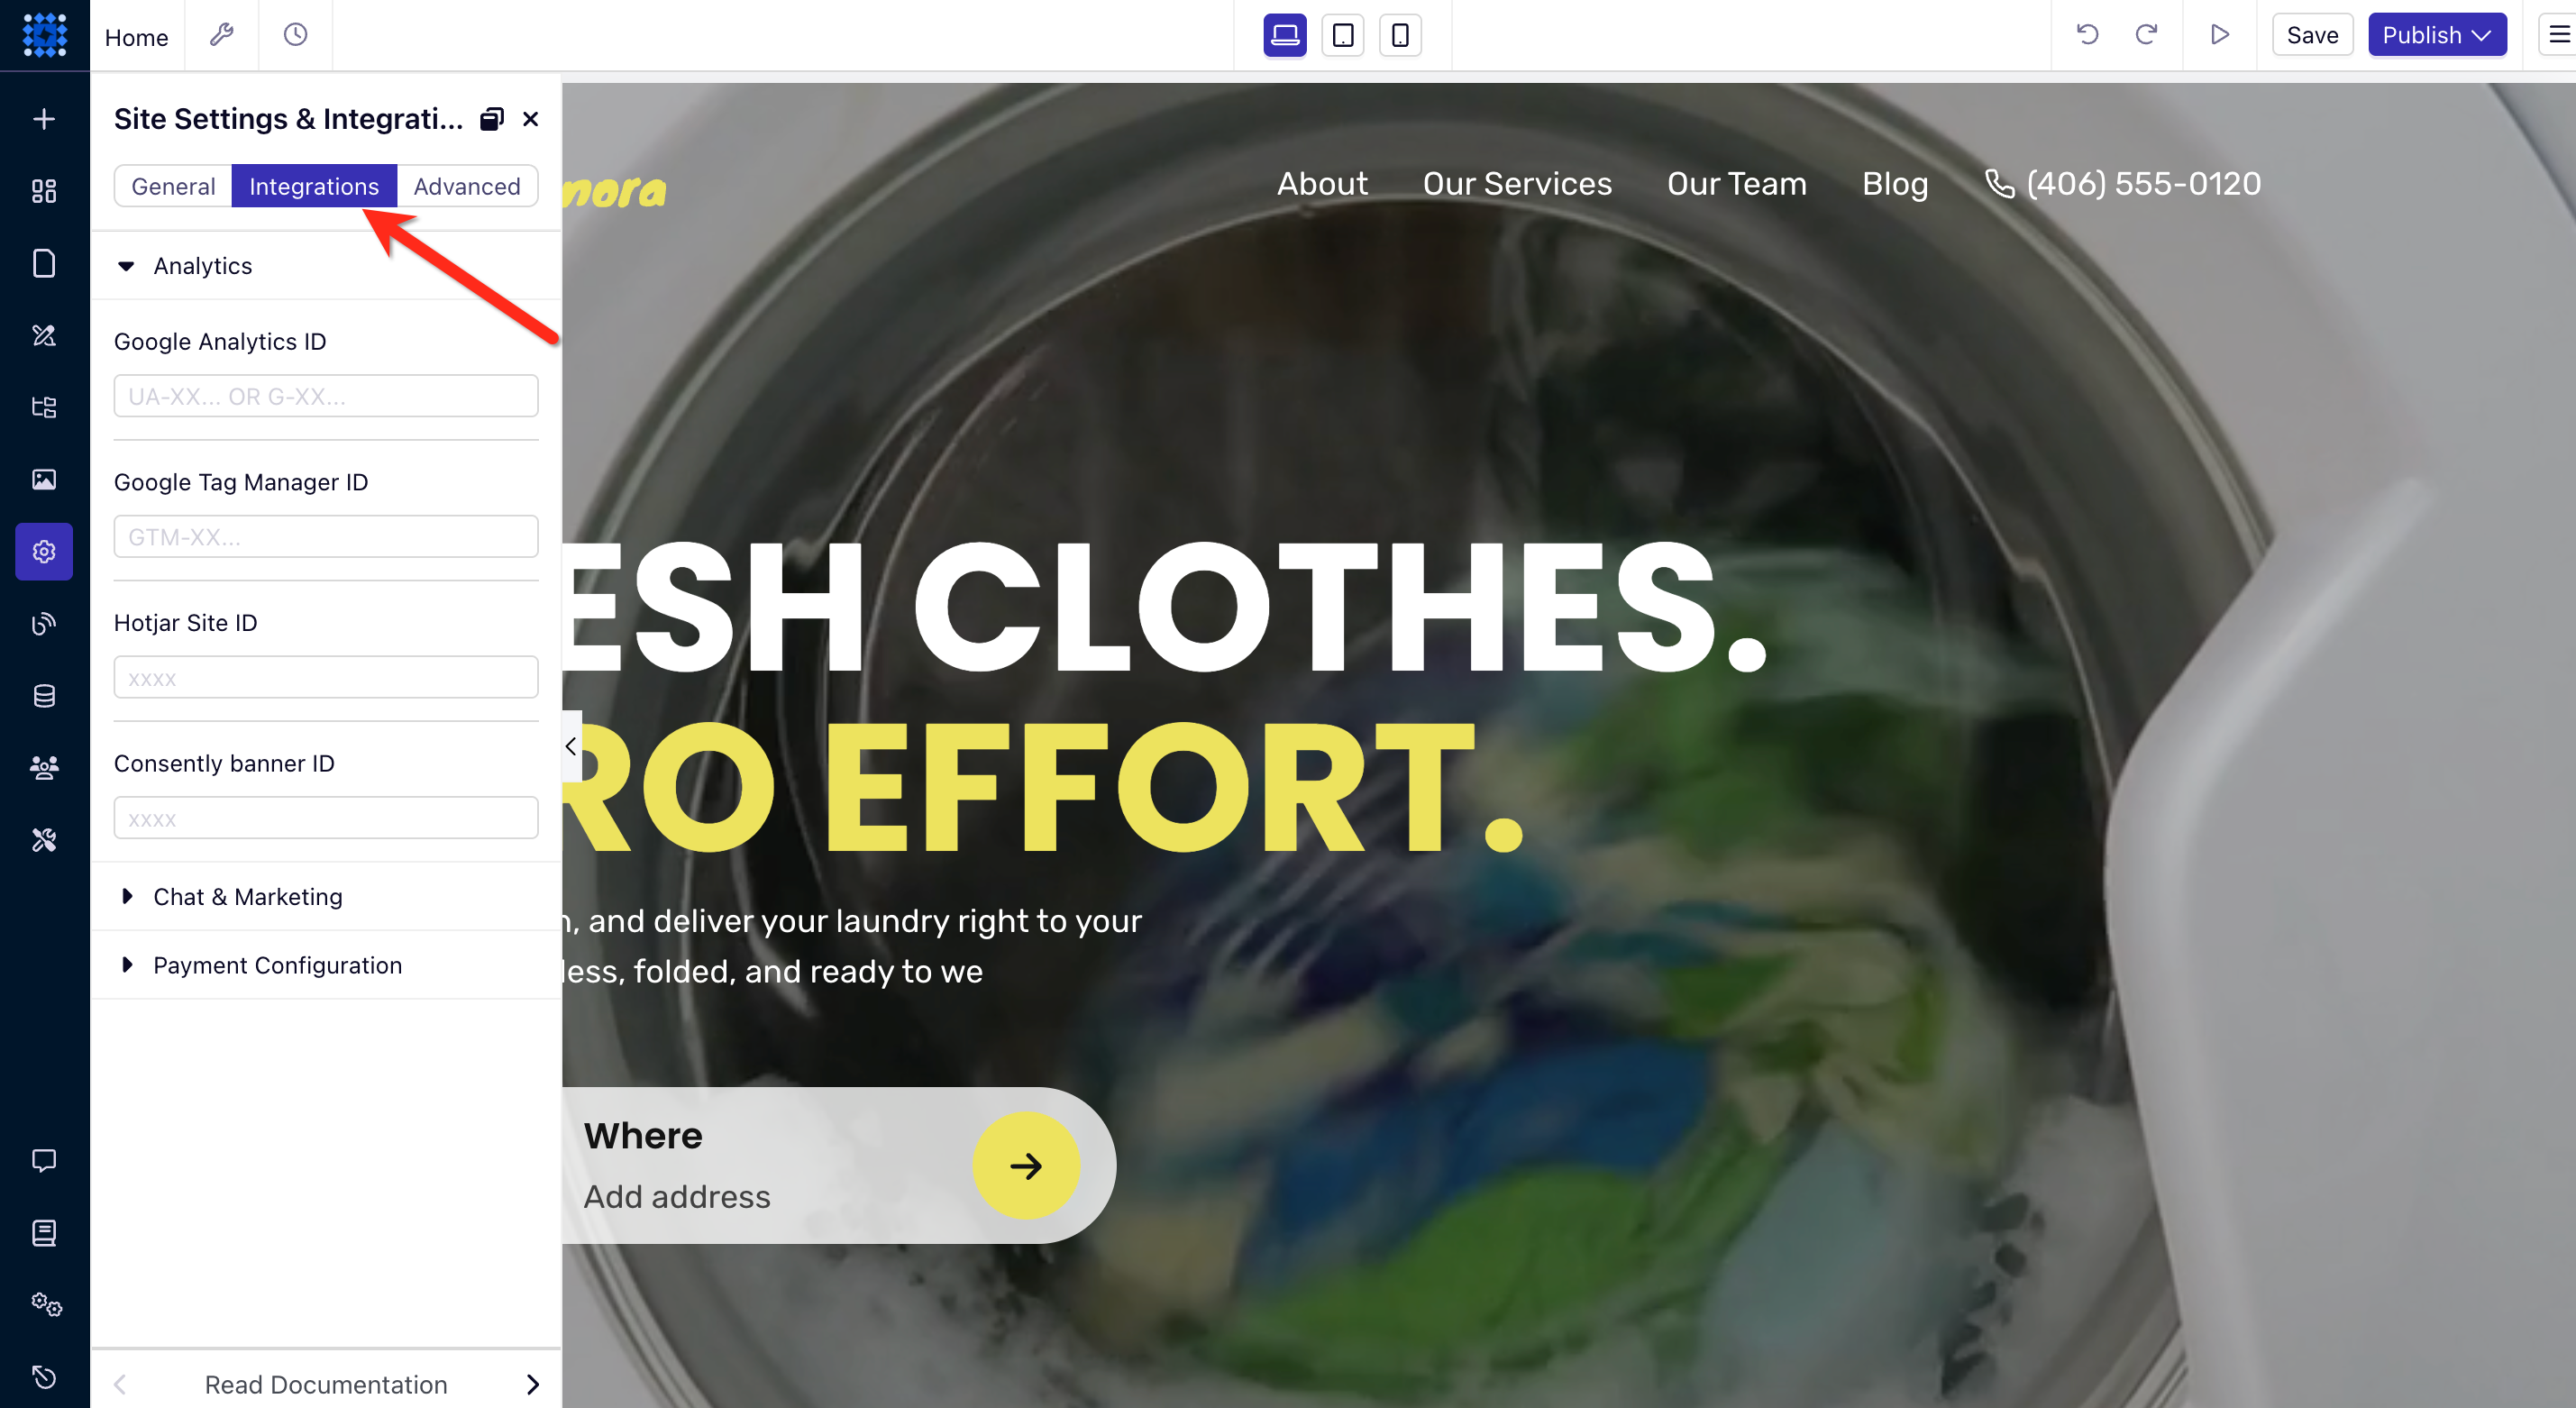
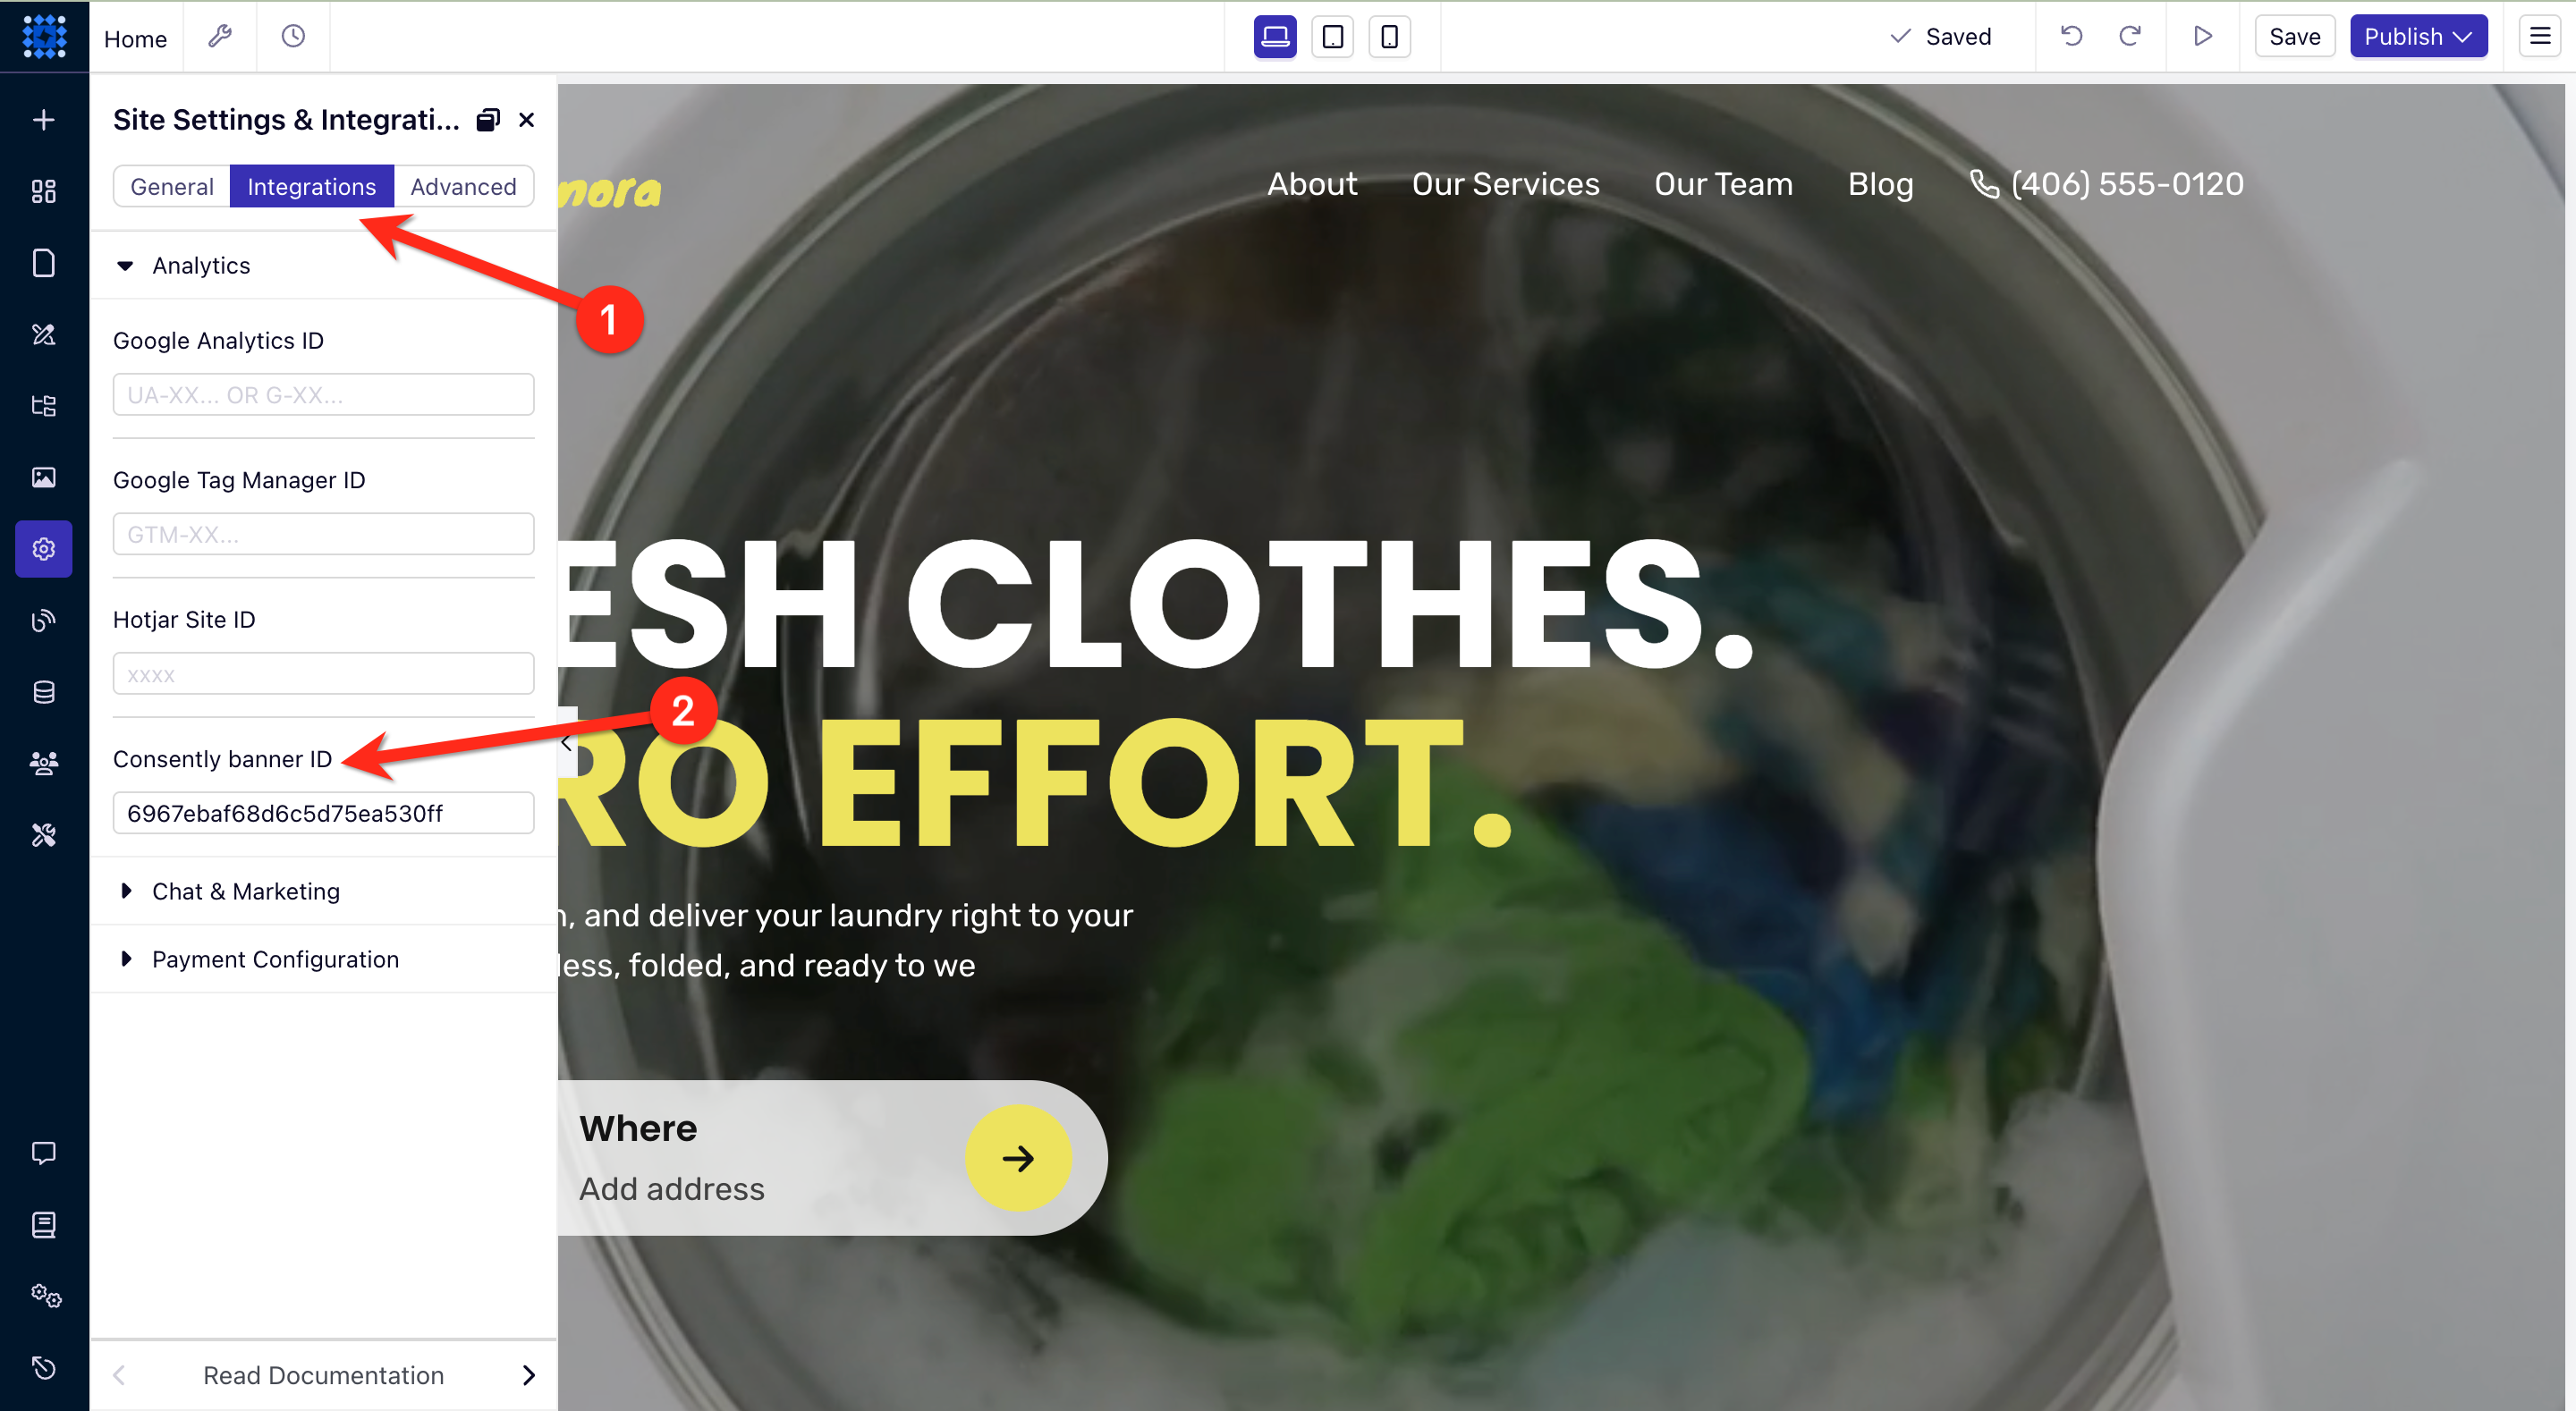
Step 5: Paste the Banner ID
Scroll down to the Consently Banner ID field and paste the copied ID here.
Step 6: Save and publish your site
Click Save to store your Site Settings, then click Publish in the top-right corner of the editor to make your changes live.

Done!
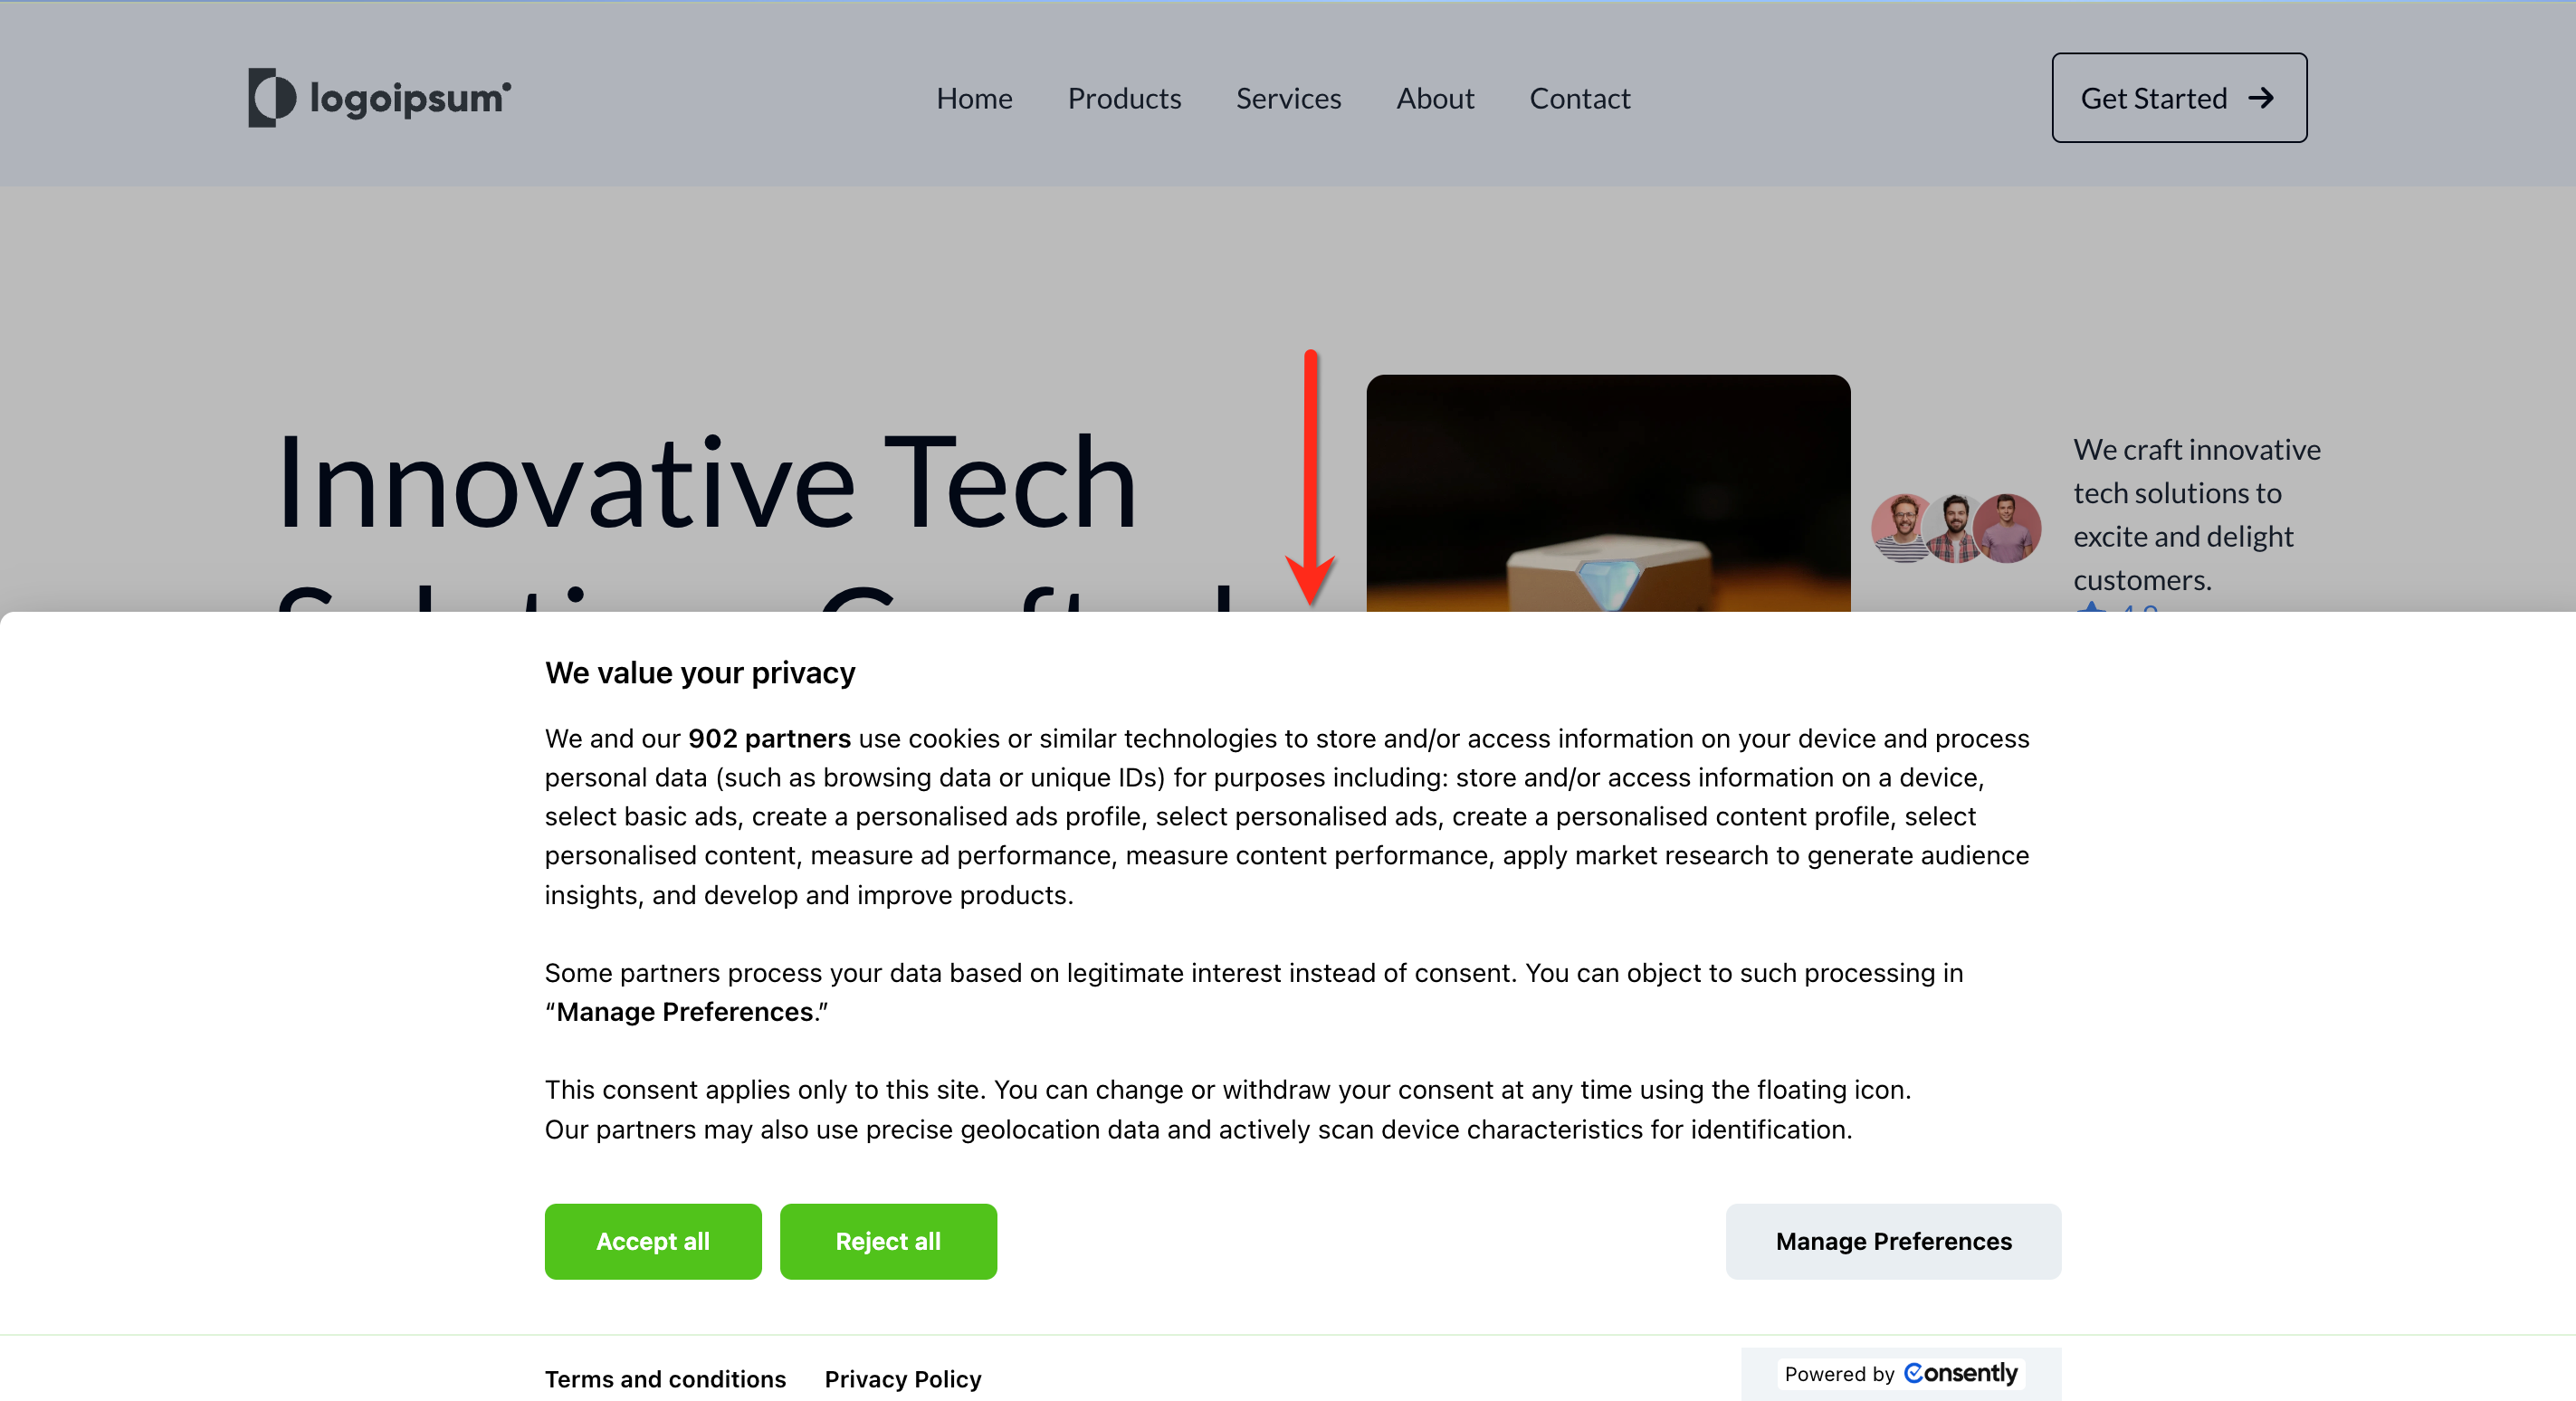
Your Consently consent banner is now active on all pages of your Dorik site.
✅ Success indicator: Visit your published site and you should see the consent banner appear immediately.
What's Next
Now that you've installed Consently on Dorik, you should:
Test your installation to verify the banner appears correctly
Troubleshooting
The banner isn't showing on my site
Why this happens: The most common cause is the script being placed in Footer Code instead of Header Code, or the site not being published after adding the script.
Solution:
Go back to Site Settings → Advanced tab and verify the script is in the Header Code section (not Footer Code)
Make sure you clicked Publish after saving your Site Settings
Clear your browser cache and refresh your site
If the issue persists, check that you copied the complete script including the opening
<script>and closing</script>tags
The banner appears on some pages but not others
Solution: When you add code to Site Settings (not Page Settings), it applies to all pages. If the banner only appears on certain pages, you may have accidentally added the script to individual Page Settings instead of Site Settings. Remove any page-specific scripts and ensure the script is only in your Site Settings → Advanced → Header Code.
I see two banners on my site
Why this happens: The script has been added in multiple places.
Solution:
Check Site Settings → Advanced → Header Code and remove any duplicate scripts
Check individual Page Settings → Advanced → Header Code on each page and remove the Consently script (it should only be in Site Settings)
Clear your browser cache and refresh
Related Pages
Direct HTML Installation — Understanding how the script works
Platform Compatibility — Installation guides for other platforms