

Overview
The Consently WordPress Plugin helps you manage cookie consent, script blocking, and privacy compliance directly from your WordPress website.
⚠️ Important: This plugin requires the WP Consent API plugin to work properly.
Prerequisites
Before you begin, make sure:
You have a WordPress website
You have admin access to your dashboard
You have generated API Key on Consently
You have downloaded the Consently WordPress Plugin
Step 1: Install Required Plugin (WP Consent API)
Consently depends on the WP Consent API plugin. Without it, the plugin will not activate properly and will show a warning.
Steps:
Go to Plugins → Add Plugin
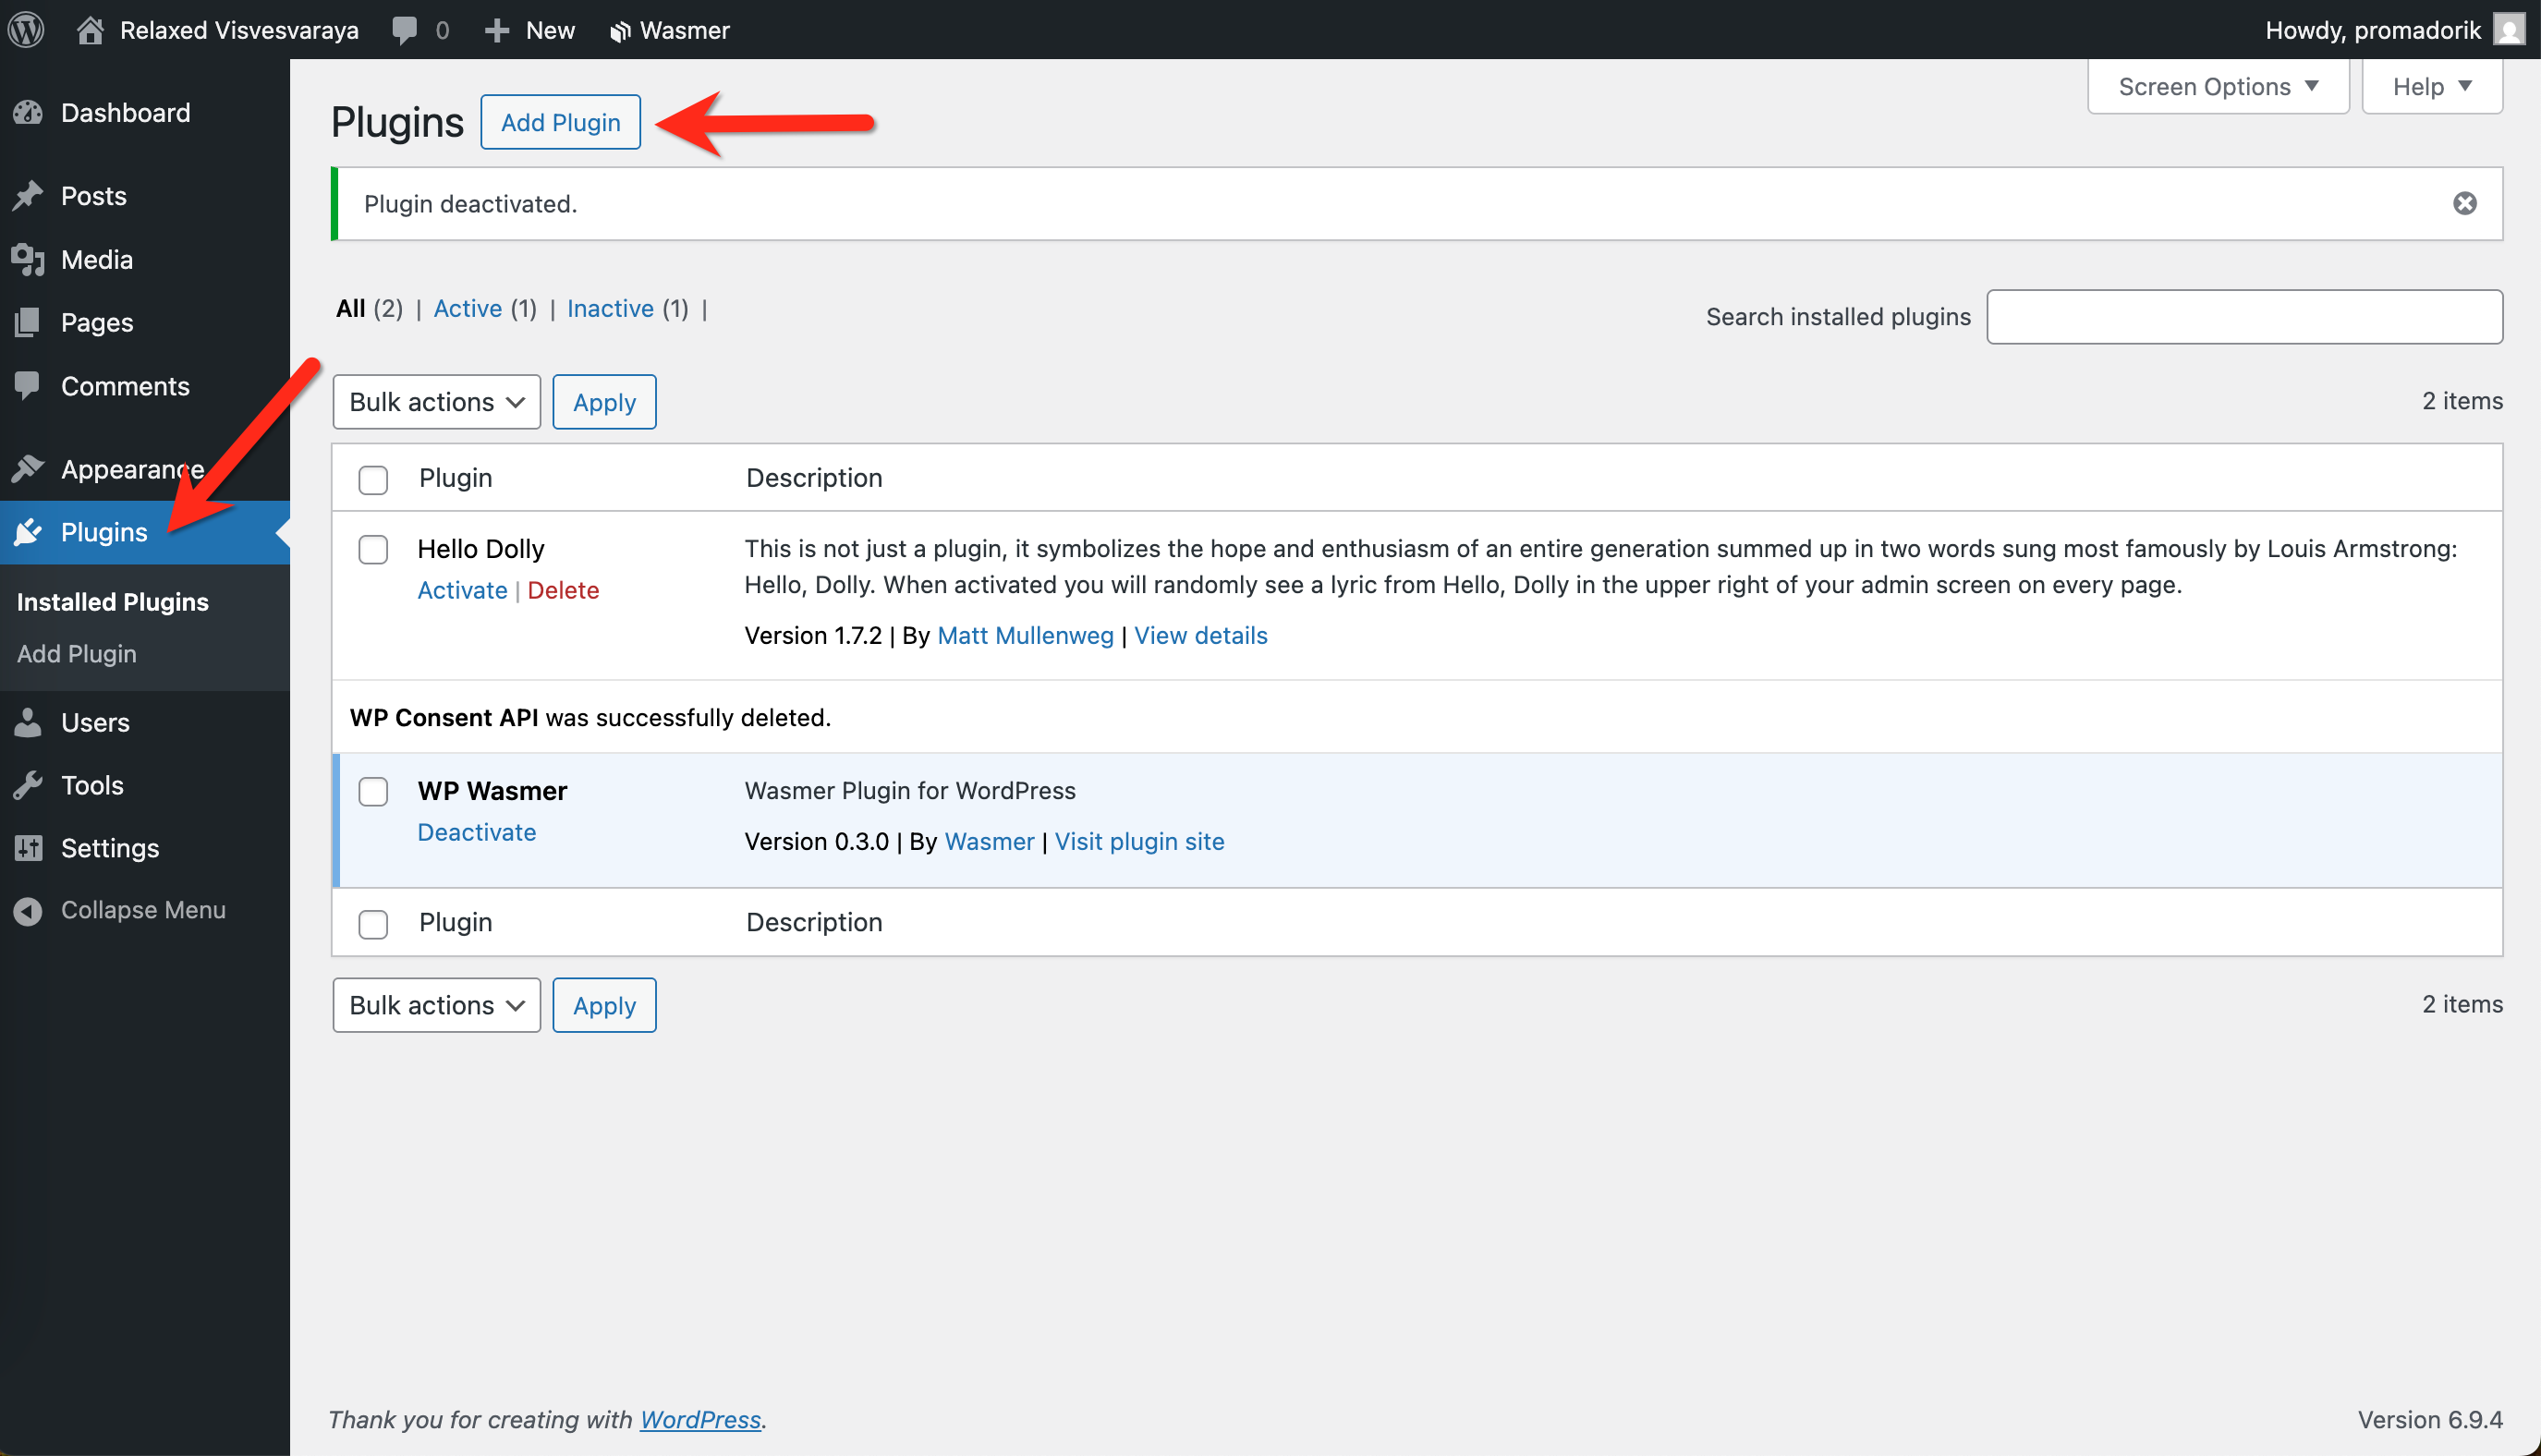
Search for “WP Consent API”
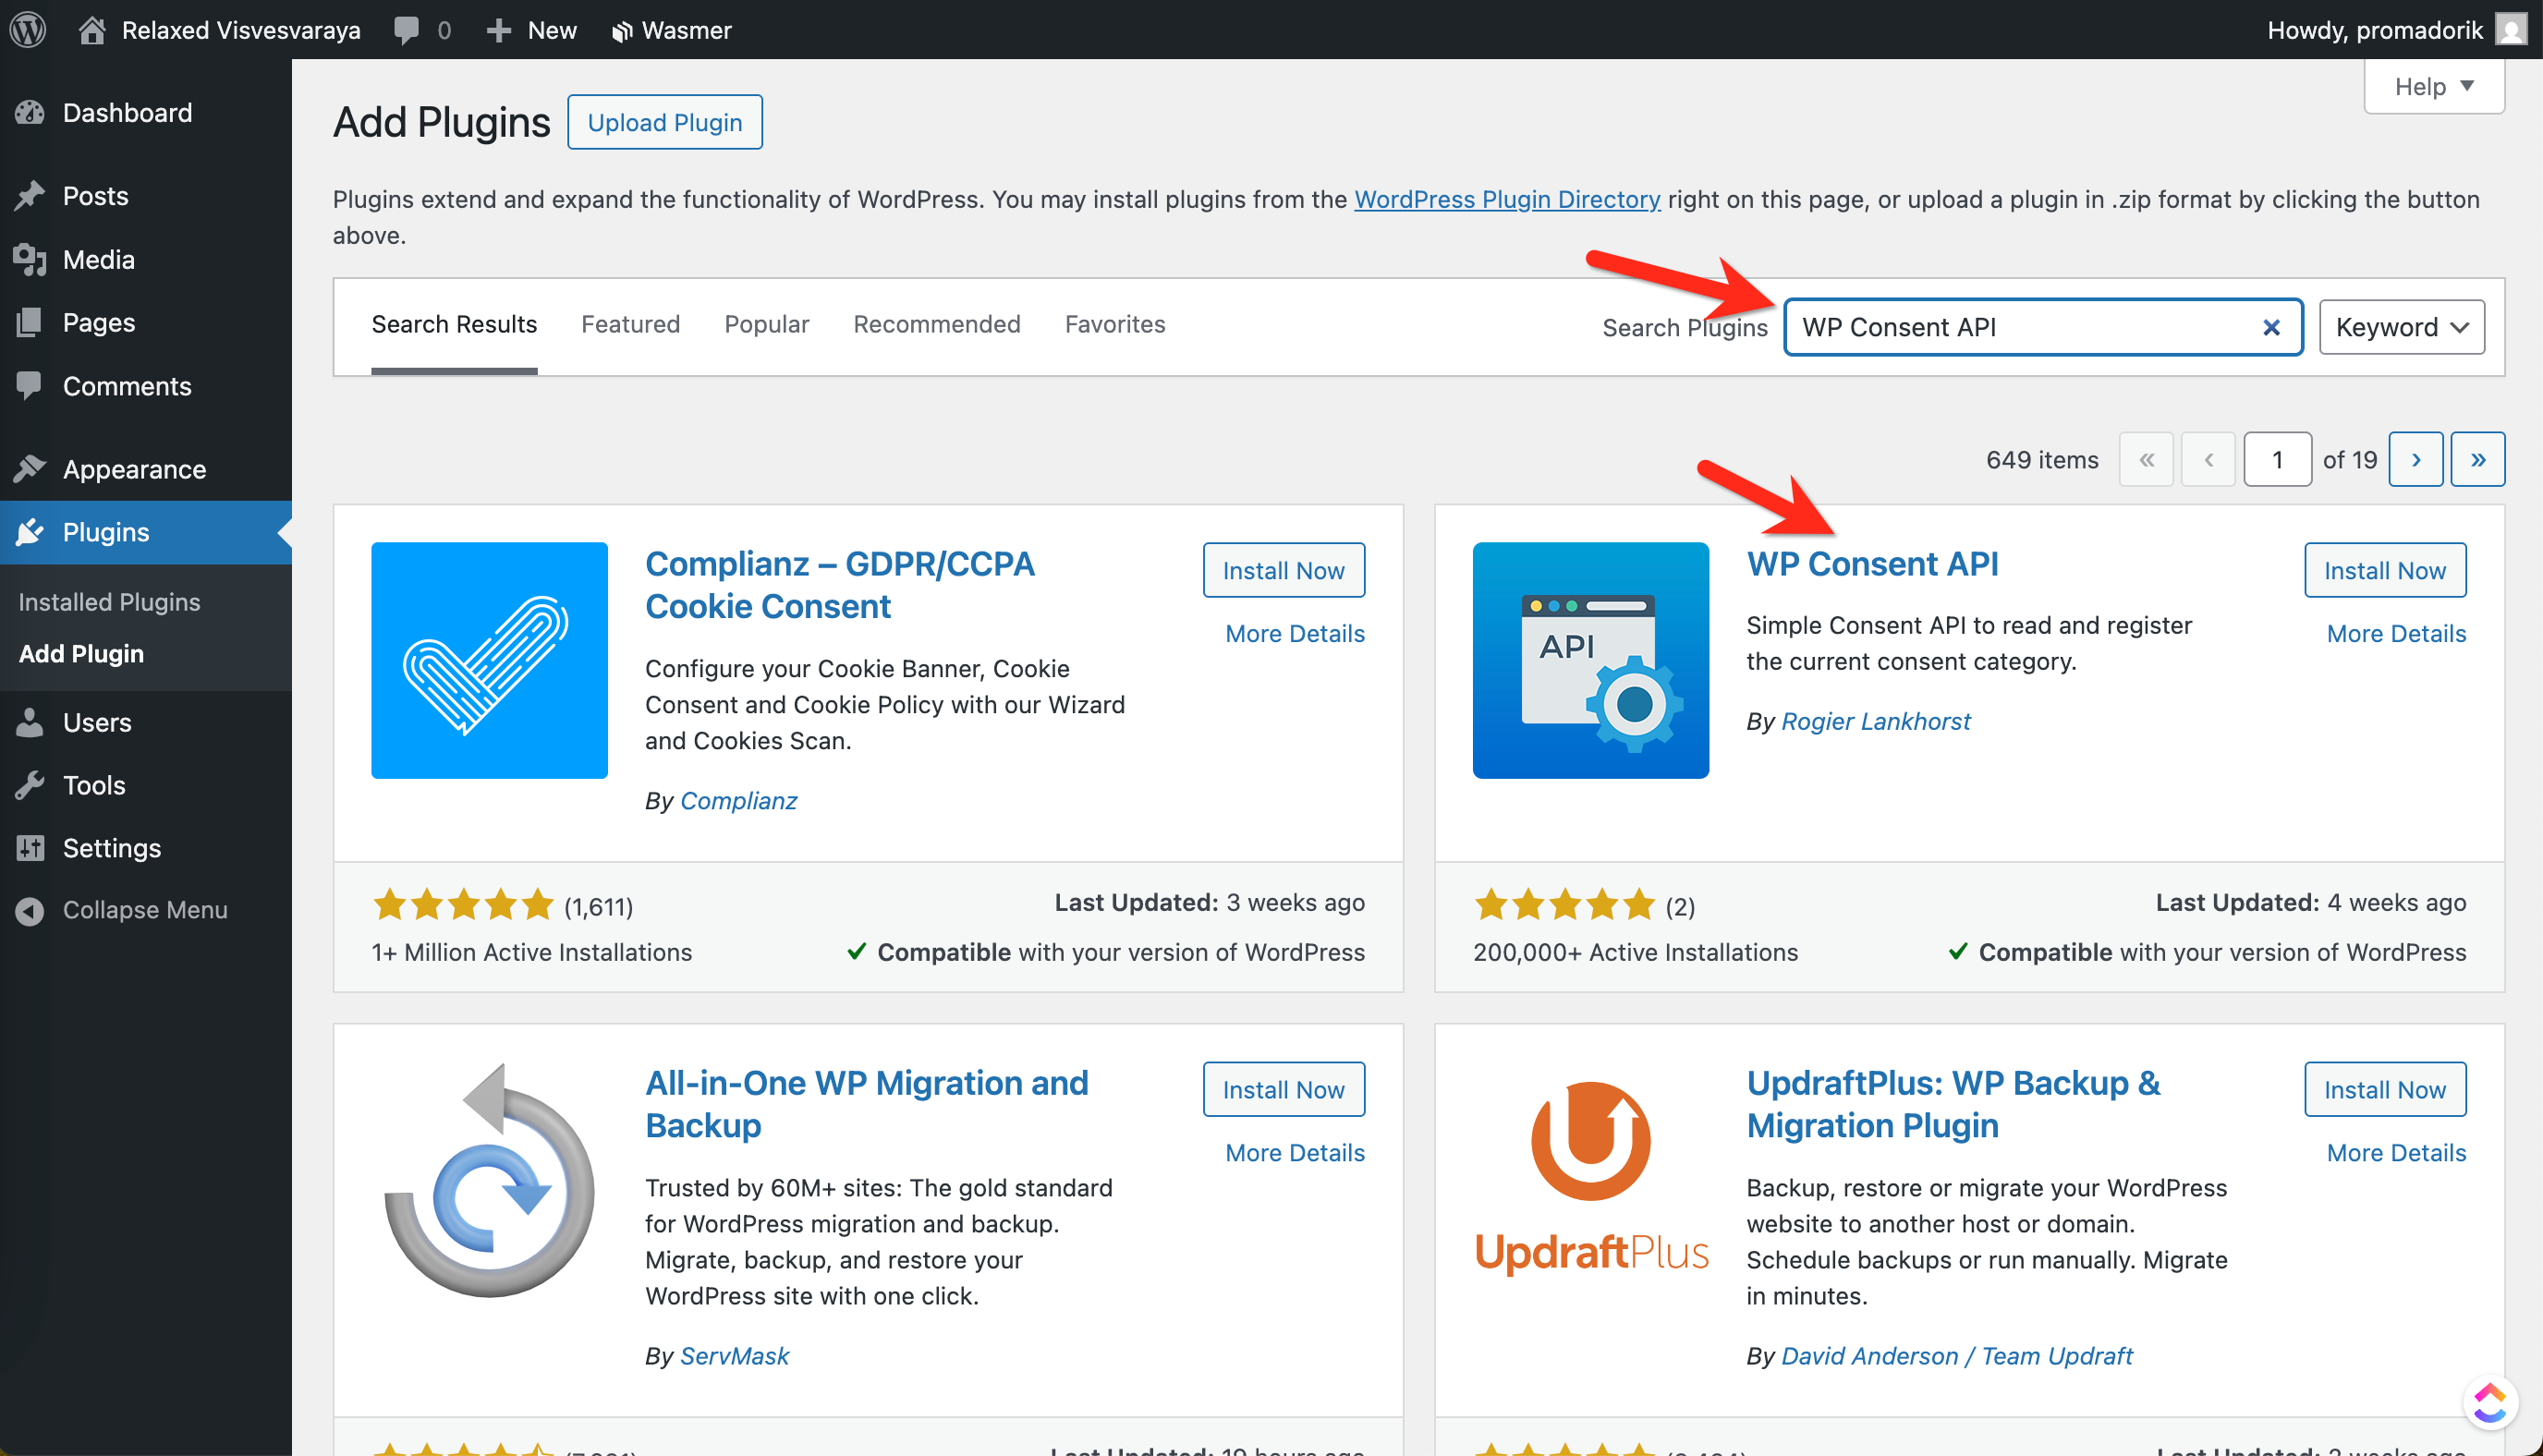
Click on "Install Now"
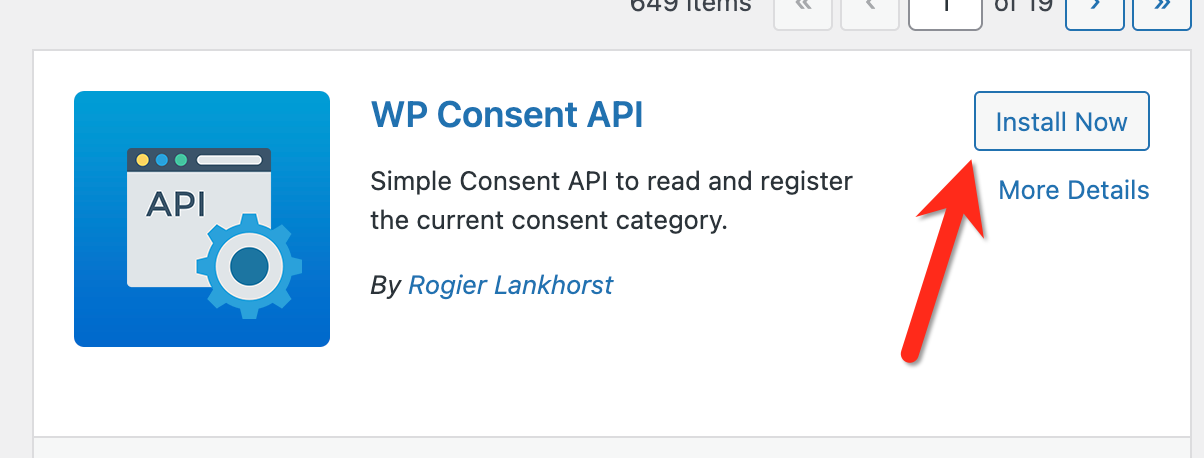
Click on "Active"
Step 2: Install the Consently Plugin
Go to Plugins → Add Plugin
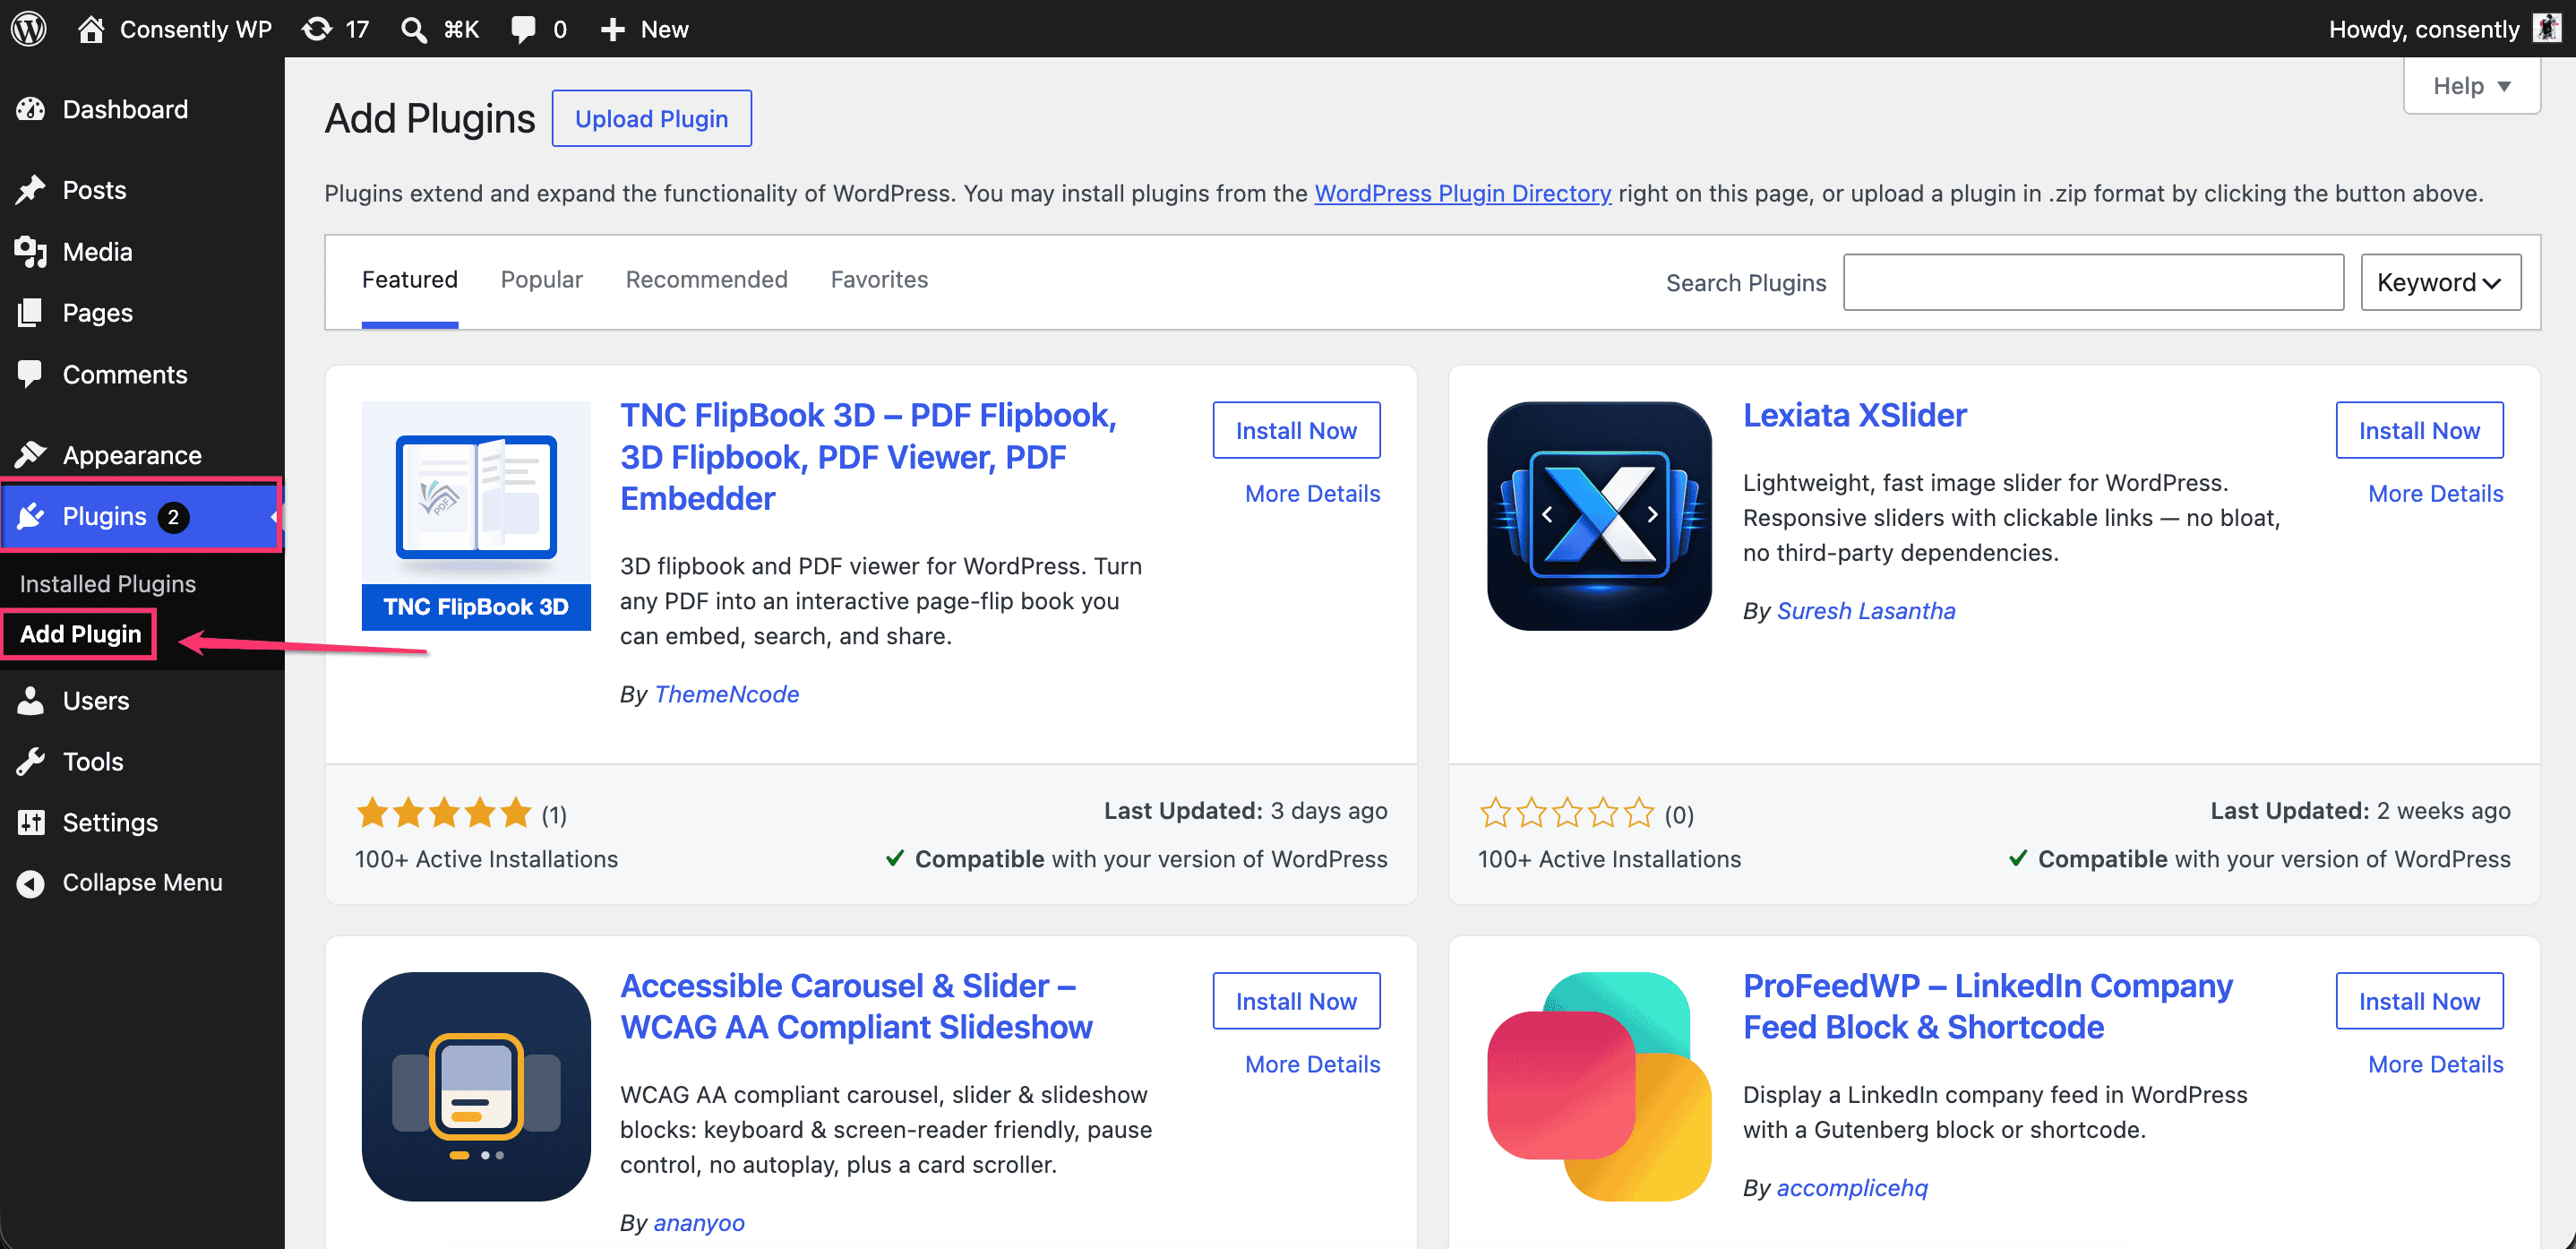
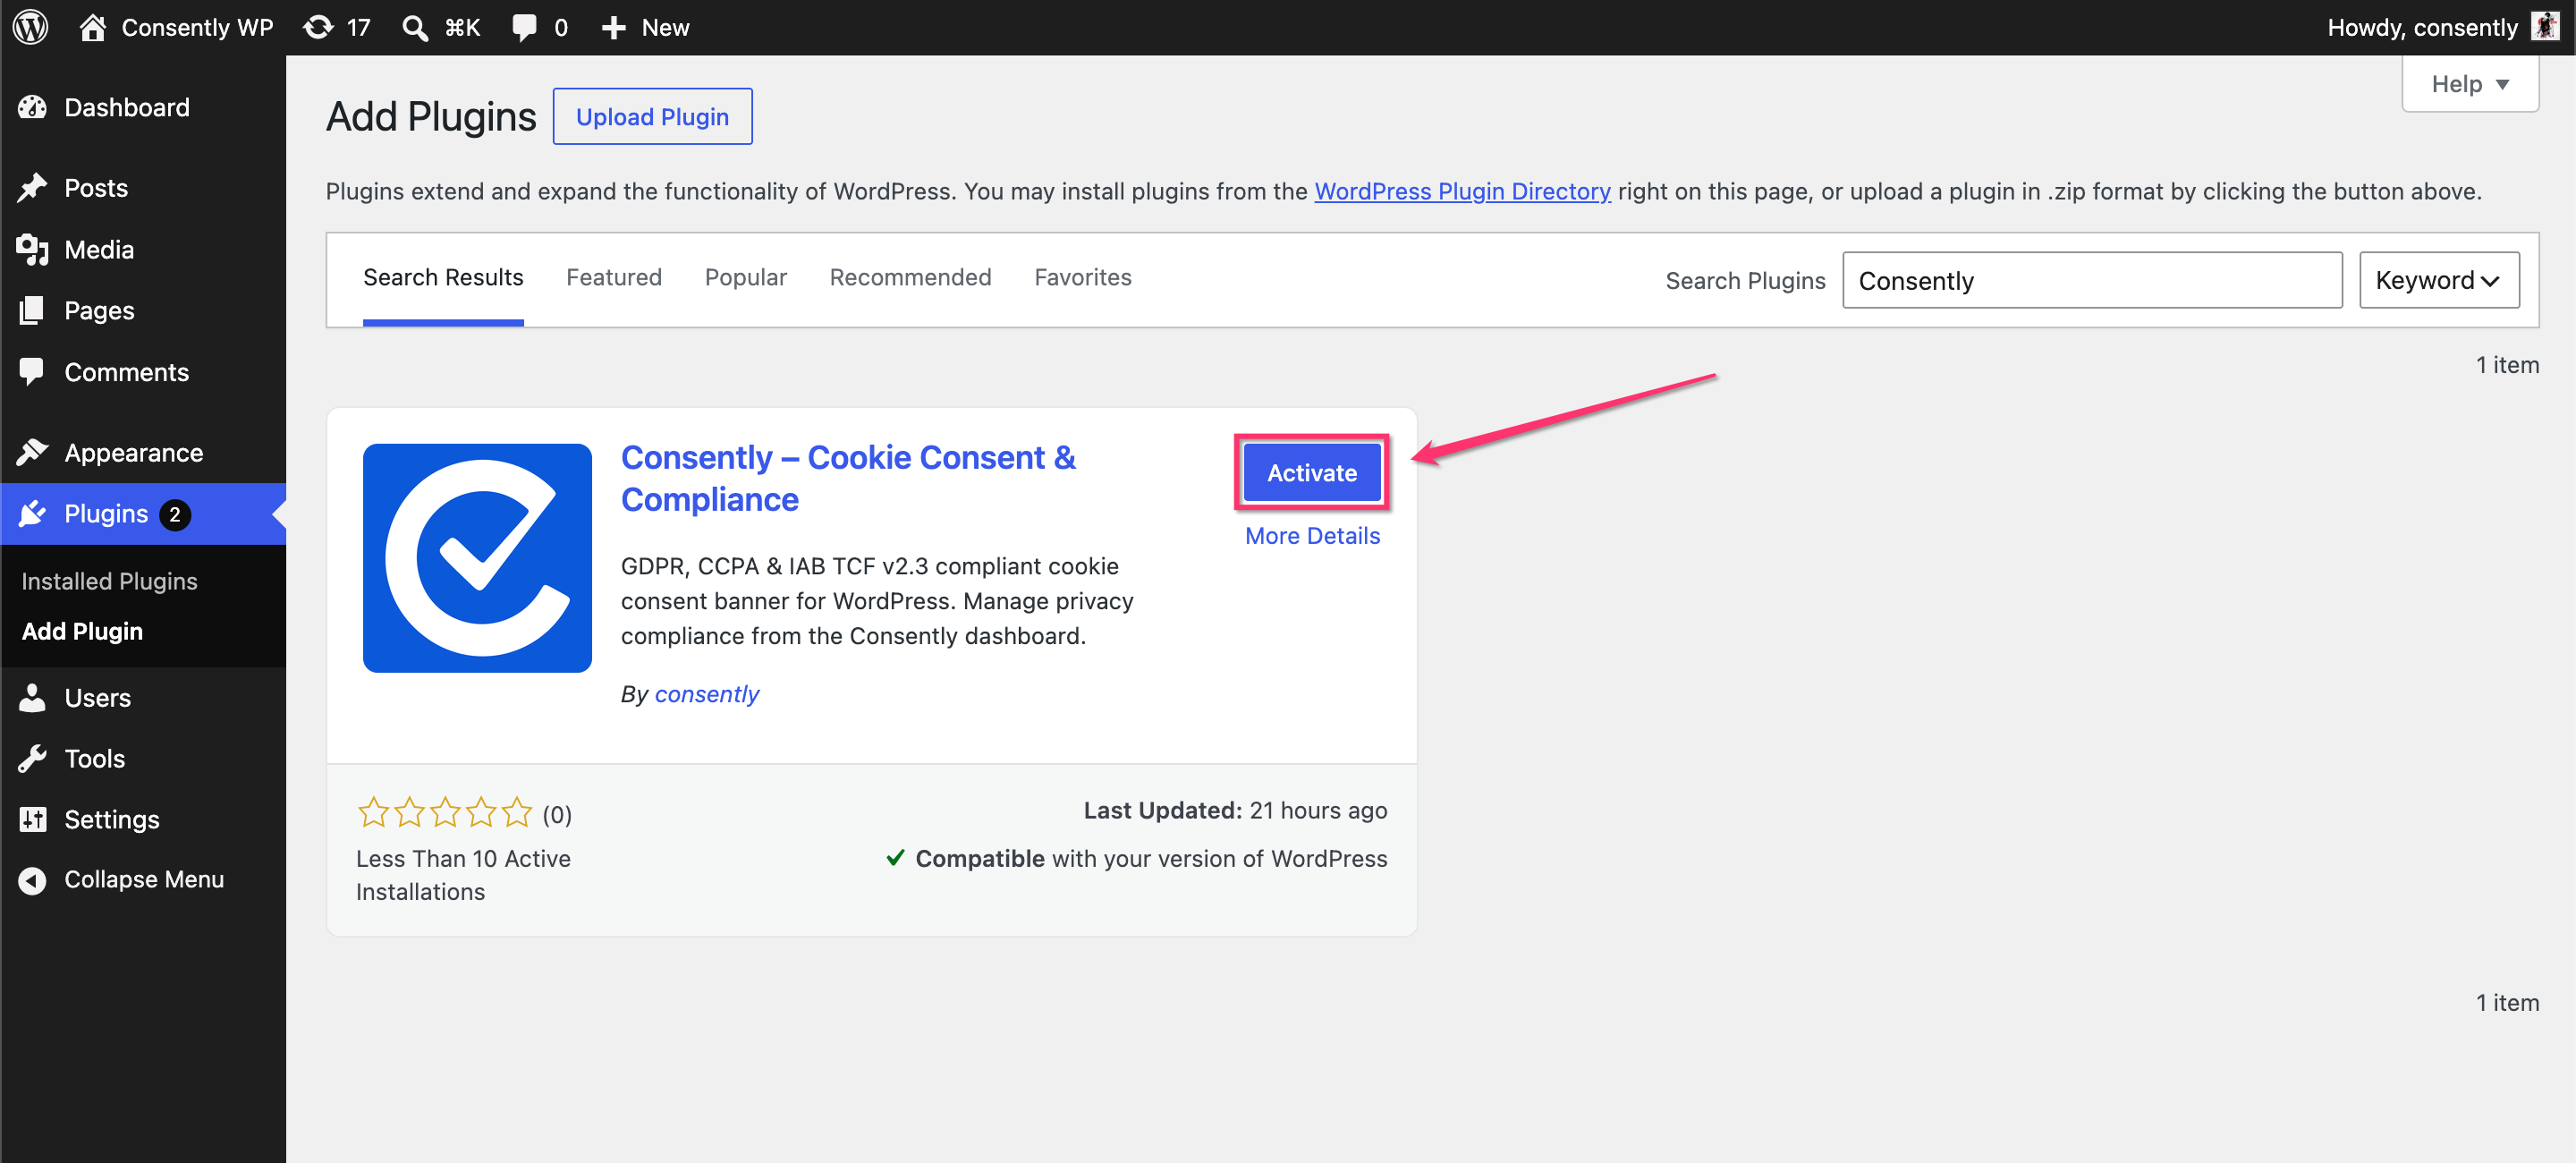
Search for “Consently”
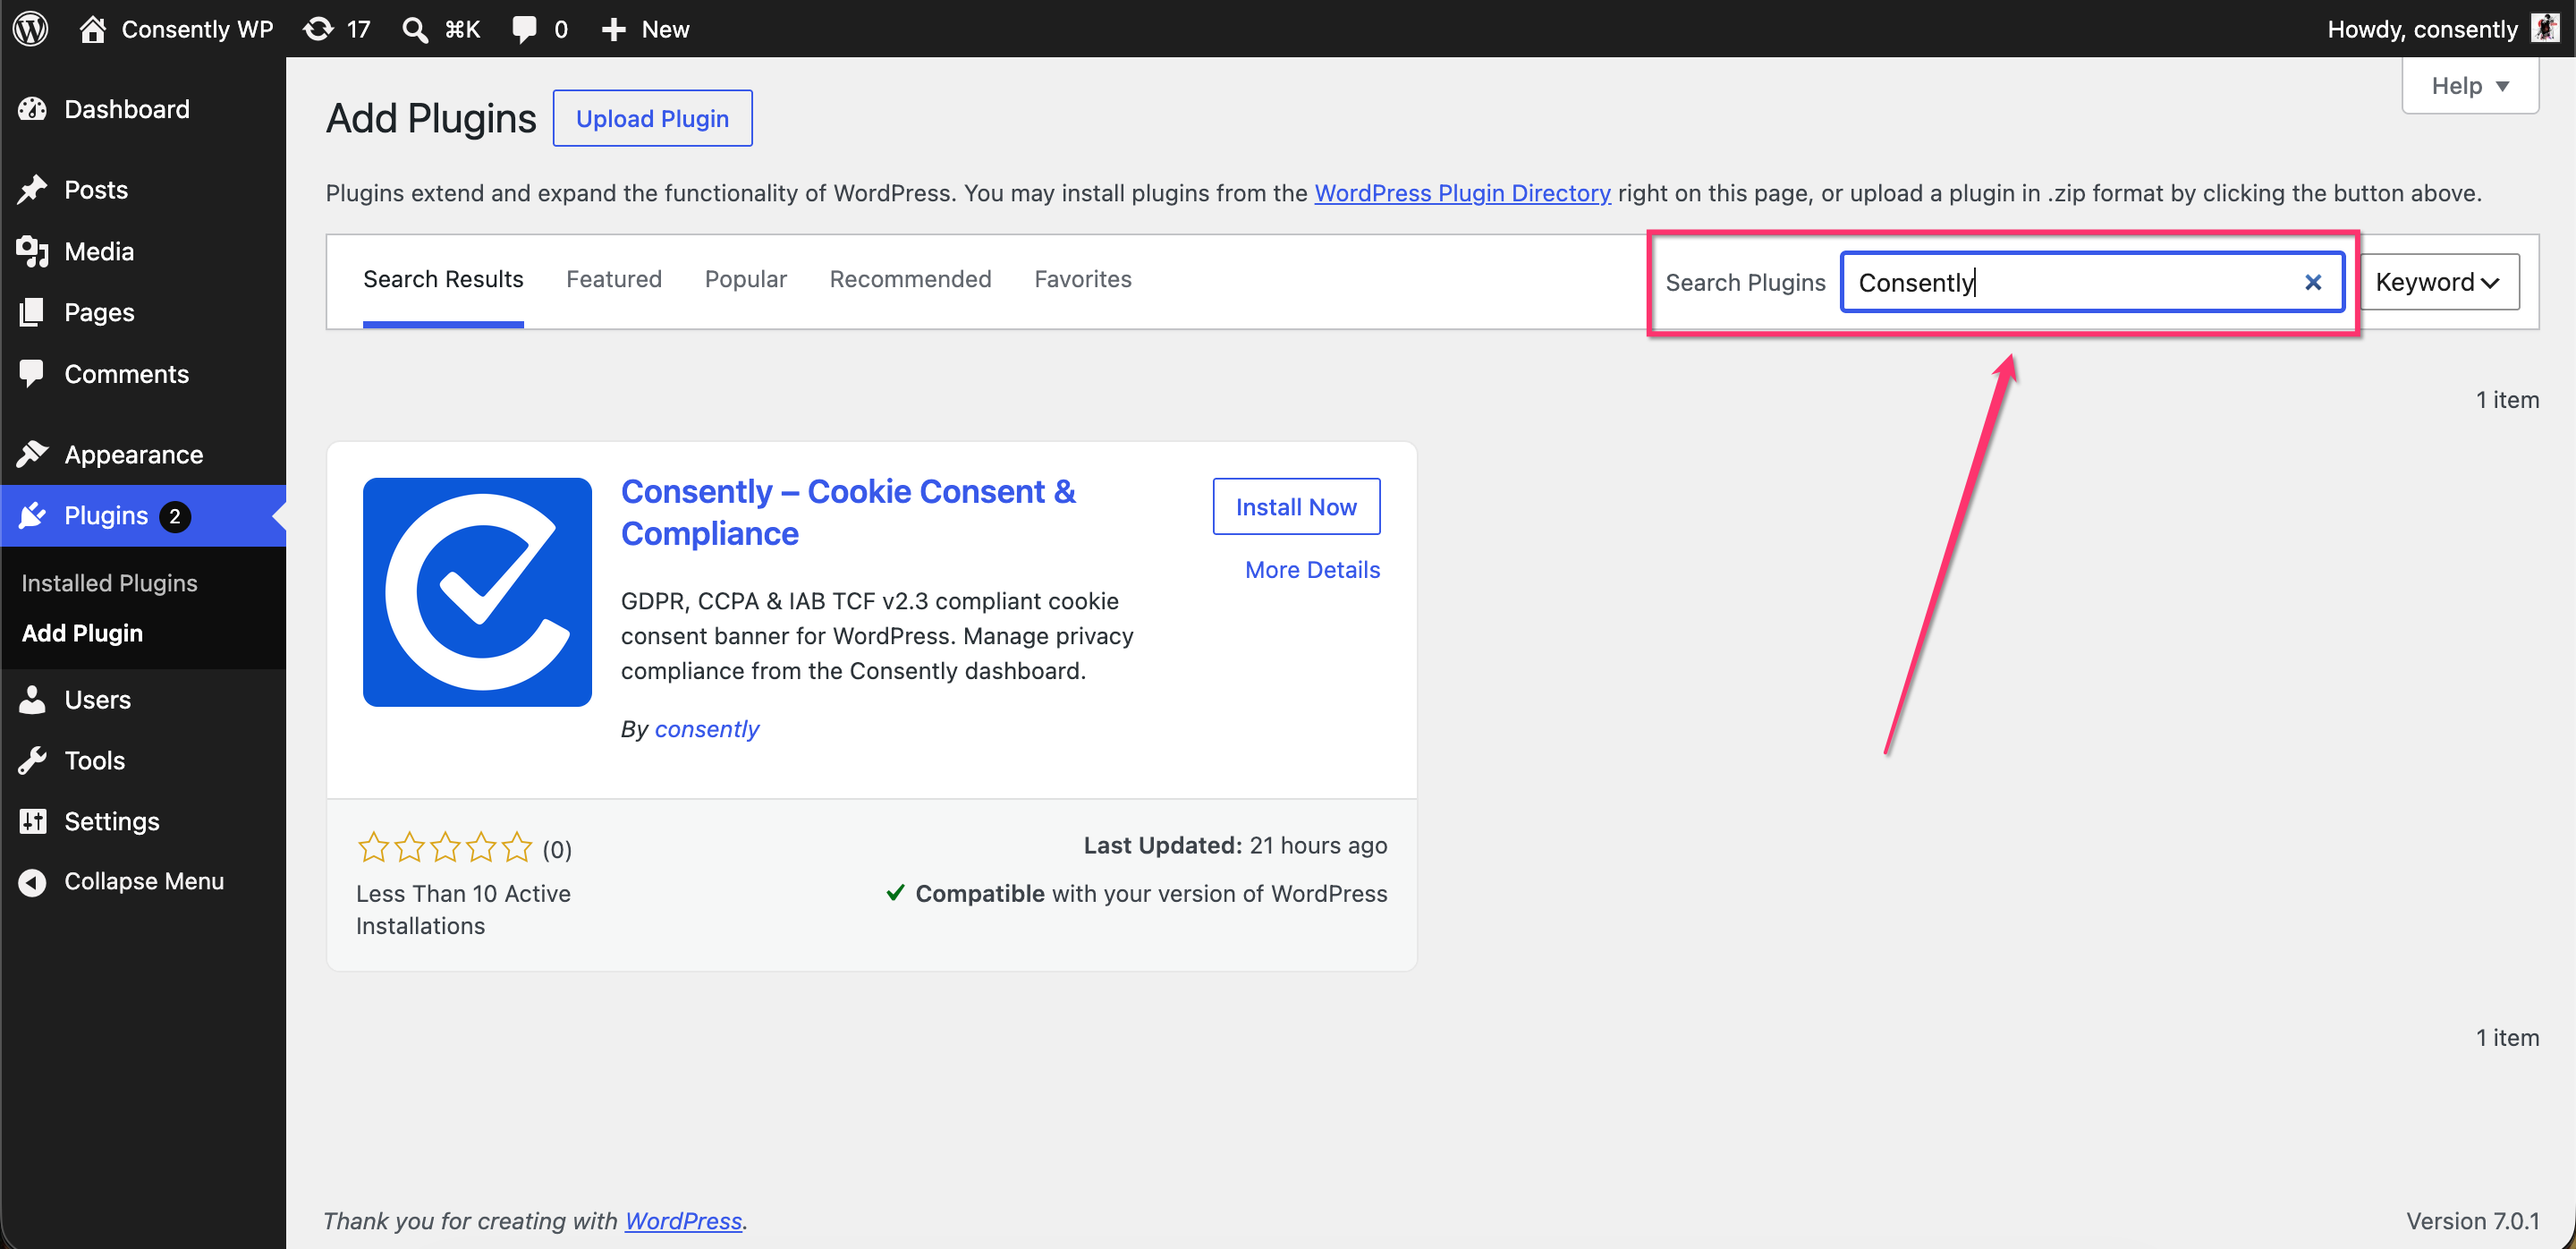
Click Install Now
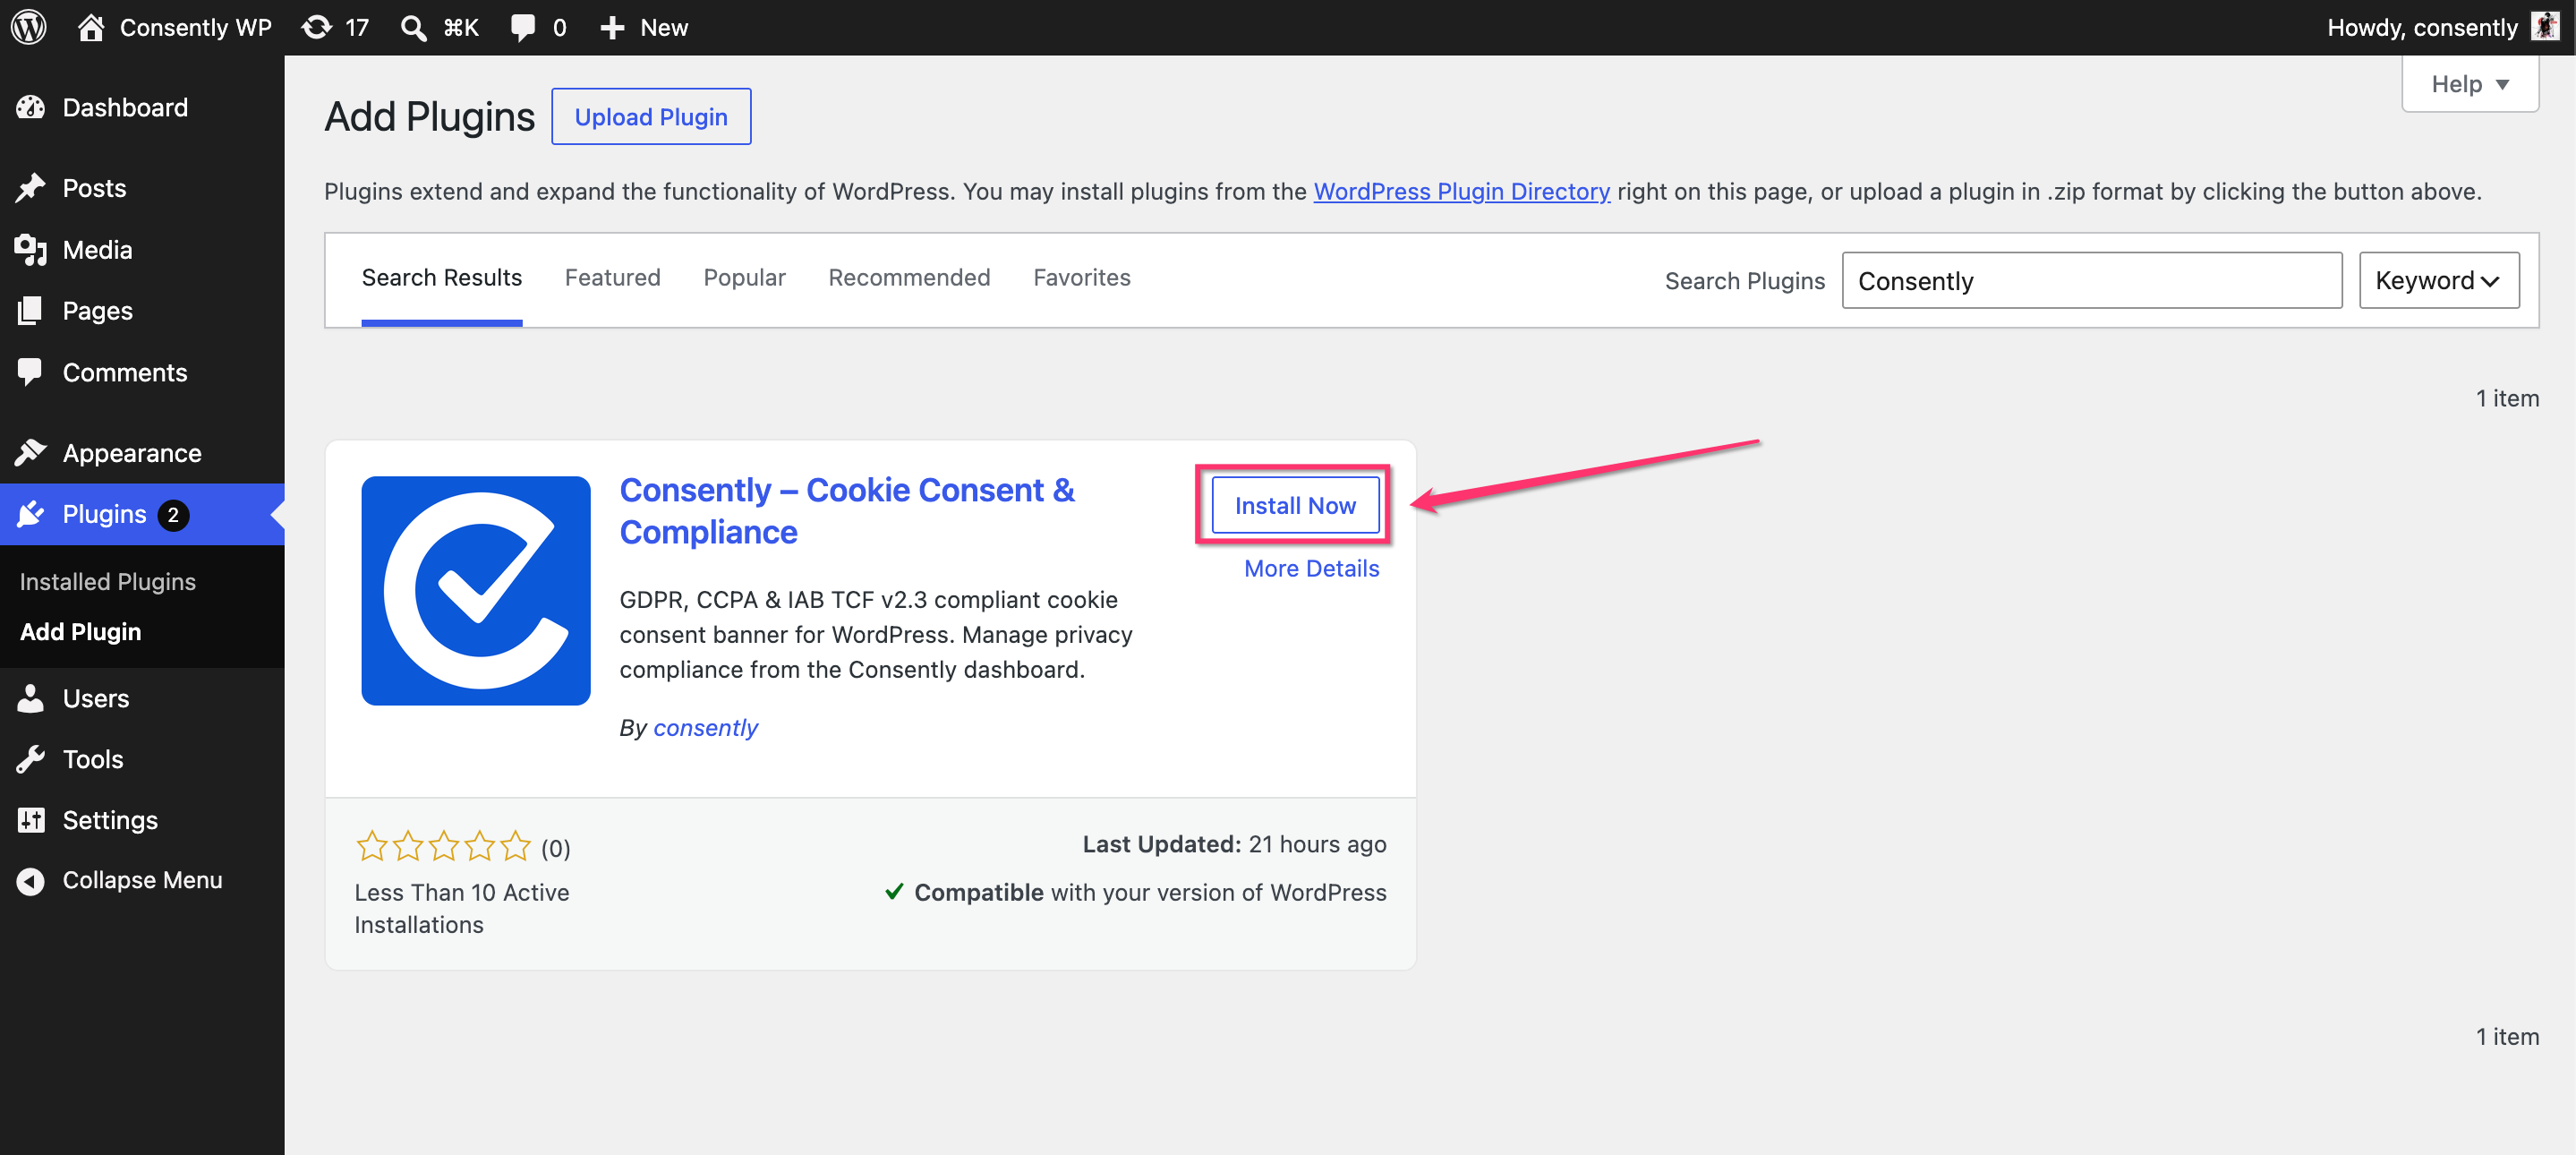
Click Activate
Step 4: Generate API Key from Consently
To connect your website:
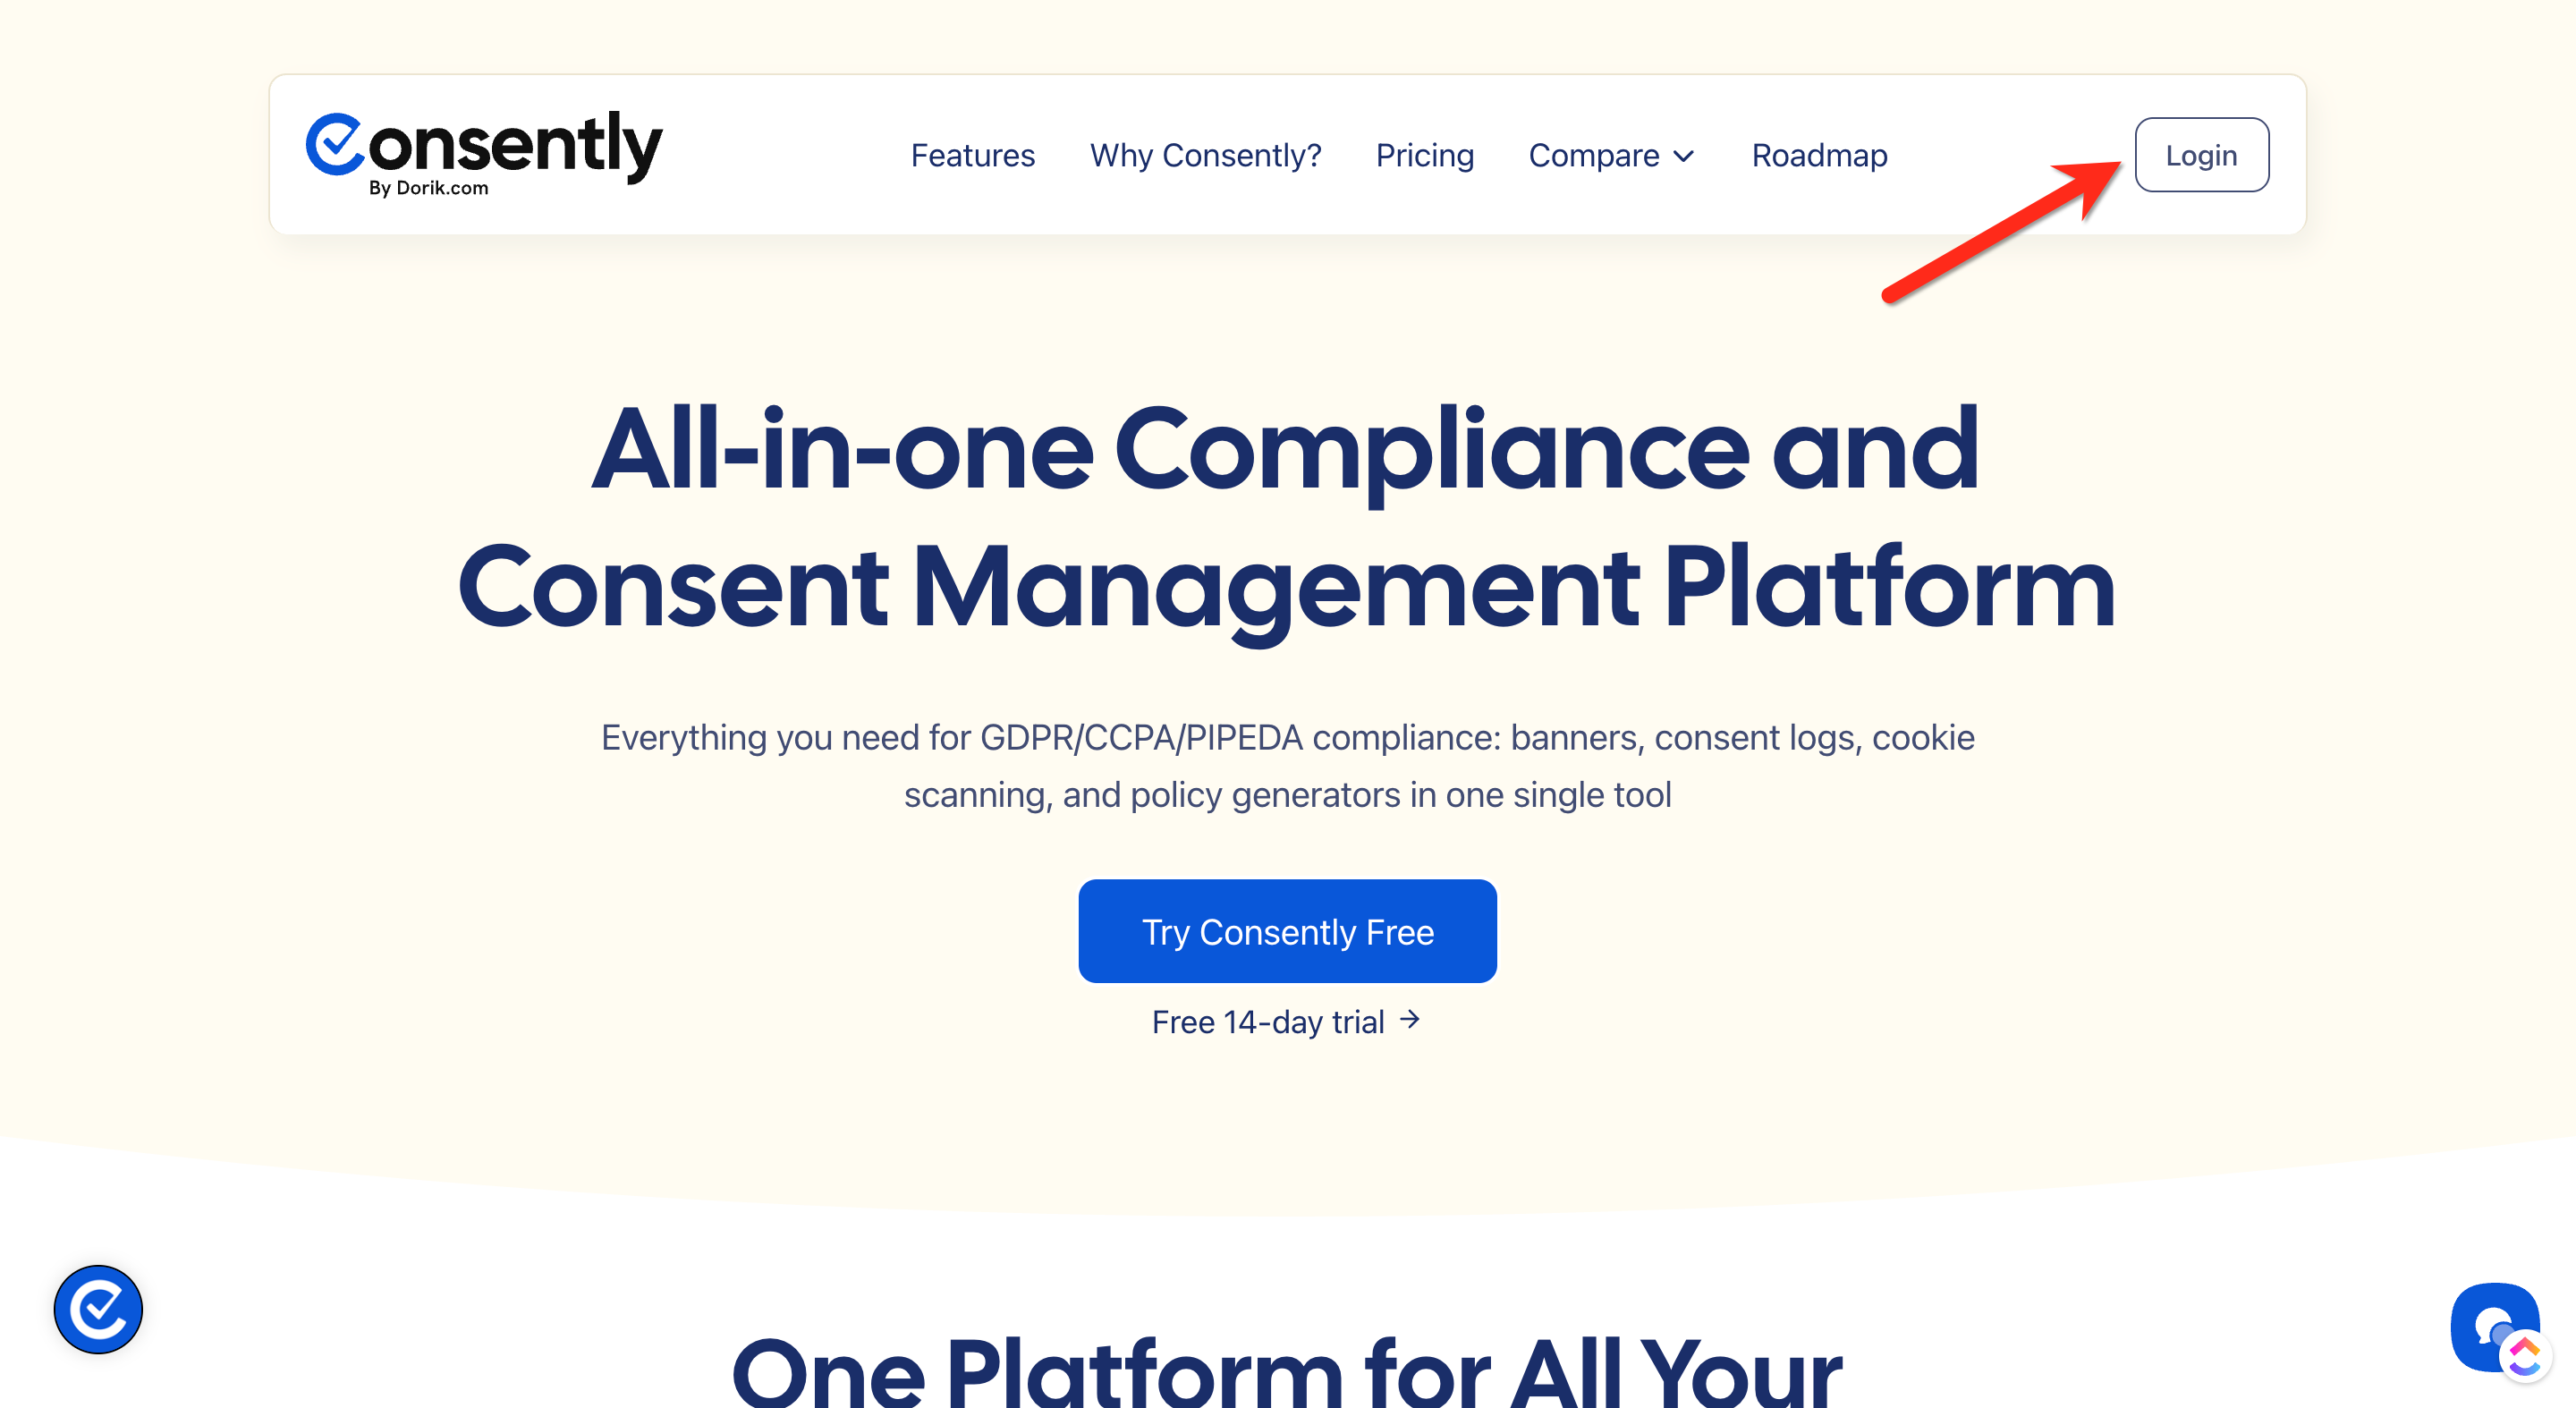
Log in to your Consently dashboard
Navigate to API Keys Settings
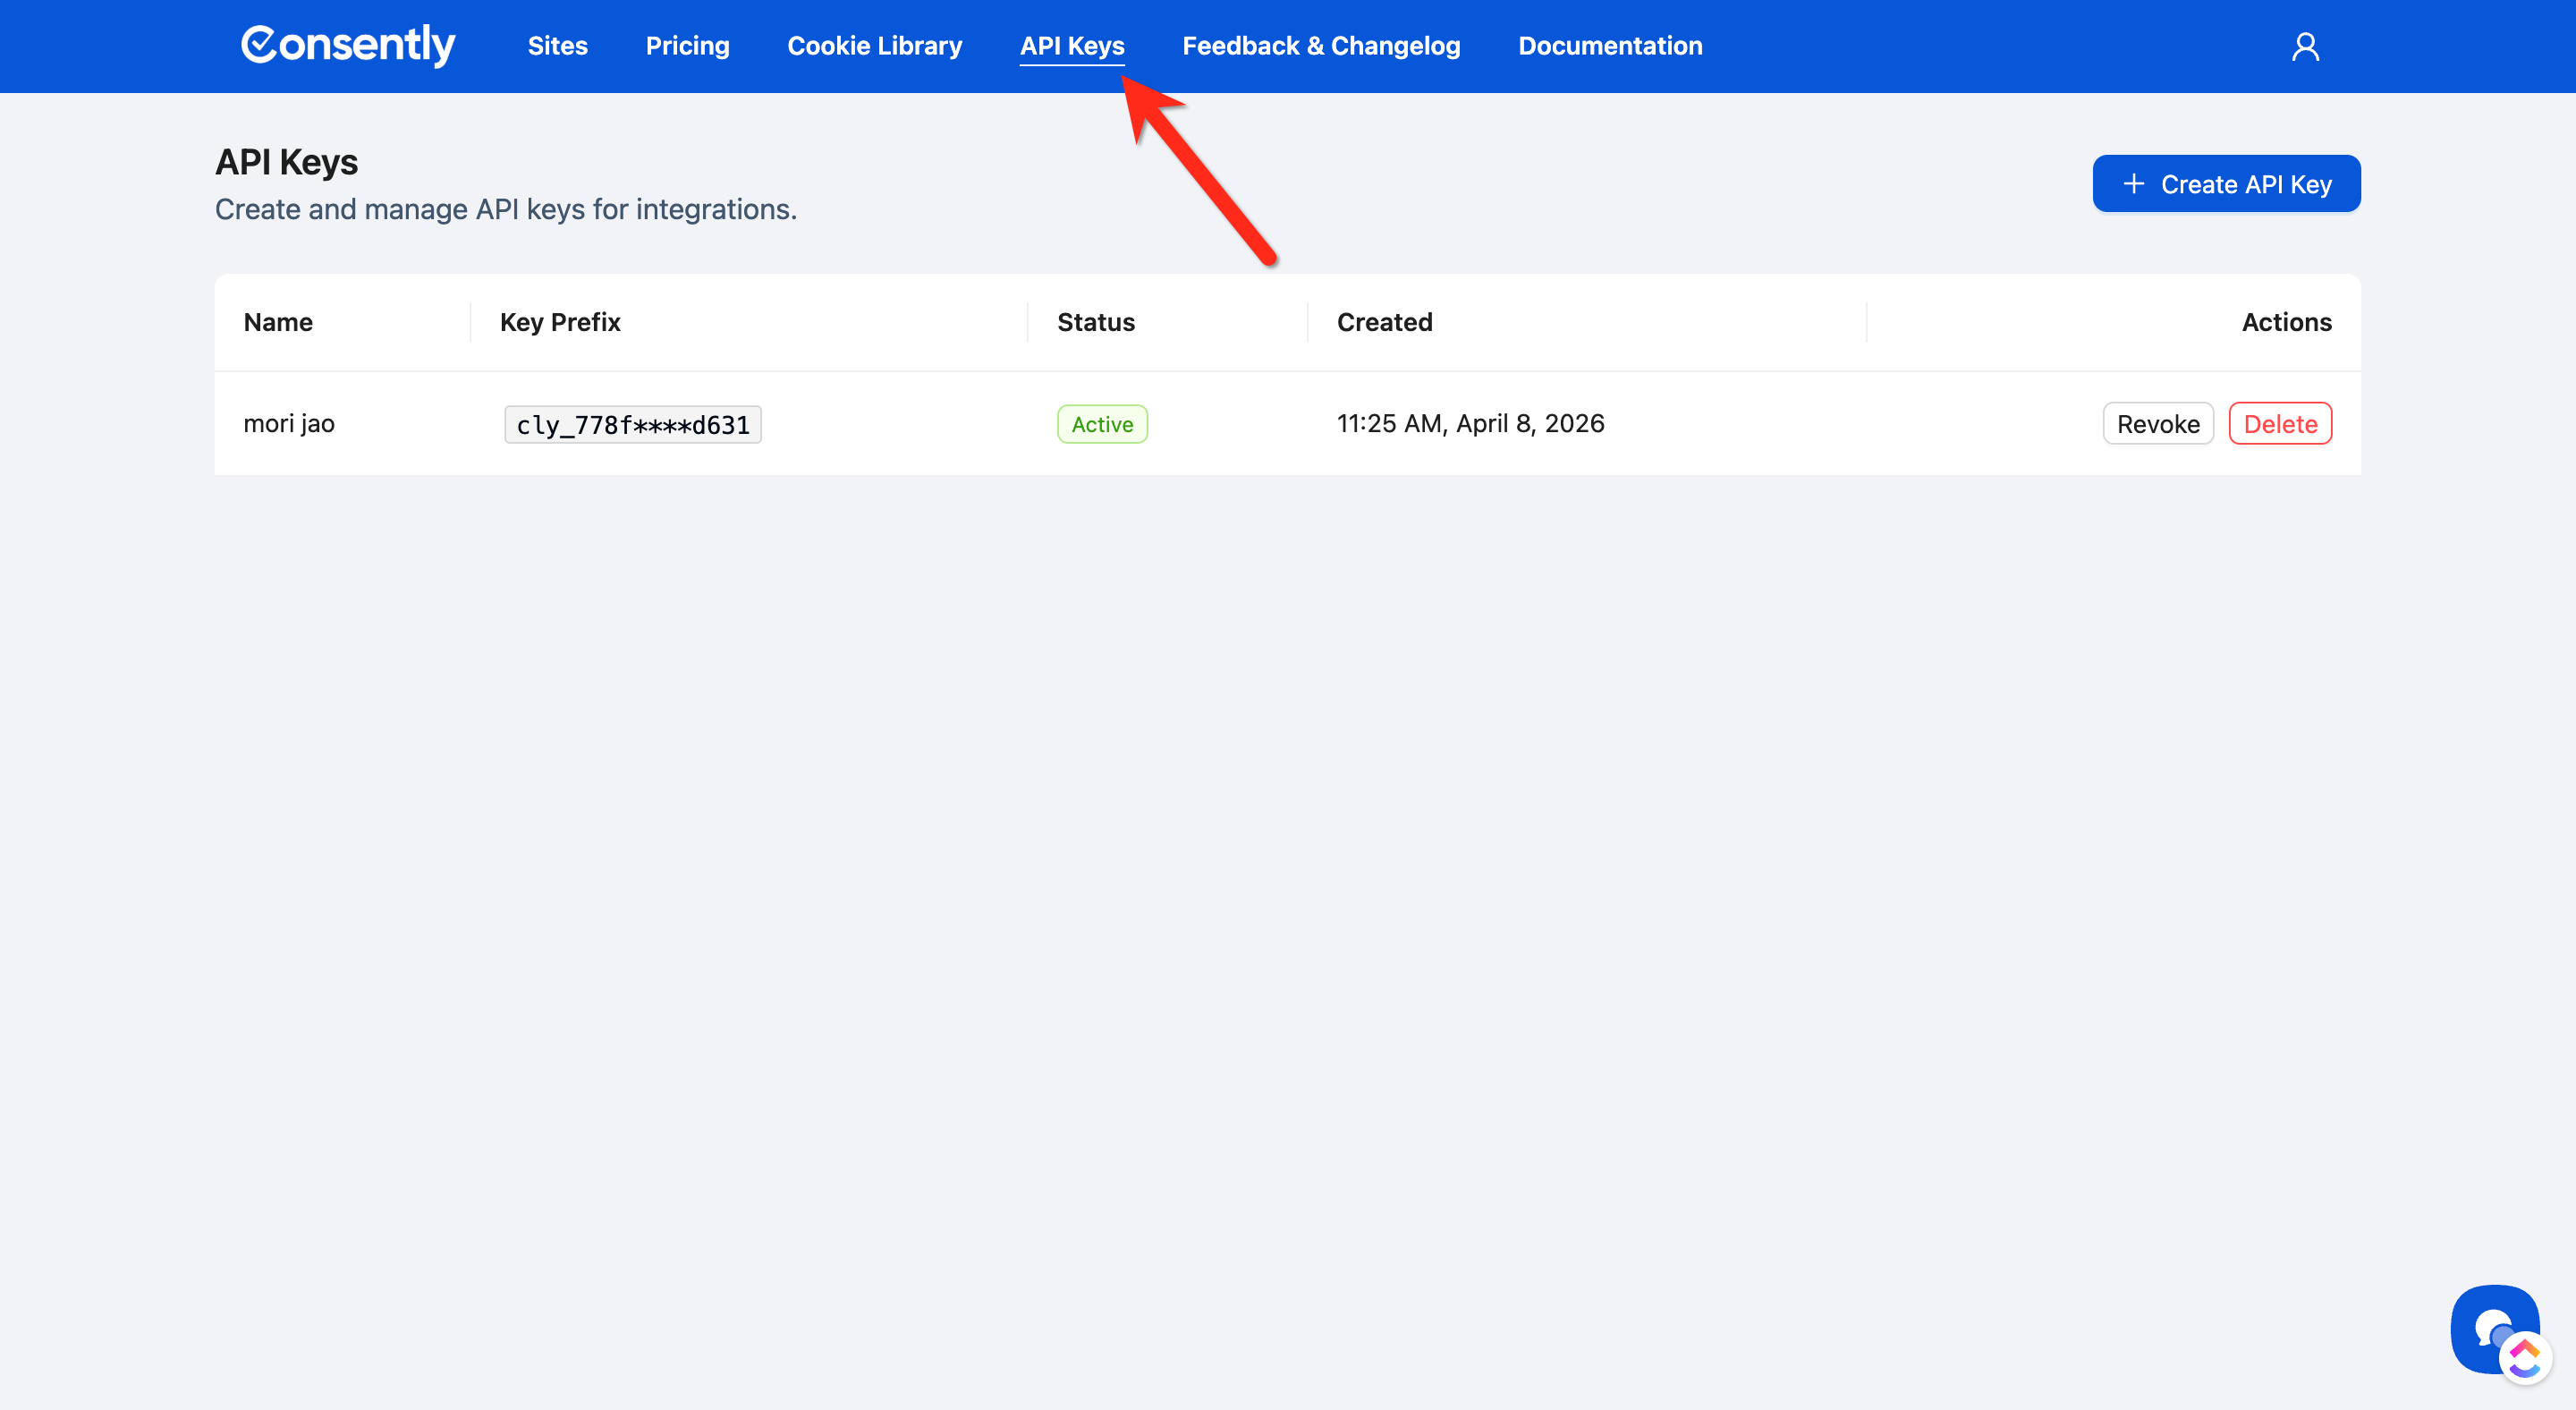
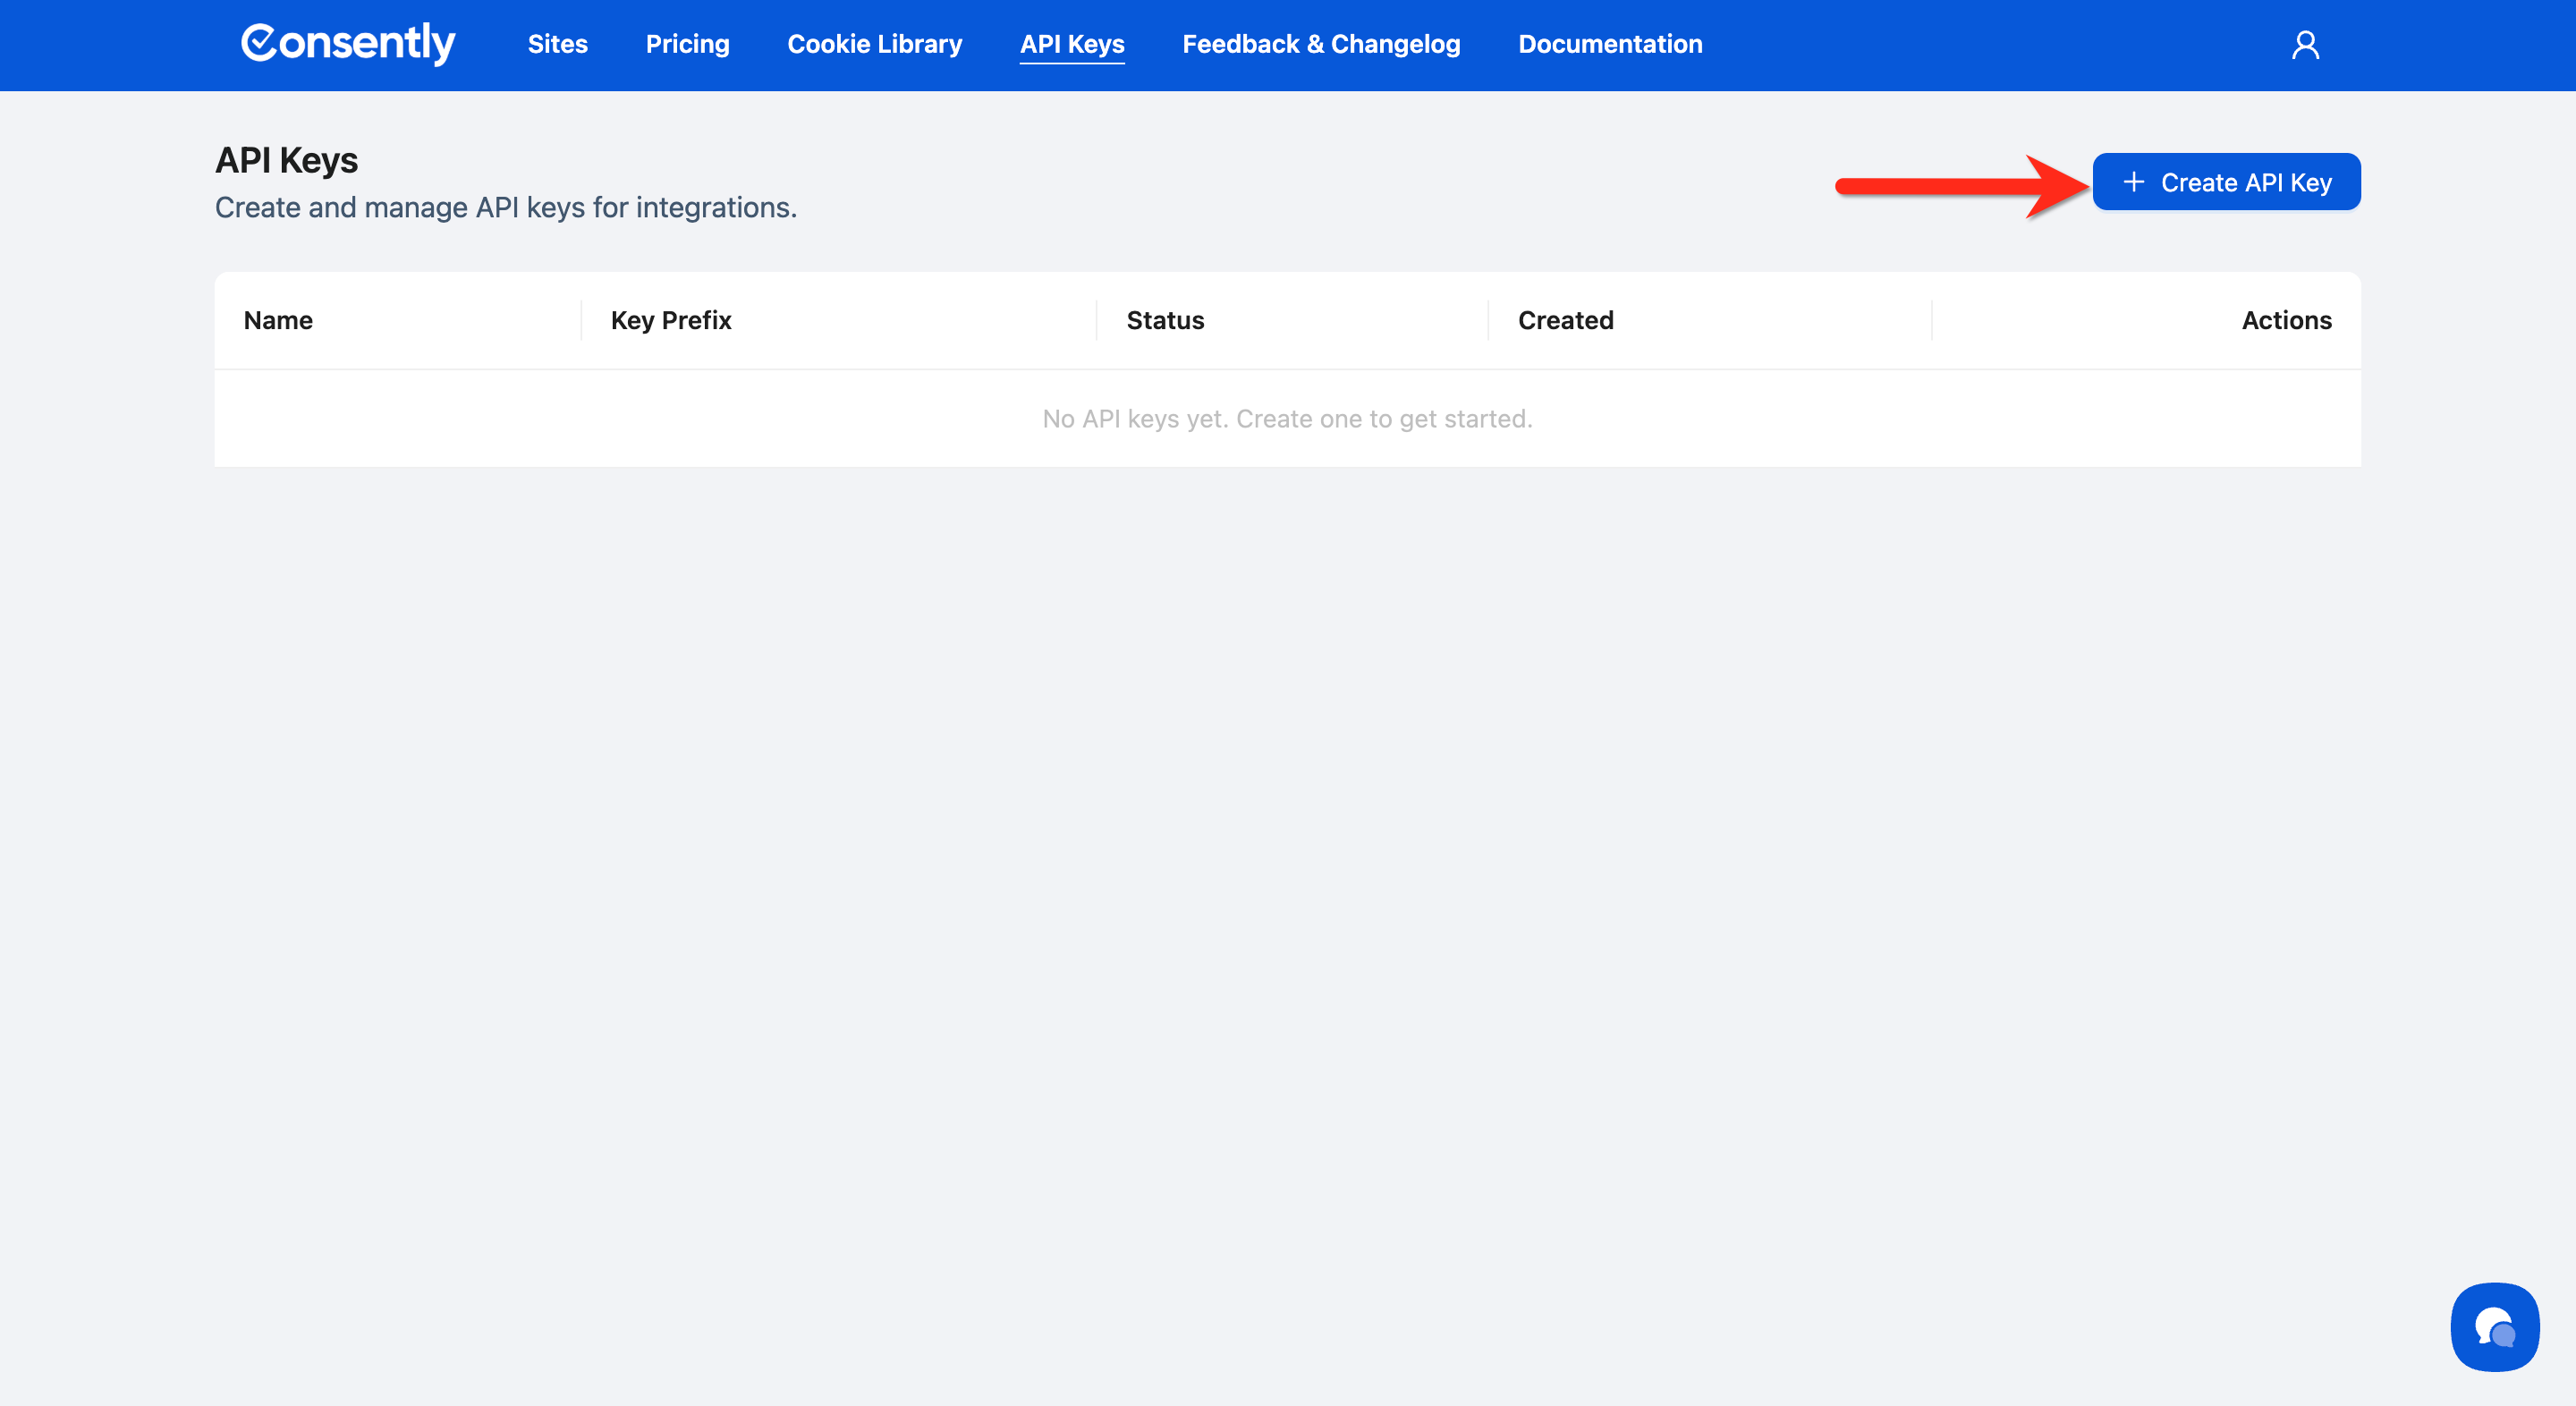
Click the + Create API Key button
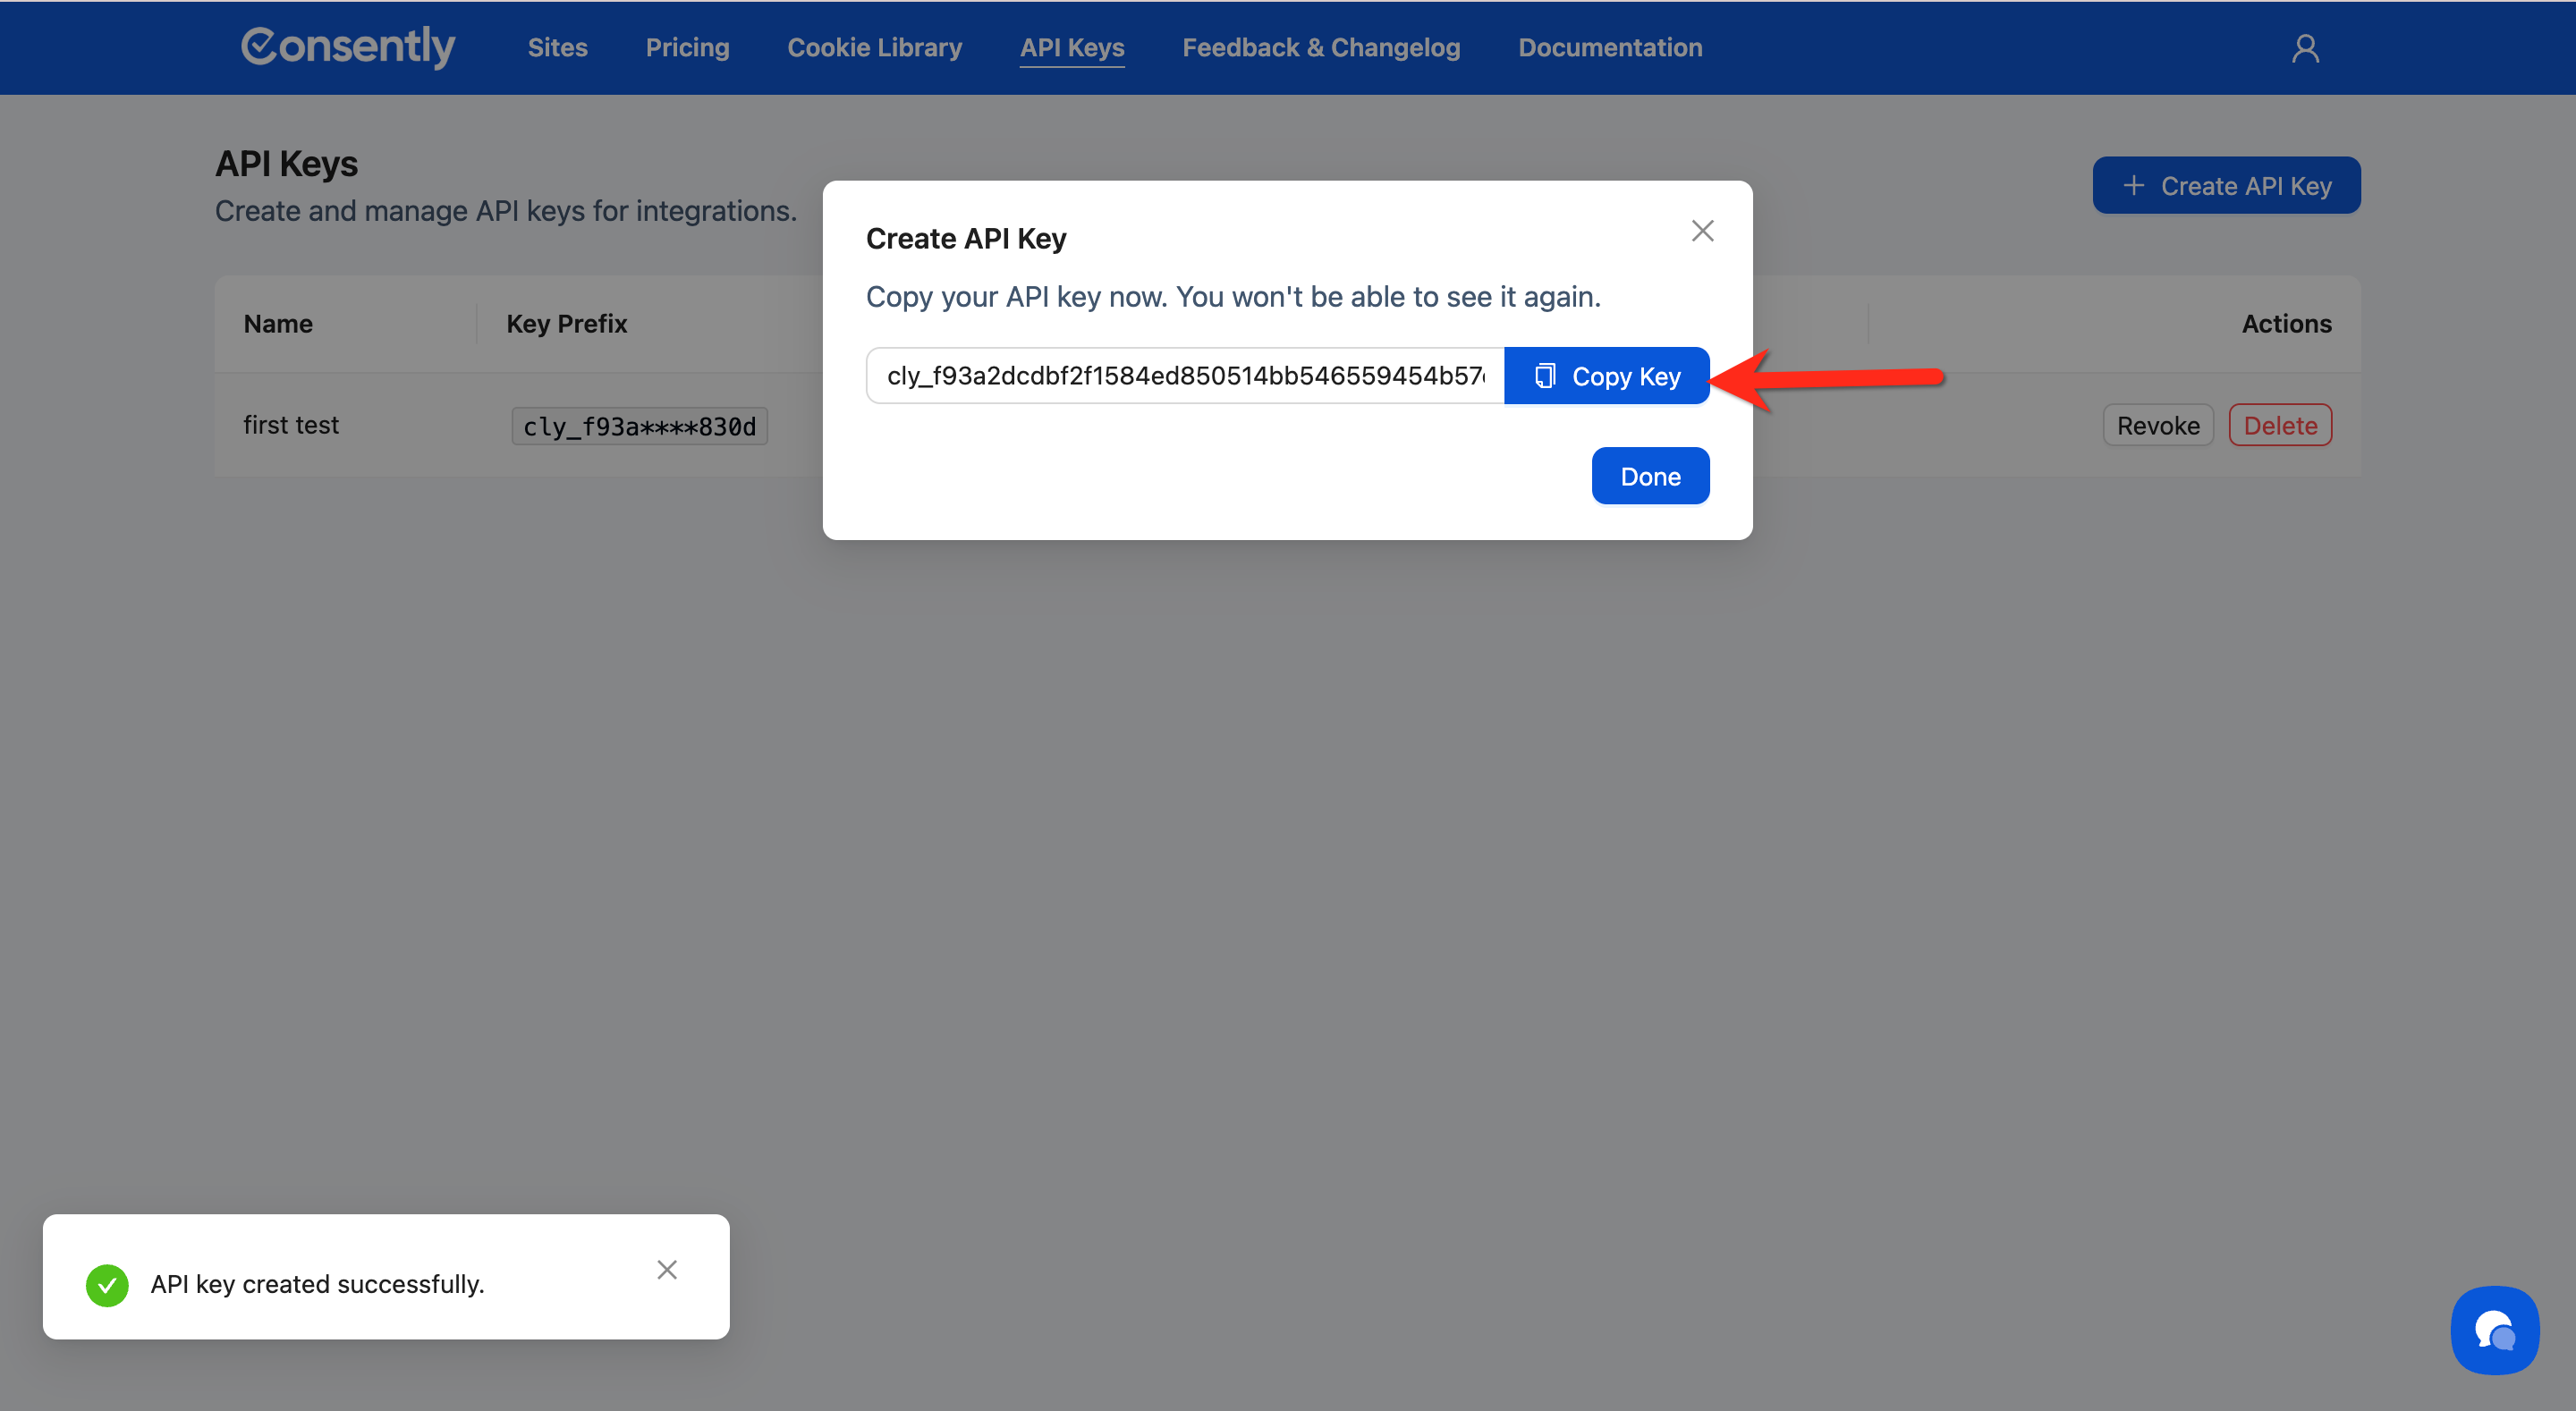
Copy the API key
Step 5: Connect Your Website
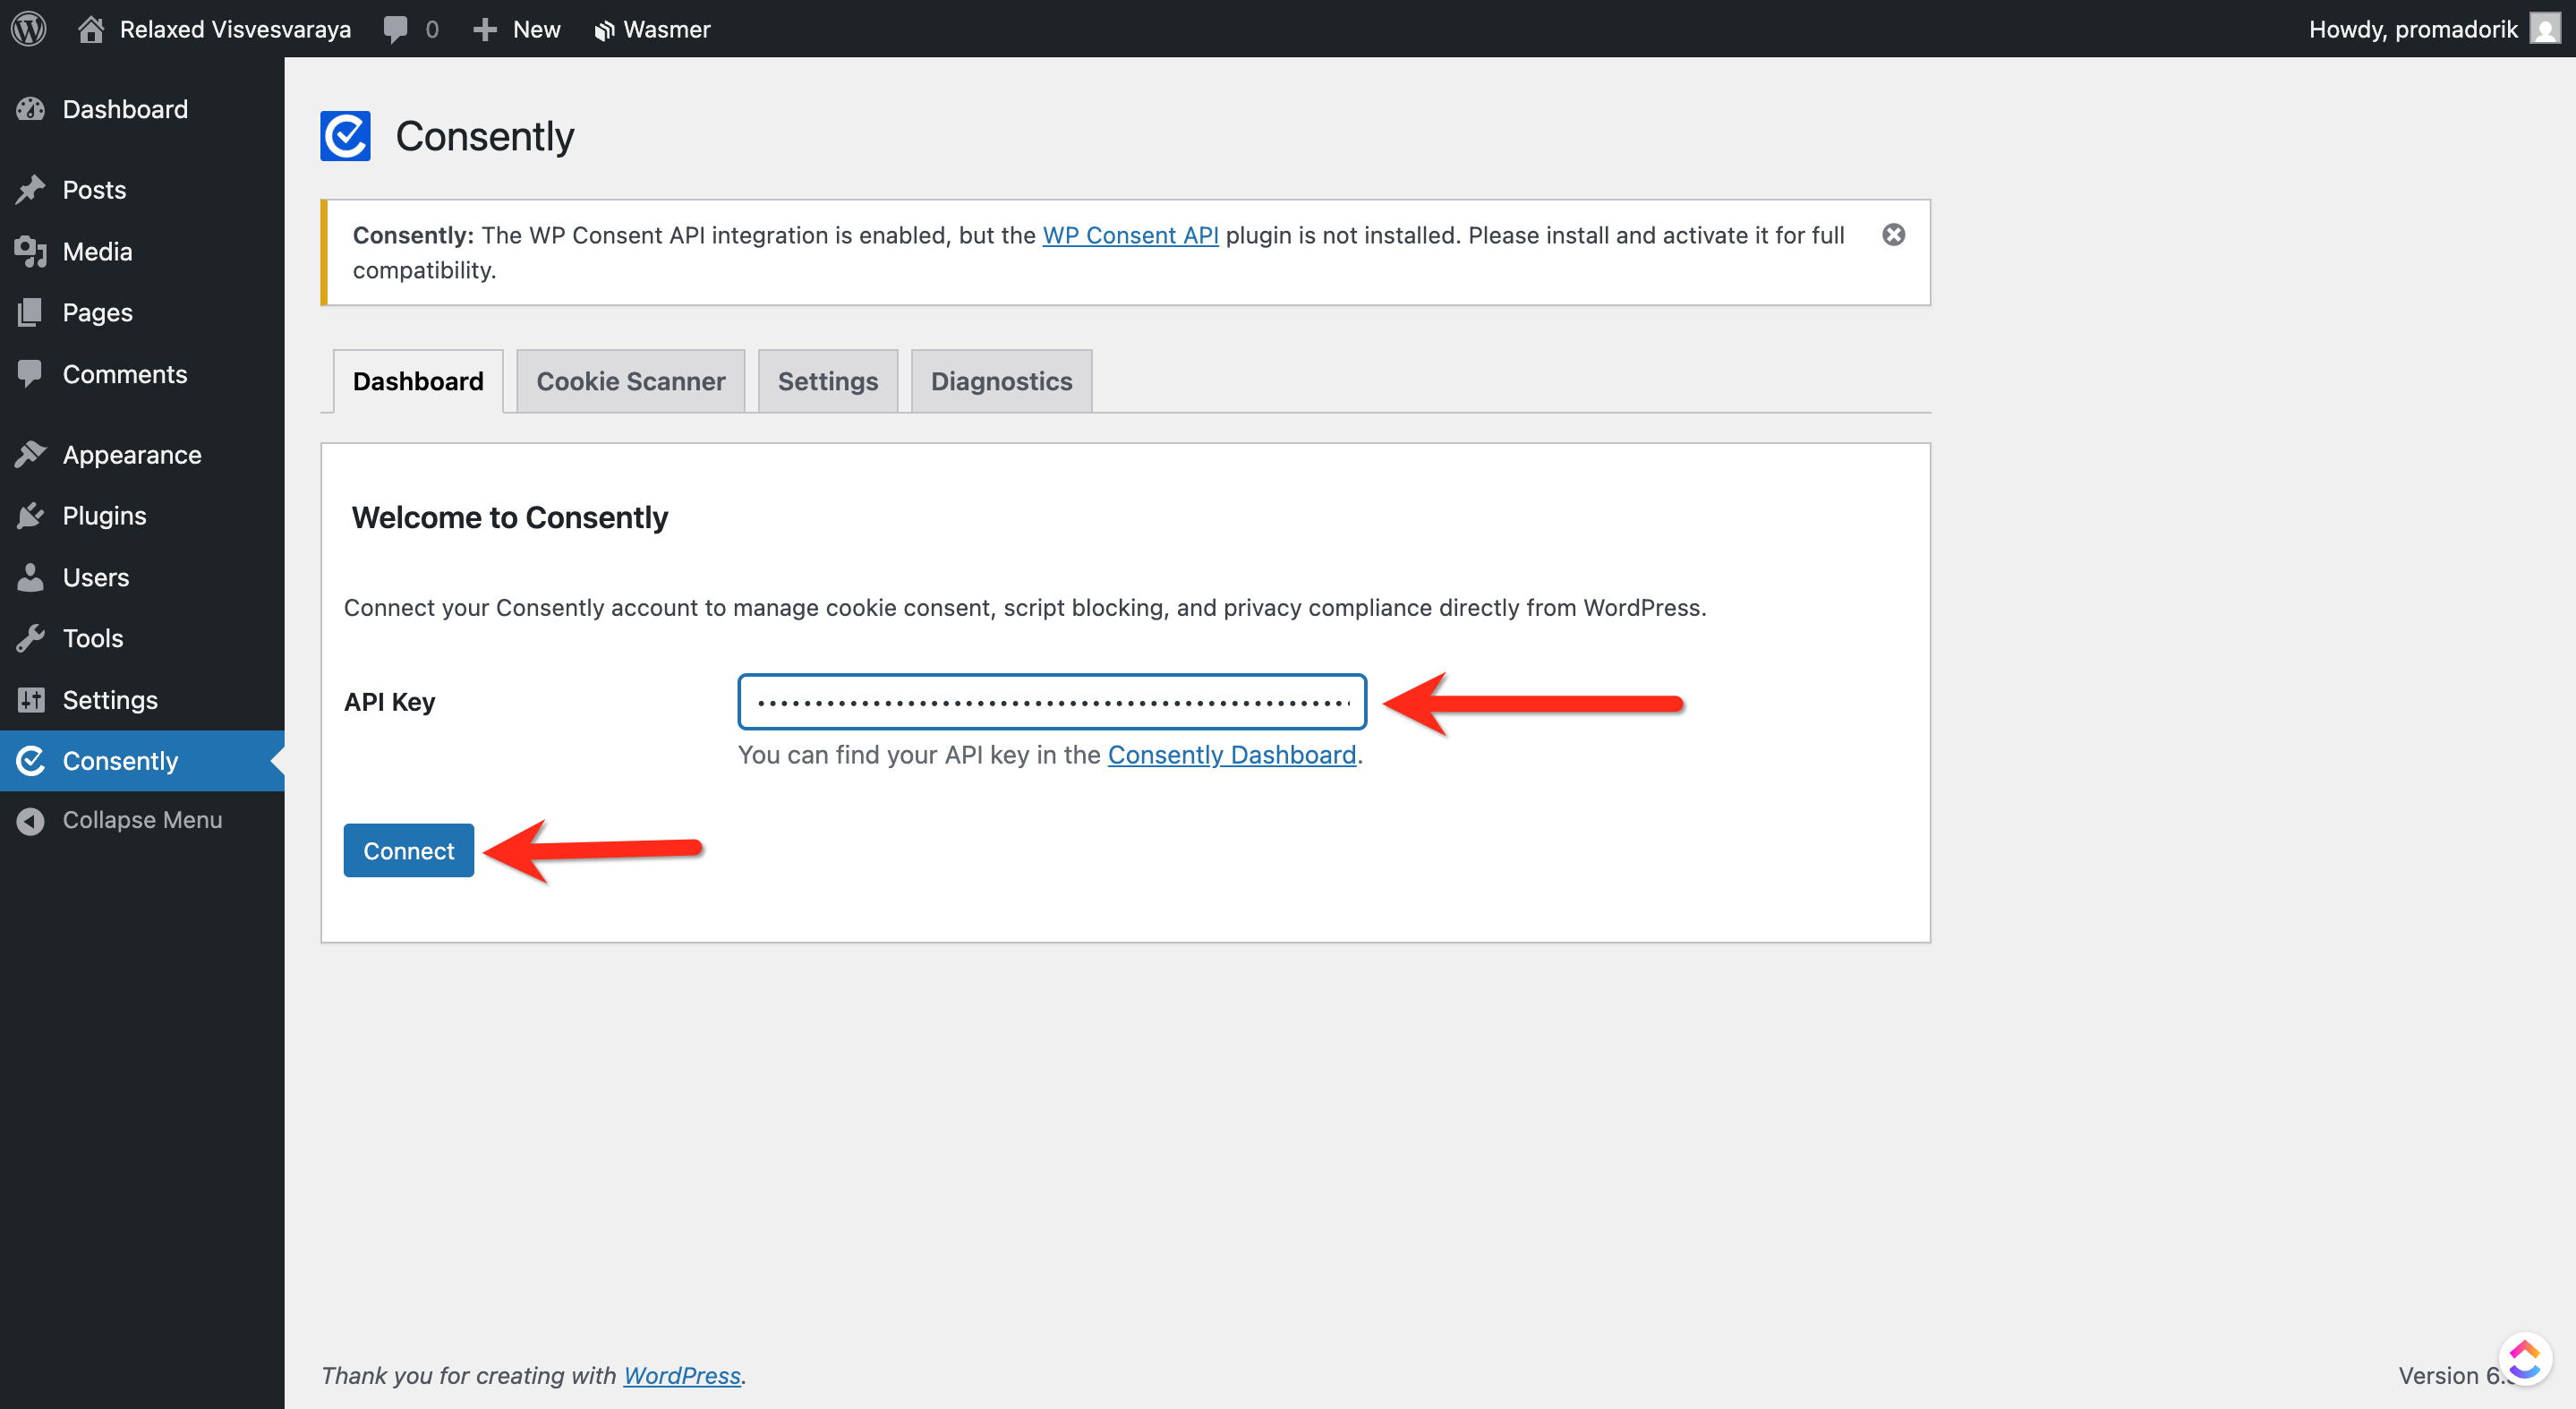
Go to Consently → Dashboard in WordPress
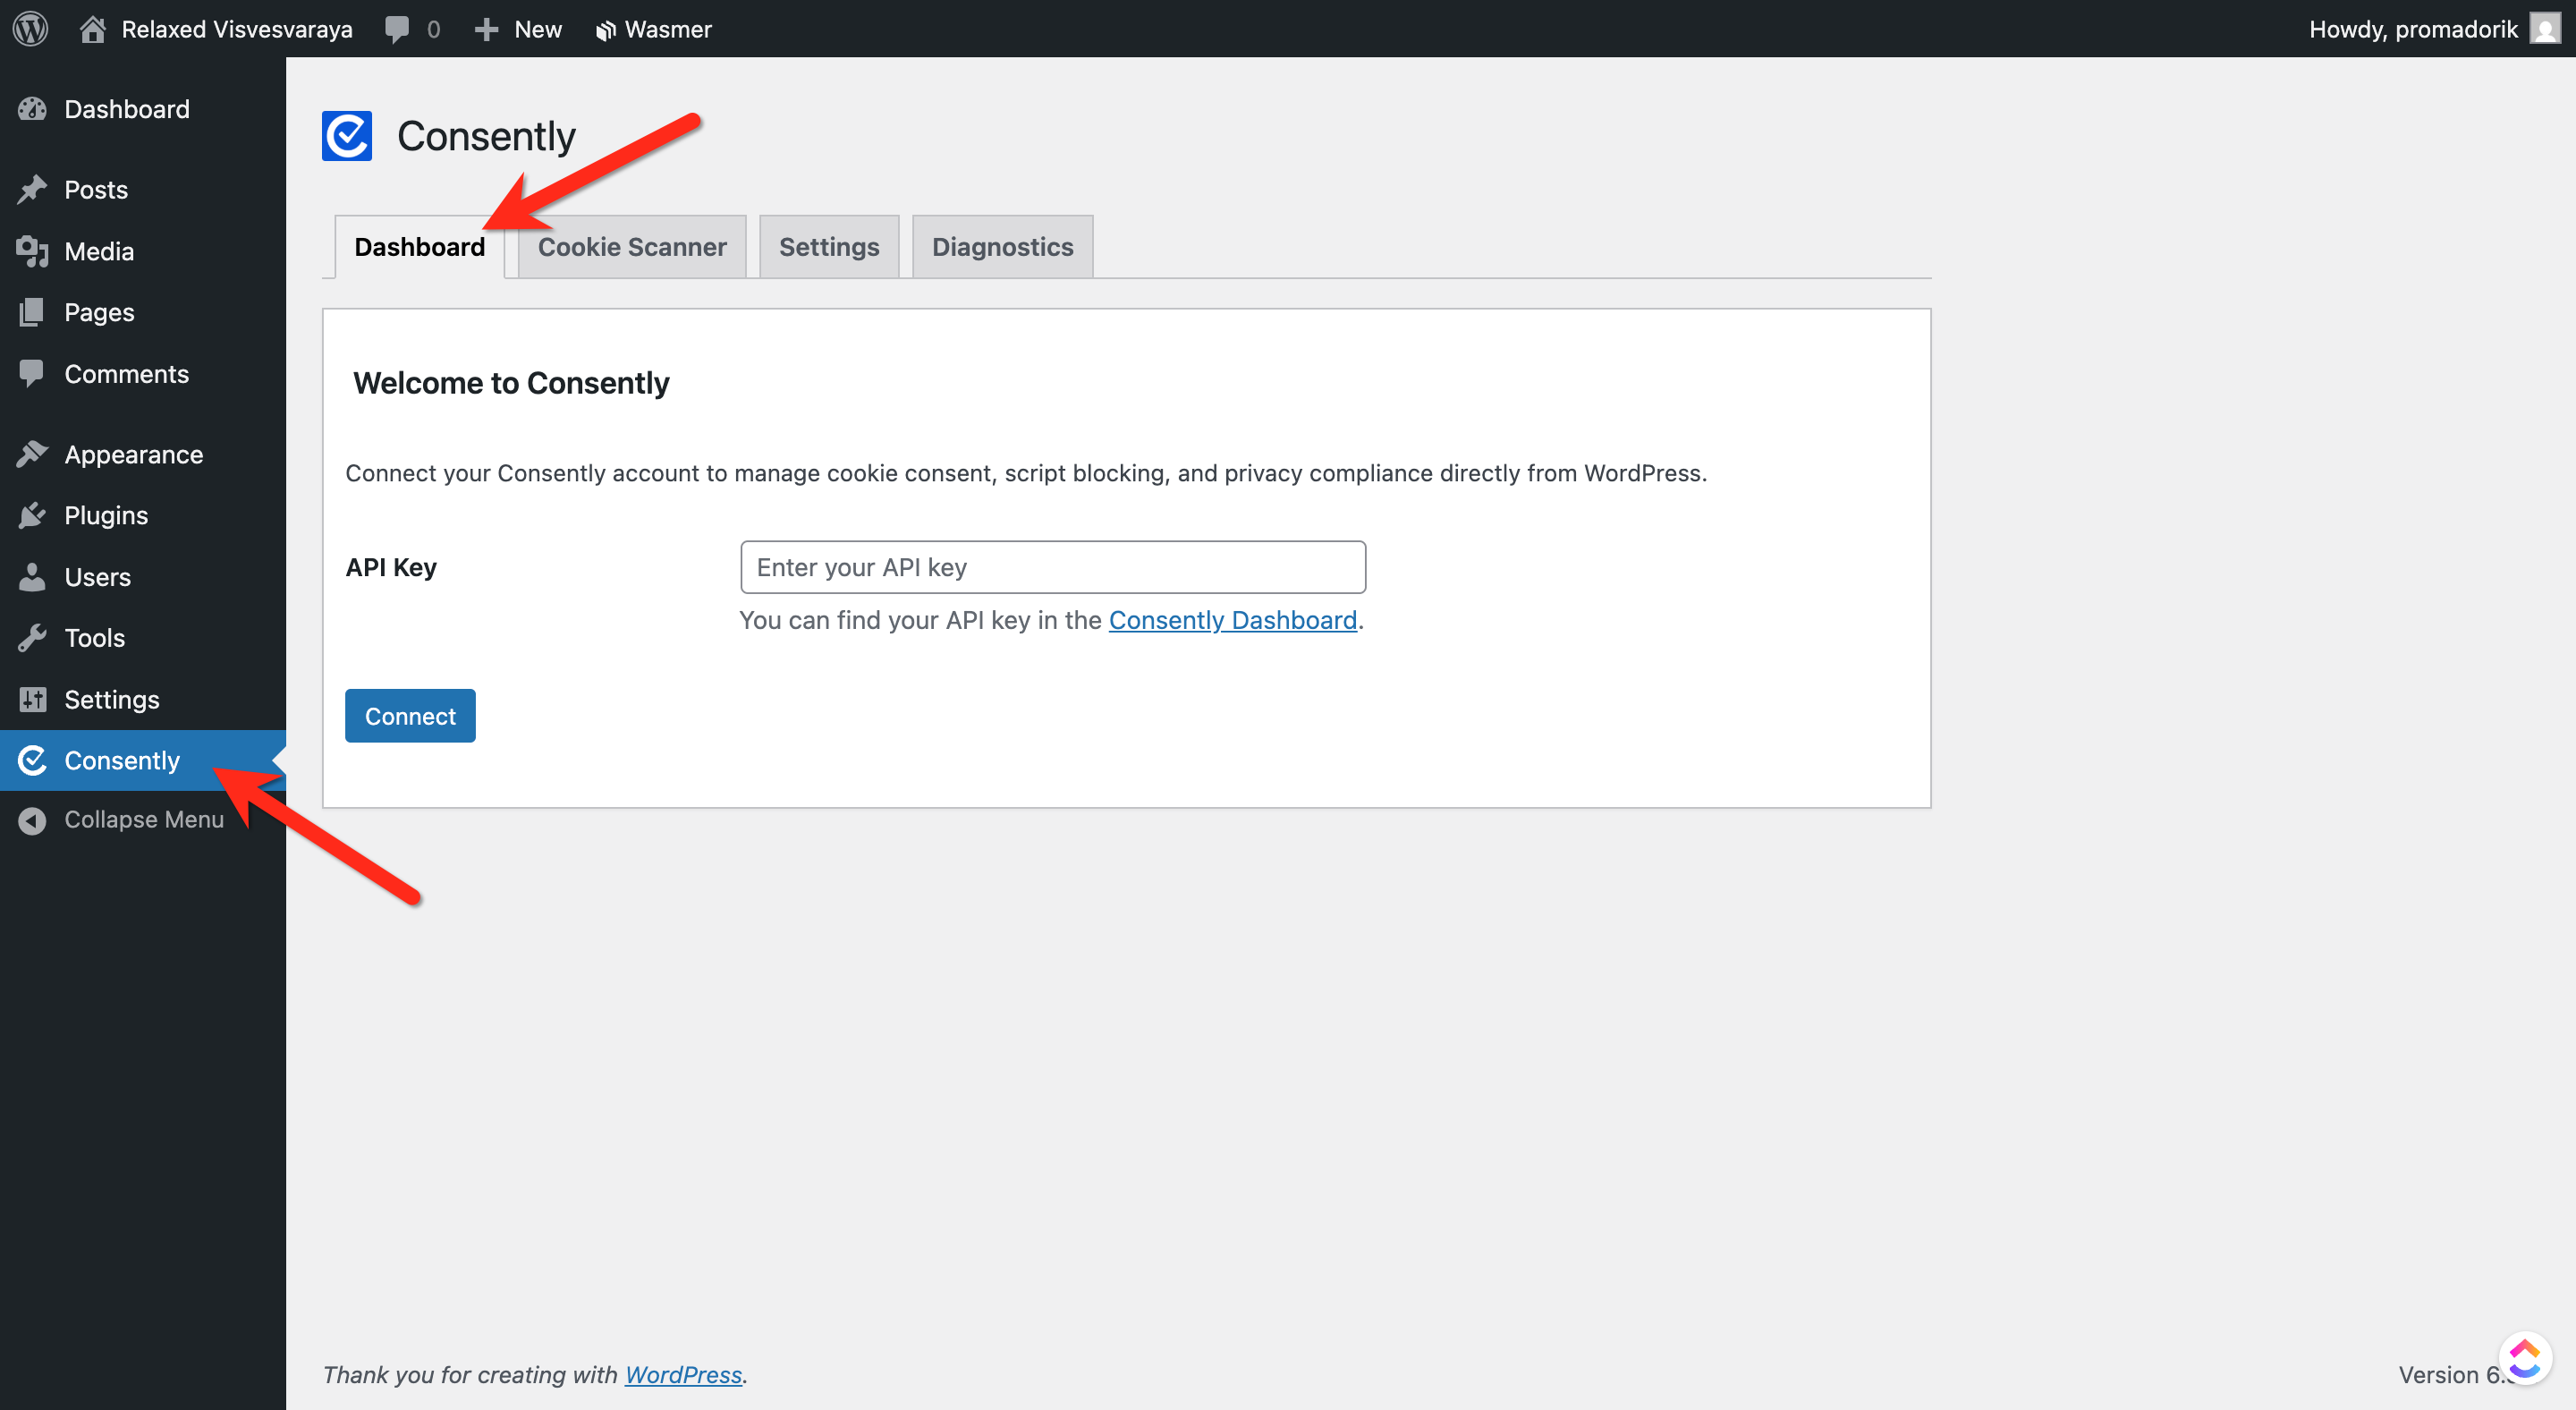
Enter your API Key & Click the Connect button
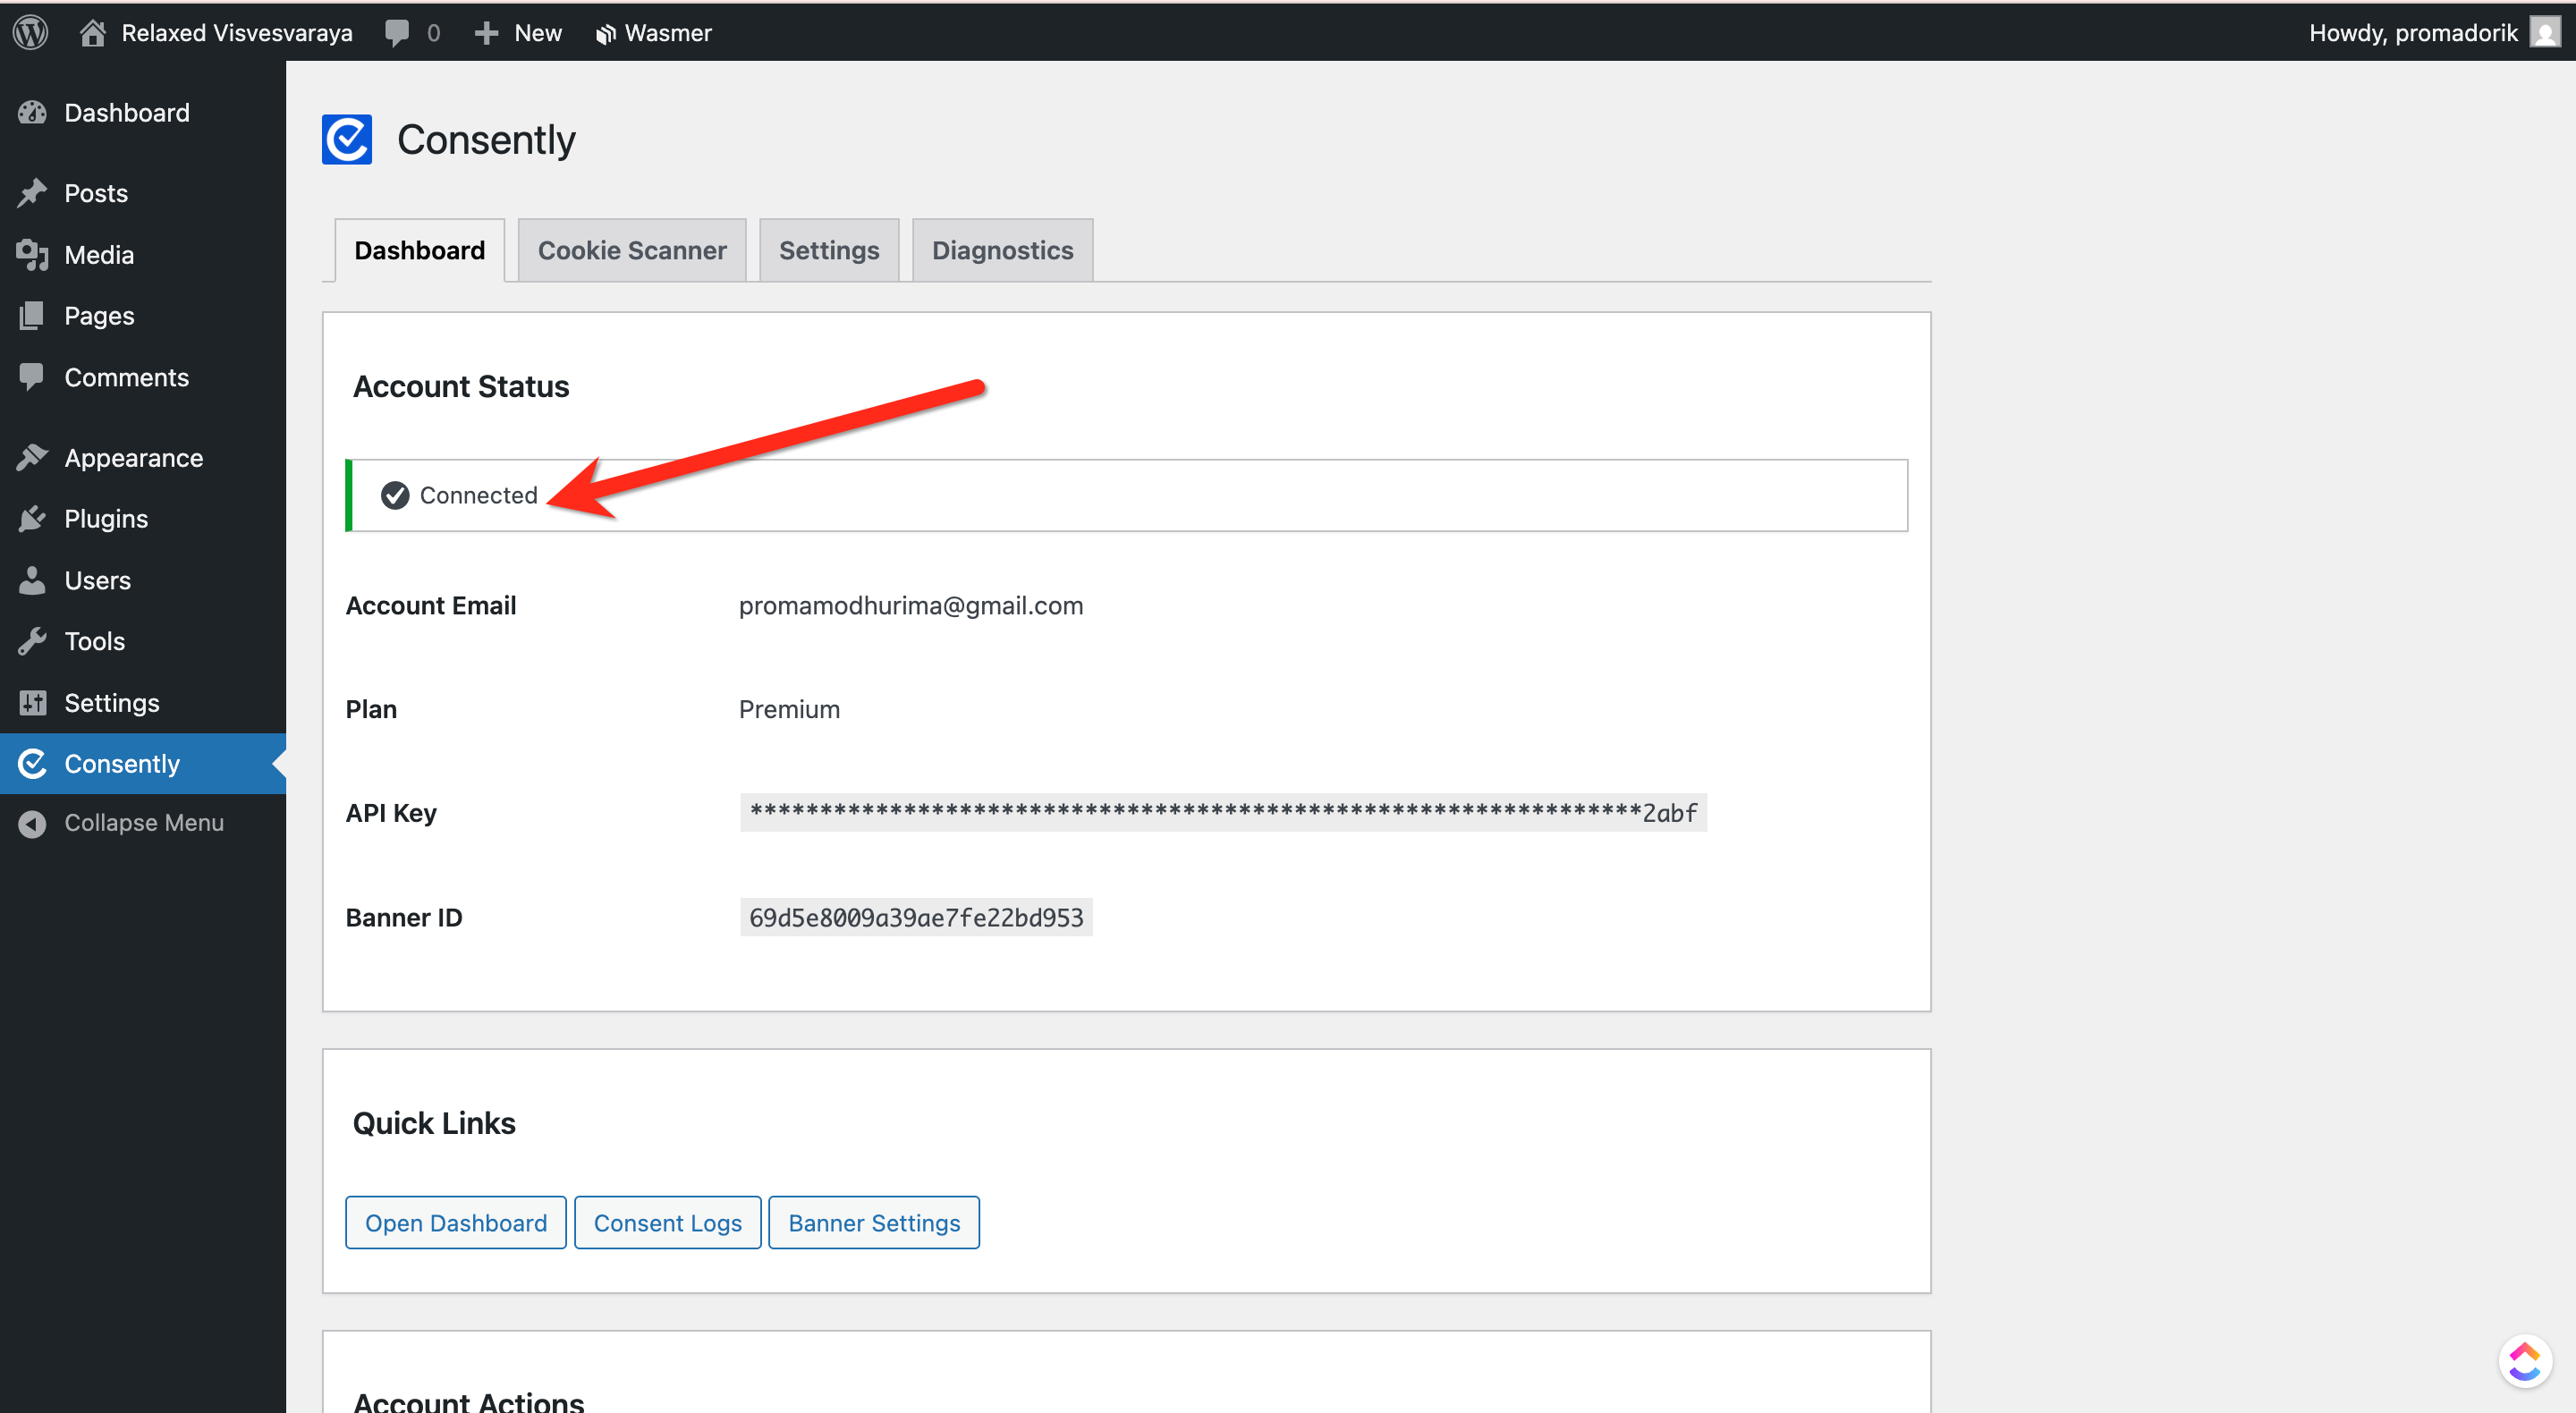
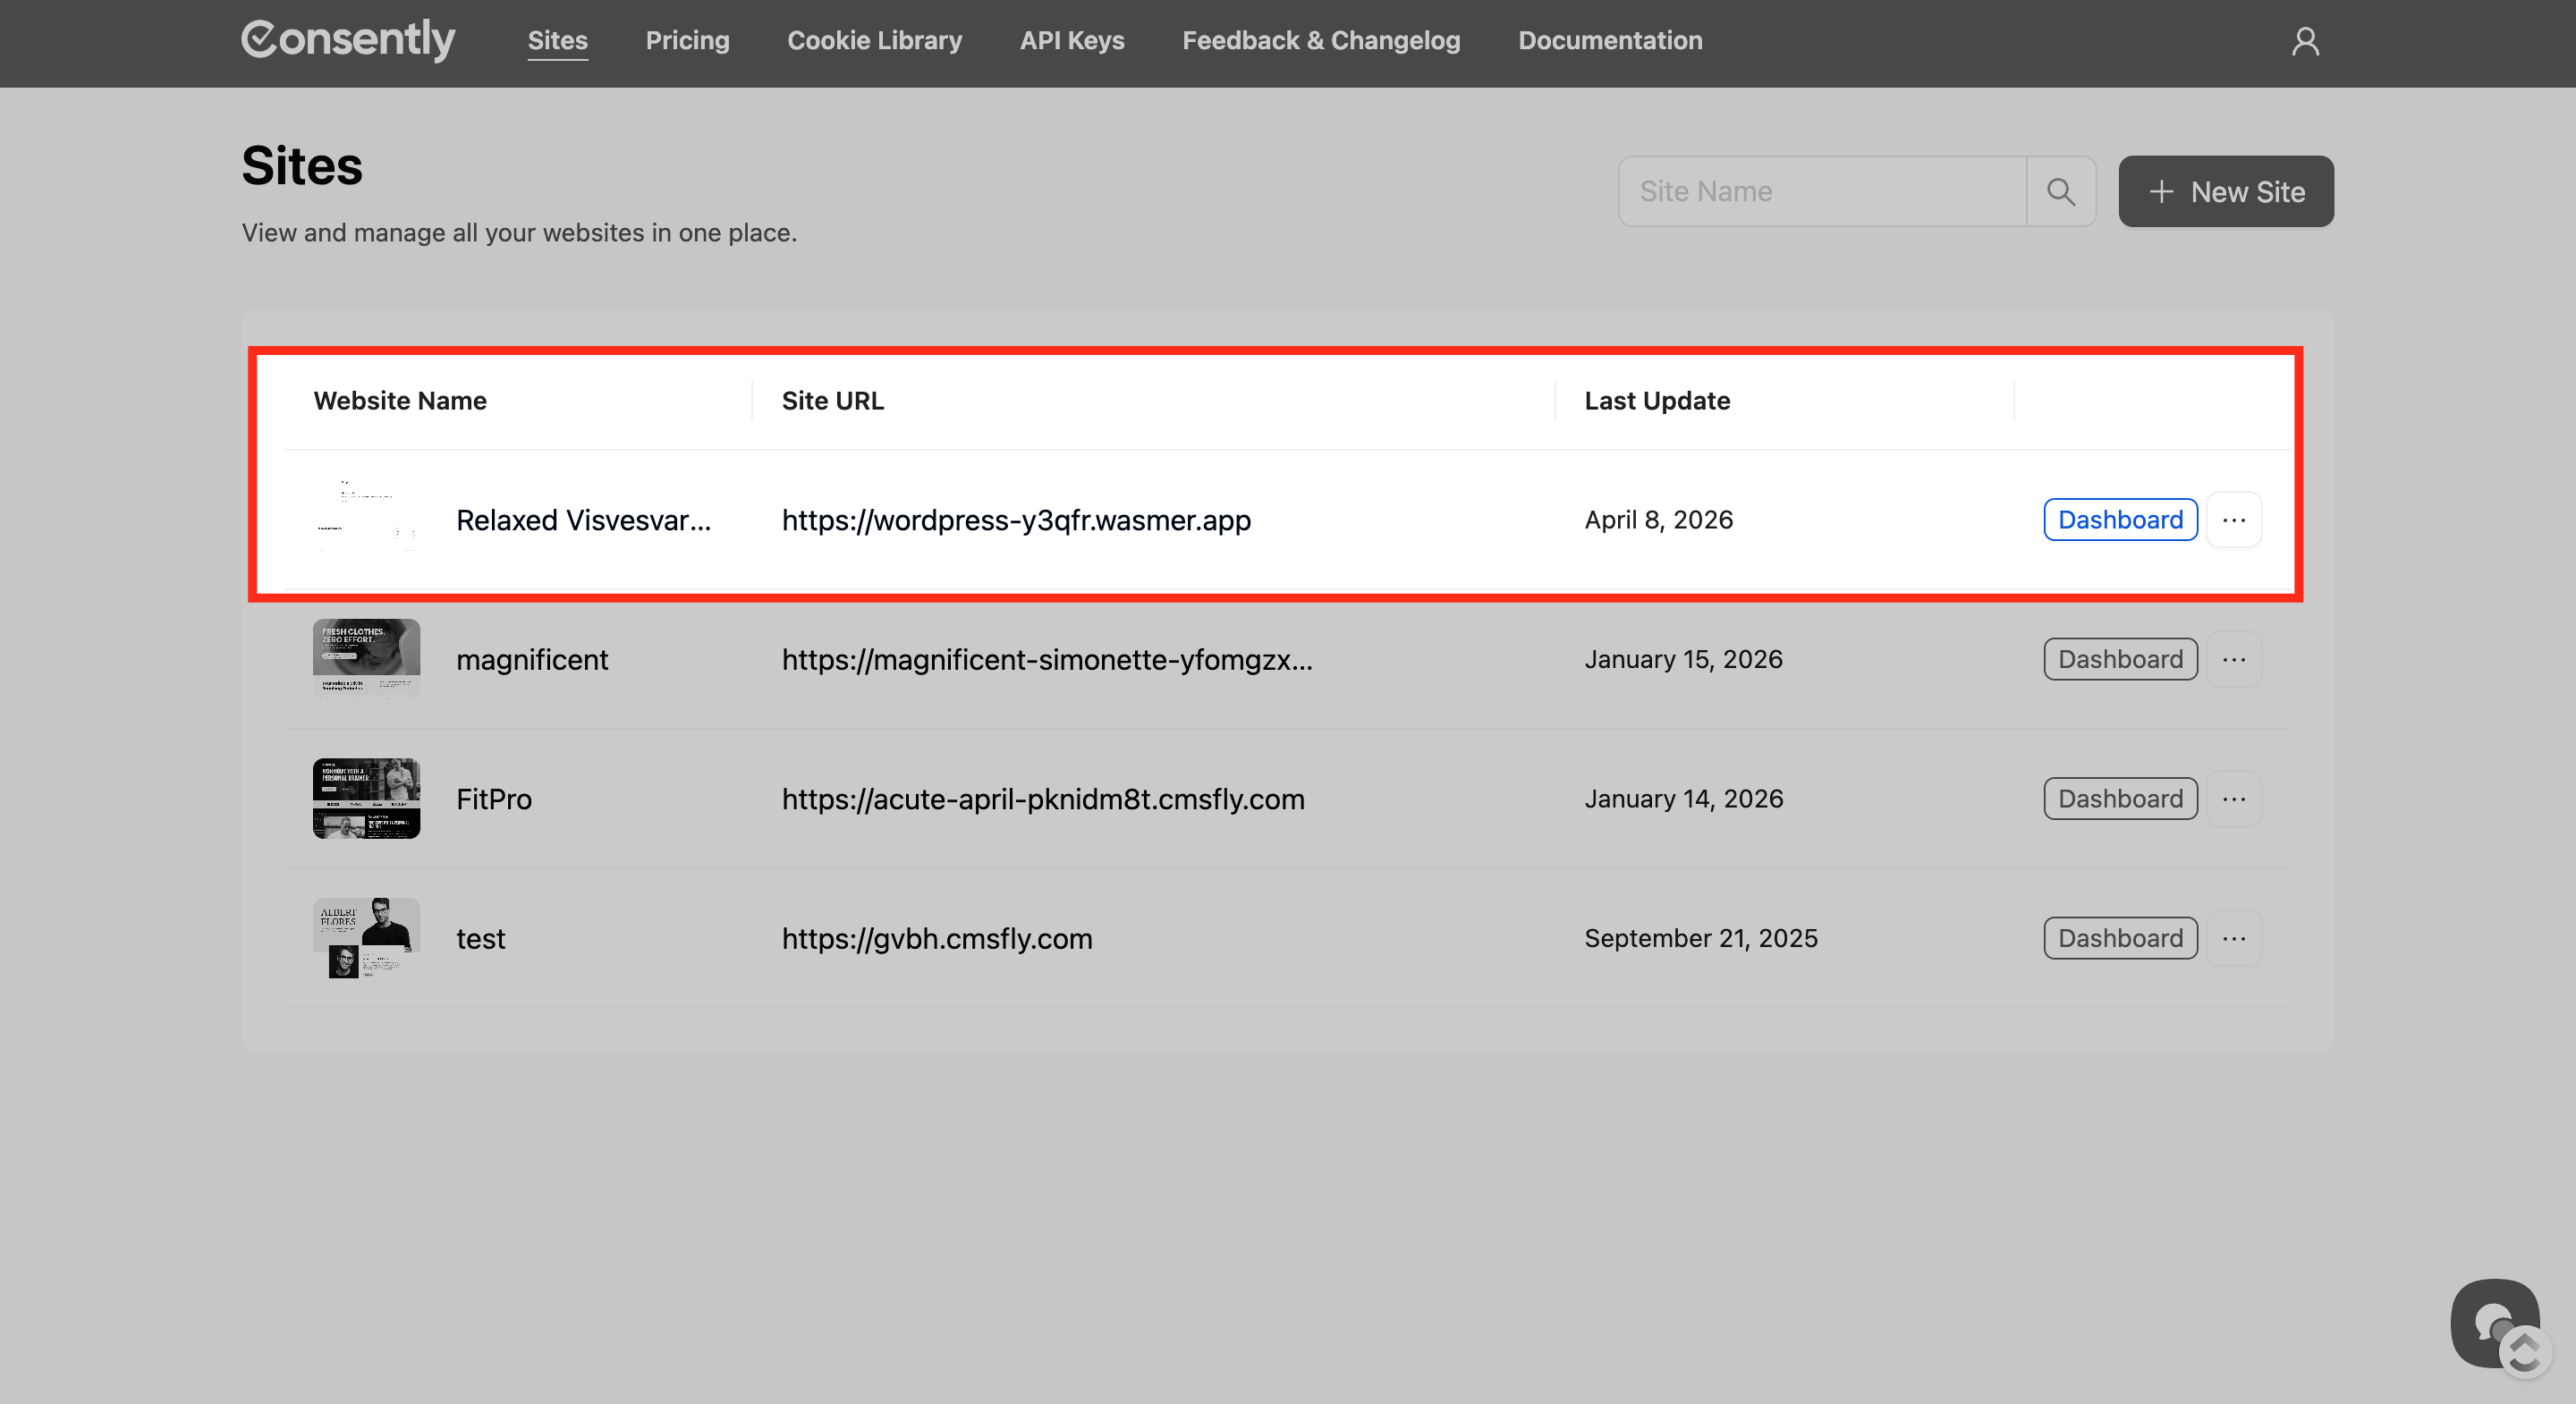
✅ Once connected:
Your website will automatically appear in your Consently dashboard
Step 6: Navigate Plugin Sections
After connecting, you will see the following tabs:
Dashboard → Overview and connection status
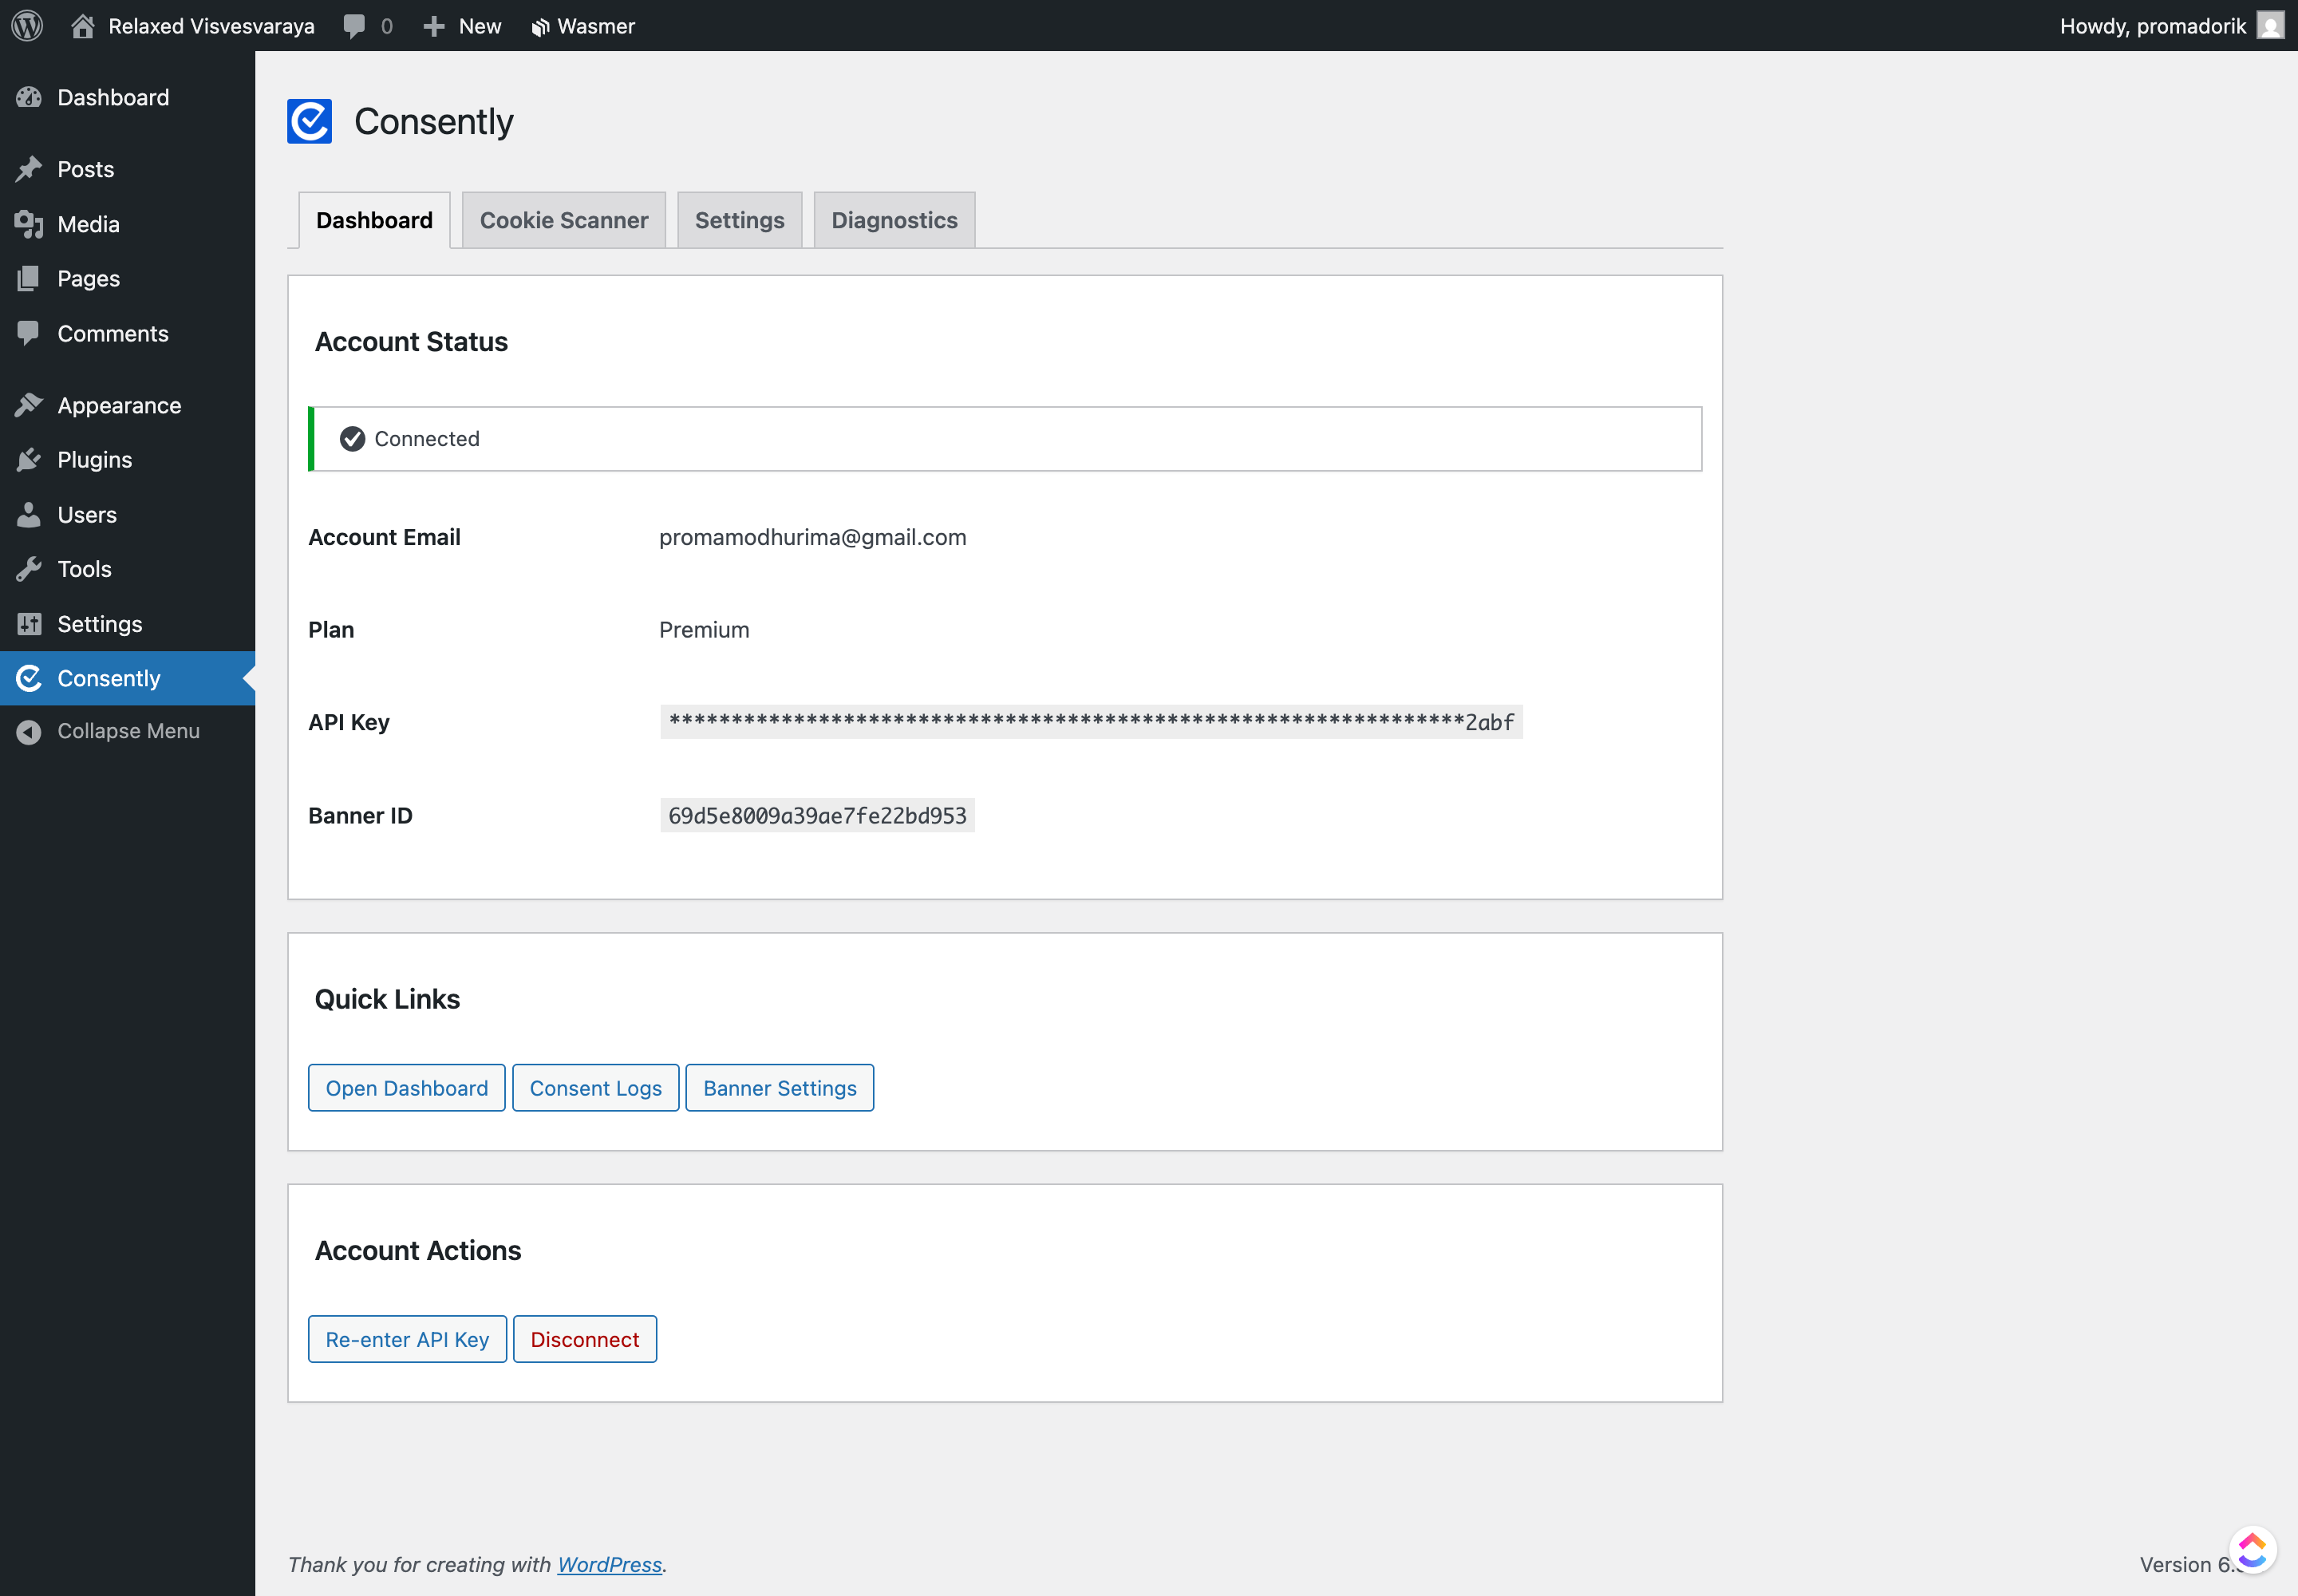
2. Cookie Scanner → Detect cookies used on your site
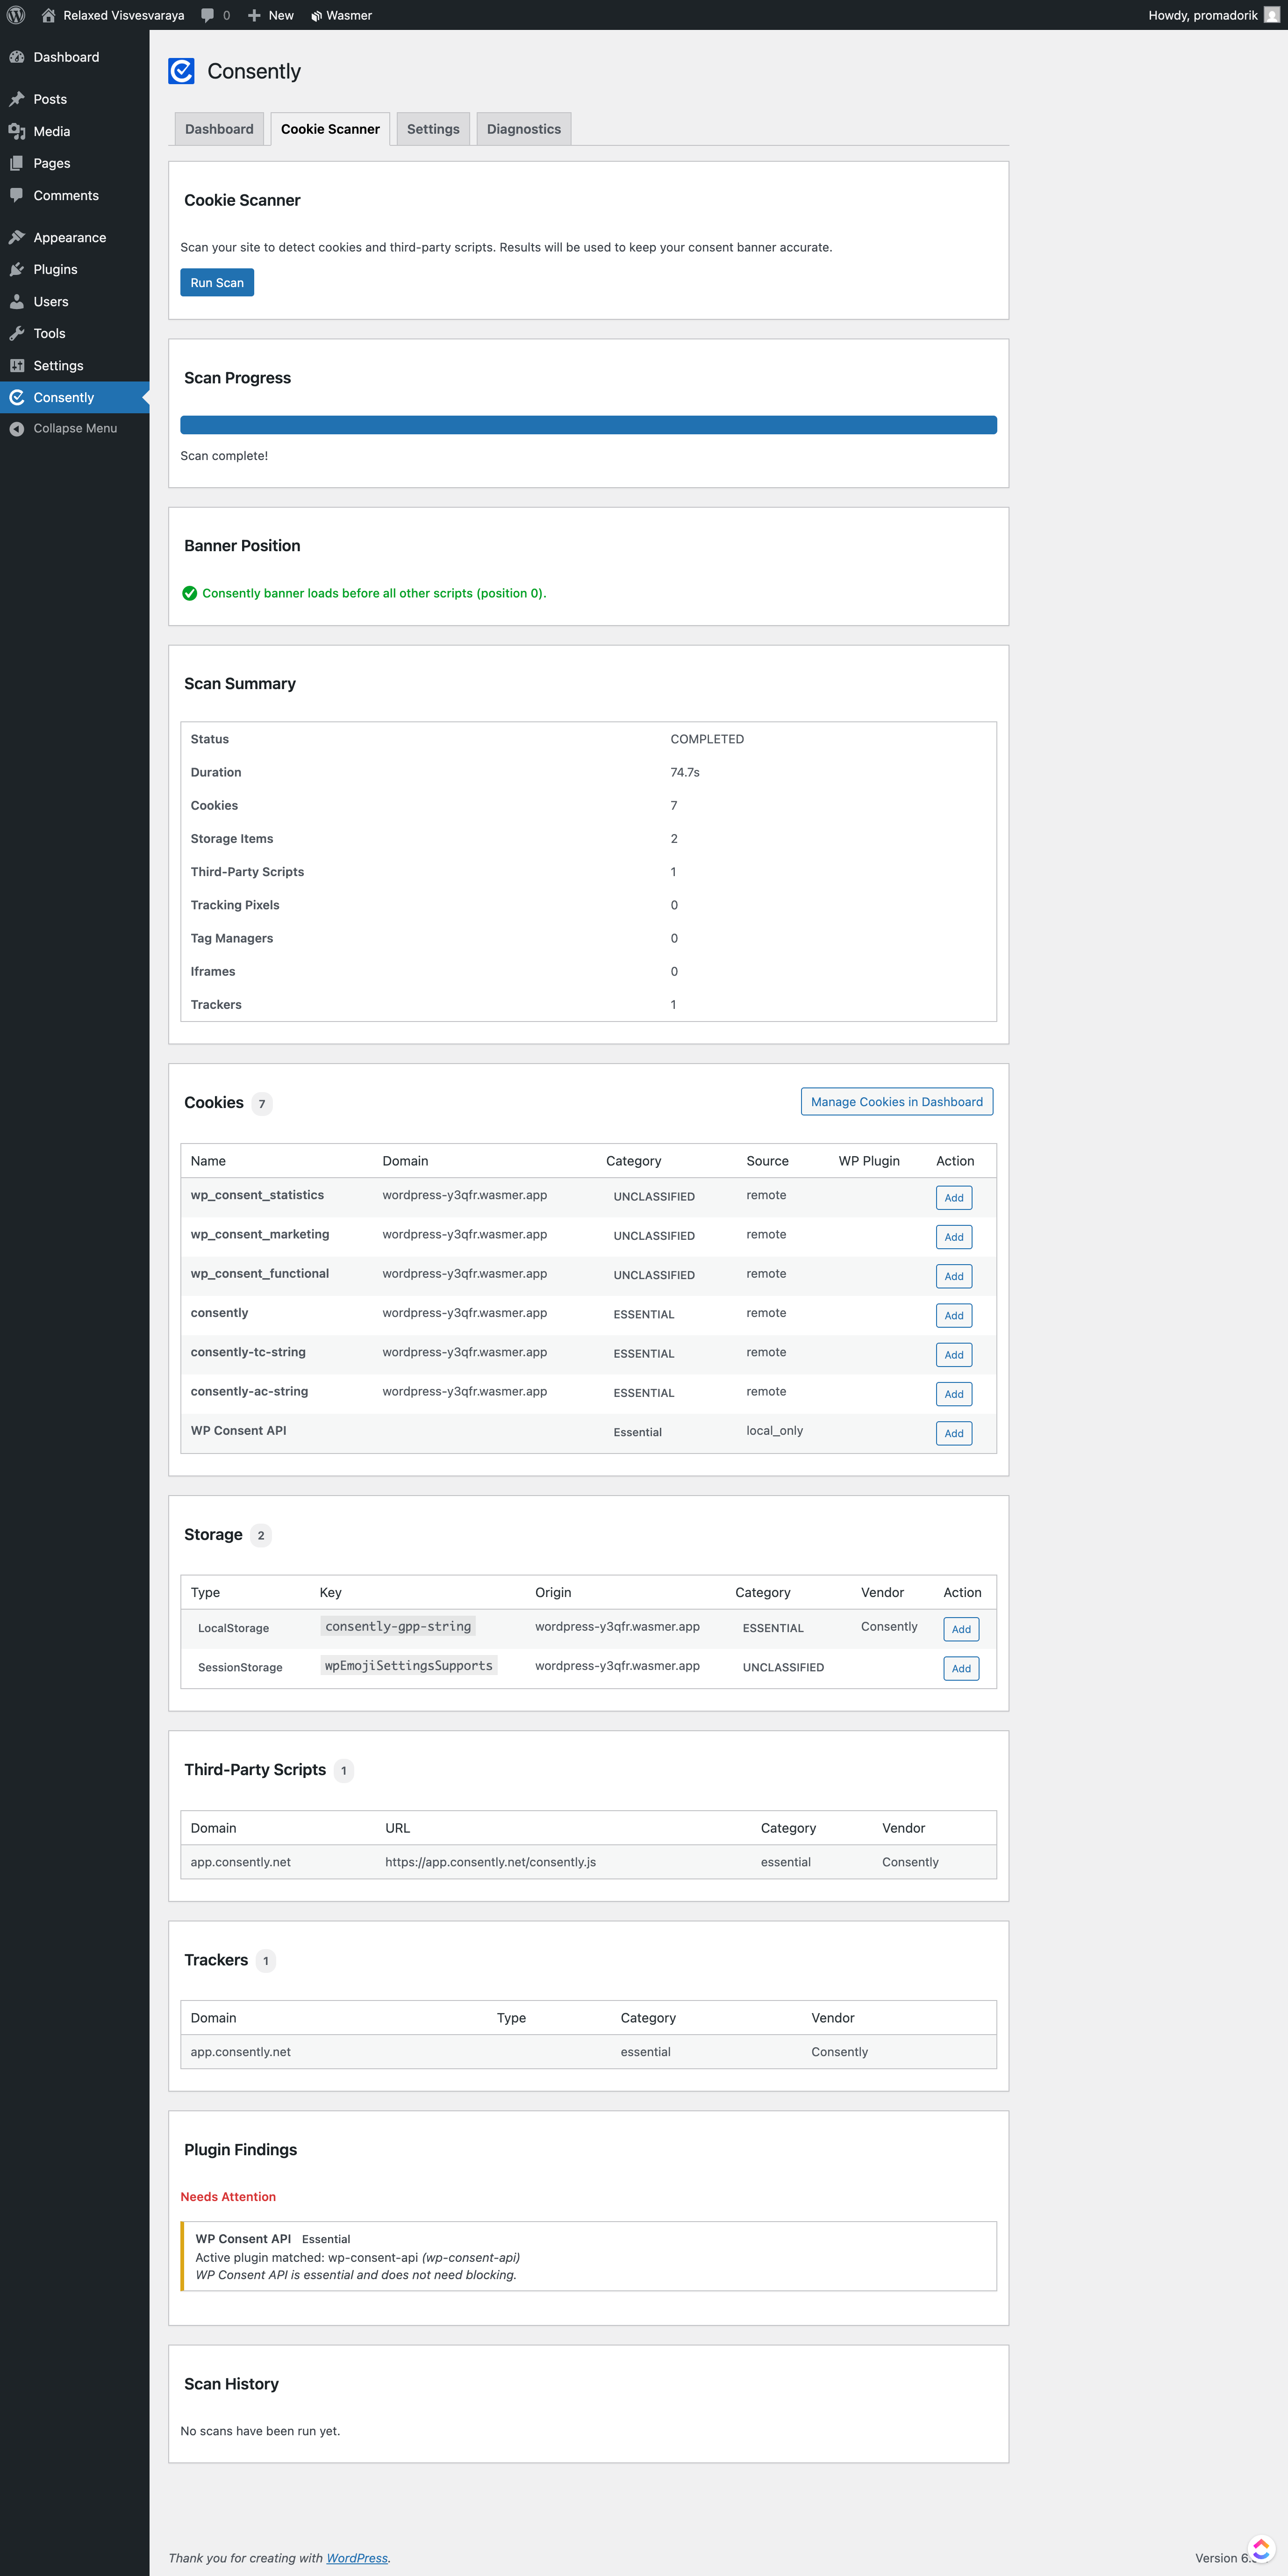
3. Settings → Configure behavior and consent options
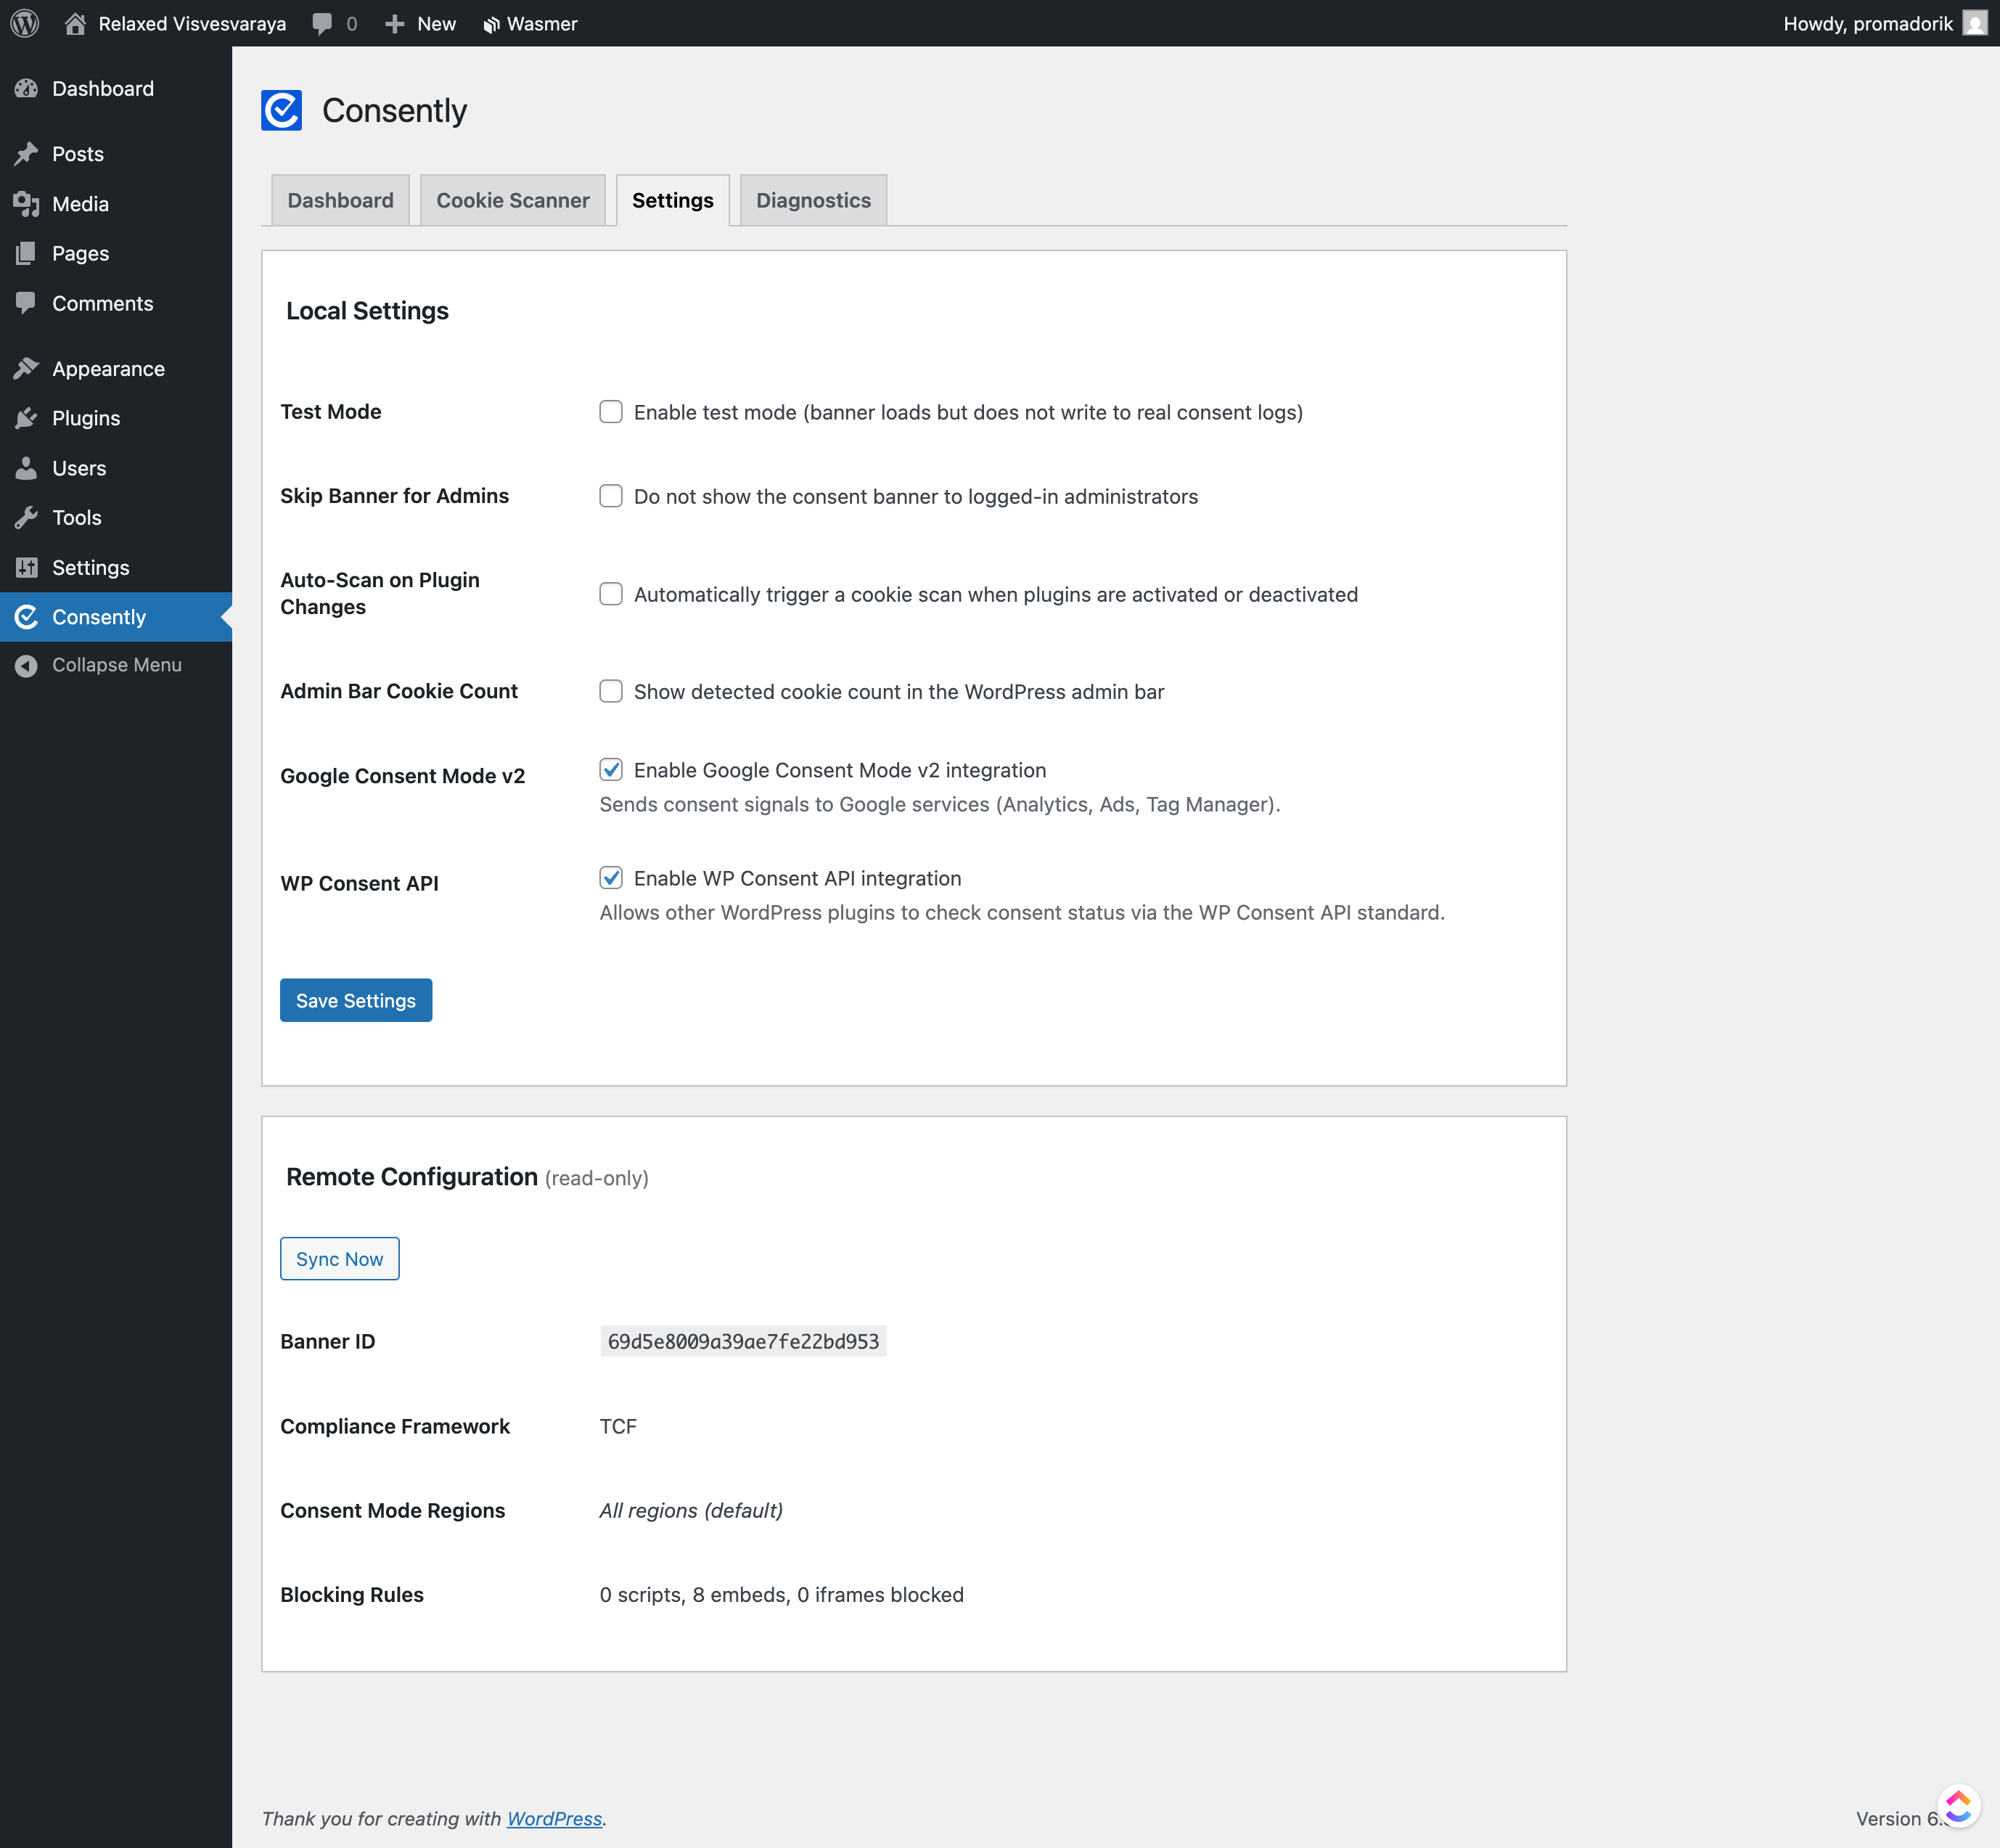
4. Diagnostics → Check system status and debug issues
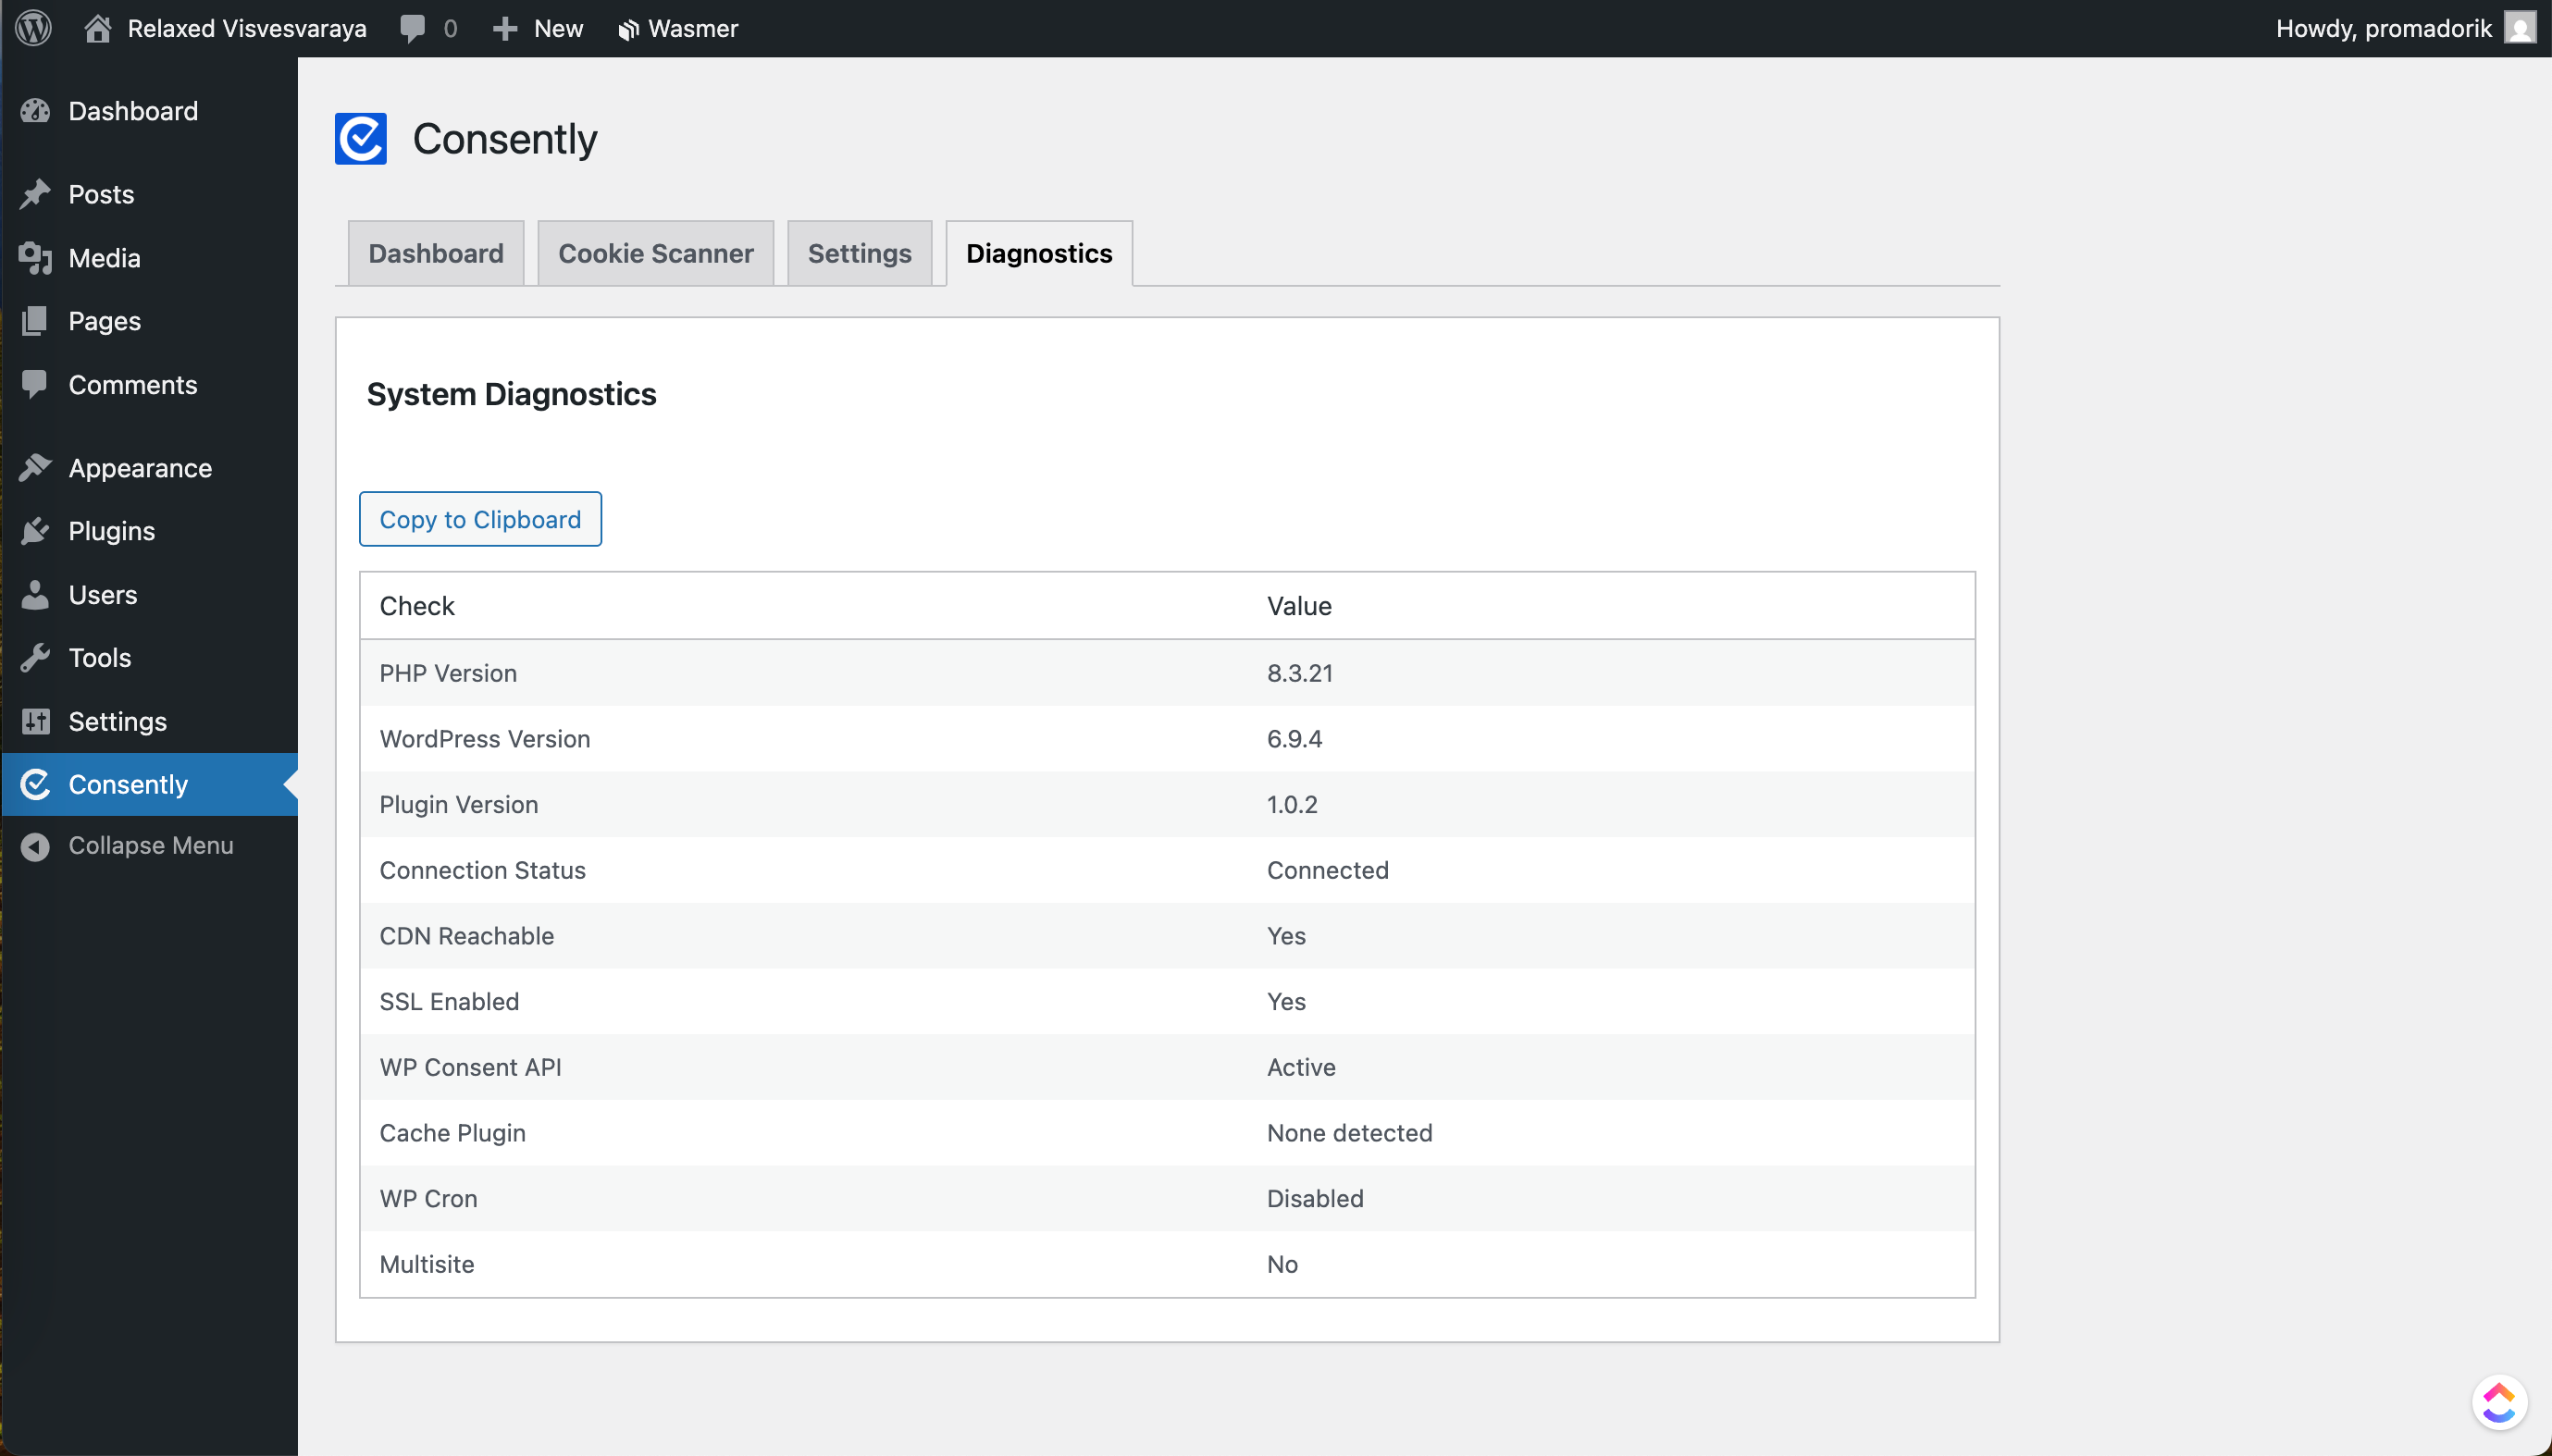
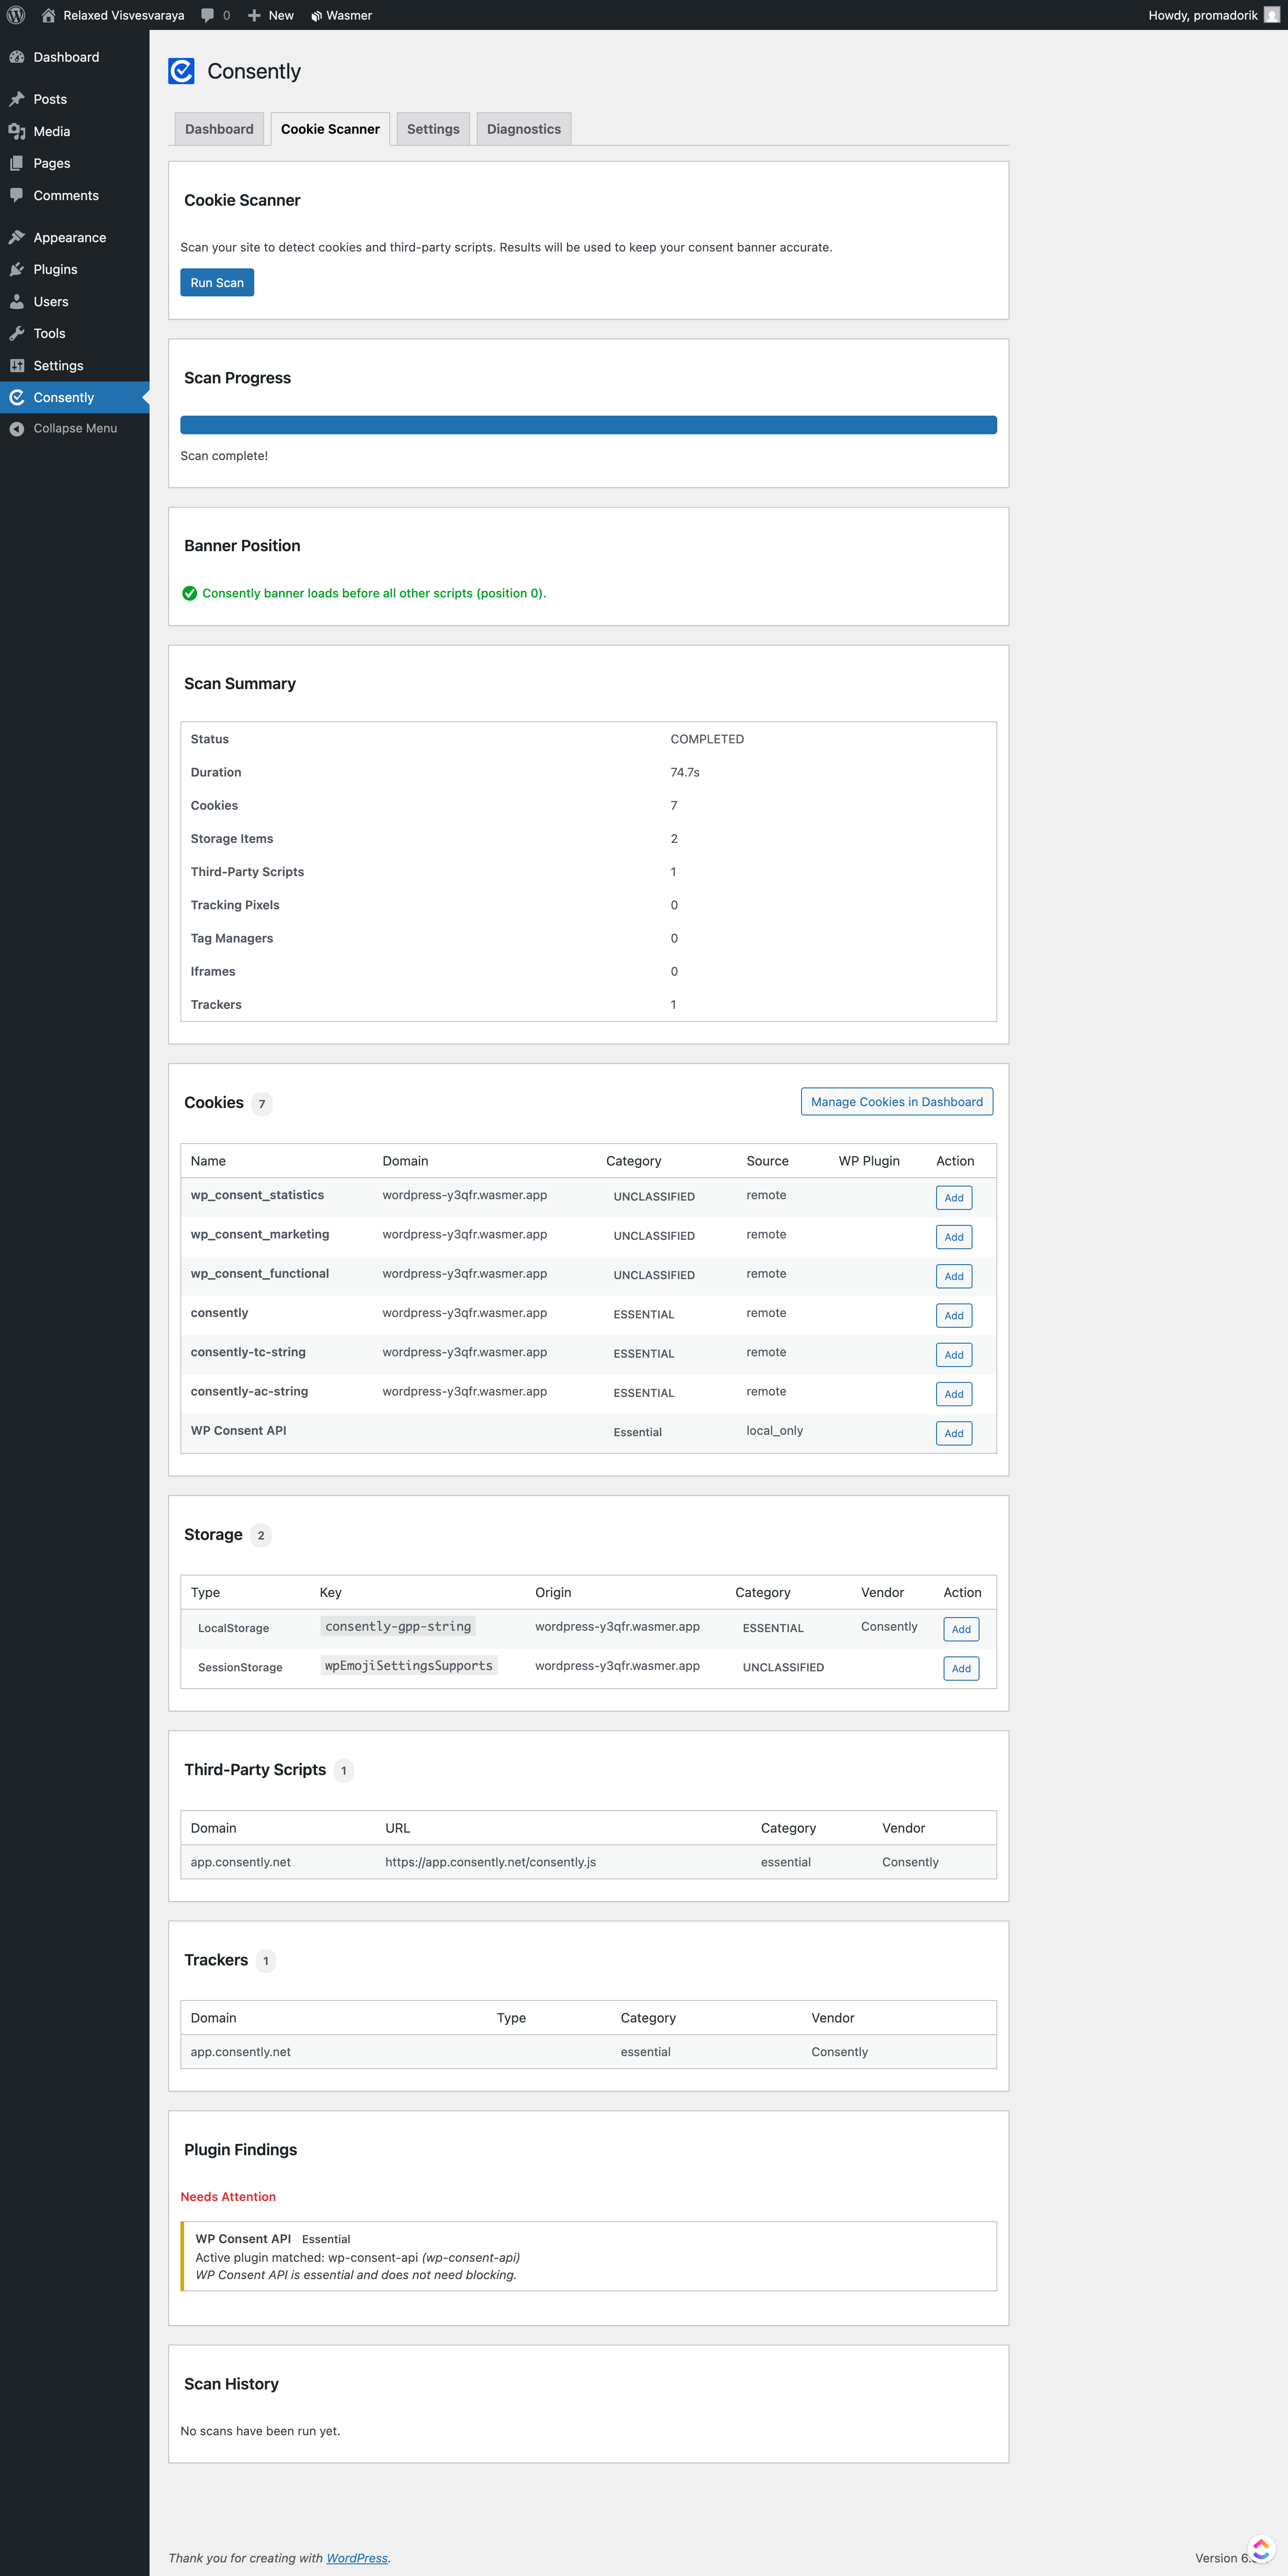
Cookie Scanner
The Cookie Scanner helps detect cookies used on your website.
How it works:
May prompt to connect your account (if not already connected)
Run a scan
View detected cookies and results
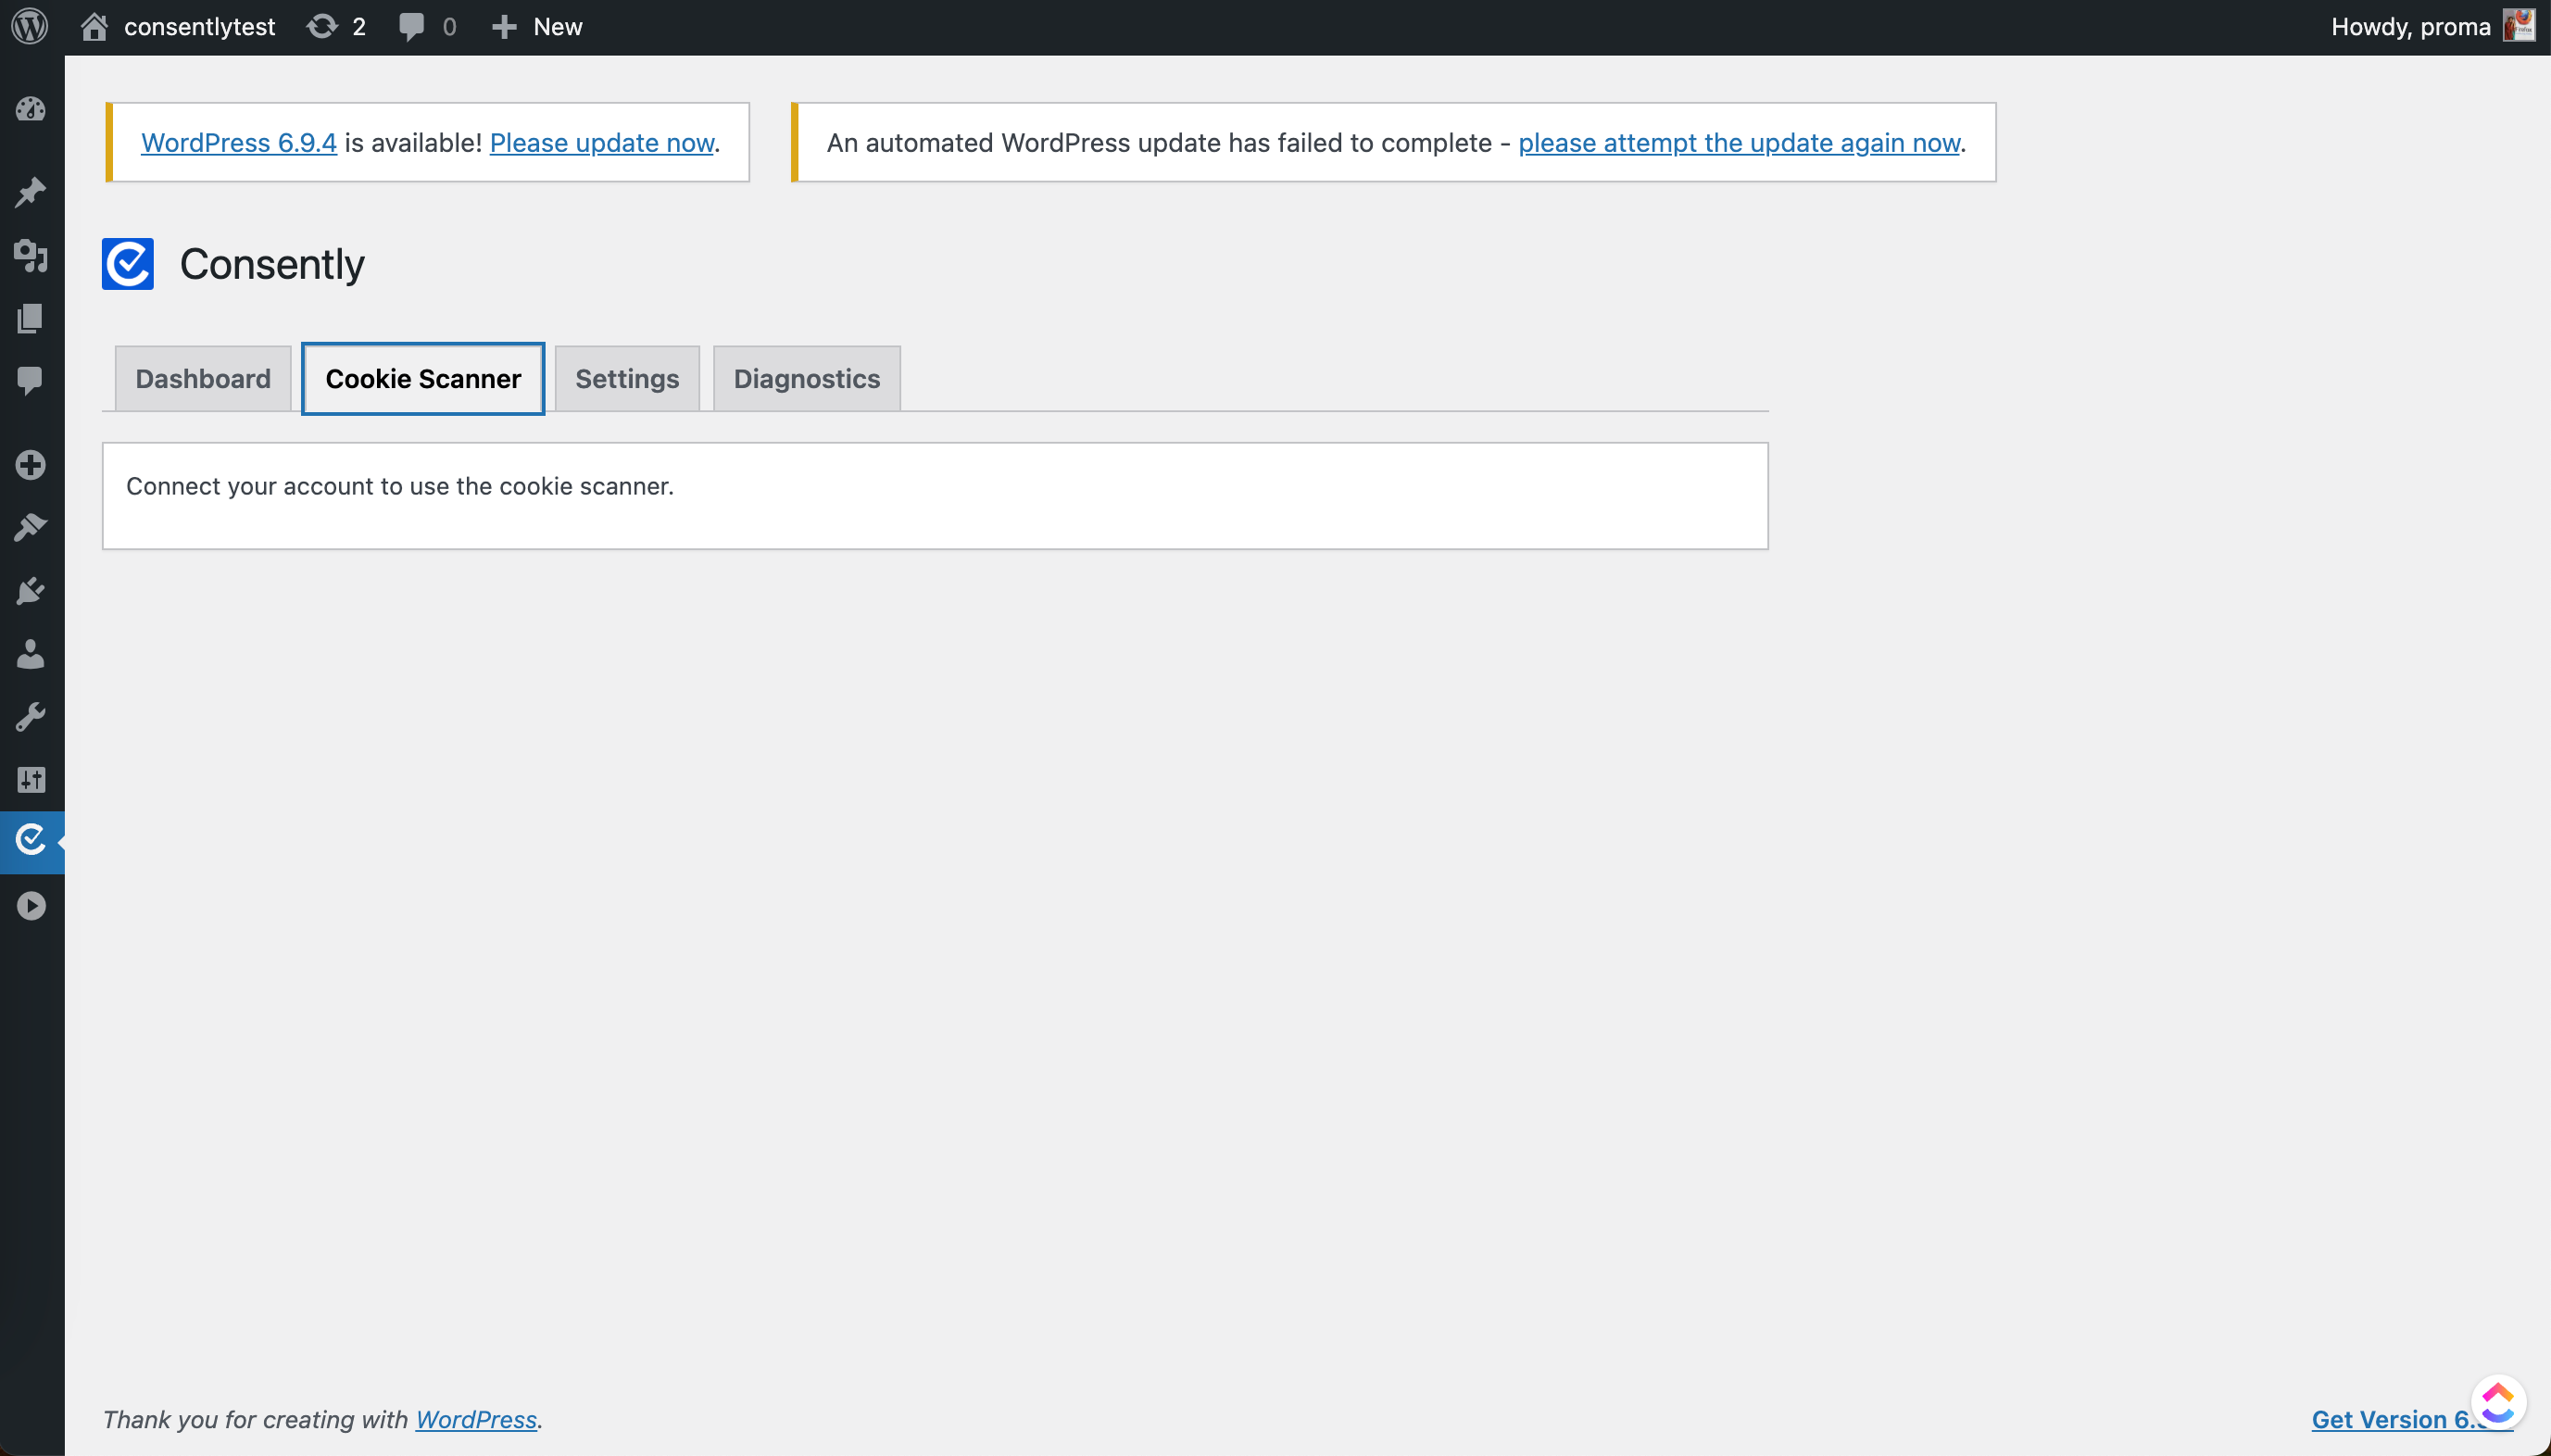
Settings
The Settings tab controls how consent behaves on your site.
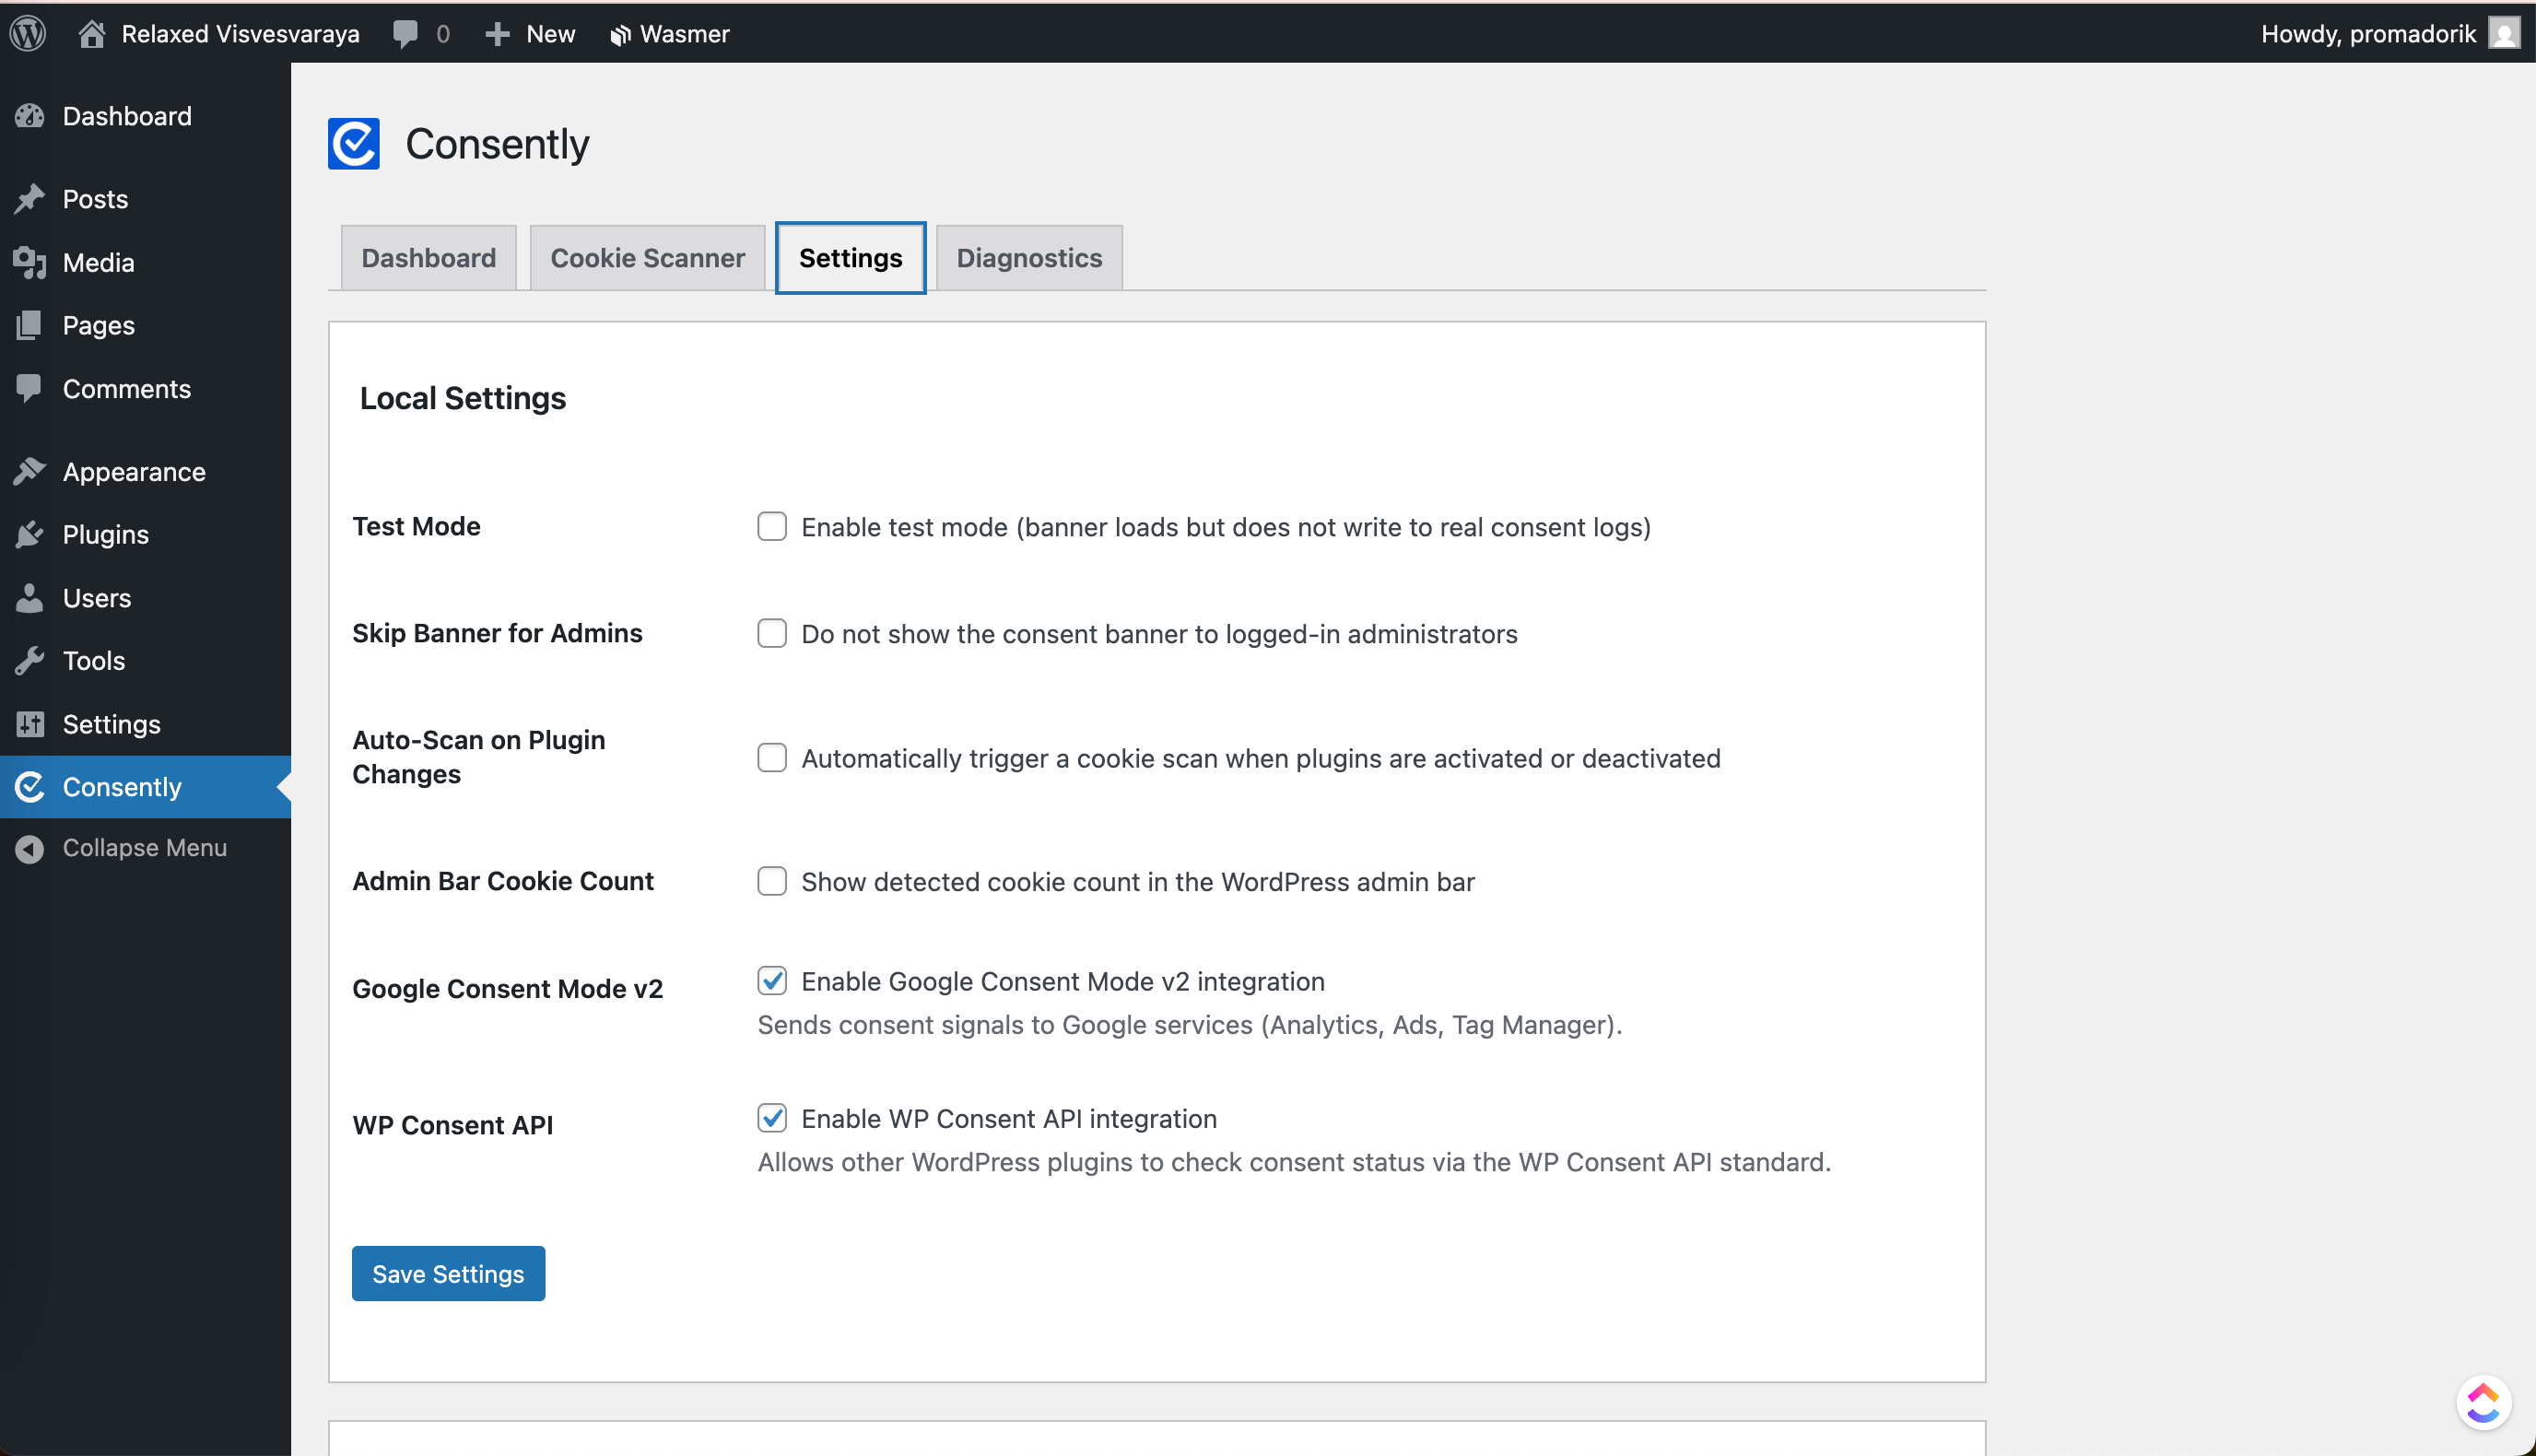
Local Settings Explained
Test Mode: Enables testing without saving real user consent
Skip Banner for Admins: Hides the banner for logged-in admins
Auto-Scan on Plugin Changes: Automatically scans cookies when plugins change
Admin Bar Cookie Count: Shows cookie count in admin bar
Google Consent Mode v2: Sends consent signals to Google services (Analytics, Ads, Tag Manager)
WP Consent API: Allows other plugins to check consent status
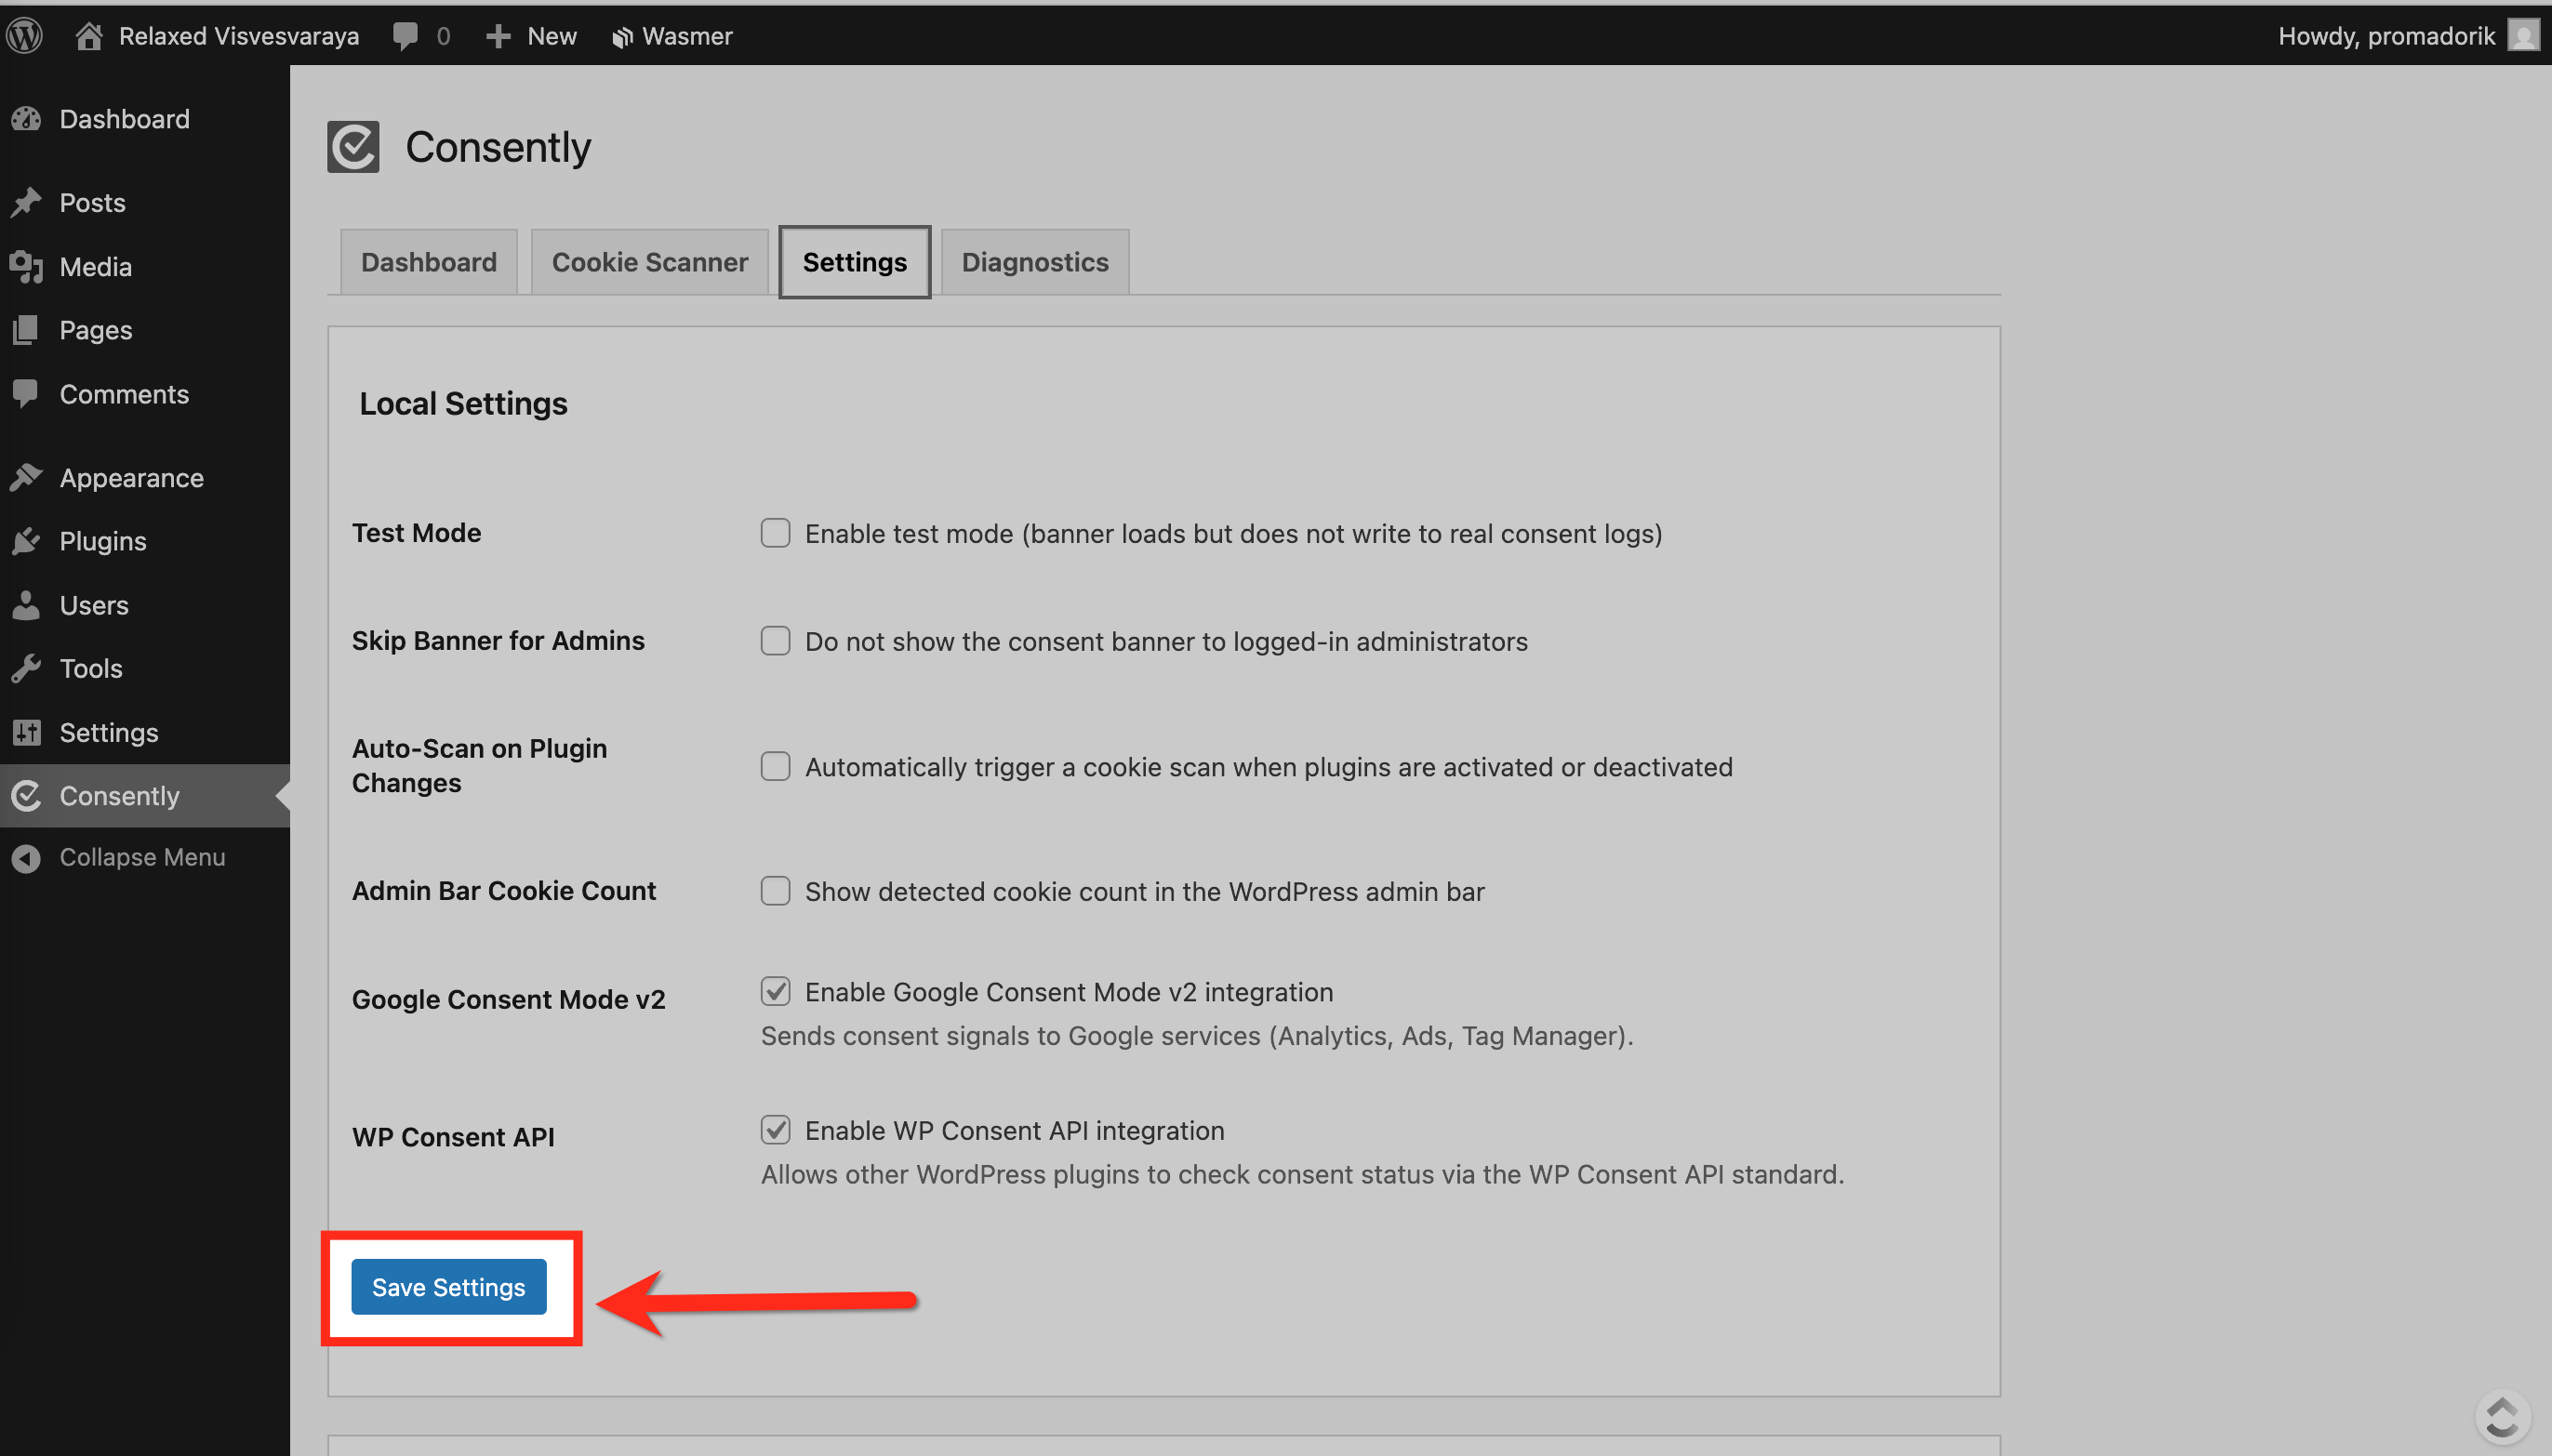
Save Settings
After making changes:
Click Save Settings
Diagnostics
The Diagnostics section helps identify issues with your setup.
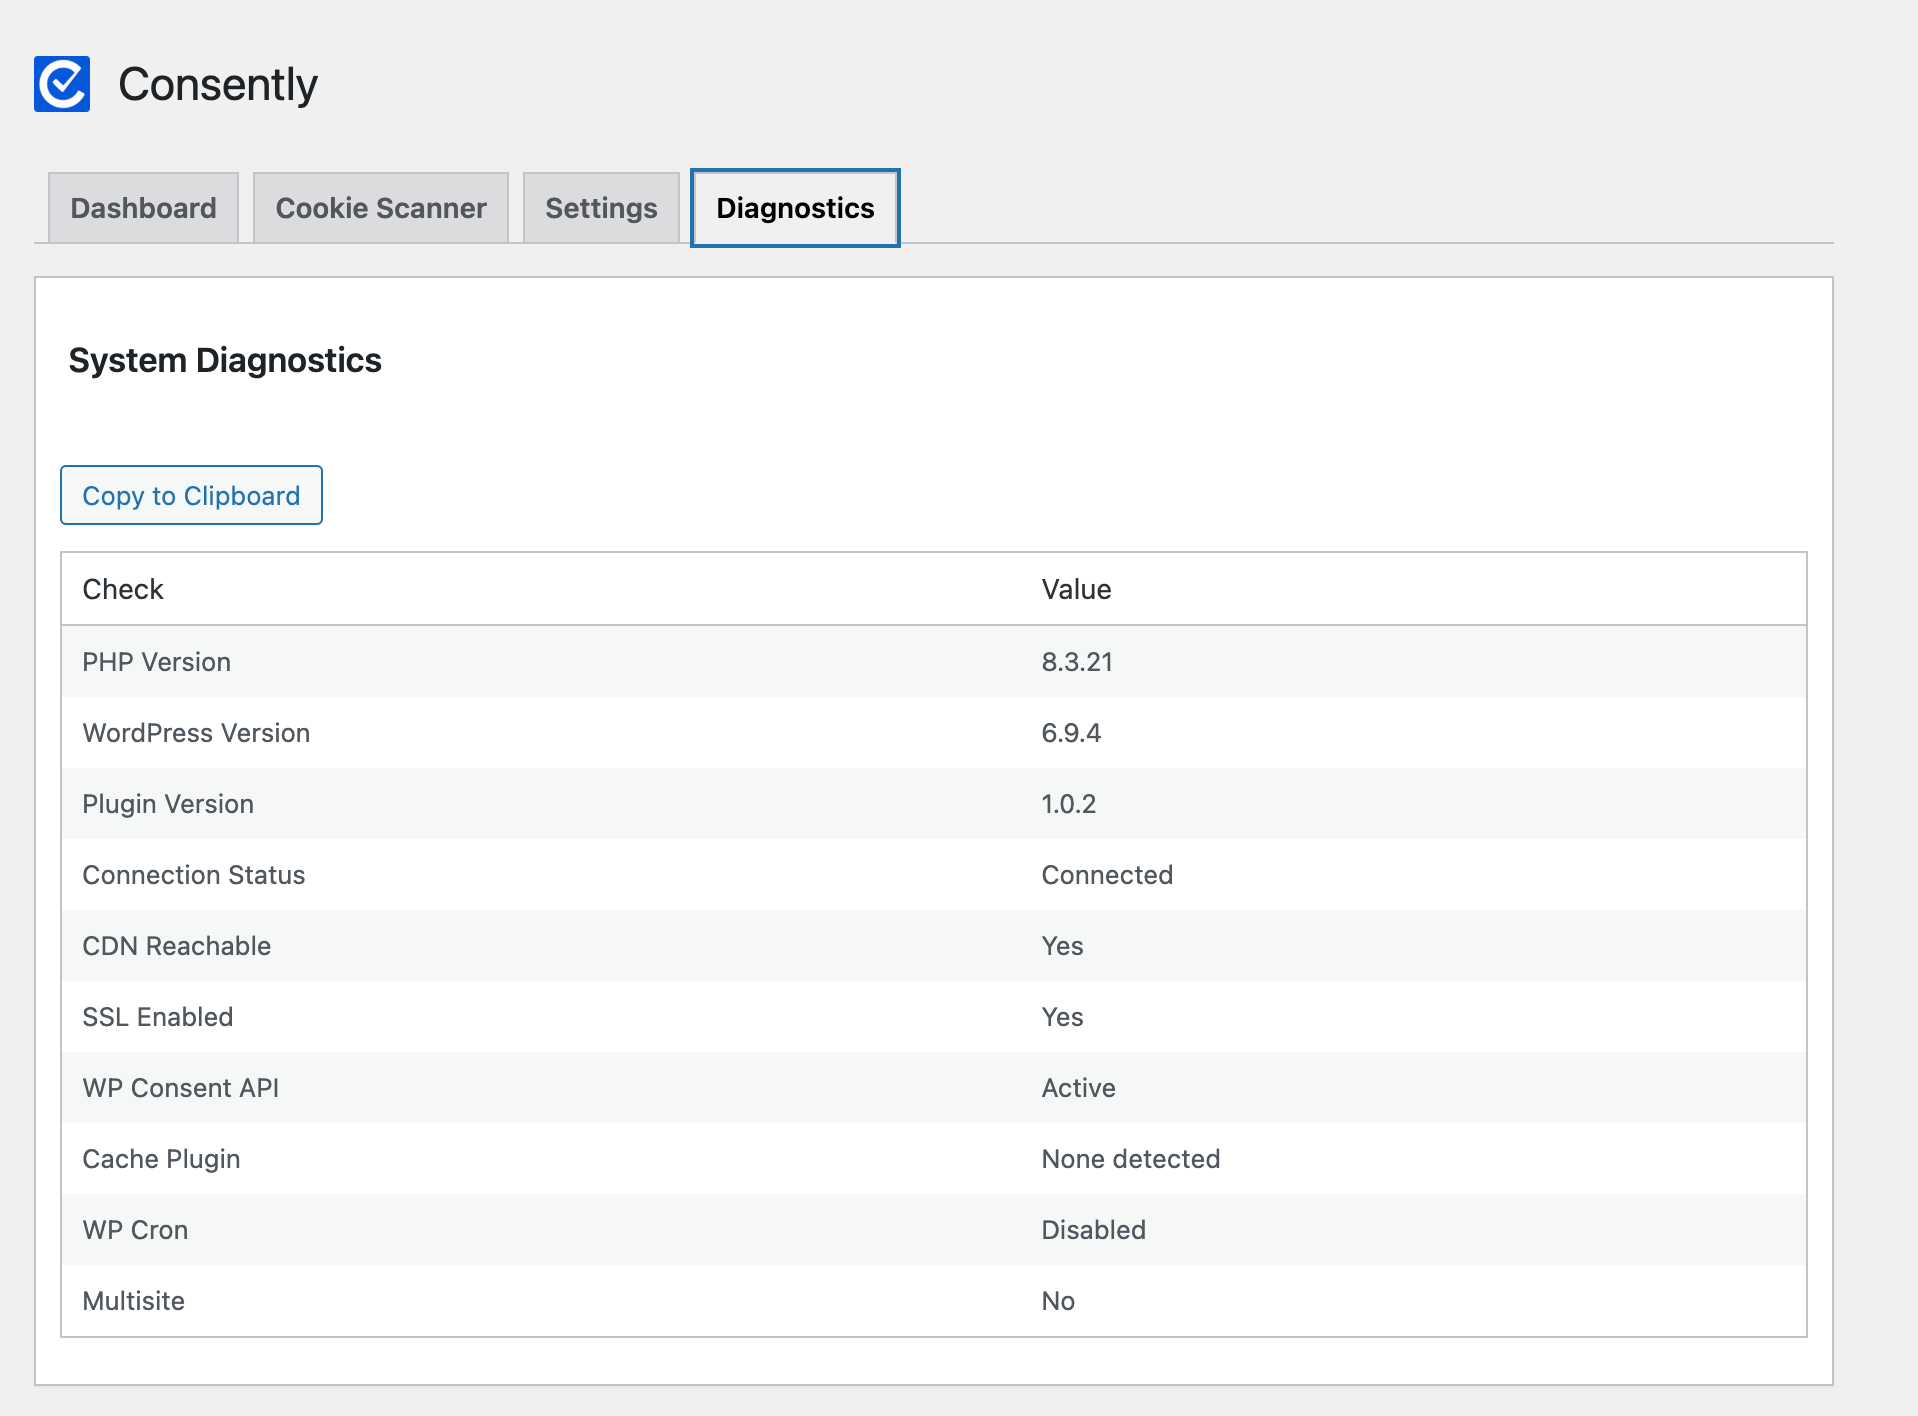
System Diagnosis
This section displays:
PHP Version
WordPress Version
Plugin Version
Connection Status
CDN Reachable
SSL Enabled
WP Consent API Status
Cache Plugin Detection
WP Cron Status
Multisite Status
💡 Tip: If something is not working correctly, check this section first.
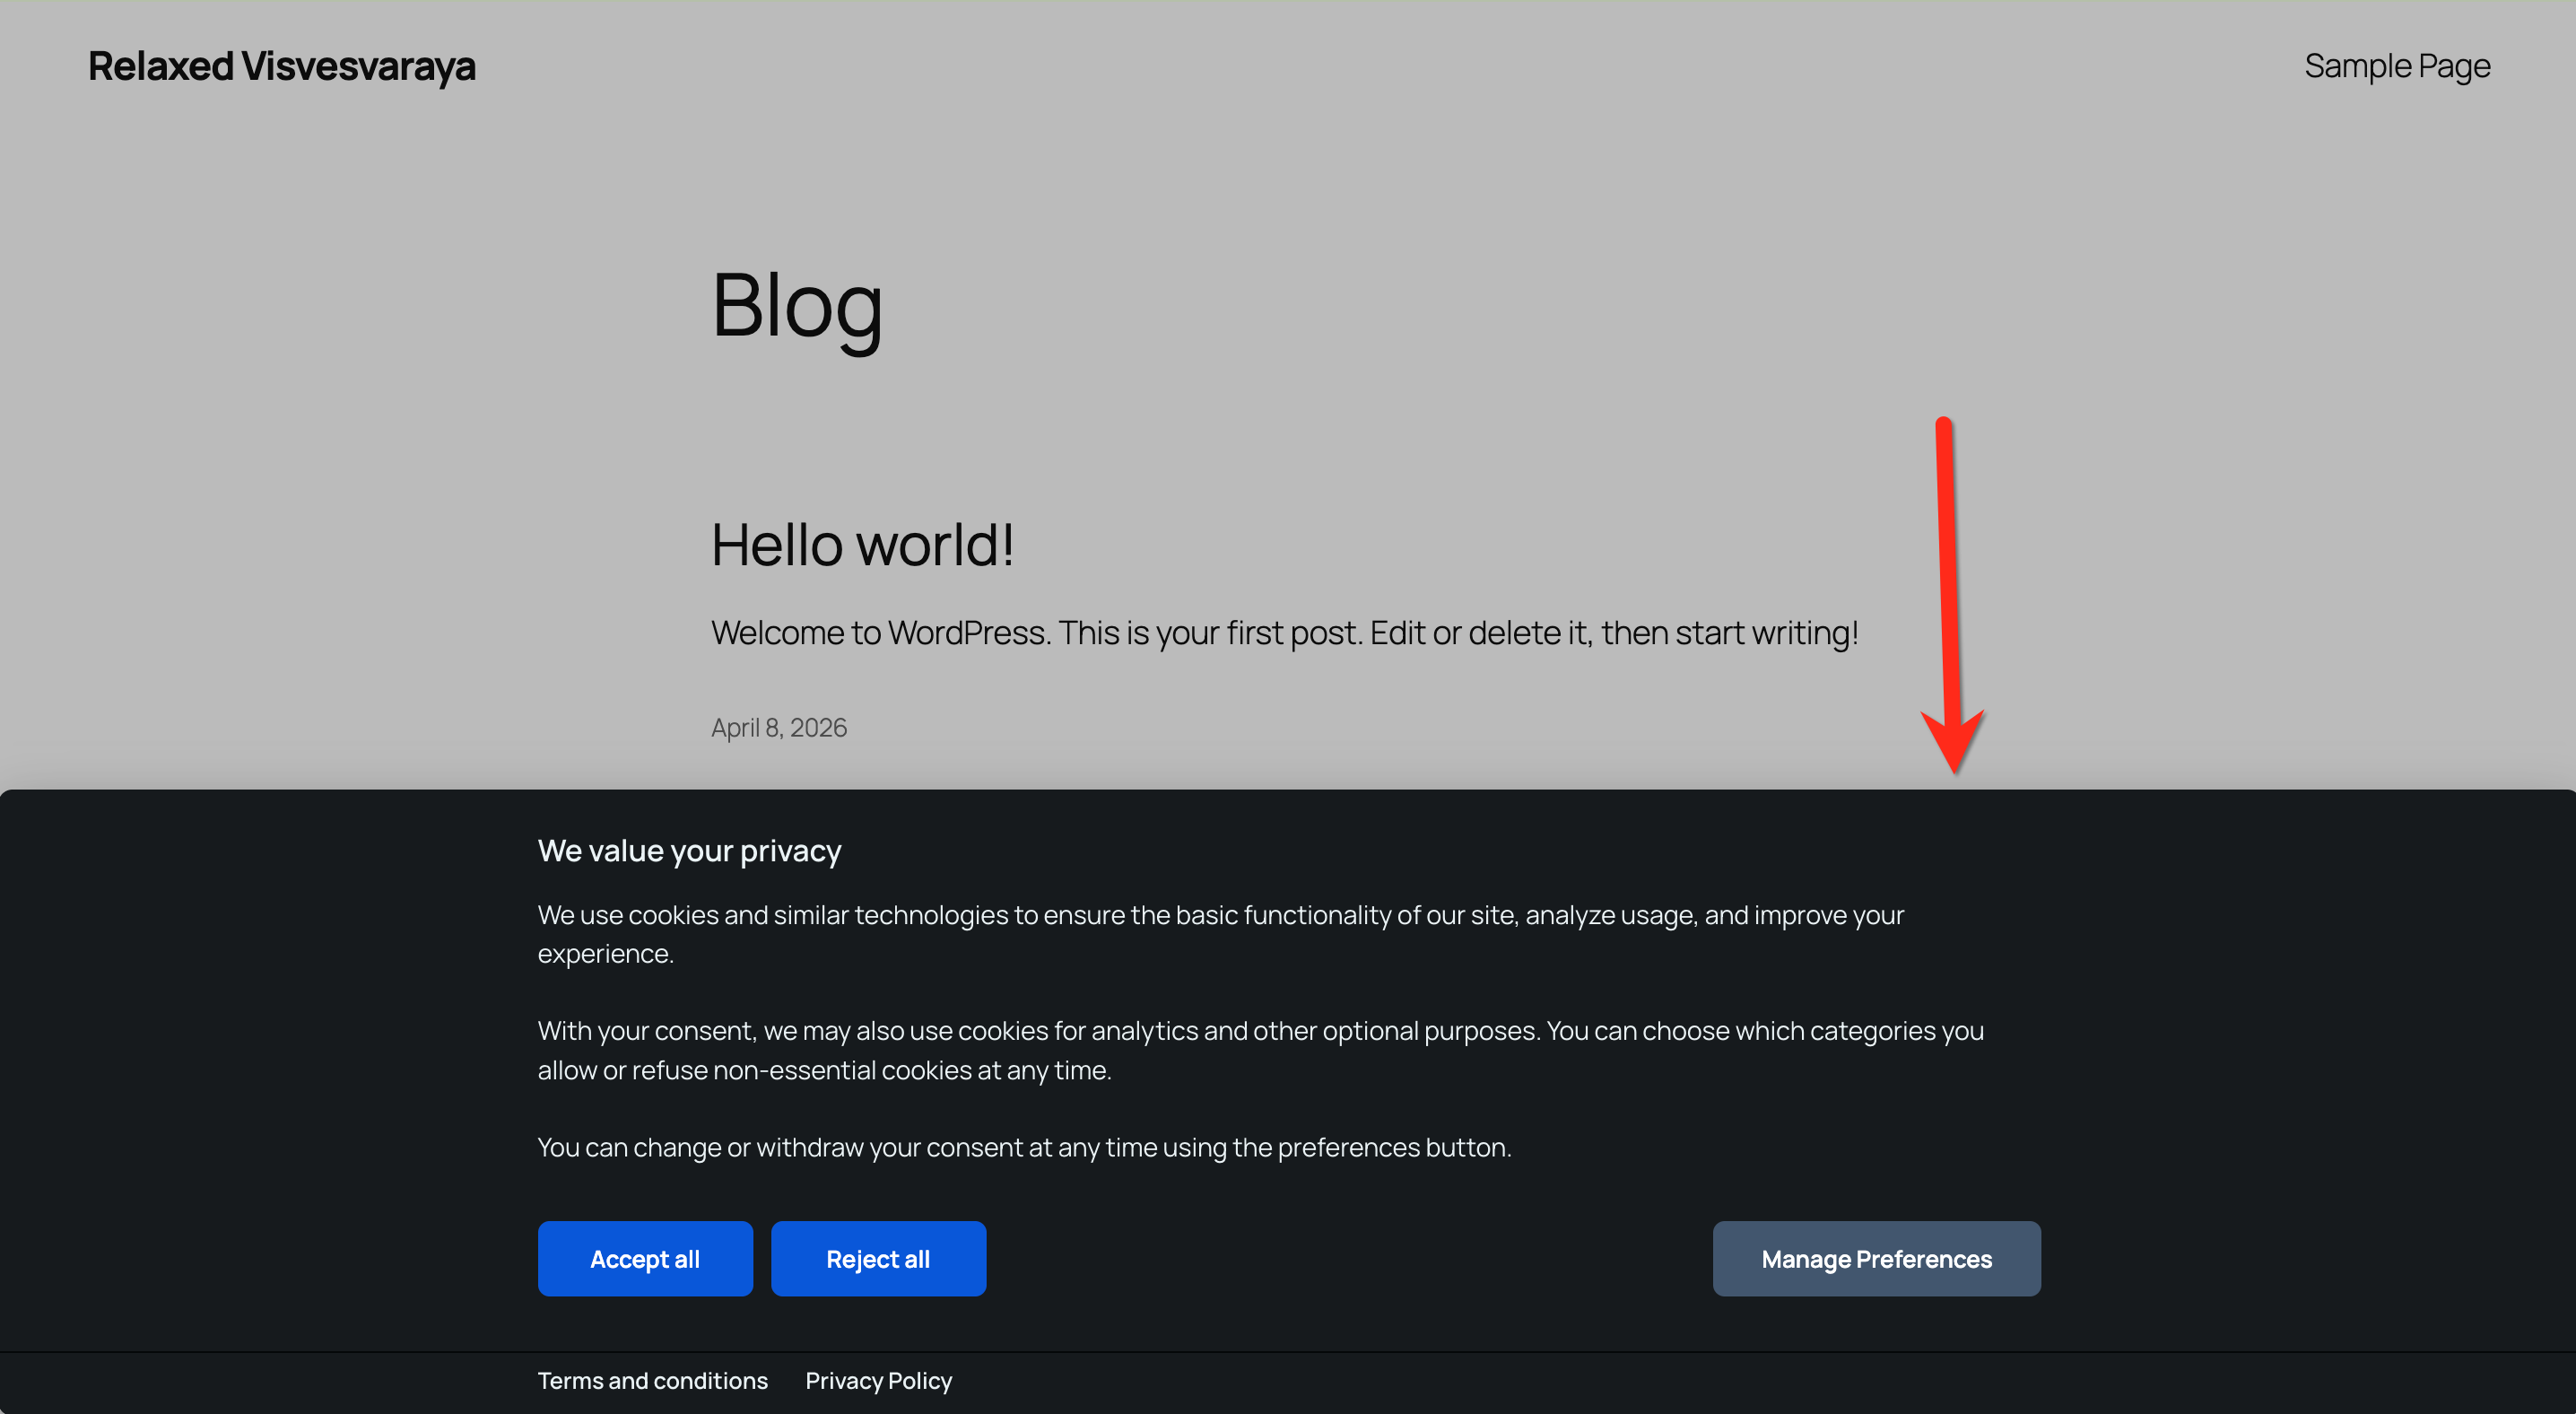
Final Step: Verify on Your Website
Visit your website frontend
Check if the cookie banner appears
What's Next
Now that you understand installing consently plugin into your WordPress site, you should know about:
Troubleshooting
Plugin not working?
→ Make sure WP Consent API is installed and active
Site not showing in the dashboard?
→ Check API key
→ Reconnect
Banner not visible?
→ Clear cache (browser/CDN)
→ Check plugin conflicts