

TL;DR: Cloudflare Dashboard → Delivery & performance → Web tag management → Tag setup → Select Domain → Custom HTML → Navigate to Actions→ Paste Consently script with Pageview trigger. Deploy your consent banner through Cloudflare without editing site code using Zaraz, a cloud-based tool manager that loads scripts outside the browser.
Overview
Cloudflare Zaraz is a third-party tool manager that loads scripts through Cloudflare's edge network. Installing Consently via Zaraz improves page load performance and simplifies script management by loading the consent banner from Cloudflare's servers rather than directly from your website code.
Before You Begin
Make sure you have:
A Cloudflare account with an active domain. Domains purchased elsewhere can also be added to Cloudflare by following this guide.
Admin access to your Cloudflare dashboard
Time required: About 5 minutes
How to Install Consently via Cloudflare Zaraz
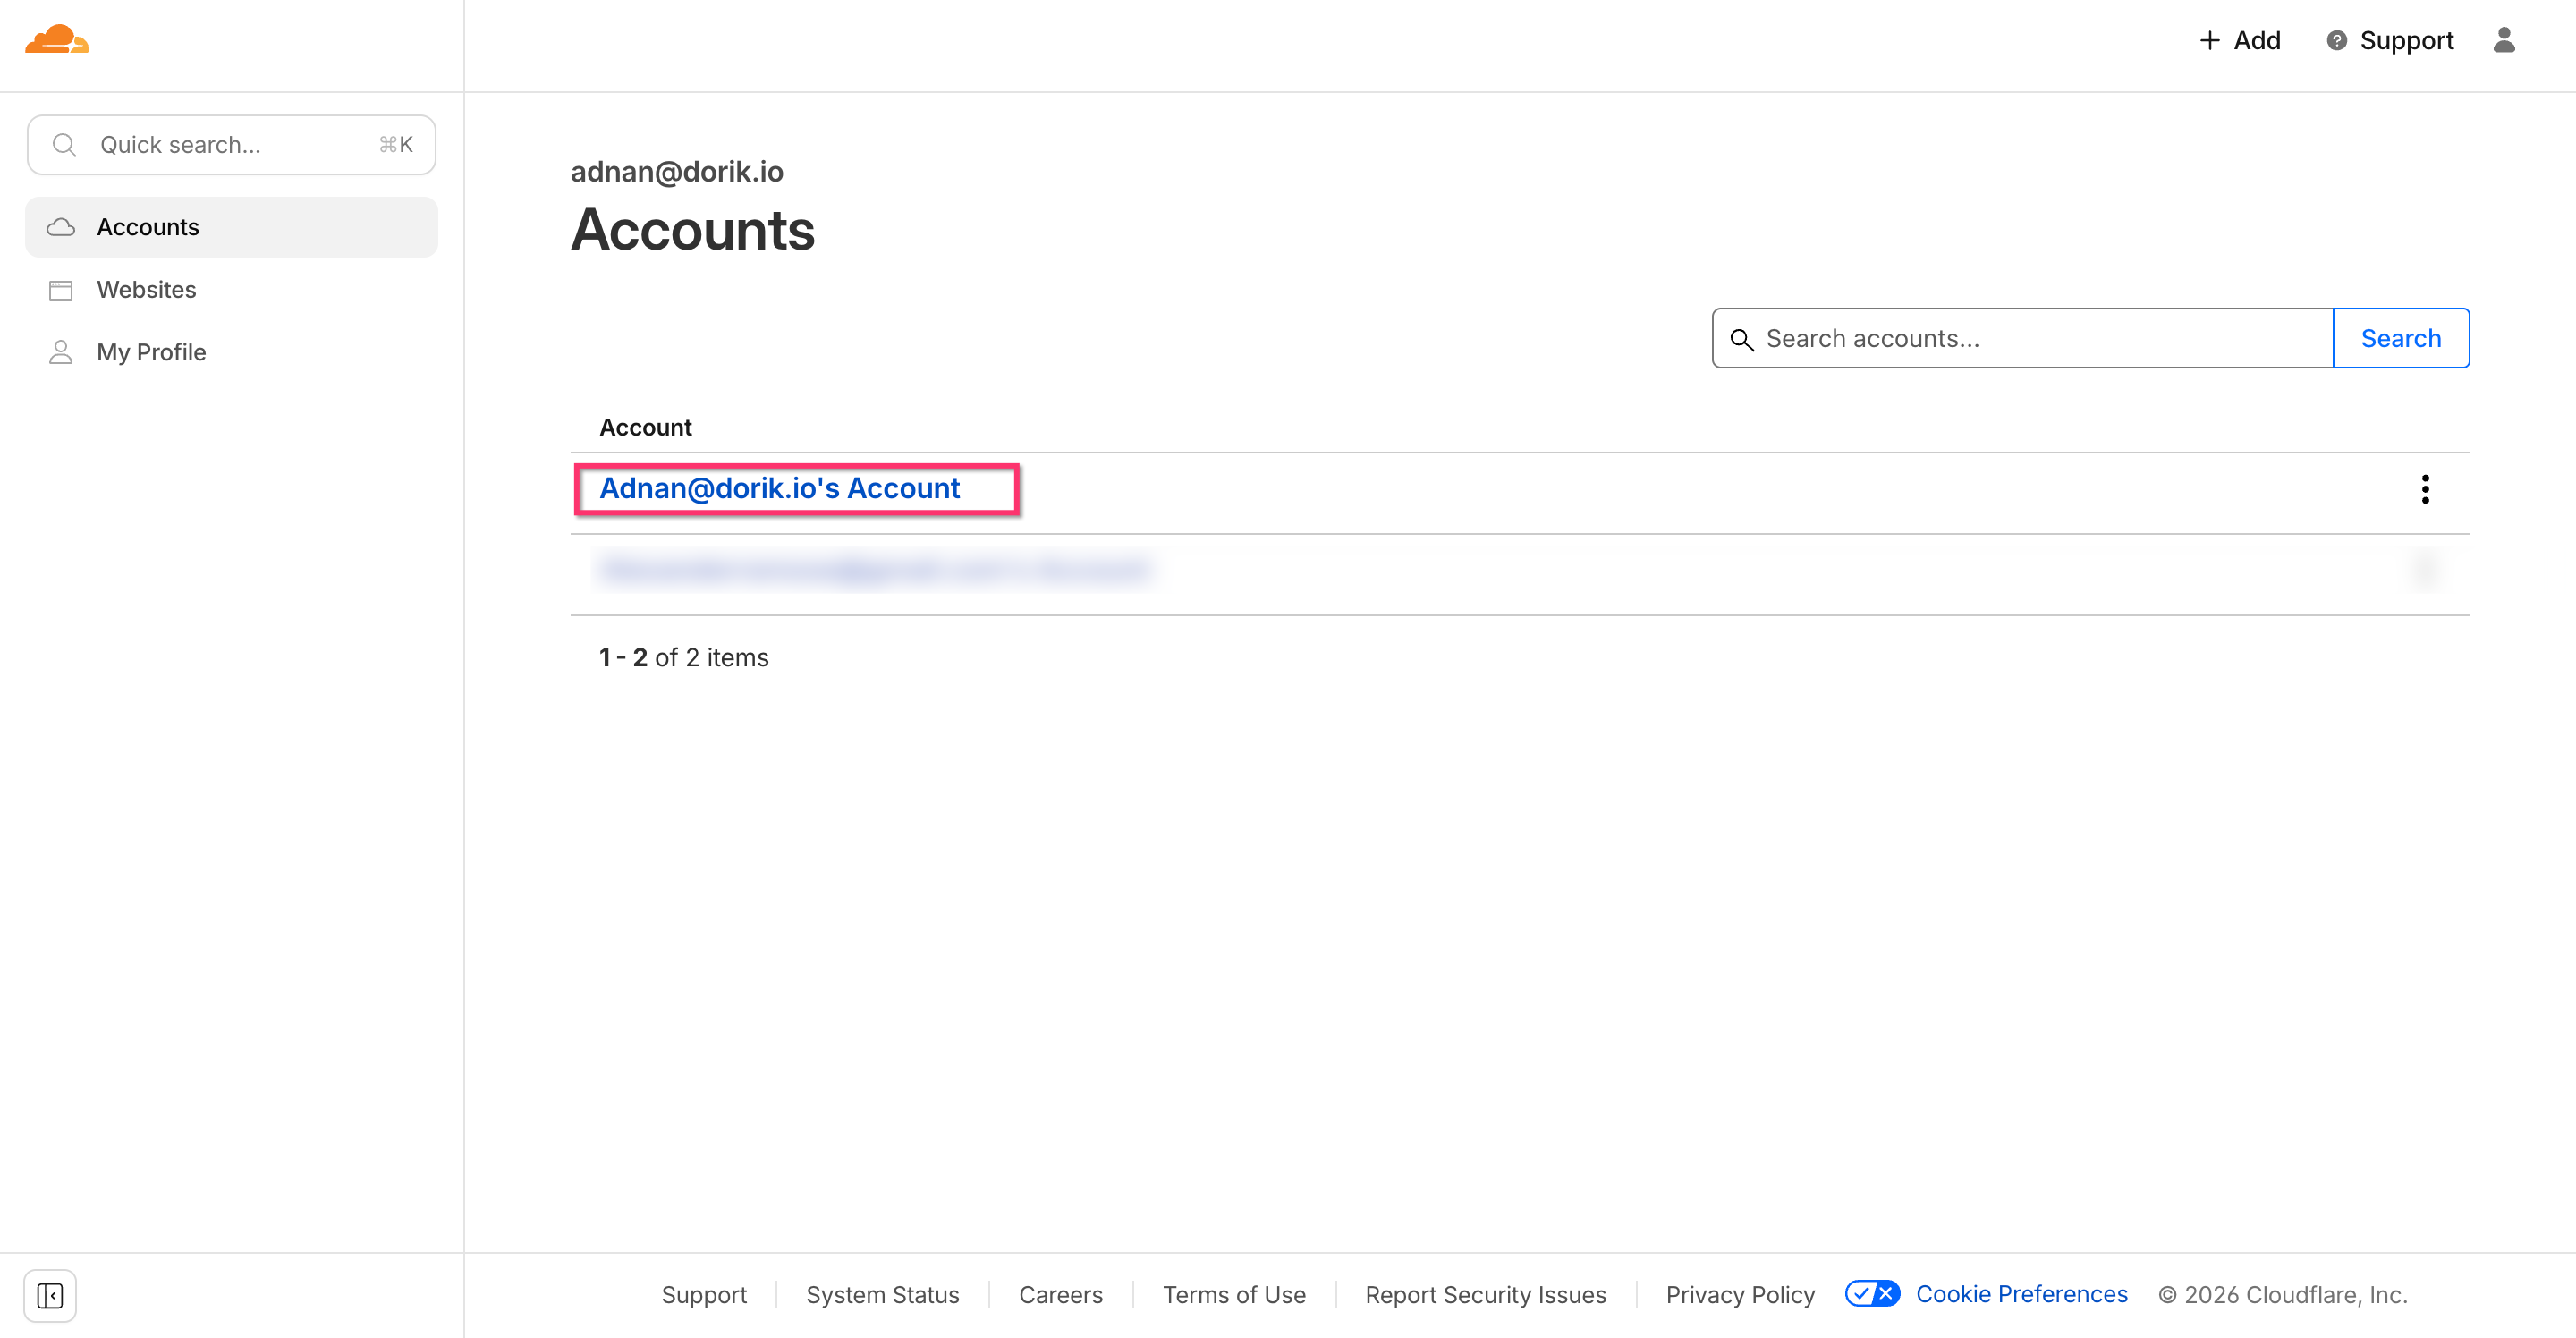
Step 1: Access your Cloudflare dashboard
Log in to the Cloudflare Dashboard and select the account with the domain where you want to add Consently.
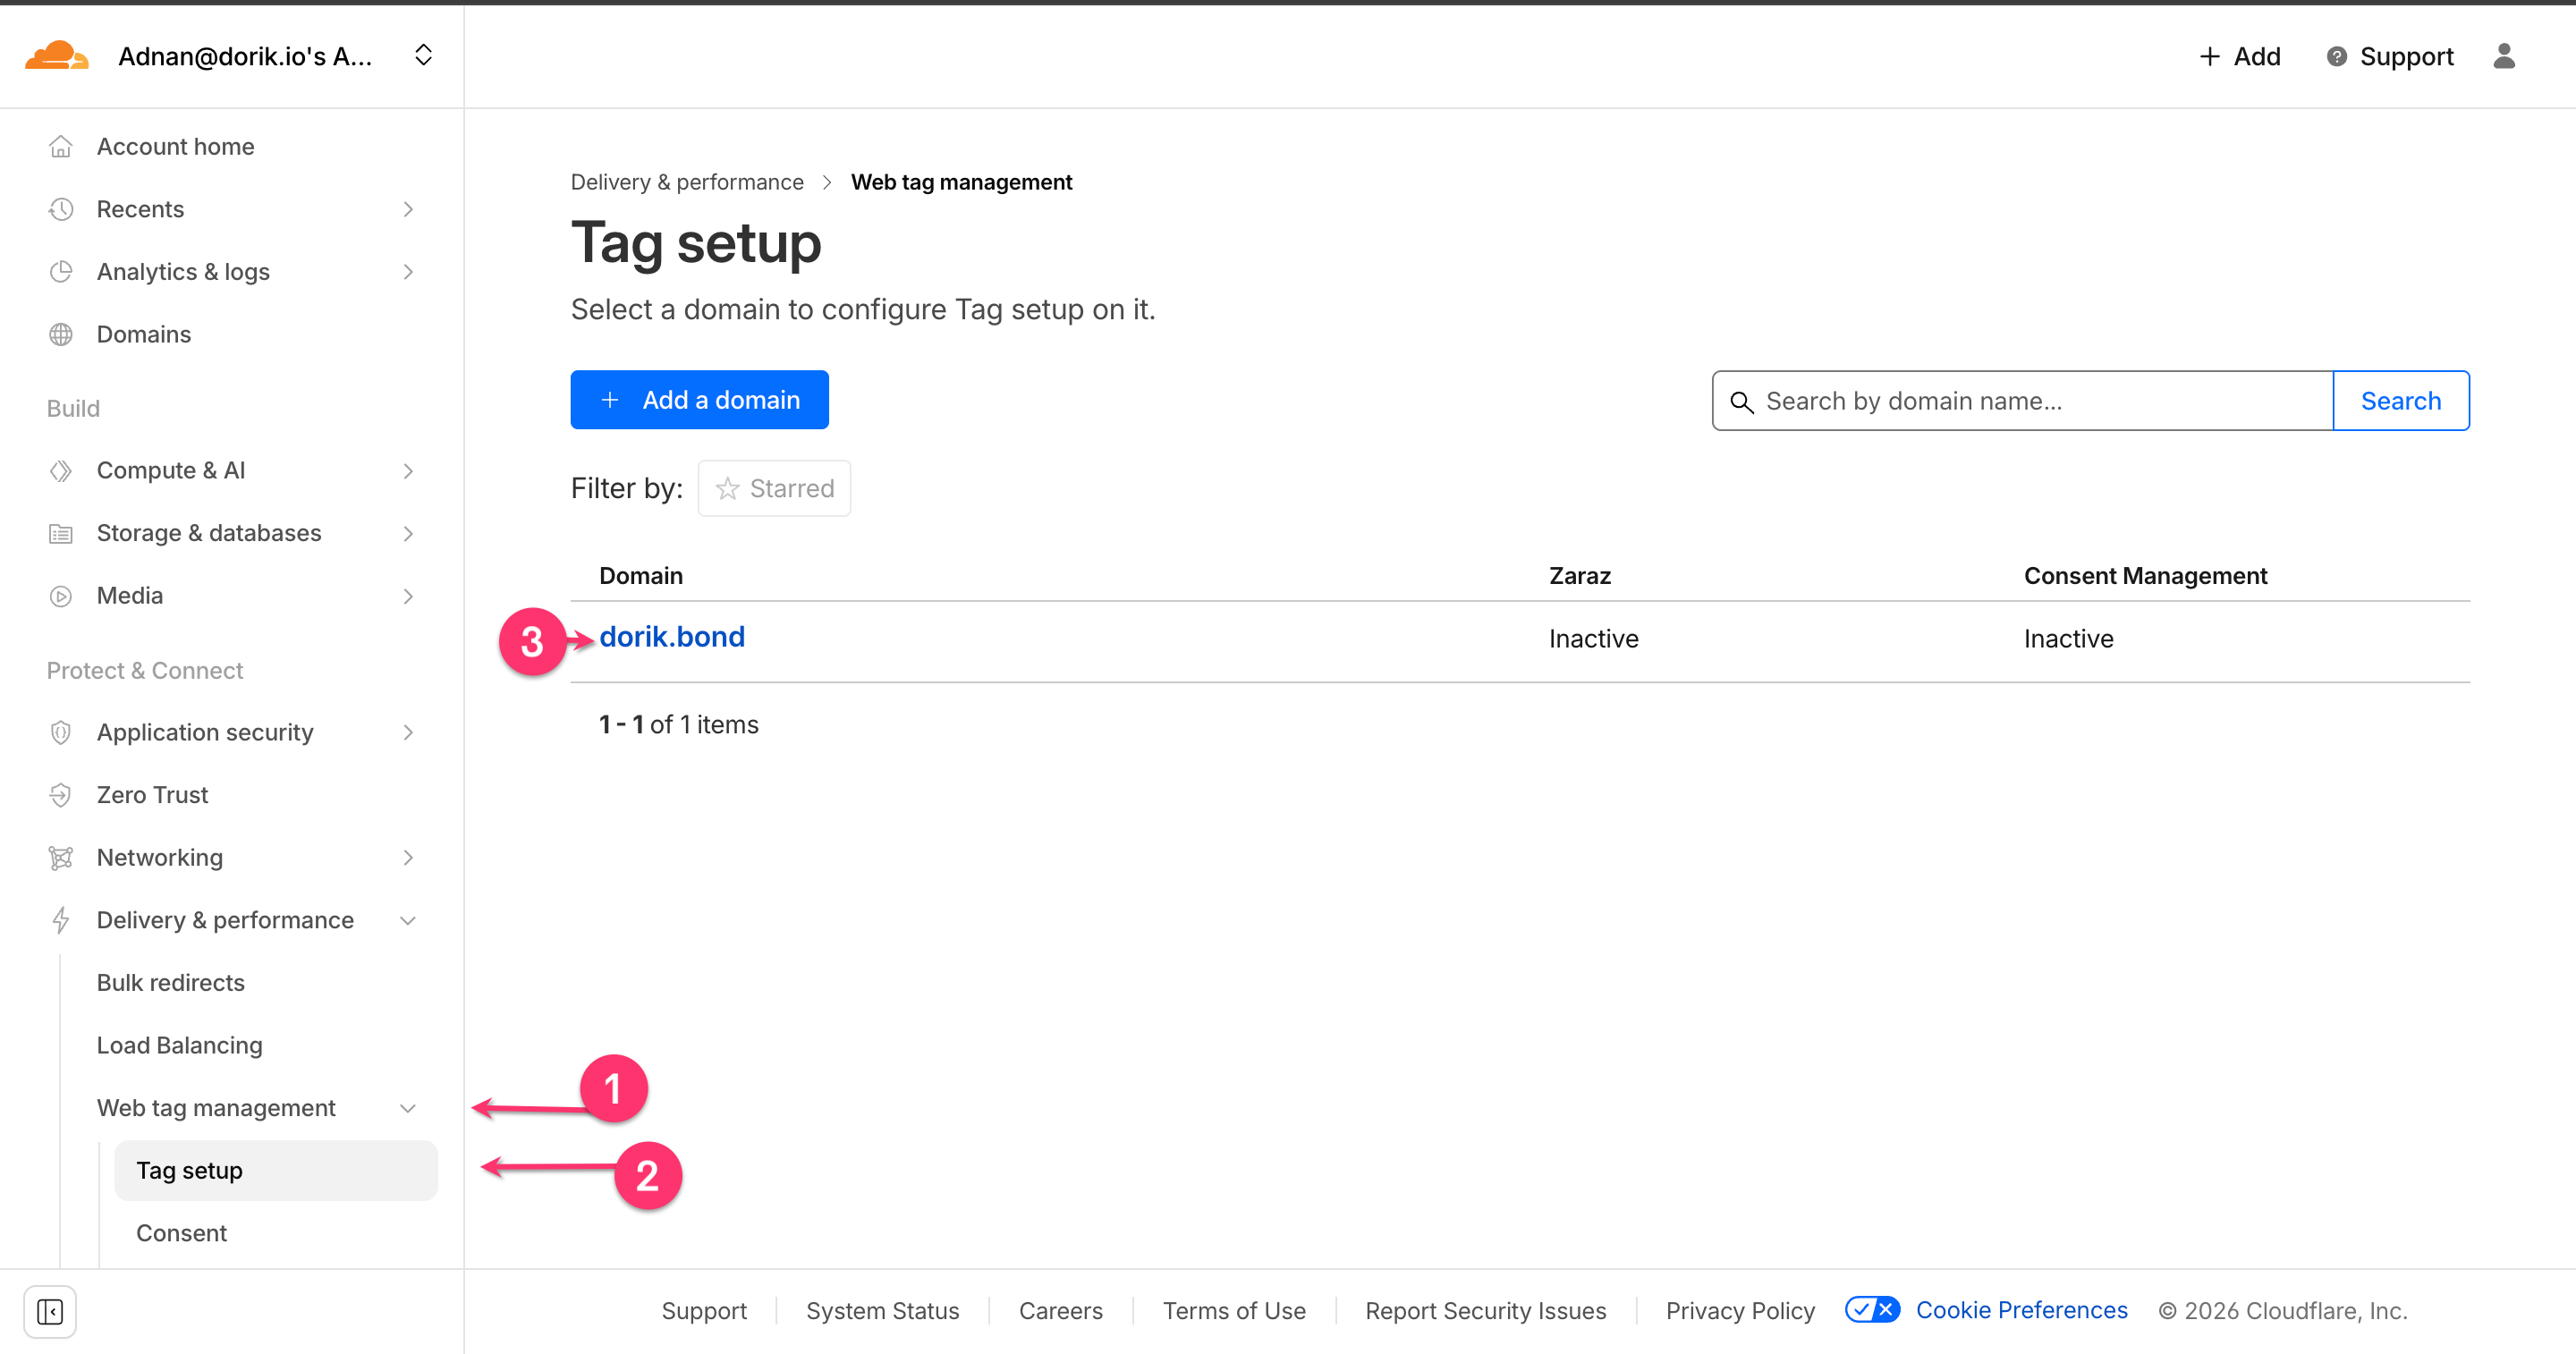
Step 2: Navigate to Zaraz settings
Navigate to Delivery & performance → Web tag management → Tag setup. Then click on the domain where you want to add Consently.
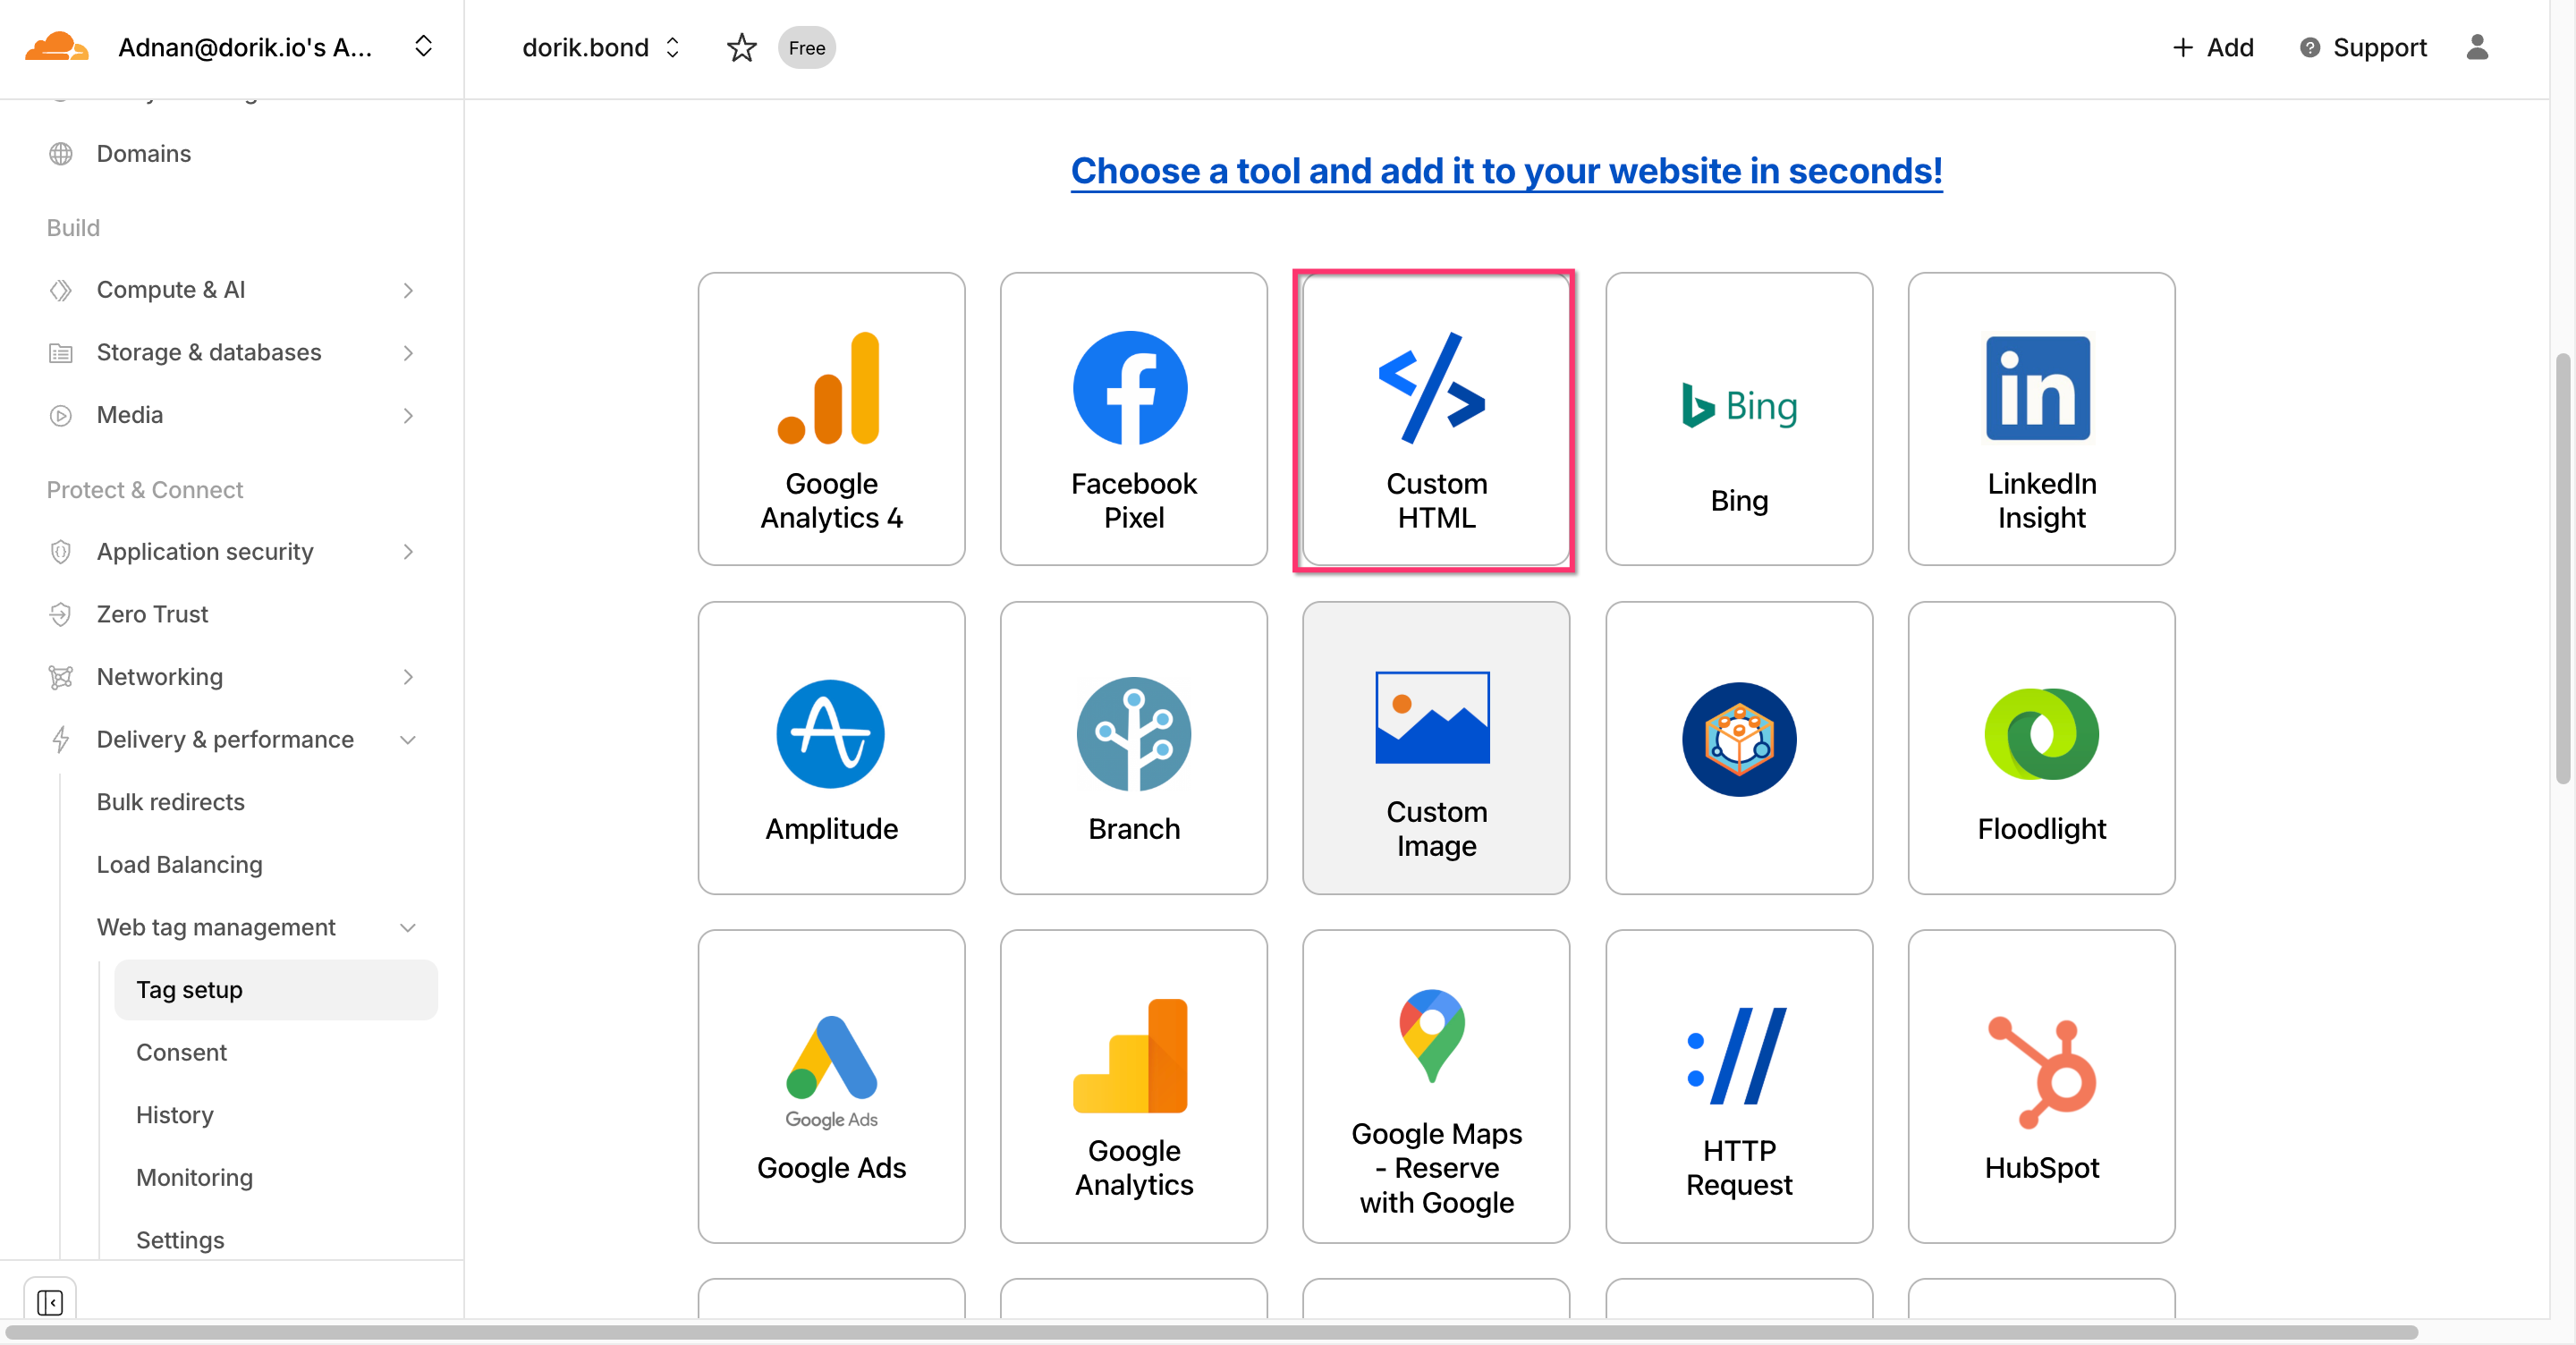
Step 3: Select Custom HTML
Scroll through the tool options and click the Custom HTML card.
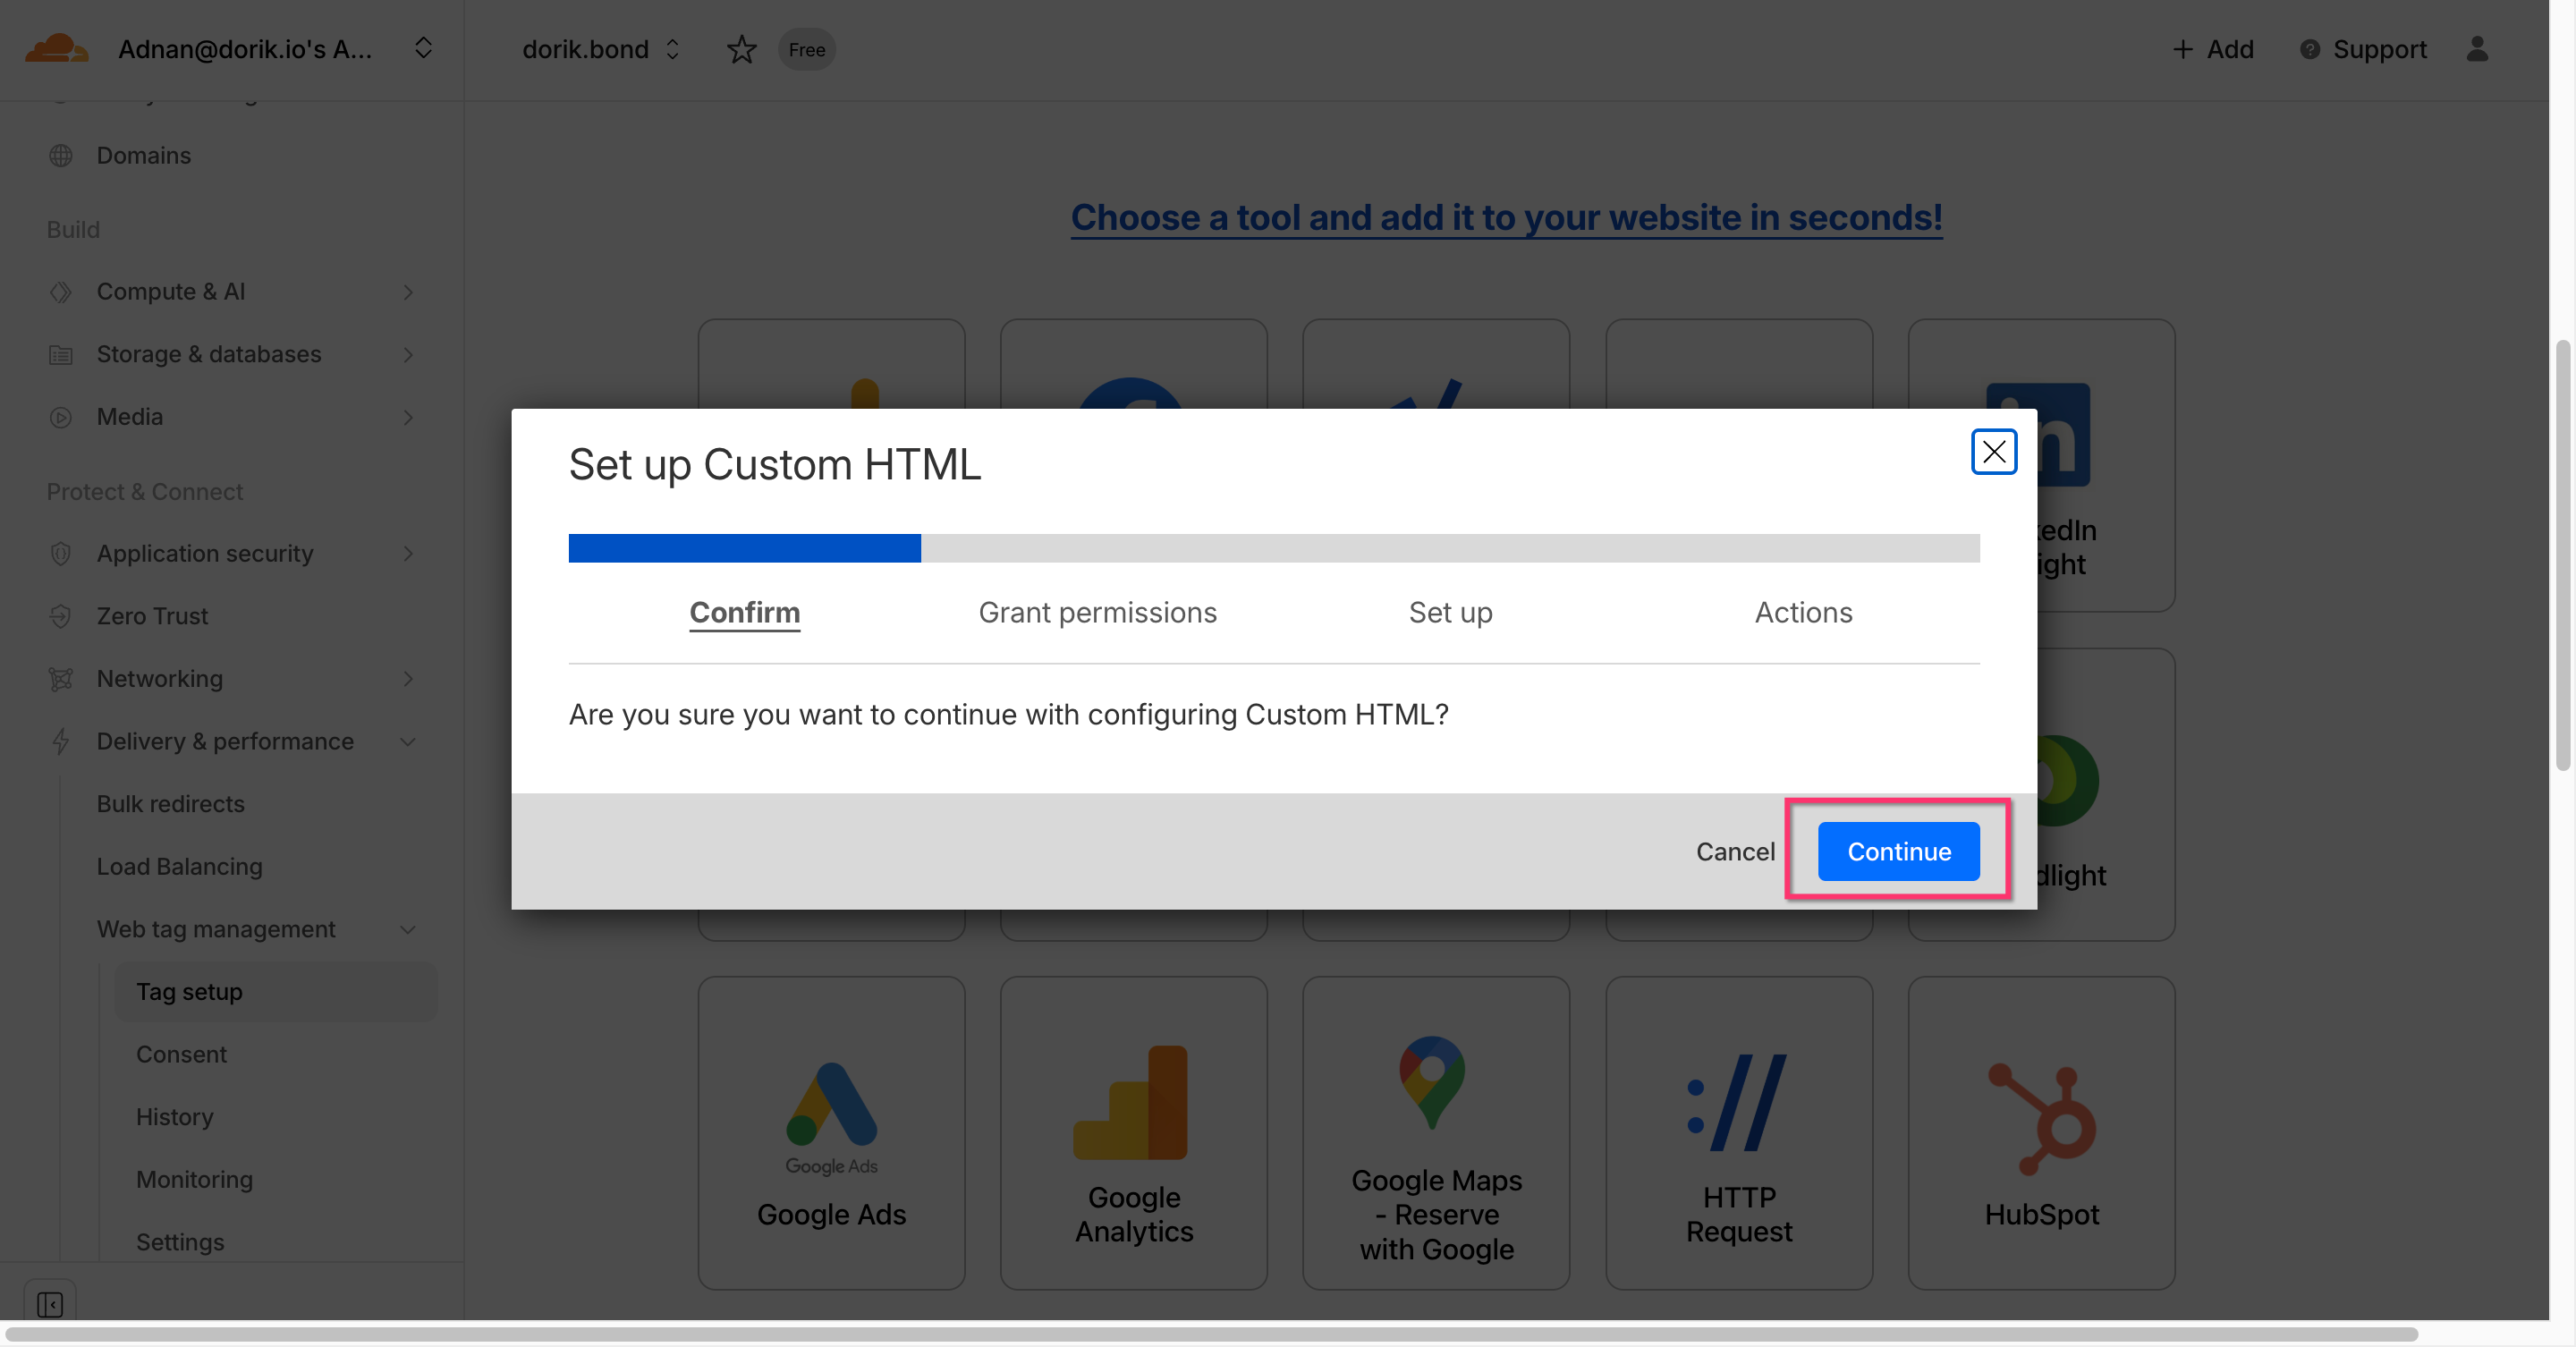
Step 4: Confirm tool selection
In the "Set up Custom HTML" modal that appears, click Continue to proceed with configuring the tool.
Step 5: Grant JavaScript execution permission
On the "Grant permissions" screen, ensure the Execute client-side JavaScript toggle is enabled, then click Continue.
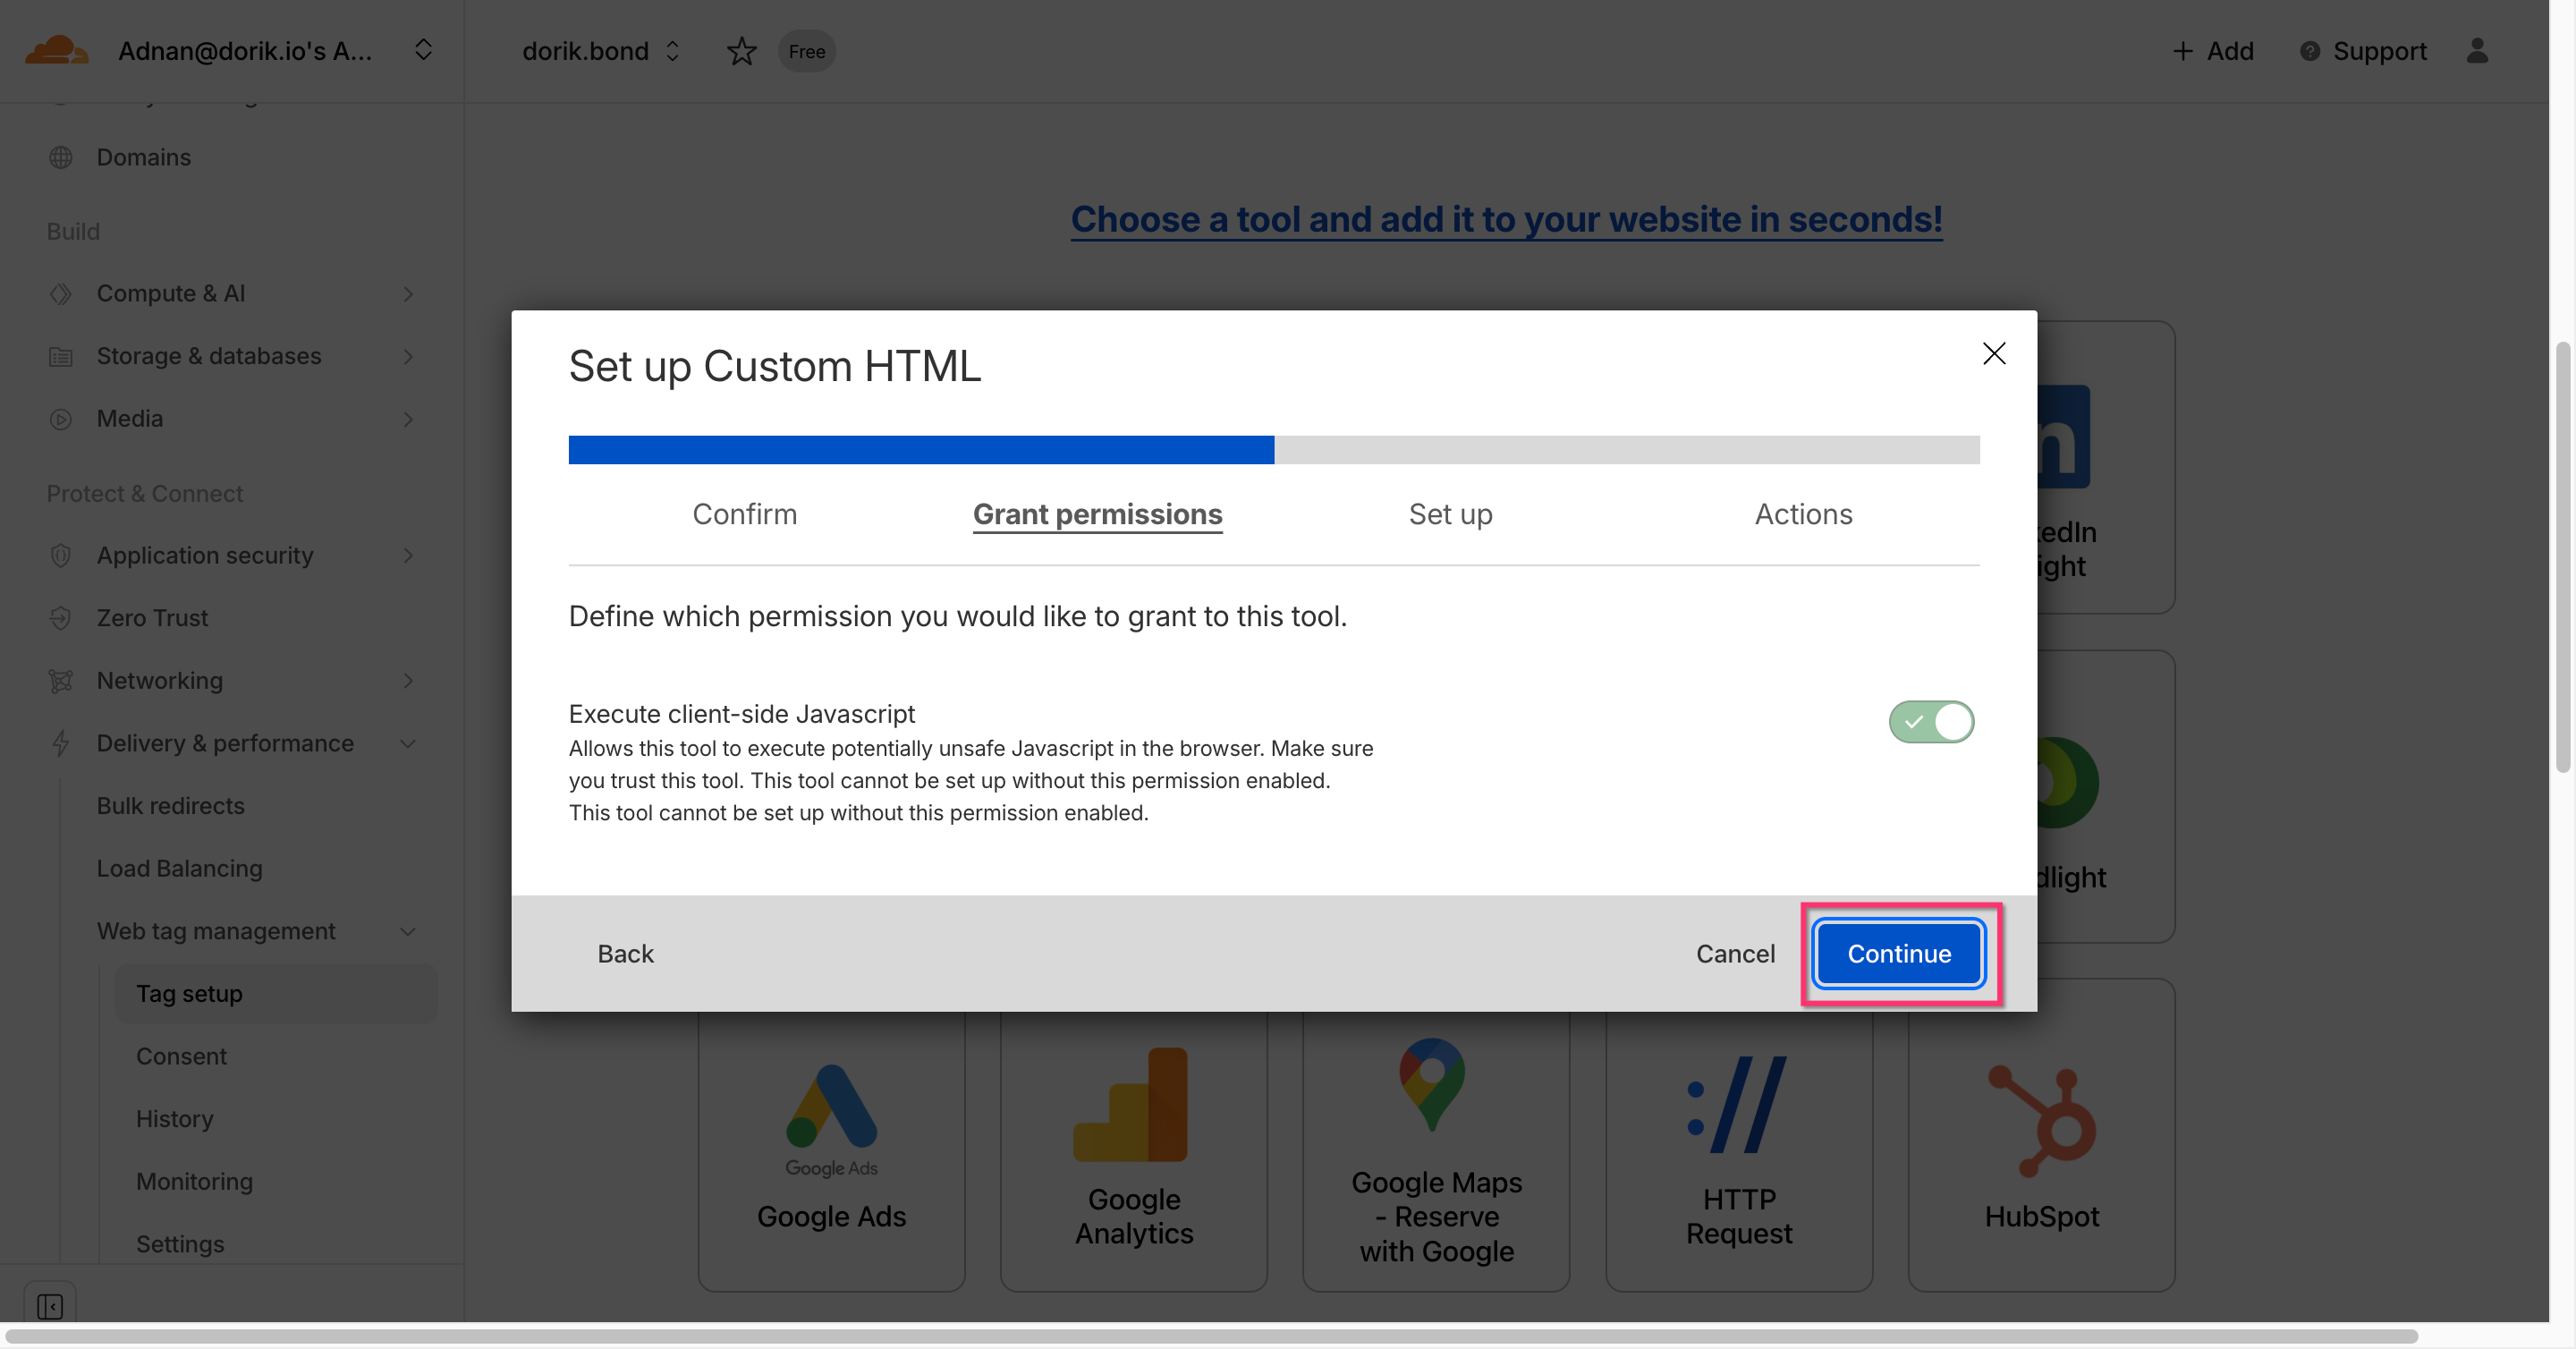
⚠️ Important: This permission is required for this method of integration to work.
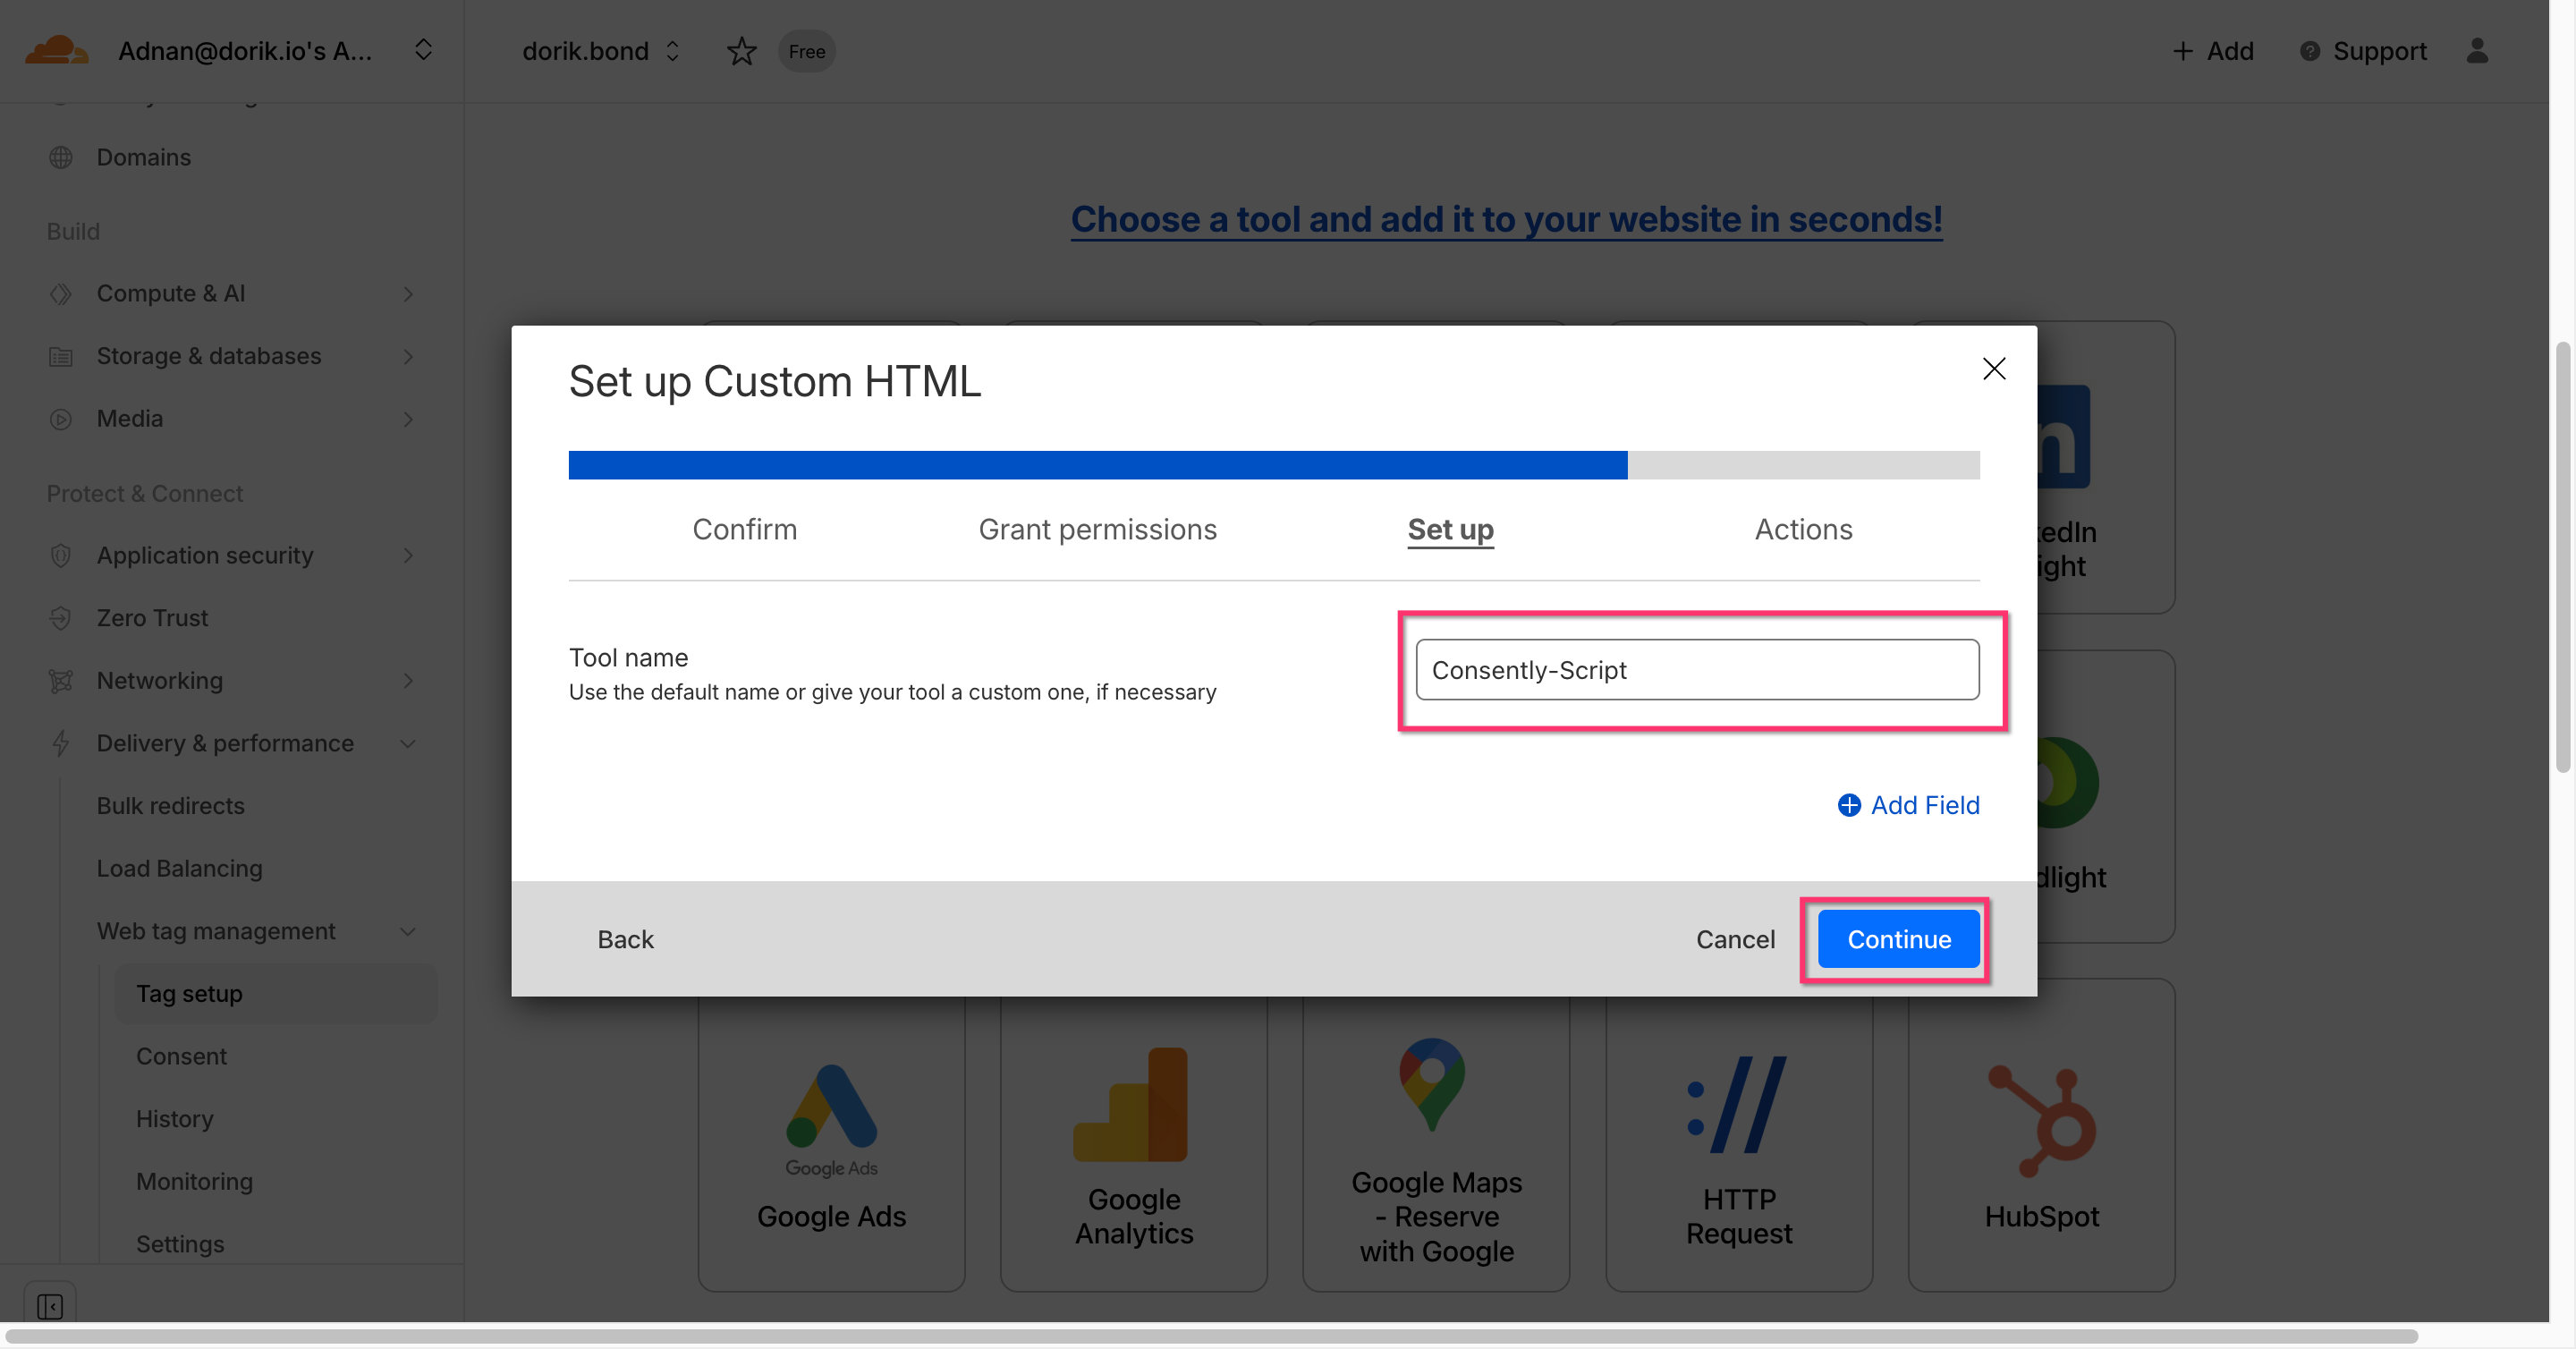
Step 6: Configure the tool settings
You can provide a Custom Tool name in this step. Press Continue when you are done.
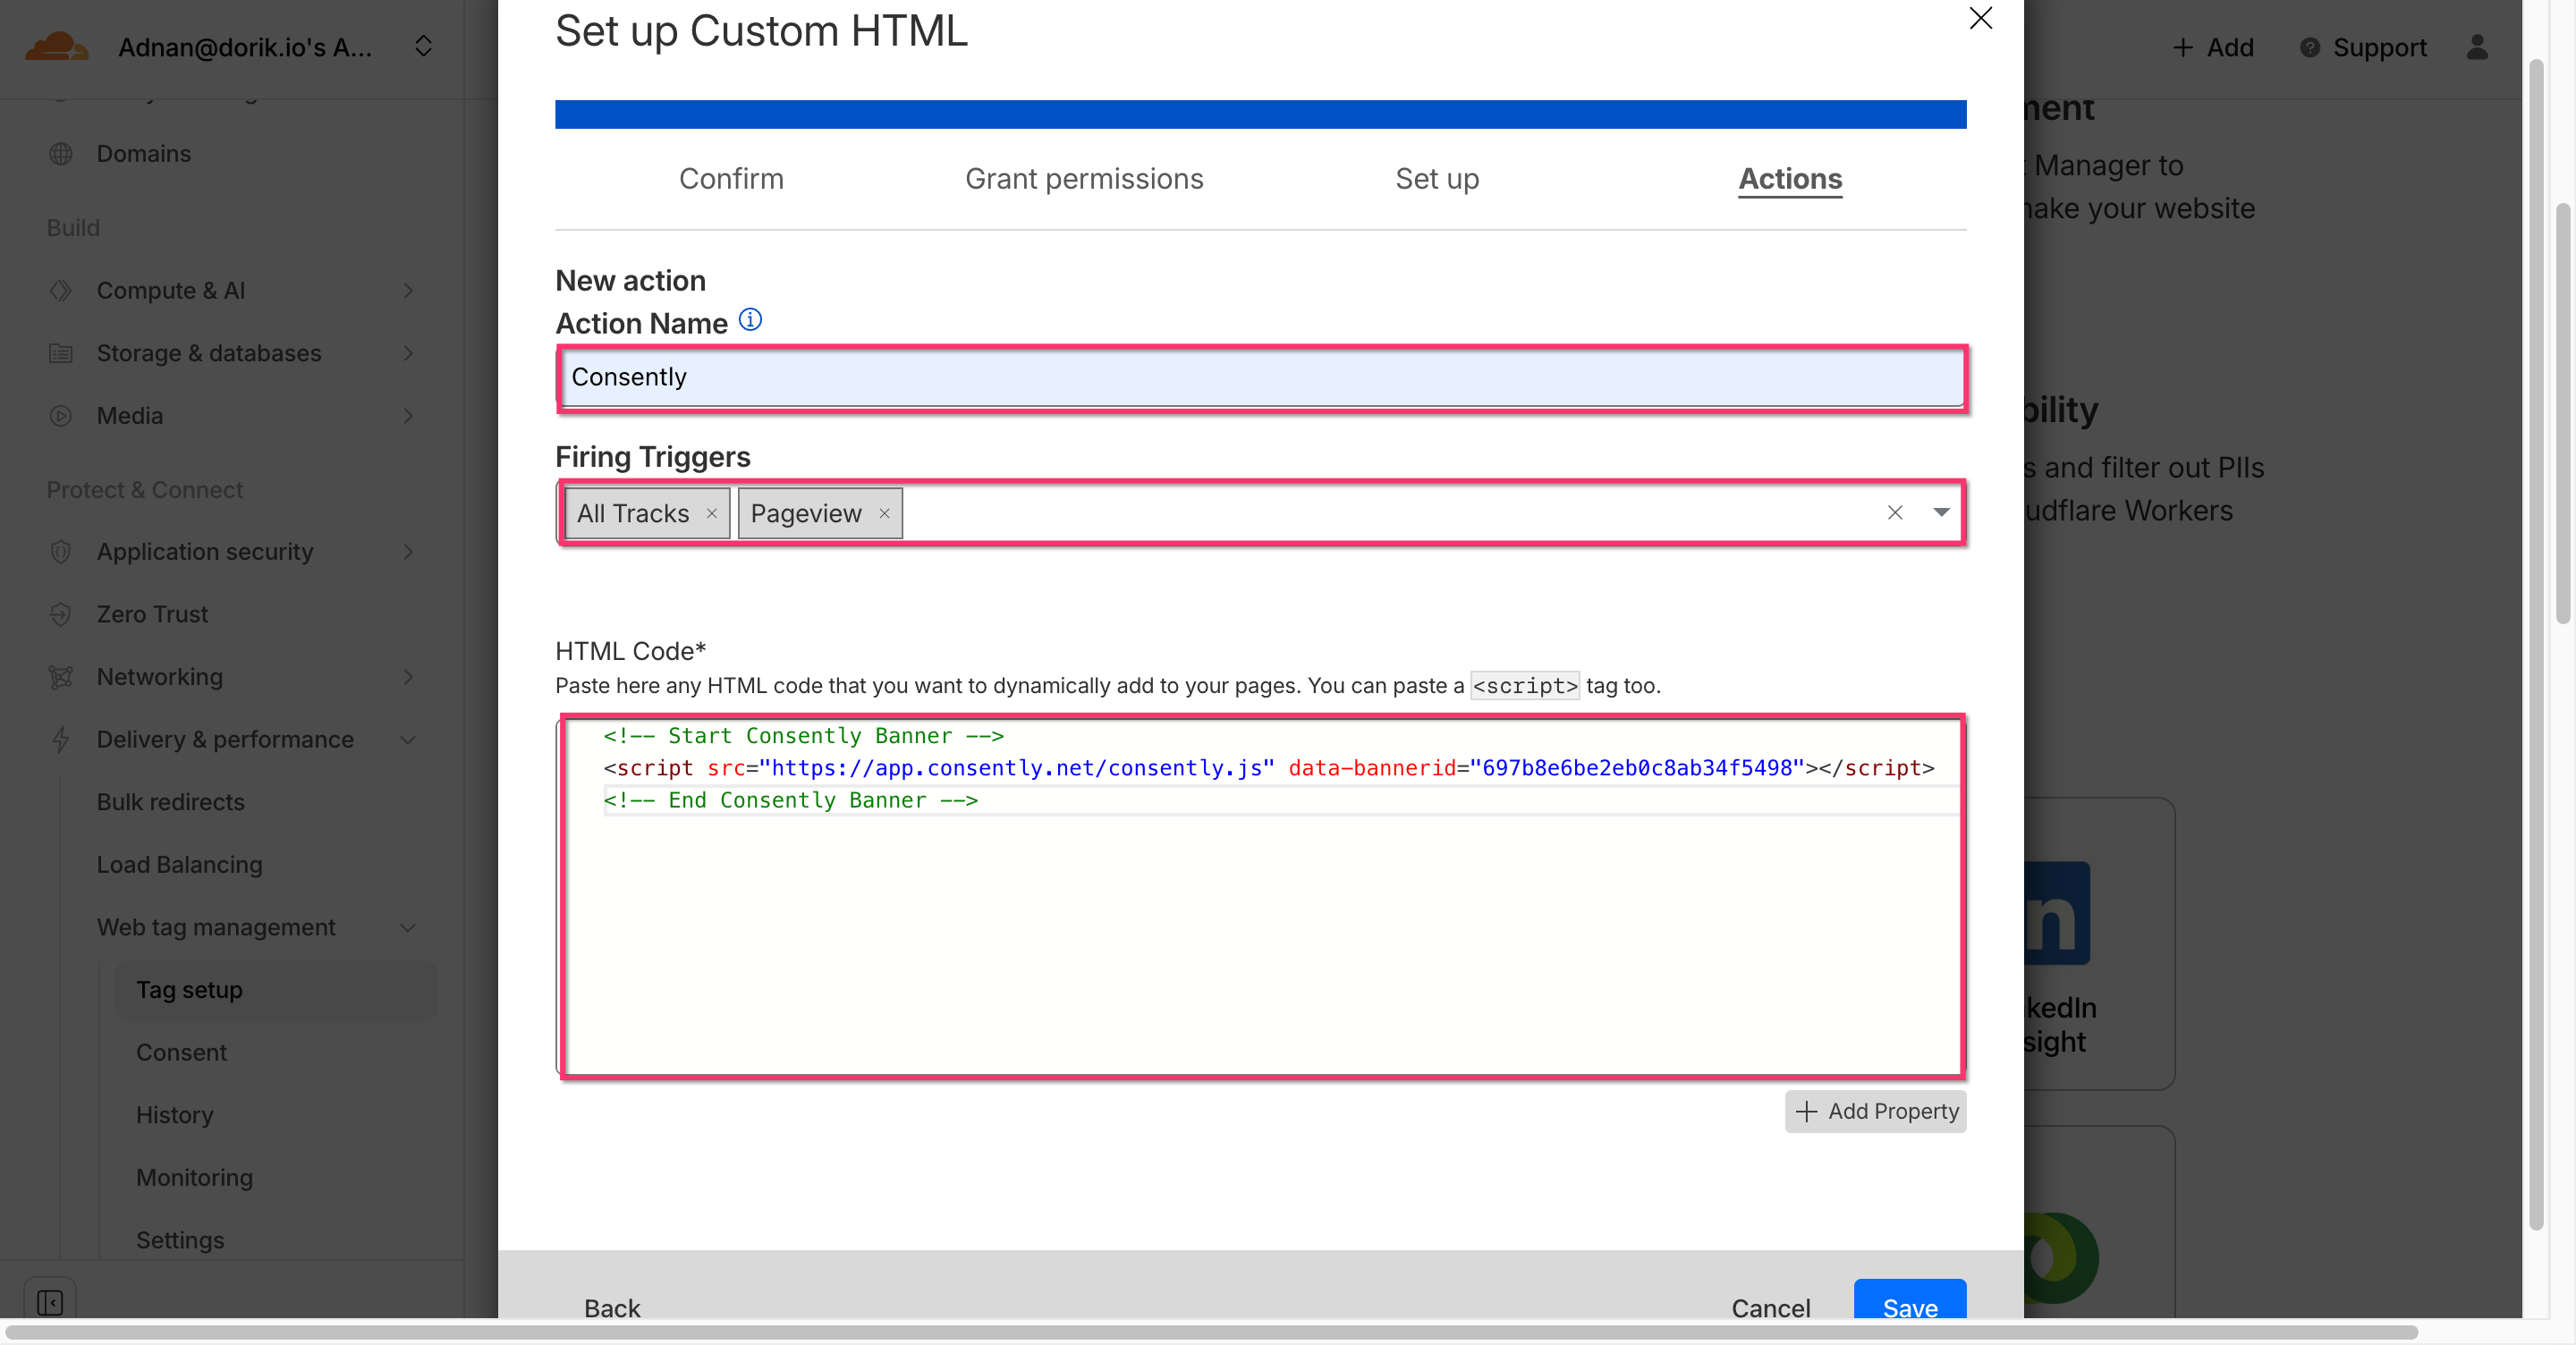
Step 7: Set Up Custom HTML
Provide an Action Name
Choose the Firing Triggers from the dropdown
Paste your Consently Script in the HTML Code input field
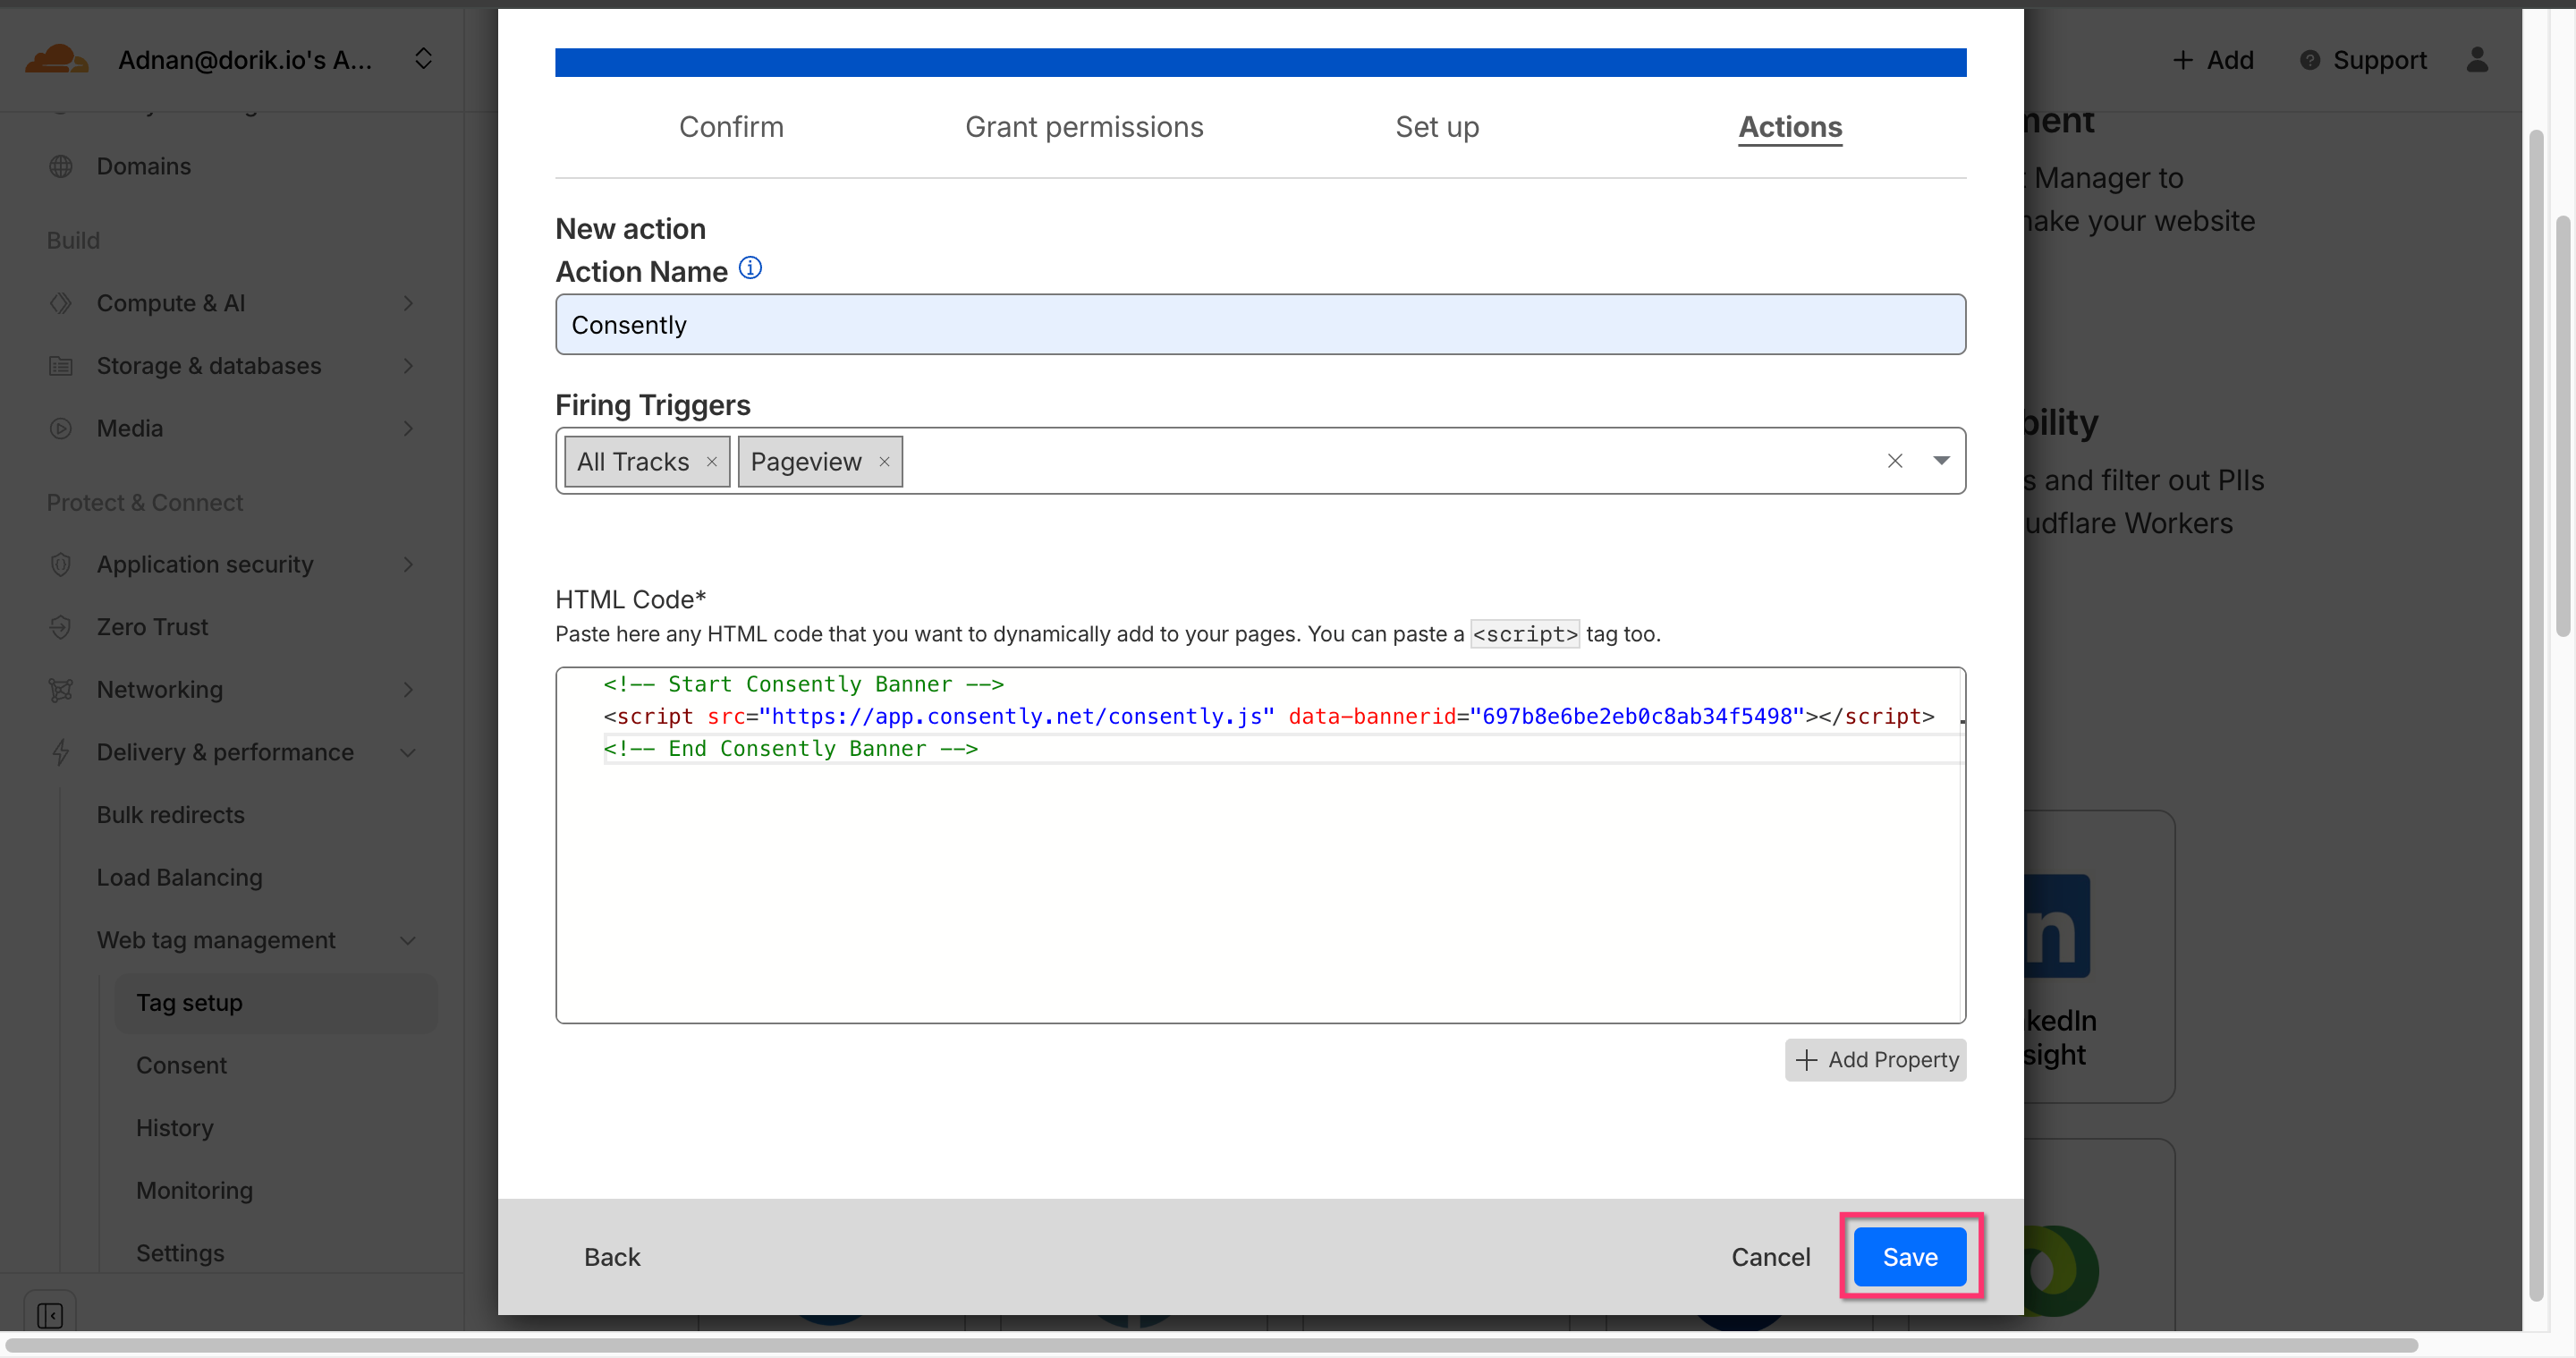
Step 8: Complete the setup
Click Save to finalize the configuration.
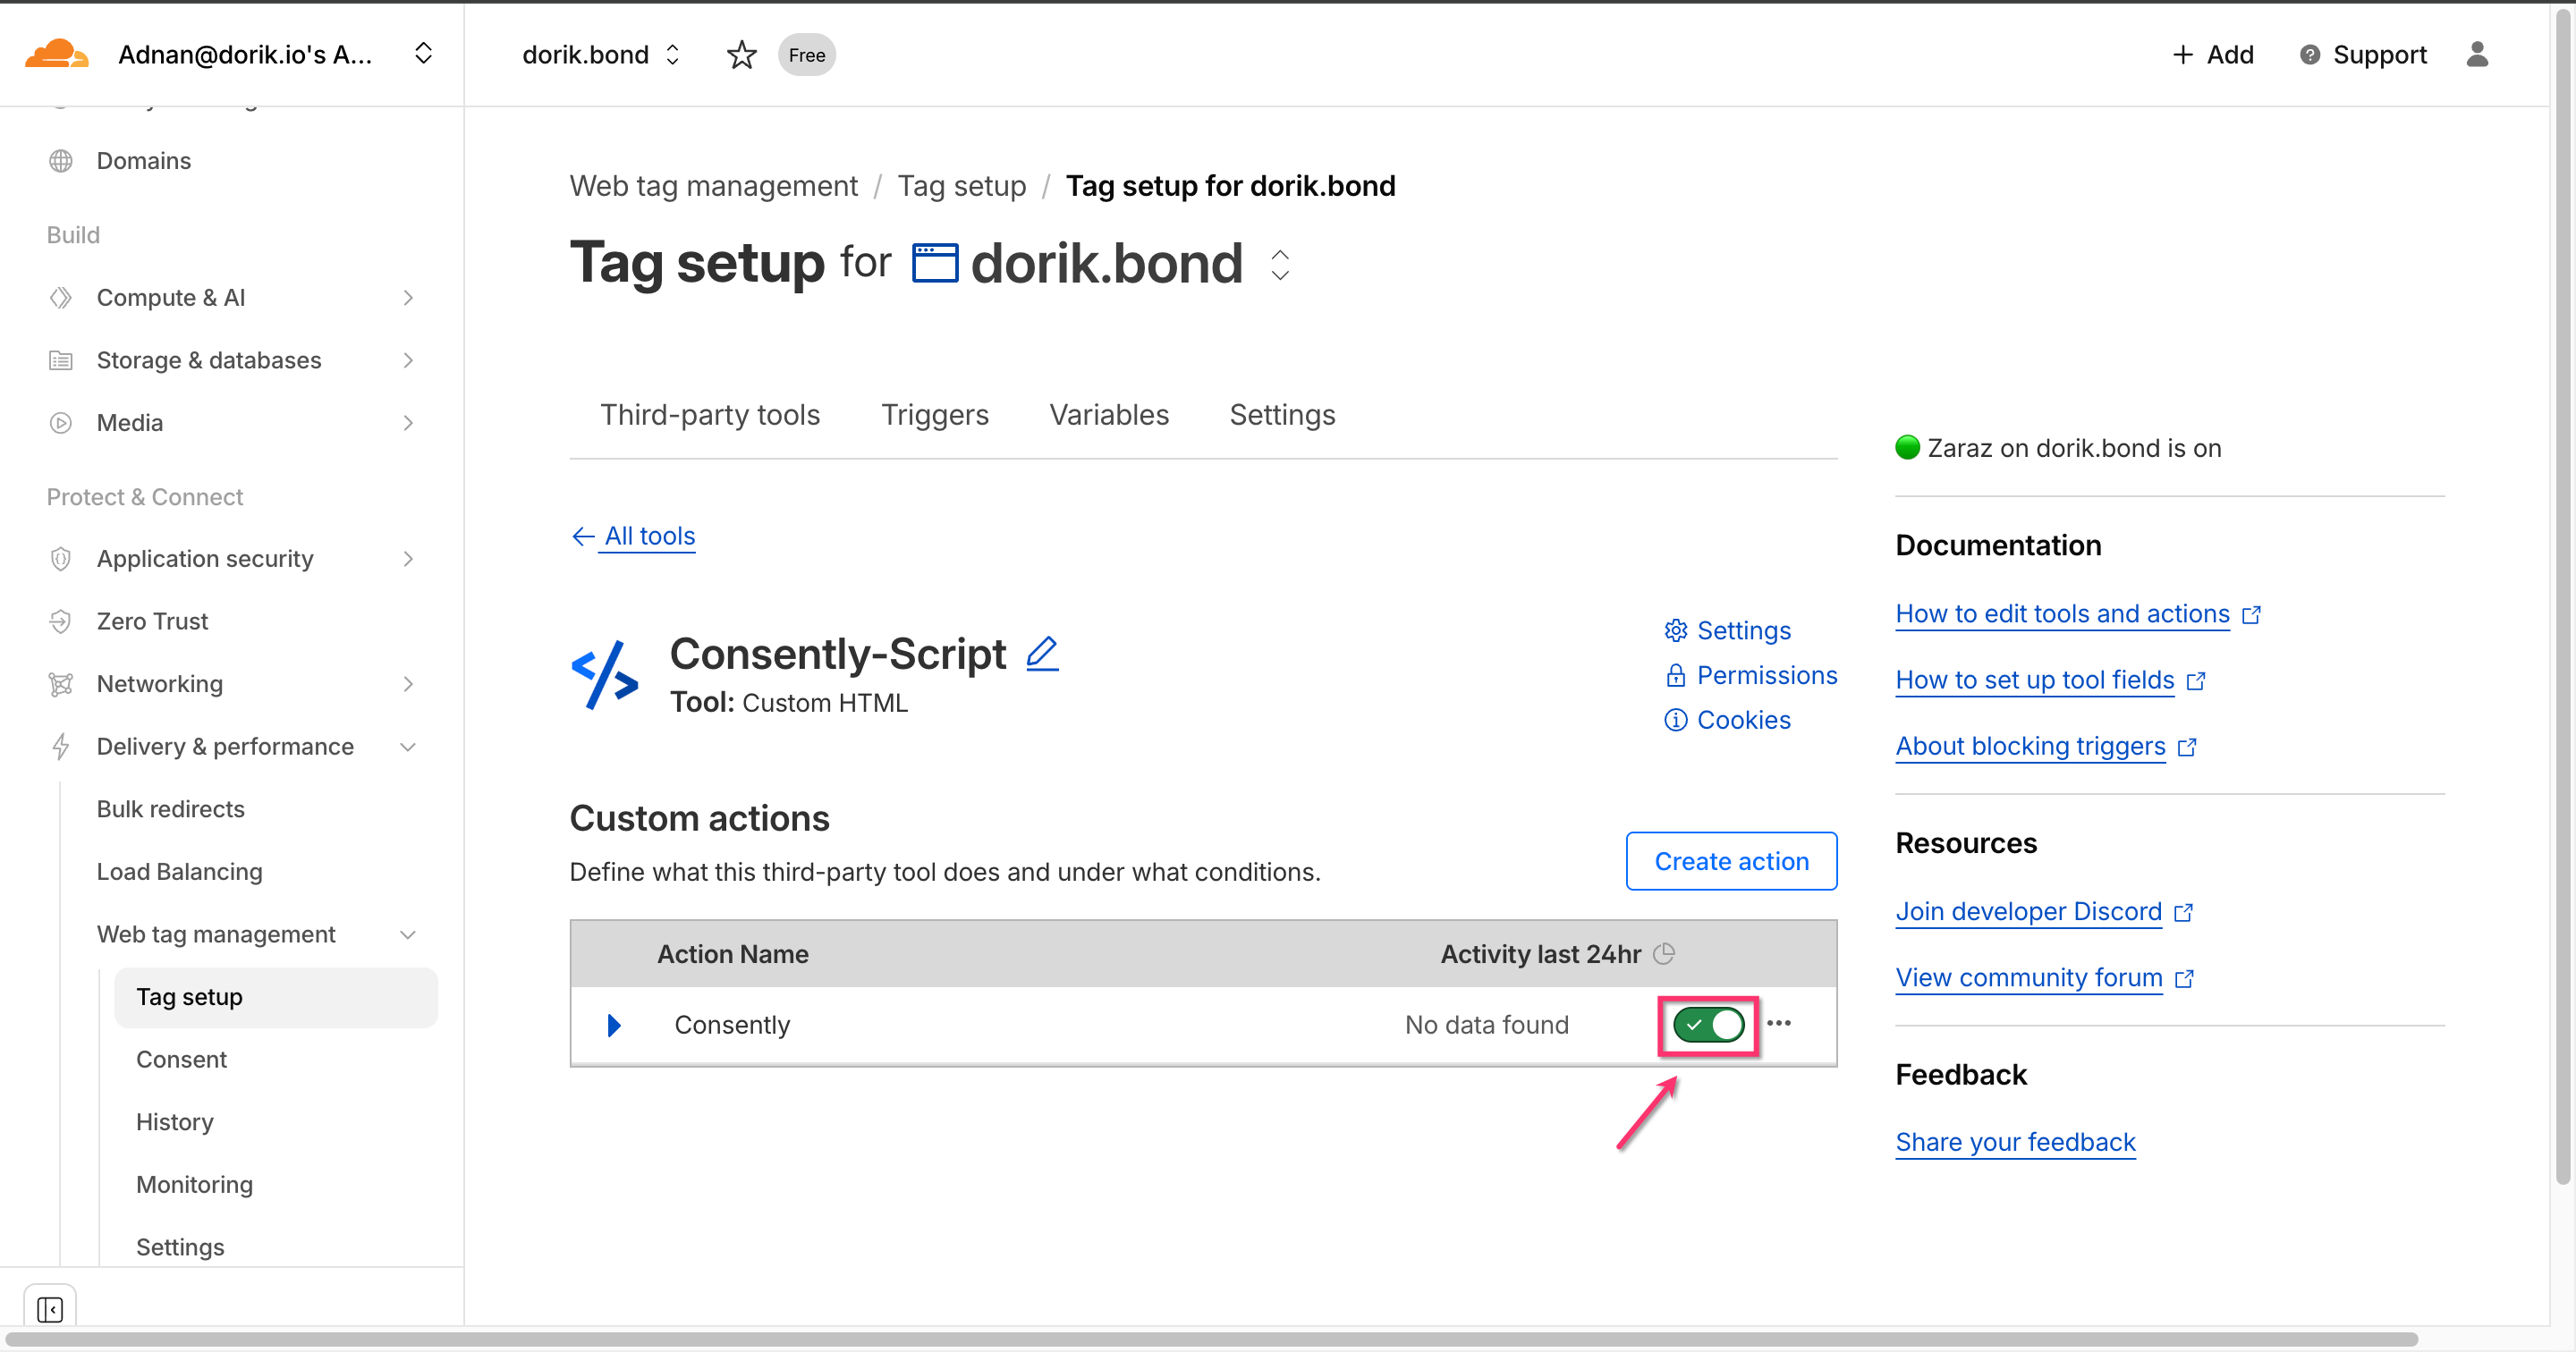
Step 9: Verify the tool is enabled
After saving, your Custom HTML tool page will list all Custom Actions. Verify that the newly added Consently action is turned on.
Done!
Your Consently consent banner is now deployed via Cloudflare Zaraz and will load automatically on all pages.
✅ Success indicator: Launch your site in an incognito window to confirm the consent banner appears.
Benefits of Using Zaraz for Consently
Faster page loads – Scripts run in the cloud, not the user’s browser.
Reduced browser workload – Less JS execution on the client side.
Centralized management – Easily add, update, or remove scripts without editing site code.
Simplified maintenance – Avoids script removal during theme updates or site changes.
Improved user experience – Faster, smoother site interactions with fewer delays.
What's Next
Now that you've installed Consently via Zaraz, you should:
Troubleshooting
Banner not appearing after setup
Why this happens: Zaraz changes may take a few minutes to propagate, or the tool might be disabled.
Solution:
Wait 5 minutes and clear your browser cache
Check that the Consently tool shows "Active" status in Zaraz Tag setup
Verify the Enabled toggle is switched on in the tools list
Open your browser's developer console (F12) and check for any JavaScript errors
Banner appears twice
Why this happens: You may have Consently installed both directly in your site code AND via Zaraz.
Solution:
Check your website's HTML source code for duplicate Consently script tags
Remove any direct installations if you're using Zaraz
Keep only one installation method active at a time
Script shows "Invalid banner ID" error
Solution: Verify you copied the complete embed script from your Consently dashboard, including the correct data-bannerid attribute. The banner ID is unique to your site and must match exactly.
Changes to banner design not reflecting
Why this happens: Cloudflare's edge cache may be serving an older version of your banner configuration.
Solution:
Publish your banner changes in the Consently dashboard
Wait 2-3 minutes for the changes to propagate
Clear your browser cache and refresh the page
If the issue persists, purge your Cloudflare cache: Account → Select Your Domain → Caching → Configuration → Purge Everything
Related Pages
Google Tag Manager Installation — Alternative tag manager installation method
Direct HTML Installation — Manual installation without tag managers