

TL;DR: Cookie Banner → General → Configuration → Compliance Framework → Select framework → Configure region settings → Save. Choose the compliance framework that matches your website's advertising technology and geographic audience.
Overview
The Compliance Framework determines how your consent banner collects and manages visitor consent. Consently offers four frameworks, each designed for different technical requirements and regional compliance needs. Your choice depends on whether you use Google advertising products, IAB-certified ad vendors, or neither.
Before You Begin
Make sure you know:
Whether you use Google Ads, Google Analytics 4 (GA4), or Google AdSense
Whether you work with IAB-certified advertising vendors or ad networks
Which regions your website visitors come from
Your primary compliance requirements (GDPR, CCPA, LGPD, etc.)
Time required: 5 minutes
Accessing Compliance Framework Settings
Step 1: Navigate to Cookie Banner
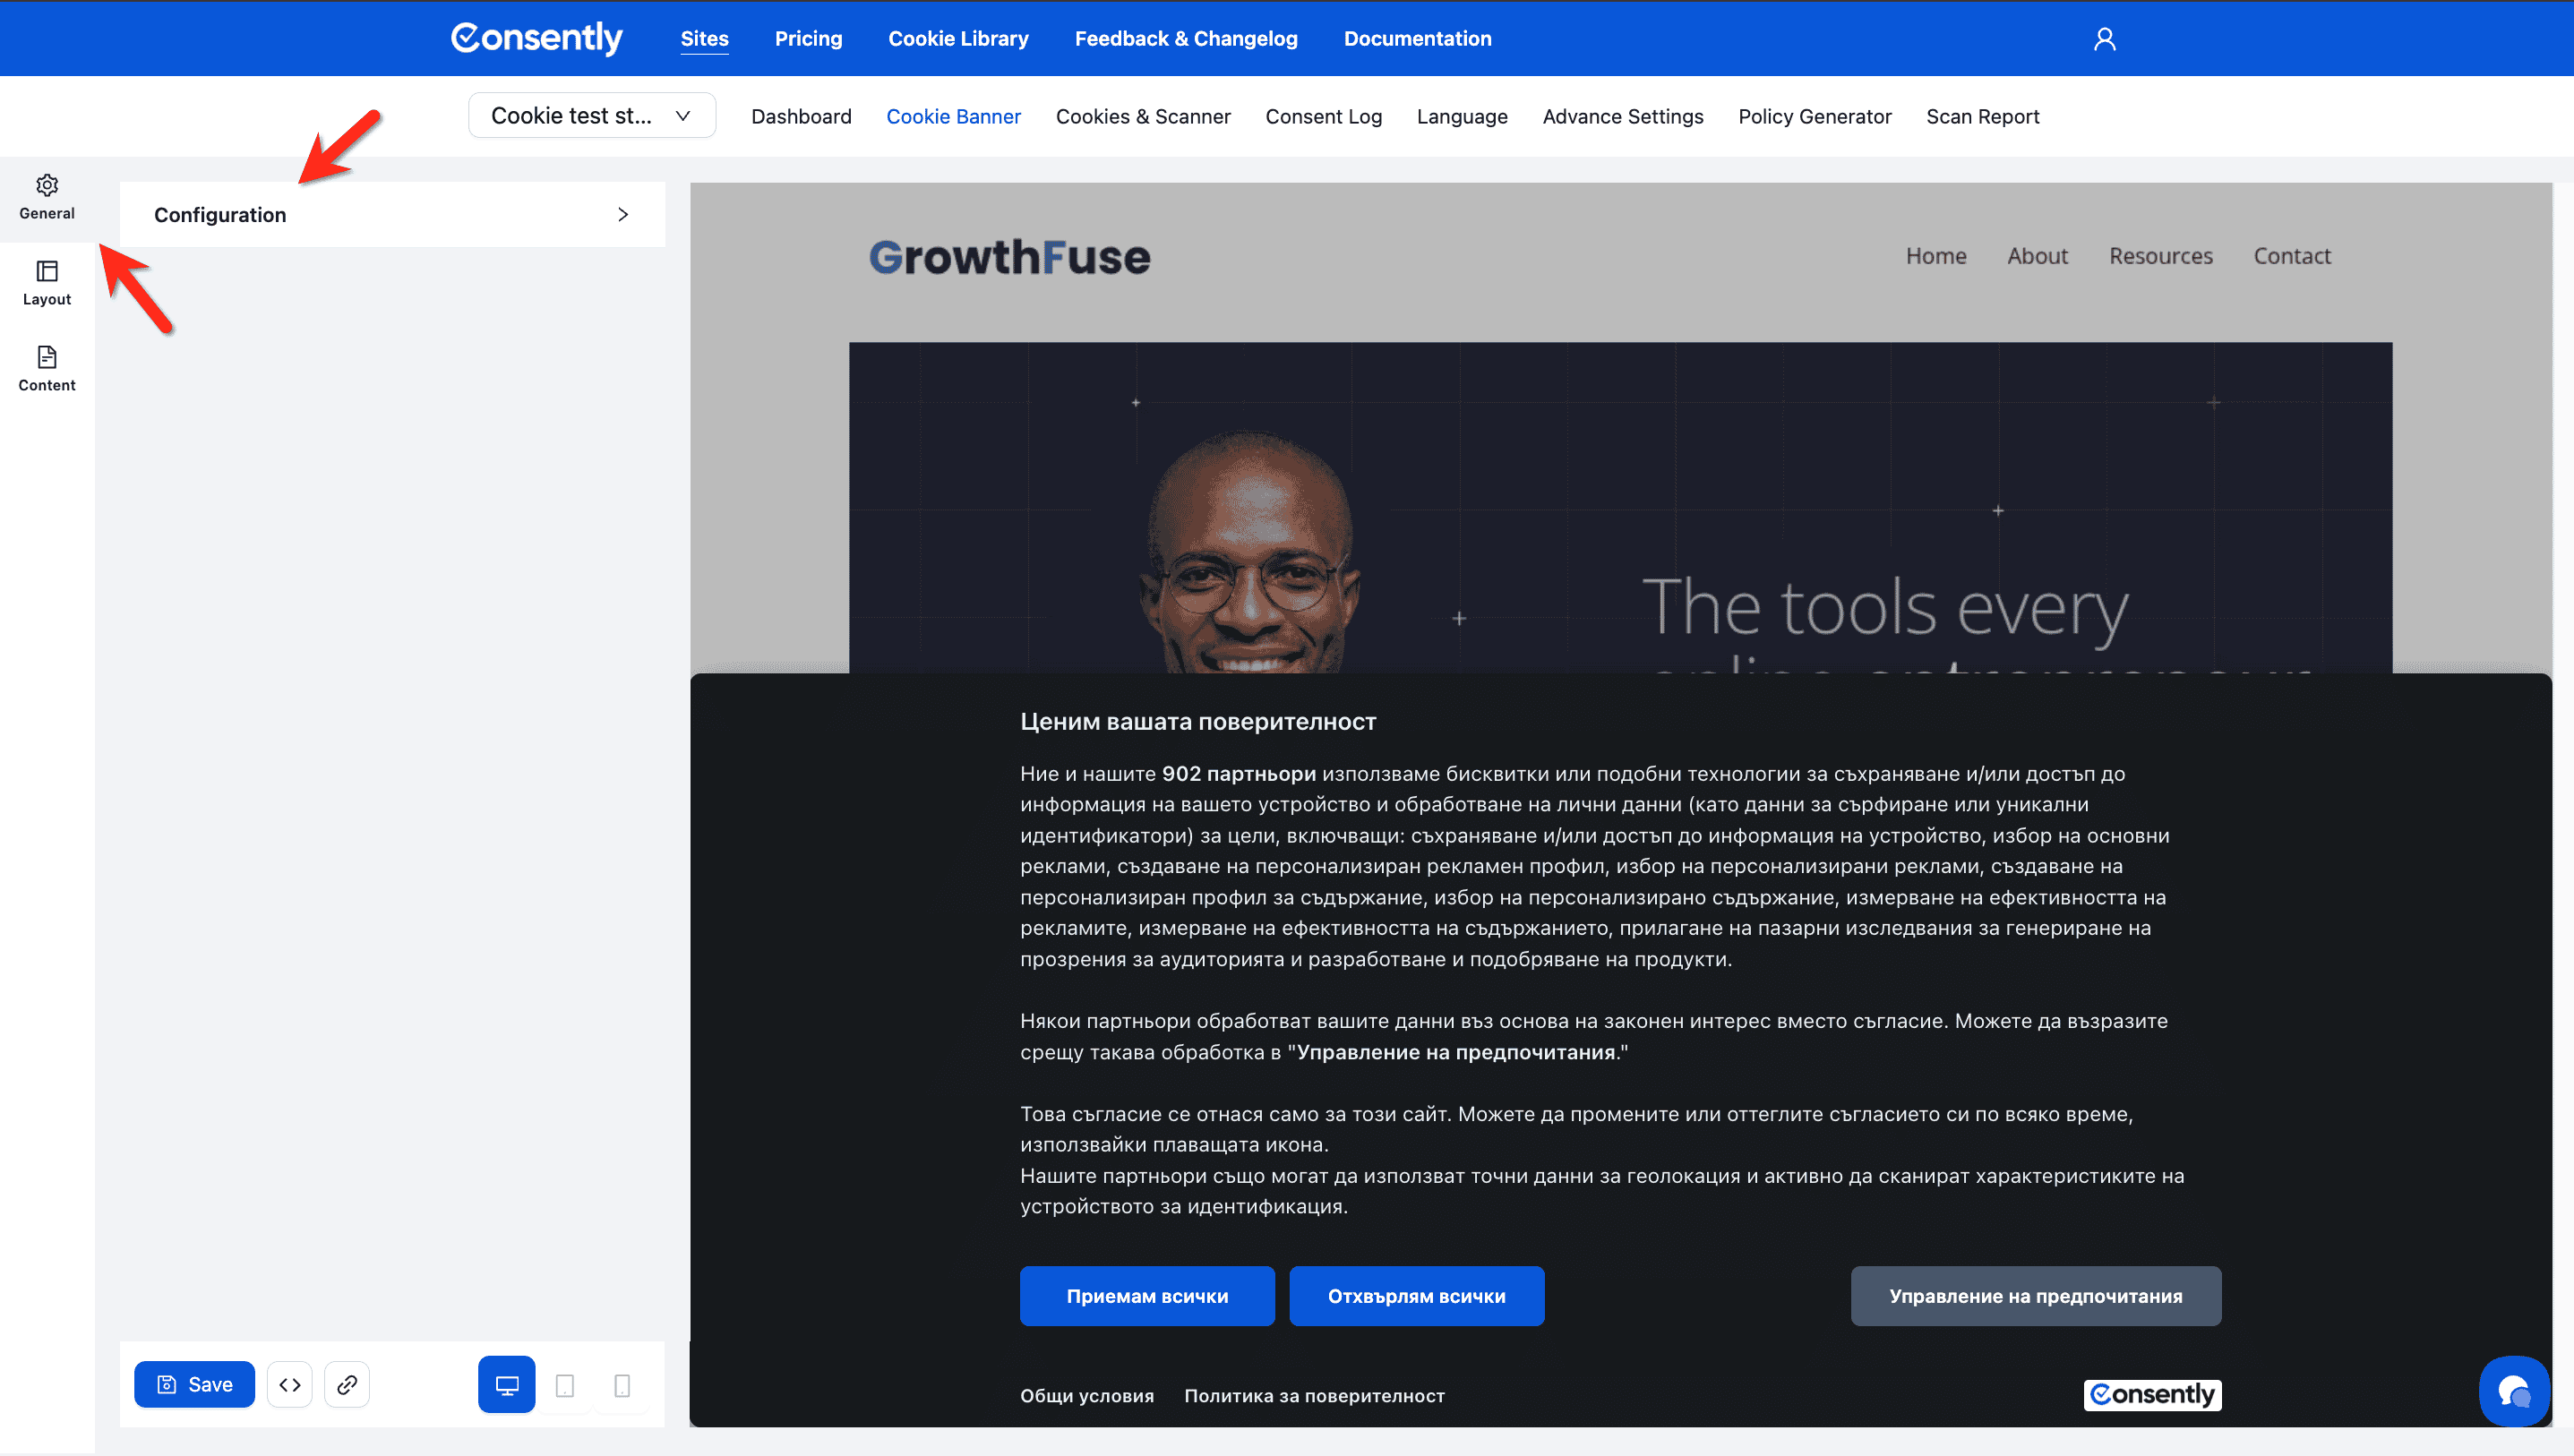
Click Cookie Banner in the top navigation bar.

Step 2: Open Configuration
In the left sidebar under General, click Configuration to expand the section.
Step 3: View Compliance Framework options
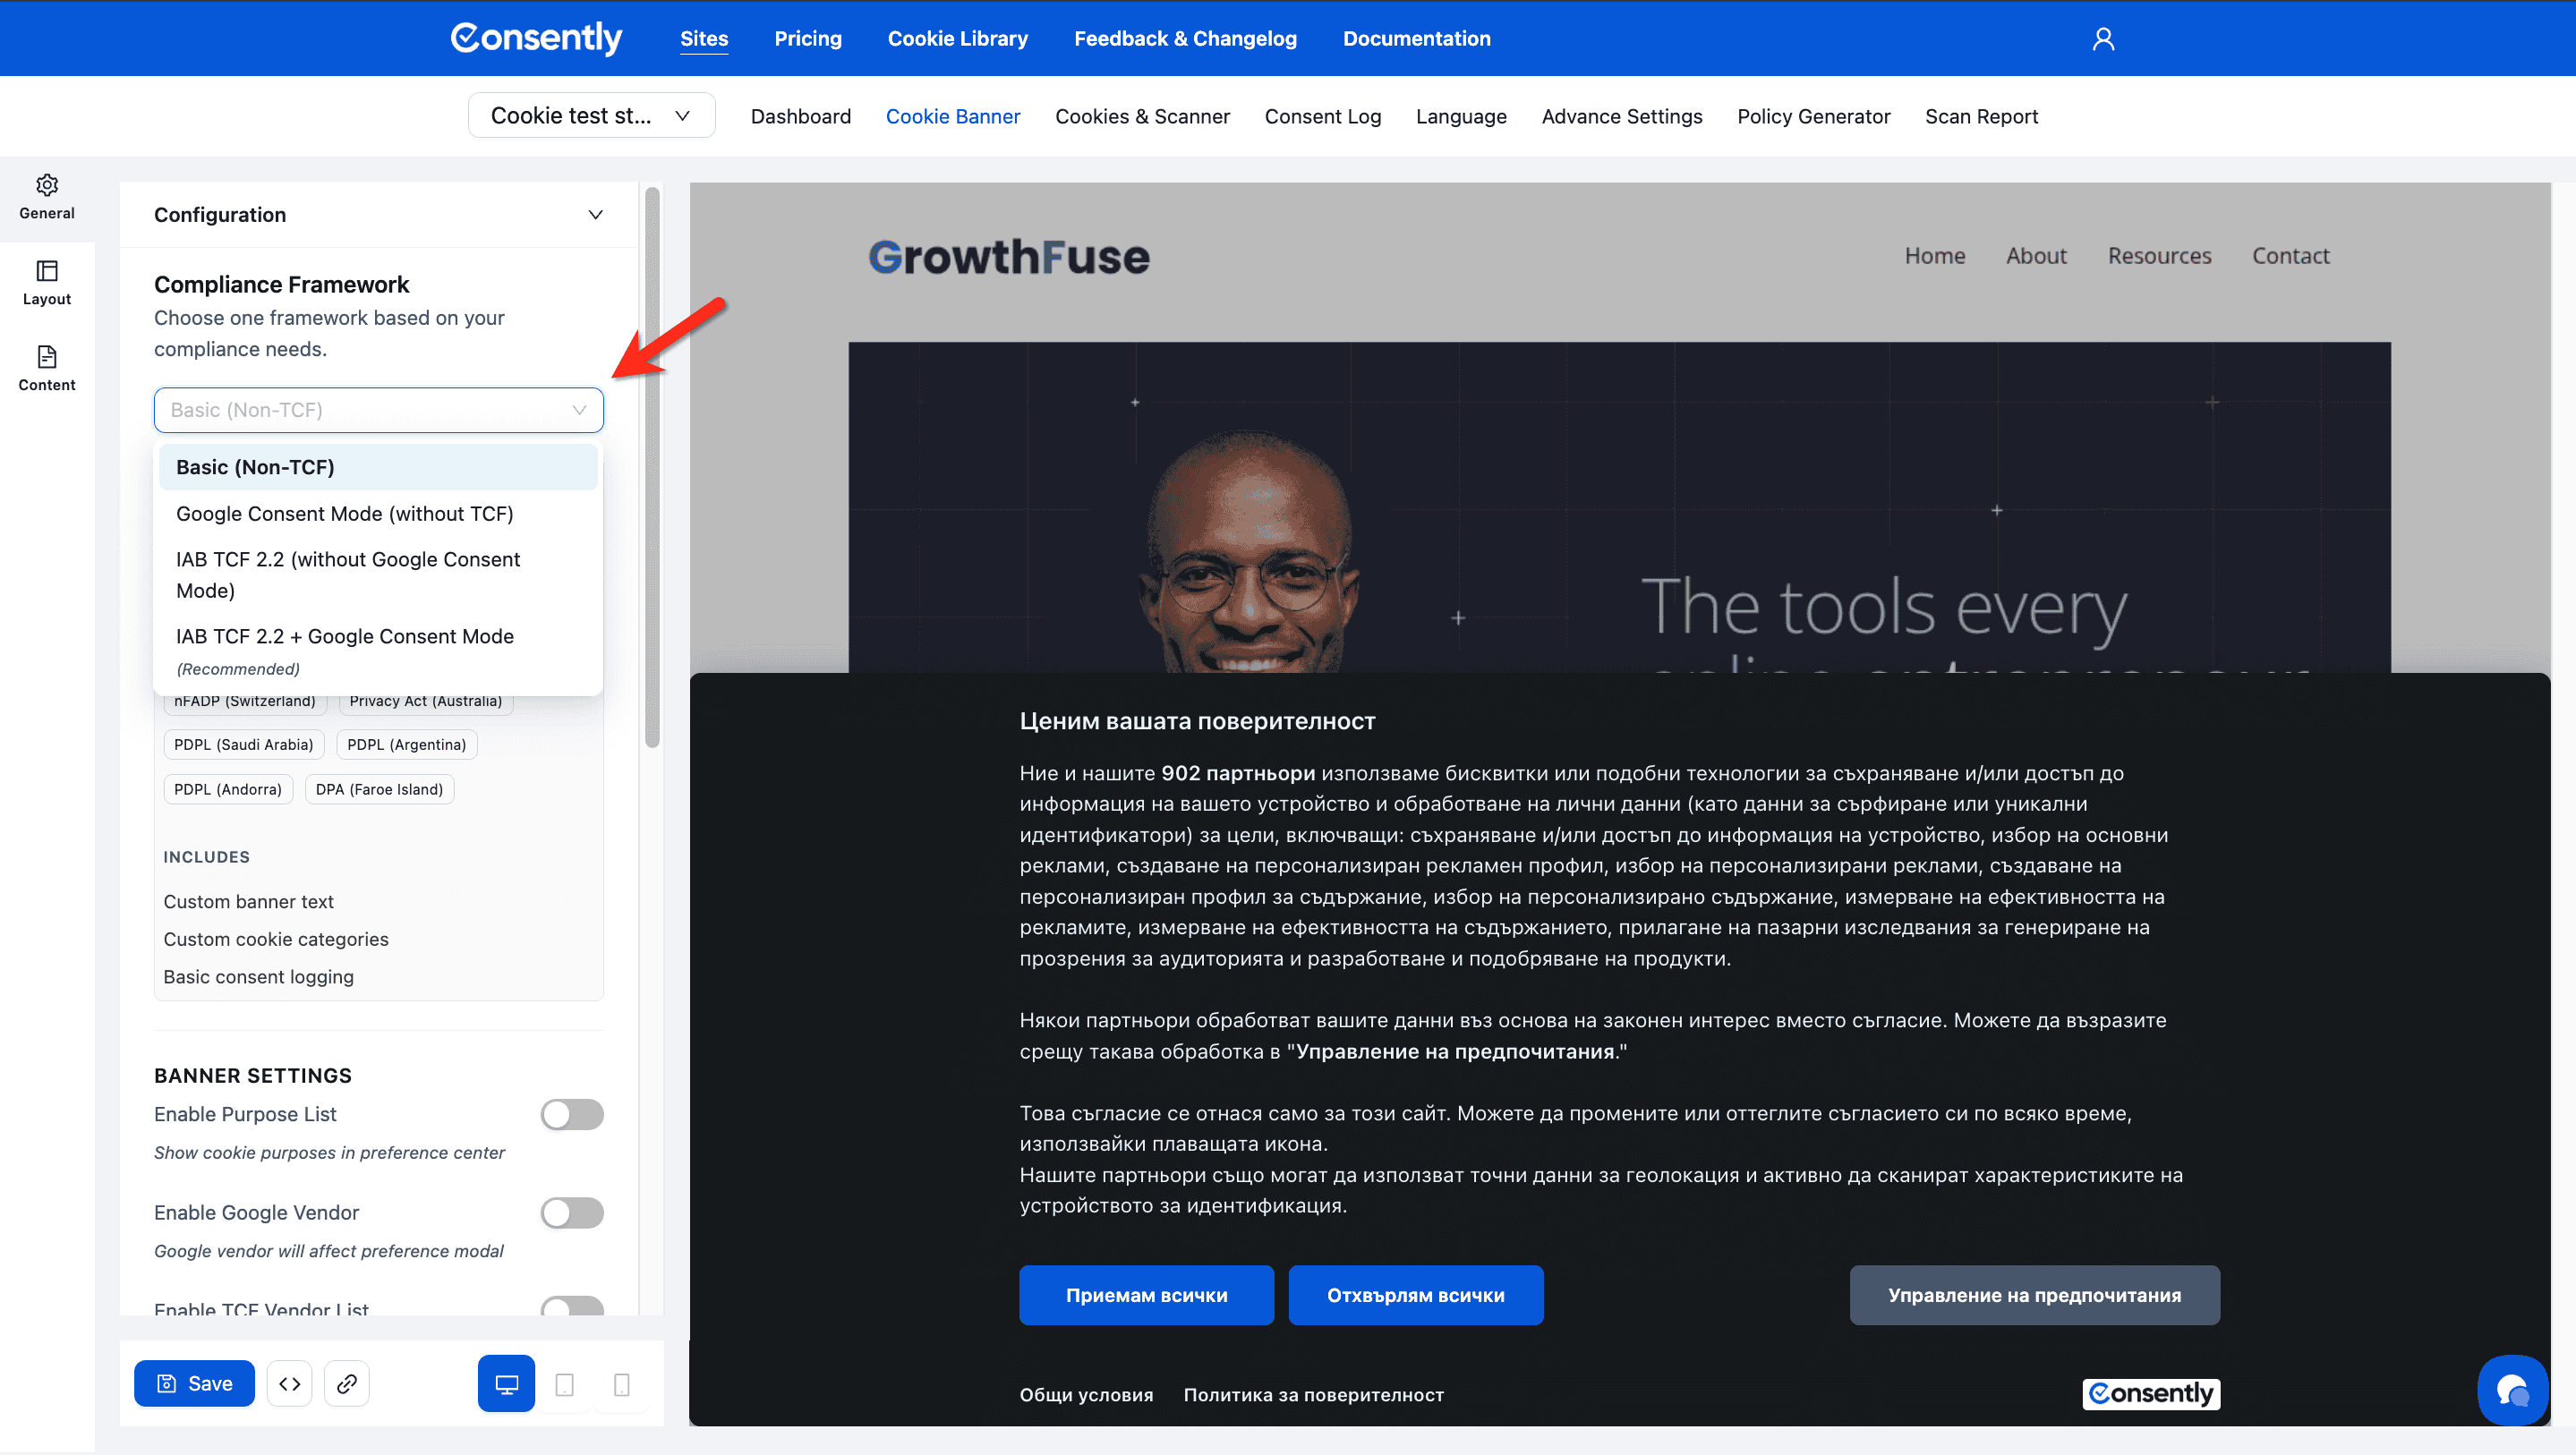
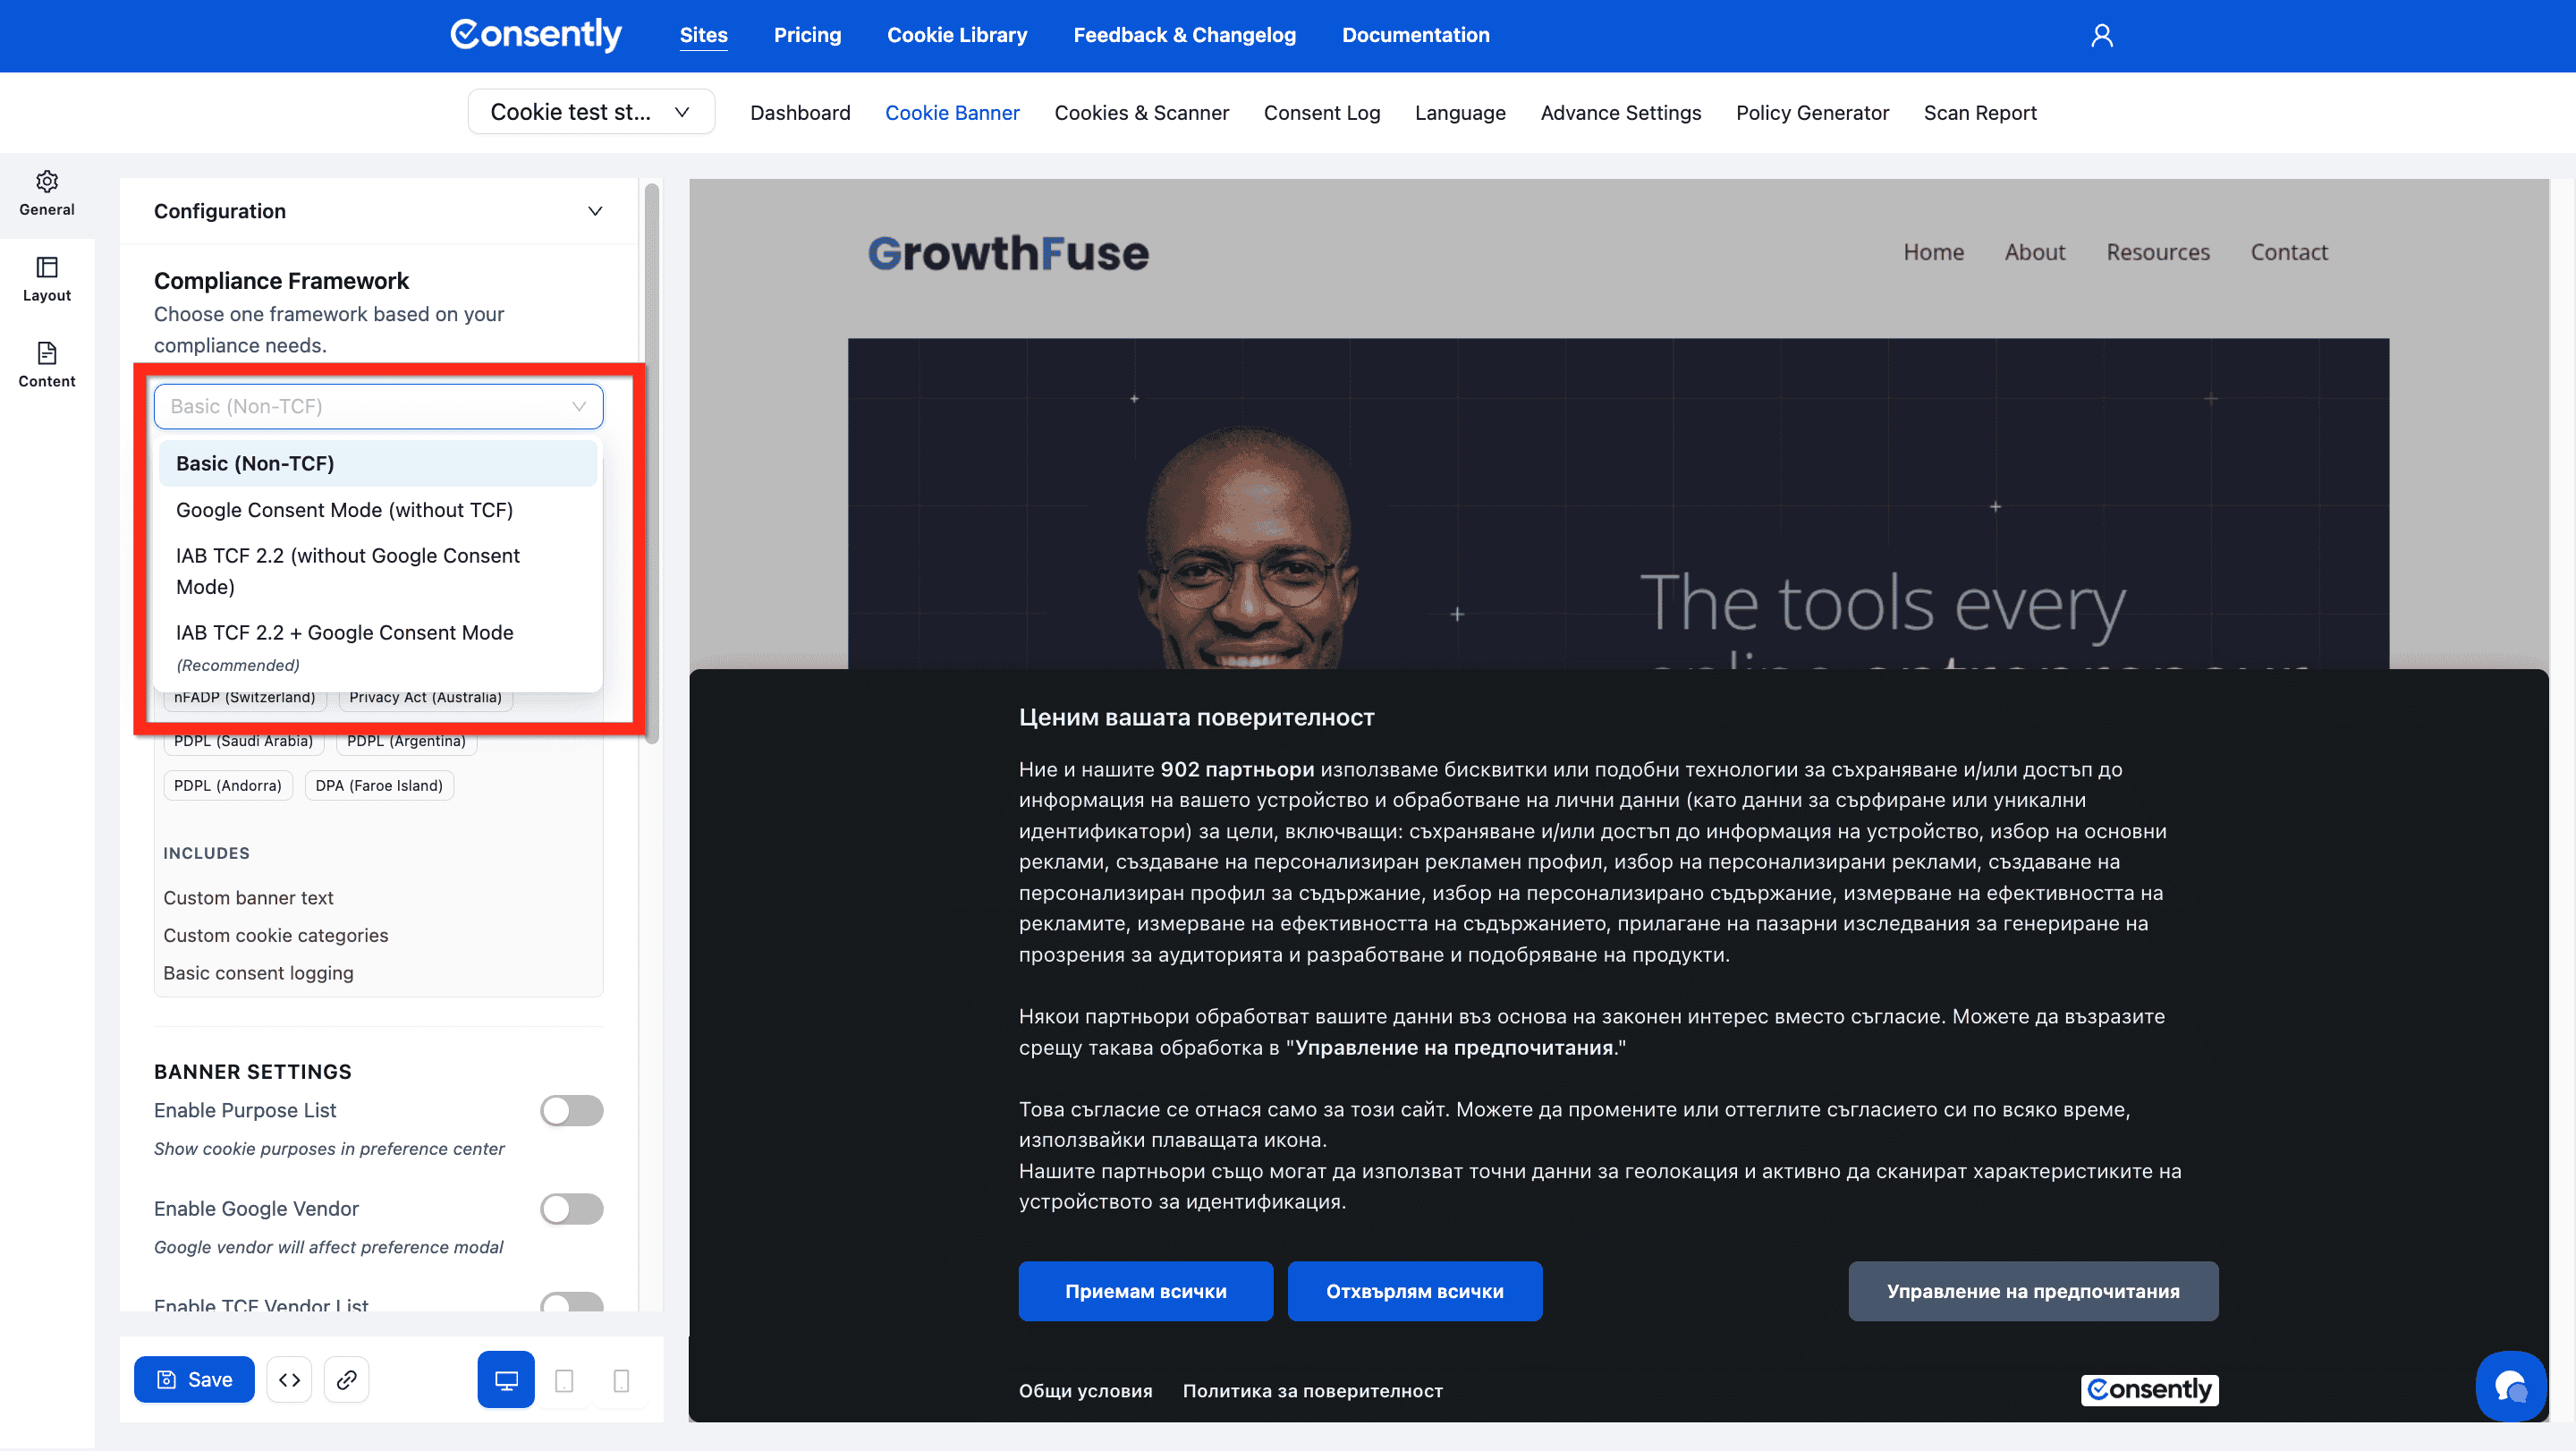
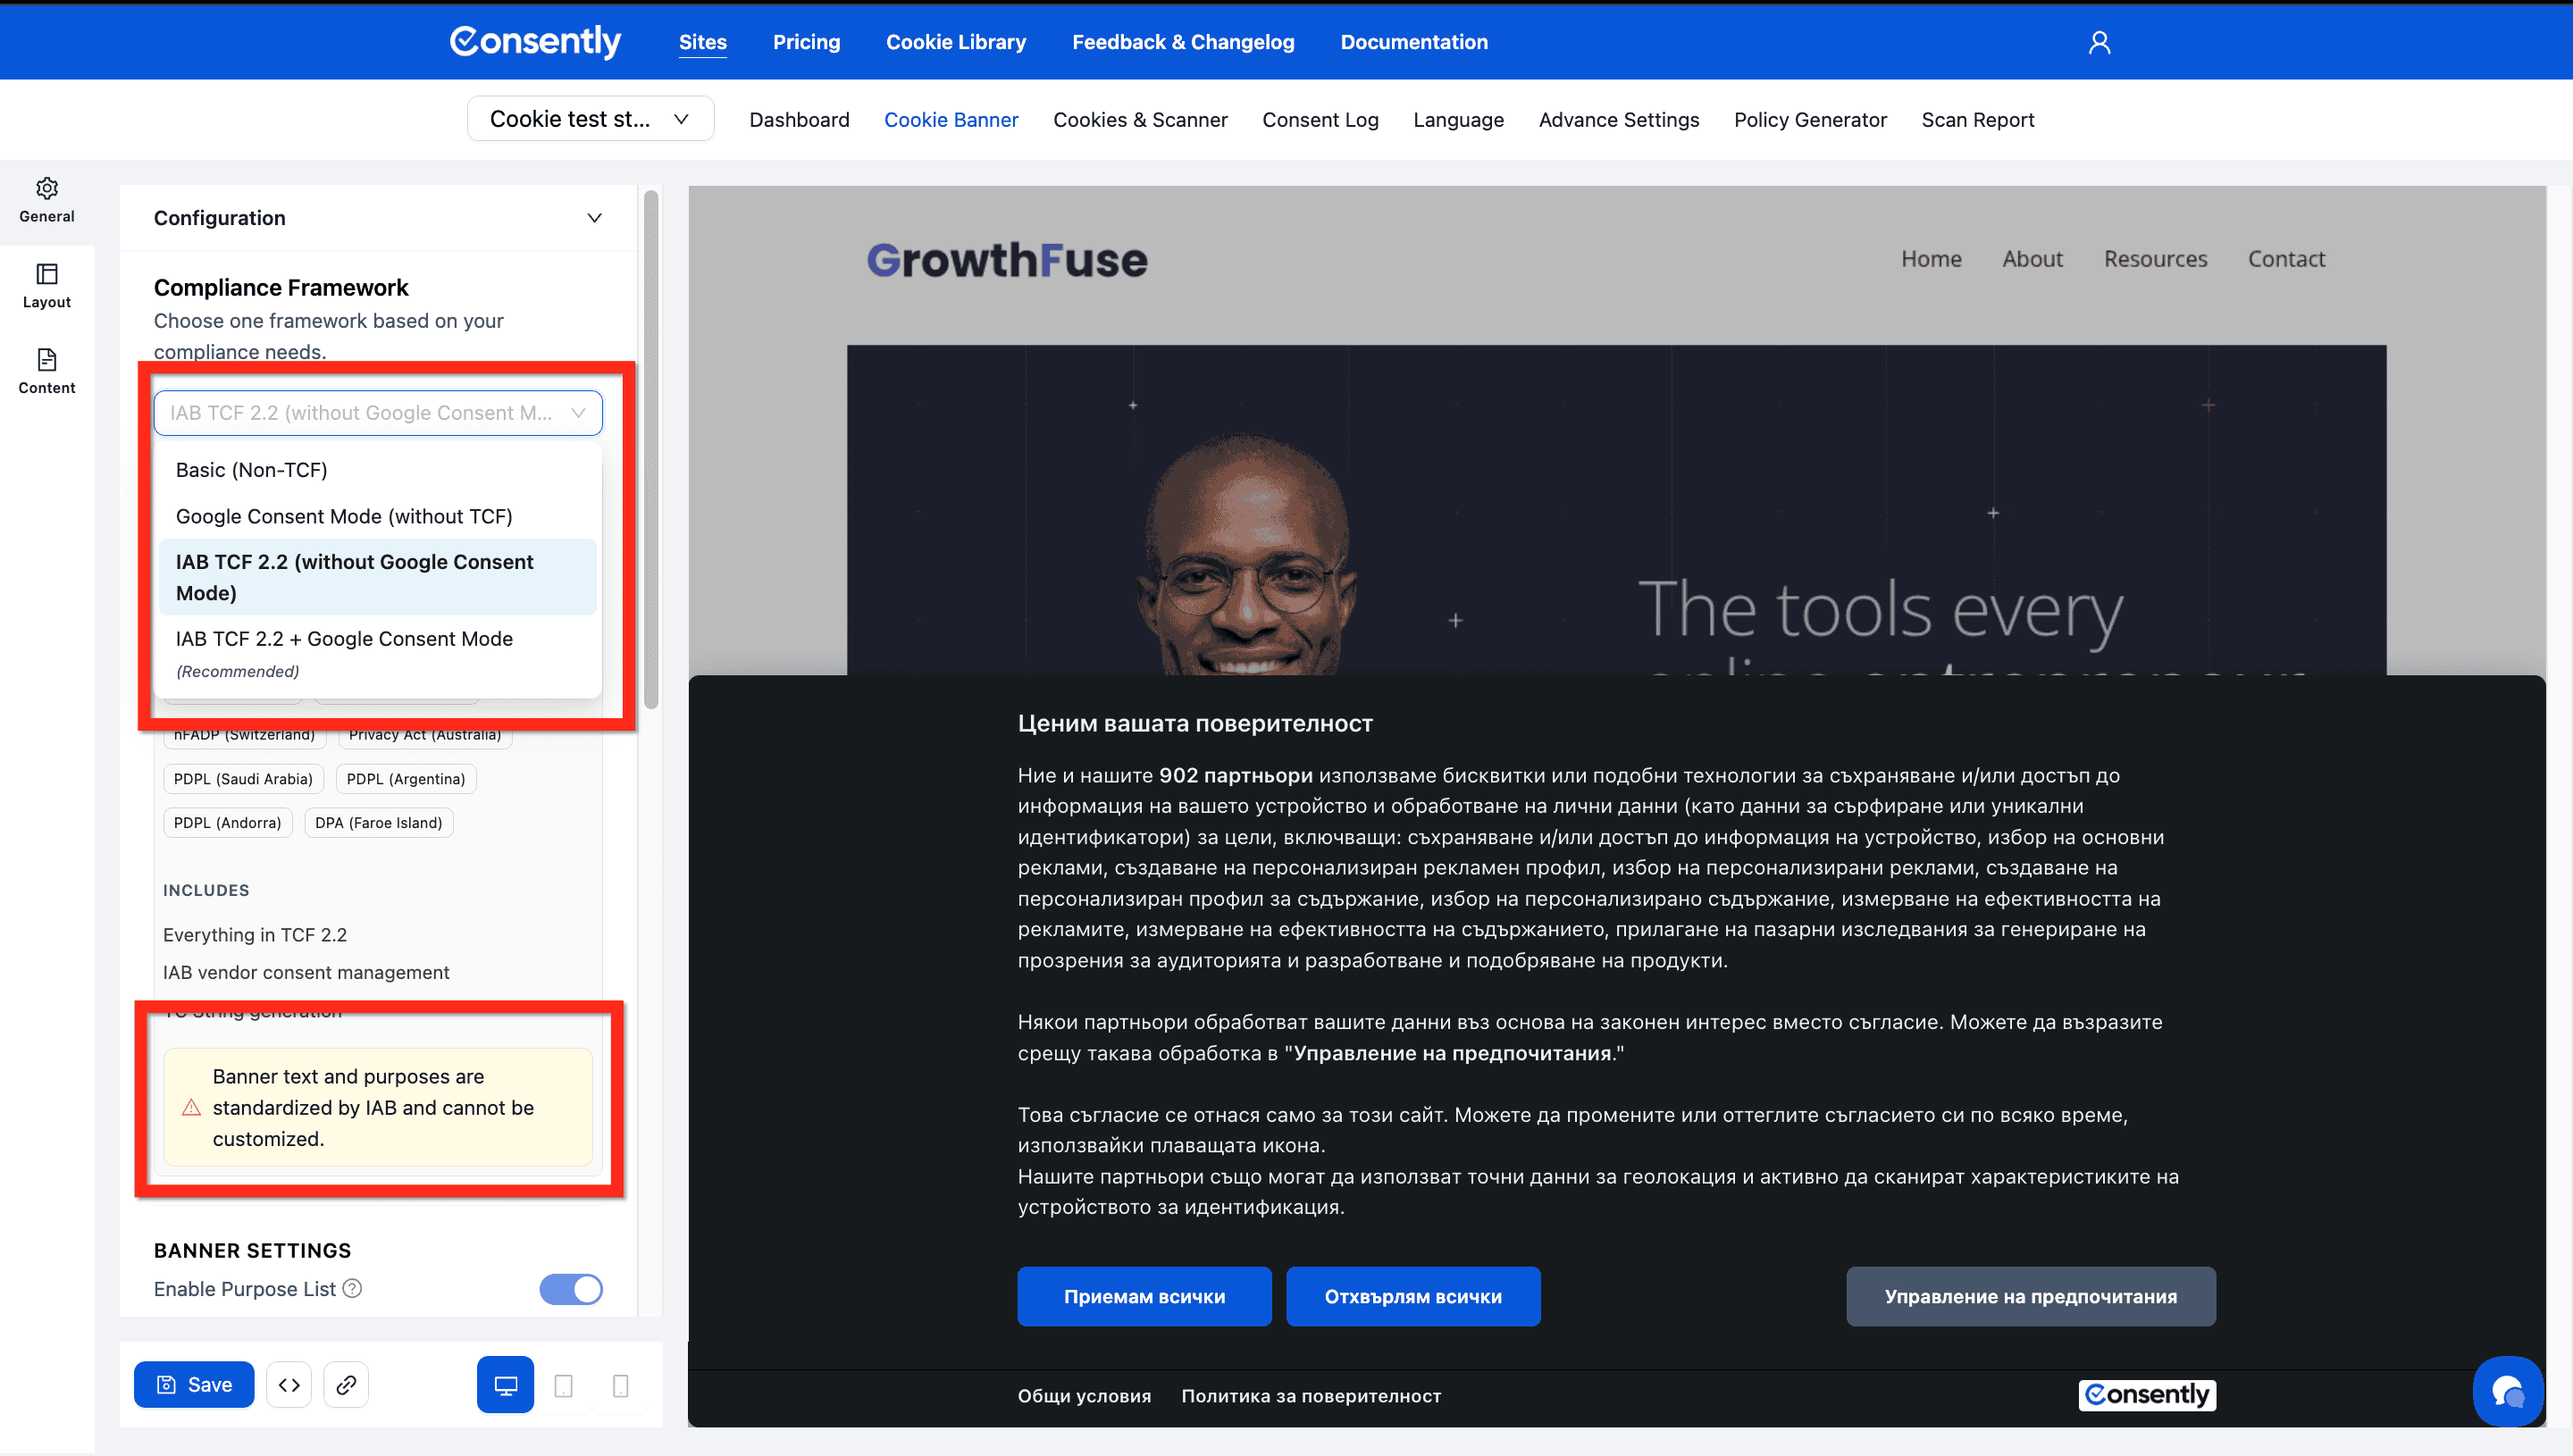
The Compliance Framework dropdown shows all available frameworks. Click it to see your options.

Framework Options
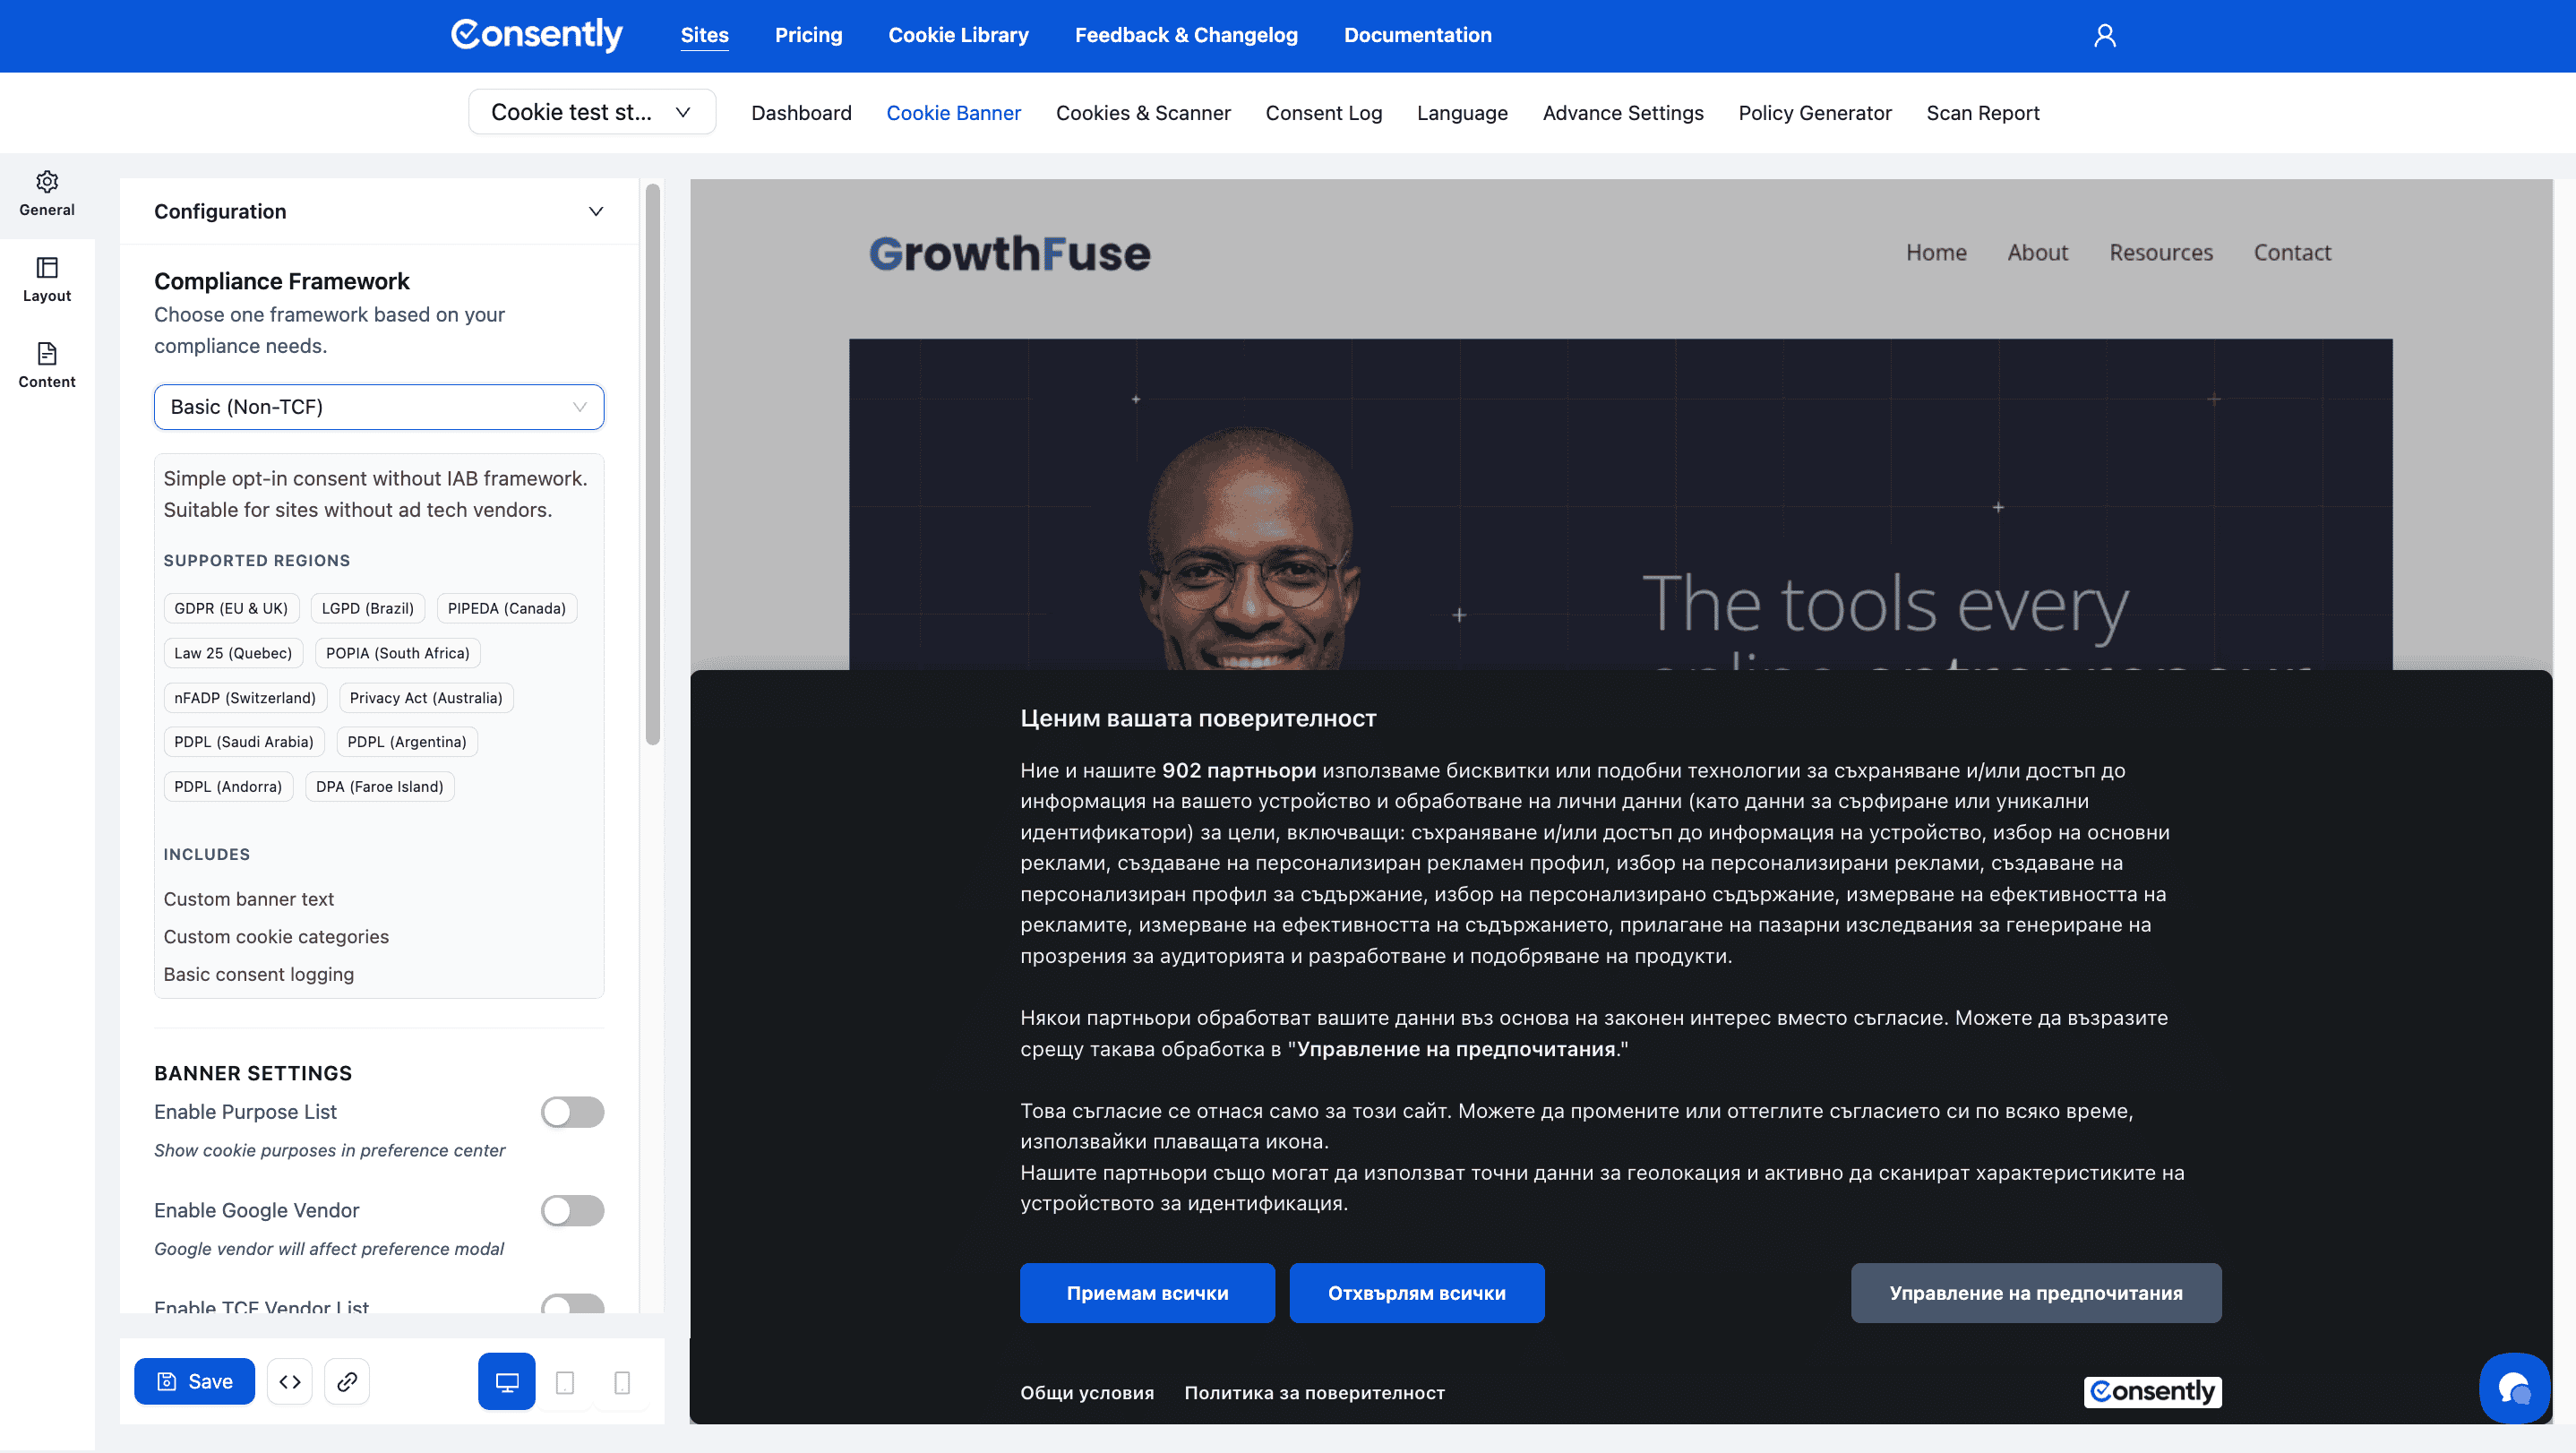
Framework 1: Basic (Non-TCF)
Best for: Simple websites without advertising technology or third-party ad vendors
Description: Simple opt-in consent without IAB framework. Suitable for sites without ad tech vendors.
Supported Regions
All major privacy regulations are covered:
GDPR (EU & UK)
LGPD (Brazil)
PIPEDA (Canada)
Law 25 (Quebec)
POPIA (South Africa)
nFADP (Switzerland)
Privacy Act (Australia)
PDPL (Saudi Arabia)
PDPL (Argentina)
PDPL (Andorra)
DPA (Faroe Island)
Includes
Custom banner text
Custom cookie categories
Basic consent logging
When to Choose This
✅ Your website doesn't use Google Ads, AdSense, or GA4
✅ You don't work with programmatic advertising or ad networks
✅ You want full control over banner text and cookie categories
✅ You need simple compliance for analytics and functional cookies
When NOT to Choose This
❌ You use Google advertising products
❌ You work with IAB-certified ad vendors
❌ You need advanced consent mode features
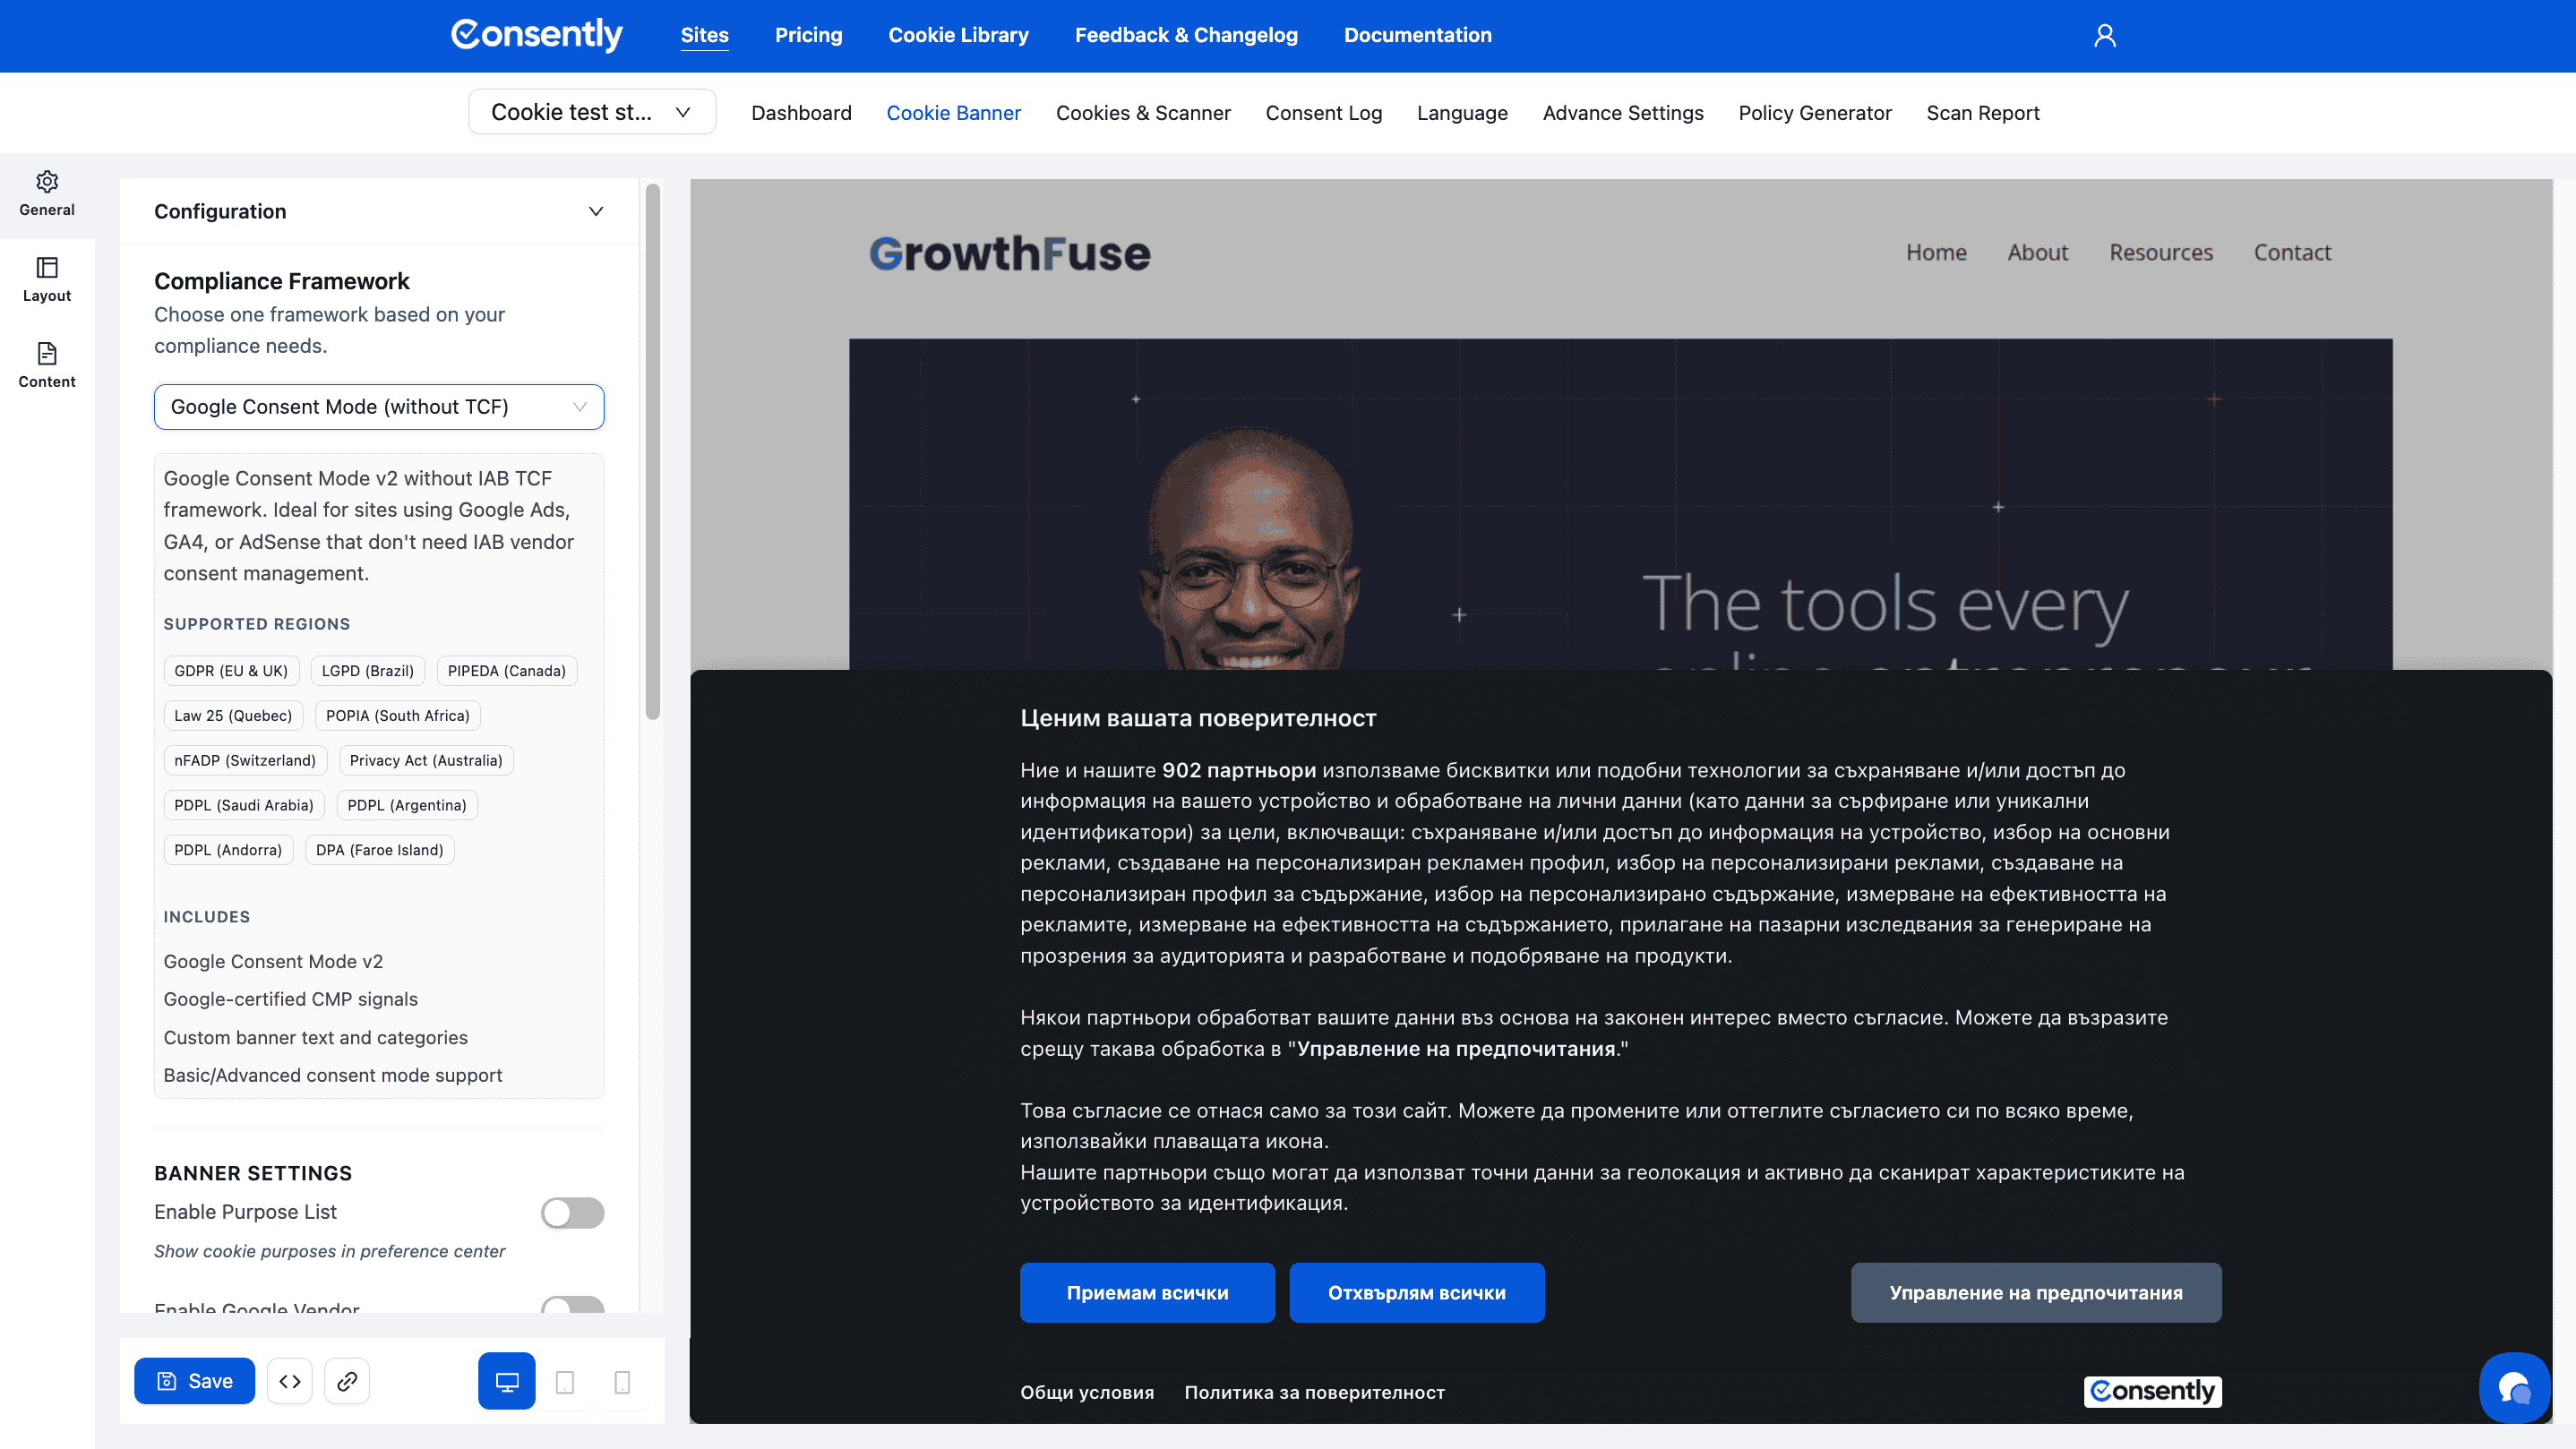
Framework 2: Google Consent Mode (without TCF)
Best for: Websites using Google advertising products but not other ad vendors
Description: Google Consent Mode v2 without IAB TCF framework. Ideal for sites using Google Ads, GA4, or AdSense that don't need IAB vendor consent management.
Supported Regions
Same comprehensive coverage as Basic framework:
GDPR, LGPD, PIPEDA, Law 25, POPIA, nFADP, Privacy Act, PDPL (multiple countries), DPA
Includes
Google Consent Mode v2
Google-certified CMP signals
Custom banner text and categories
Basic/Advanced consent mode support
When to Choose This
✅ You use Google Ads, Google Analytics 4, or Google AdSense
✅ You want Google's conversion modeling for users who decline consent
✅ You DON'T work with other IAB-certified ad vendors
✅ You want to customize your banner text and categories
When NOT to Choose This
❌ You use programmatic advertising through IAB vendors
❌ You need full TCF 2.3 compliance for ad tech partners
What is Google Consent Mode v2?
Google Consent Mode communicates visitor consent choices to Google's advertising and analytics products. When visitors decline consent, Google uses conversion modeling to fill gaps in your analytics data while respecting privacy preferences.
Key Benefits:
Maintains advertising measurement accuracy even with consent declines
Ensures compliance with Google's consent requirements
Enables remarketing to consented users only
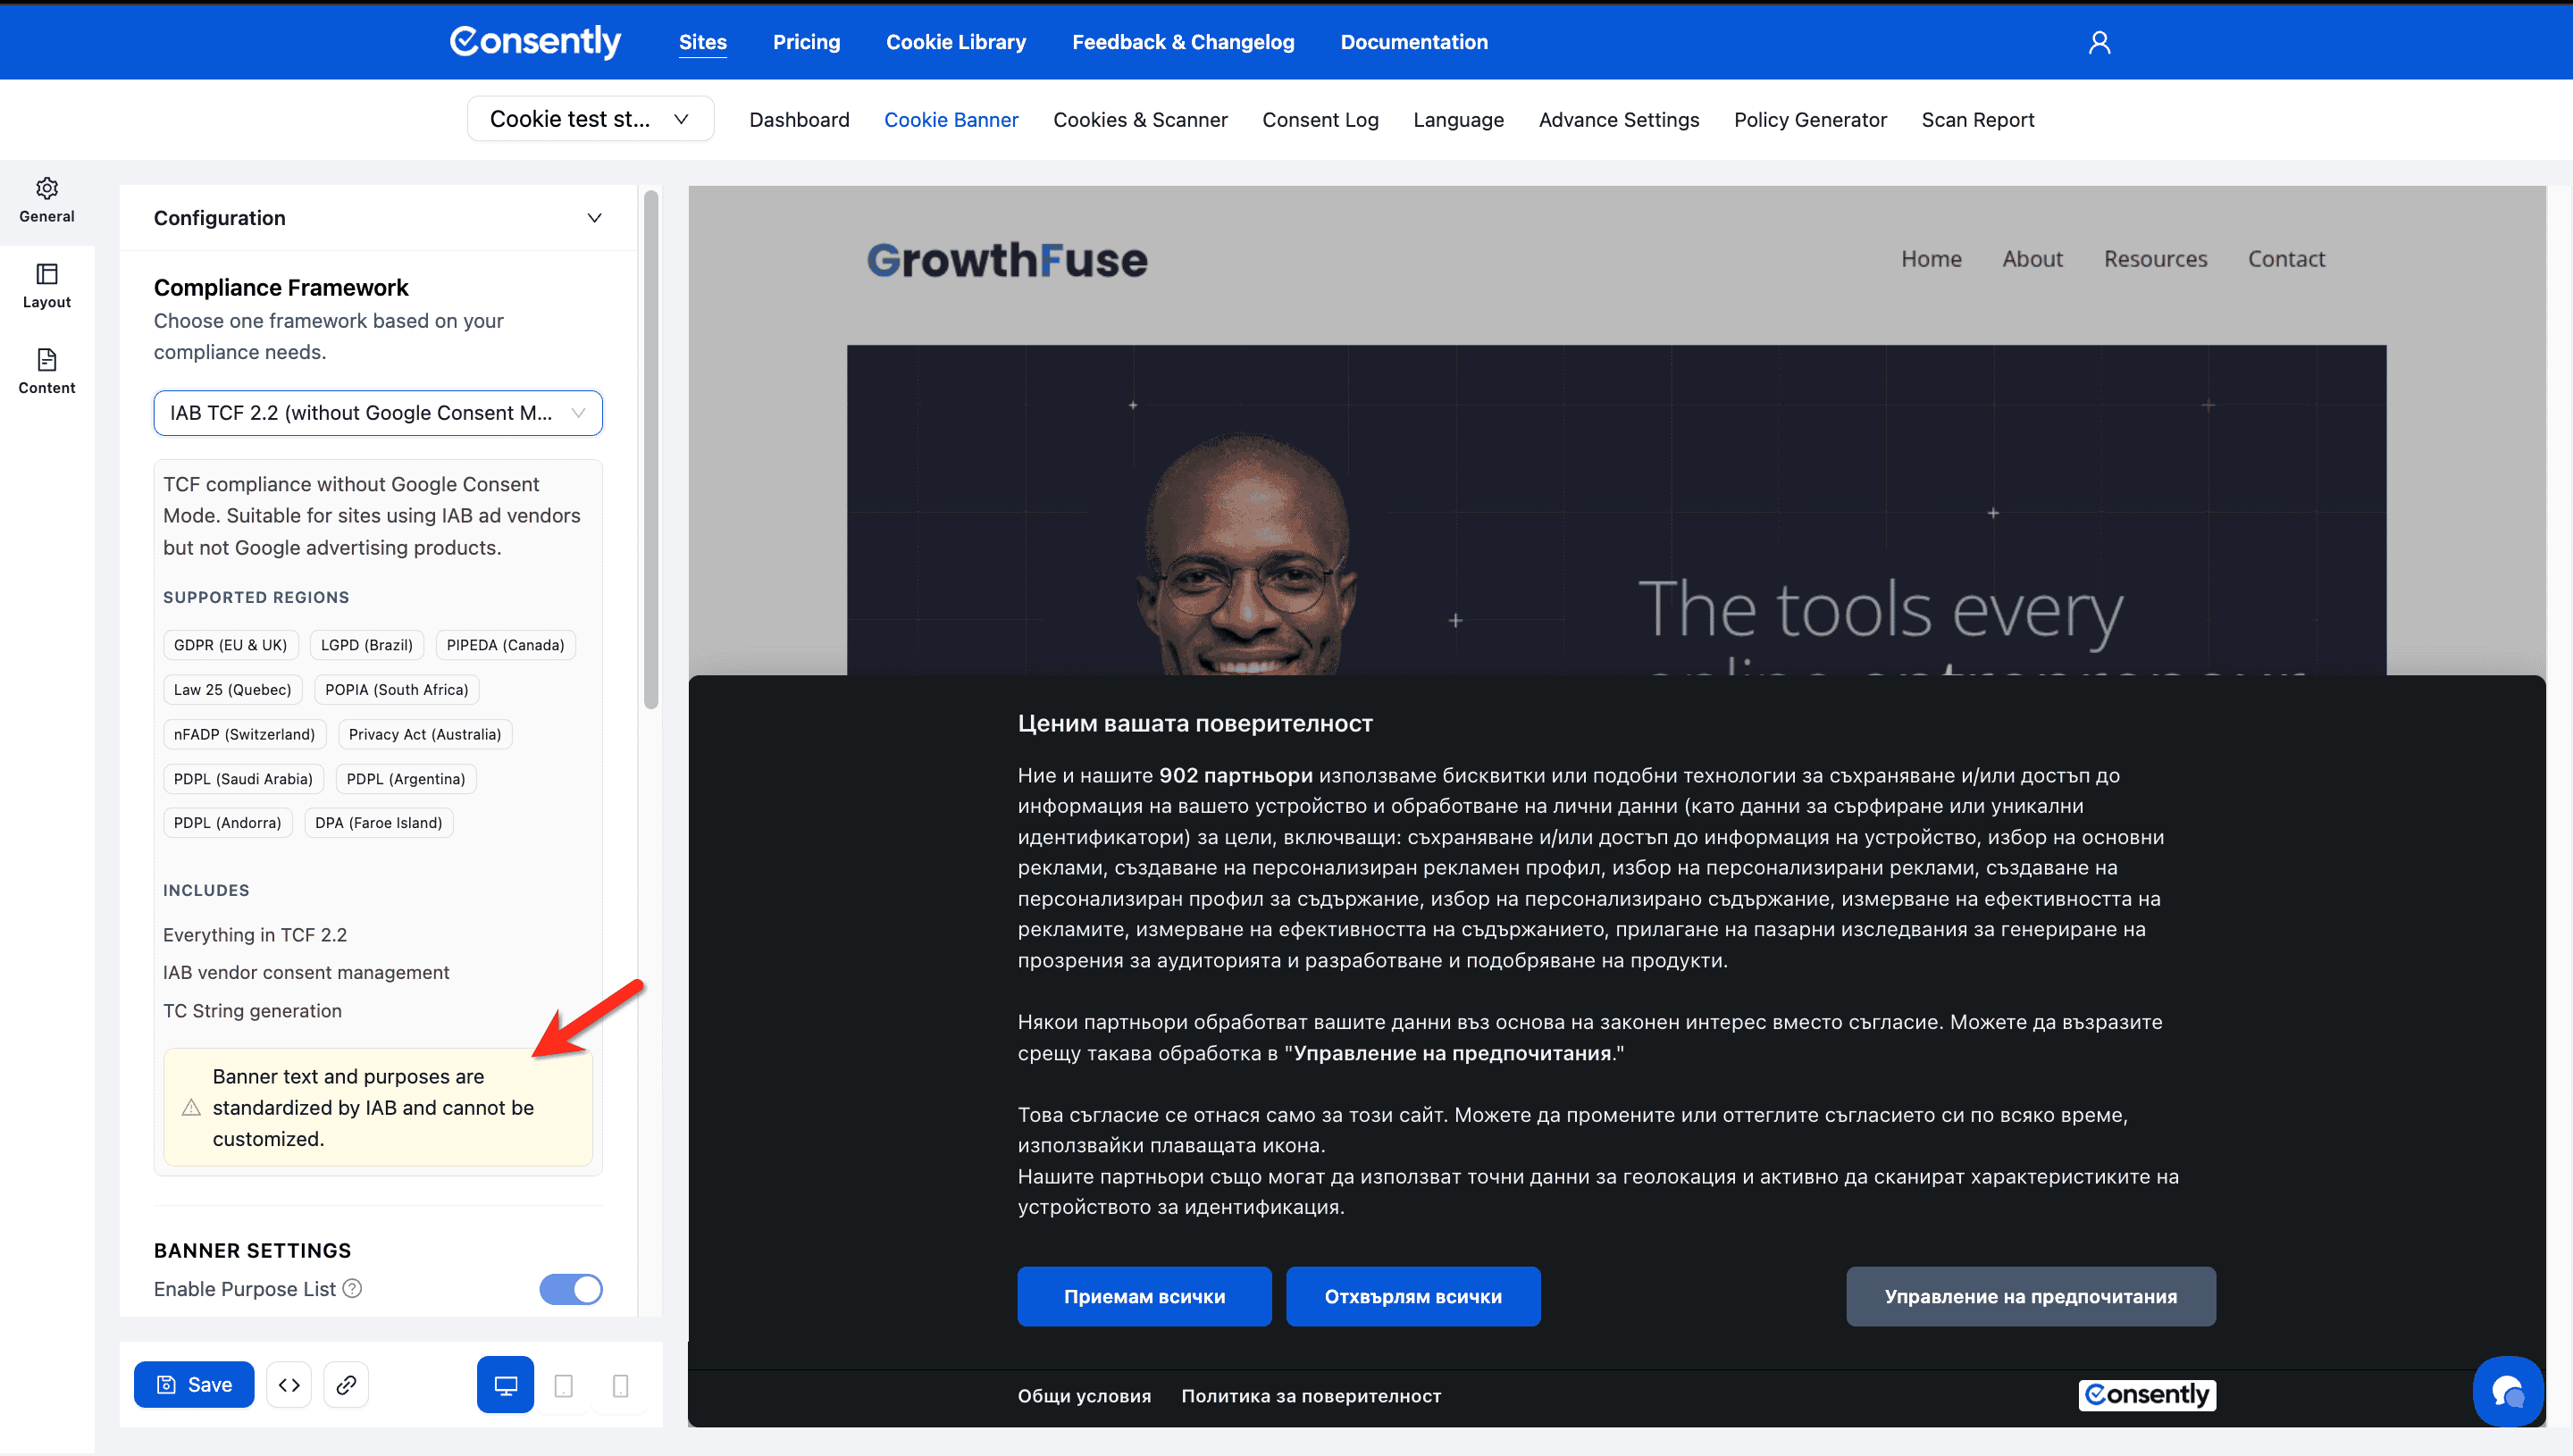
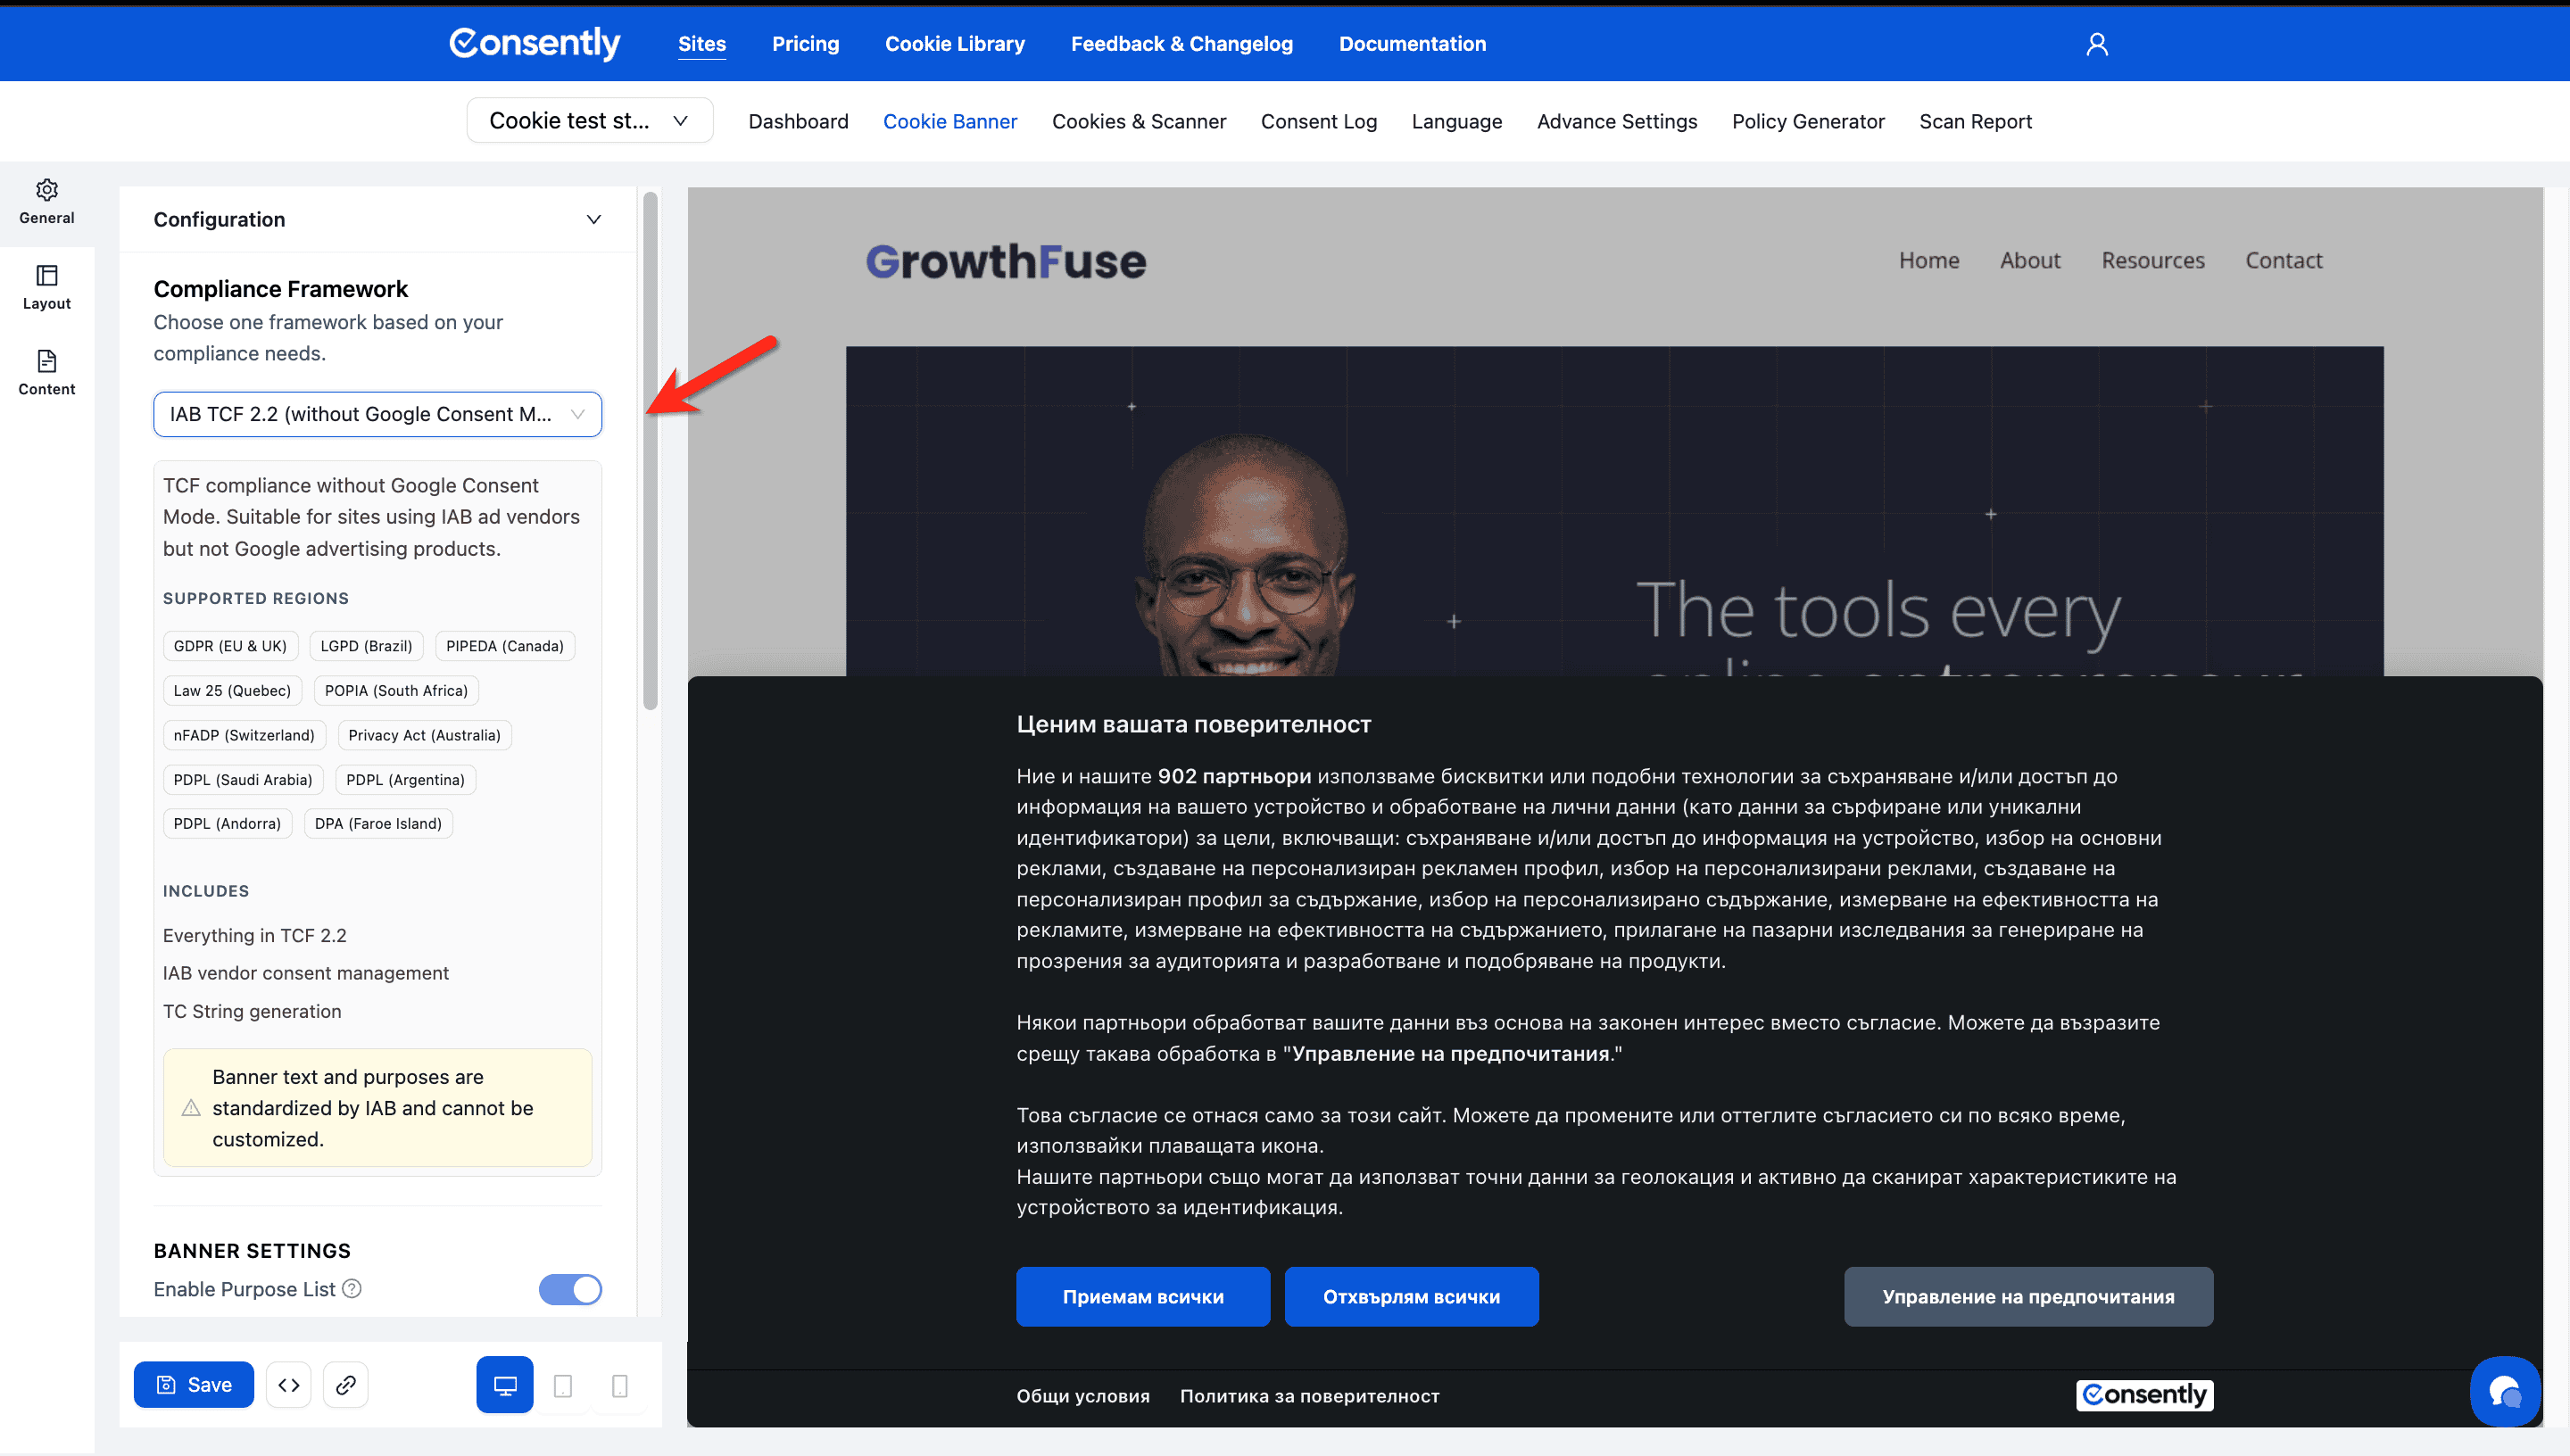
Framework 3: IAB TCF 2.3 (without Google Consent Mode)
Best for: Publishers working with IAB-certified ad vendors but not Google products
Description: TCF compliance without Google Consent Mode. Suitable for sites using IAB ad vendors but not Google advertising products.
Supported Regions
Same comprehensive coverage:
GDPR, LGPD, PIPEDA, Law 25, POPIA, nFADP, Privacy Act, PDPL (multiple countries), DPA
Includes
Everything in TCF 2.3
IAB vendor consent management
TC String generation
Important Limitation
⚠️ Banner text and purposes are standardized by IAB and cannot be customized.
This is a compliance requirement of the IAB TCF framework. Your banner will display standardized purpose descriptions set by the IAB Transparency & Consent Framework.
When to Choose This
✅ You monetize through programmatic advertising
✅ You work with IAB-certified ad vendors and SSPs
✅ You DON'T use Google Ads, AdSense, or GA4
✅ You need TCF 2.3 compliance for ad tech partnerships
When NOT to Choose This
❌ You use Google advertising products (choose Framework 4 instead)
❌ You need to customize the banner text and purposes
❌ You don't work with programmatic advertising
What is IAB TCF 2.3?
The IAB Transparency & Consent Framework (TCF) is an industry standard for collecting and communicating user consent to hundreds of advertising technology vendors. It generates a TC String (Transparency & Consent String) that encodes visitor preferences.
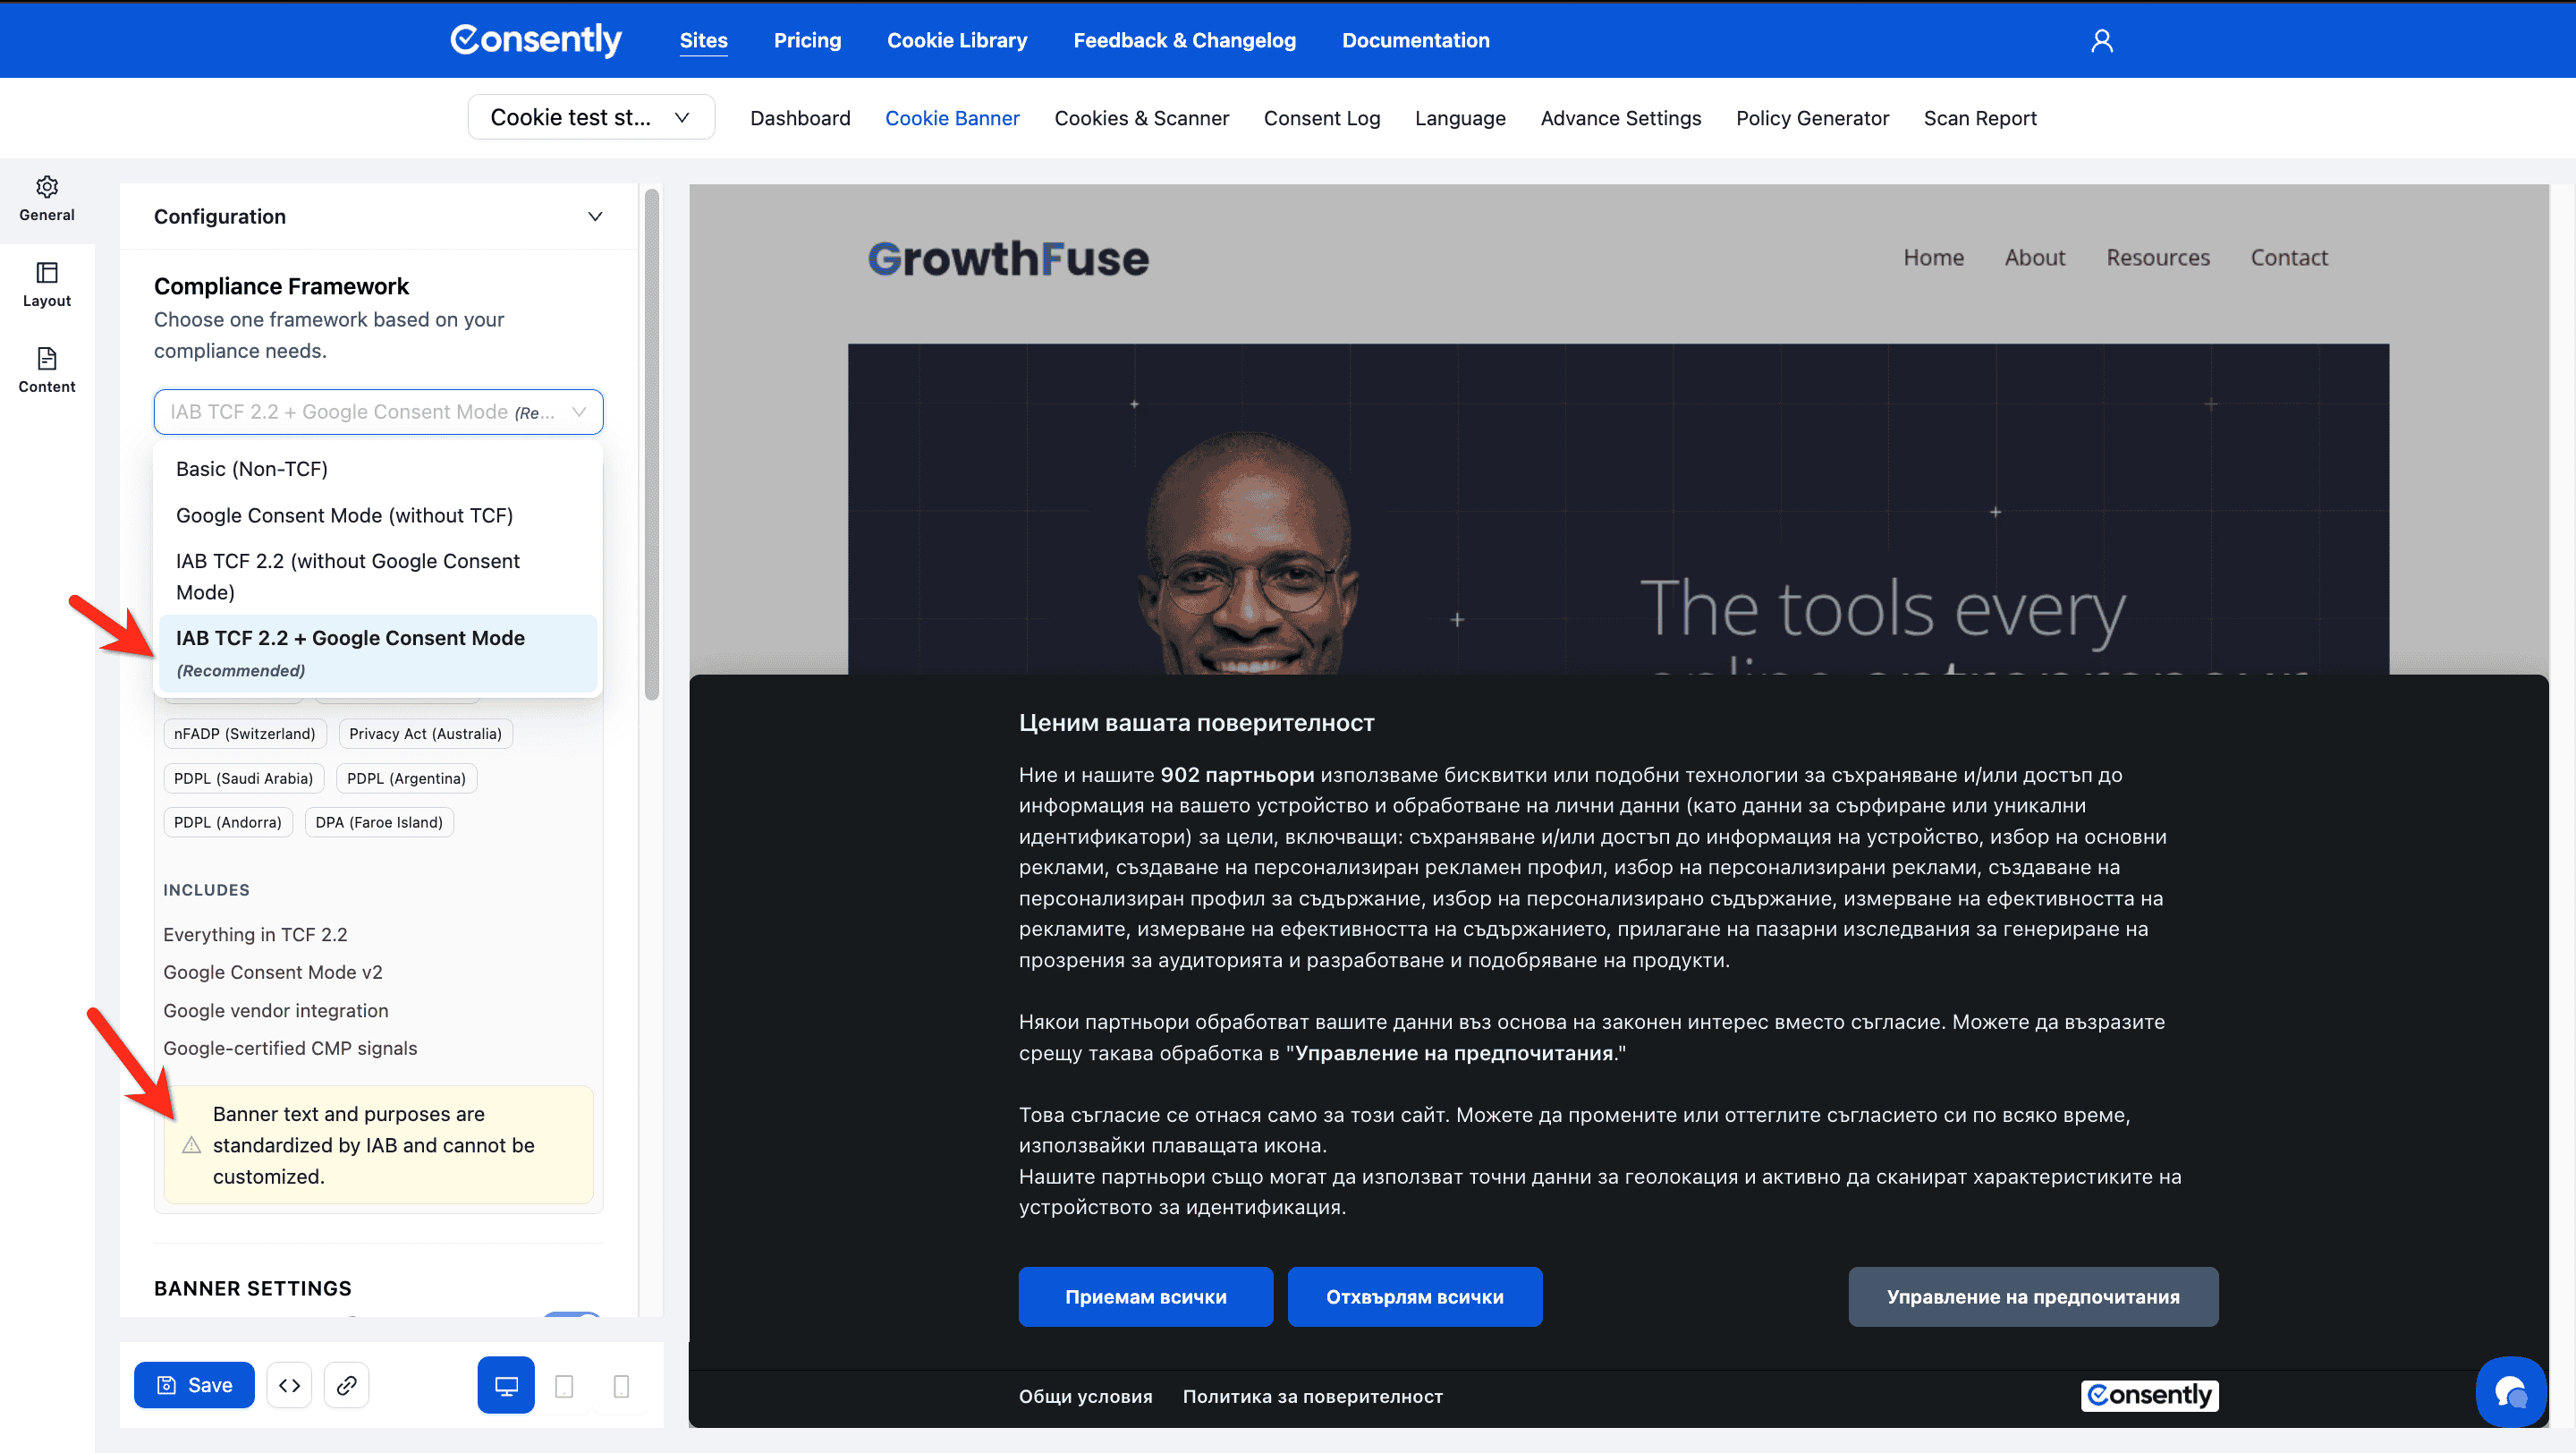
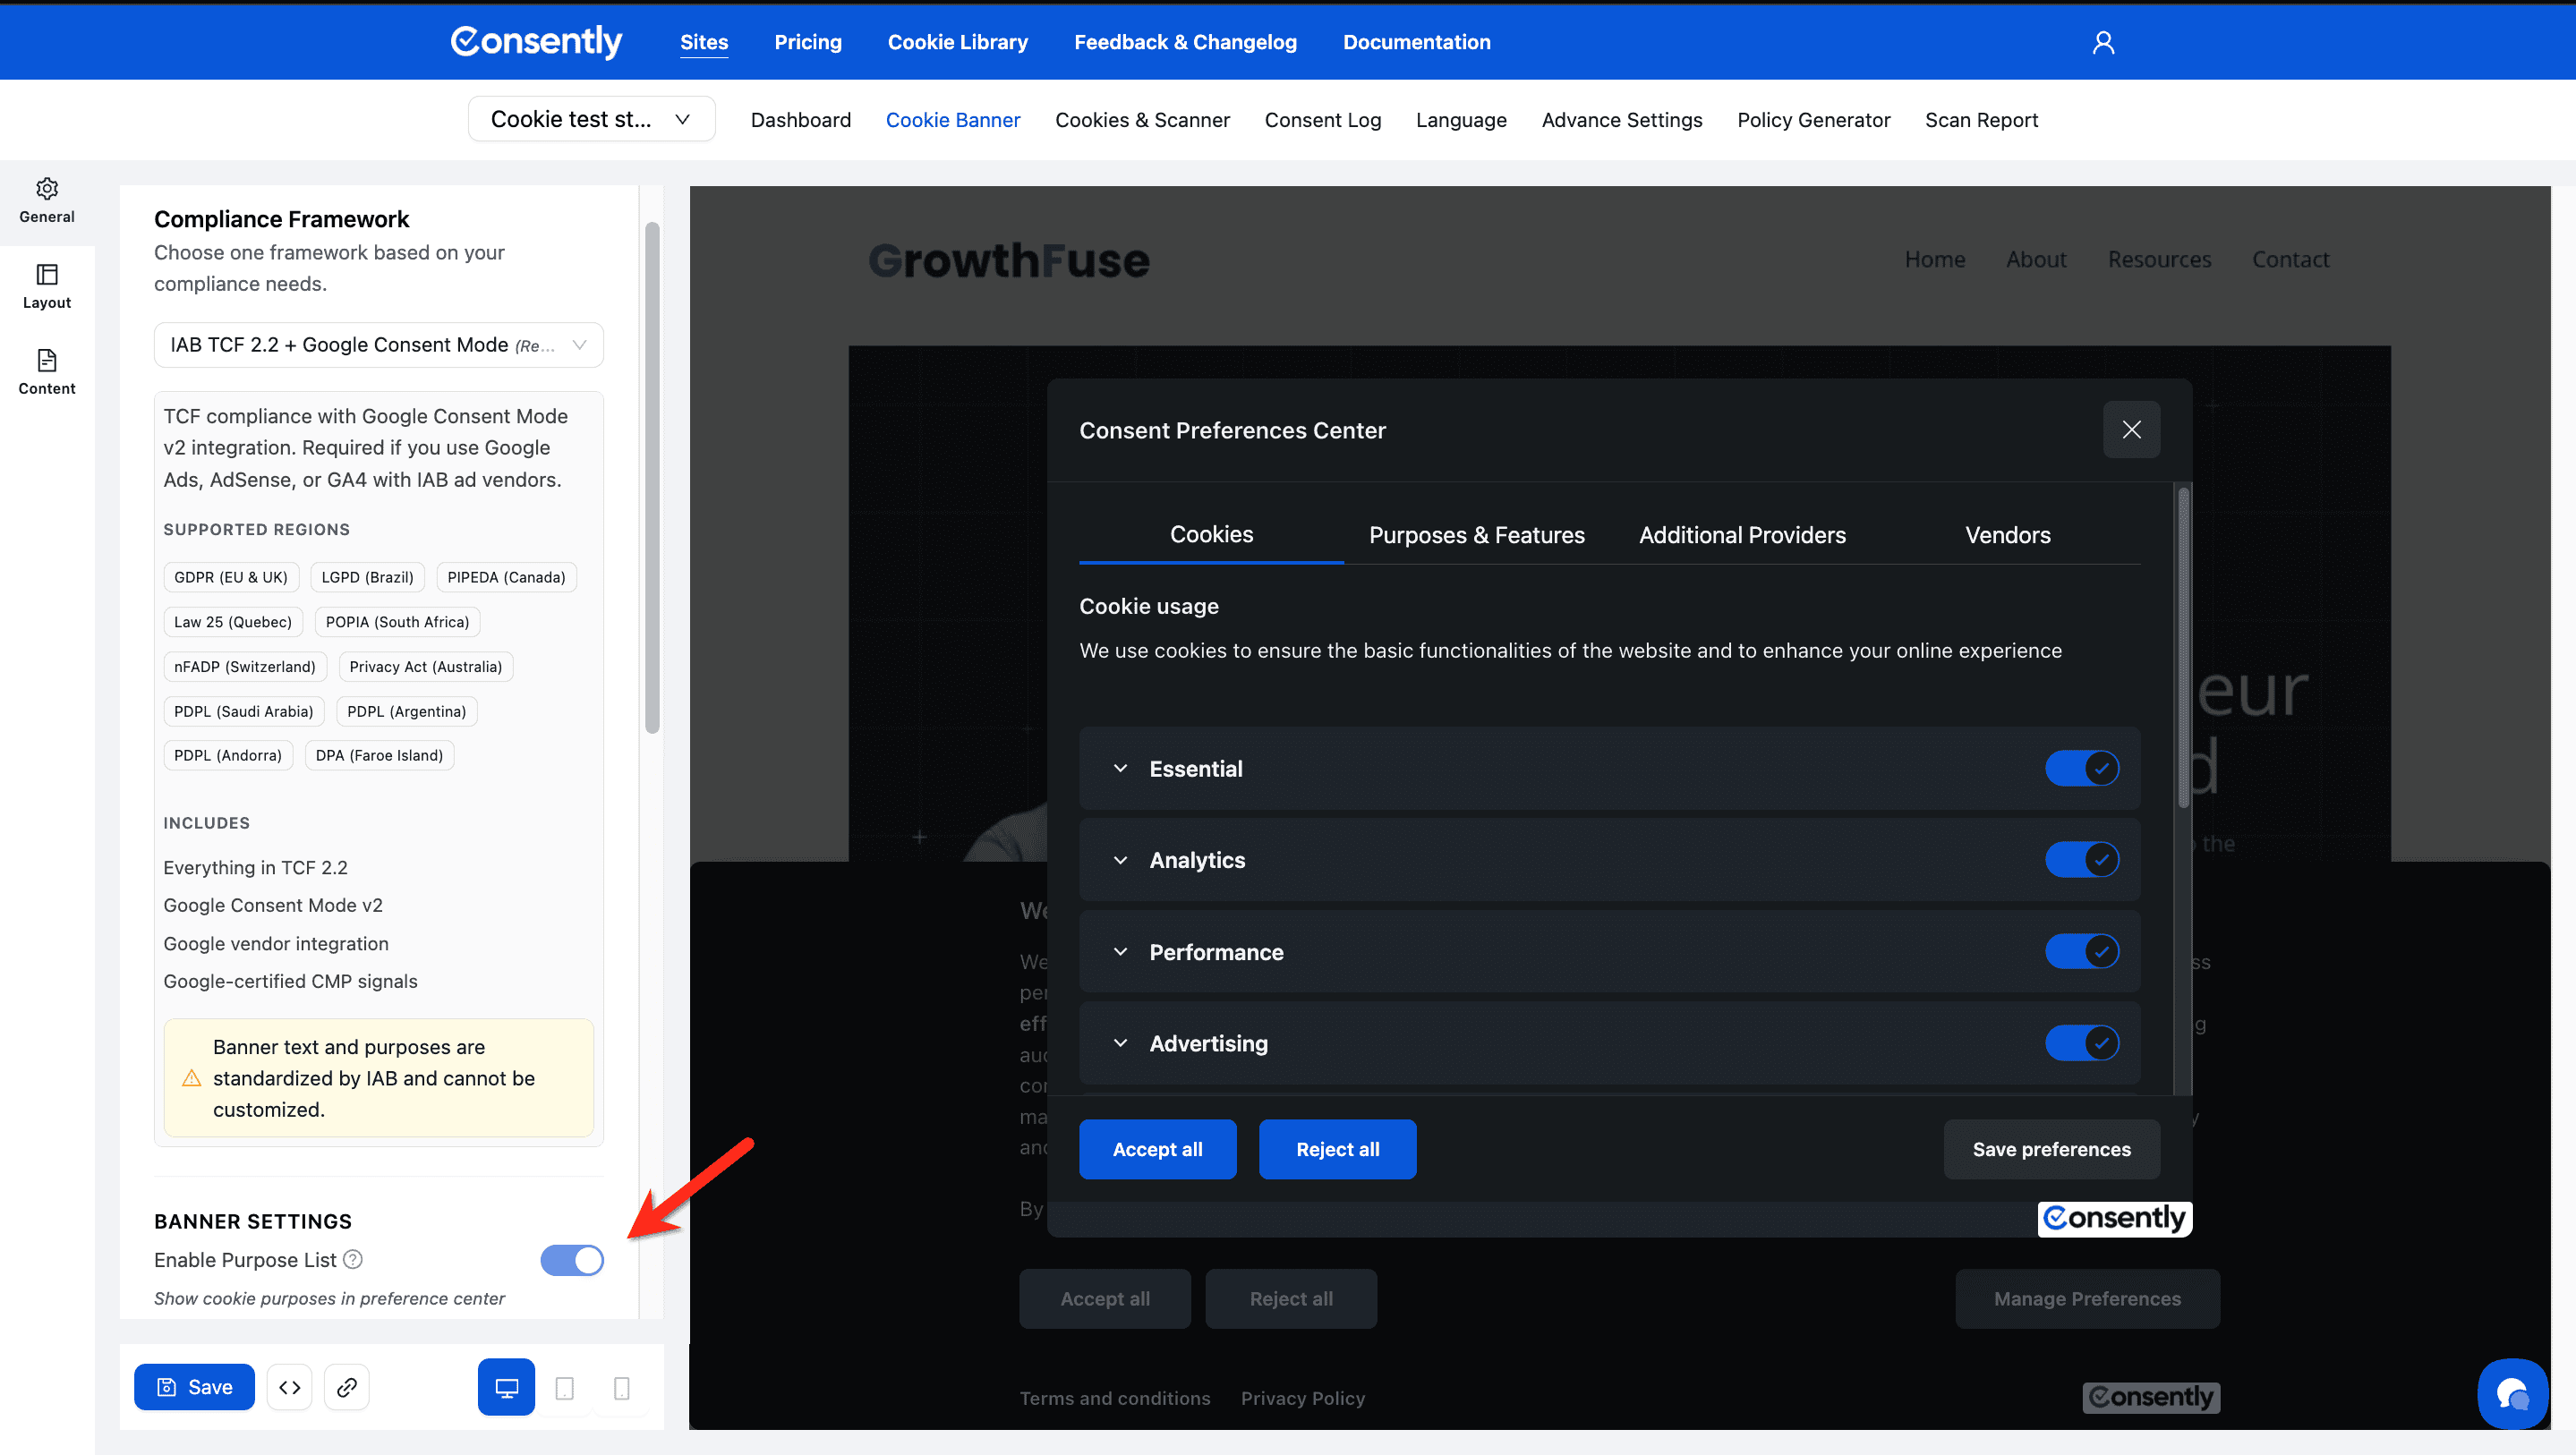
Framework 4: IAB TCF 2.3 + Google Consent Mode (Recommended)
Best for: Publishers using both Google products AND IAB-certified ad vendors
Description: TCF compliance with Google Consent Mode v2 integration. Required if you use Google Ads, AdSense, or GA4 with IAB ad vendors.
Supported Regions
Same comprehensive coverage:
GDPR, LGPD, PIPEDA, Law 25, POPIA, nFADP, Privacy Act, PDPL (multiple countries), DPA
Includes
Everything in TCF 2.3
Google Consent Mode v2
Google vendor integration
Google-certified CMP signals
Important Limitation
⚠️ Banner text and purposes are standardized by IAB and cannot be customized.
When to Choose This
✅ You use Google Ads, AdSense, or GA4
✅ You ALSO work with IAB-certified ad vendors
✅ You need both Google and IAB compliance
✅ You monetize through multiple ad networks
When NOT to Choose This
❌ You only use Google products (choose Framework 2)
❌ You only use IAB vendors without Google (choose Framework 3)
❌ You need complete control over banner text
Why This is Recommended
This framework provides the most comprehensive compliance coverage for publishers using modern ad technology. It ensures:
Full IAB TCF 2.3 compliance for programmatic advertising
Google Consent Mode v2 for Google products
Certified CMP status with both Google and IAB
Maximum ad revenue potential while maintaining compliance

Selecting Your Framework
Step 1: Choose the appropriate framework
Click the Compliance Framework dropdown and select the framework that matches your needs.
Step 2: Review the framework description
Read the description and supported regions to confirm this framework matches your requirements.
Step 3: Note any limitations
Pay attention to any warning messages, especially about IAB standardization.
Done Selecting Framework
Click Save at the bottom of the page to apply your framework choice.
✅ Success indicator: The framework name appears in the Compliance Framework field, and appropriate banner settings become available.
Additional Banner Settings
After selecting your framework, configure these additional settings:
Banner Settings (All Frameworks)
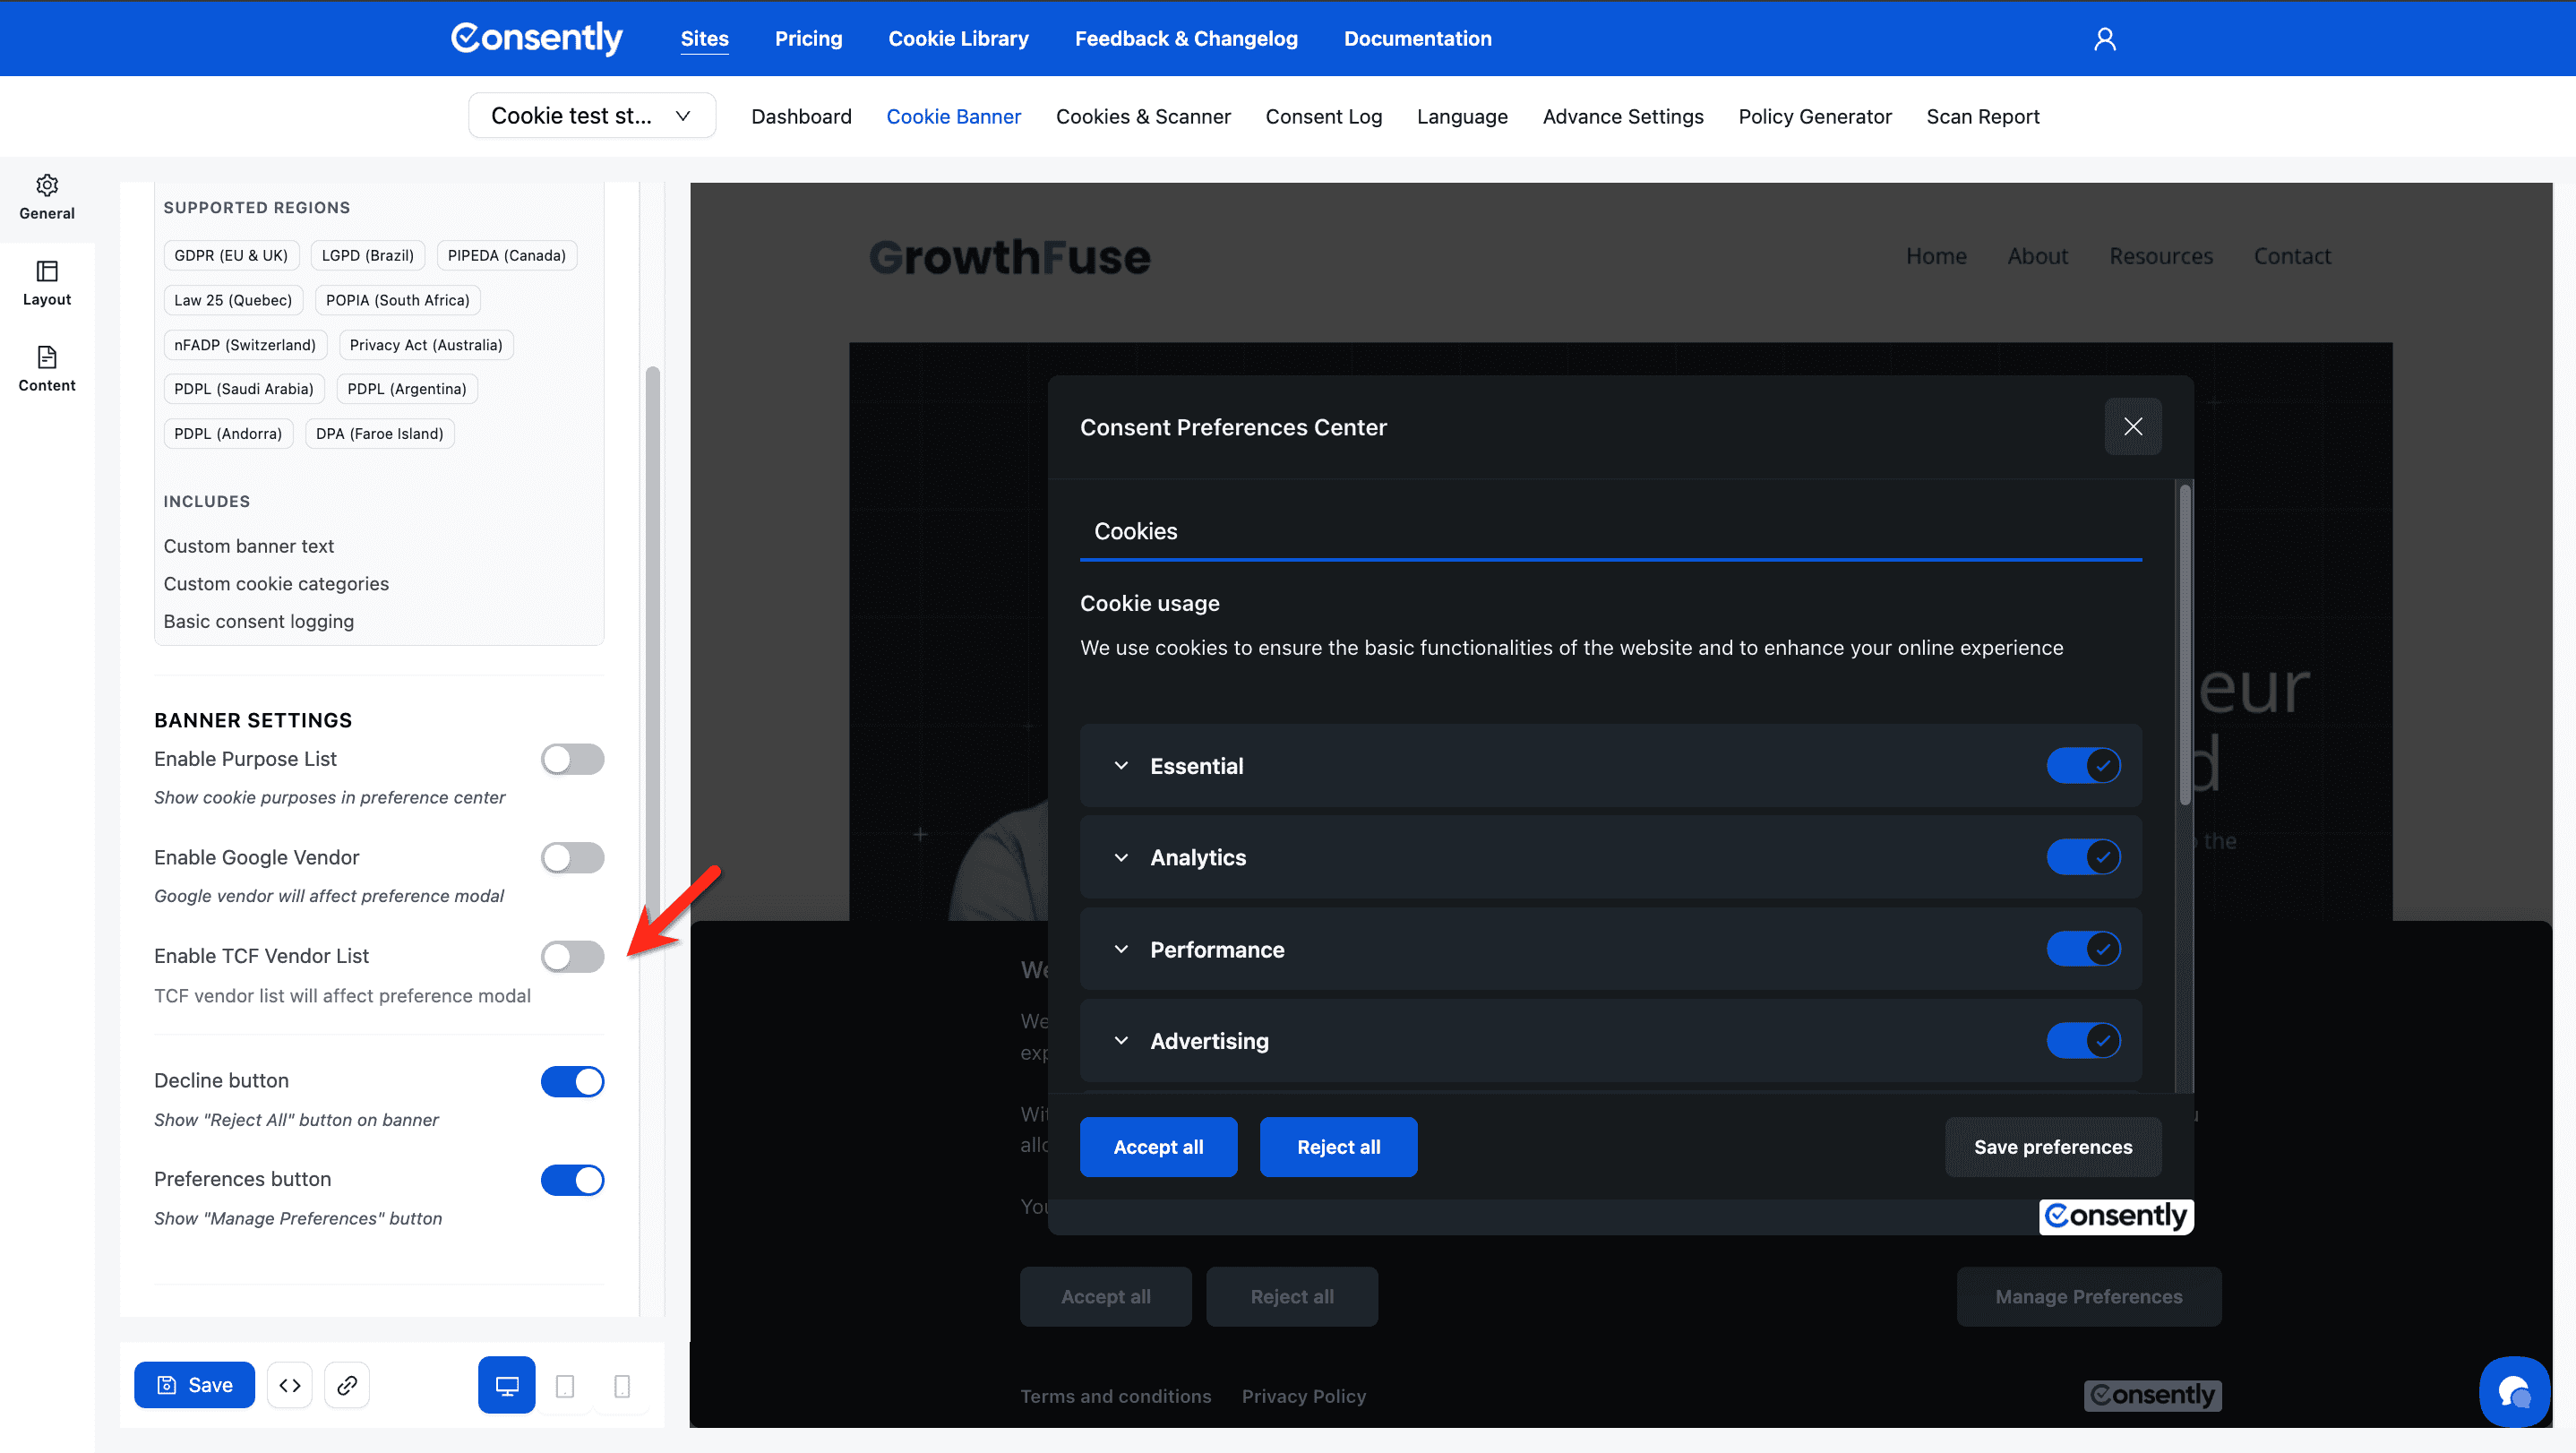
Enable Purpose List
Shows or hides the purpose list in the preference center.
When enabled: Displays IAB-standardized purposes (e.g., "Store and/or access information on a device")
When disabled: Simplifies the preference center by hiding detailed purposes
Enable Google Vendor
Shows Google as a vendor in the TCF vendor list.
When enabled: Google appears alongside other IAB vendors
When disabled: Google consent is handled separately from IAB vendors
Recommended: Keep enabled for transparency
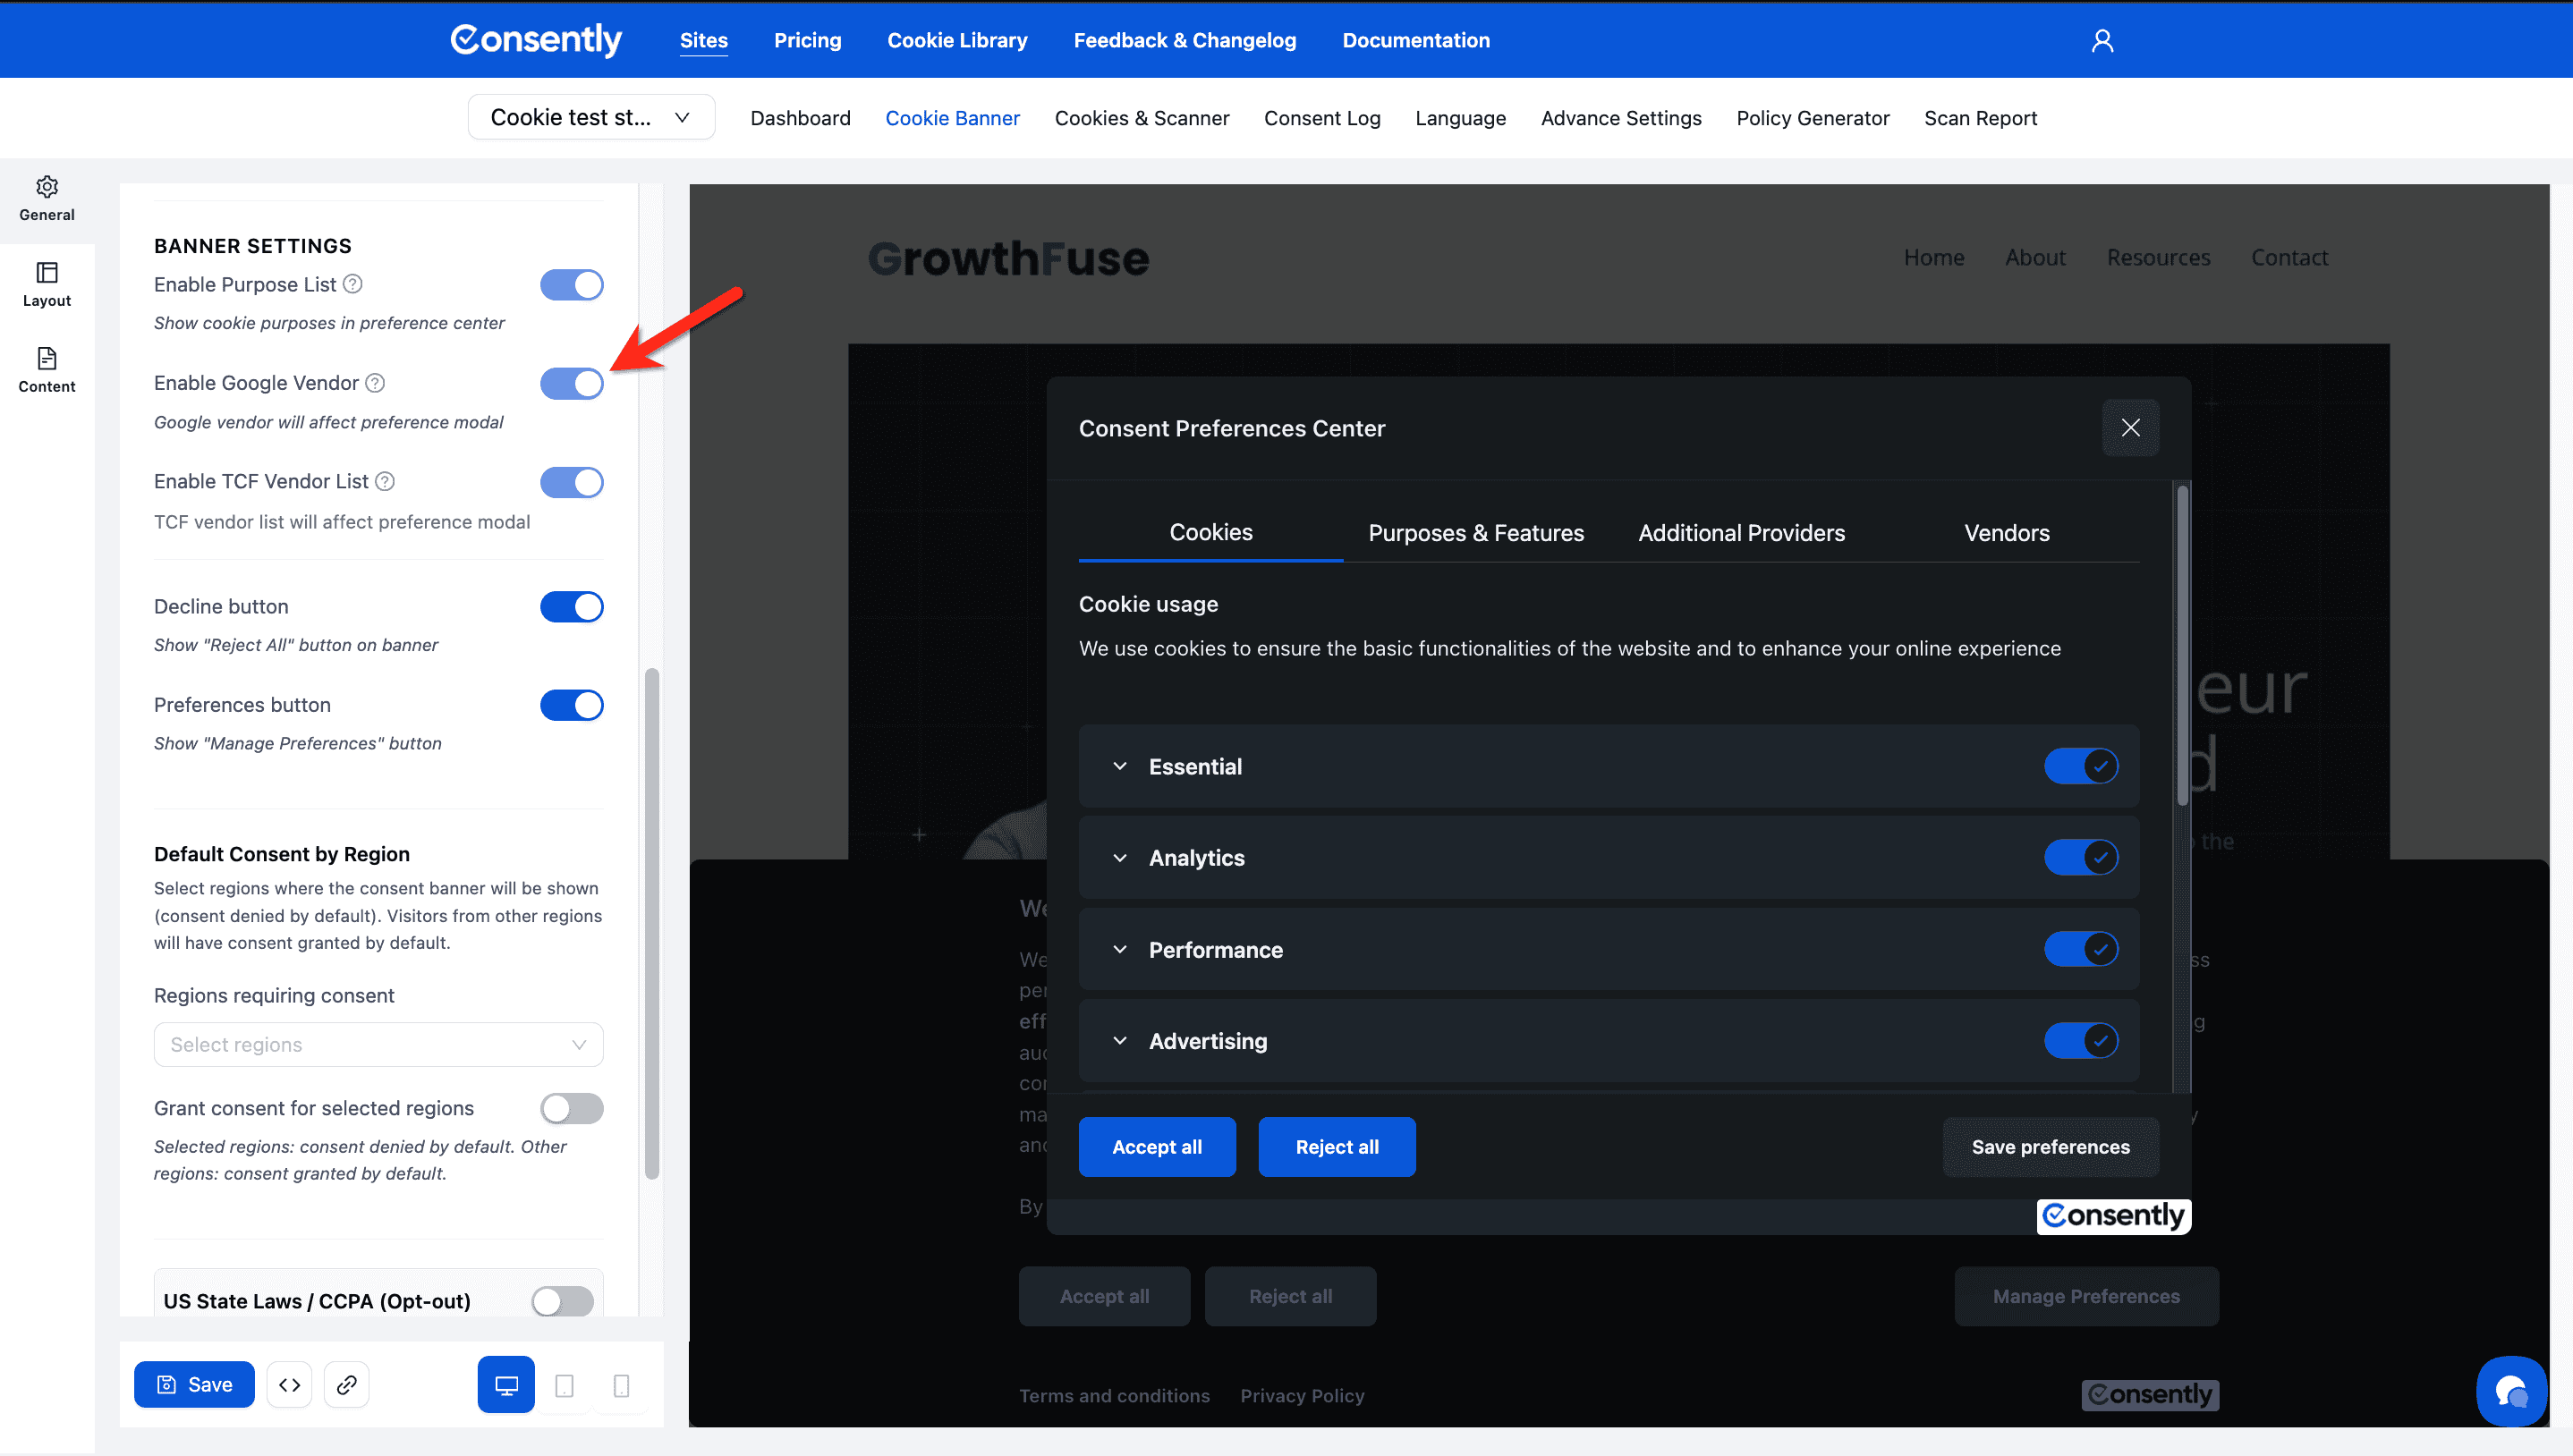
Enable TCF Vendor List
Shows or hides the full TCF vendor list in the preference center.
When enabled: Displays the complete list of IAB-certified vendors requesting consent
When disabled: Hides the vendor list, showing only purpose categories
Note: TCF vendor list will affect preference modal appearance
Decline Button
Shows or hides the "Reject All" button on the consent notice.
When enabled: Visitors can reject all non-essential cookies with one click
When disabled: Visitors must use "Manage Preferences" to decline cookies
Best practice: Keep enabled for GDPR compliance
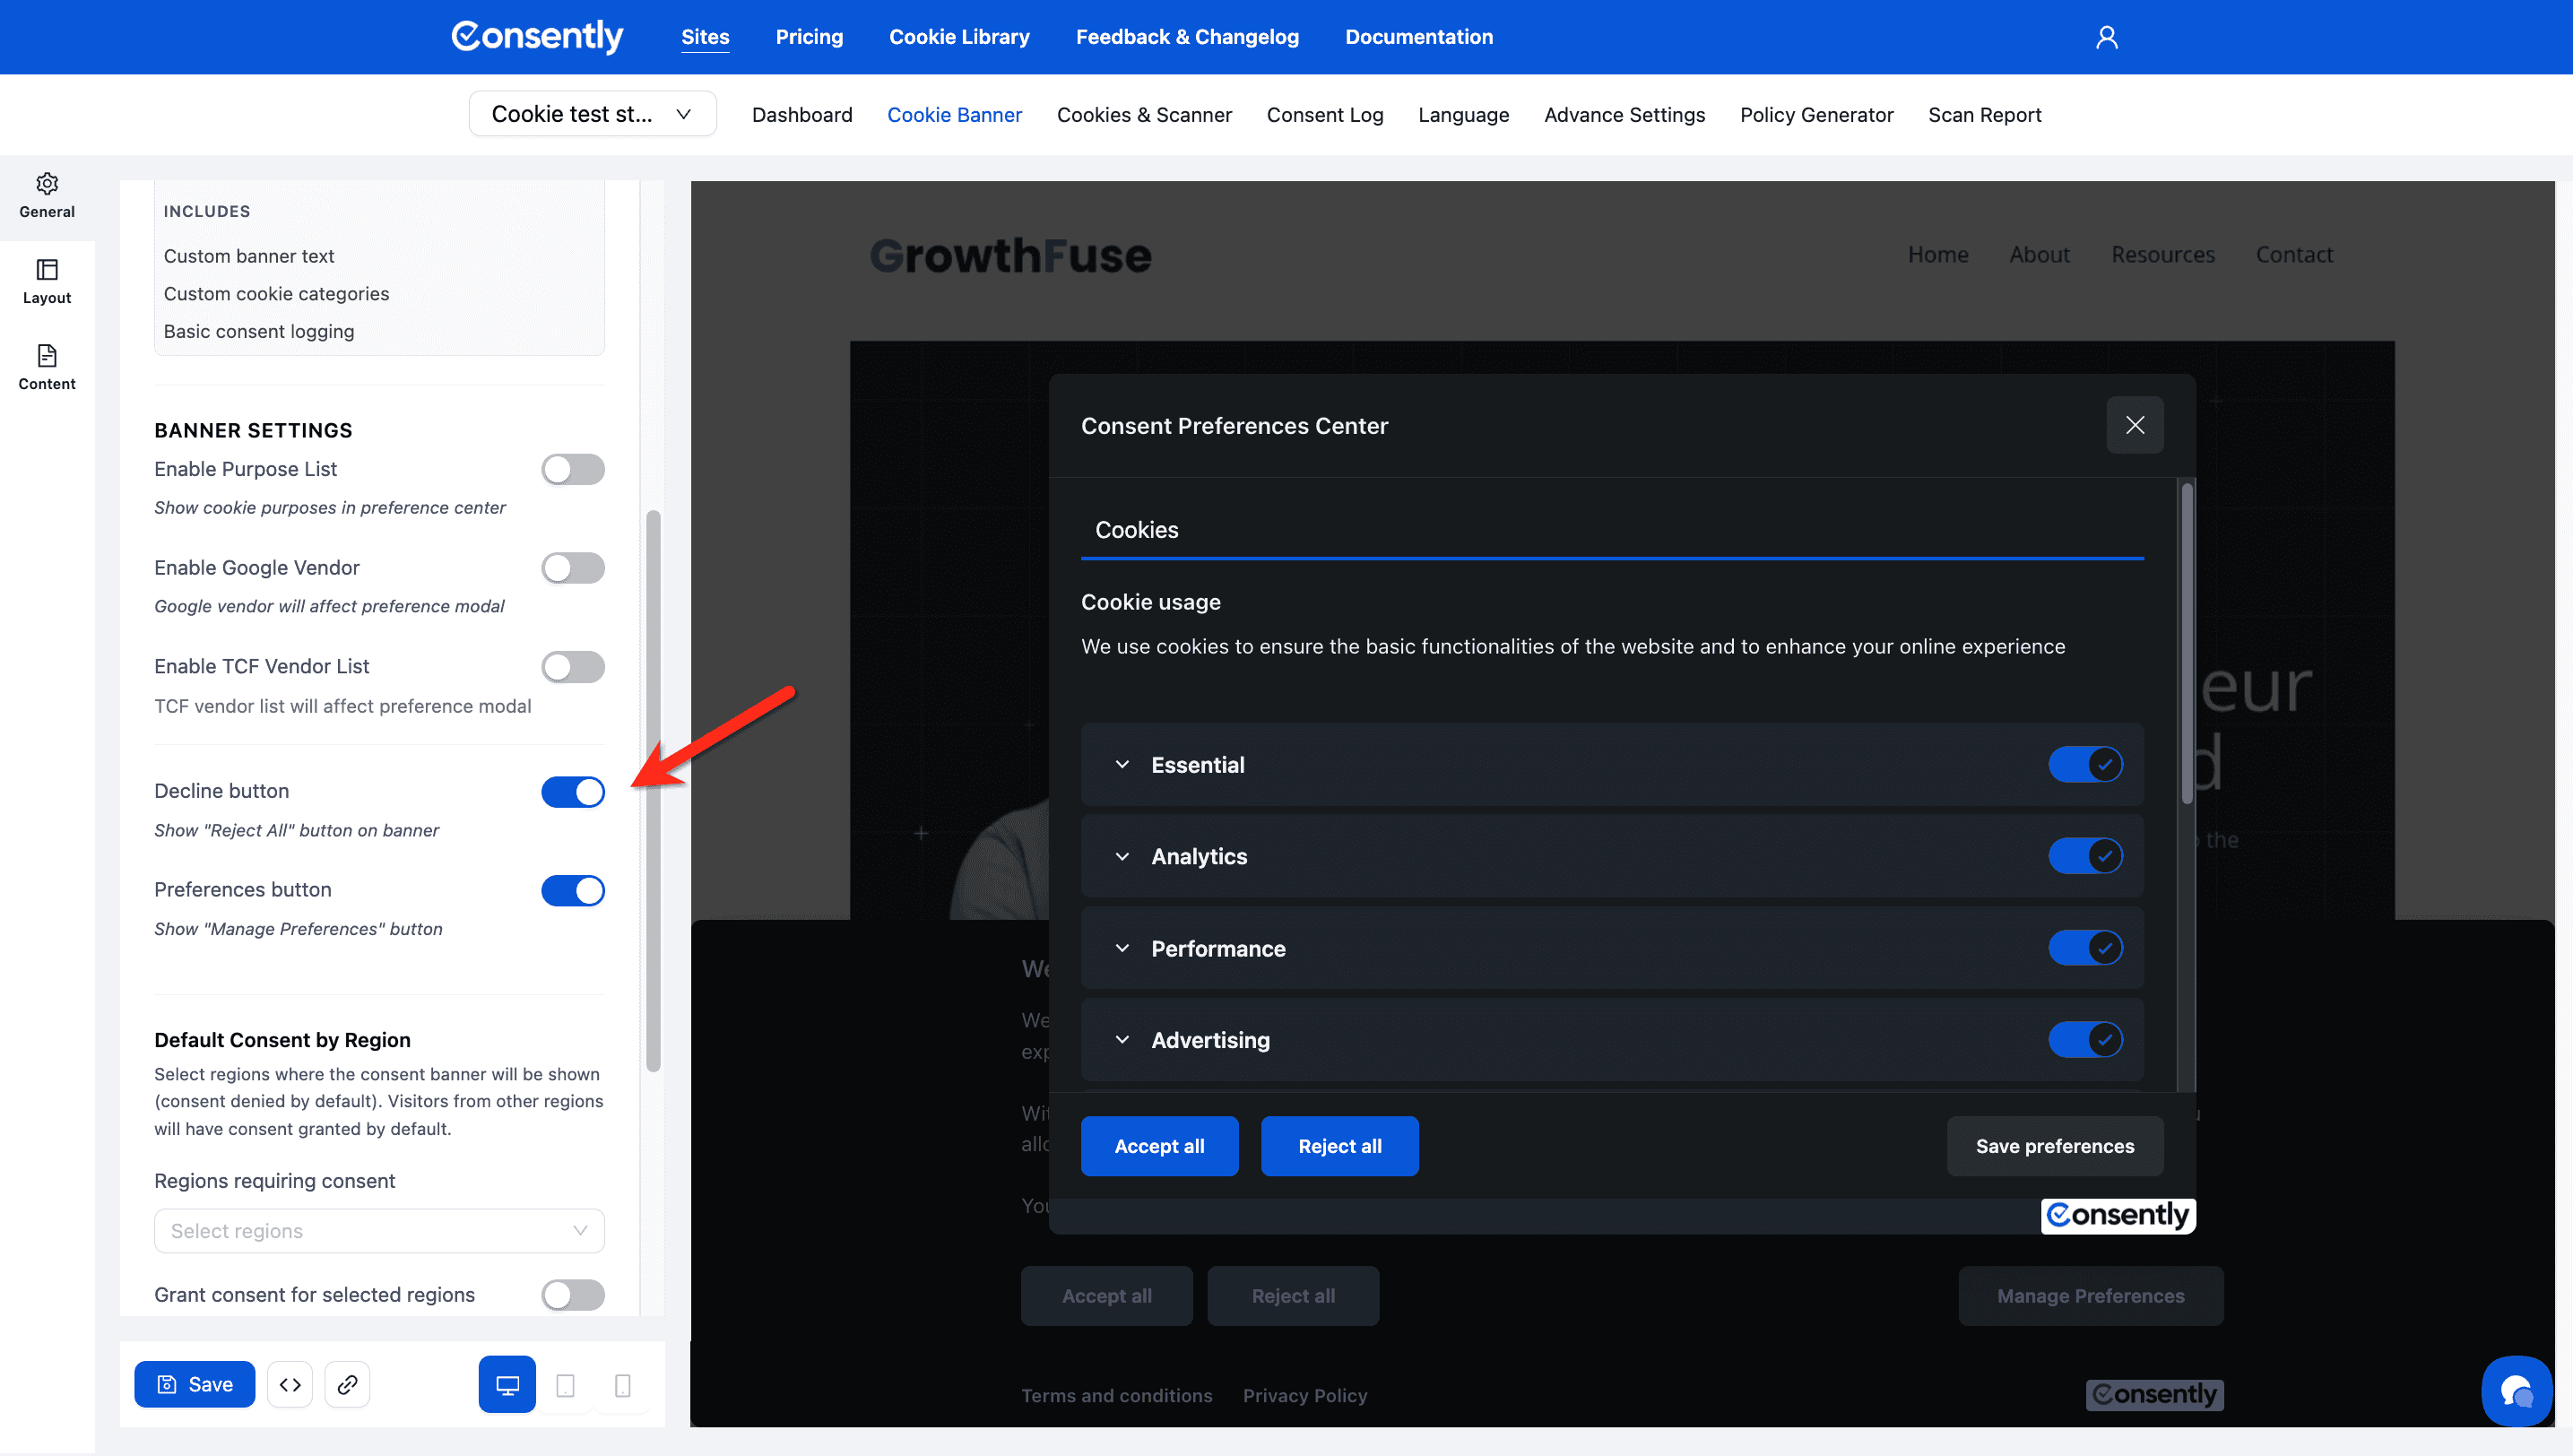
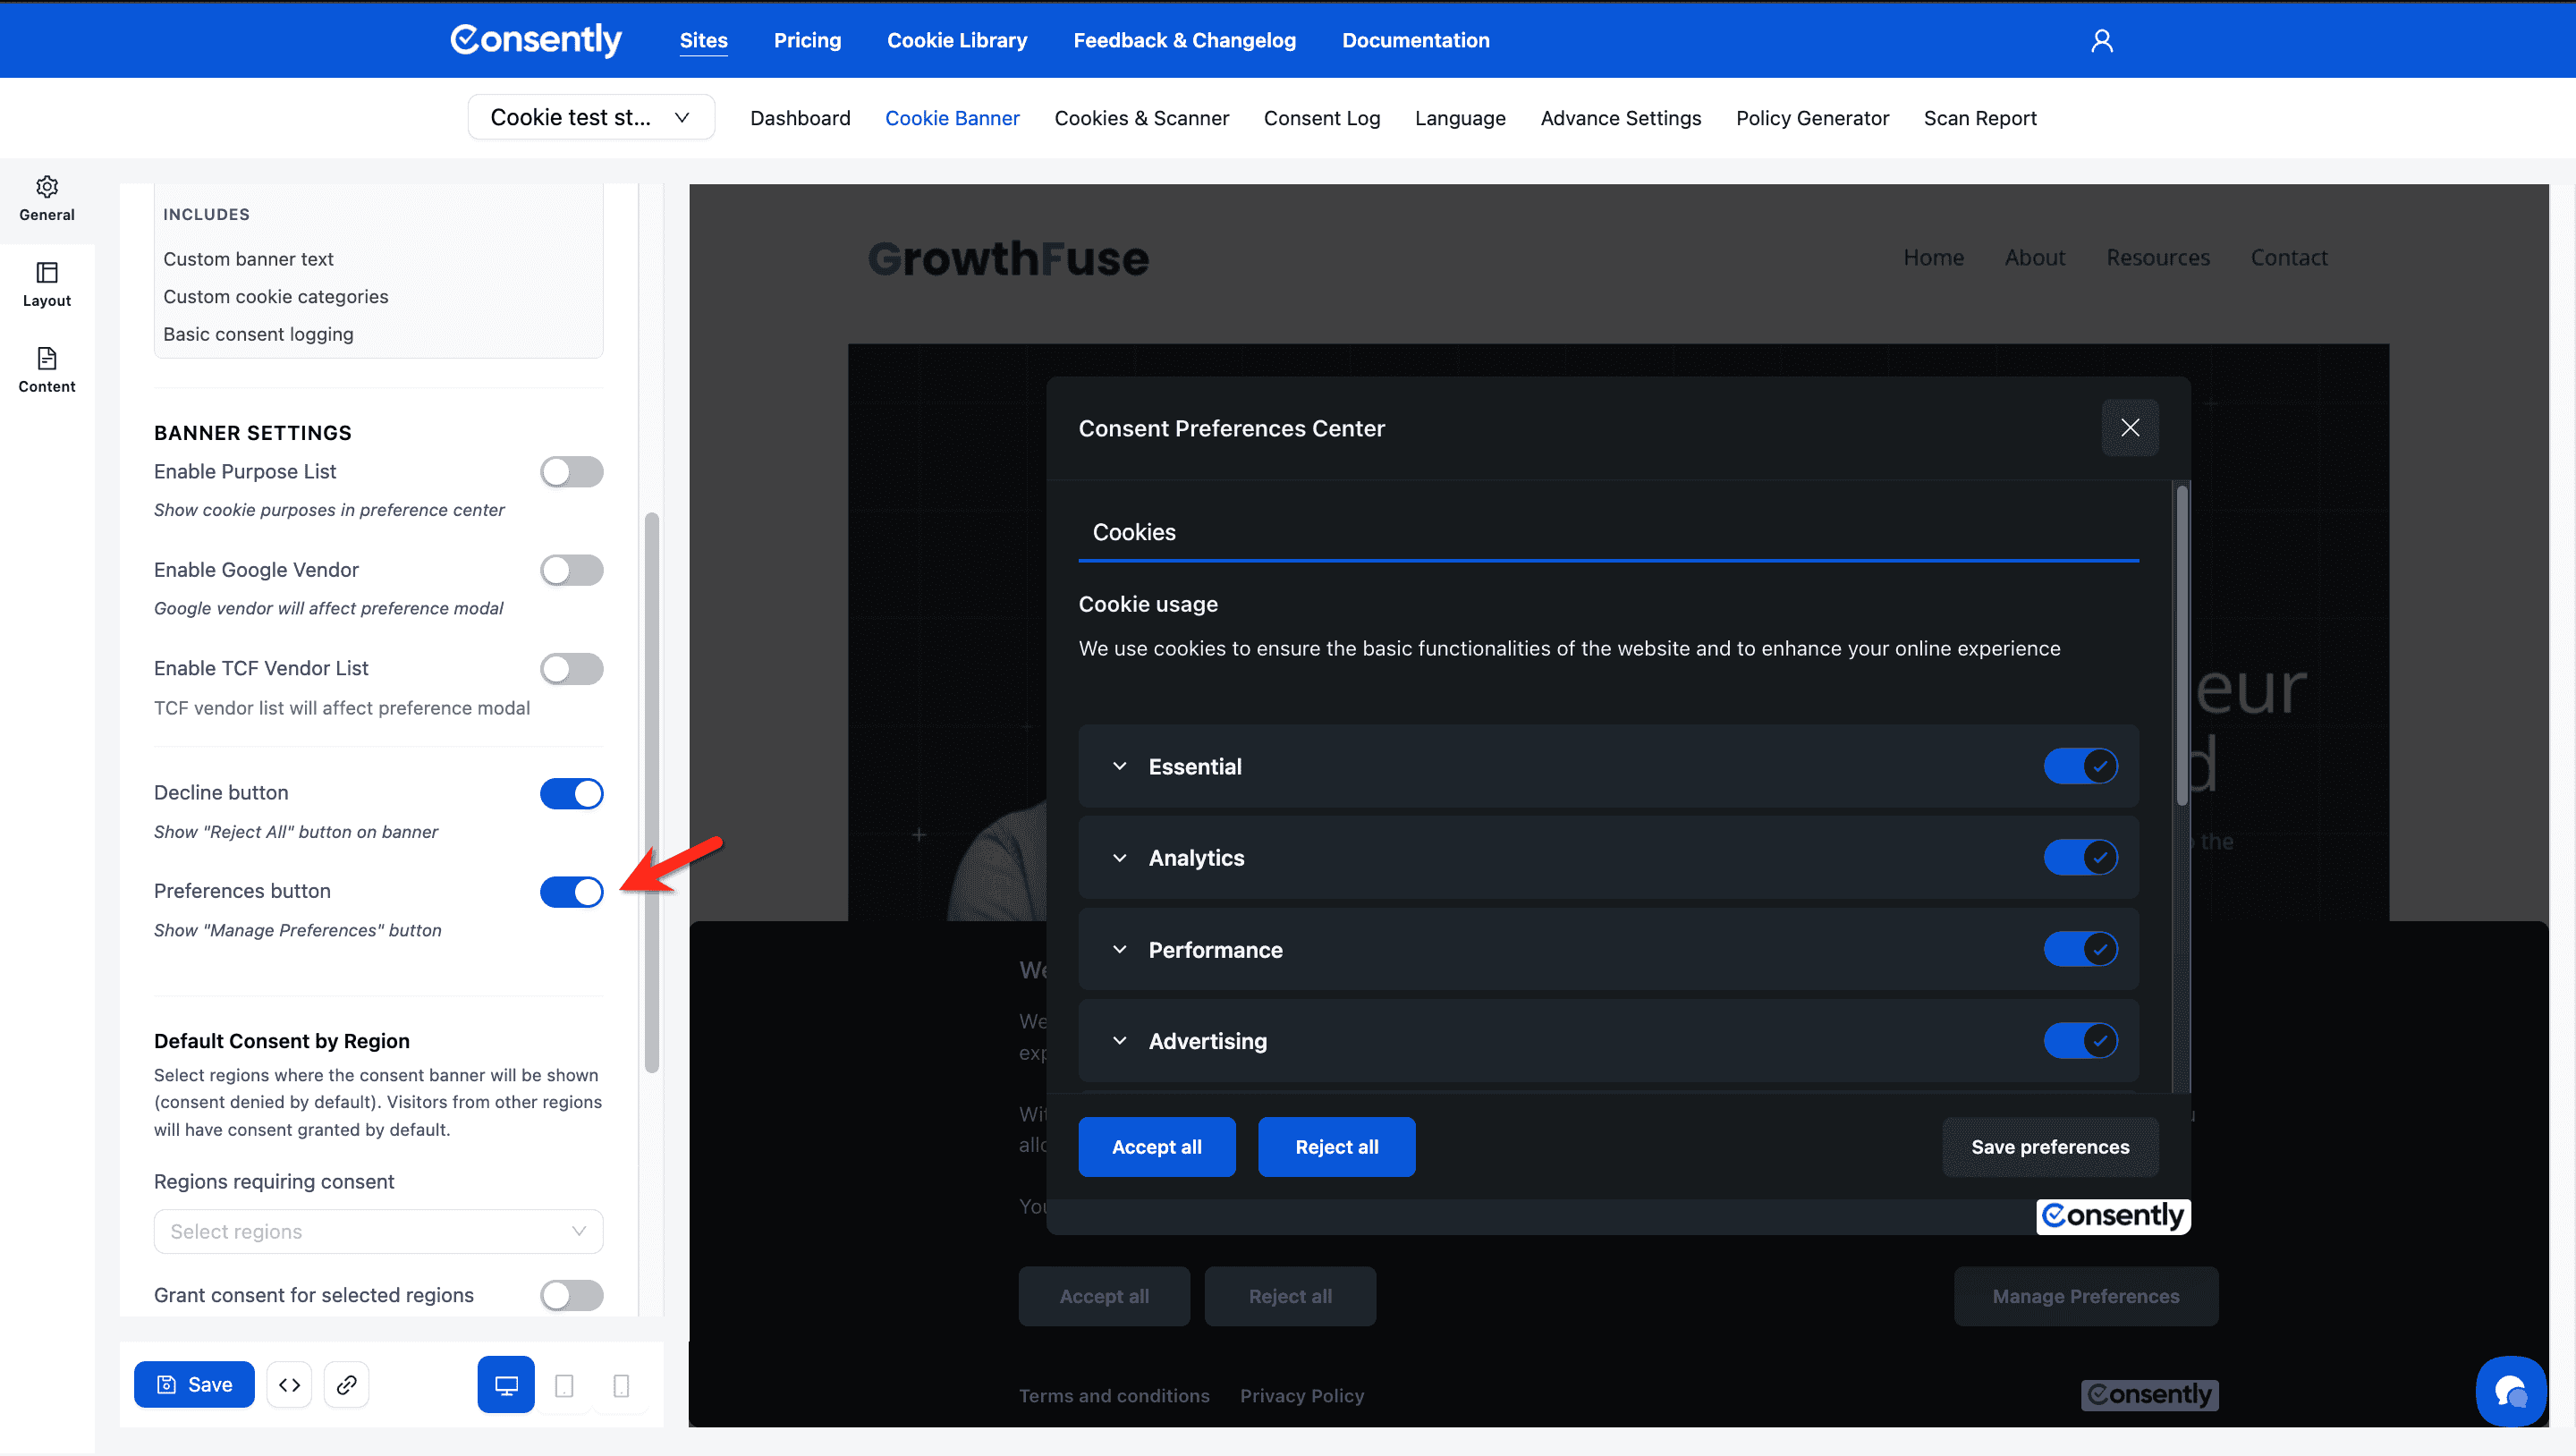
Preferences Button
Shows or hides the "Manage Preferences" button on the consent notice.
When enabled: Visitors can access granular cookie controls
When disabled: Visitors can only accept or reject all cookies
Best practice: Keep enabled to allow granular consent choices
Default Consent by Region
Control which regions require explicit consent versus automatic consent.
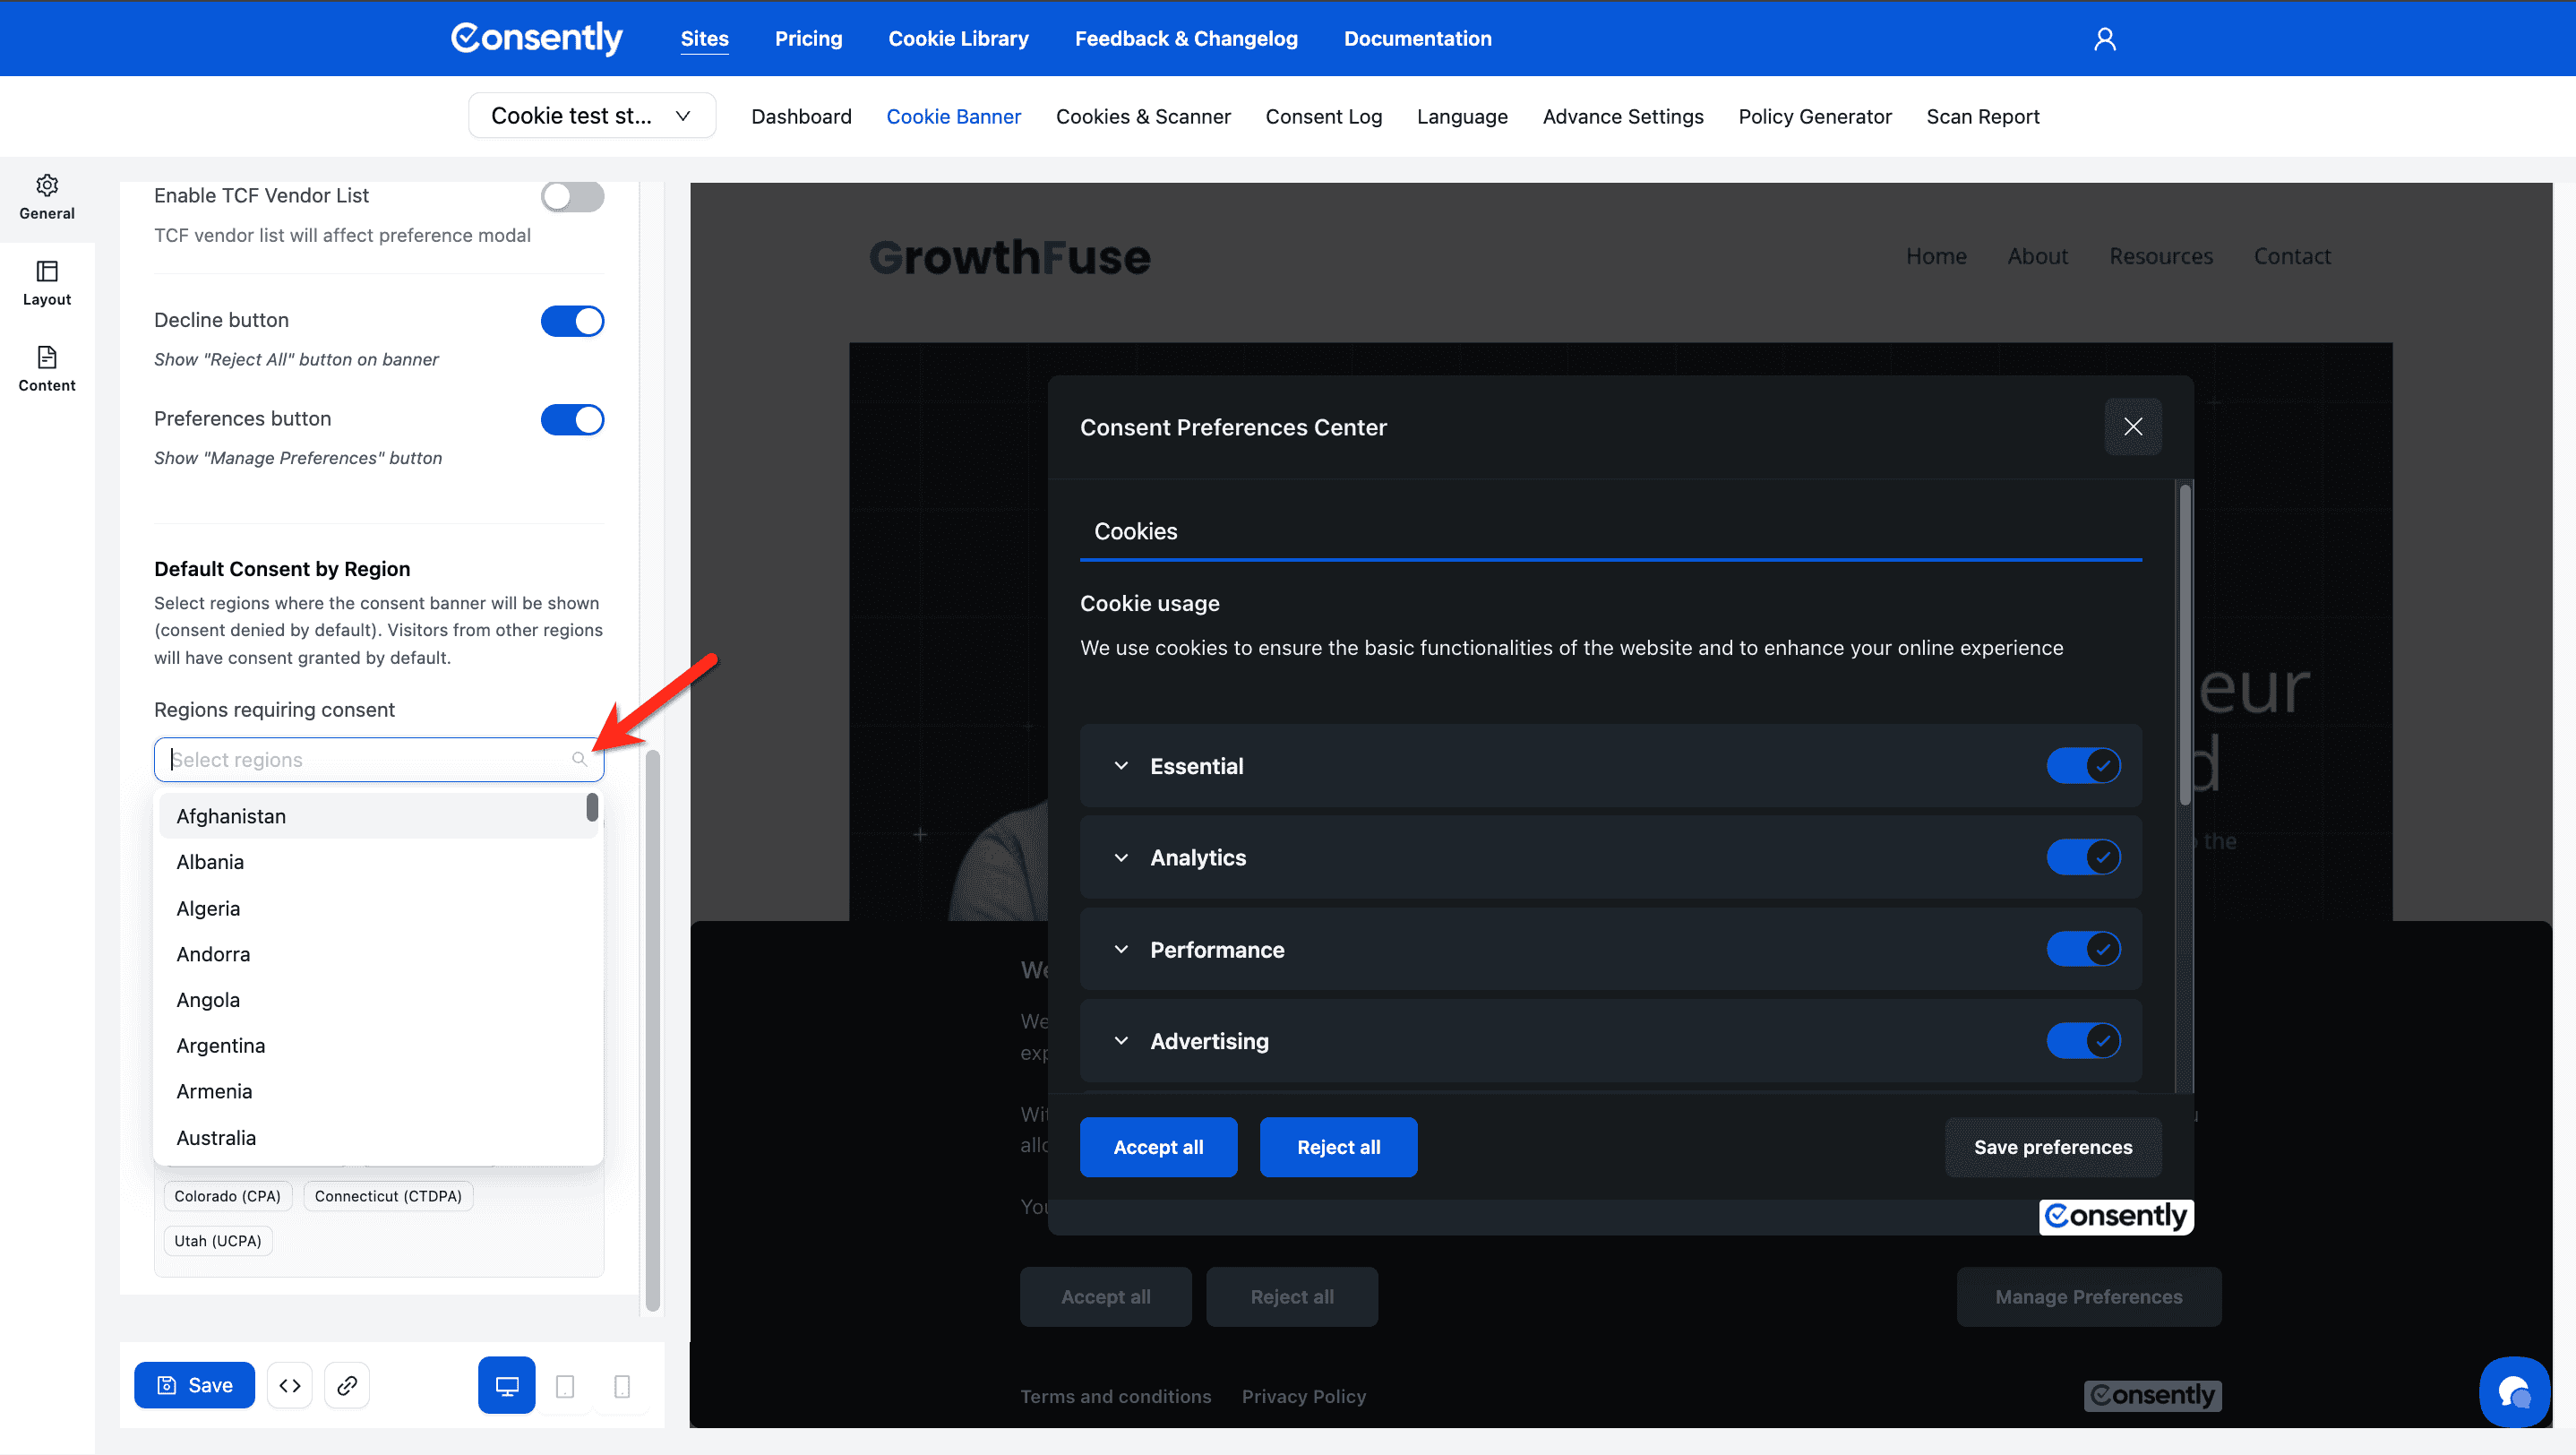
Regions Requiring Consent
Select regions where the consent banner will be shown (consent denied by default). Visitors from other regions will have consent granted by default.
Configuration:
Click Select regions dropdown
Choose regions that require consent (typically GDPR regions)
Visitors from selected regions see the banner
Visitors from other regions automatically grant consent
Grant Consent for Selected Regions
Toggle: When enabled, reverses the logic
When enabled: Selected regions grant consent by default
When disabled: Selected regions require consent (standard behavior)
Use case: If you want most regions to require consent but grant it automatically for specific regions
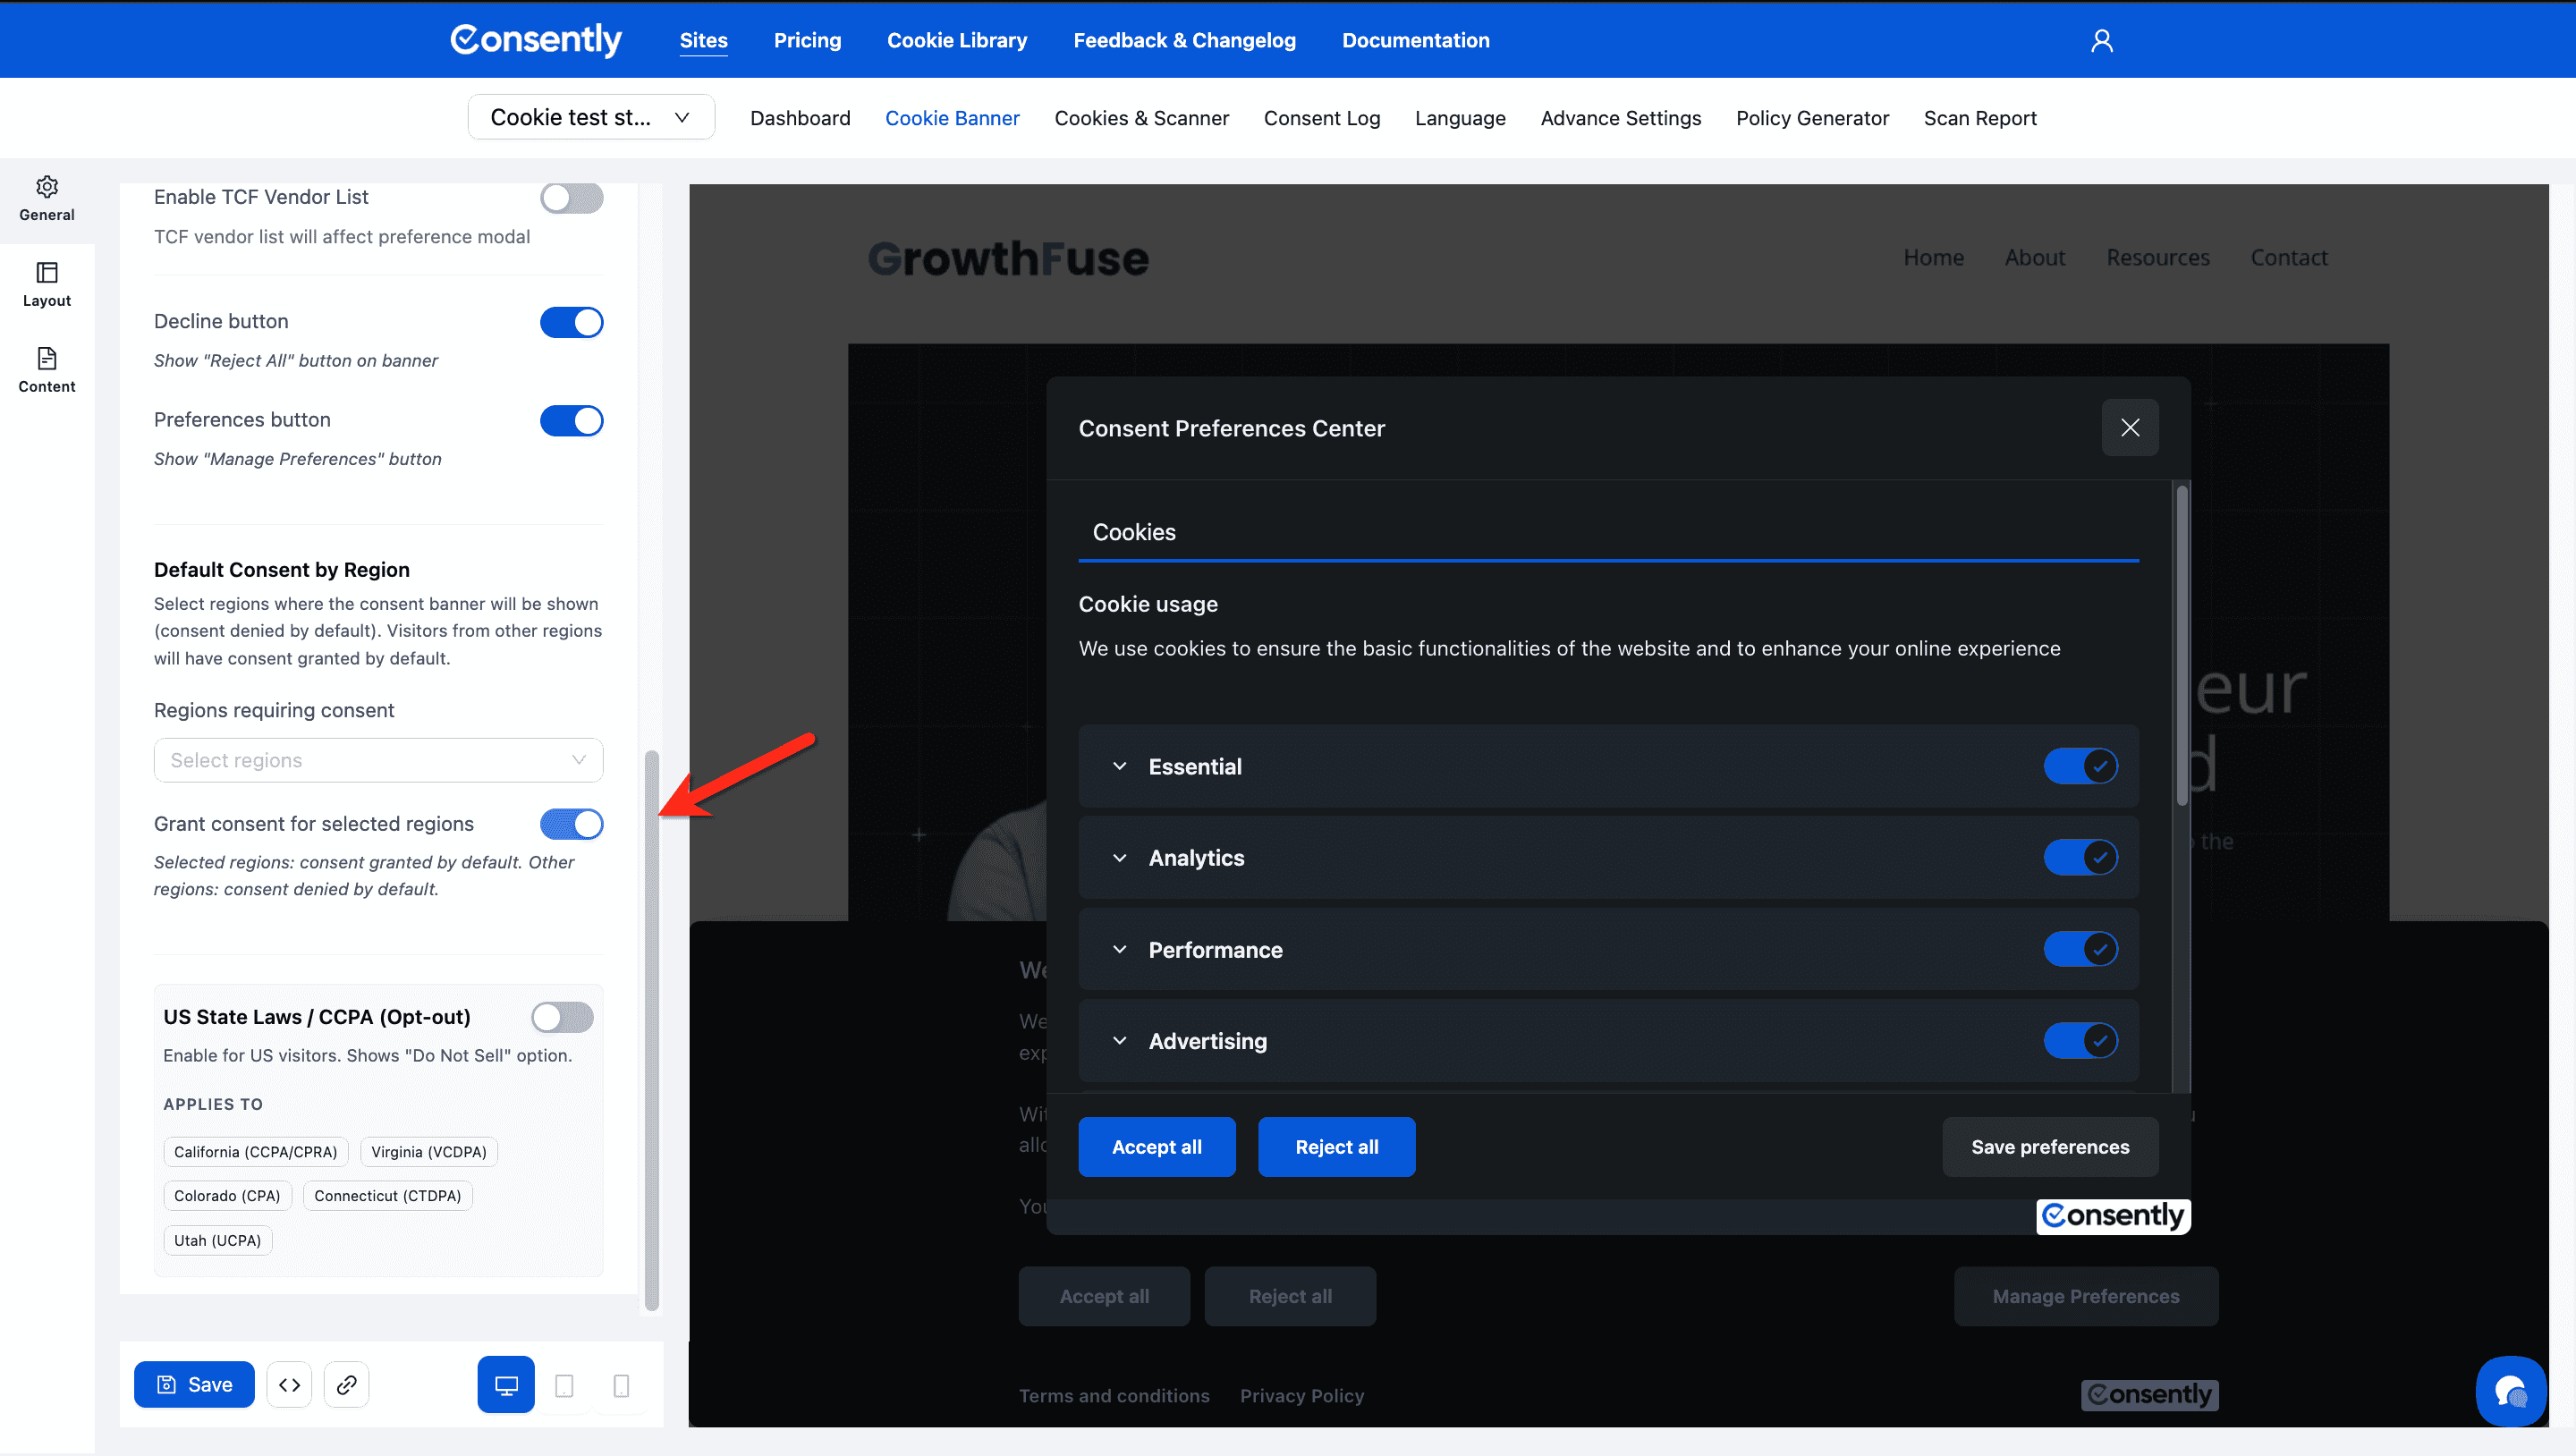
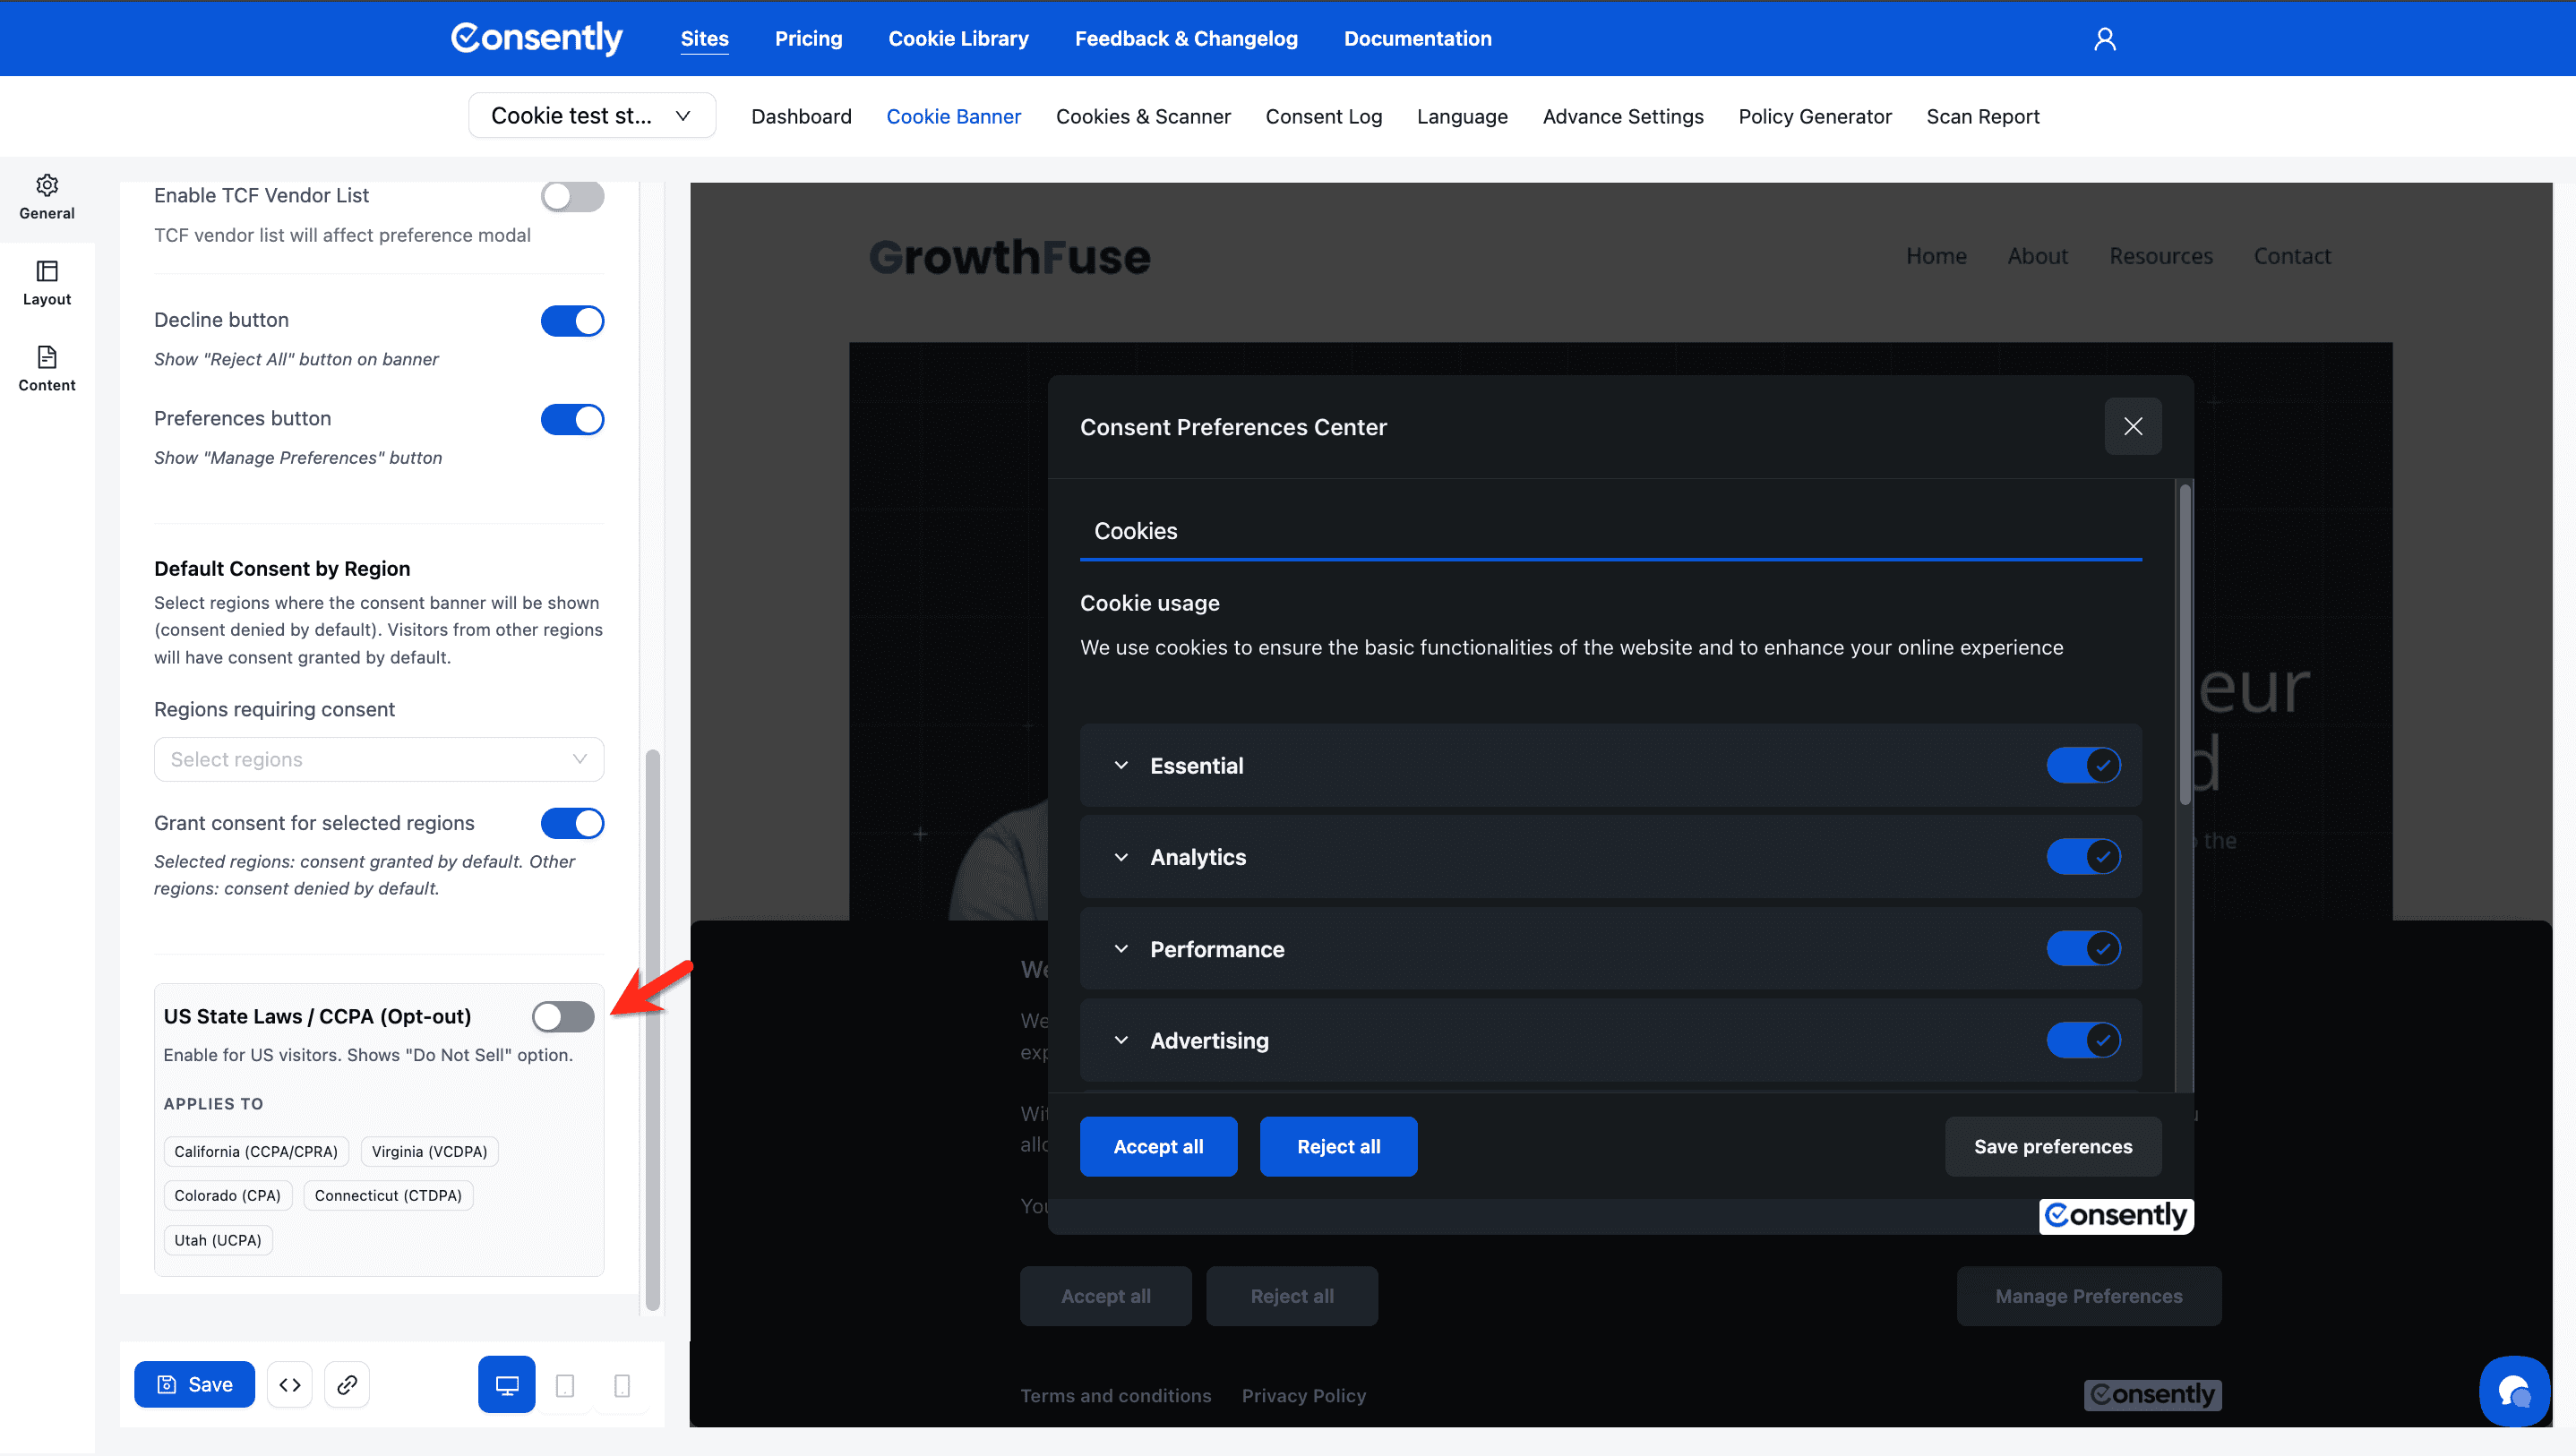
US State Laws / CCPA (Opt-out)
Enable the opt-out consent model for US visitors.
When enabled: Shows "Do Not Sell or Share My Personal Information" option
When disabled: US visitors see the standard opt-in banner
Applies To
The following US states with privacy laws:
California (CCPA/CPRA)
Virginia (VCDPA)
Colorado (CPA)
Connecticut (CTDPA)
Utah (UCPA)
How it works:
Visitors from these states see an opt-out model
Cookies load by default unless visitor opts out
Complies with US state privacy laws
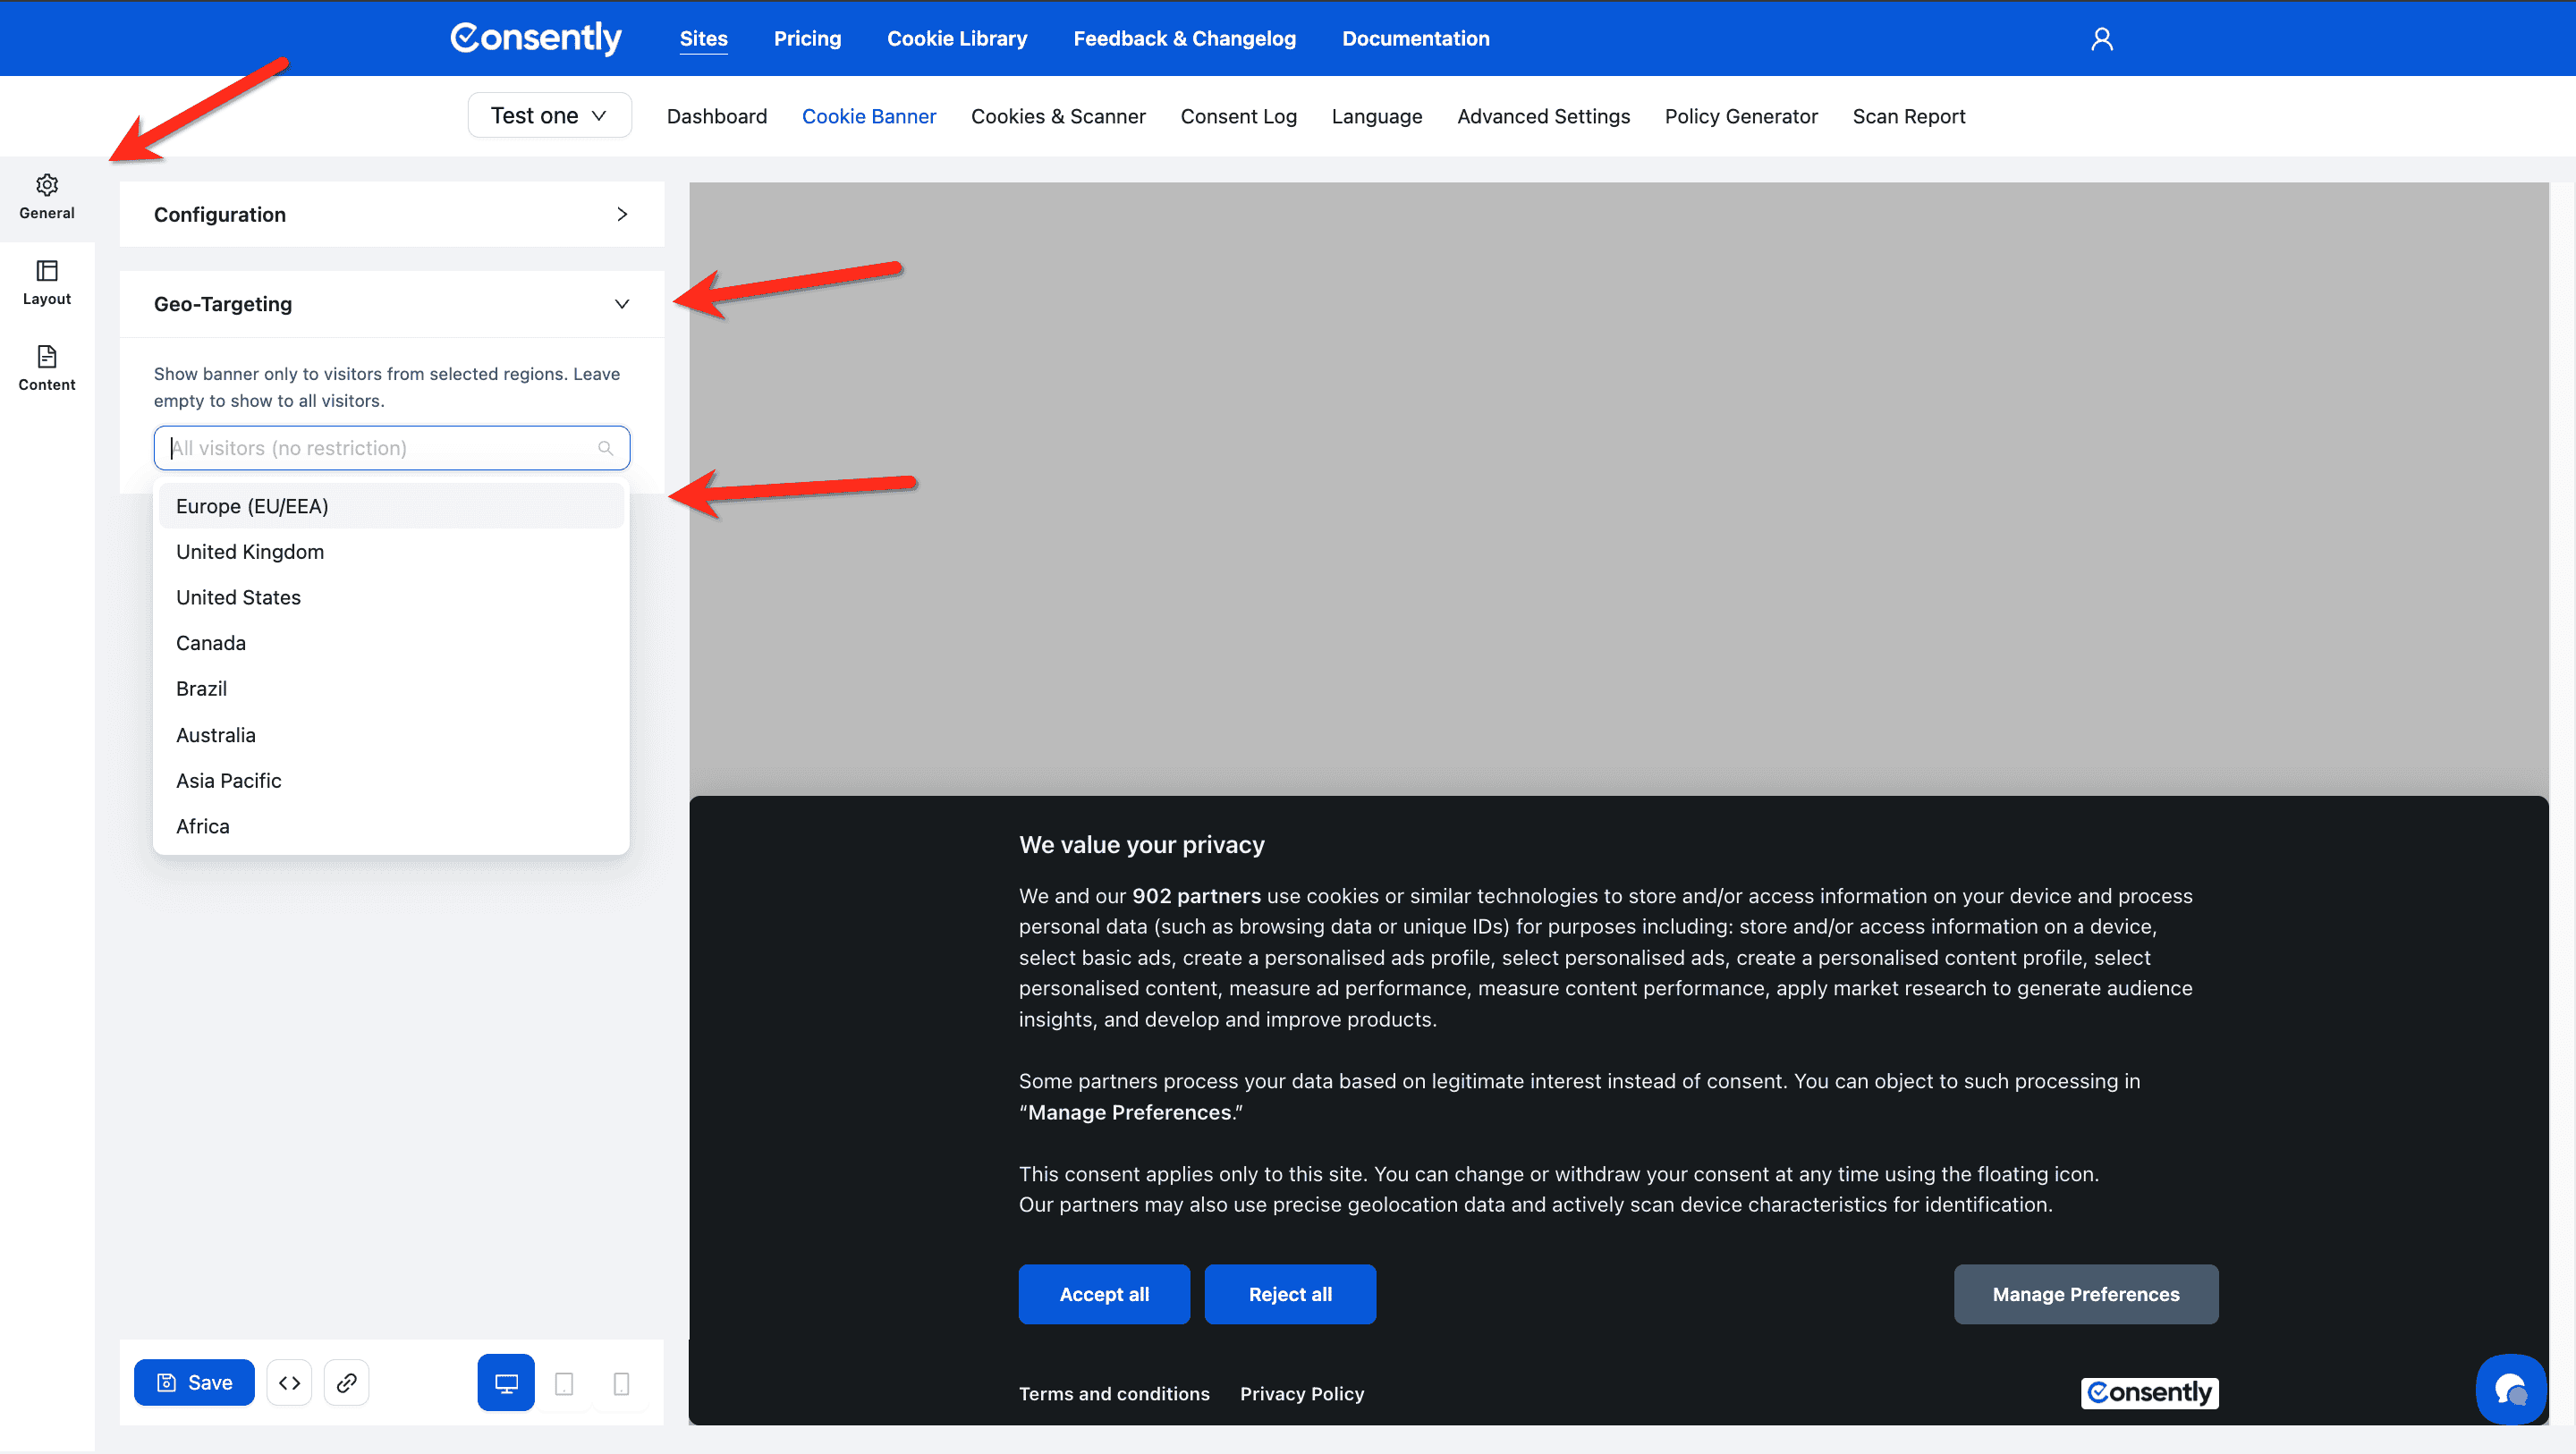
Geo-Targeting
Controls whether the consent banner appears for visitors from specific regions — independently of the consent framework or default consent settings.
When left empty (default): The banner shows to all visitors worldwide — "All visitors (no restriction)."
When regions are selected: The banner only appears to visitors from those regions. Visitors from all other regions see no banner.
Available regions:
Europe (EU/EEA), United Kingdom, United States, Canada, Brazil, Australia, Asia Pacific, Africa
Use Geo-Targeting when you only need compliance for specific markets and want to avoid showing a consent banner to visitors in regions where it isn't legally required.
💡 Tip: Geo-Targeting controls banner visibility. Default Consent by Region controls the consent state for visitors who do see the banner. These two settings work independently and can be combined.
What's Next
Now that you've chosen your compliance framework:
Configure banner layout to choose display style and position
Customize banner content to edit text and messages (if using Basic or Google CM)
Design your banner to match your brand colors
Troubleshooting
I'm not sure which framework to choose
Solution: Answer these questions:
Do you use Google Ads, AdSense, or GA4? → If yes, choose Framework 2 or 4
Do you use programmatic advertising or IAB ad vendors? → If yes, choose Framework 3 or 4
If you answered yes to BOTH questions above → Choose Framework 4
If you answered no to BOTH questions → Choose Framework 1
Can I change frameworks later?
Yes, you can change frameworks at any time.
Solution:
Navigate back to Cookie Banner → General → Configuration
Select a different Compliance Framework
Click Save
Republish your banner
Important: Changing from a customizable framework (1 or 2) to a TCF framework (3 or 4) will replace your custom text with IAB-standardized content.
Why can't I customize banner text with TCF?
Why this happens: IAB TCF 2.3 requires standardized purpose descriptions to ensure consistent disclosure across all websites.
Solution: If you need custom banner text, use Framework 1 (Basic) or Framework 2 (Google Consent Mode). However, you won't have IAB TCF compliance, which may be required for programmatic advertising partnerships.
What if I only have visitors from one region?
Solution: Use the "Default Consent by Region" settings to configure regional behavior:
If all visitors are from GDPR regions → Select that region in "Regions requiring consent"
If all visitors are from US → Enable "US State Laws / CCPA" toggle
This optimizes the banner for your specific audience
Do I need TCF if I only use Google AdSense?
No. Google AdSense works with Framework 2 (Google Consent Mode without TCF).
Solution: Choose Framework 2 unless you:
Also work with other ad networks or exchanges
Need IAB TCF certification for business partnerships
Use programmatic advertising platforms beyond Google
Related Pages
IAB TCF Settings — Detailed TCF configuration options
Google Consent Mode v2 — How Google Consent Mode works
GDPR Compliance — Understanding GDPR requirements