

TL;DR: Dashboard → Cookie Banner → Layout section → Select display style and position → Configure display controls → Save. Controls how and where your consent banner appears on your website.
Overview
Banner layout and positioning determine where and how your consent banner appears to visitors. Choose from four display styles, set the banner's screen position, and configure interaction controls to match your website's design and user experience goals.
Before You Begin
Make sure you have:
Selected your consent template (GDPR or US State Laws)
Access to your Consently dashboard
Time required: About 3 minutes
How to Configure Banner Layout
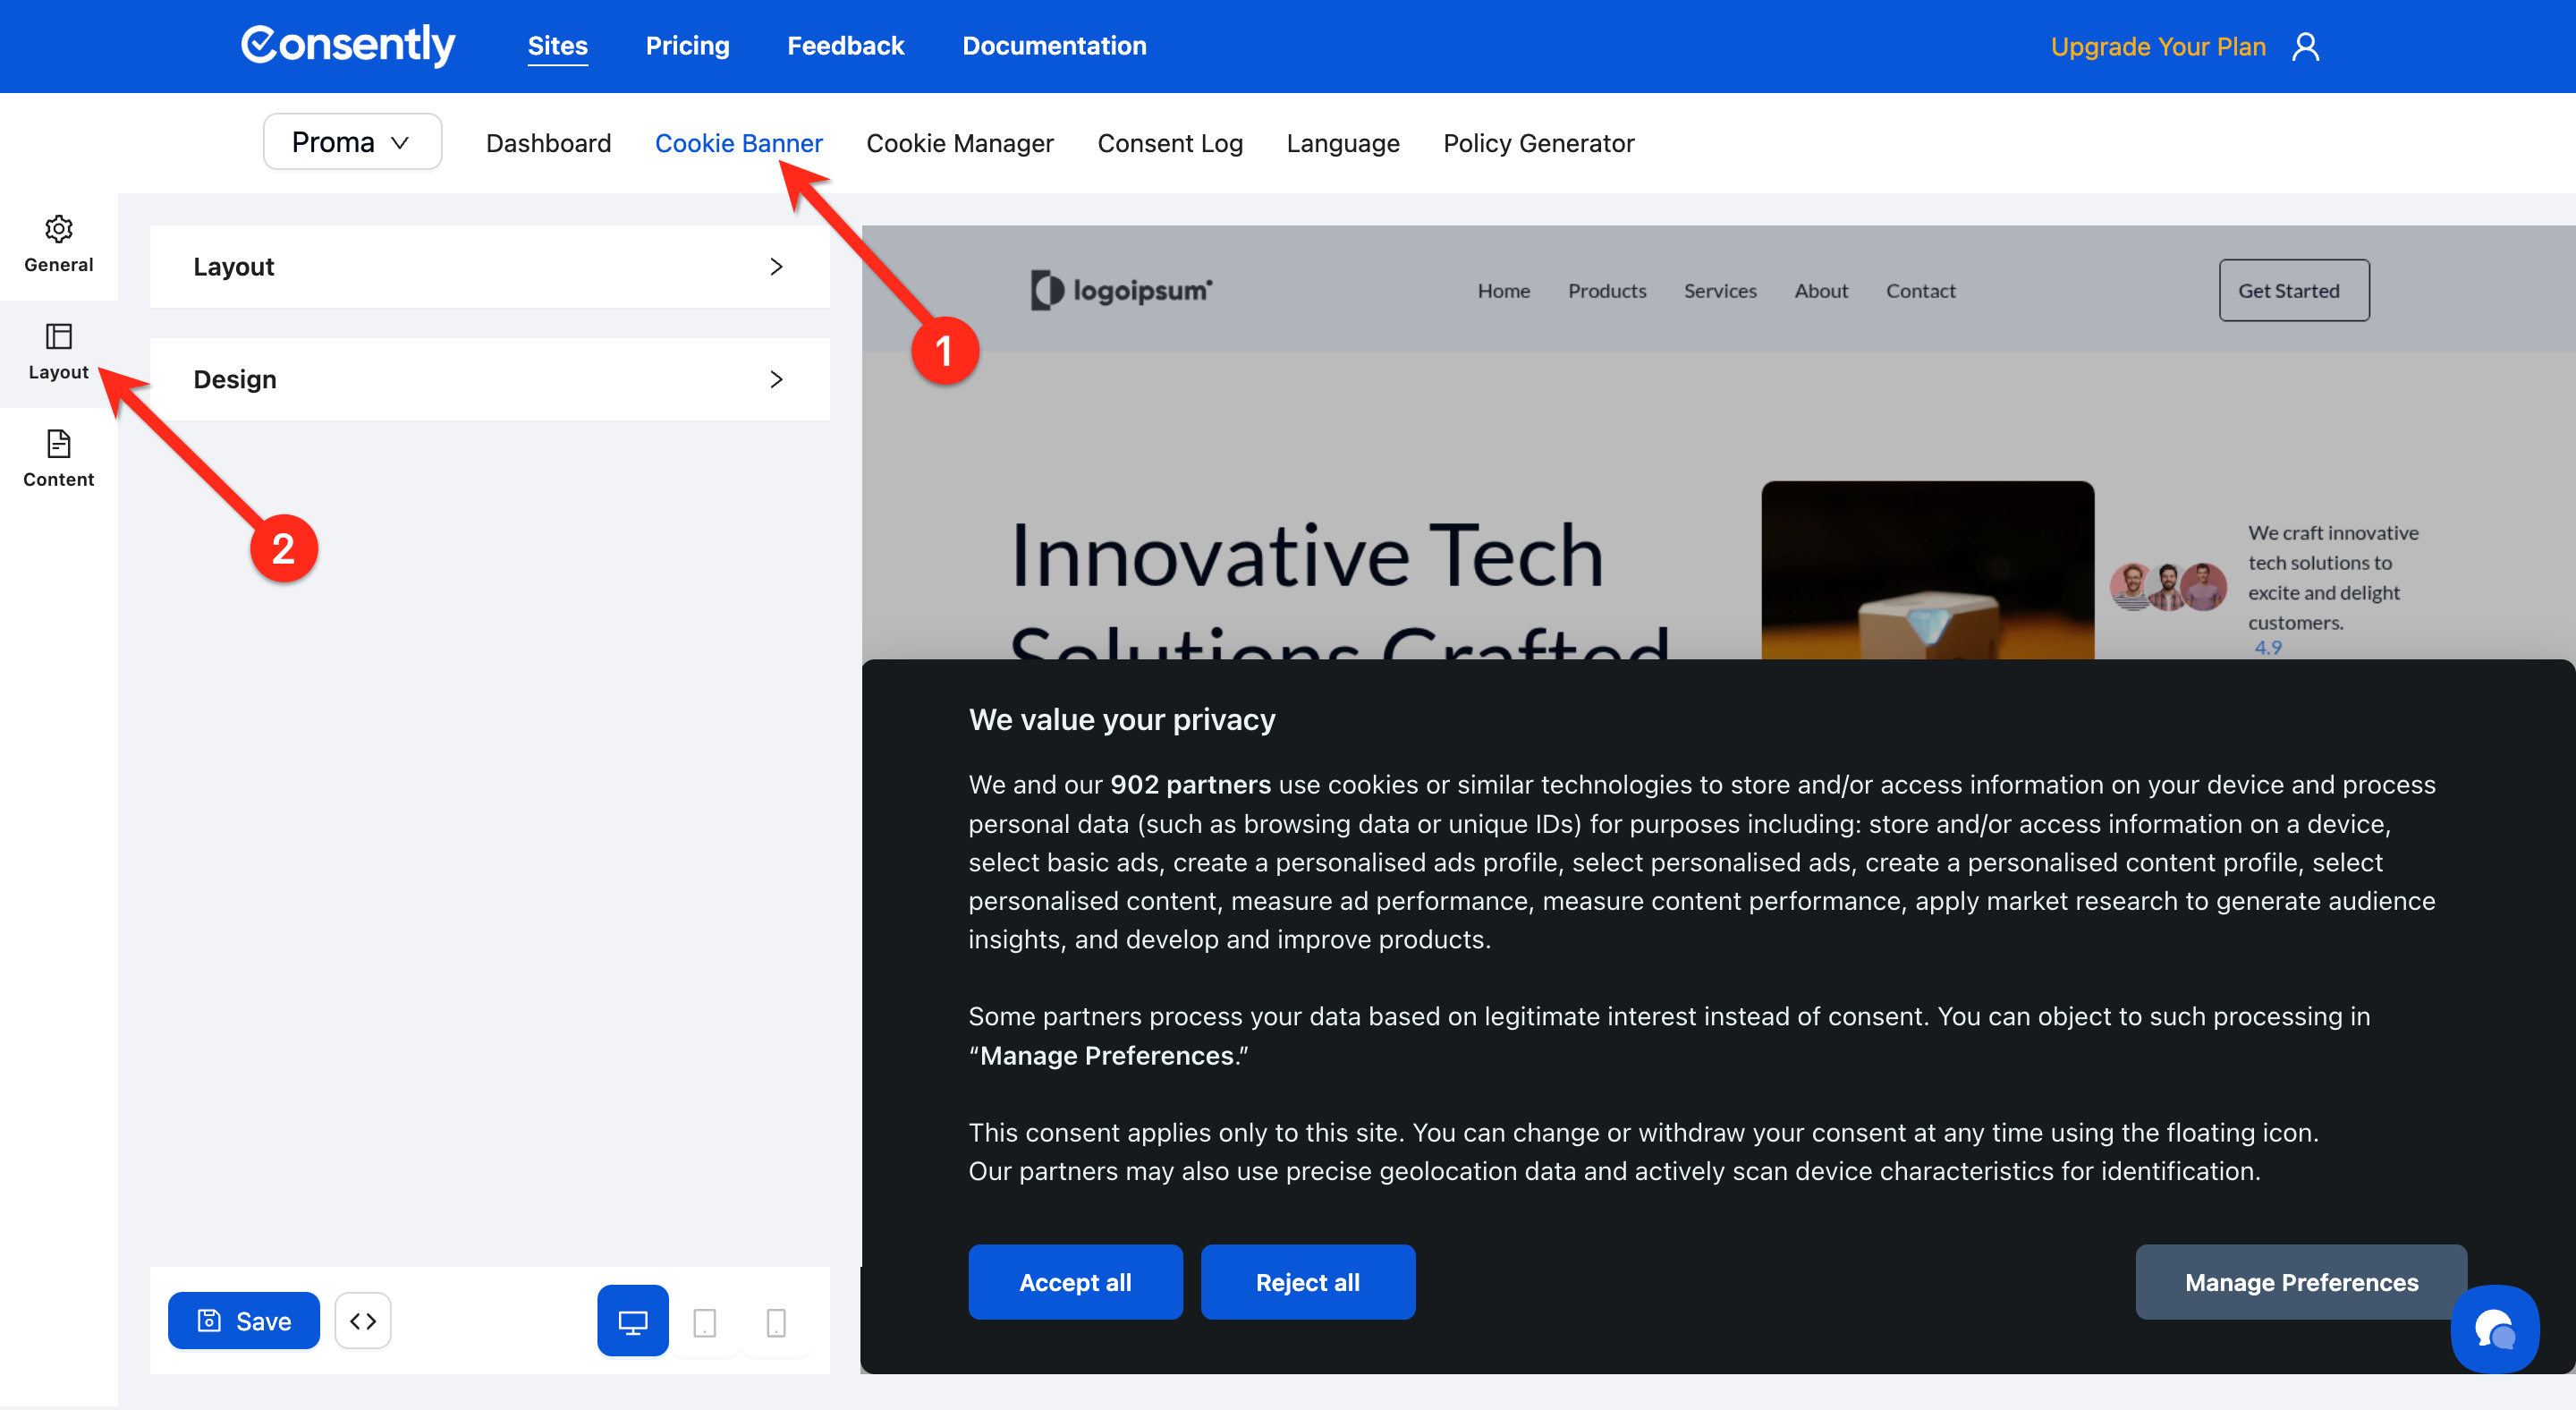
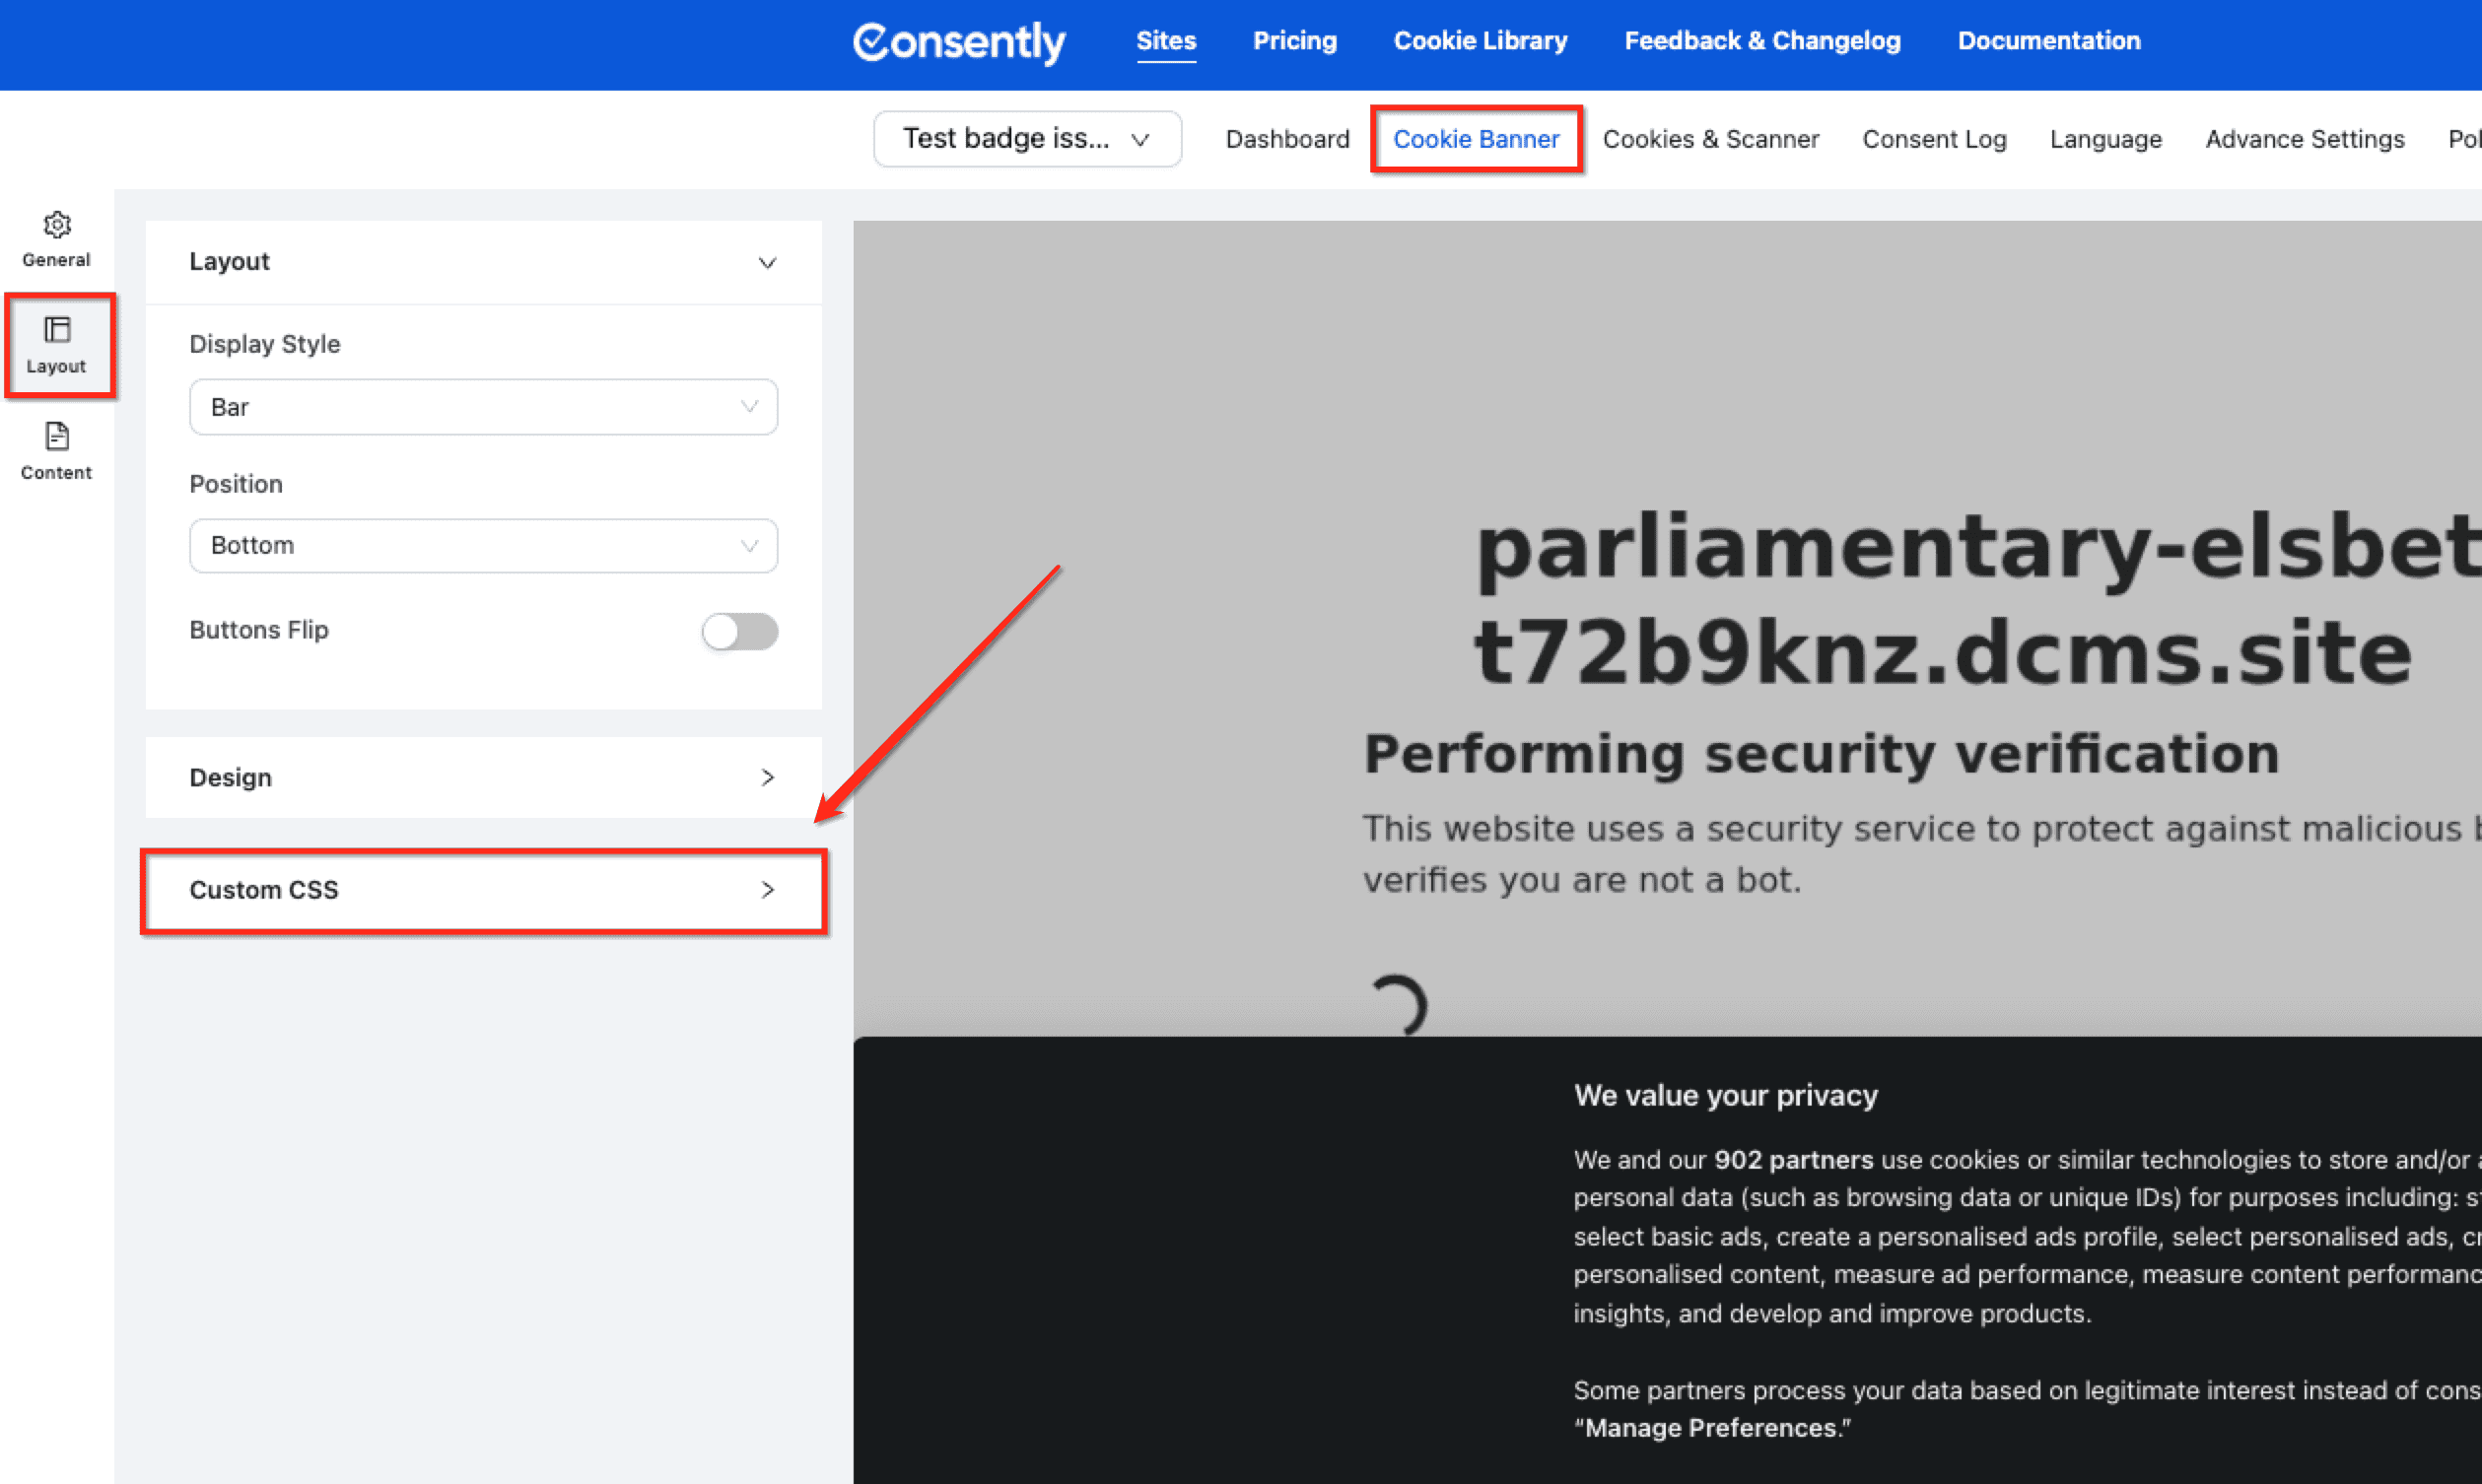
Step 1: Navigate to the Layout section
From your site dashboard, click Cookie Banner in the top navigation, then locate the Layout section in the left sidebar.
Step 2: Choose a display style
Select one of the three display styles from the Display Style dropdown in the Layout section:
Box — A compact modal box that appears on the screen
Bar — A horizontal banner across the top or bottom of the screen (least intrusive, recommended for most sites)
Cloud — A centered modal that overlays the page
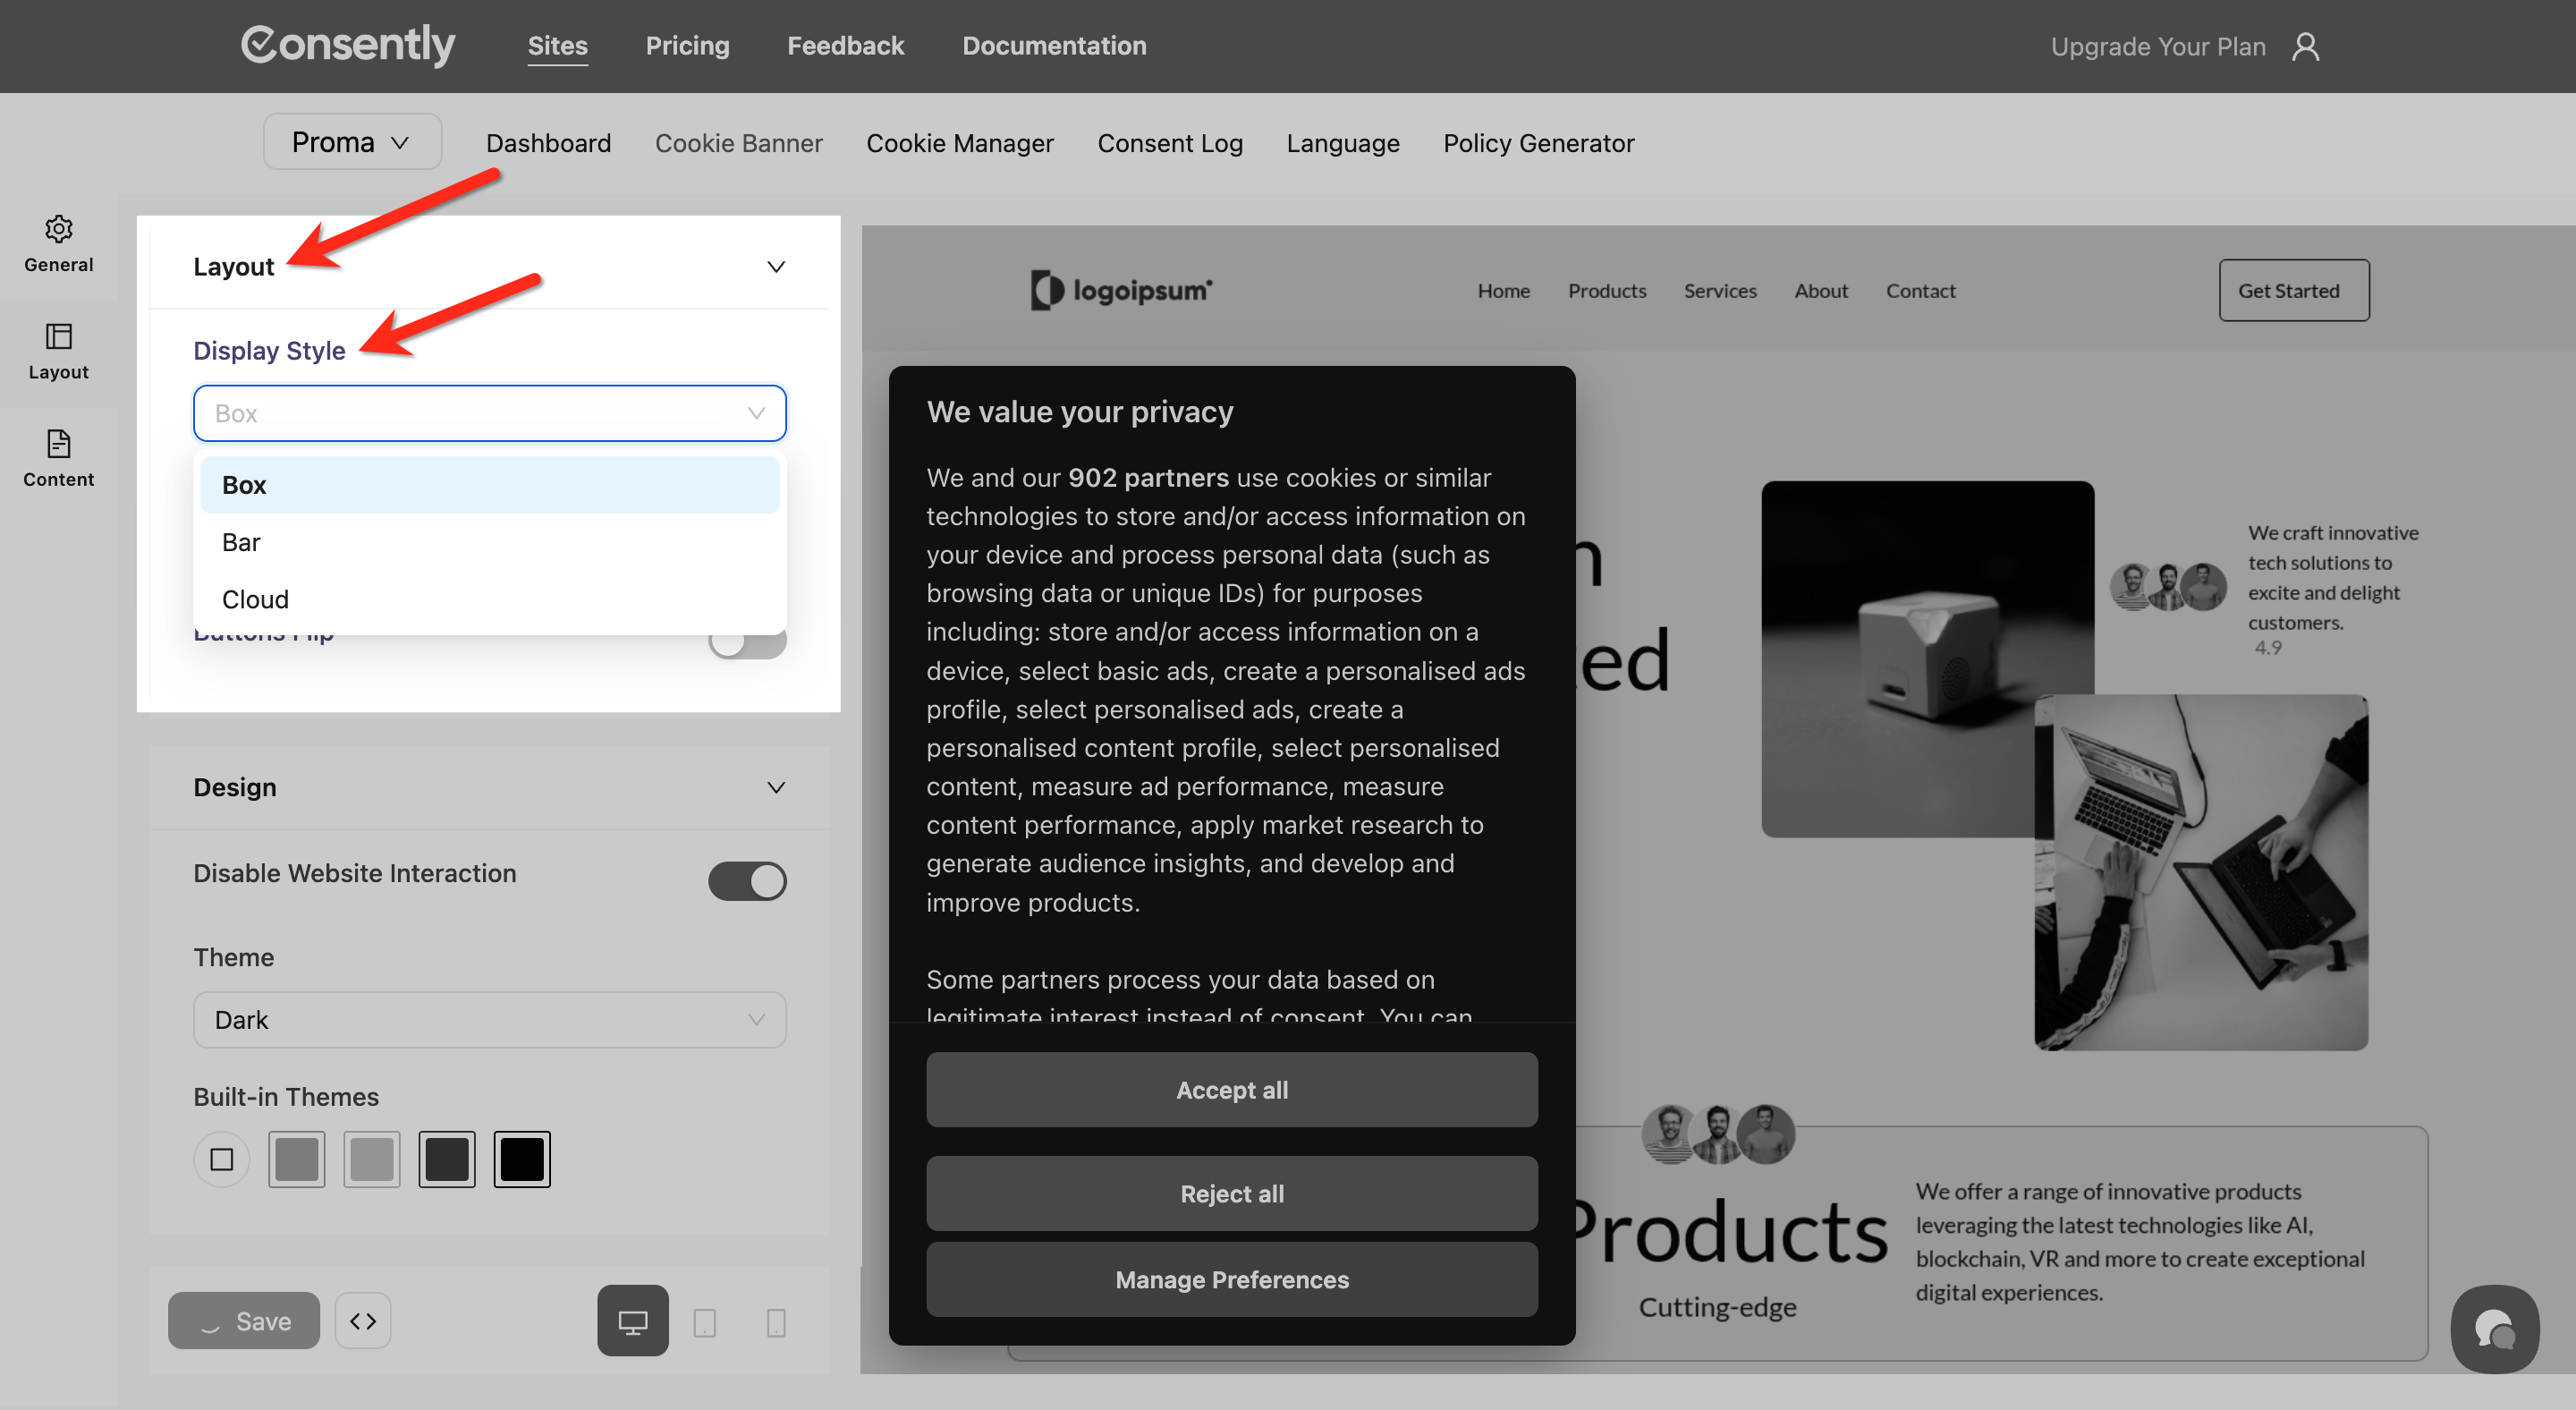
💡 Tip: Bar layouts work best for most websites as they're non-intrusive while remaining visible.
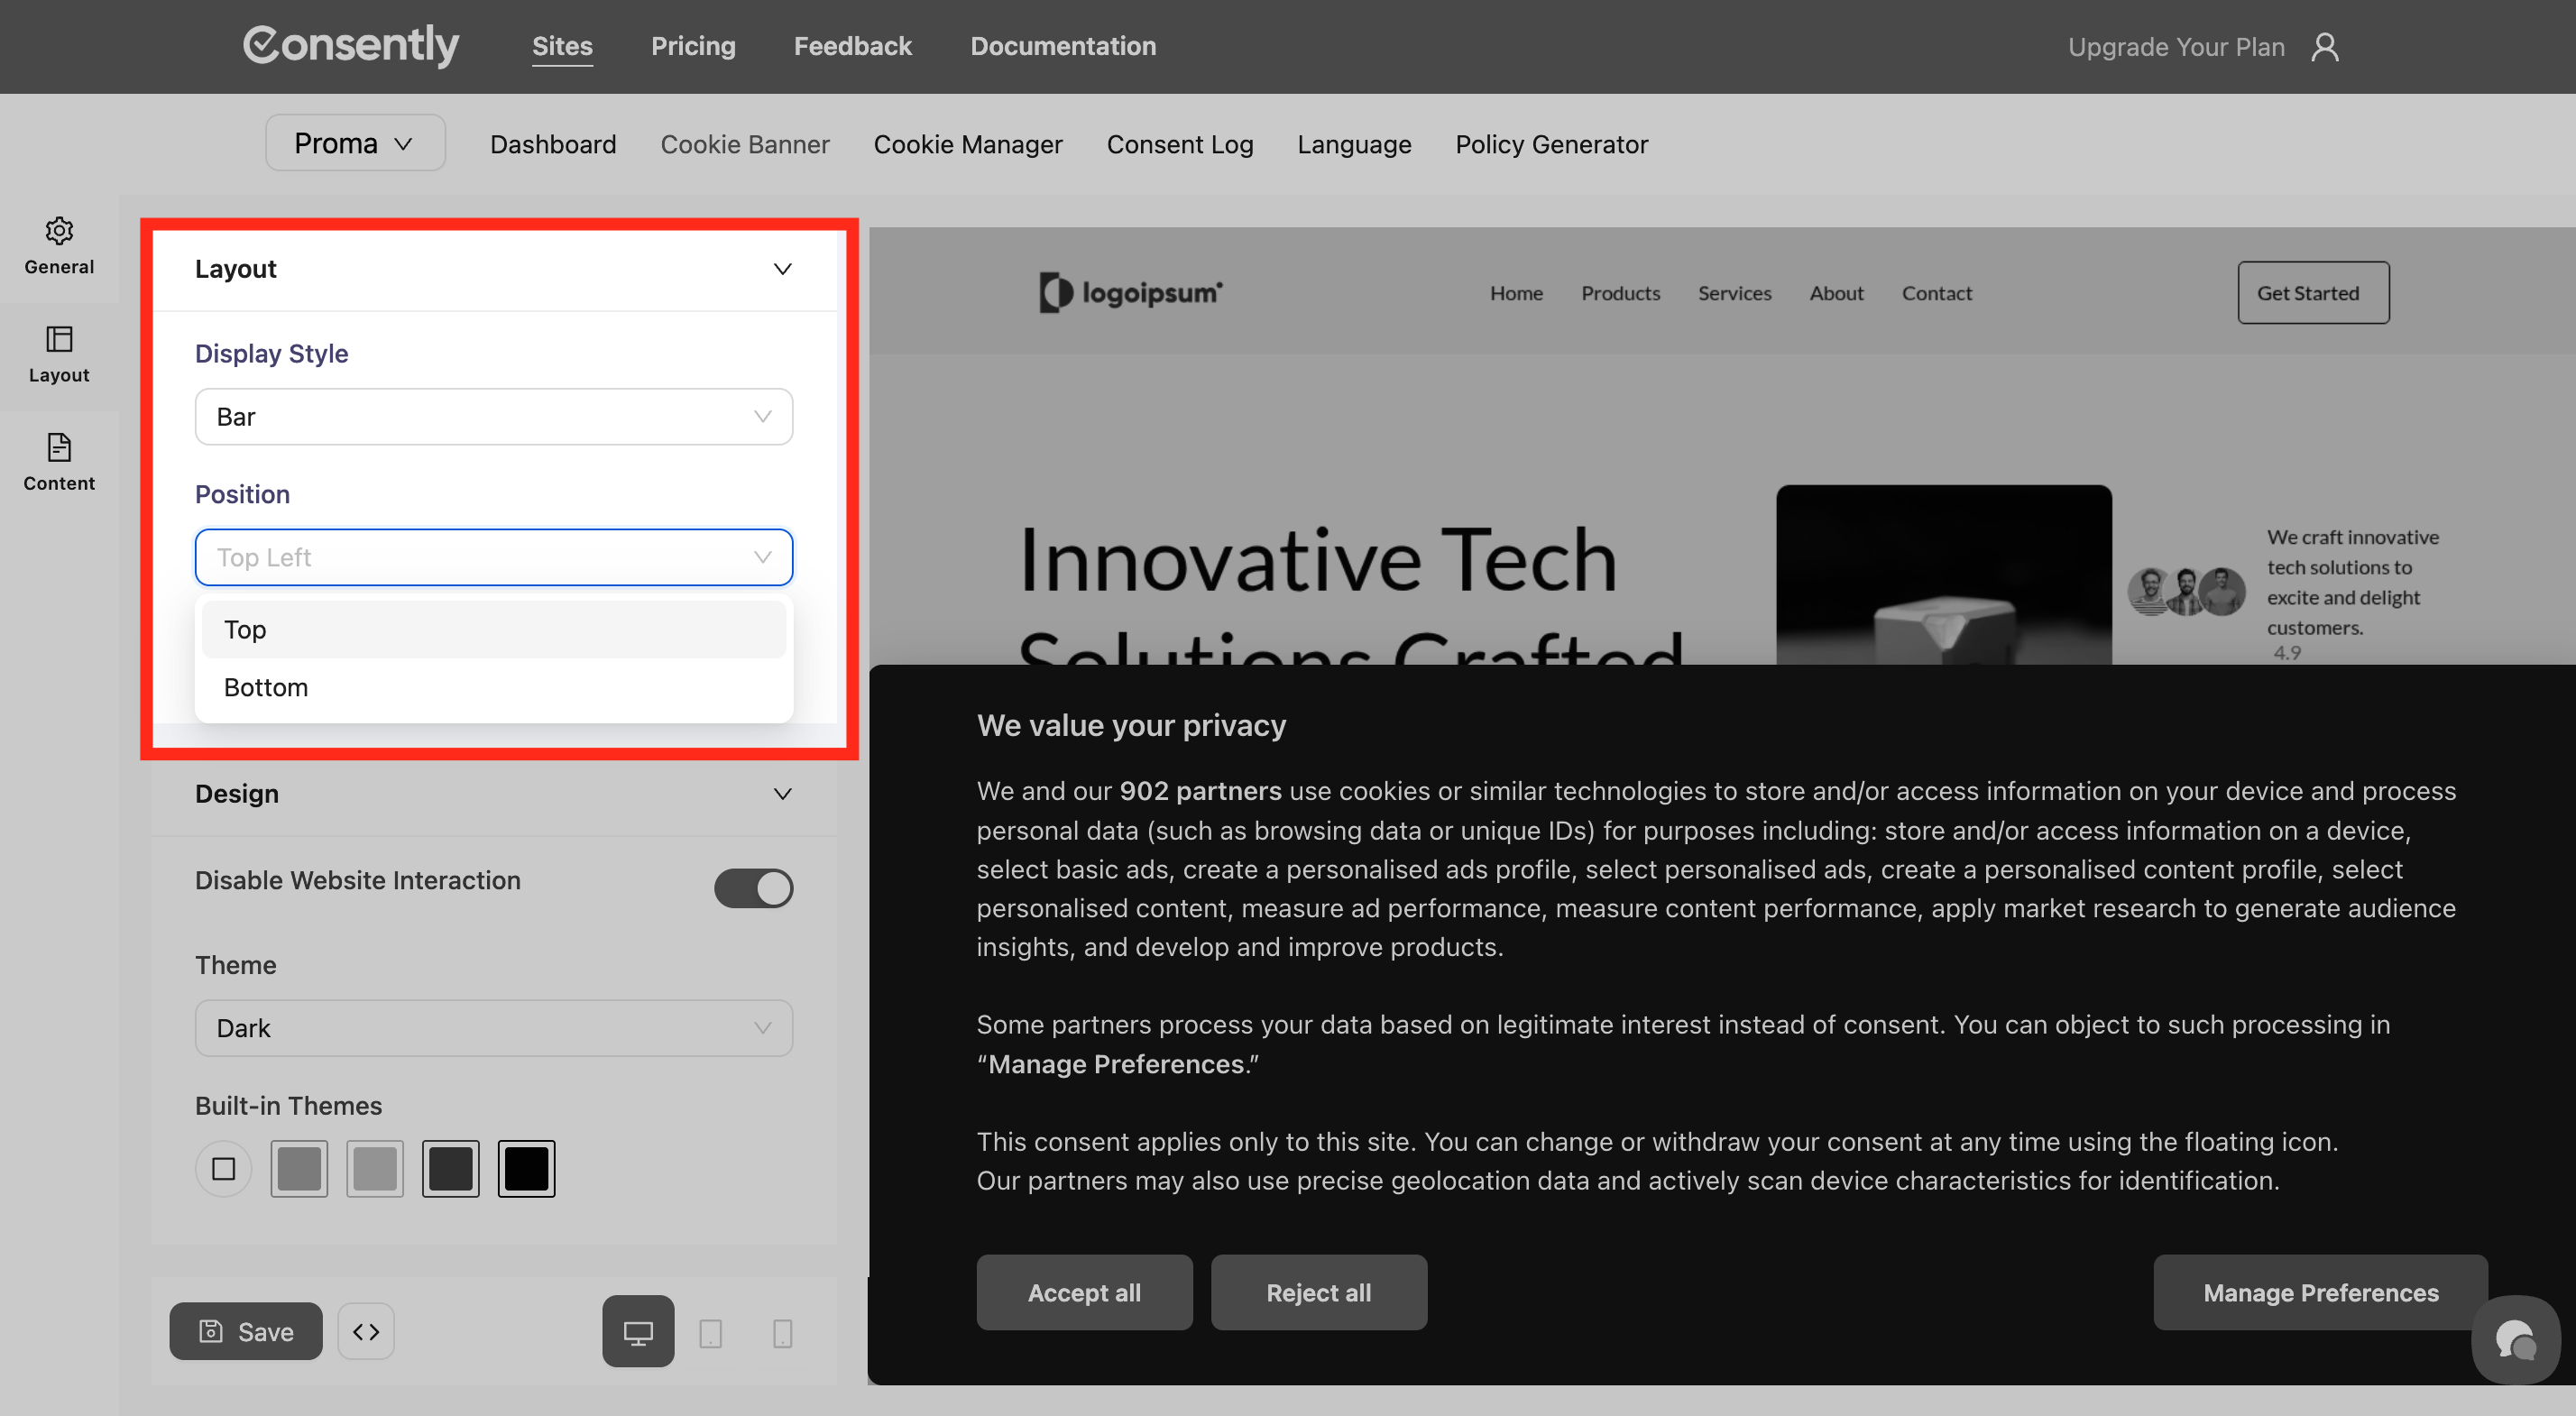
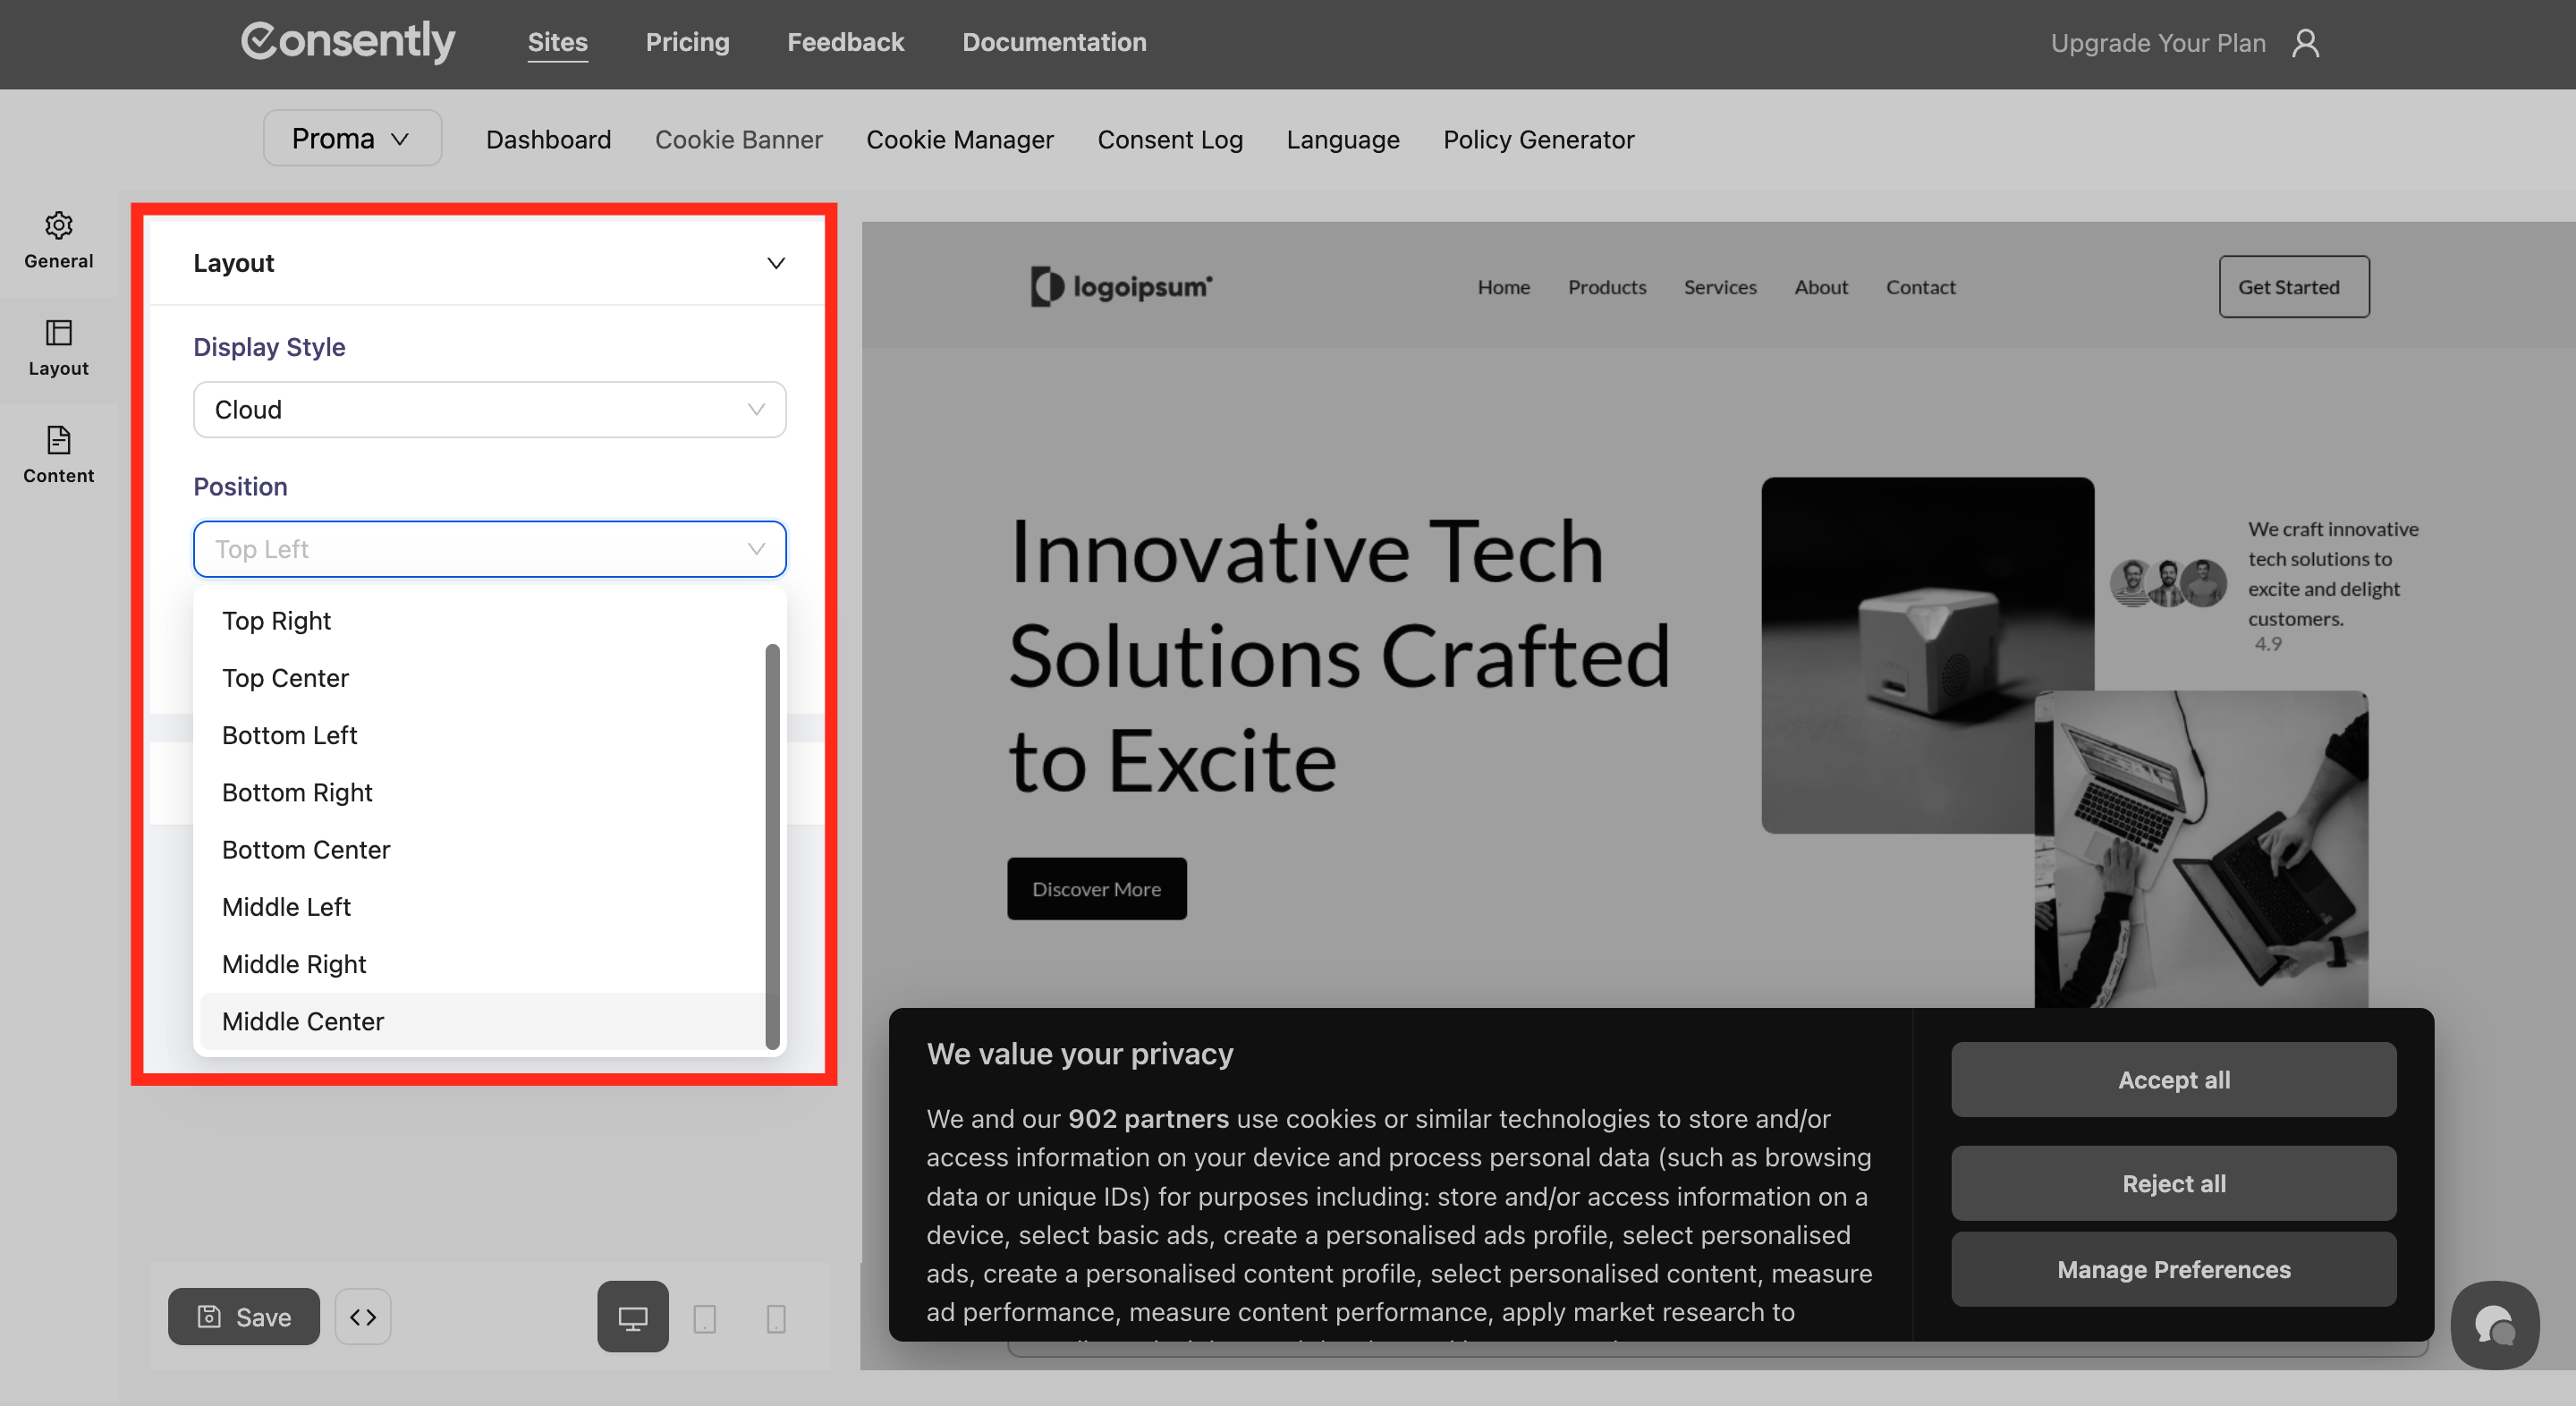
Step 3: Set the position
Choose where the banner appears using the Position dropdown in the Layout section:
For the Bar display style, only the following positions are available:
Top — Banner appears at the top of the screen
Bottom — Banner appears at the bottom of the screen (recommended for Bar style)
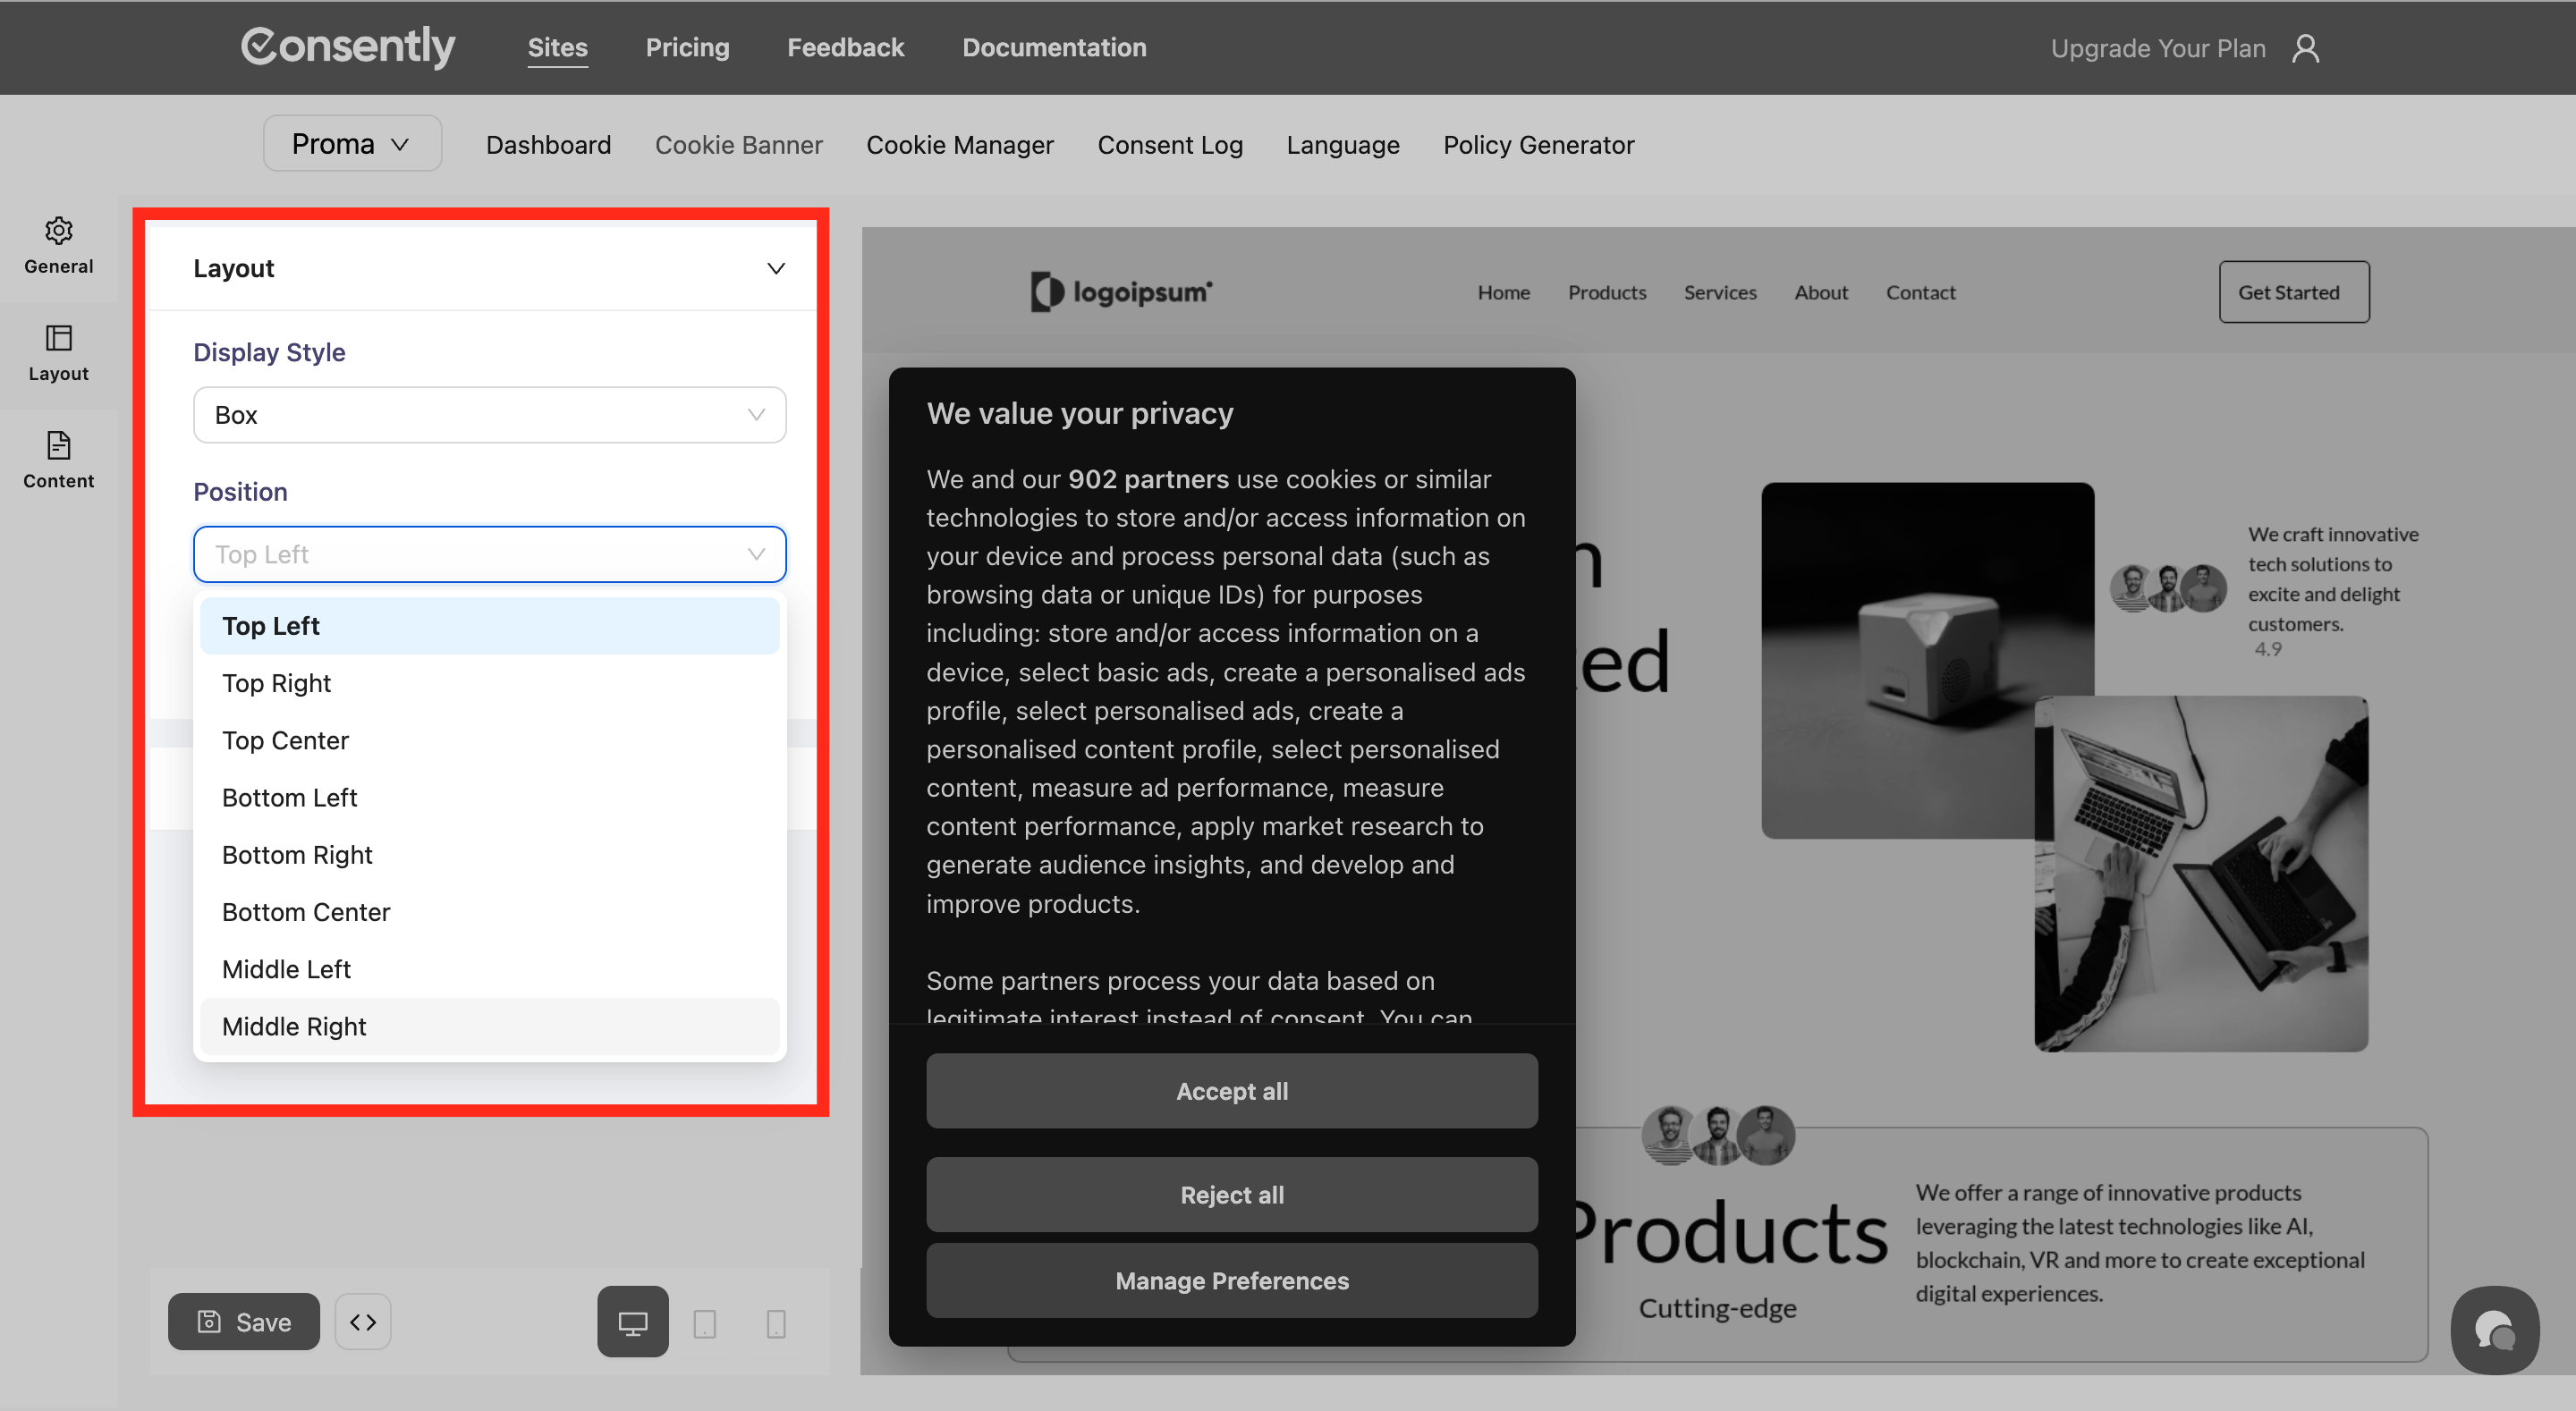
For the Box and Cloud display styles, all position options are available:
Top Left
Top Center
Top Right
Middle Left
Middle Center
Middle Right
Bottom Left
Bottom Center
Bottom Right
Step 4: Configure display controls
Toggle additional controls based on your requirements:
Buttons Flip (Layout option): Enable to reverse the order of action buttons.
When turned on: For example, Reject All will appear before Accept All, or Manage Preferences will appear before both Reject All and Accept All.

Disable Website Interaction (Display option): Enable this to add an overlay that prevents users from interacting with your website until they make a consent choice.
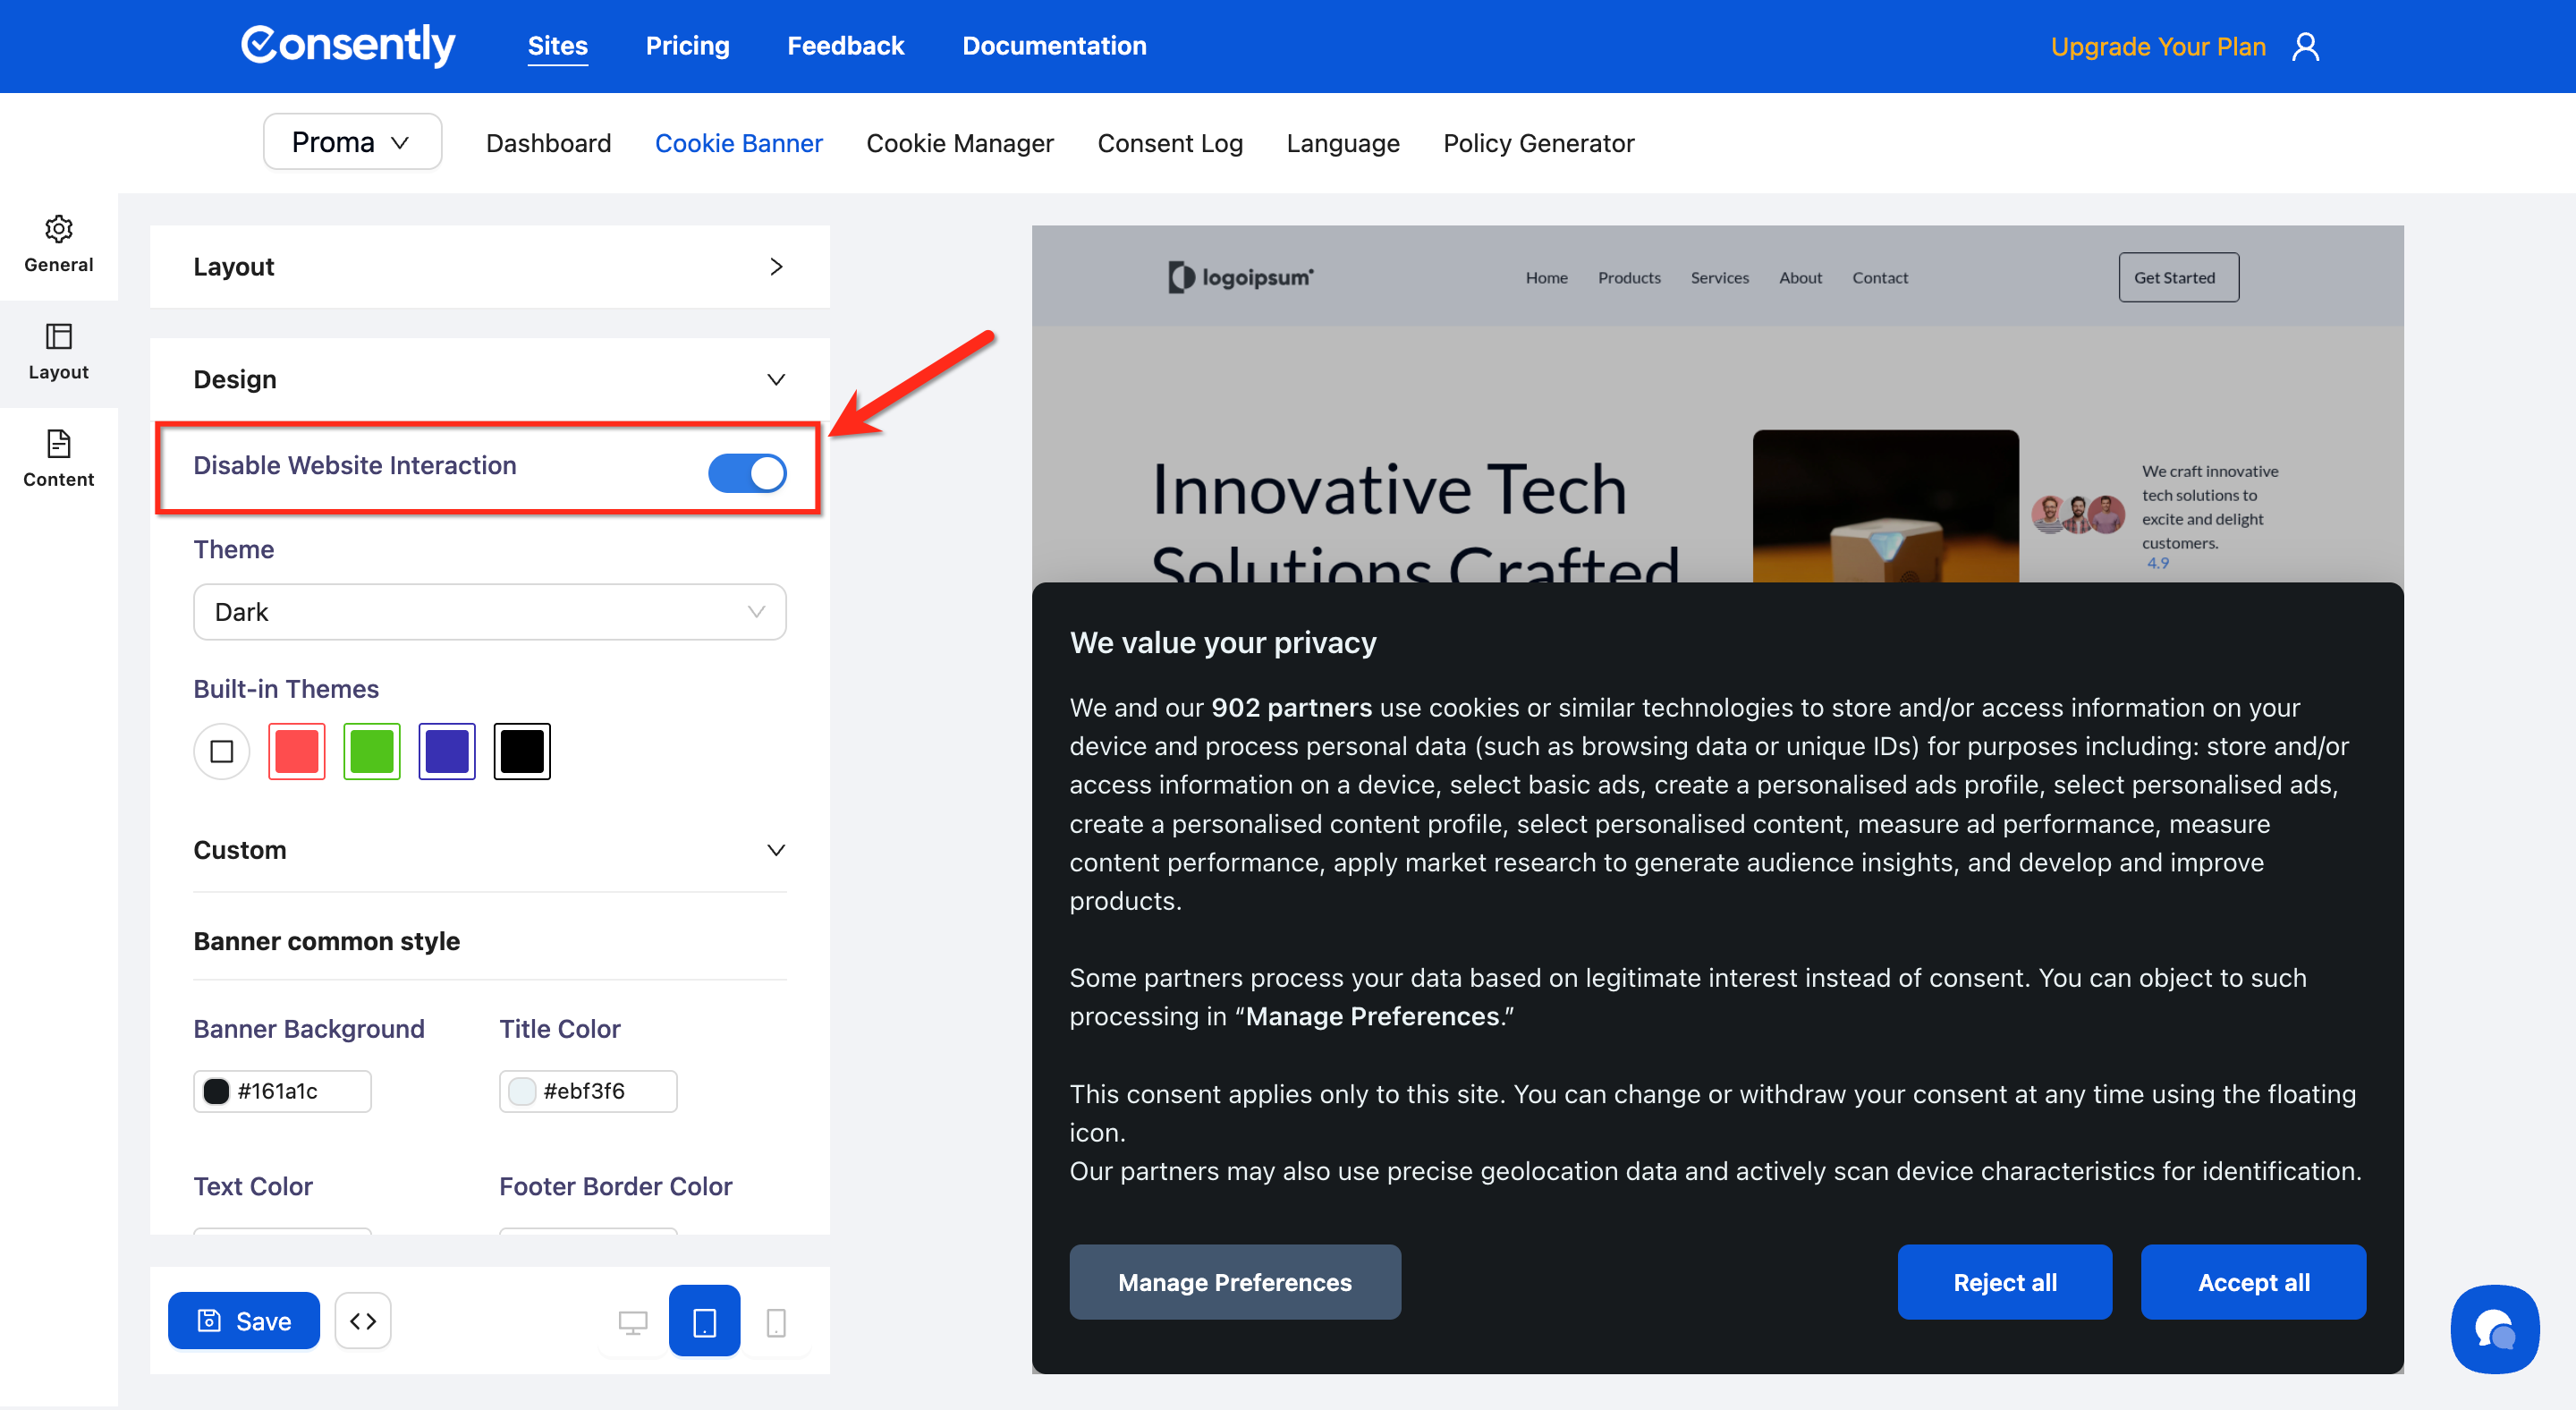
⚠️ Important: Disabling website interaction creates a "consent wall" that may not be compliant in all jurisdictions. Consult your legal advisor if serving EU visitors.
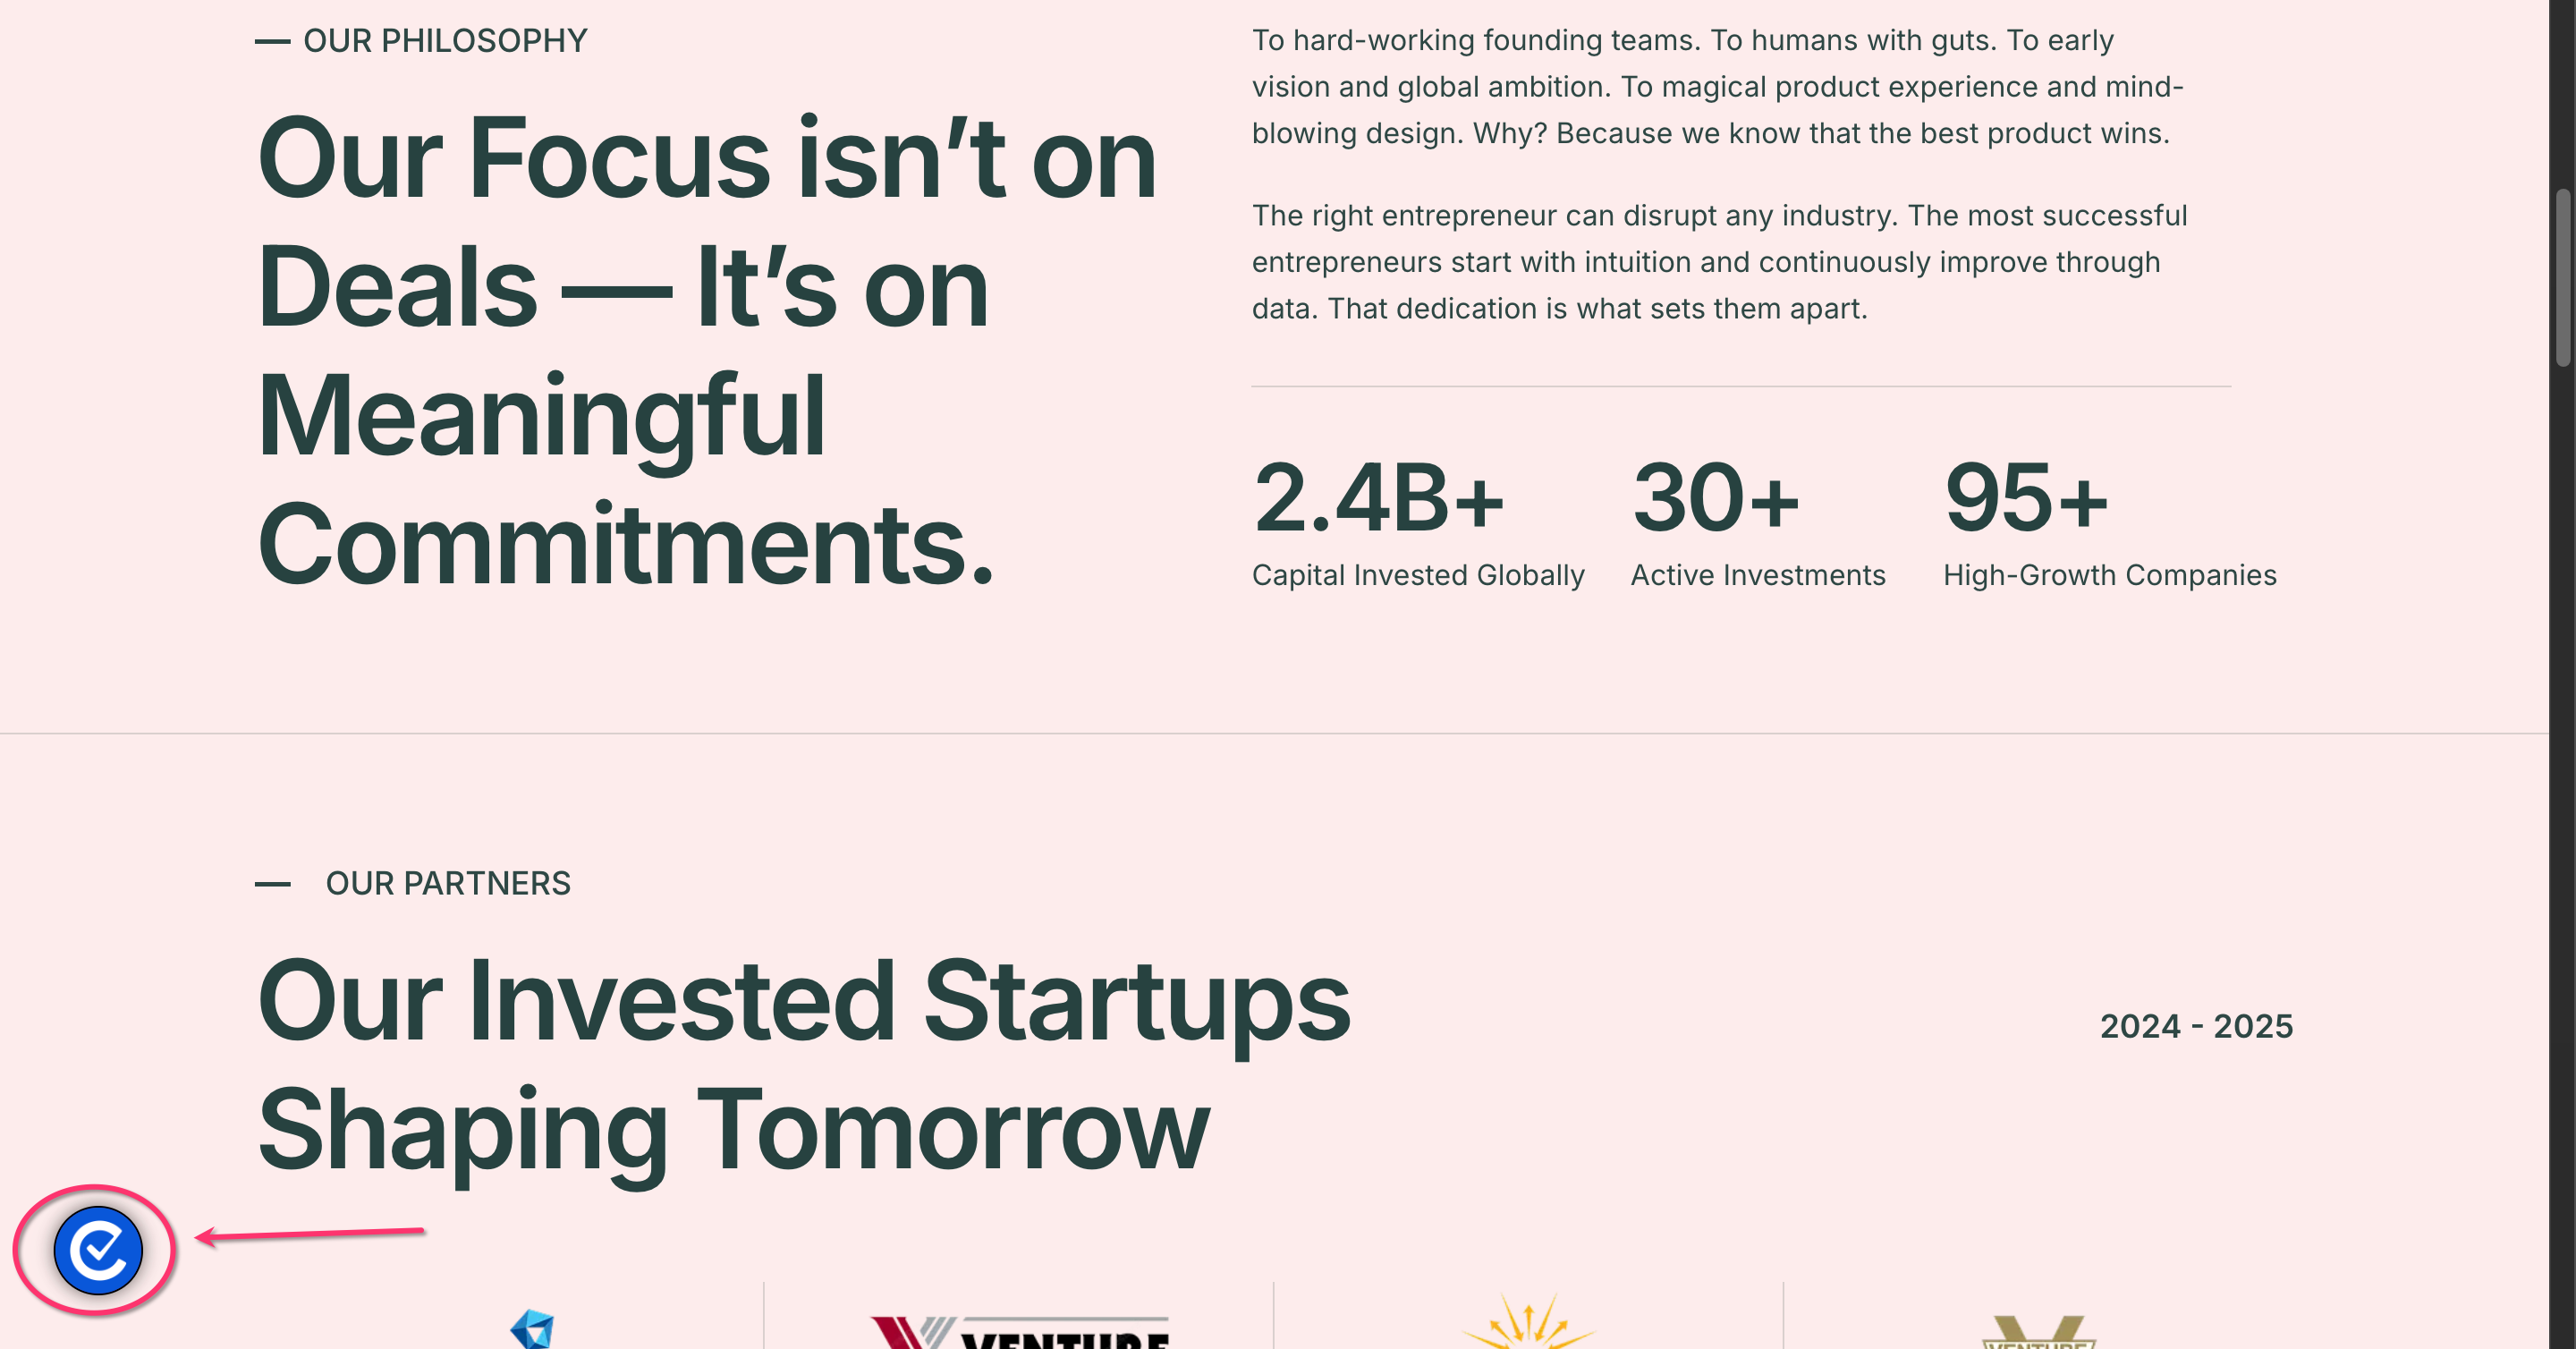
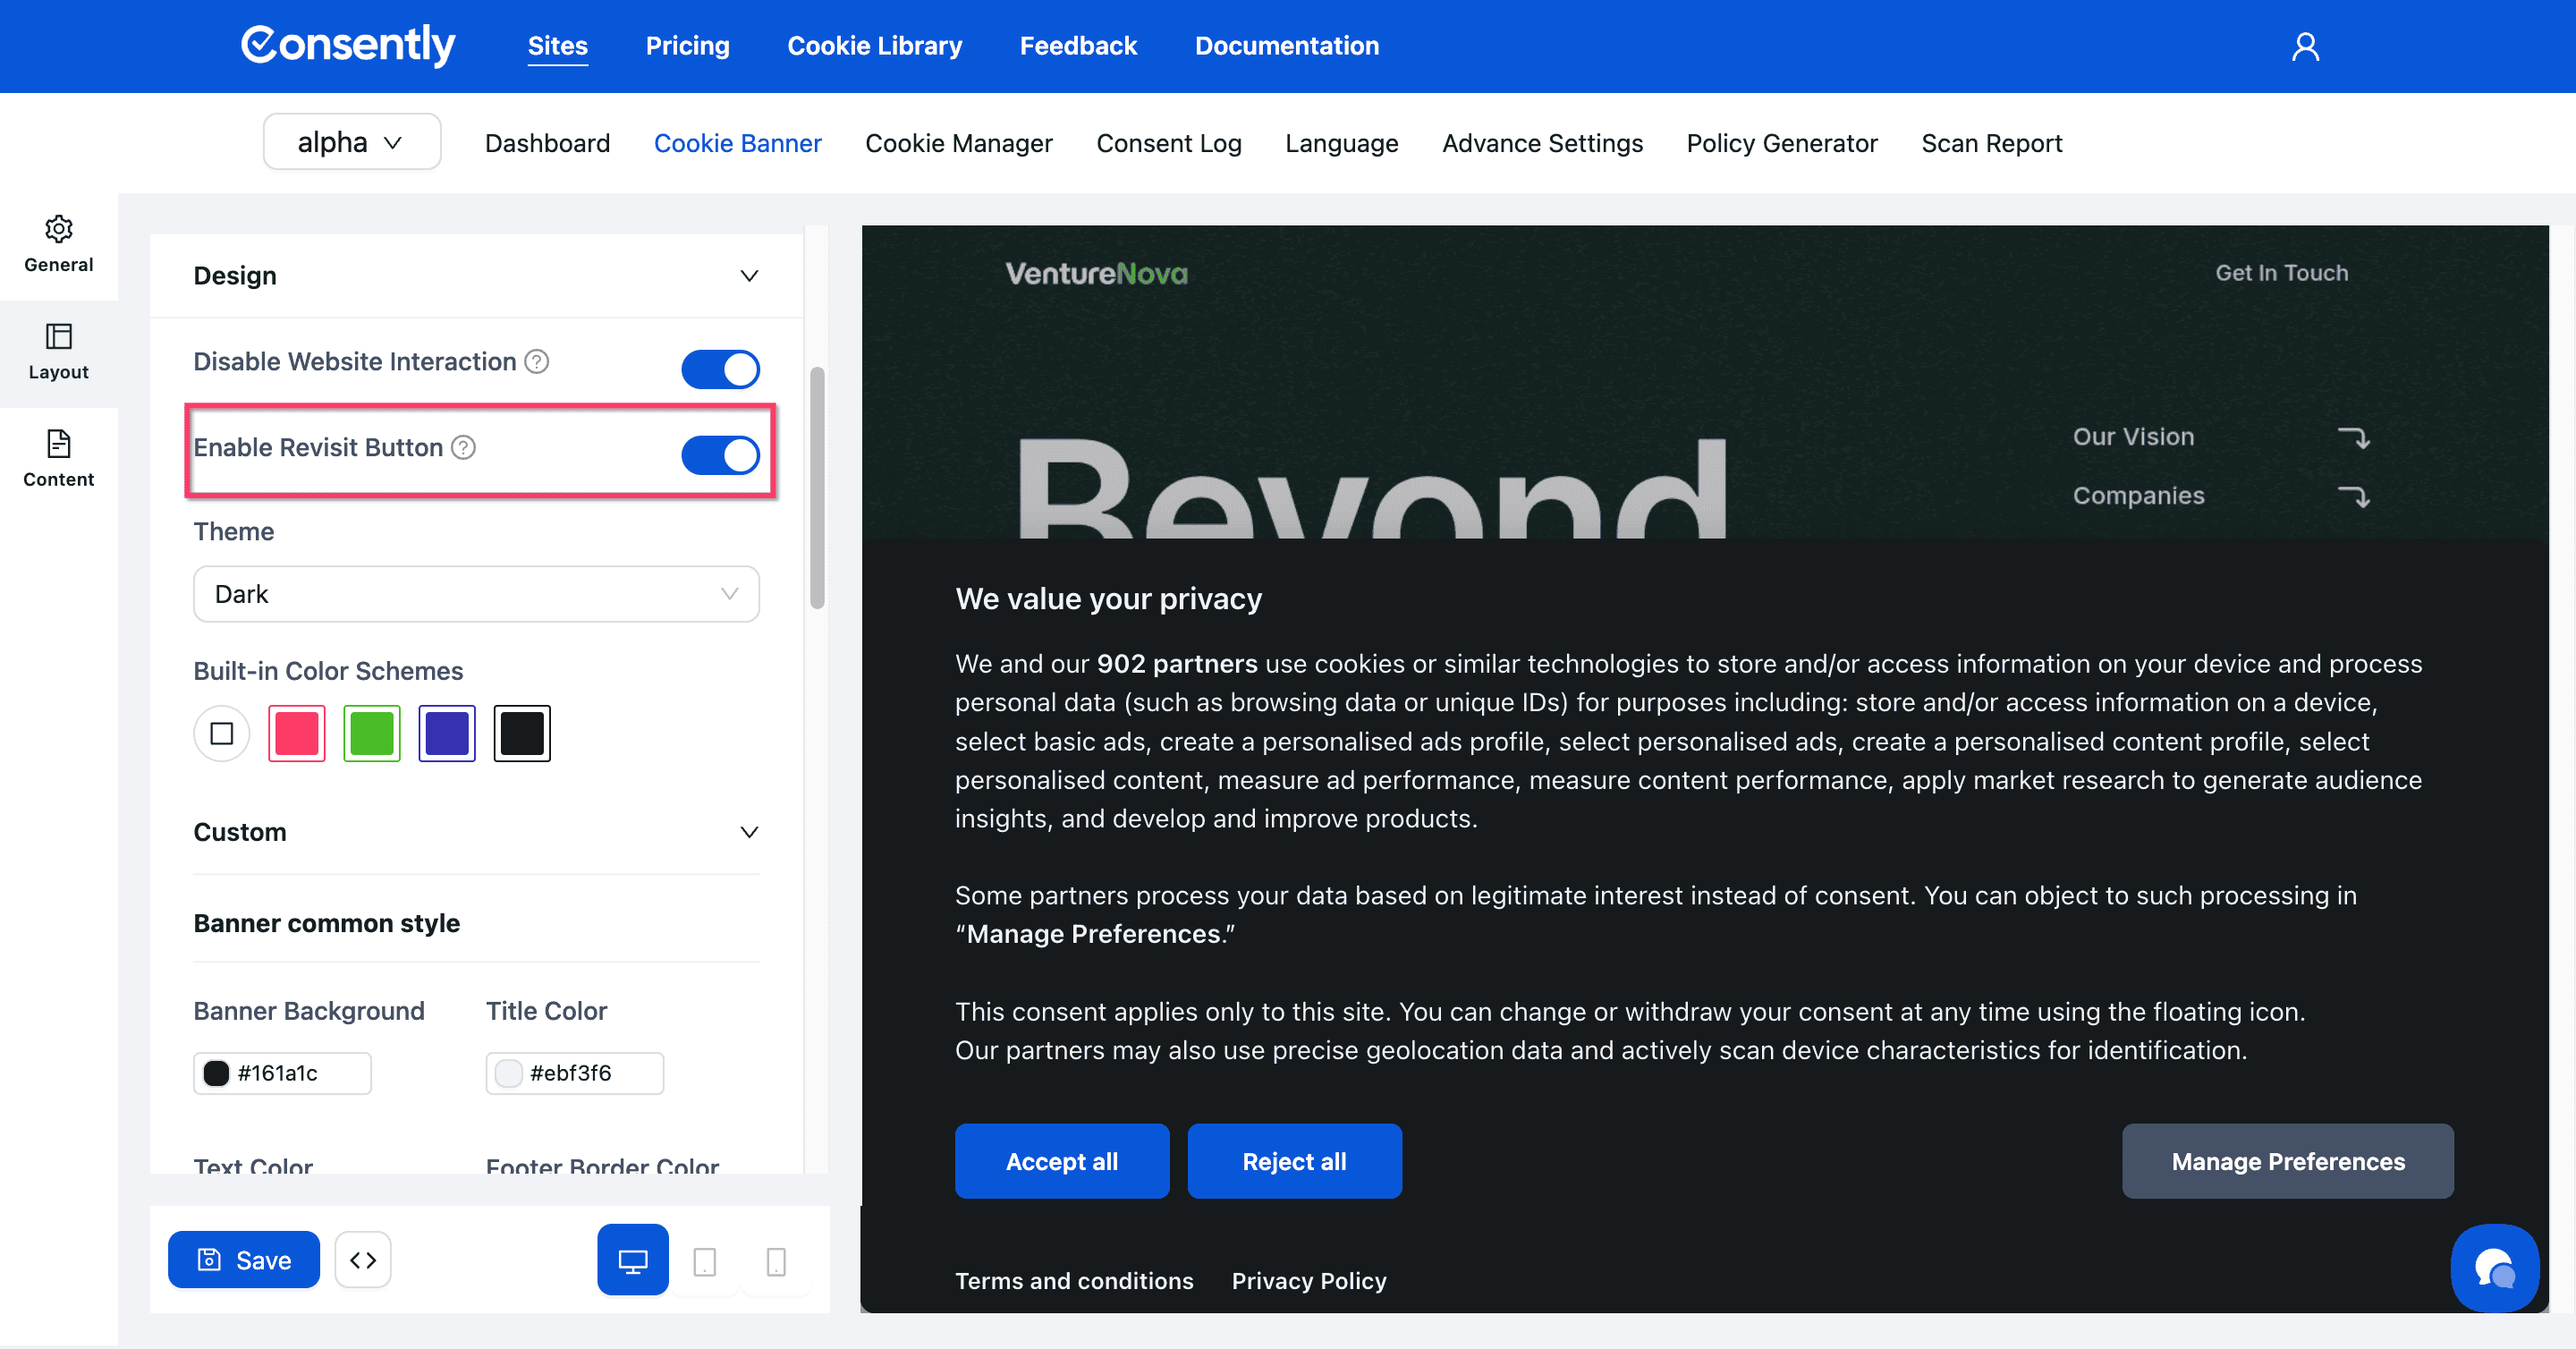
Enable Revisit Button (Floating Button): Enable this to add a floating button on the site that lets users review and update their consent preferences anytime after their initial selection.
Here is the Revisit Button on a site:
Turn Enable Revisit Button On/Off
⚠️ Important: Disabling this option will hide the preference center as soon as visitor clicks accept or reject. Which will prevent visitors from modifying their consent preferences and may lead to regulatory compliance issues. Please proceed at your own discretion.
💡 Tip: If you’d like to use your own preferences Center button, please follow our guide on setting up a custom preference center button.
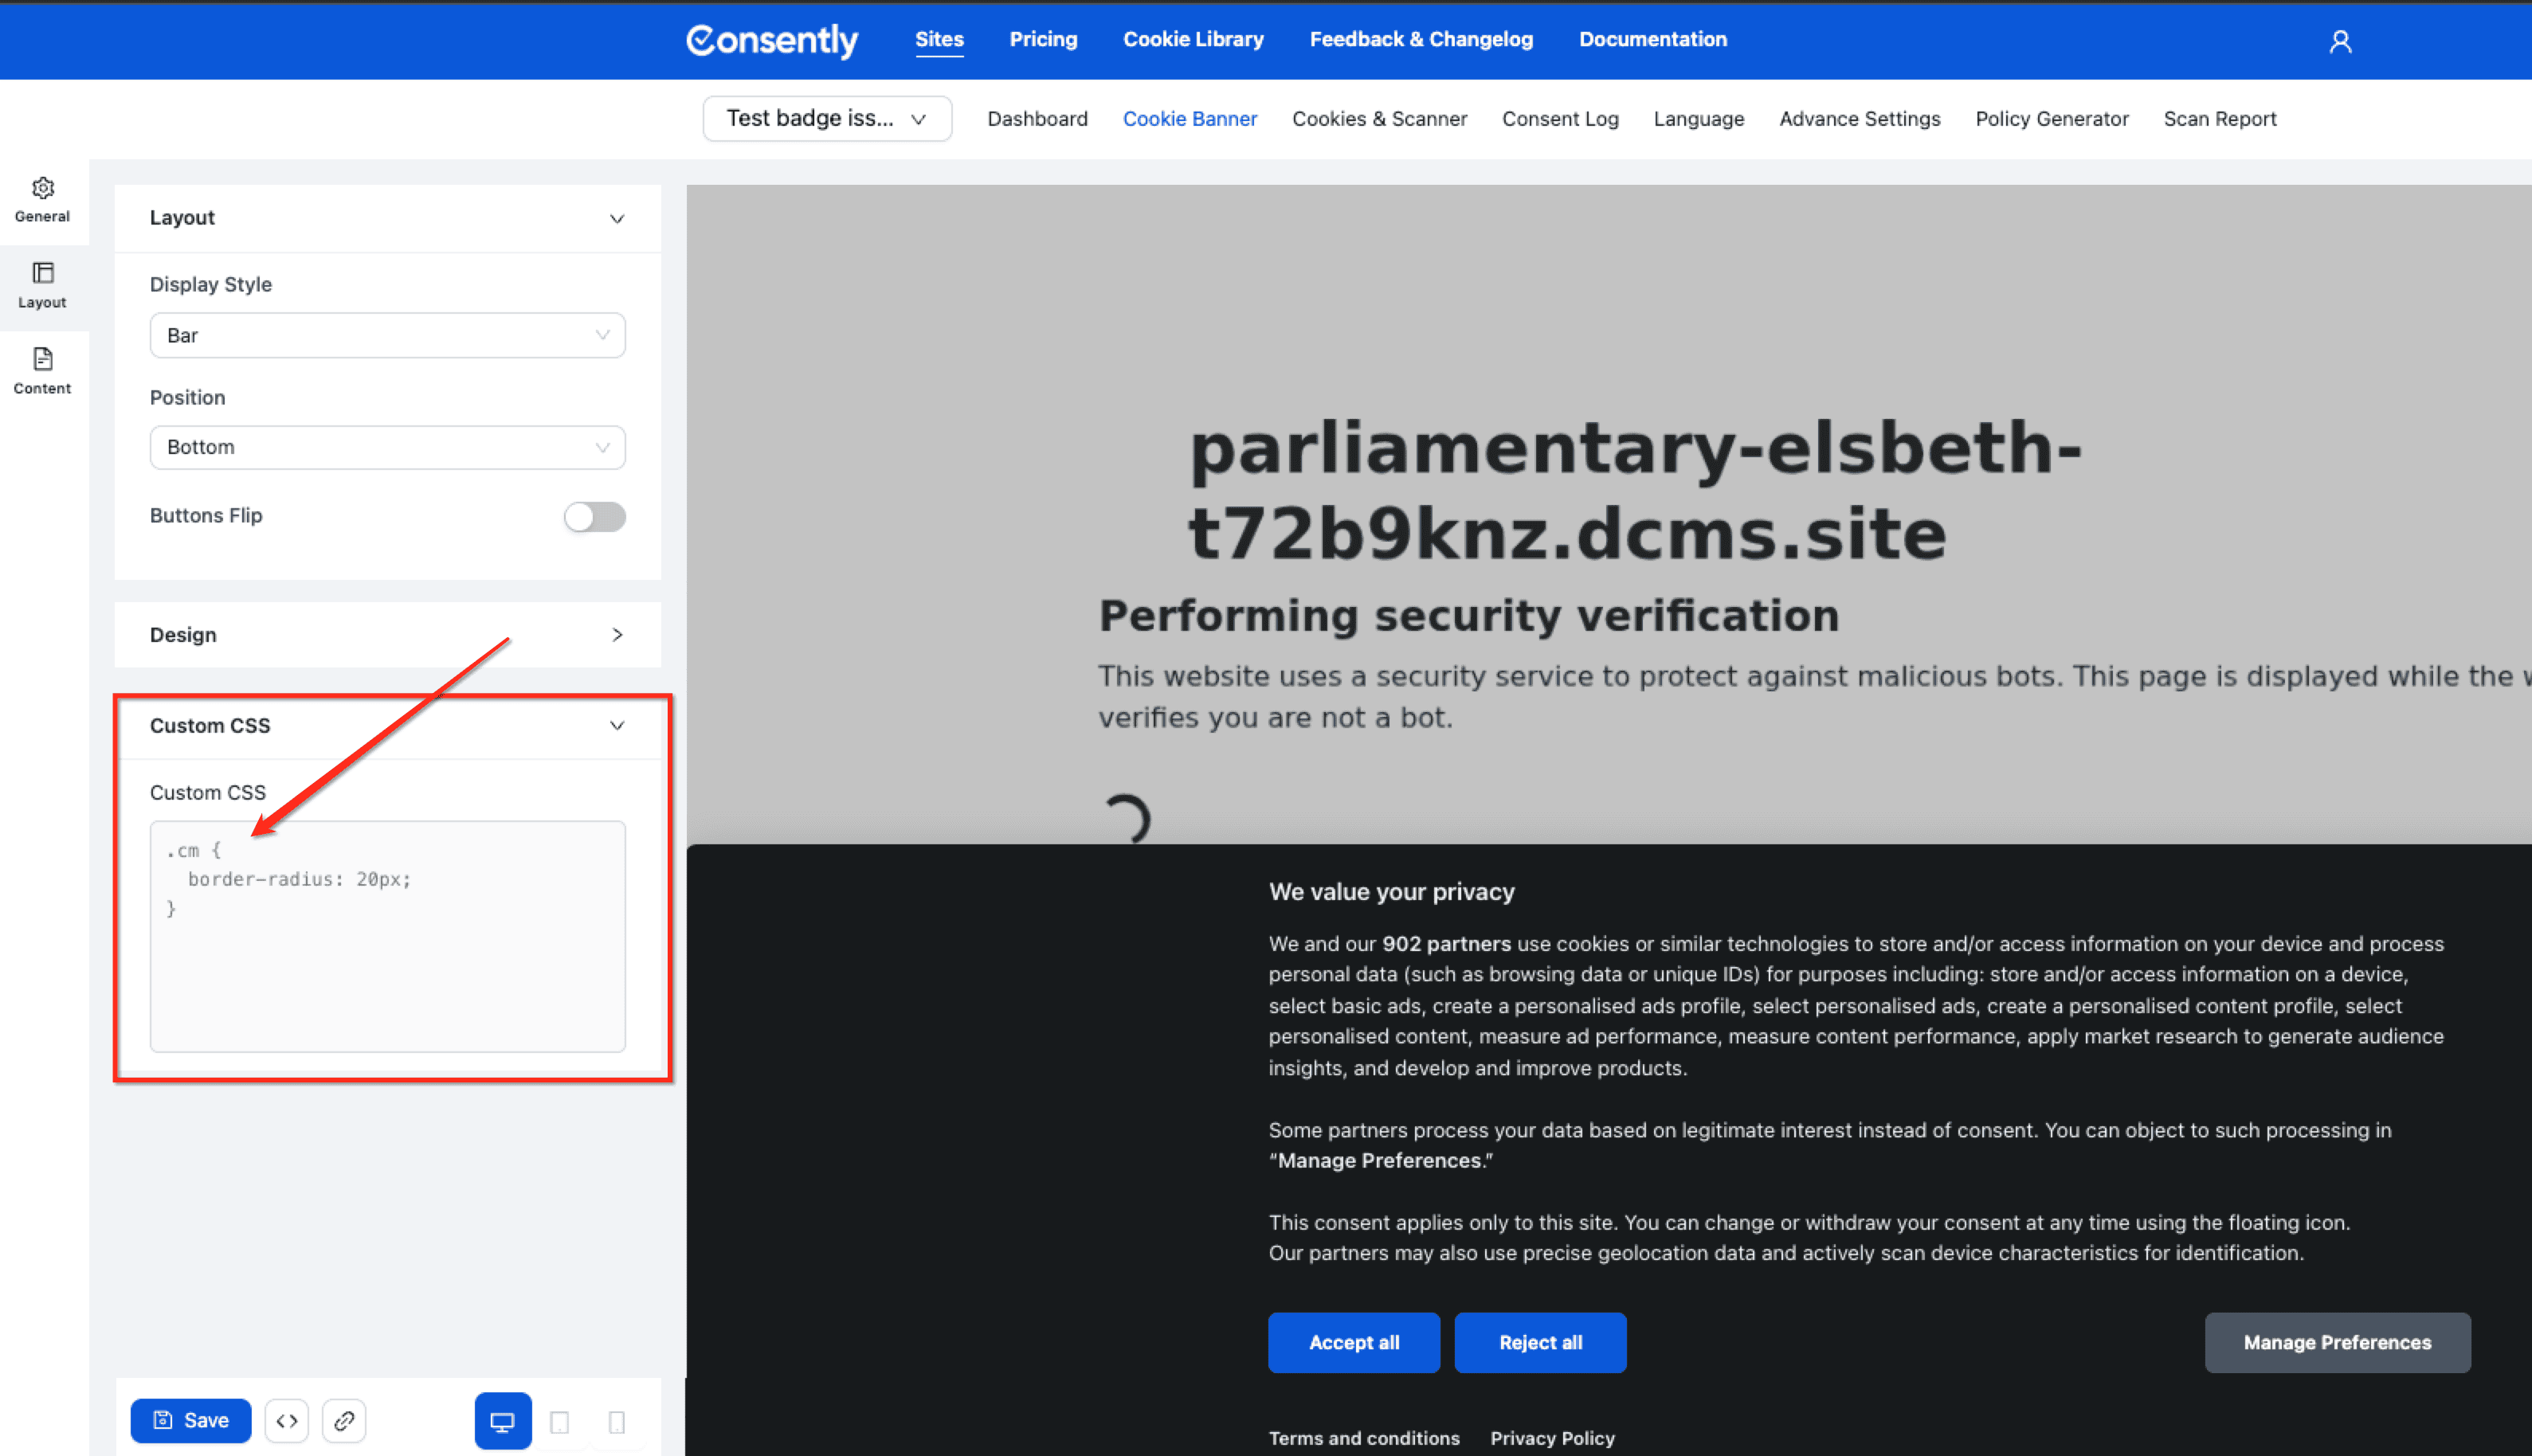
Step 5: Adding Custom CSS
You can add CSS to customize the banner. Expand the Custom CSS Tab to start writing your own CSS.
Target the selector
Class nameorIDand then apply your CSS rules.
💡 Tip: You can use browser developer tools to find out the selectors (Class name, ID). PressF12orCtrl+Shift+I(Windows/Linux) /Cmd+Option+I(Mac) to open the last used panel.
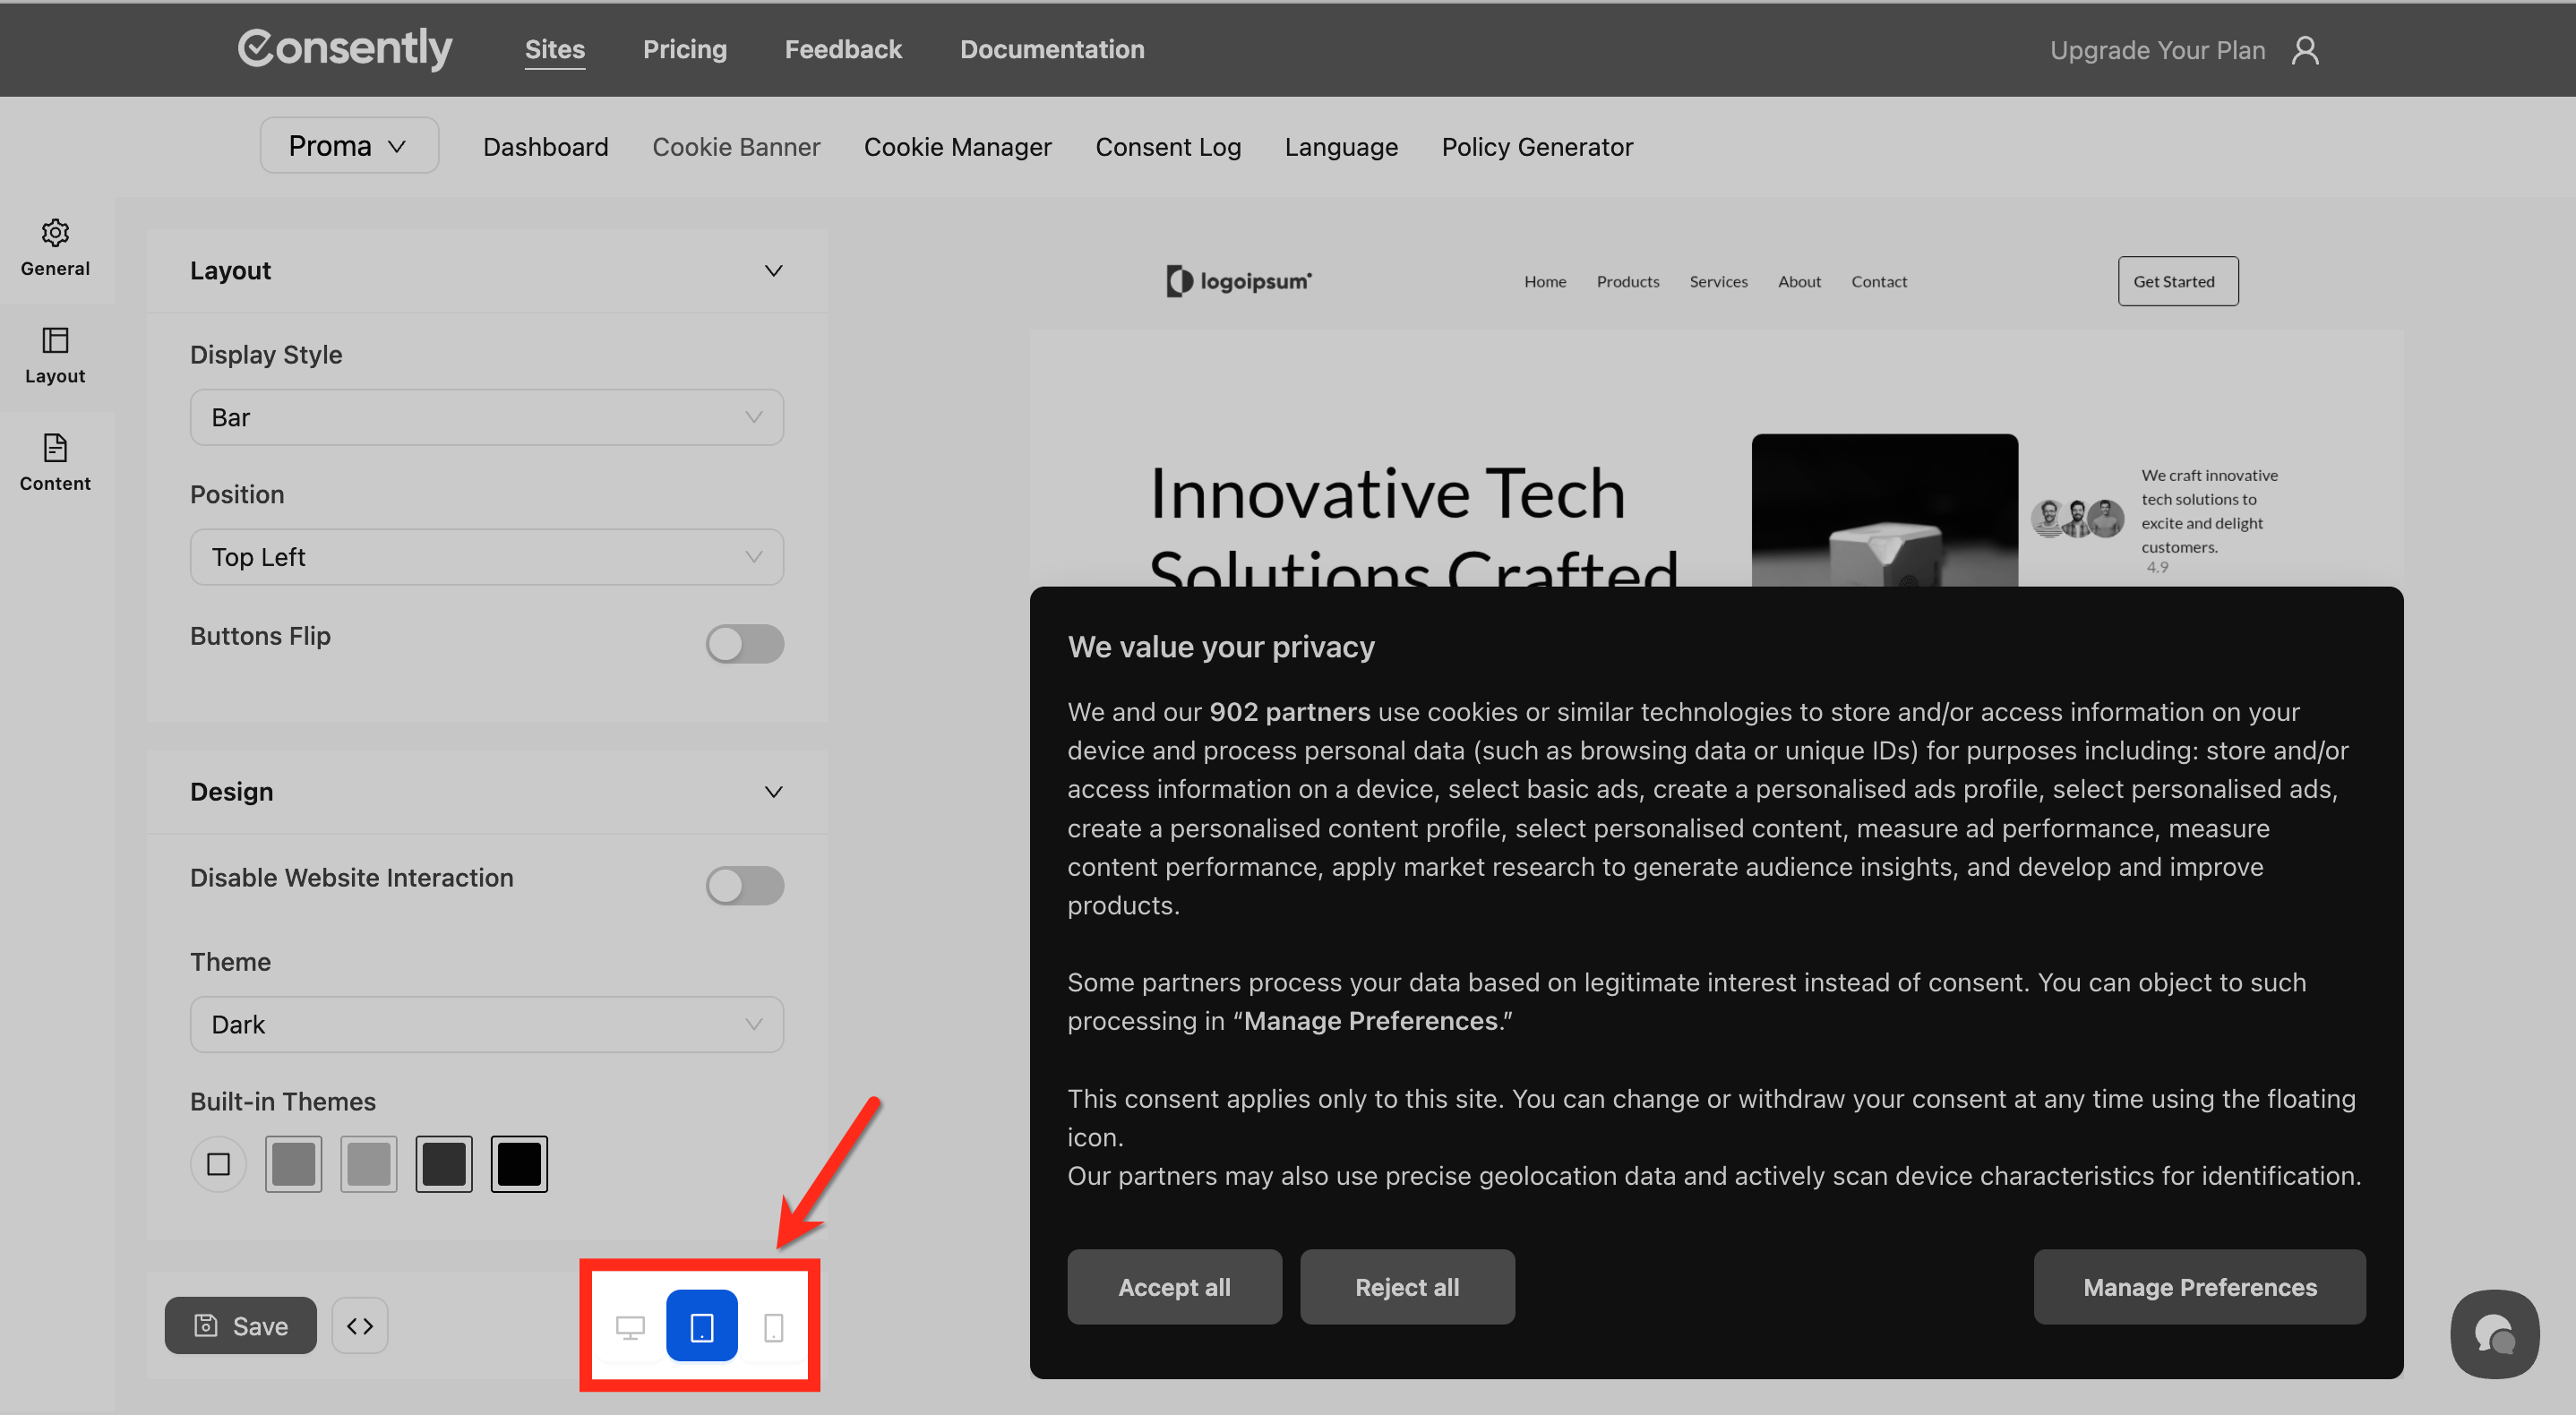
Step 6: Consider mobile vs desktop
Preview how your layout works across devices:
Mobile: Bar layouts at the bottom work best as they don't cover content
Tablet: Box and Popup layouts display well with adequate screen space
Desktop: All layouts work effectively with proper positioning
Done!
Your layout and positioning settings are configured.
✅ Success indicator: Changes take effect immediately in the preview panel on the right side of your screen.
What's Next
Now that you've configured your banner's layout:
Troubleshooting
Banner appears off-center or misaligned
Solution: Check your position settings and ensure your display style matches your intended position. For example, Bar layouts should use Top or Bottom positions, not Center.
Banner blocks important content on my site
Why this happens: The banner's size or position may conflict with your site's header or footer elements.
Solution:
Try a different display style (switch from Box to Bar)
Change the position from Top to Bottom or vice versa
Disable the "Disable Website Interaction" option if enabled
Buttons appear in the wrong order
Solution: Toggle the Buttons Flip option to reverse the button order. This setting swaps the position of the "Accept All" and "Reject All" buttons.
Users can't find the floating icon
Solution: The floating icon appears after users make their initial consent choice. The icon typically appears in the bottom-right corner of the screen.
Related Pages
Customizing Banner Content — Edit the text and messages in your banner
IAB TCF Settings — Configure advanced compliance frameworks