

TL;DR: Dashboard → Cookie Banner → Content → Preference Center section. Customize the detailed modal where visitors choose specific cookie categories.
Overview
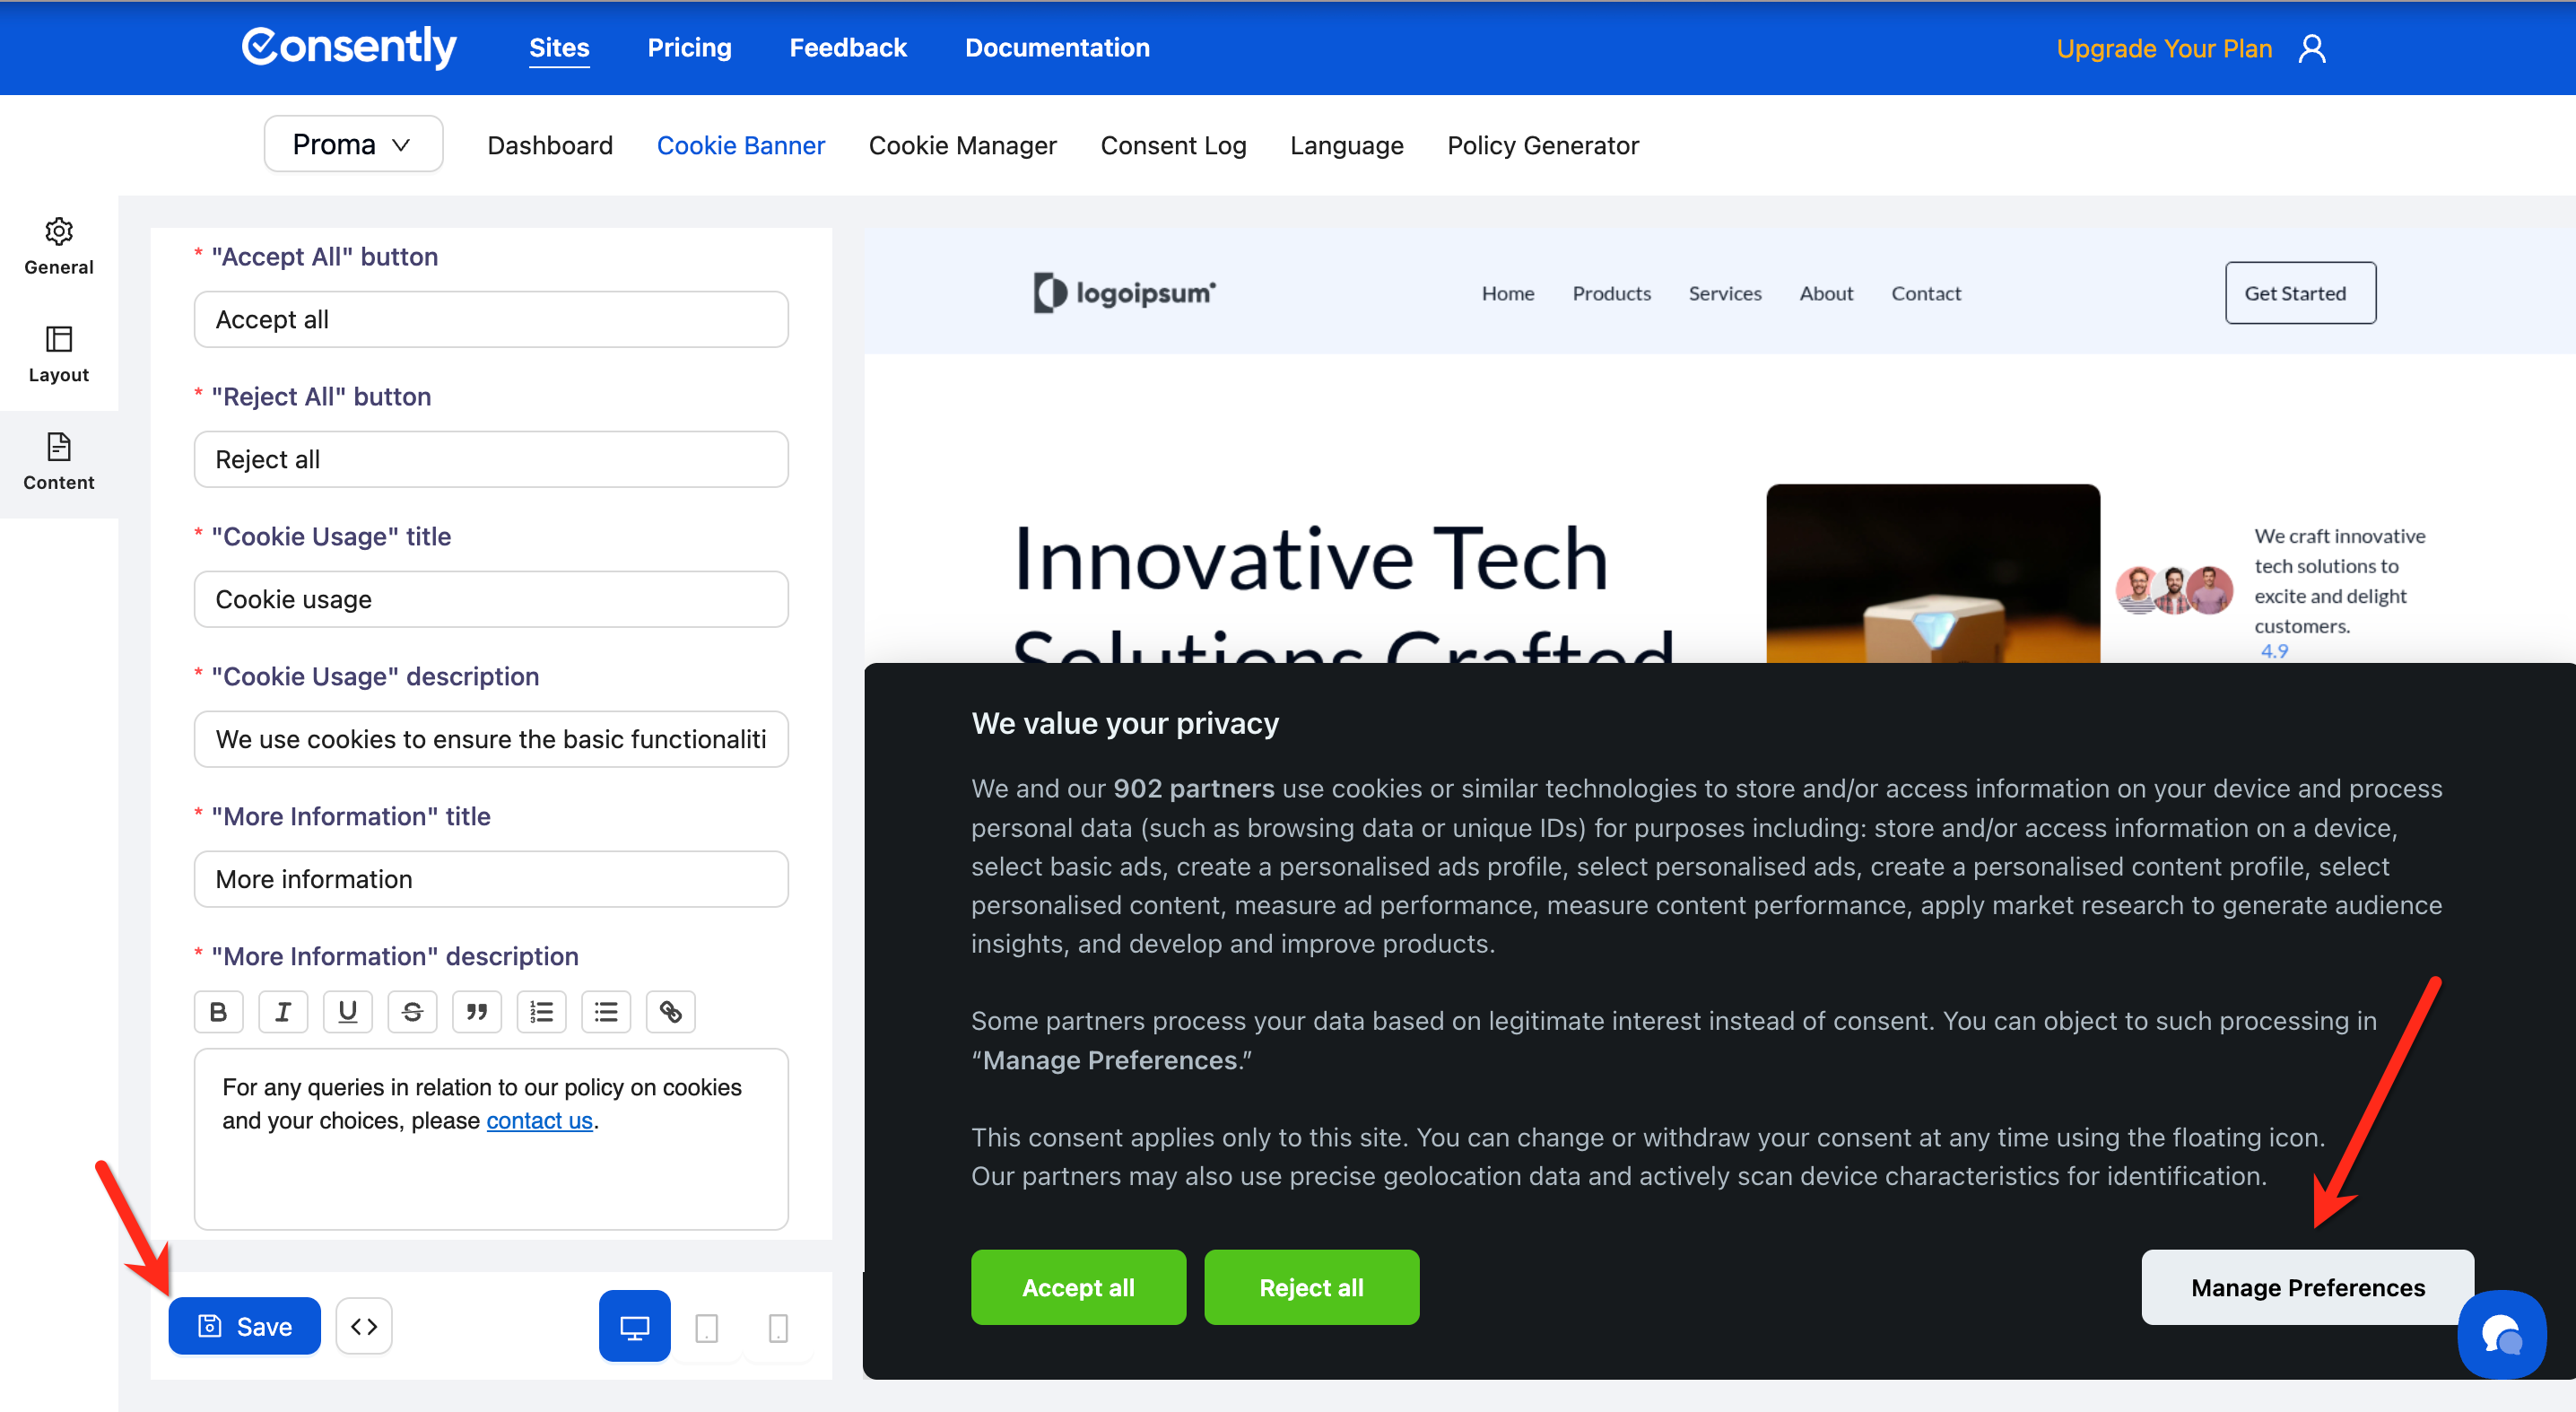
The Preference Center is the detailed modal that opens when visitors click "Manage Preferences" on your consent banner. Here you can customize all text, category descriptions, and labels that guide visitors through granular consent choices.
Before You Begin
Make sure you have:
Choose your consent template (GDPR or US State Laws)
Time required: About 5-10 minutes
How to Configure the Preference Center
Step 1: Access the Content section
From your site dashboard, click Cookie Banner in the top navigation, then select the Content tab.
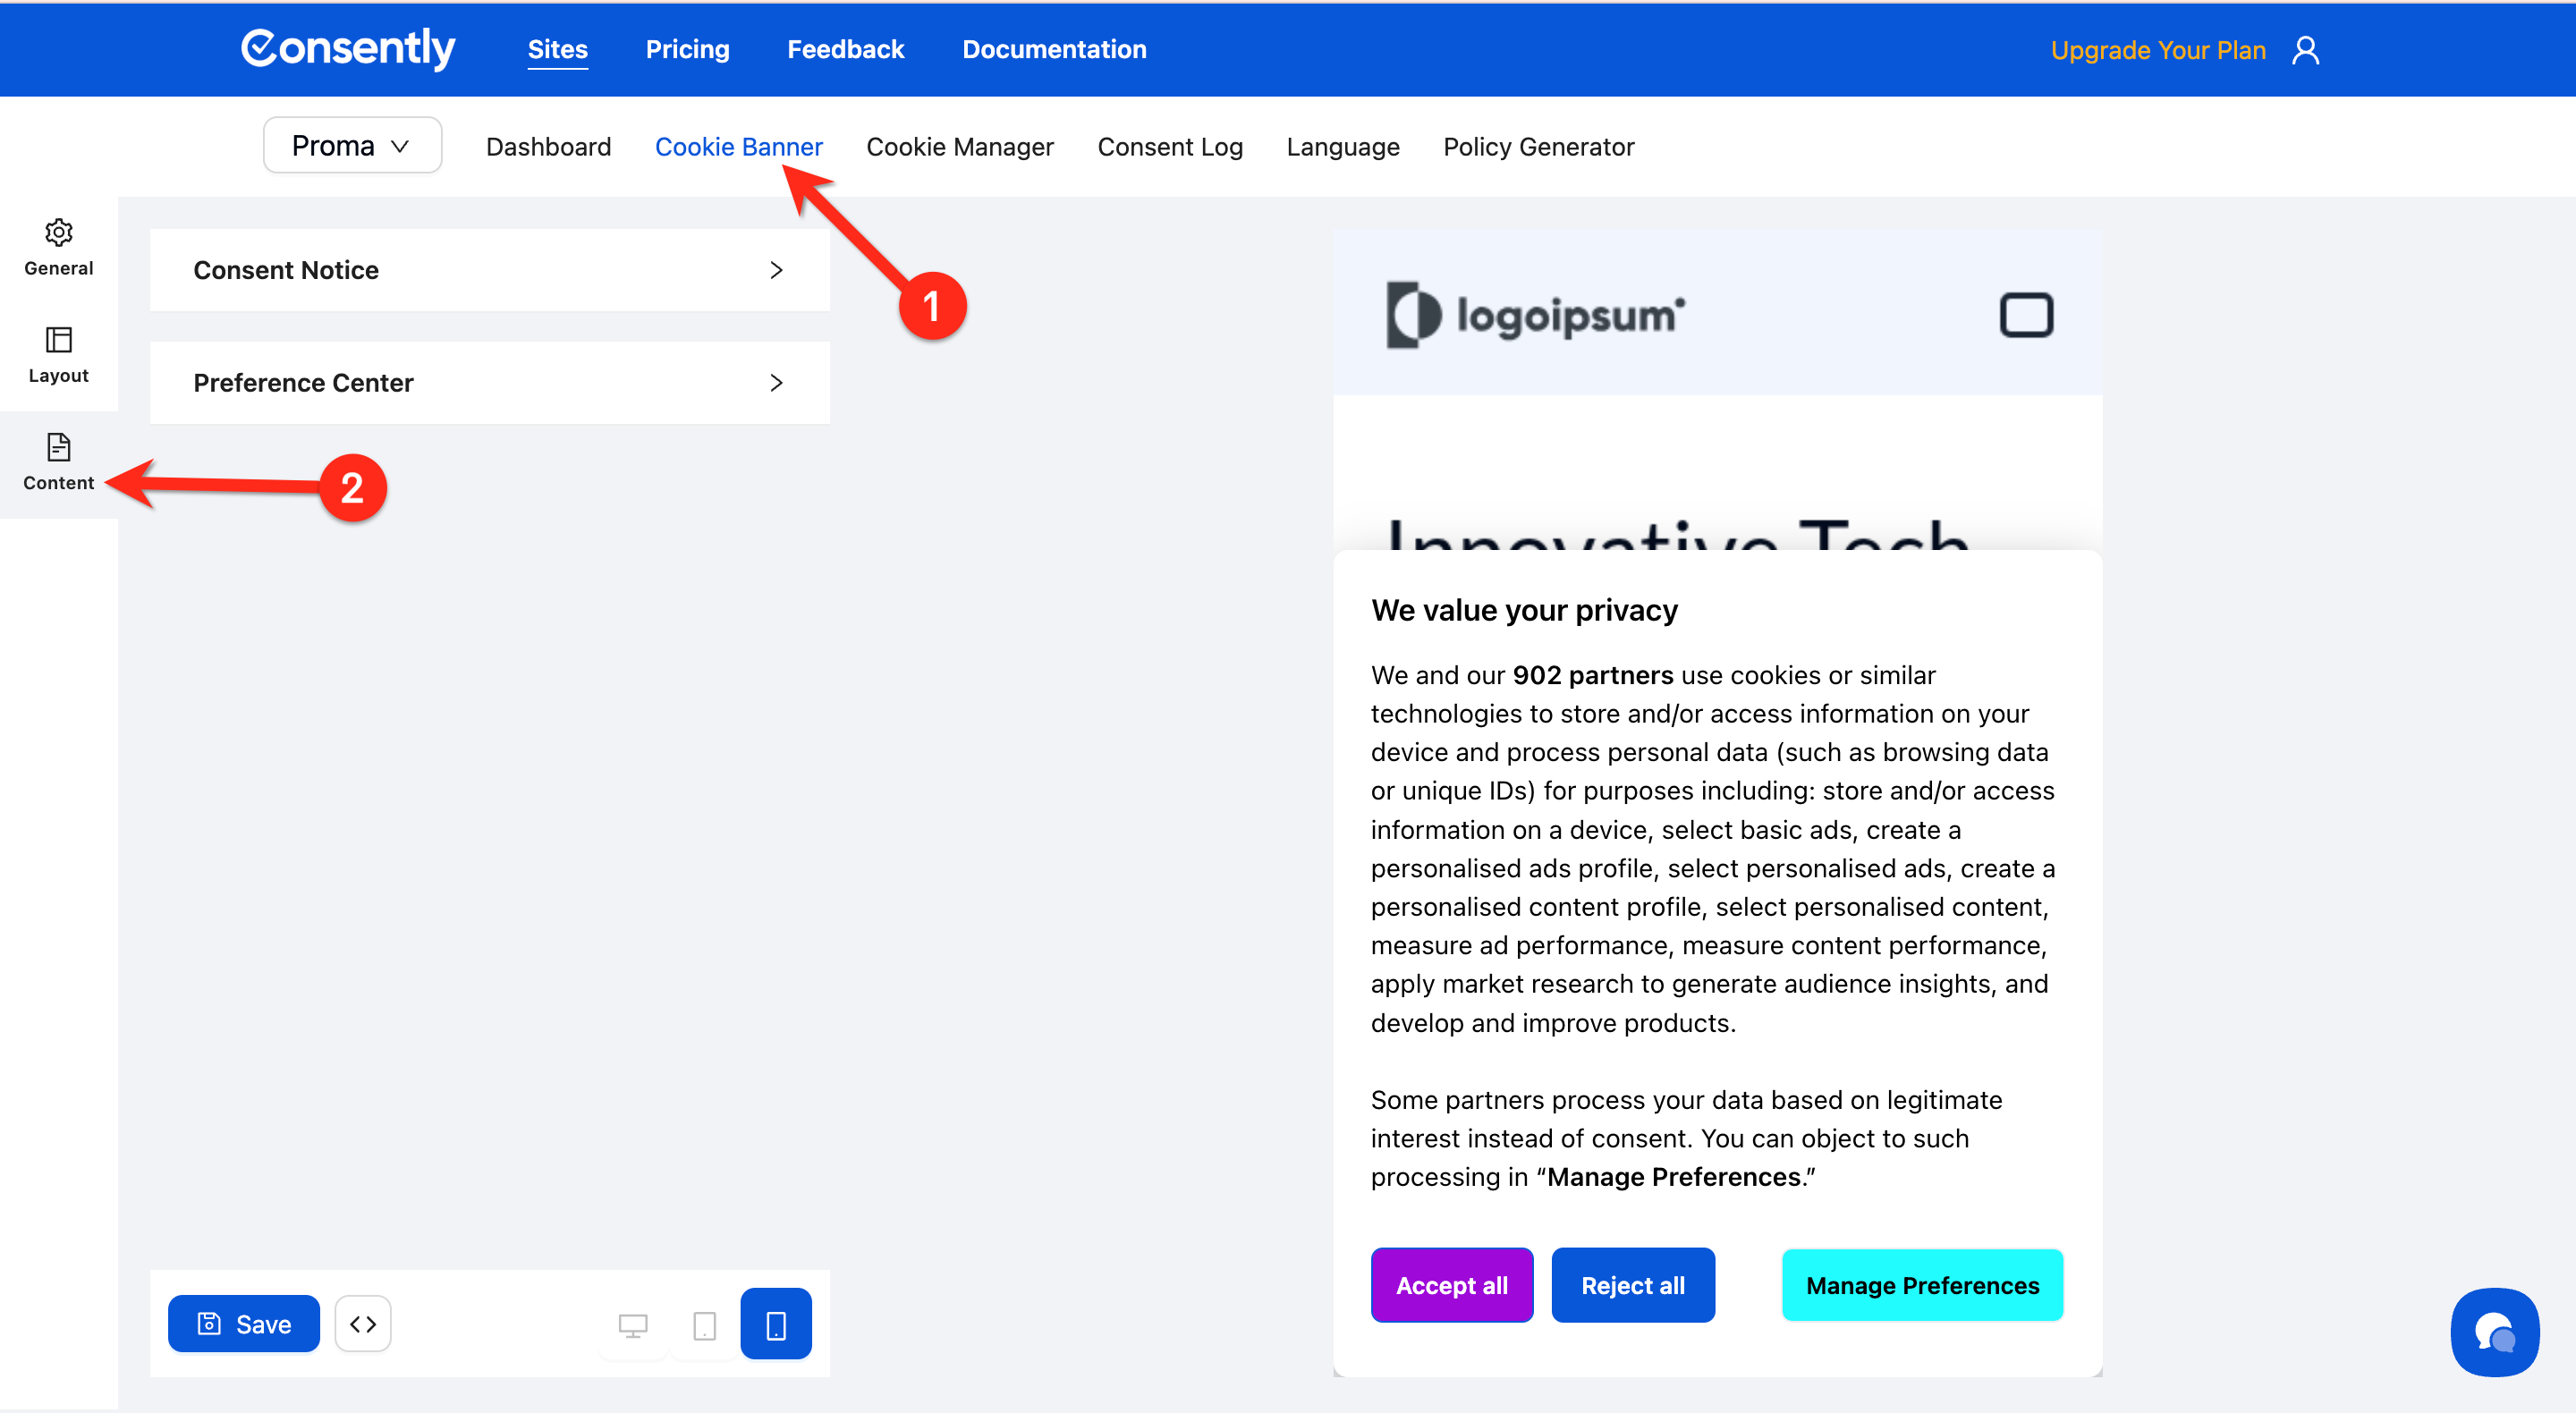
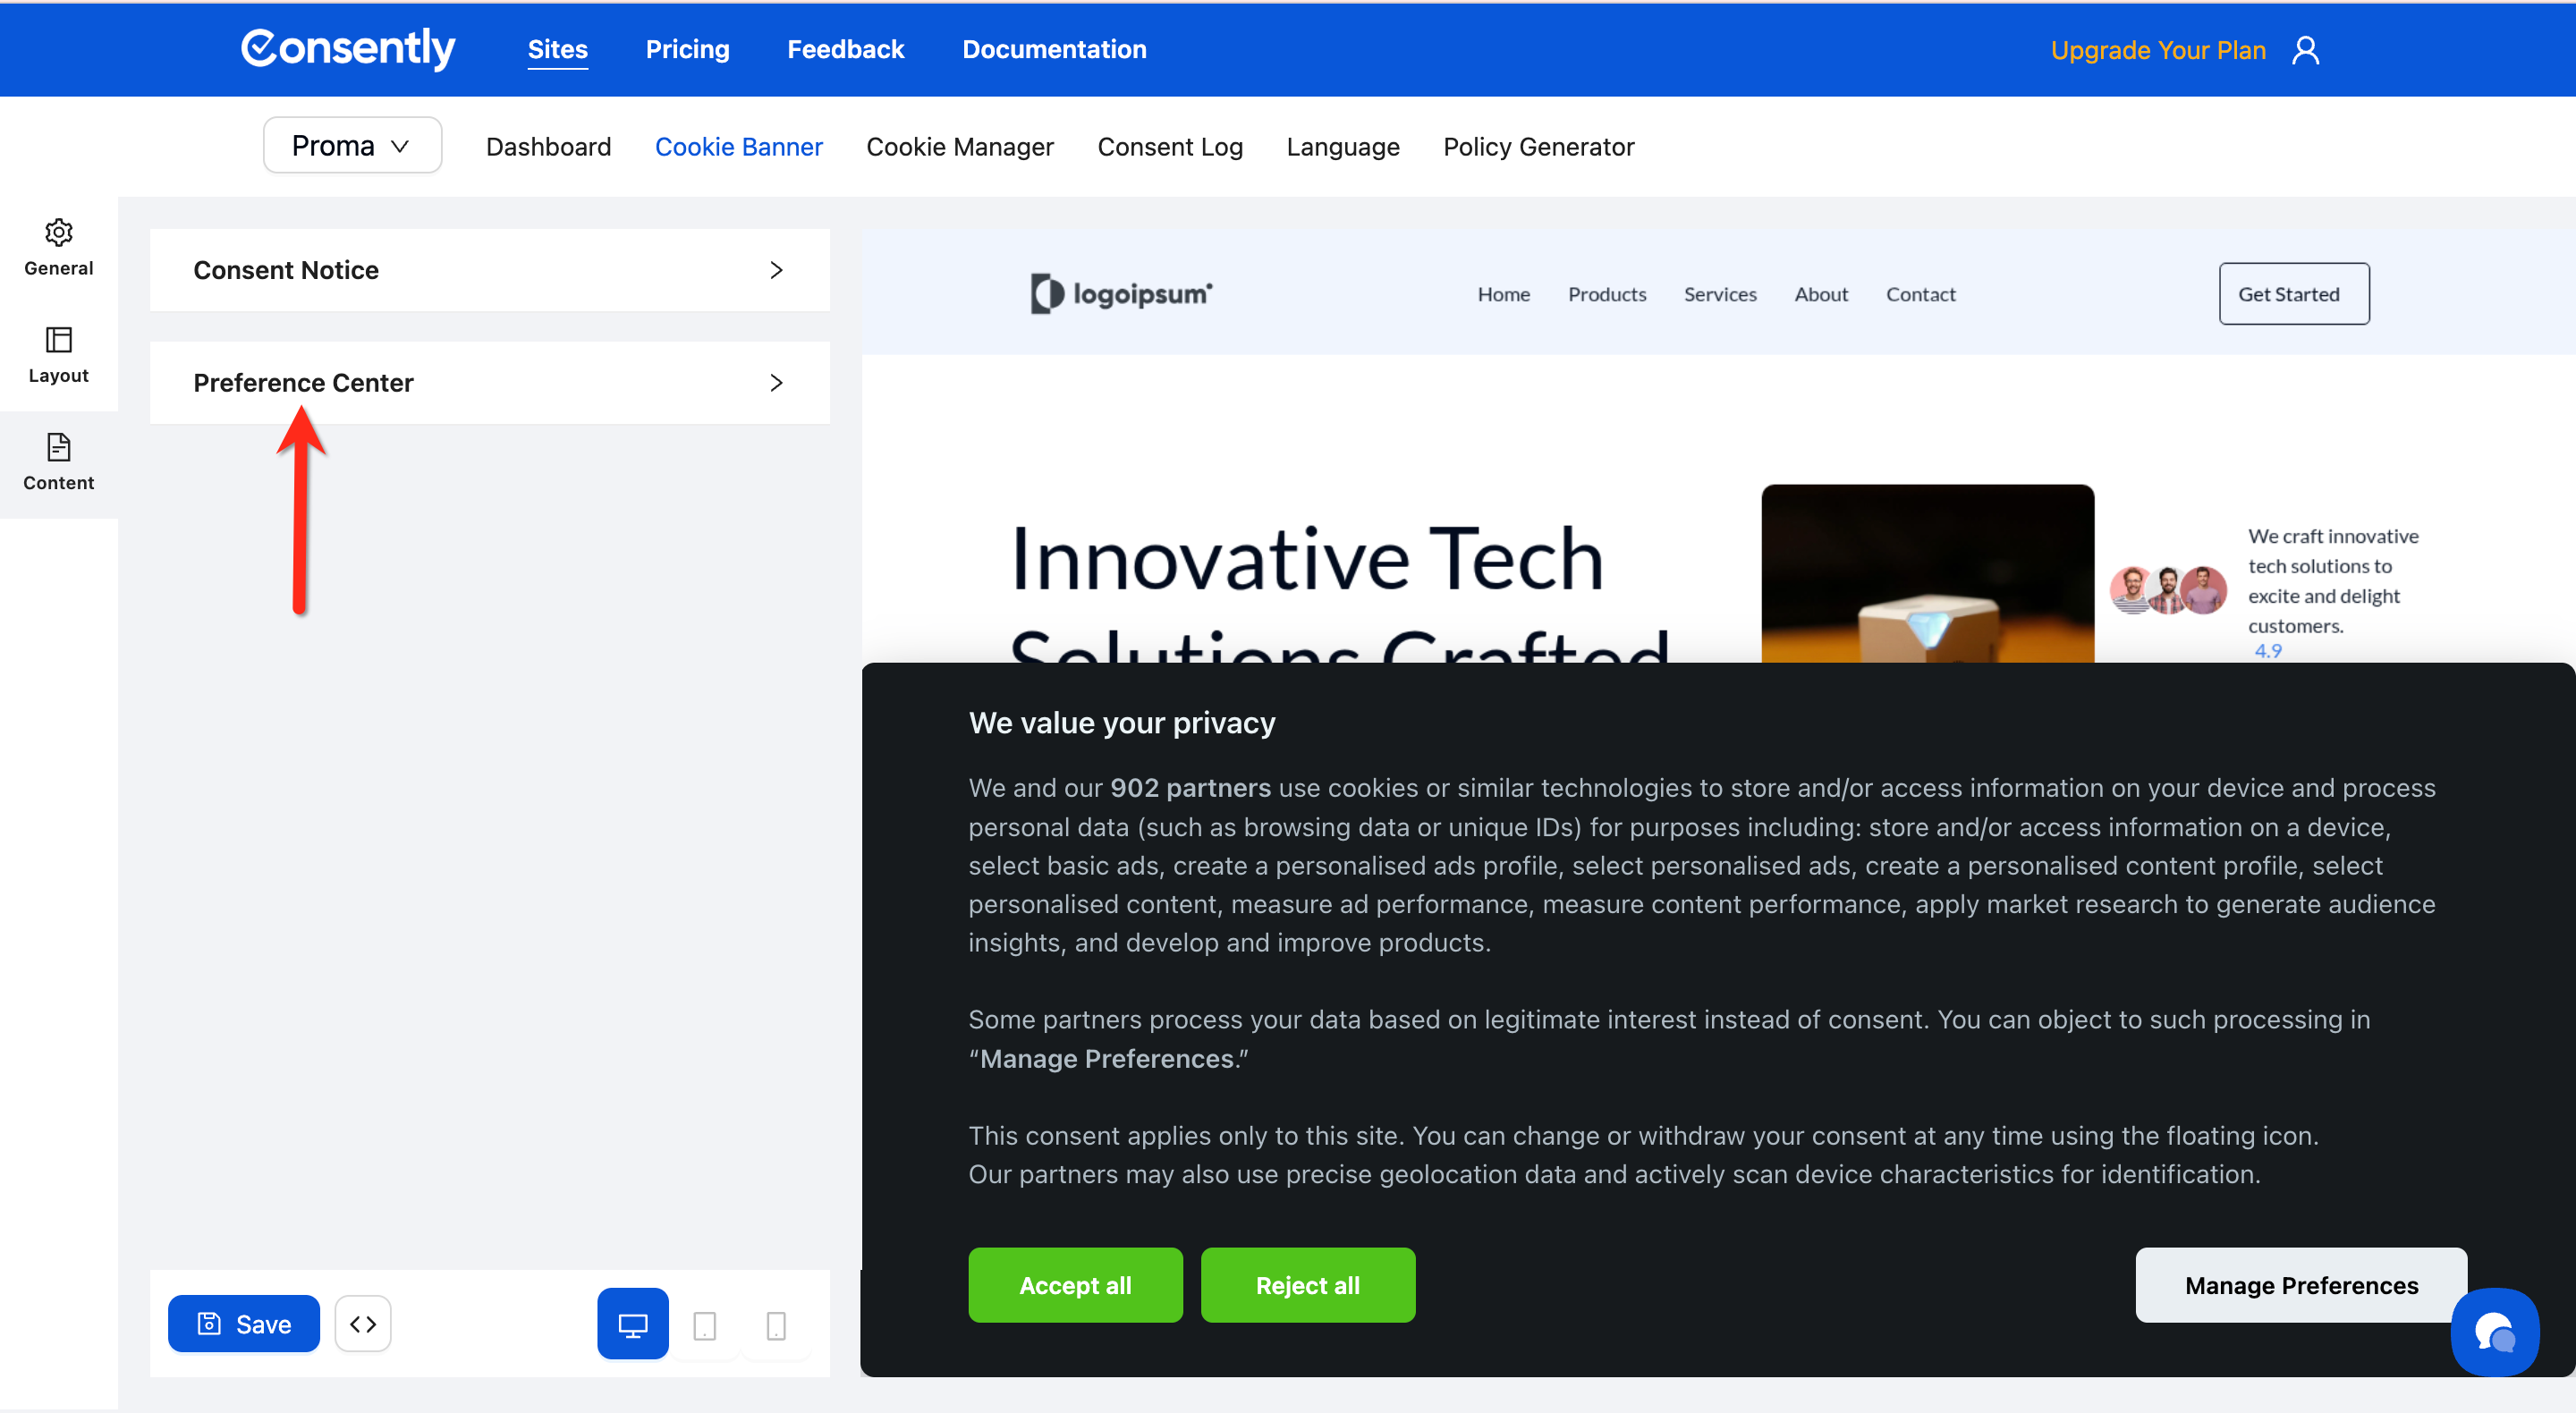
Step 2: Scroll to the Preference Center section
Scroll down past the Consent Notice section until you see the Preference Center Section.
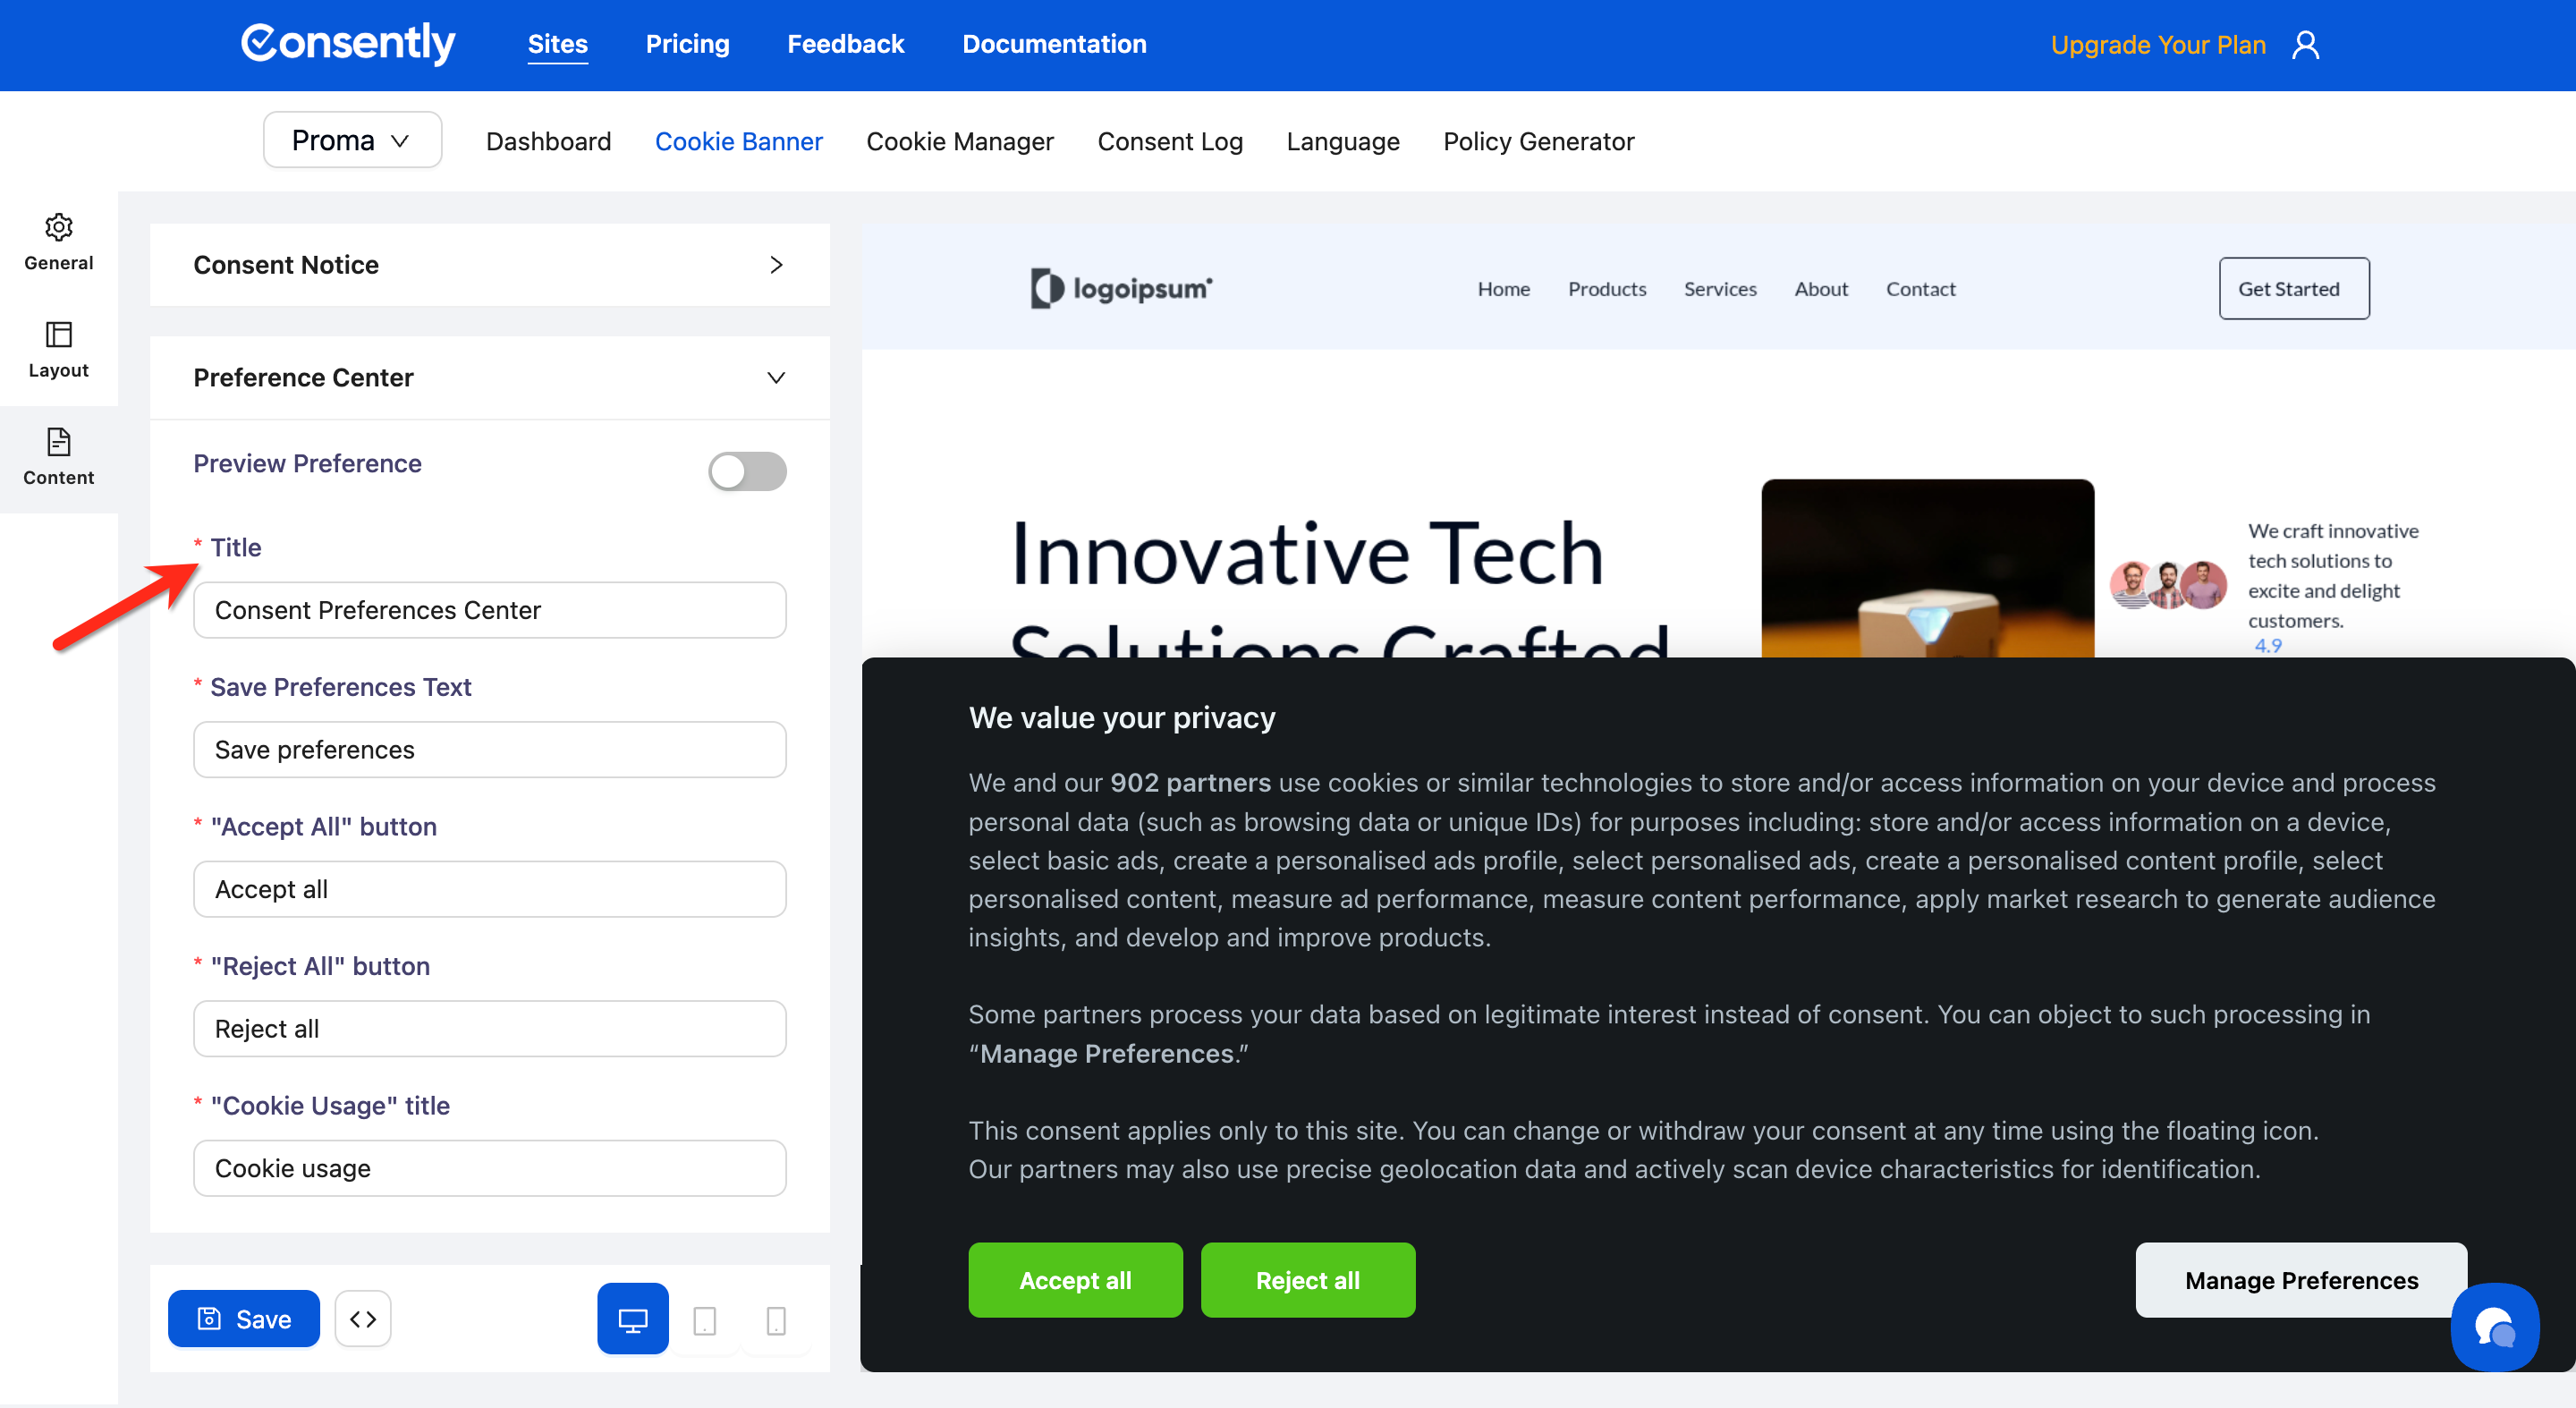
Step 3: Set the Preview Preference (Optional)
Enable this toggle to preview the preference page and see live changes in real time.
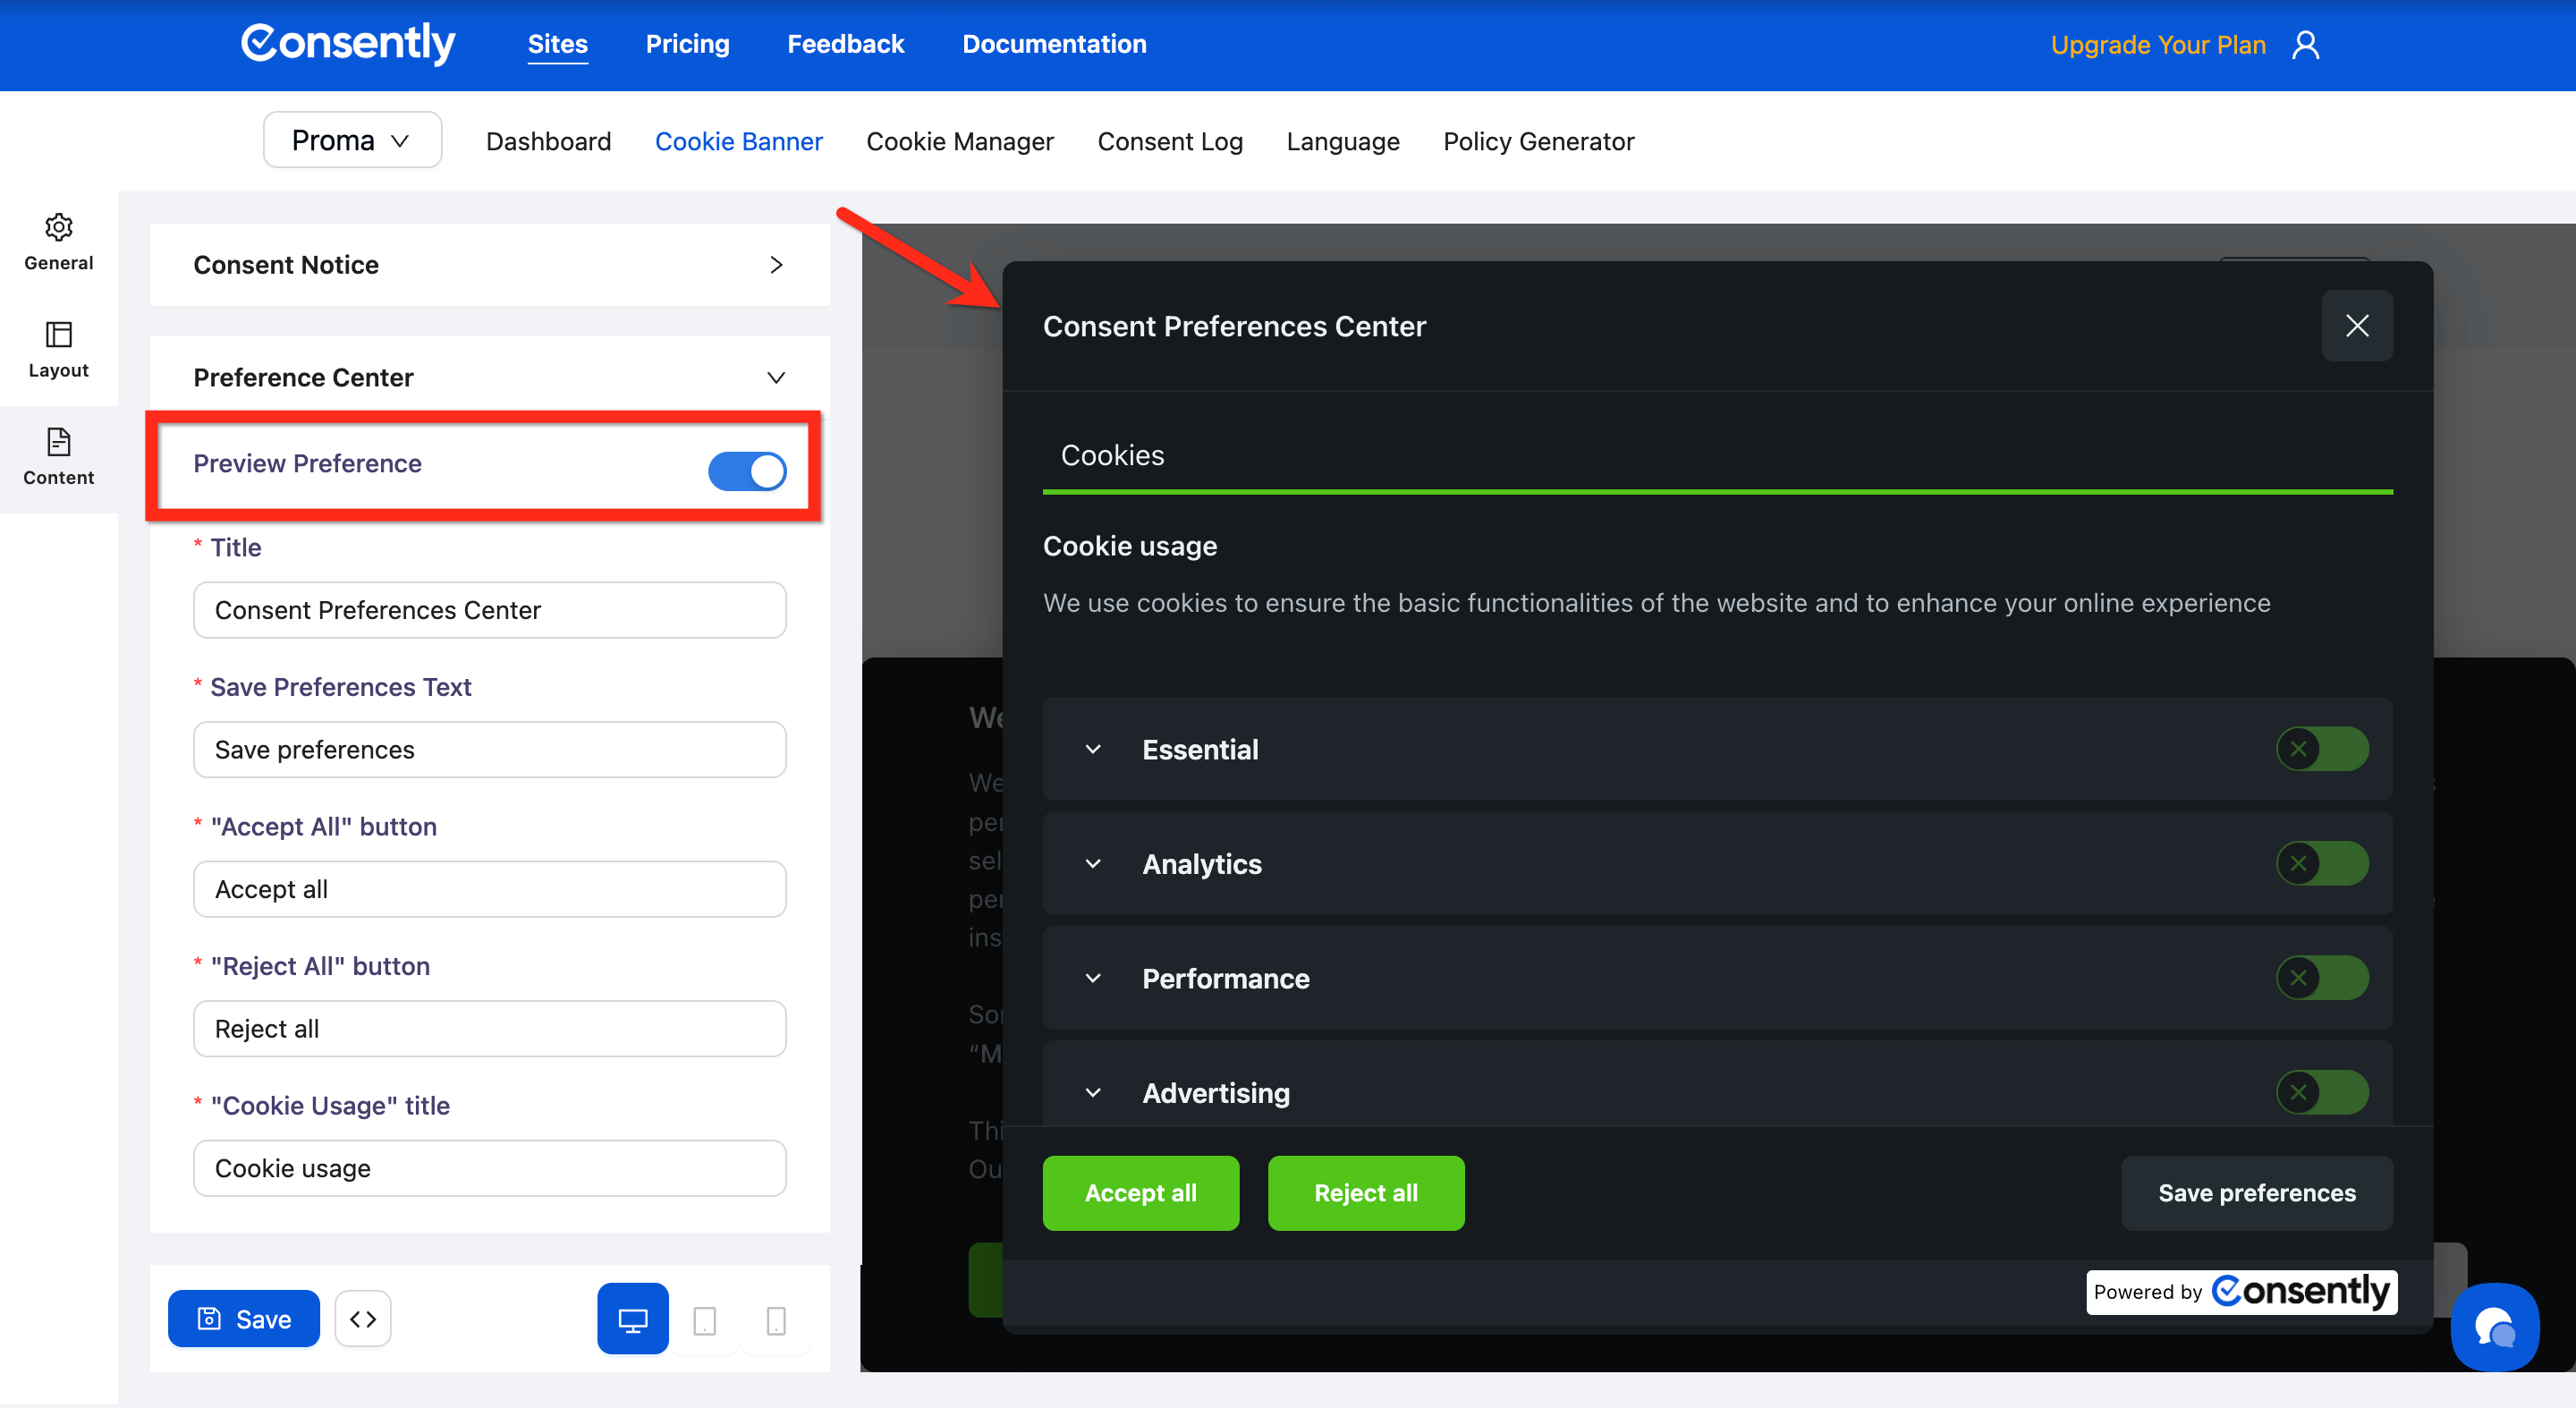
Step 4: Set the preference center title
Enter a clear title in the Title field (e.g., "Consent Preferences Center" or "Privacy Settings").
Step 5: Configure the action buttons
Set the text for all action buttons:
Save Preferences Text — Text for the save button (e.g., "Save preferences")
Accept All button text — Quick accept option in the modal
Reject All button text — Quick reject option in the modal
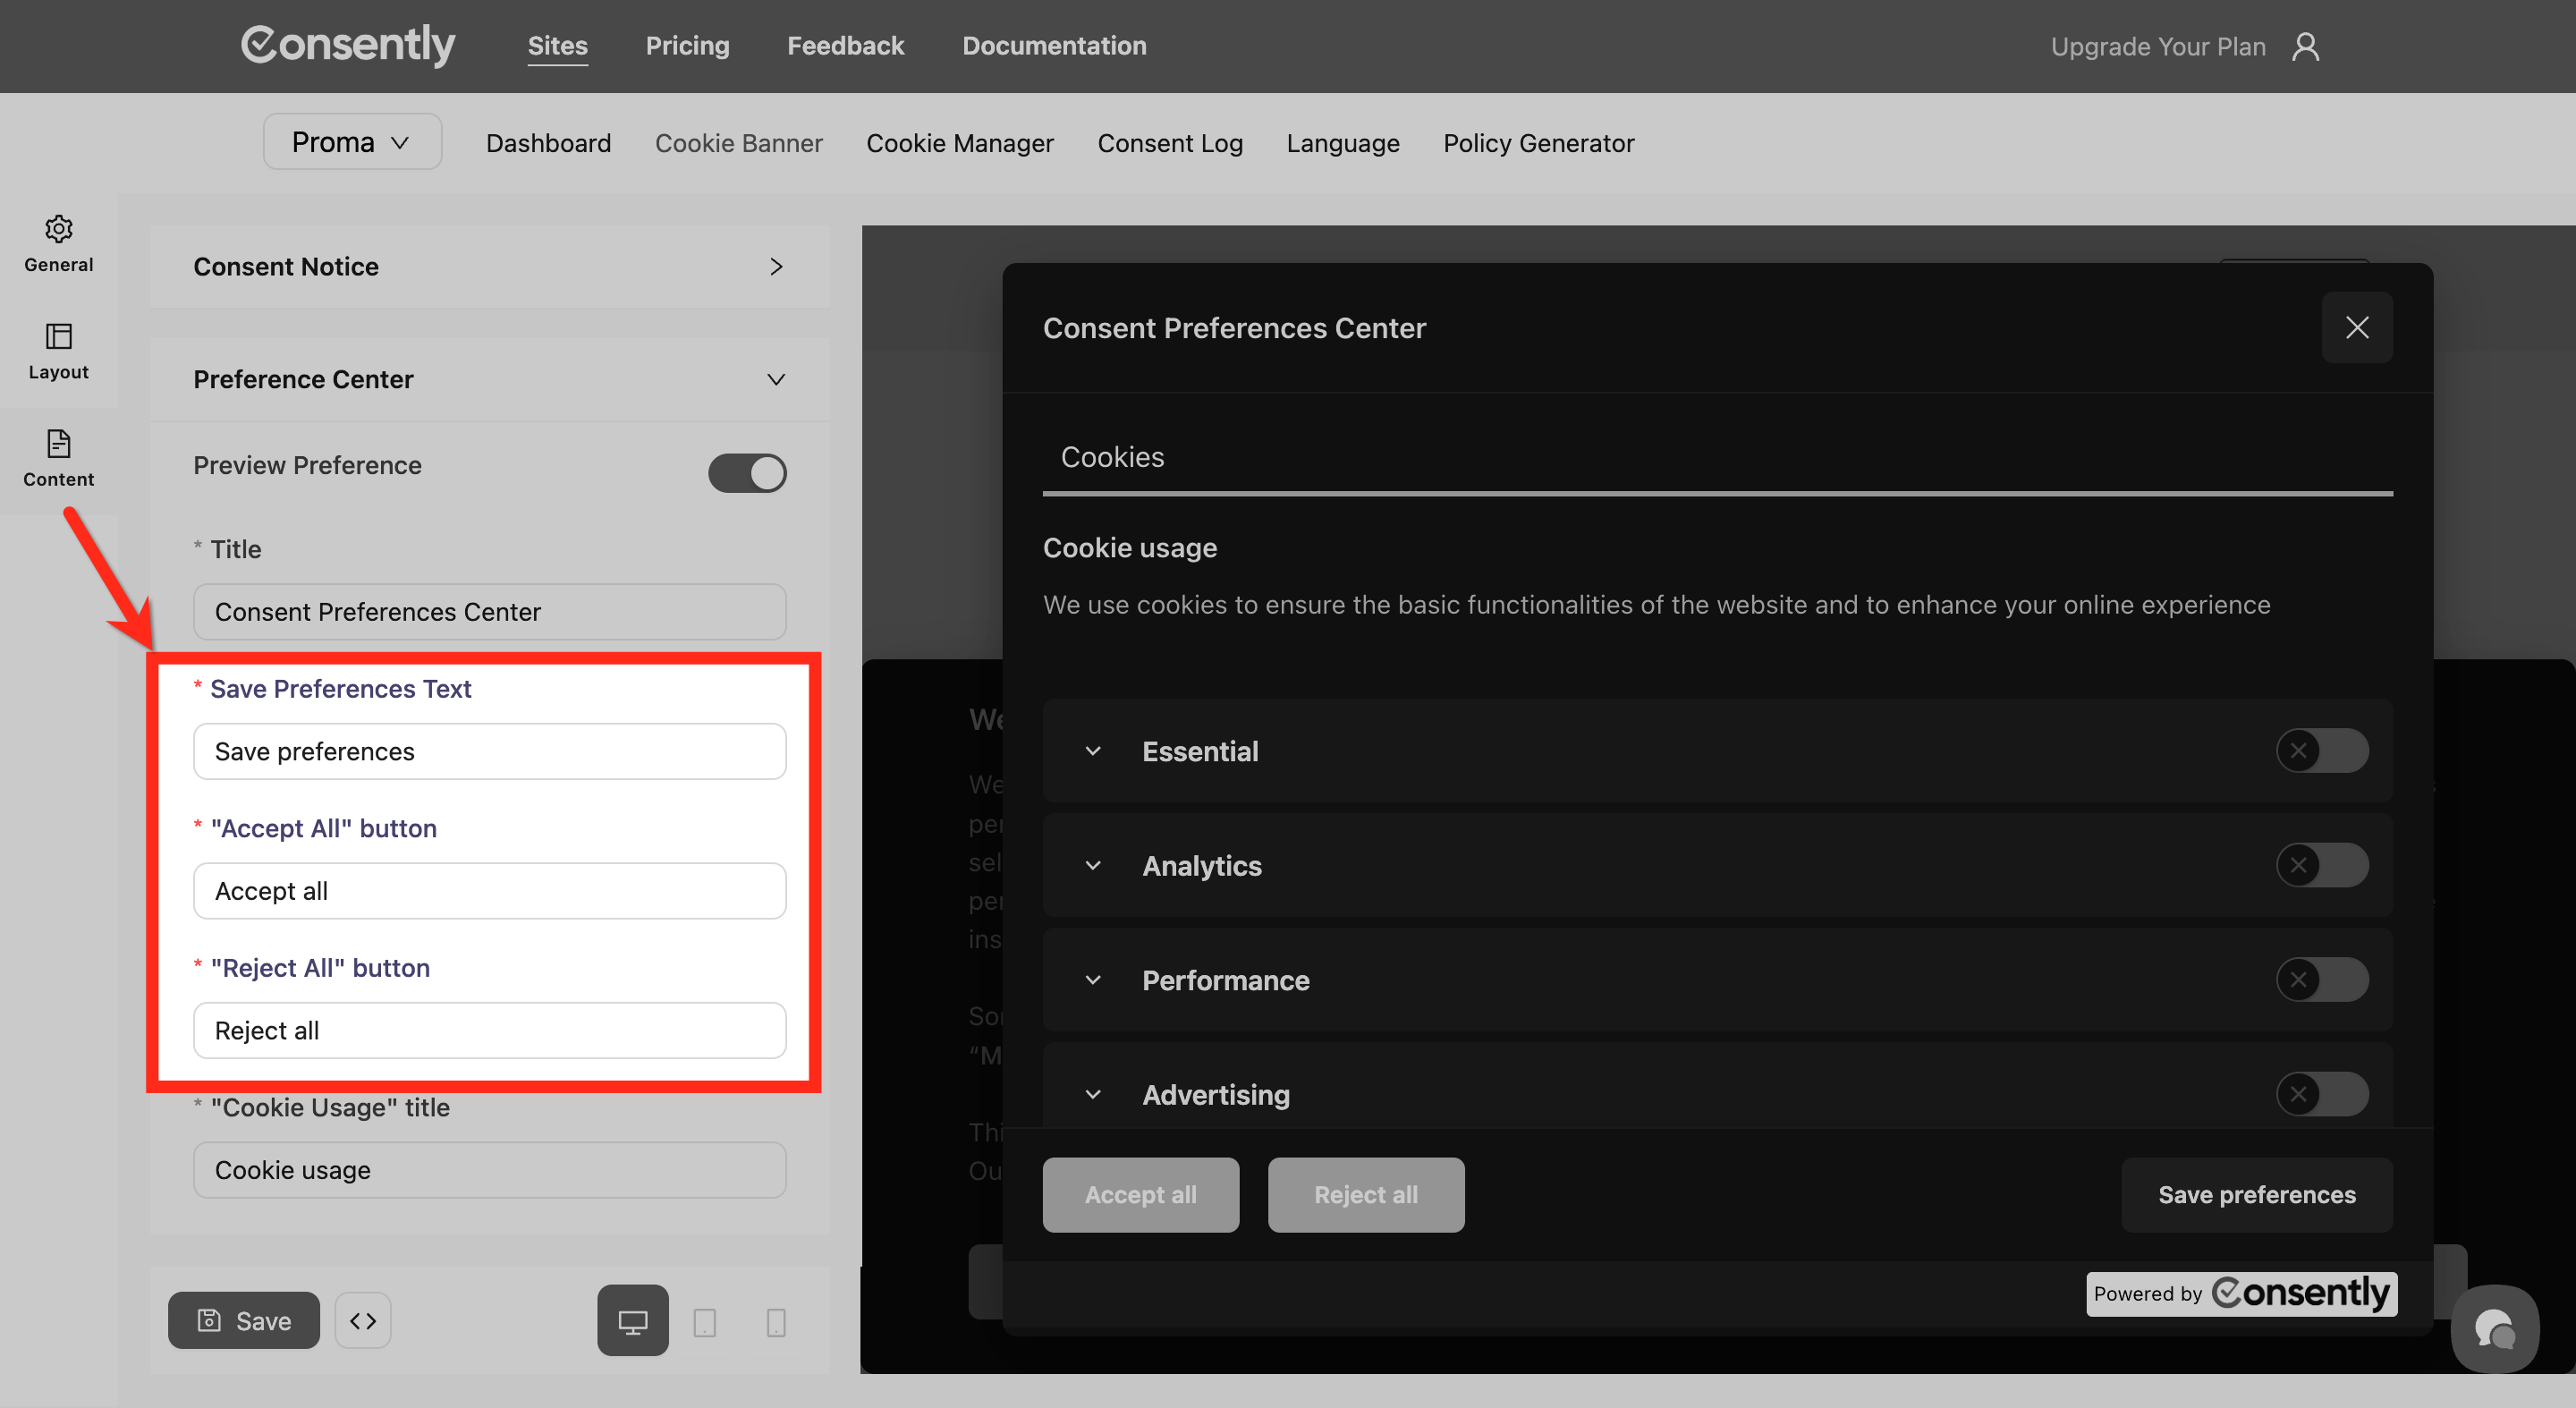
Step 6: Set up the Cookie Usage section
Configure the Cookie Usage section that explains what cookies do:
Cookie Usage title — Section heading (e.g., "Cookie Usage")
Cookie Usage description — Brief explanation of how cookies work on your site
💡 Tip: Keep the Cookie Usage description under 100 words for better readability on mobile devices.
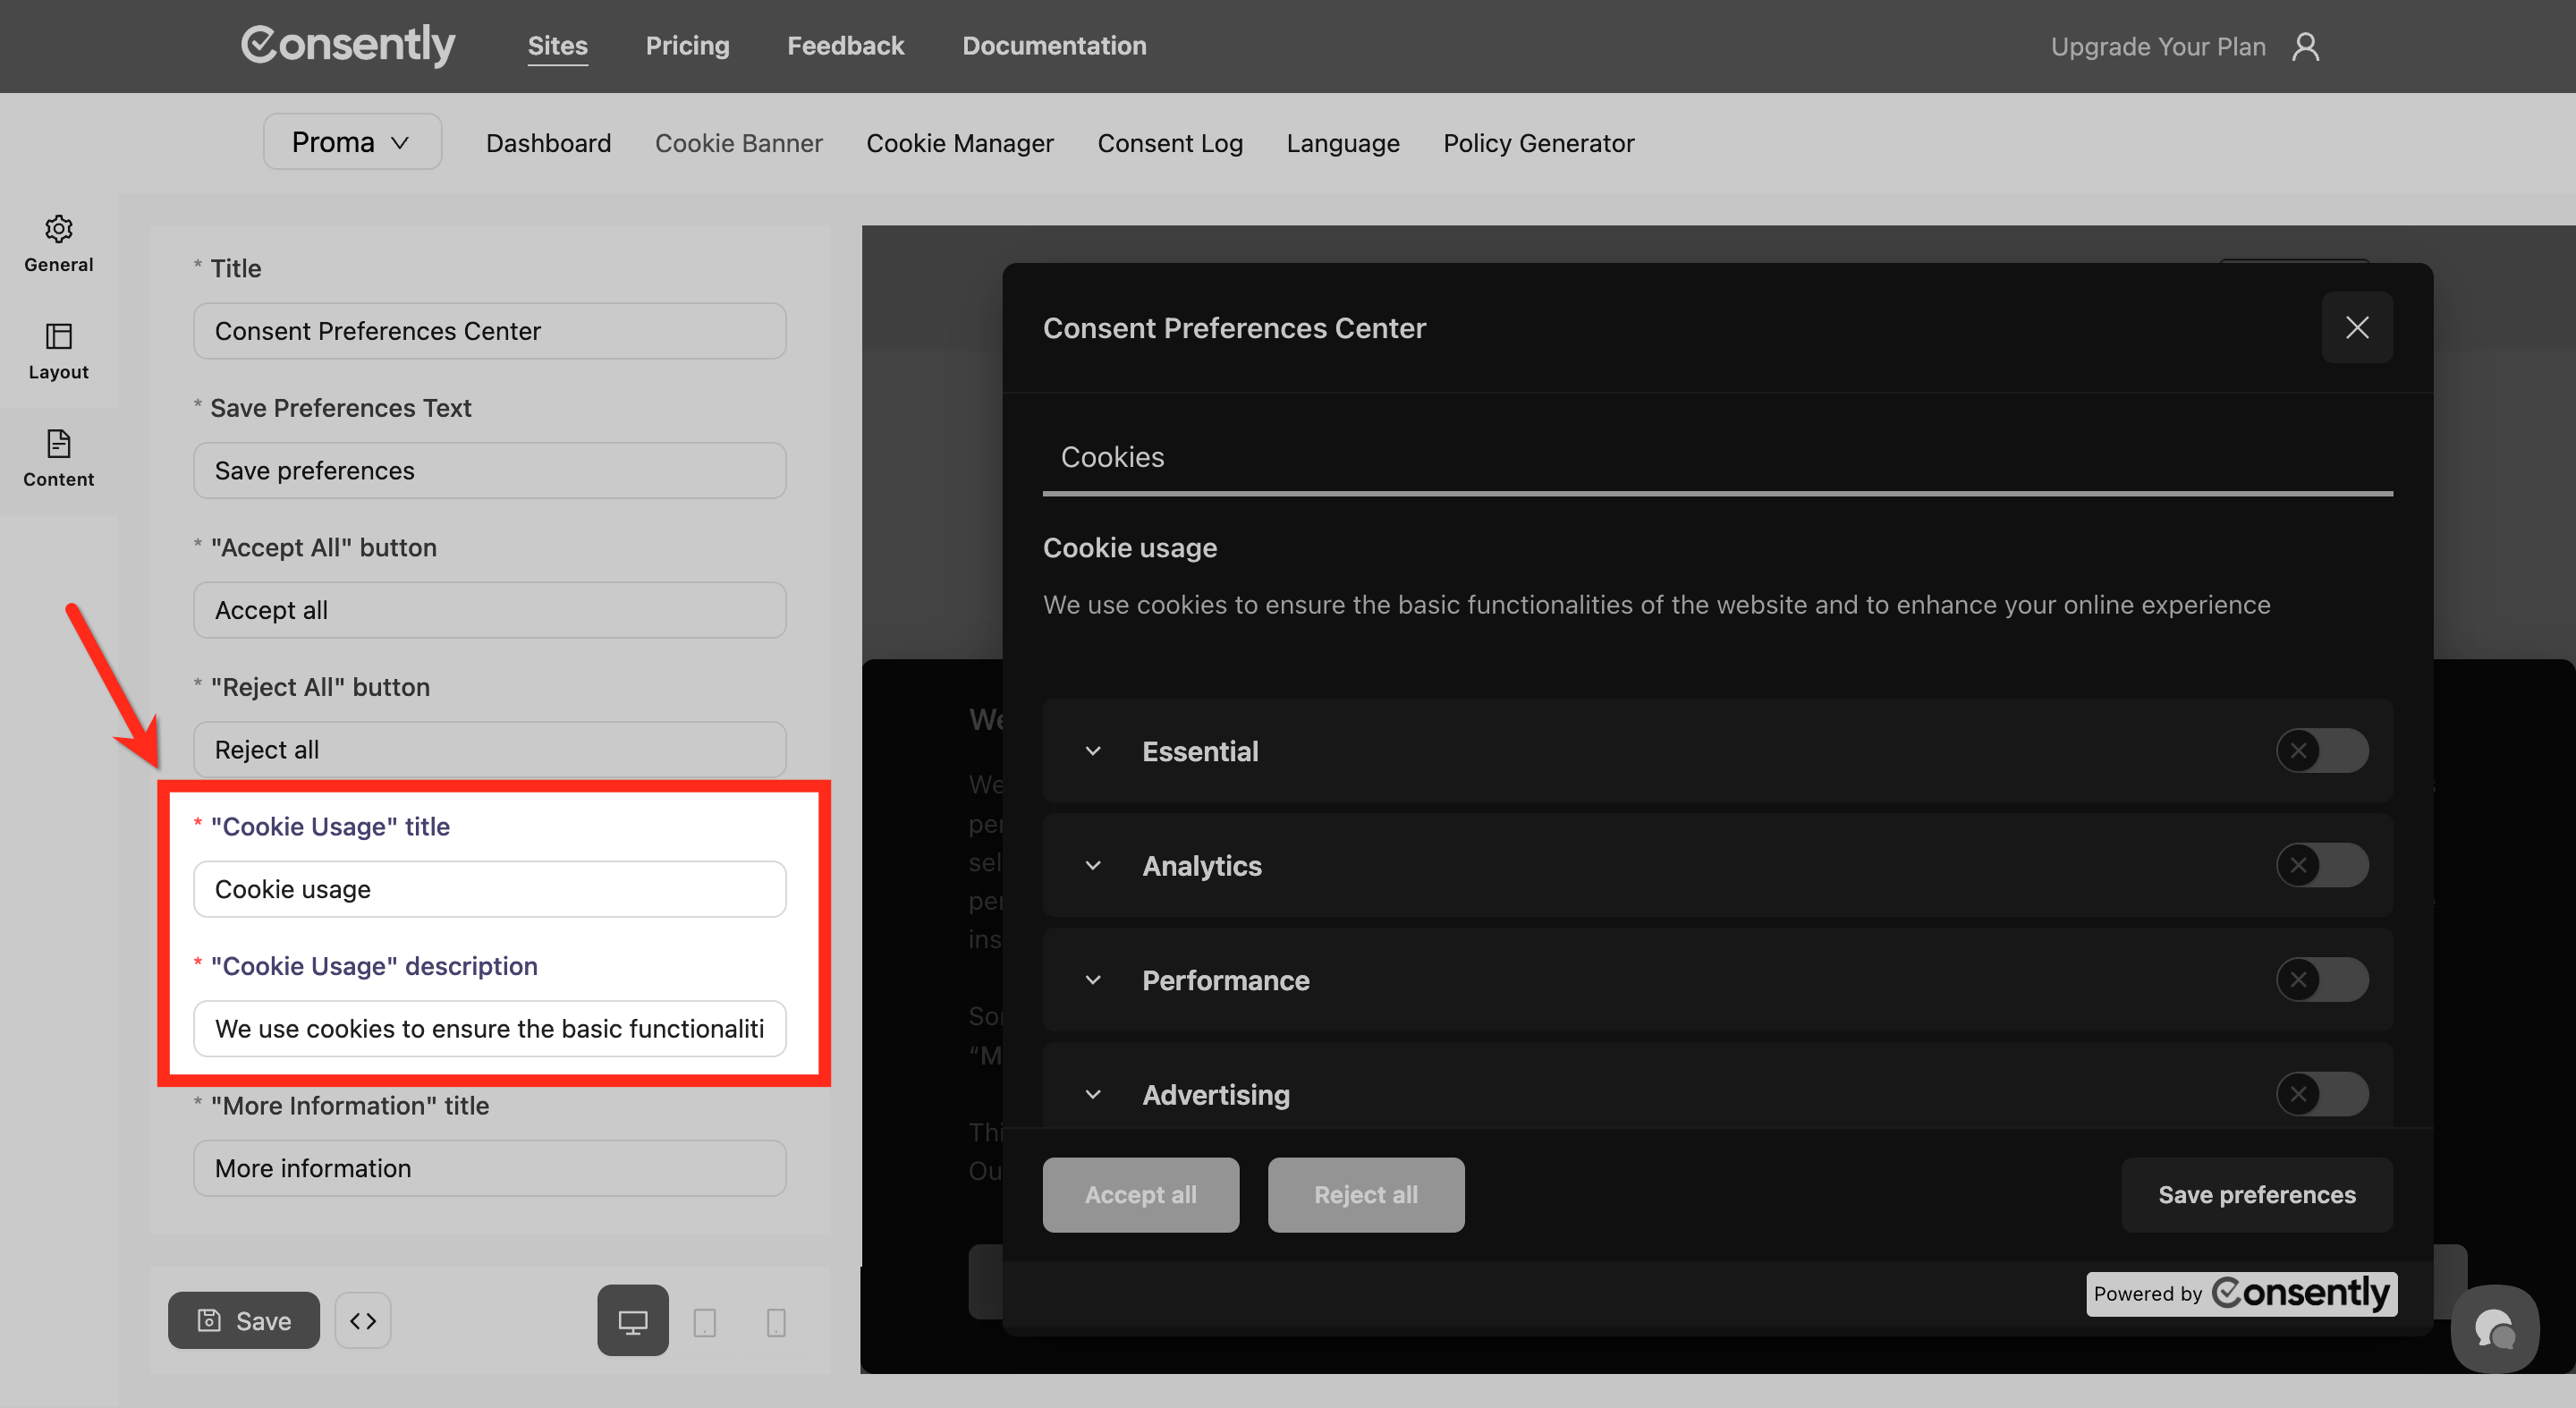
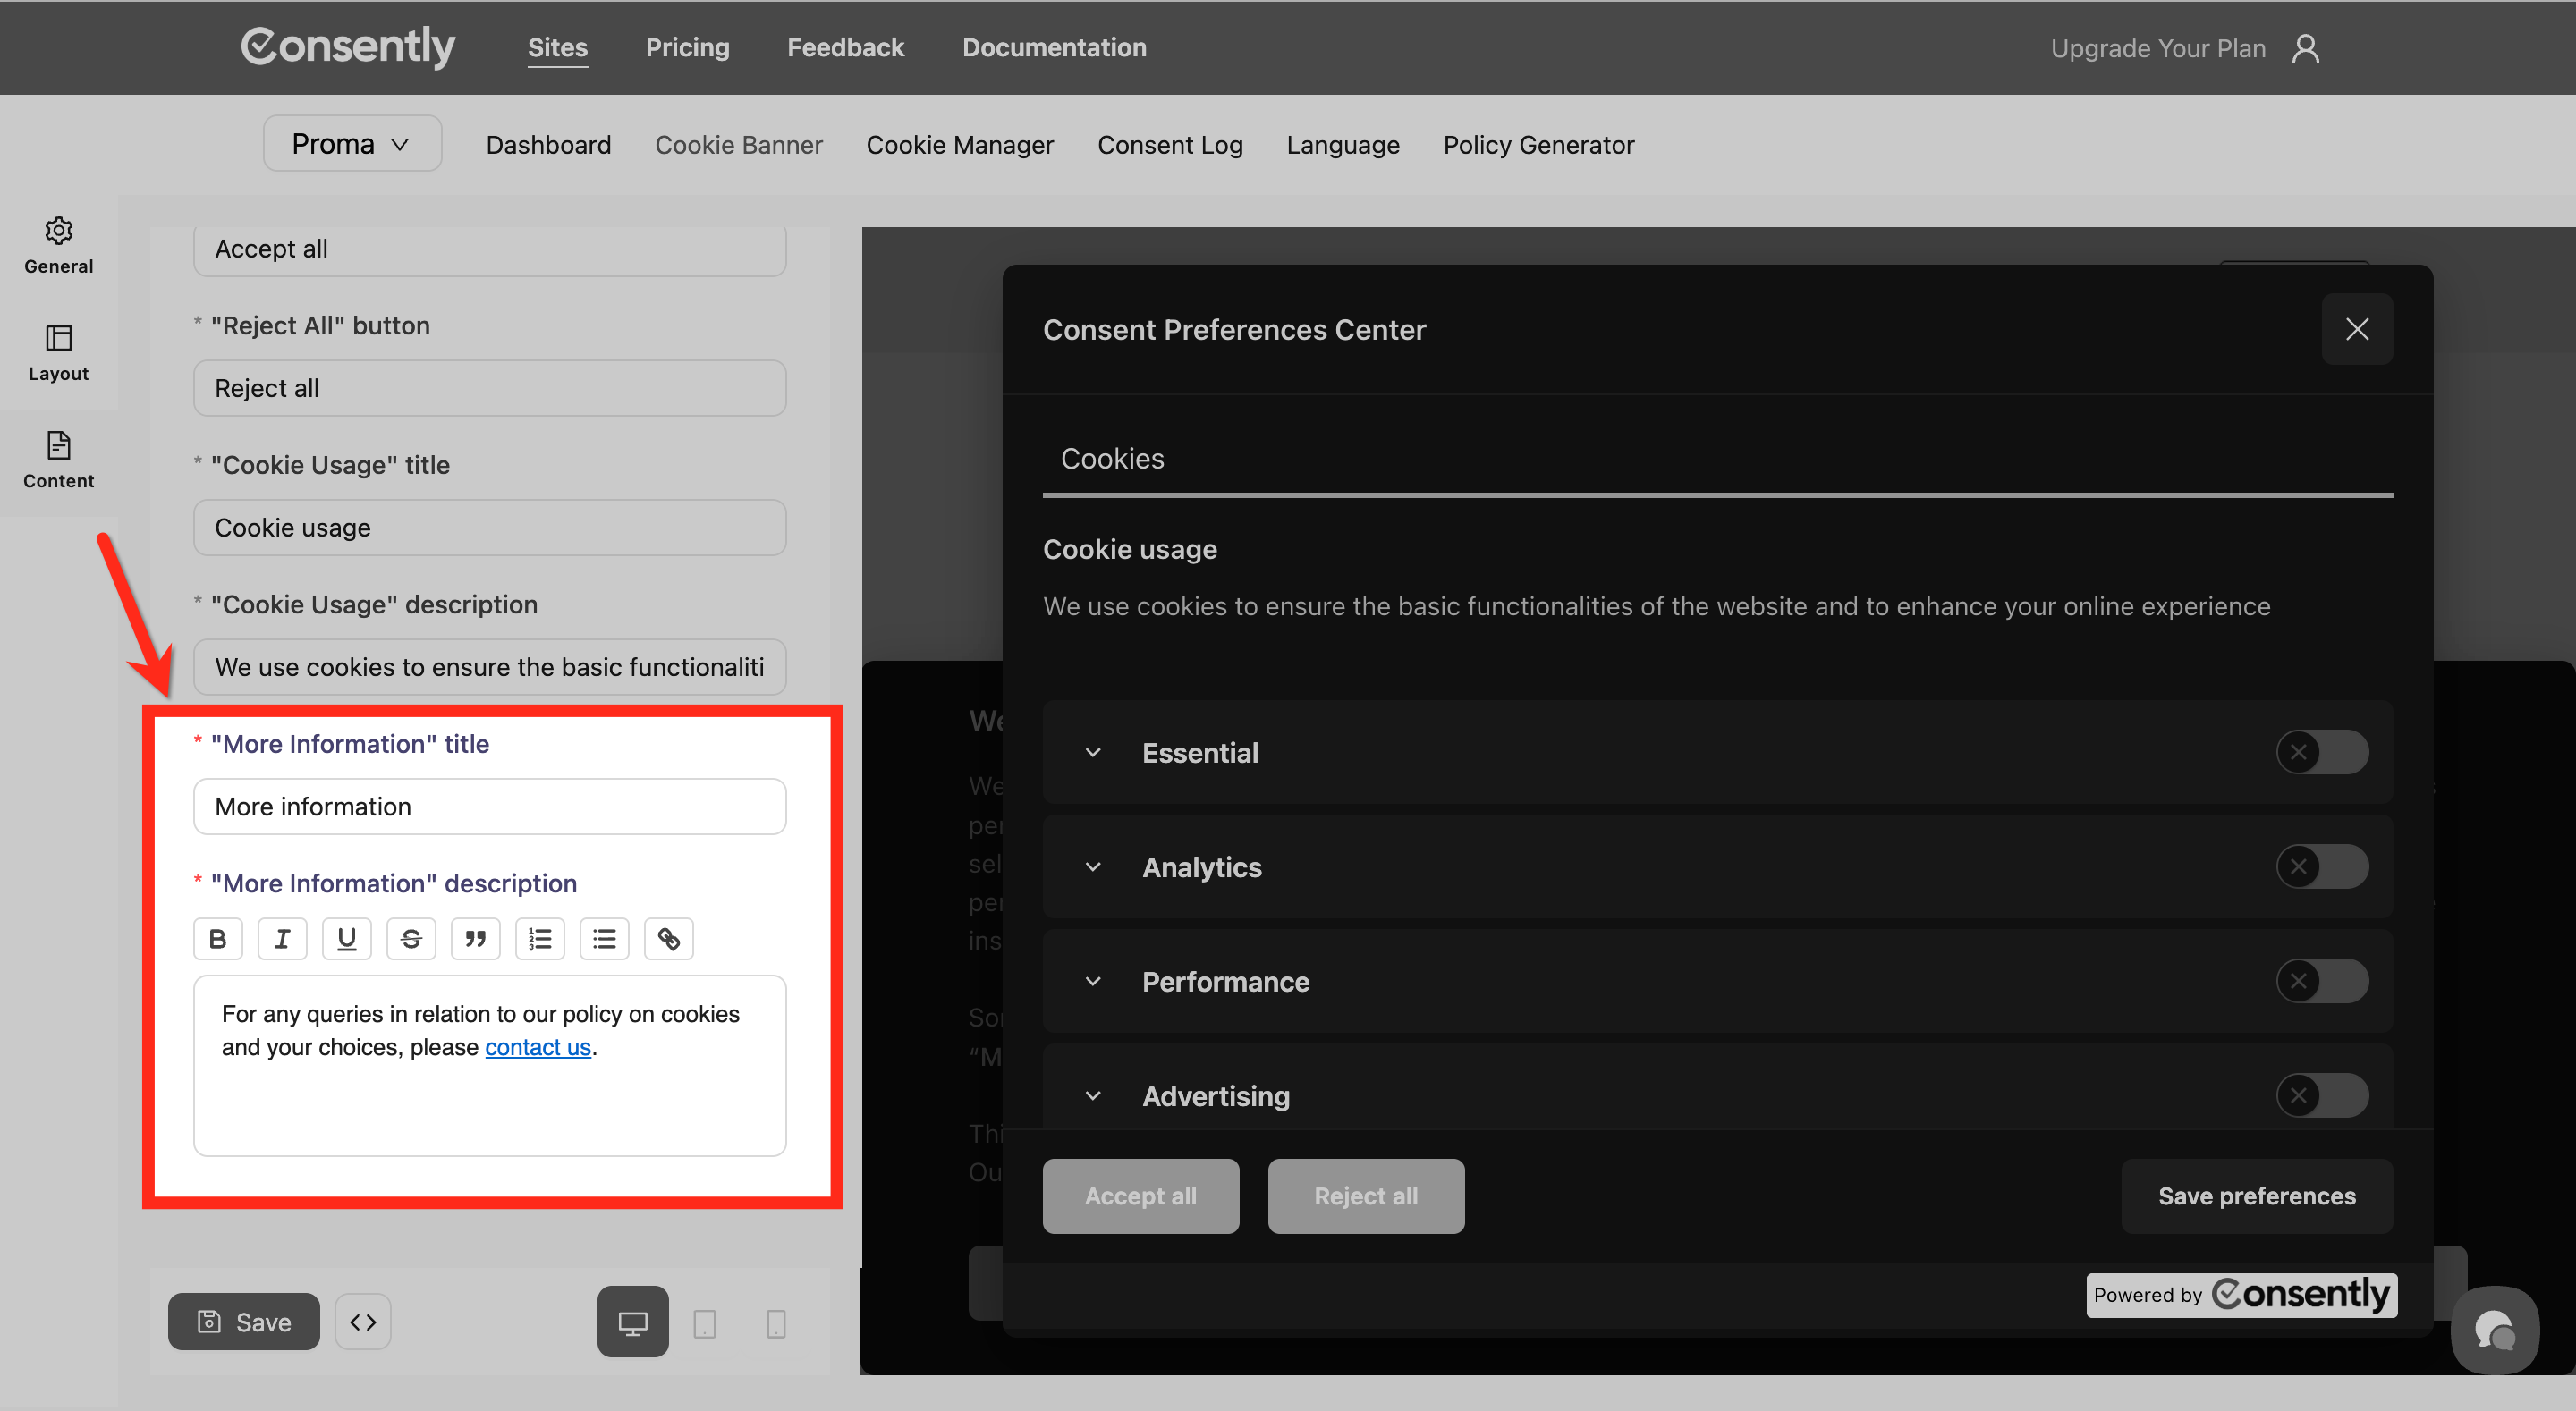
Step 7: Set up the More Information section
Configure the More Information section for additional context:
More Information title — Section heading (e.g., "More Information")
More Information description — Detailed information with links to your policies using the rich text editor
Step 8: Save your changes
Click the Save button at the bottom left of the page.
Done!
Your preference center is now configured with custom content.
✅ Success indicator: Preview your banner to see how the preference center looks with your custom text.
Custom Preference Button
By default, Consently displays a floating Revisit Button (Cookie Preferences) that lets visitors update their consent choices. You can replace this with your own custom button or link using a simple JavaScript function.
Make sure you have:
Access to edit your website's HTML
How to Add a Custom Preference Button
Step 1: Add the button to your website
Add a new button or link in your site's HTML to serve as the consent preferences control.
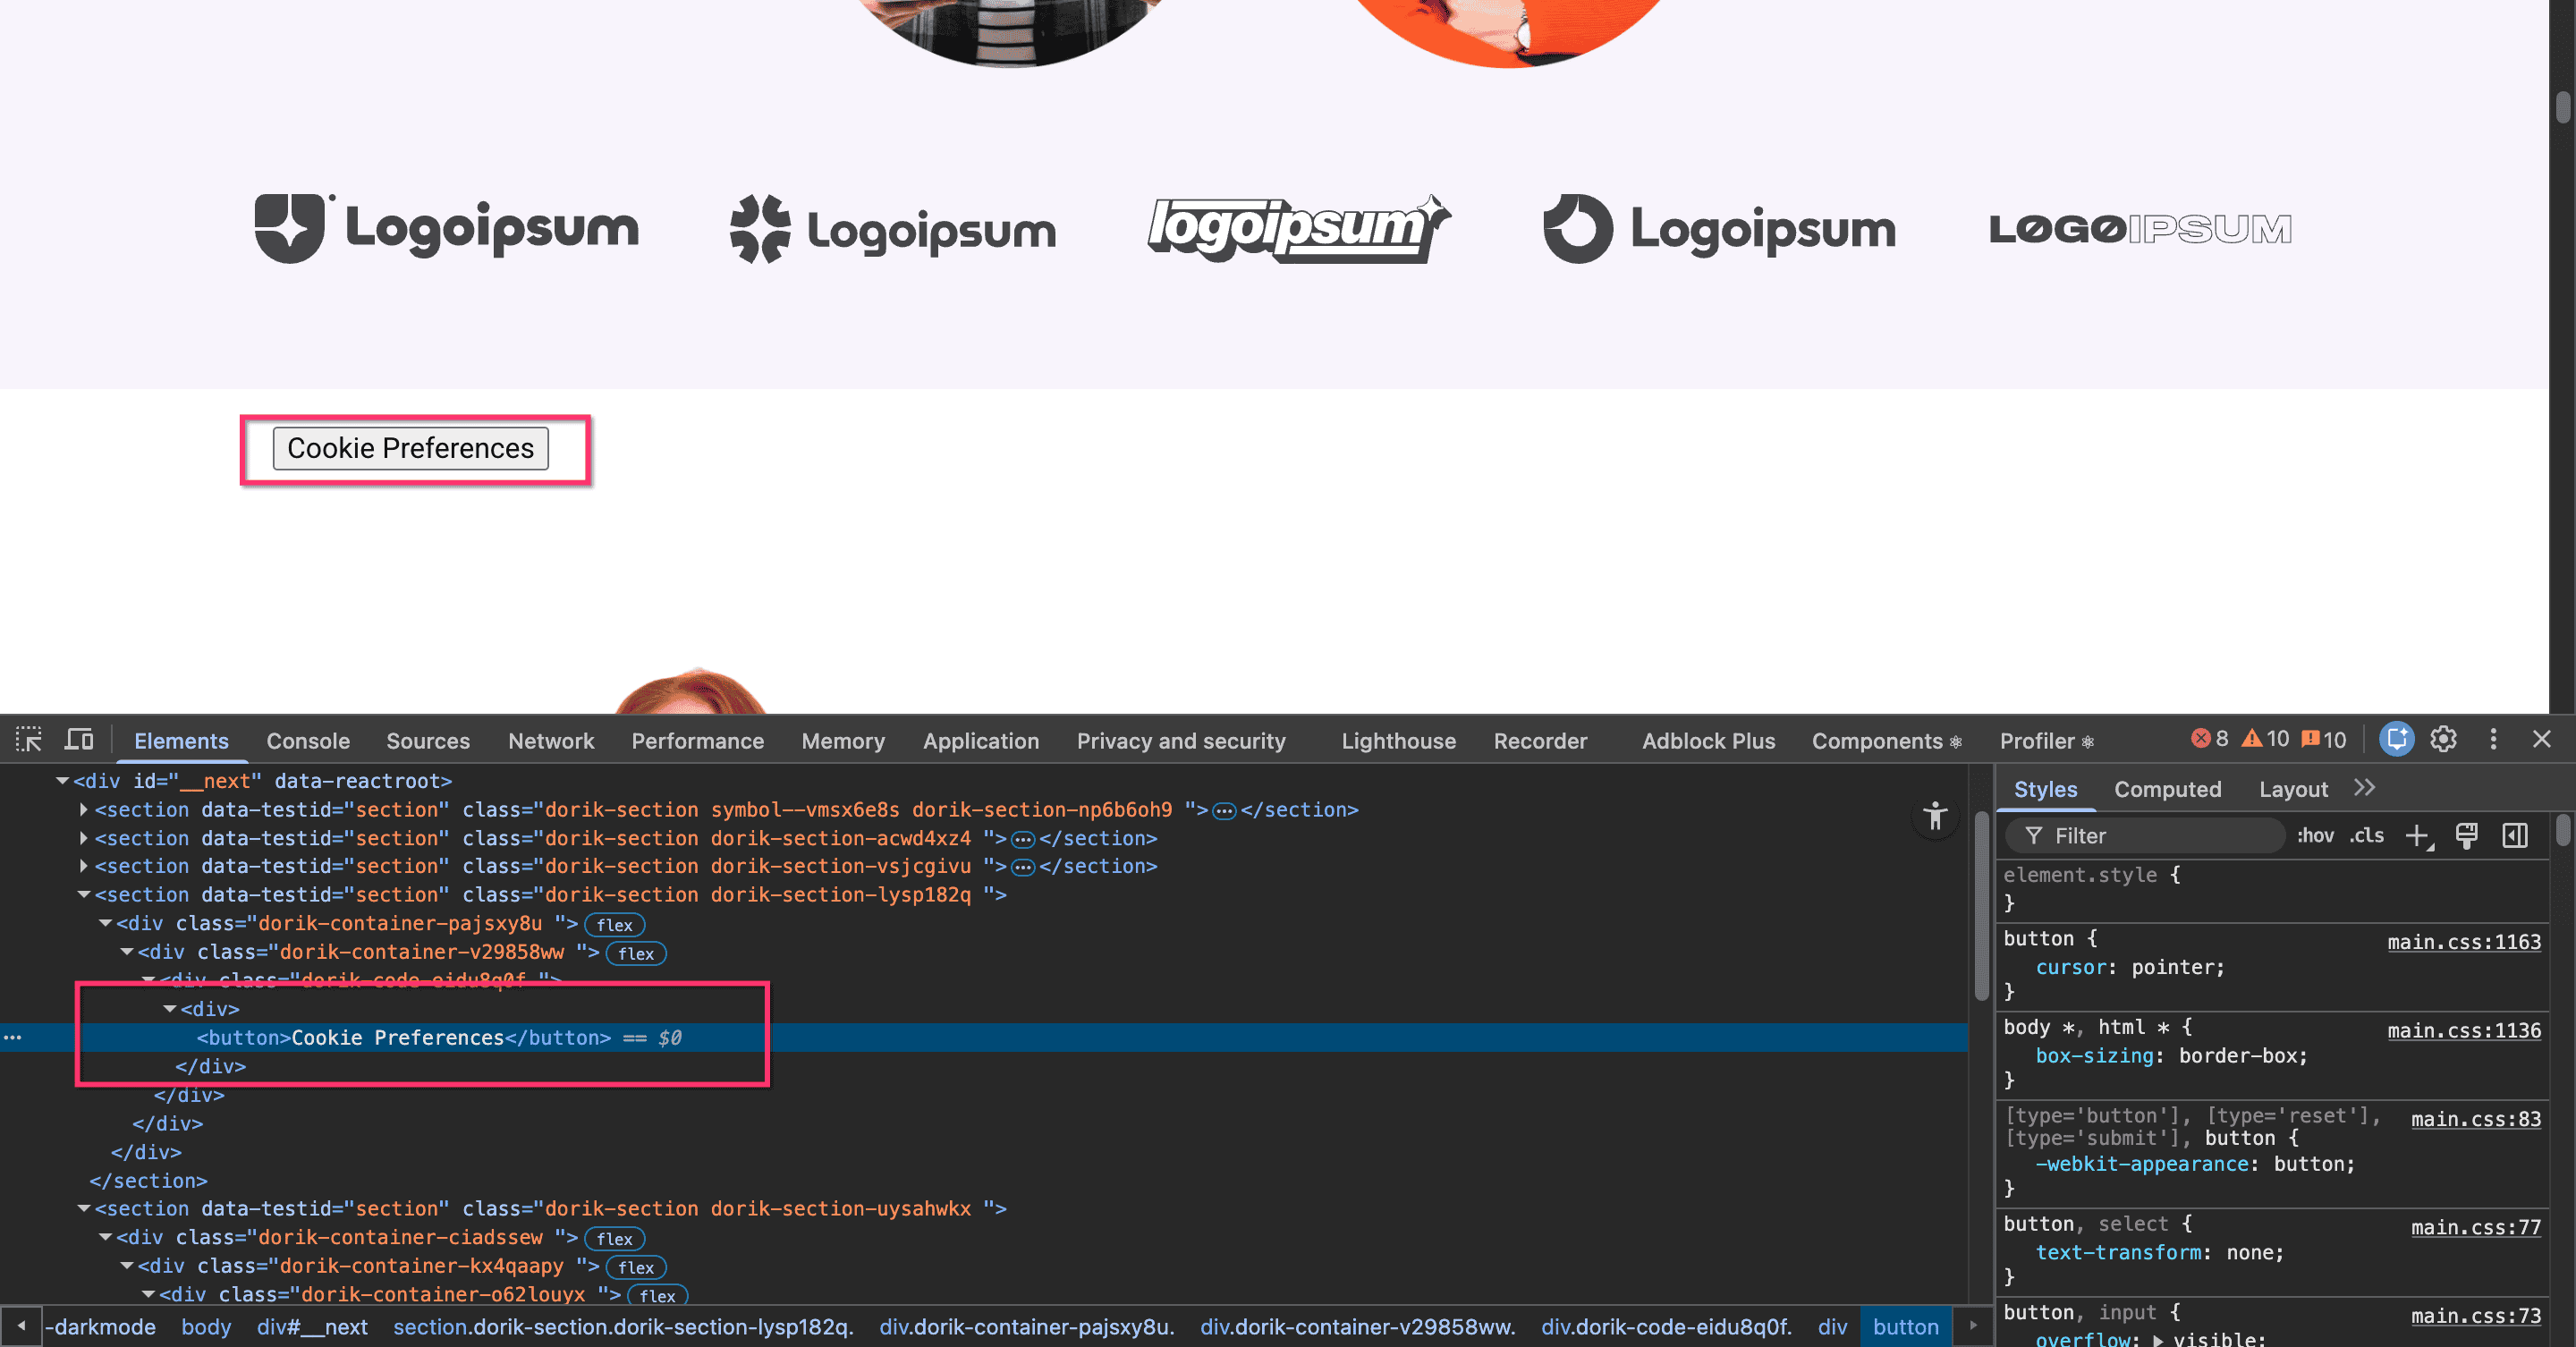
Step 2: Add the onclick attribute
Add onclick="window.showConsentPreferences()" to your button or link element.
Example with a button:
<button onclick="window.showConsentPreferences()">
  Cookie Preferences
</button>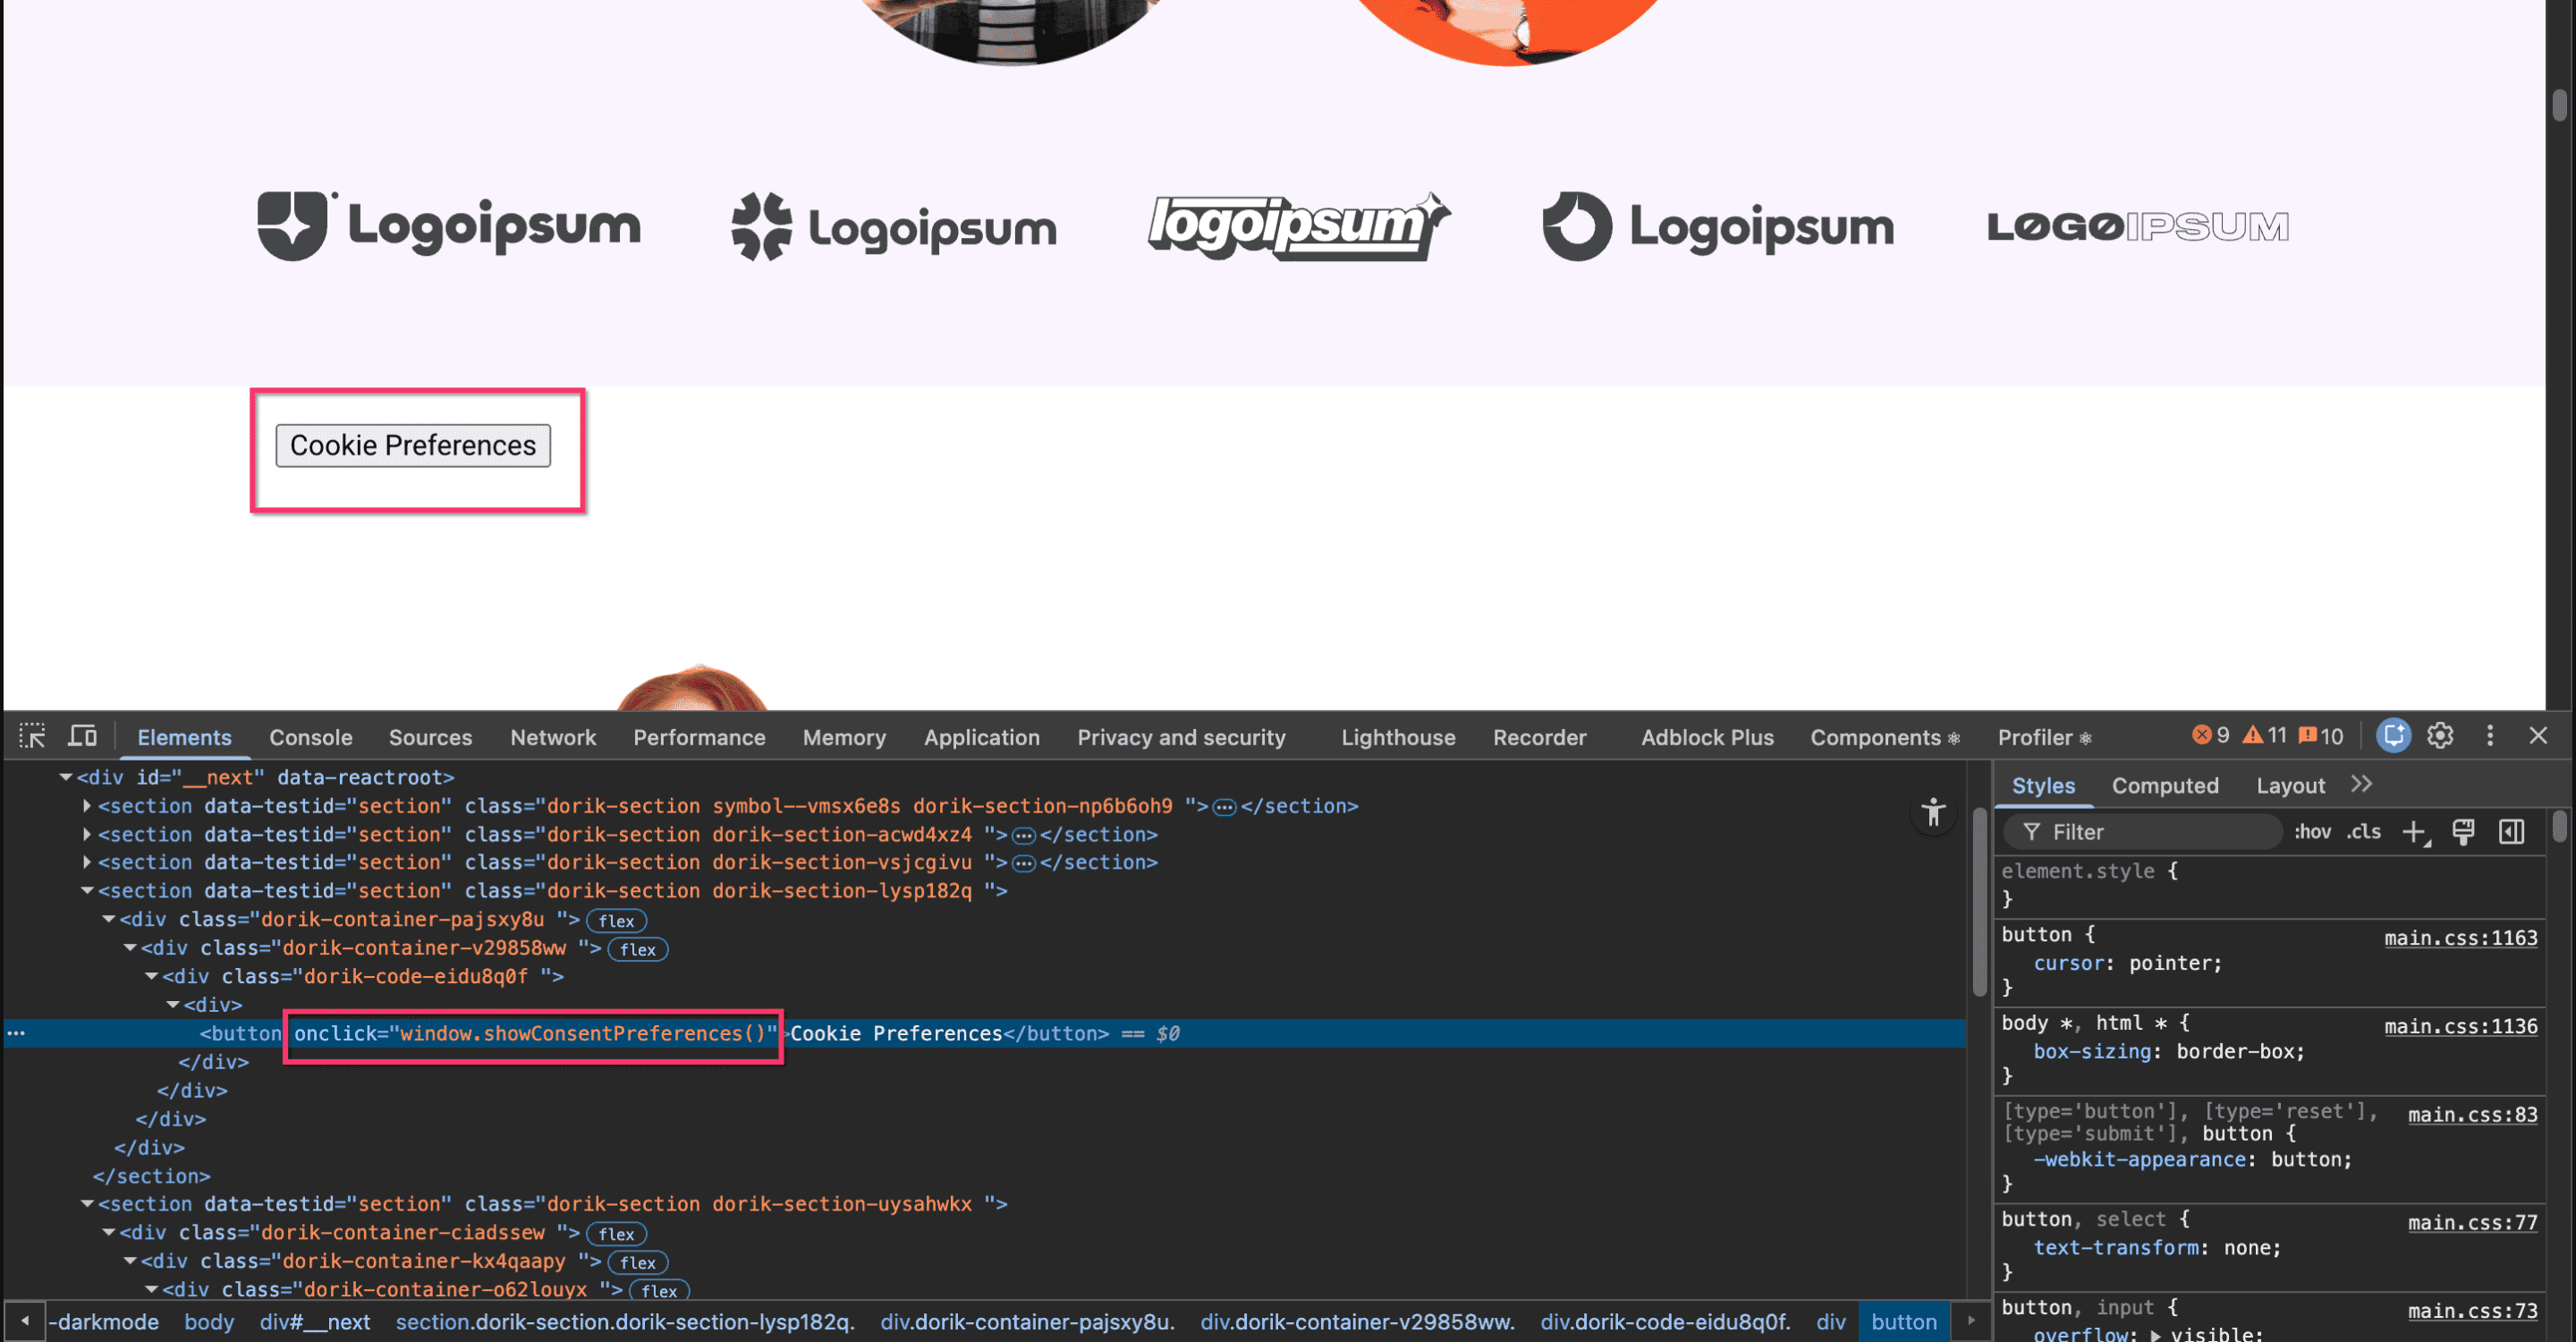
Example with a link:
<a href="#" onclick="window.showConsentPreferences(); return false;">
  Manage Cookie Settings
</a>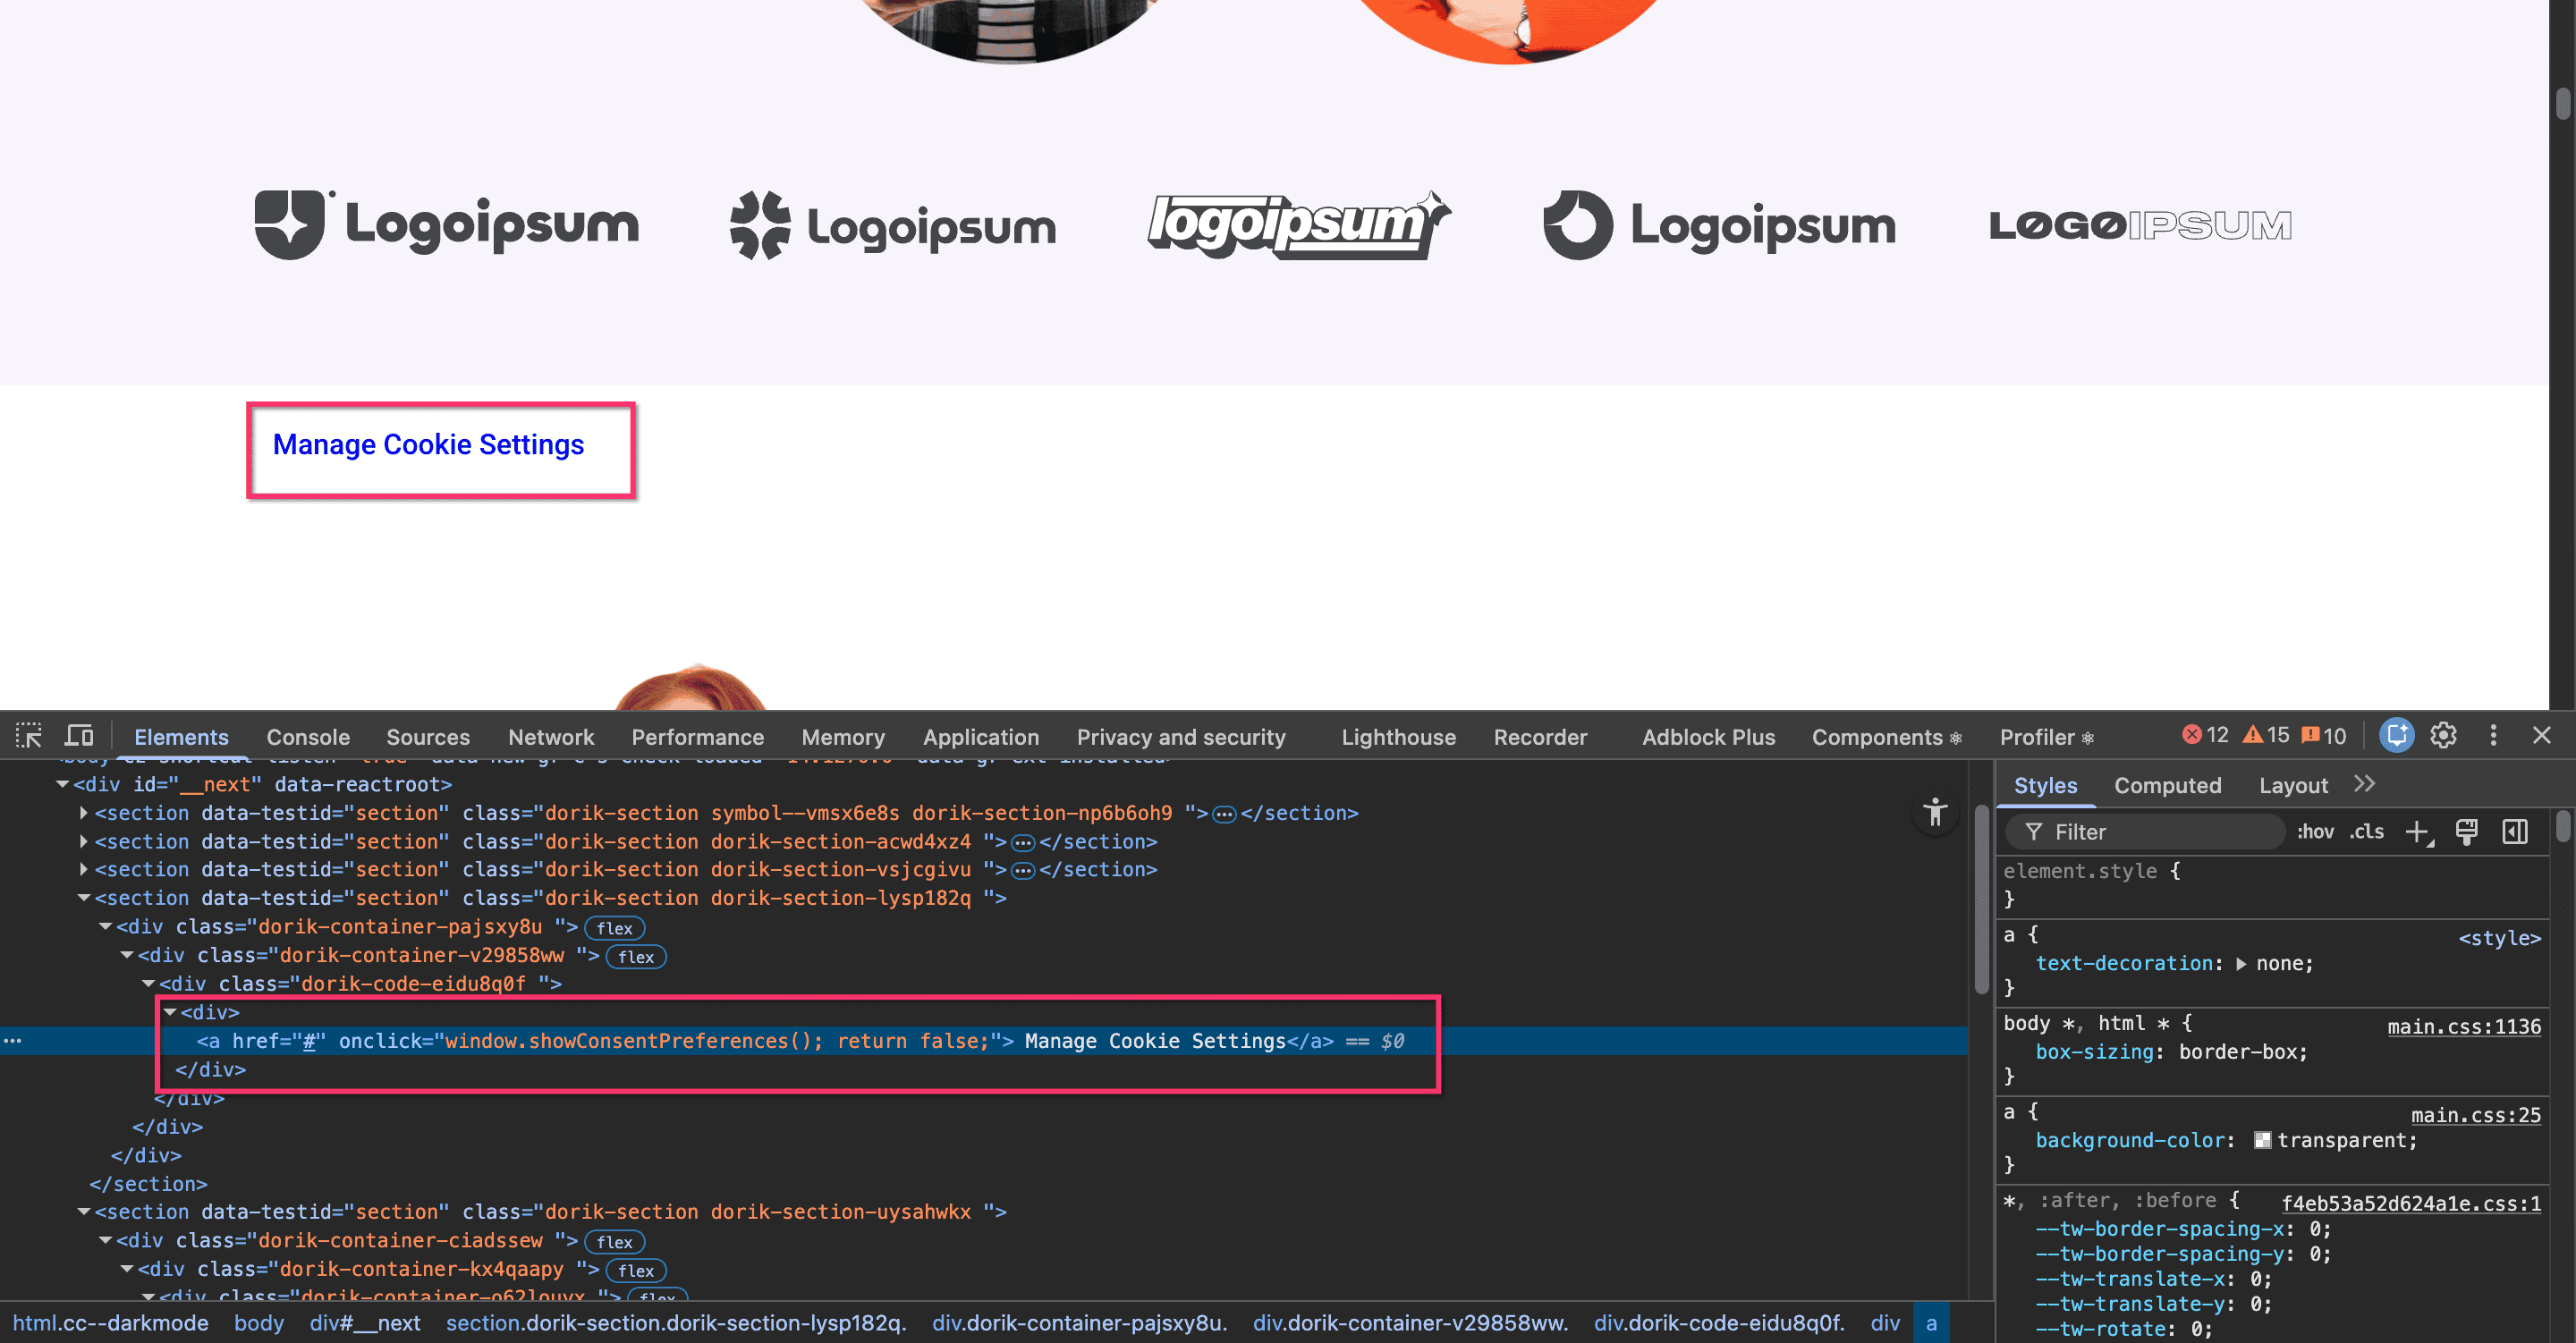
Step 3: Test the button
Save your changes and reload your website. Click your custom button to verify that the preference center opens correctly.

Done!
Your custom button now triggers the Consently preference center.
✅ Success indicator: When clicked, your custom button opens the preference center modal where visitors can update their consent choices.
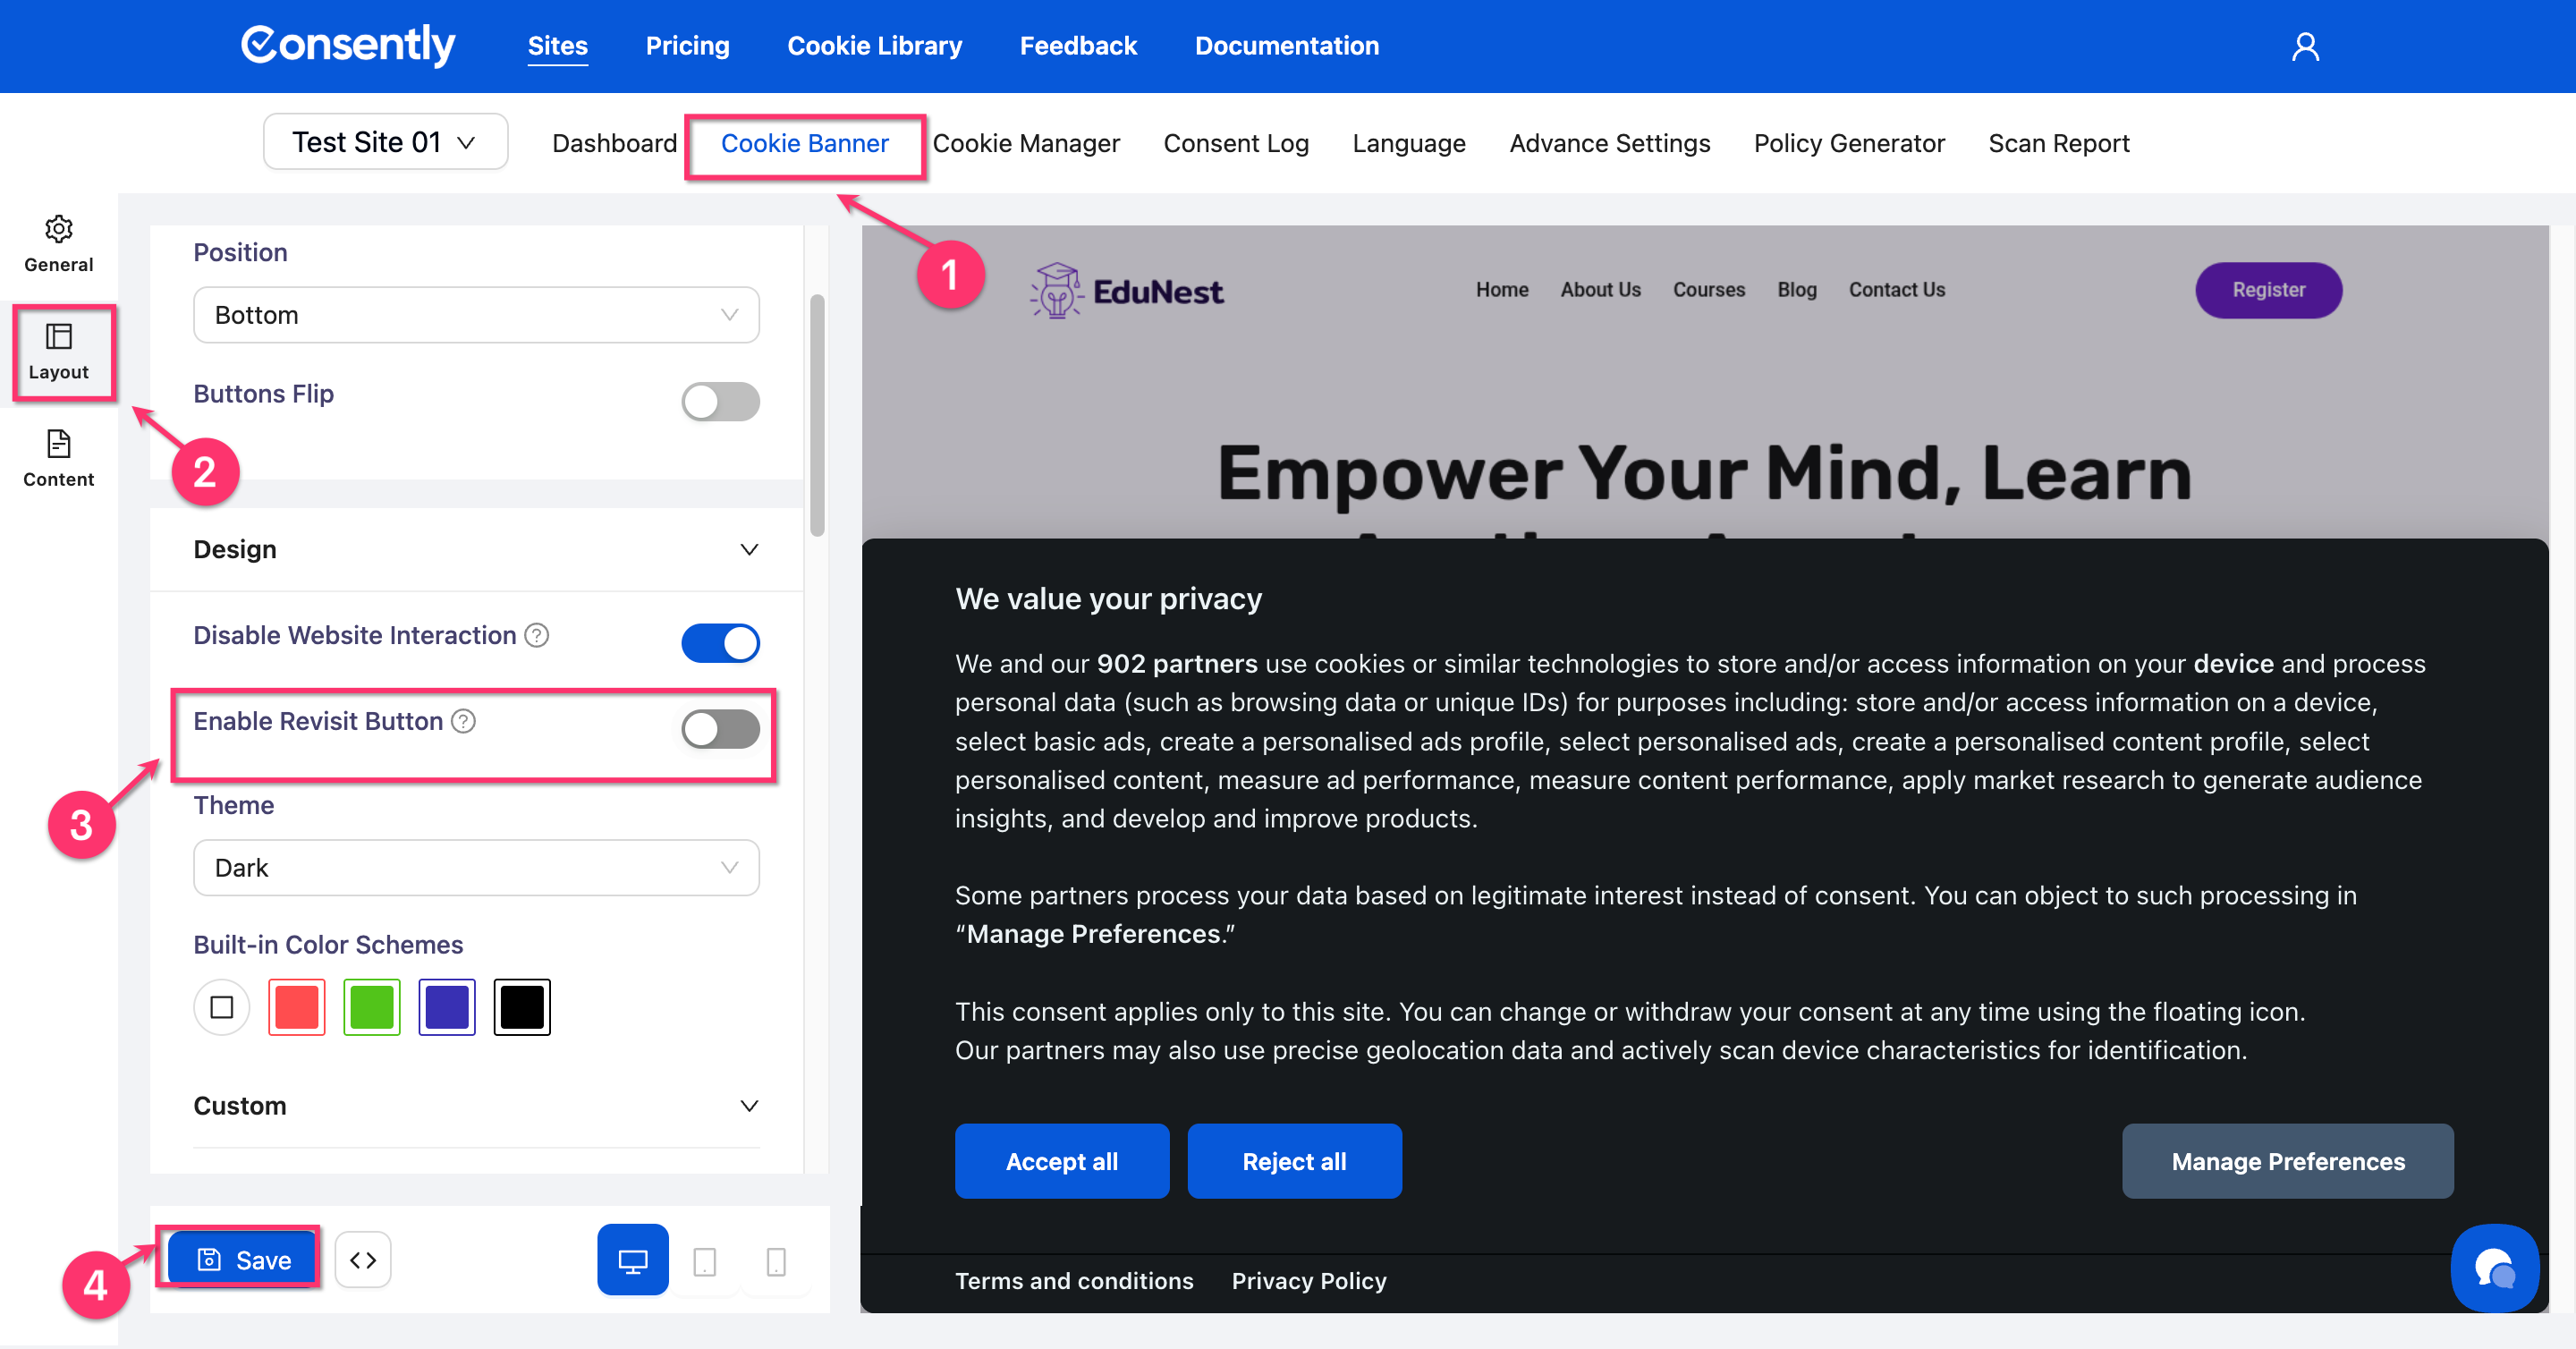
💡 Tip: If you're using a custom button, you can disable the default floating revisit button by going to Cookie Banner → Layout → Enable Revisit Button and toggling it off. This prevents both buttons from appearing on your site.
What's Next
Now that you've configured your preference center content, you should:
Troubleshooting
Rich text formatting is not appearing
Why this happens: The rich text editor requires you to select text before applying formatting.
Solution:
Type or paste your text first
Select the text you want to format
Click the formatting button (Bold, Italic, etc.)
If the issue persists, refresh the page and try again
Category descriptions are too long on mobile
Solution: Keep descriptions under 150 words. Test the mobile preview using the preview modes to ensure readability. Visitors can always read your full policies by clicking the policy links in the banner.
Changes are not reflecting in the preview
Solution: Click the Save button at the bottom of the page before previewing. Unsaved changes won't appear in the preview or on your live site.
Related Pages
Customizing Banner Content — Configure the main consent notice text