

TL;DR: Cookies & Scanner → Cookies & Tracker List → Categories → Edit. Consently provides six default categories that control how cookies are grouped, labeled, and displayed in your banner's preference center.
Overview
Cookie categories group cookies by purpose and determine how they appear to visitors in the preference center. Each category has its own name, description, and behavior settings that affect consent requirements and visitor visibility.
Before You Begin
Make sure you have:
Run at least one cookie scan, so cookies are available to categorize
Time required: About 5 minutes
Default Cookie Categories
Consently includes six fixed categories. Custom categories are not currently supported.
Essential: Required for basic website functionality. Loads automatically regardless of consent and cannot be disabled by visitors.
Analytics: Tracks website usage and visitor behavior anonymously to help you understand site performance.
Performance: Enhances website functionality for faster loading and a better user experience.
Advertising: Supports ad personalization, retargeting campaigns, and conversion tracking.
Social: Enables social sharing buttons, embedded content, and social media integrations.
Unclassified: Newly discovered cookies not yet assigned to a category. Review this tab regularly after each scan.
How to Configure a Cookie Category
Step 1: Open the Cookies & Scanner section
Navigate to your site dashboard and click Cookies & Scanner in the top navigation bar.
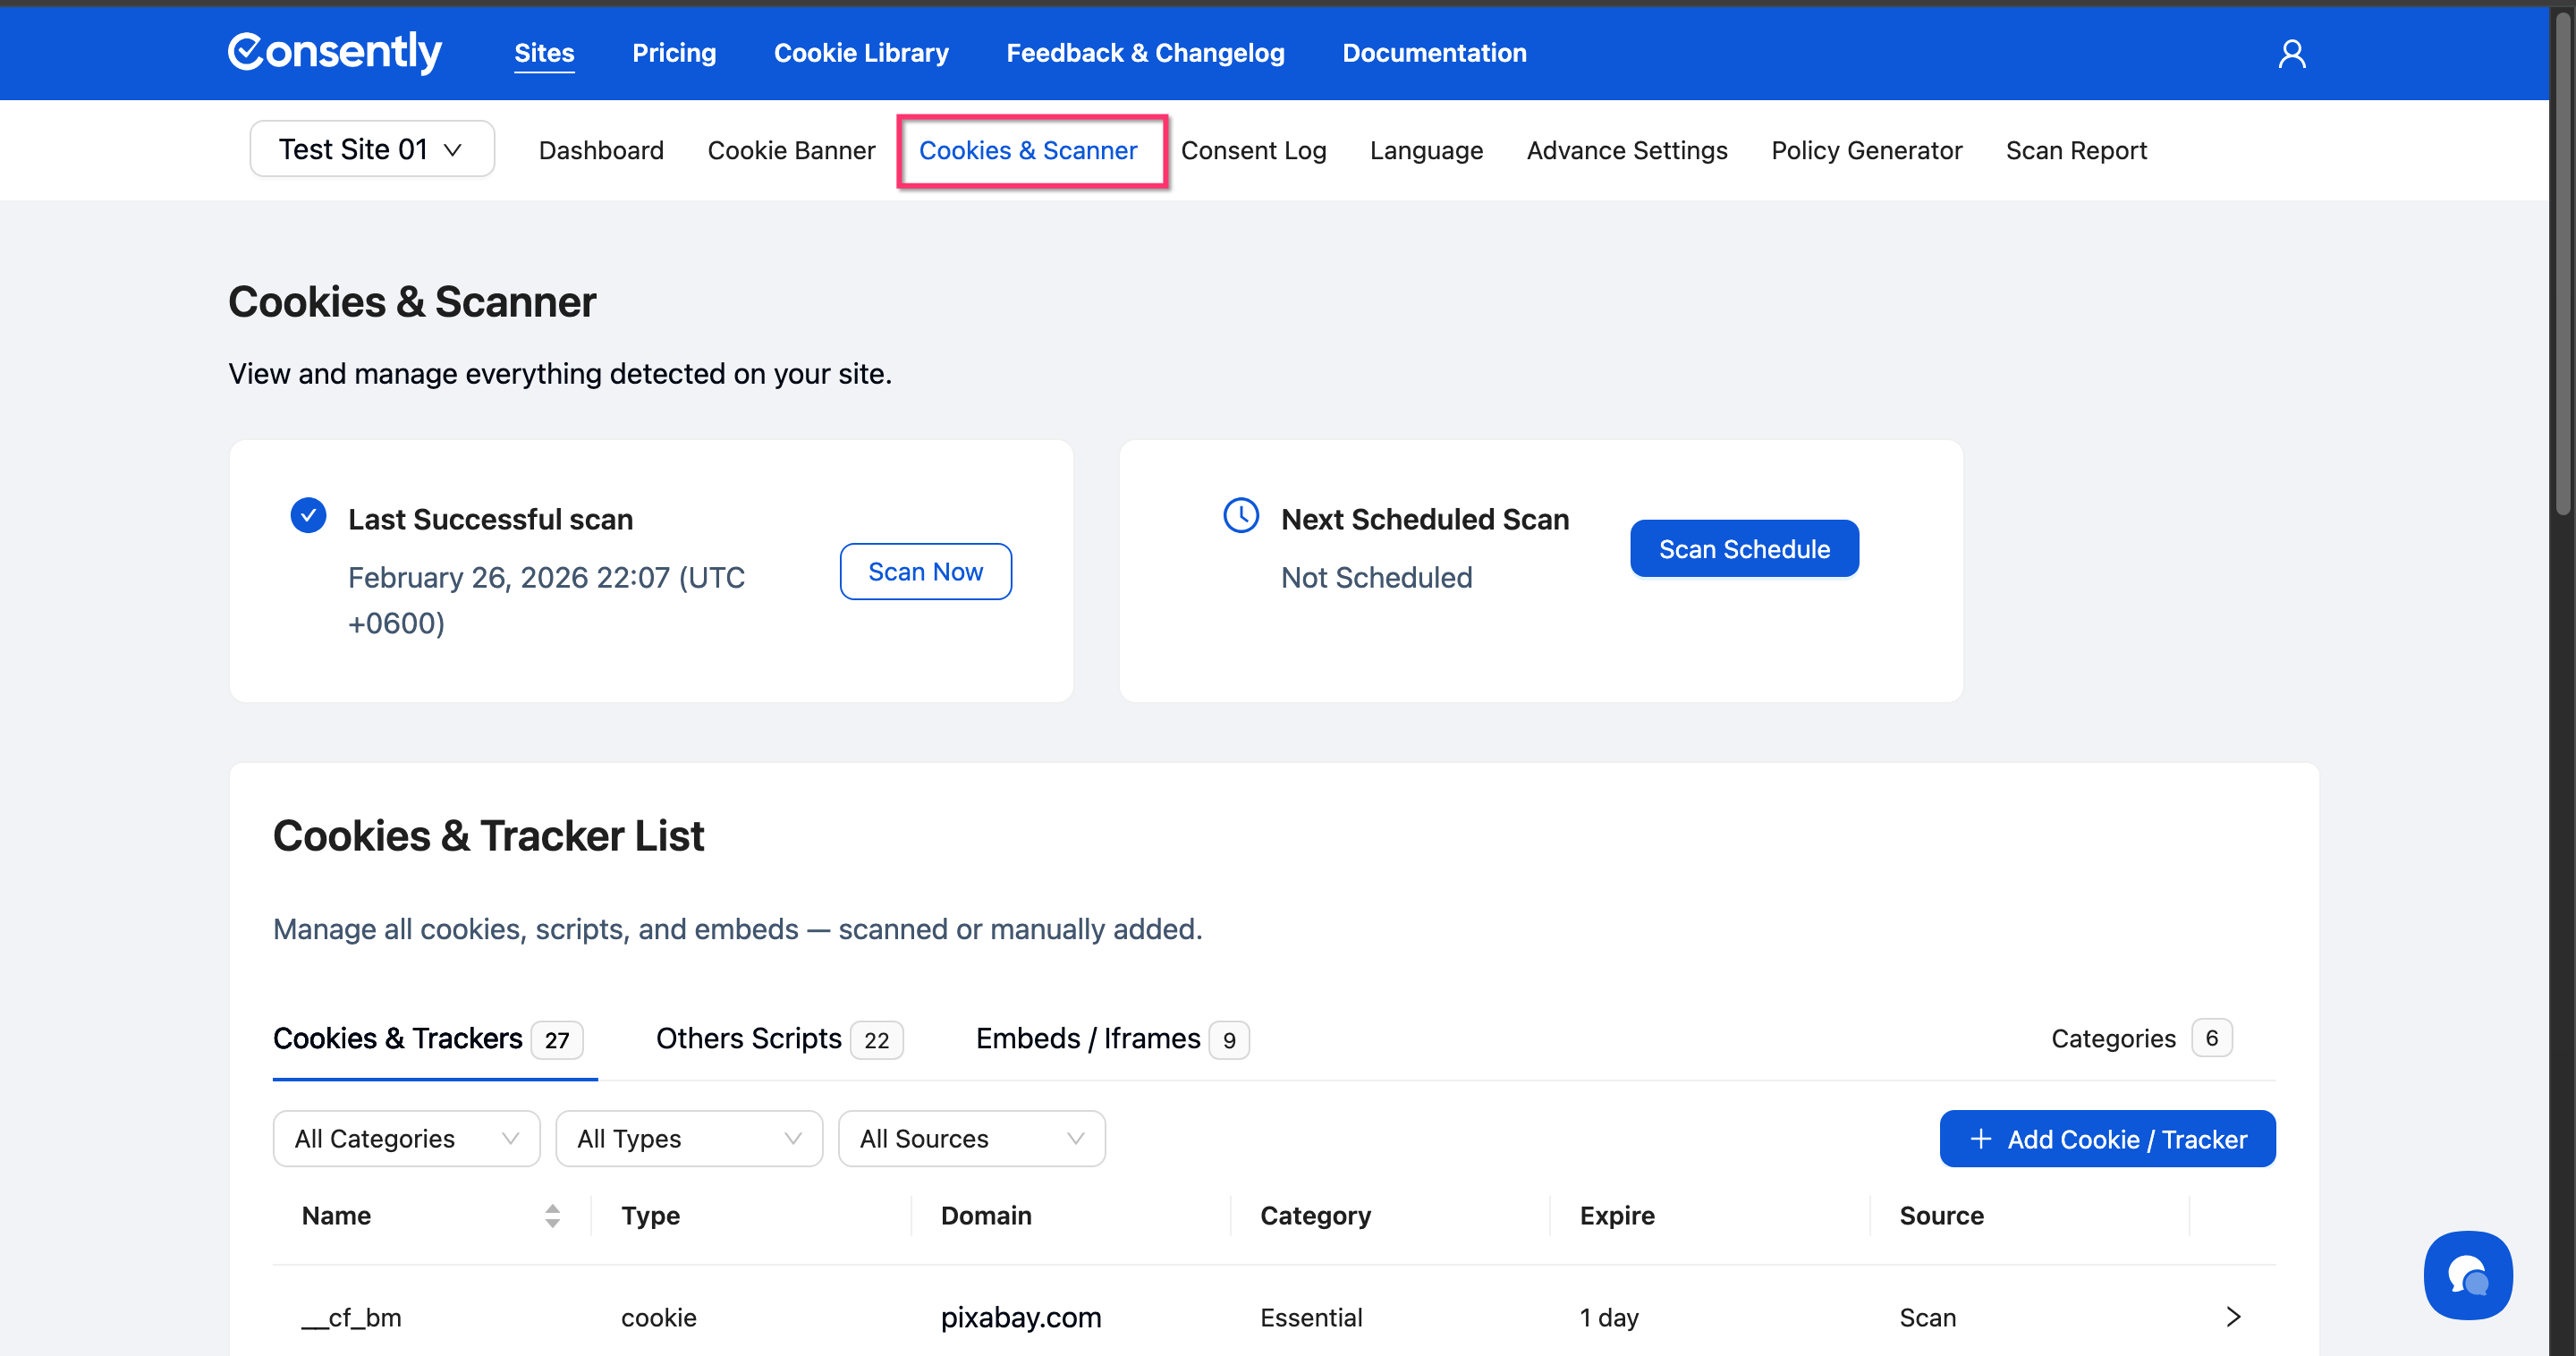
Step 2: Open the Categories view
Click the Categories button in the top-right corner of the Cookies & Tracker List tabs bar. It shows a count of your categories (e.g., Categories 6).
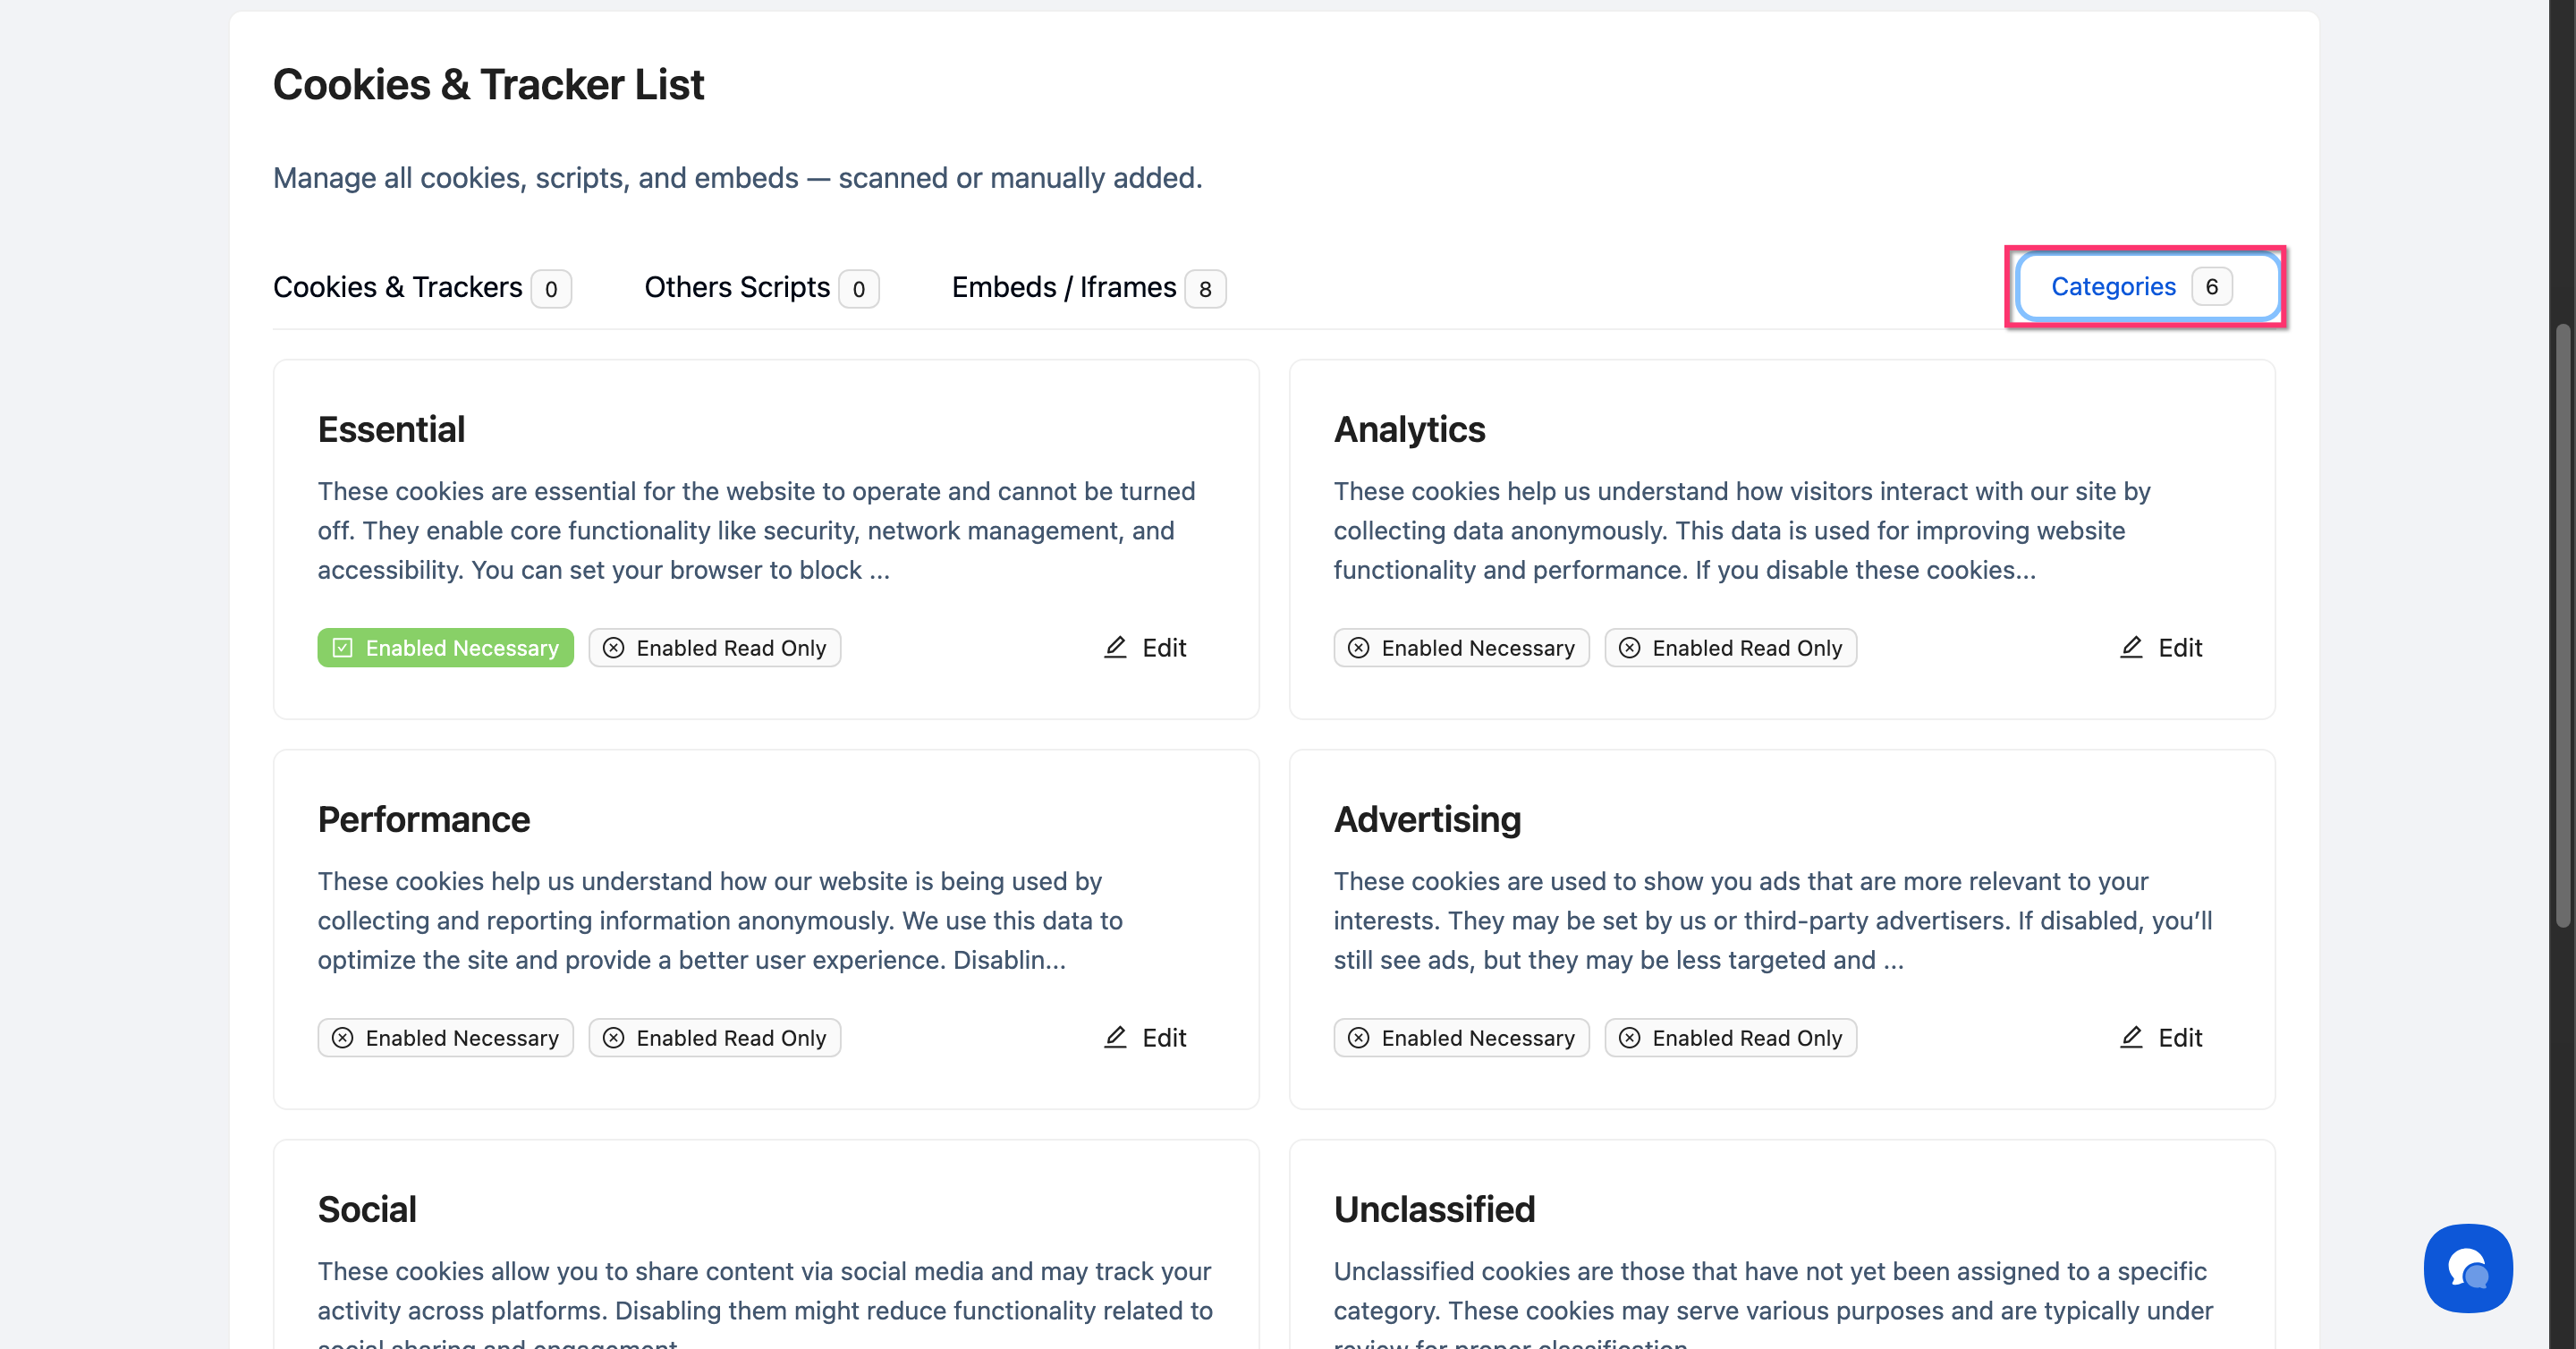
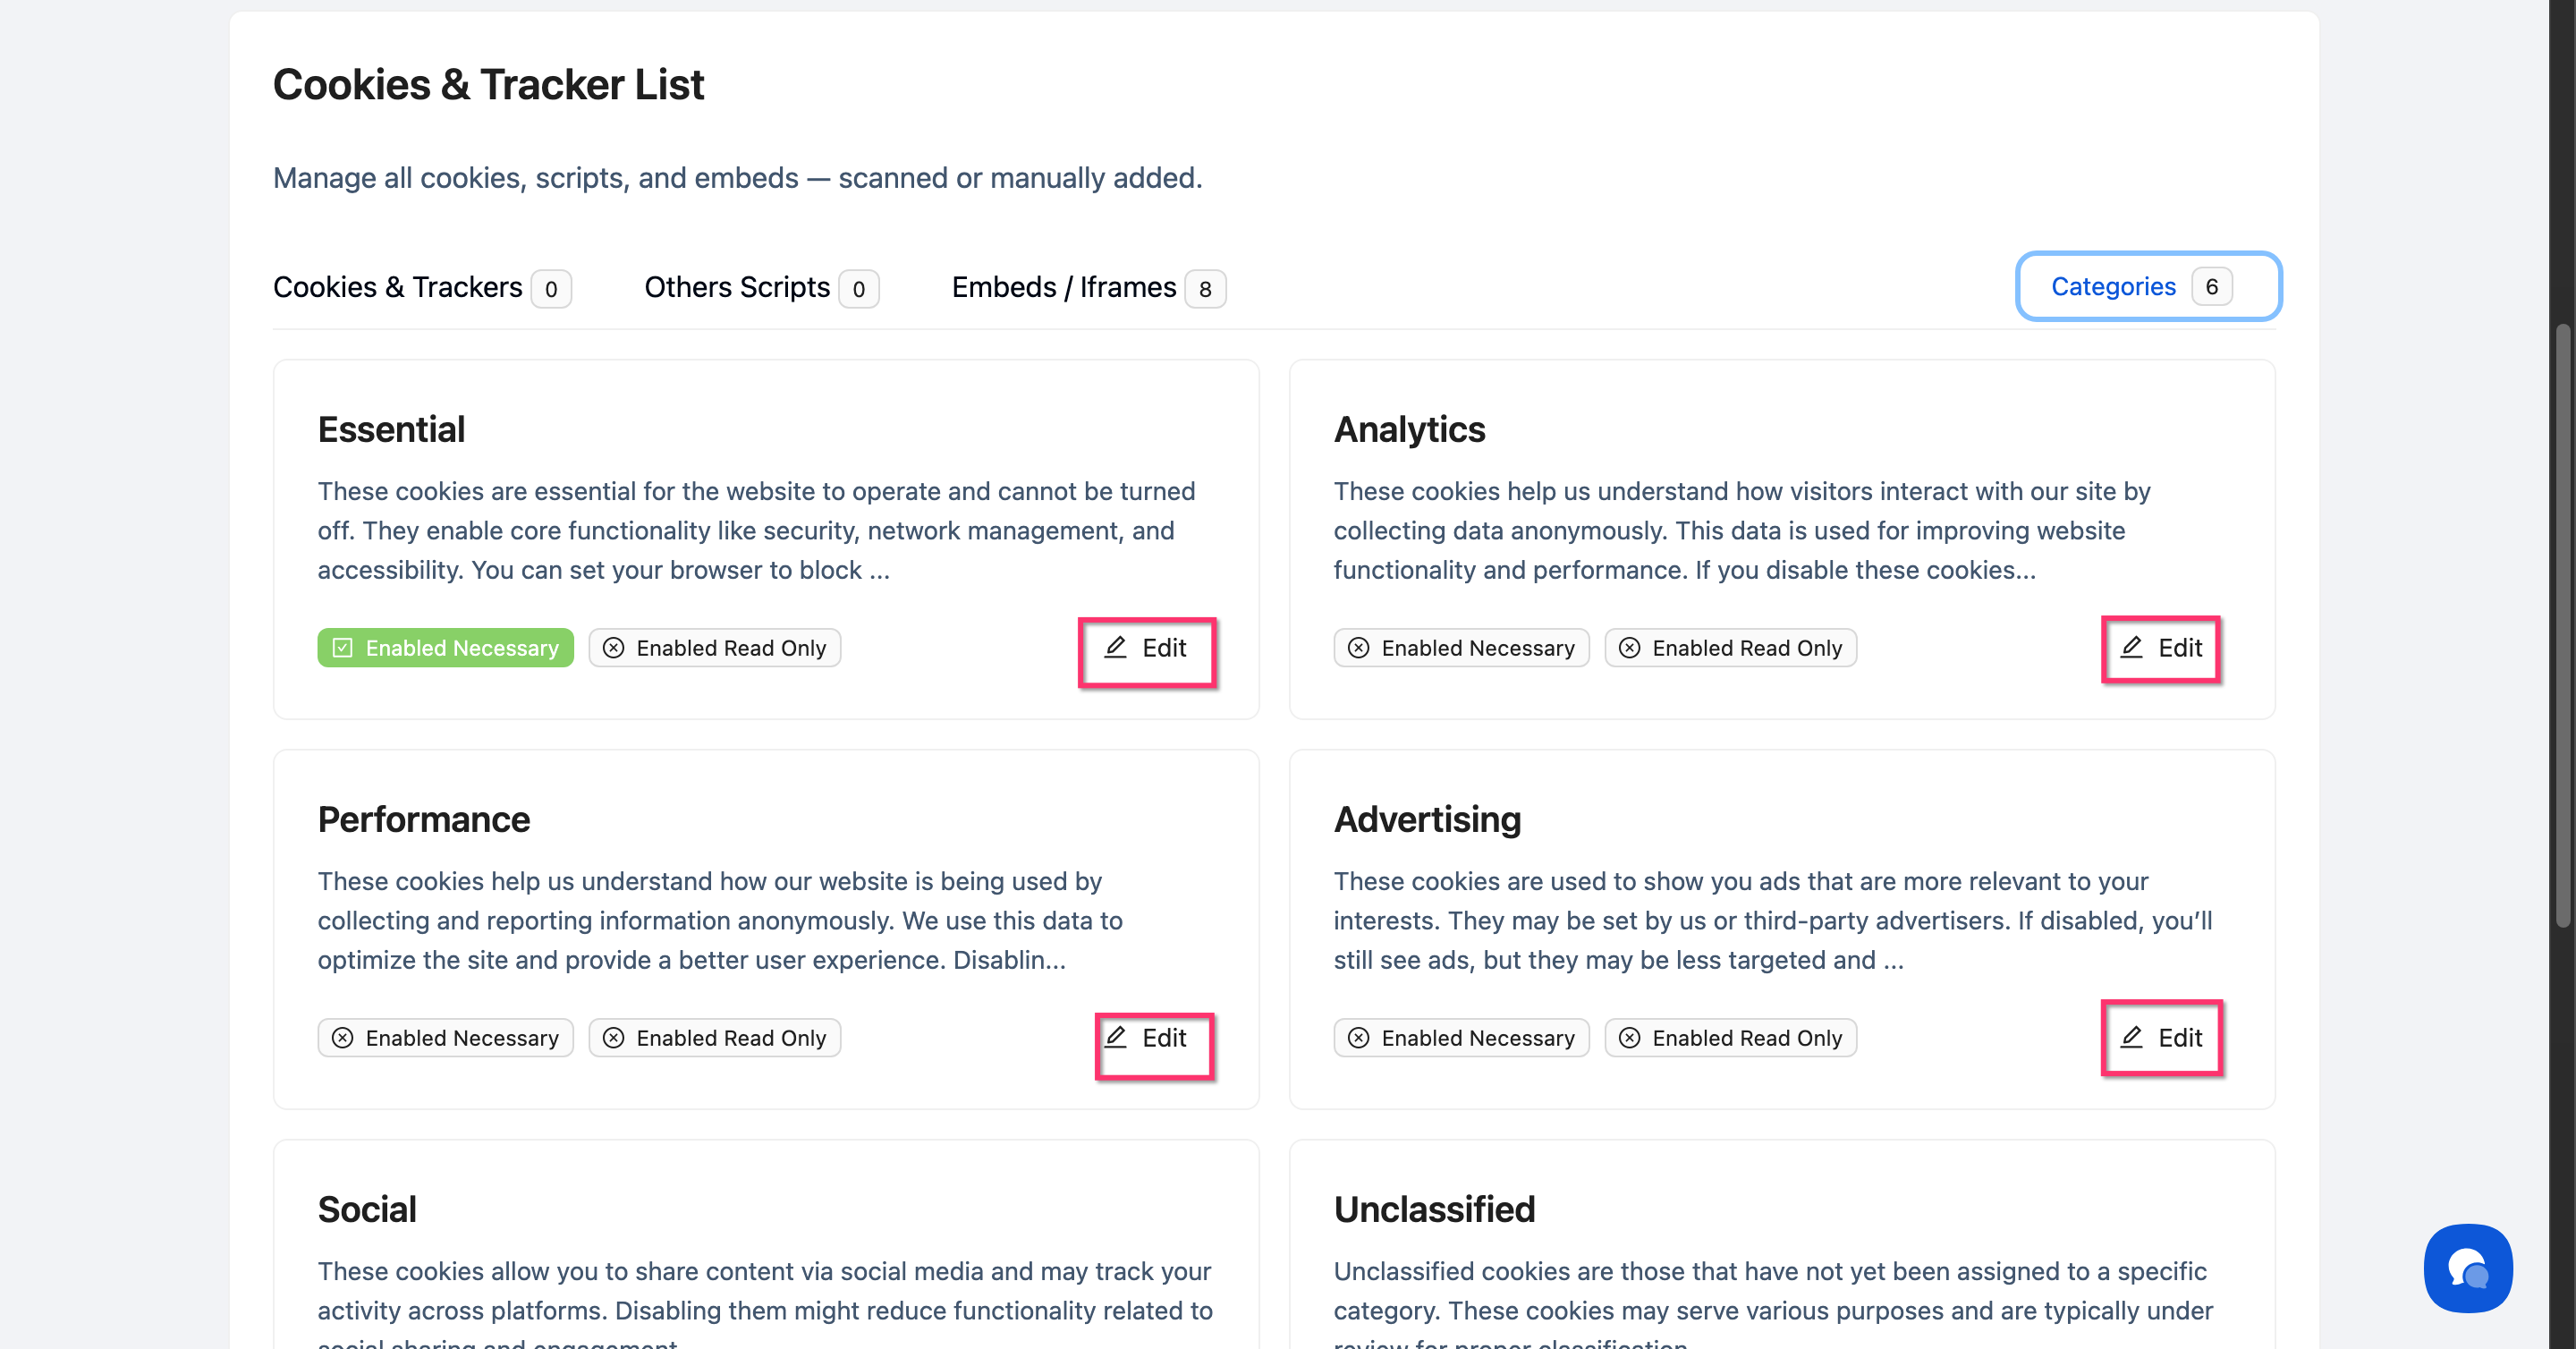
Step 3: Select a category to edit
The six category cards appear in a grid, each showing the category name, description preview, and current settings badges. Click Edit on the category you want to configure.
Step 4: Update the name and description
Modify the Description field to customize how the category appears to visitors in your banner's preference center.
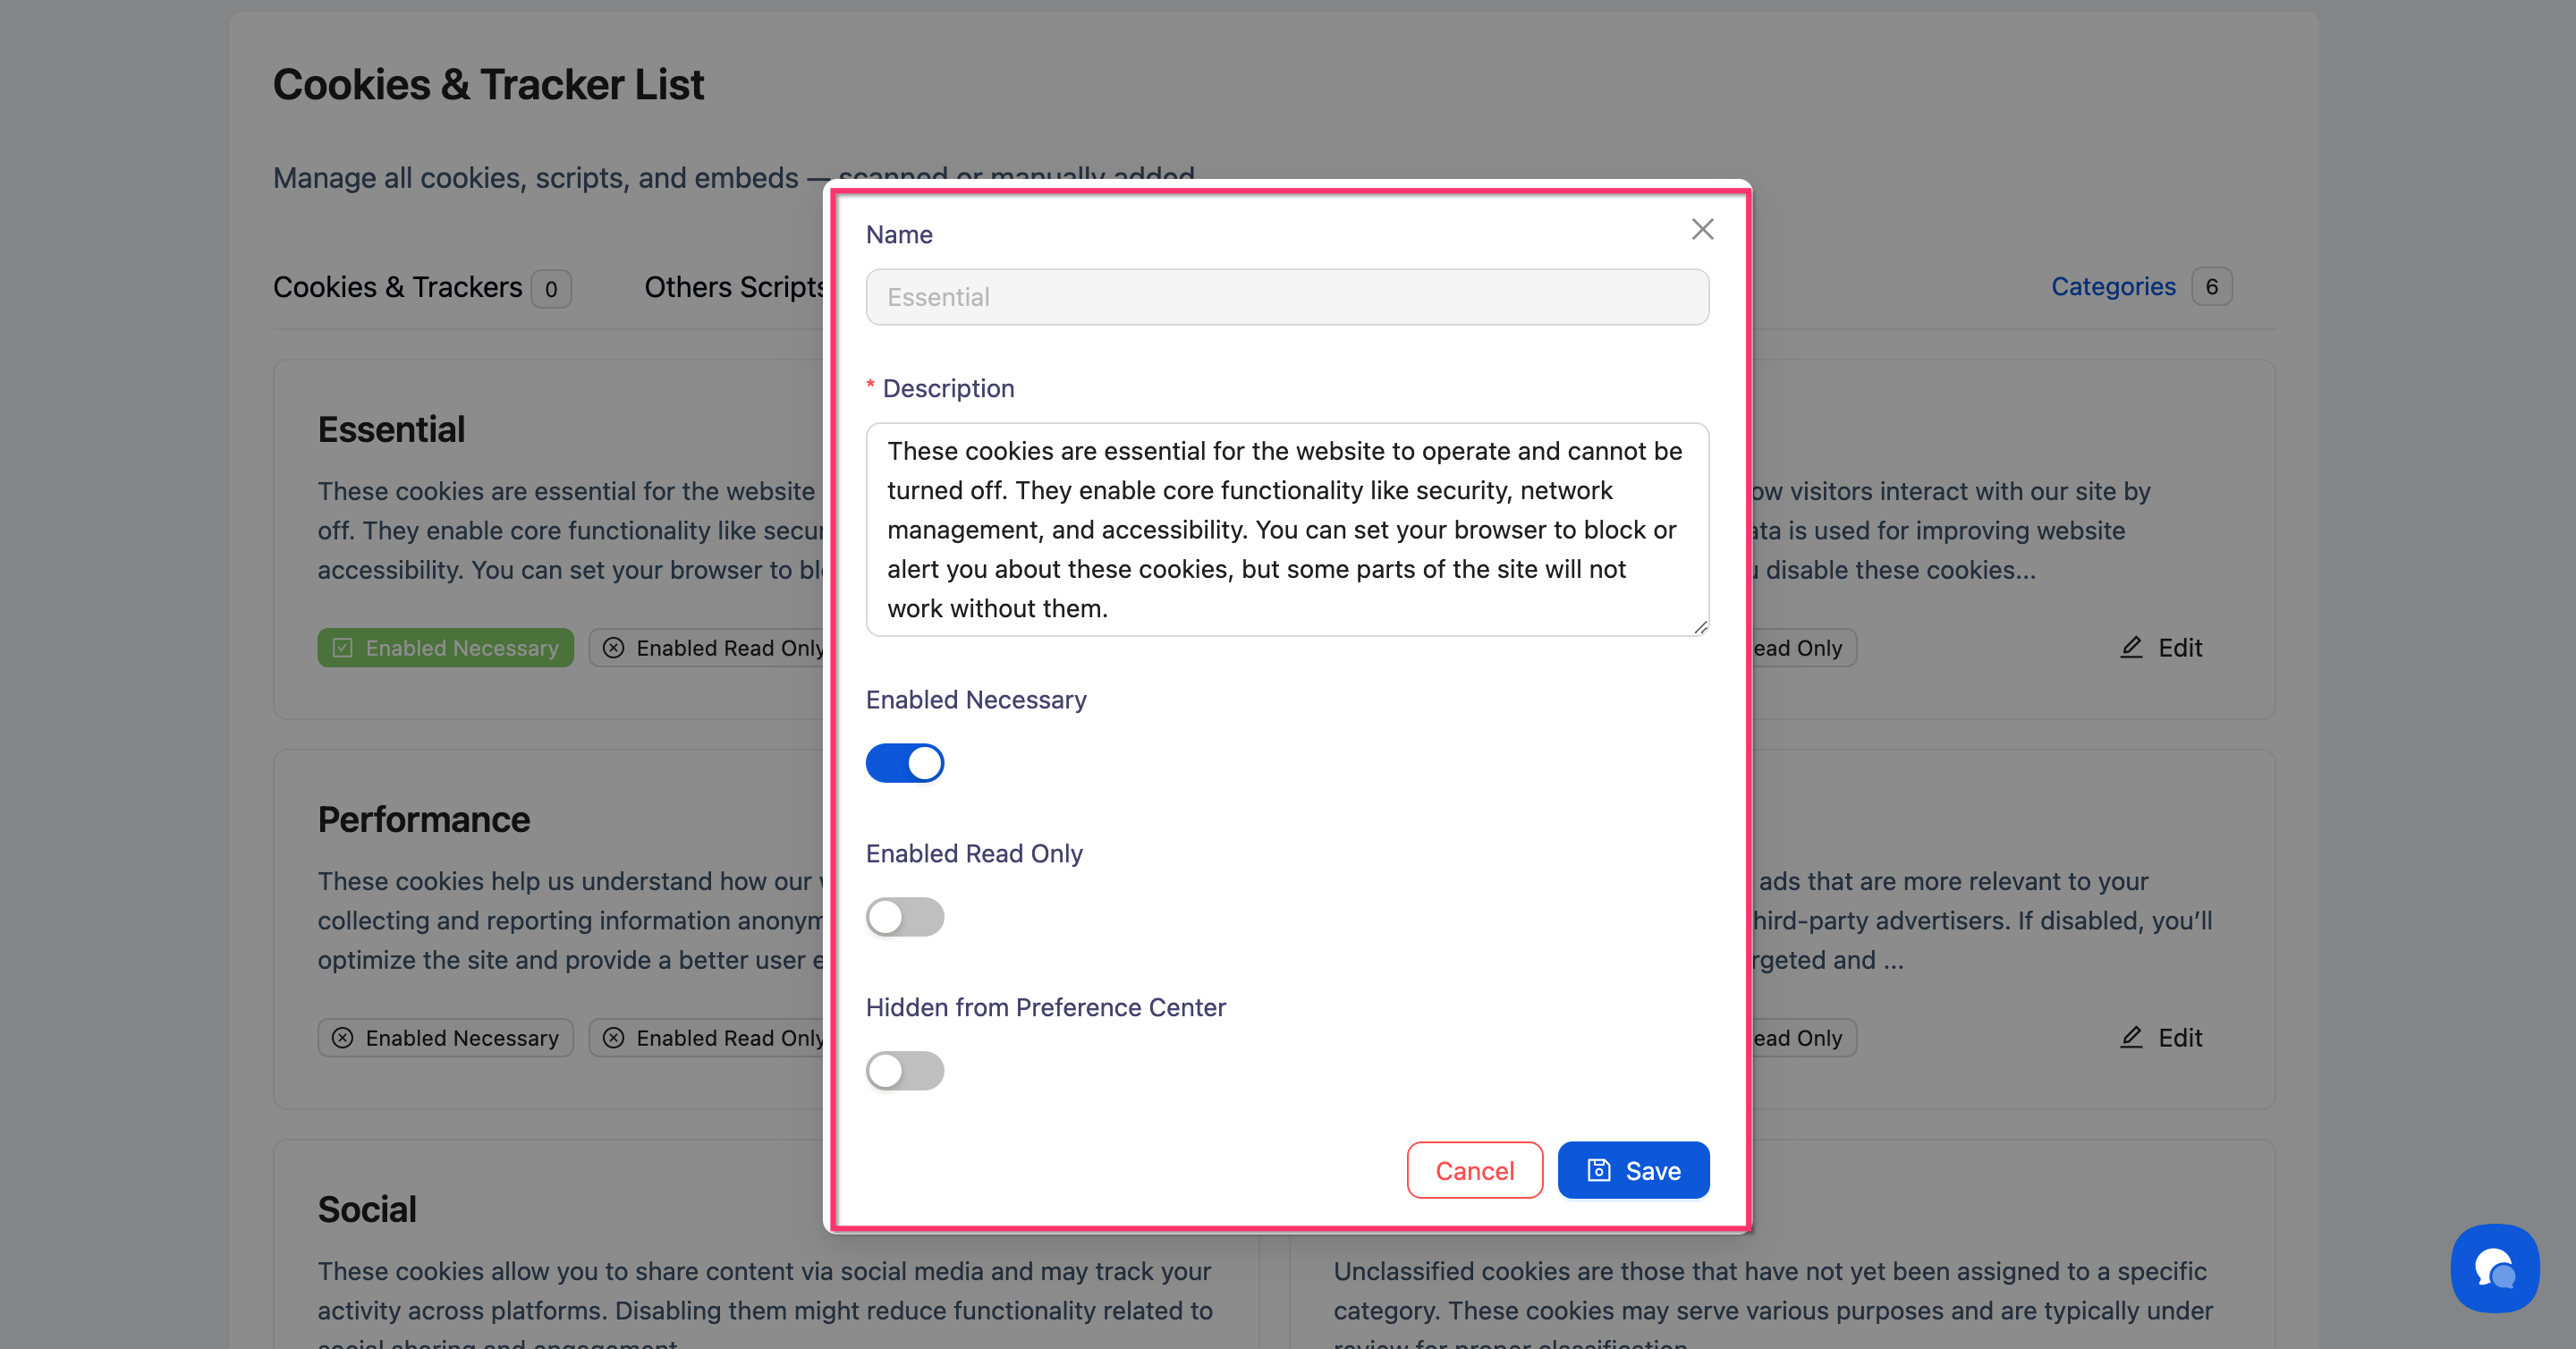
💡 Tip: Write descriptions in plain language. Visitors read these when deciding which cookies to allow, so clarity helps them make informed choices.
Step 5: Set category behavior
Configure the three behavior toggles as needed:
Enabled Necessary: Toggle on to make this category always active, regardless of visitor consent (like Essential). Visitors cannot disable it.
Enabled Read Only: Toggle on to prevent visitors from changing their consent choice for this category. The toggle appears grayed out in the preference center.
Hidden from Preference Center: Toggle on to hide this category entirely from the visitor-facing preference center. Use this to reduce clutter for empty or internal categories.
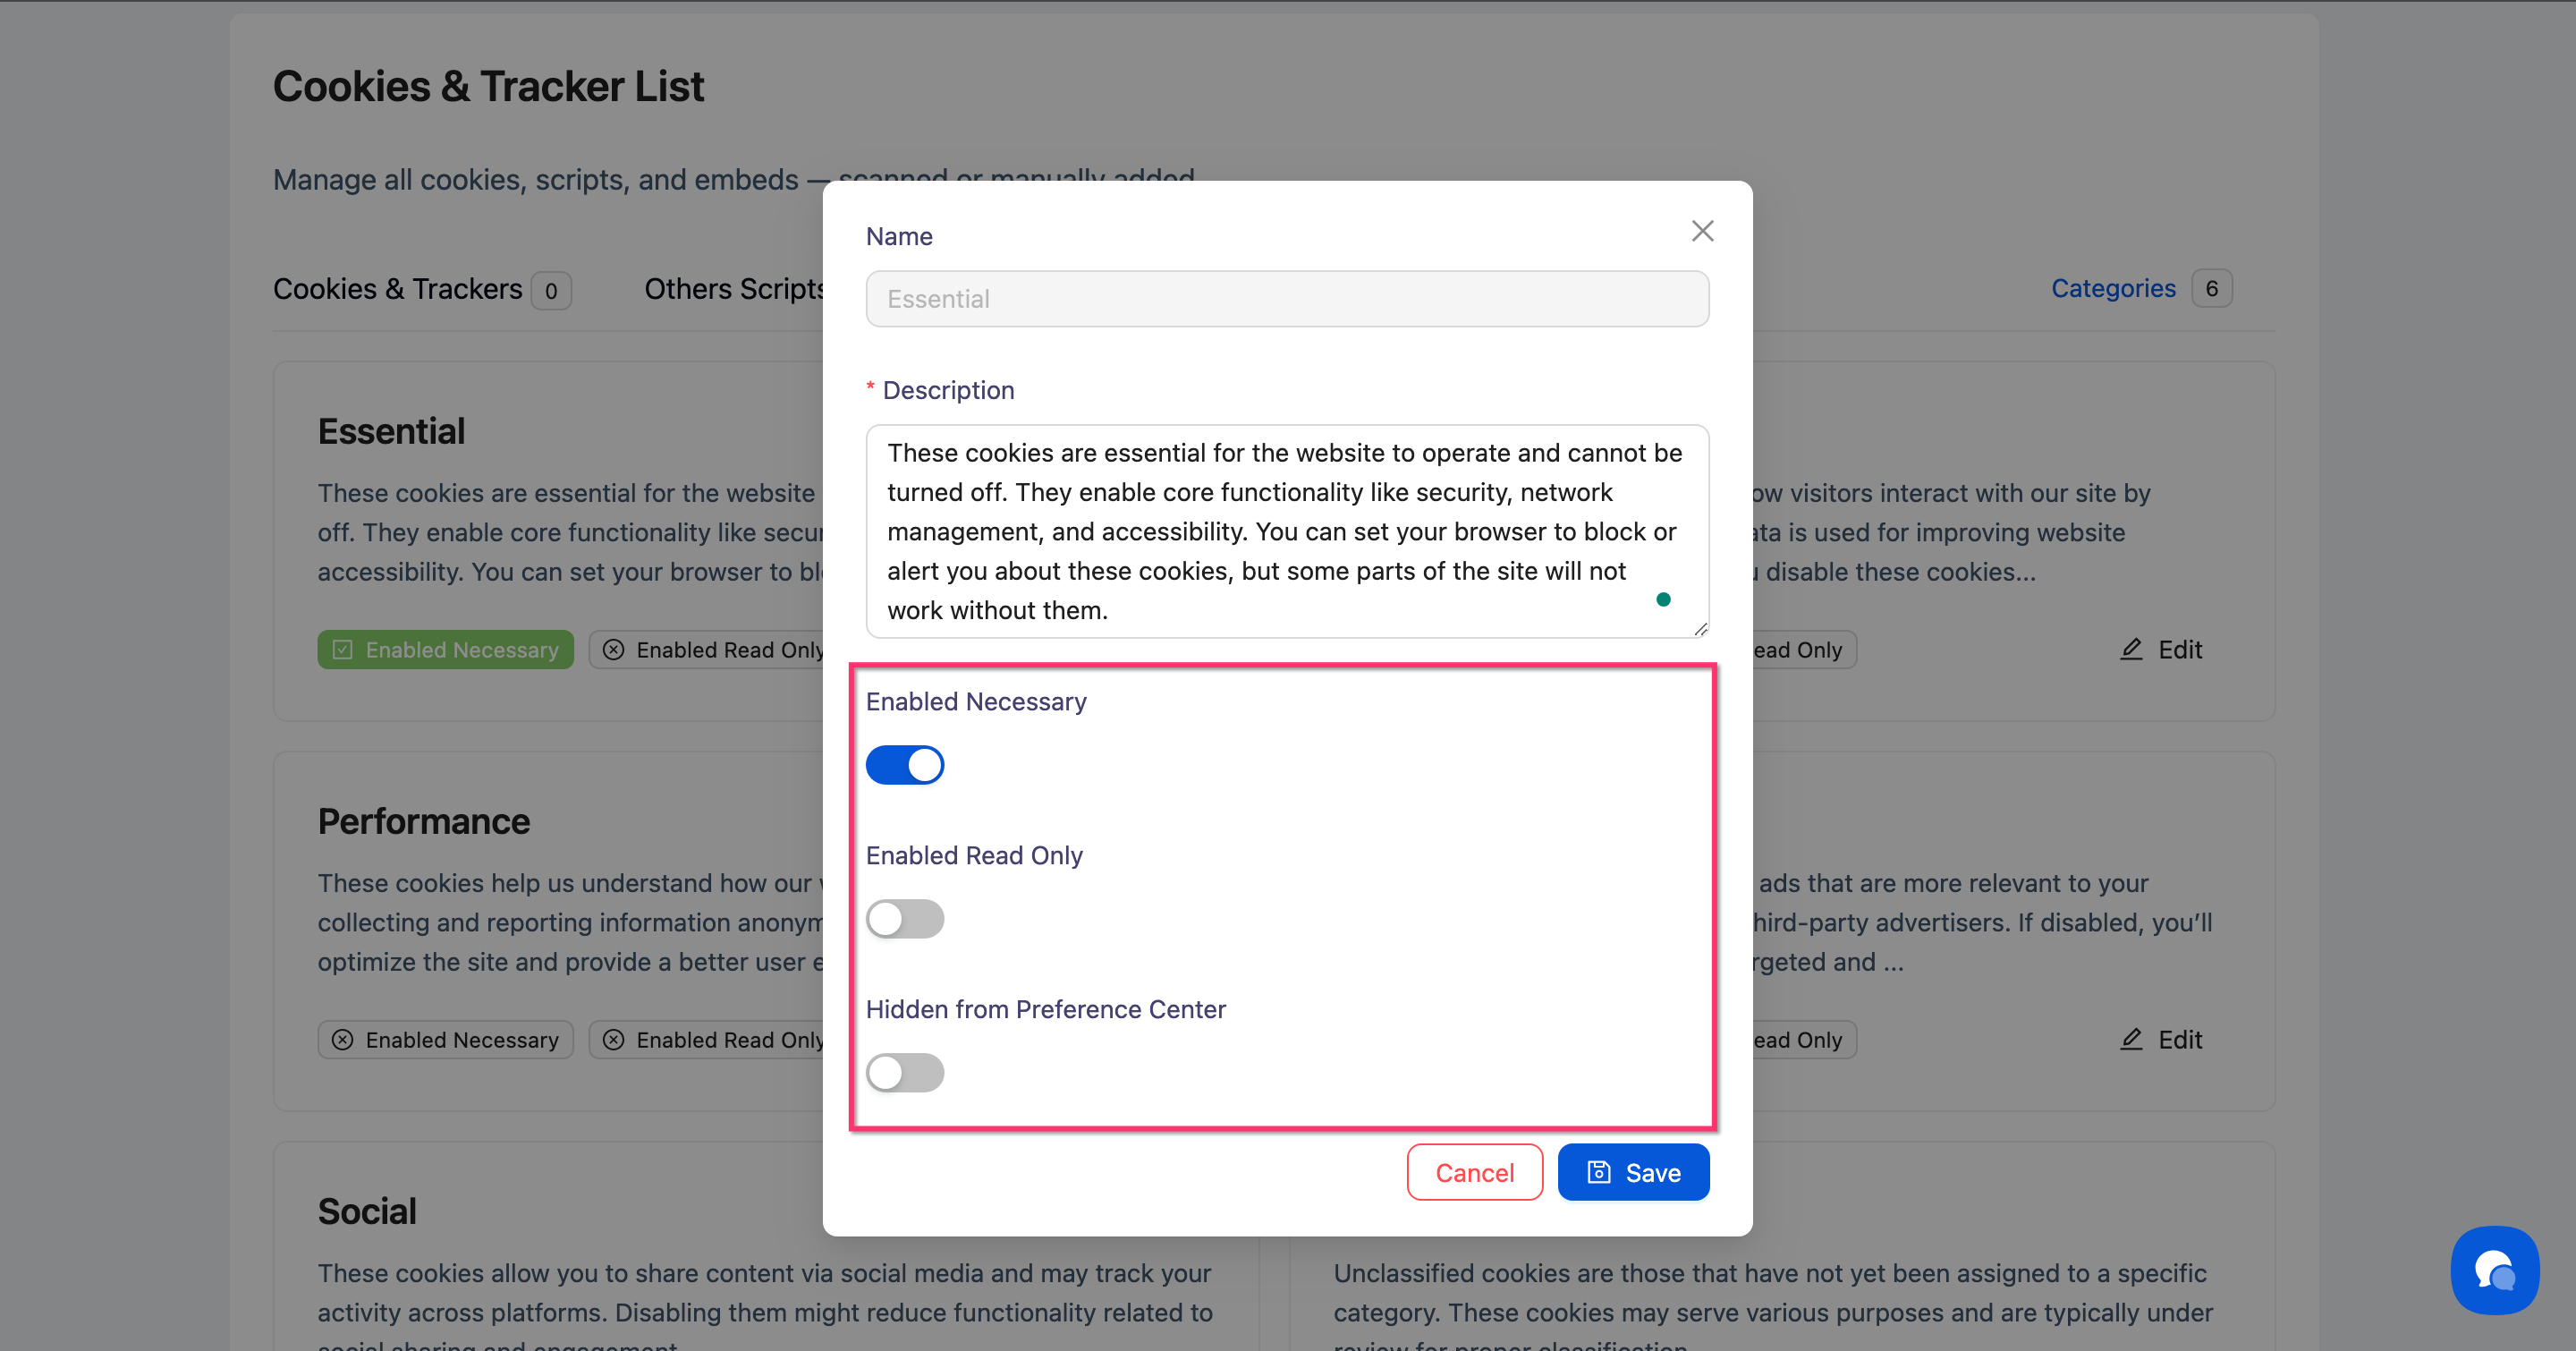
Step 6: Save your changes
Click Save to apply the configuration.

Done!
The category card updates immediately to reflect your changes.
✅ Success indicator: If you enabled "Hidden from Preference Center," an orange Hidden badge appears on the category card. The category will no longer appear in the visitor preference center.
How to Move a Cookie to a Different Category
You can reassign any cookie to a different category directly from the Cookies & Trackers list, without deleting and re-adding it.
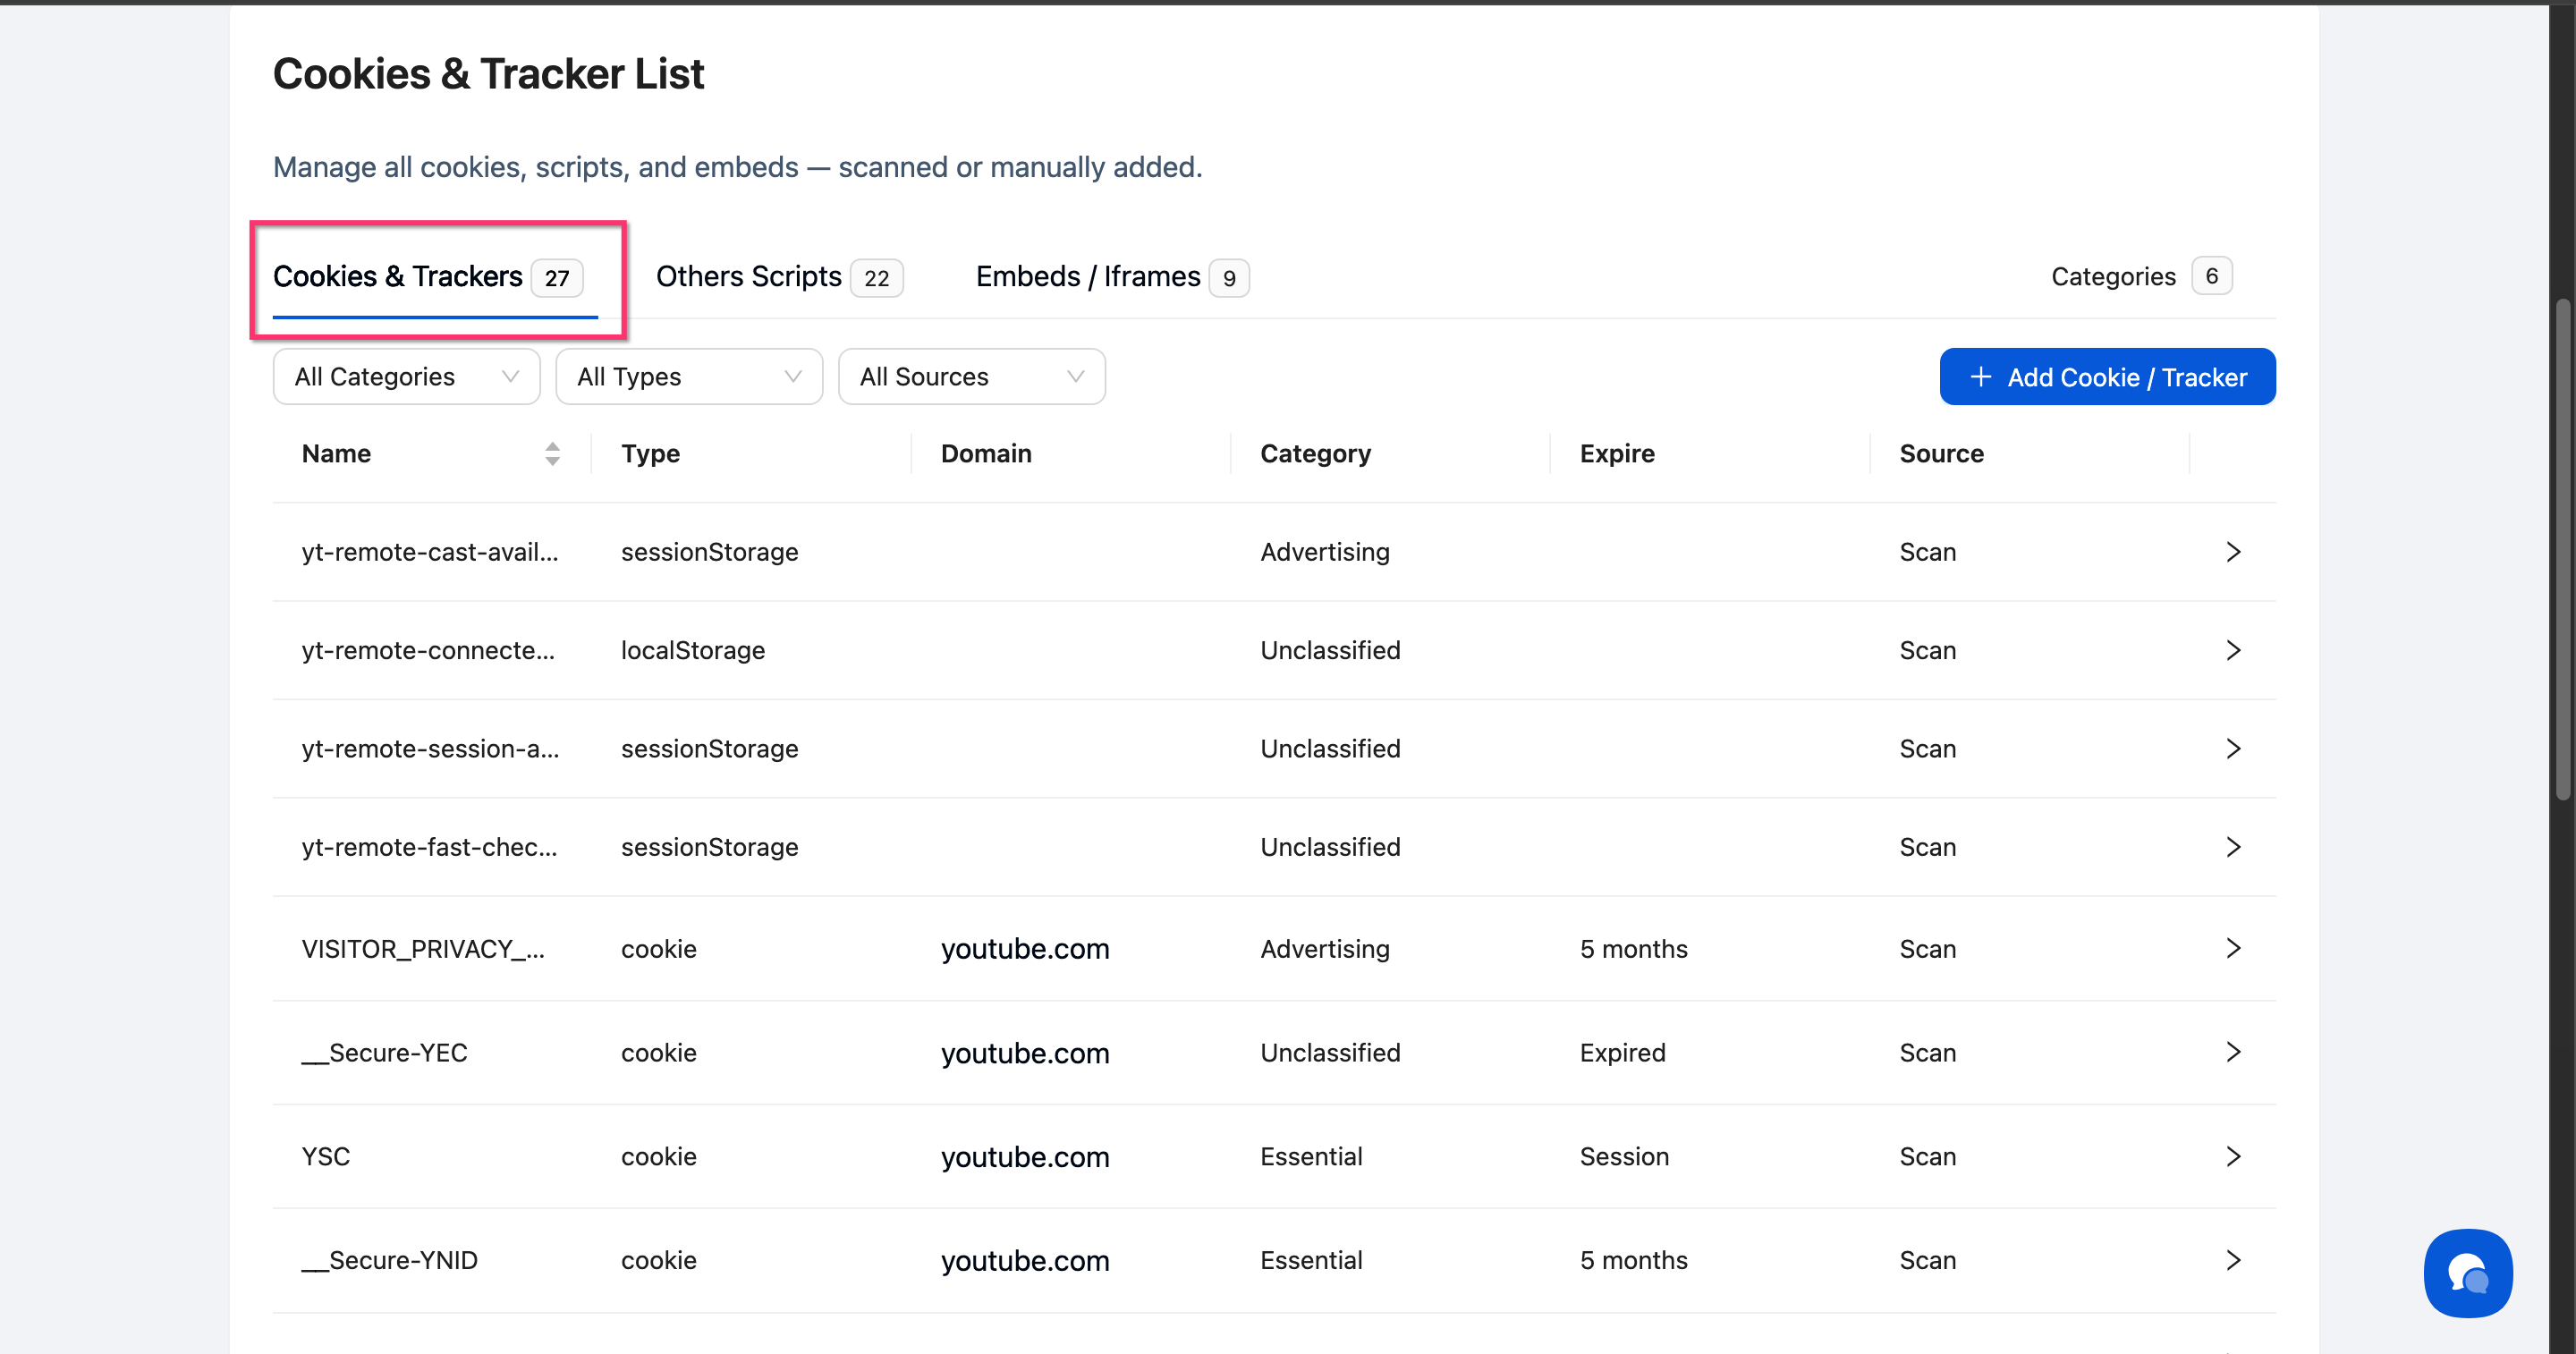
Step 1: Open the Cookies & Trackers tab
In the Cookies & Scanner section, make sure you are on the Cookies & Trackers tab.
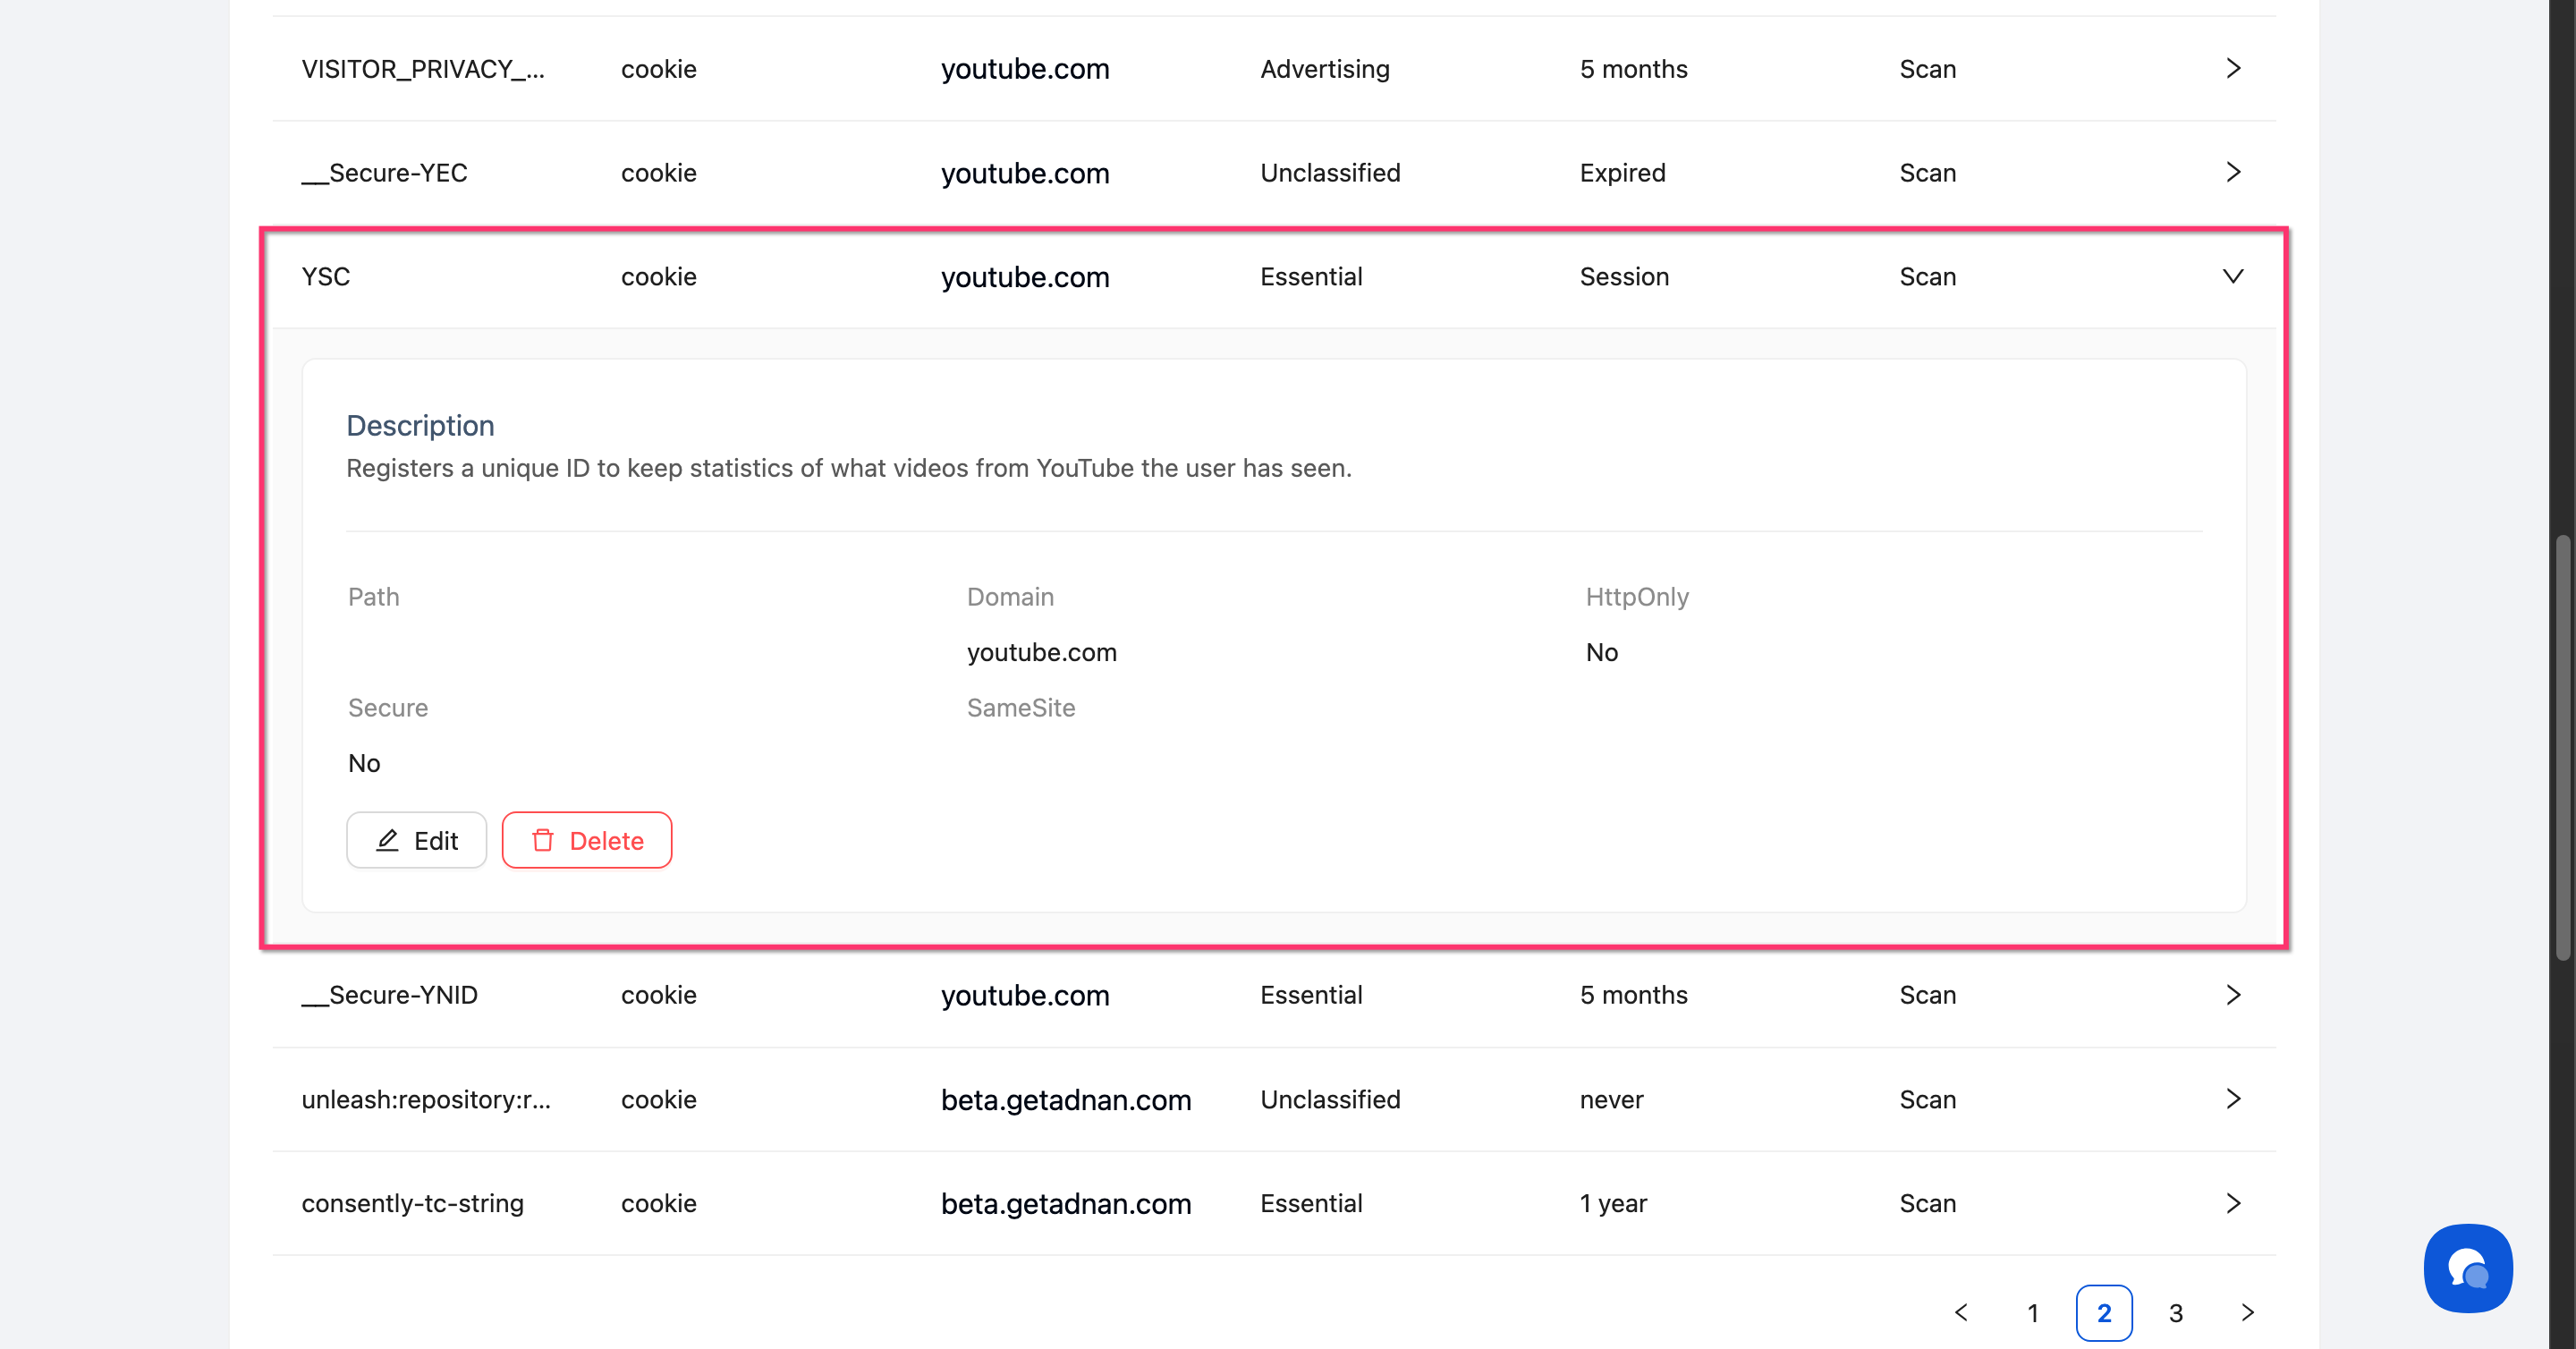
Step 2: Expand the cookie row
Click anywhere on the cookie's row to expand it and reveal its details, including Description, Path, Domain, HttpOnly, Secure, and SameSite fields, along with Edit and Delete buttons.
Step 3: Open the edit modal
Click Edit to open the Update Cookie modal.
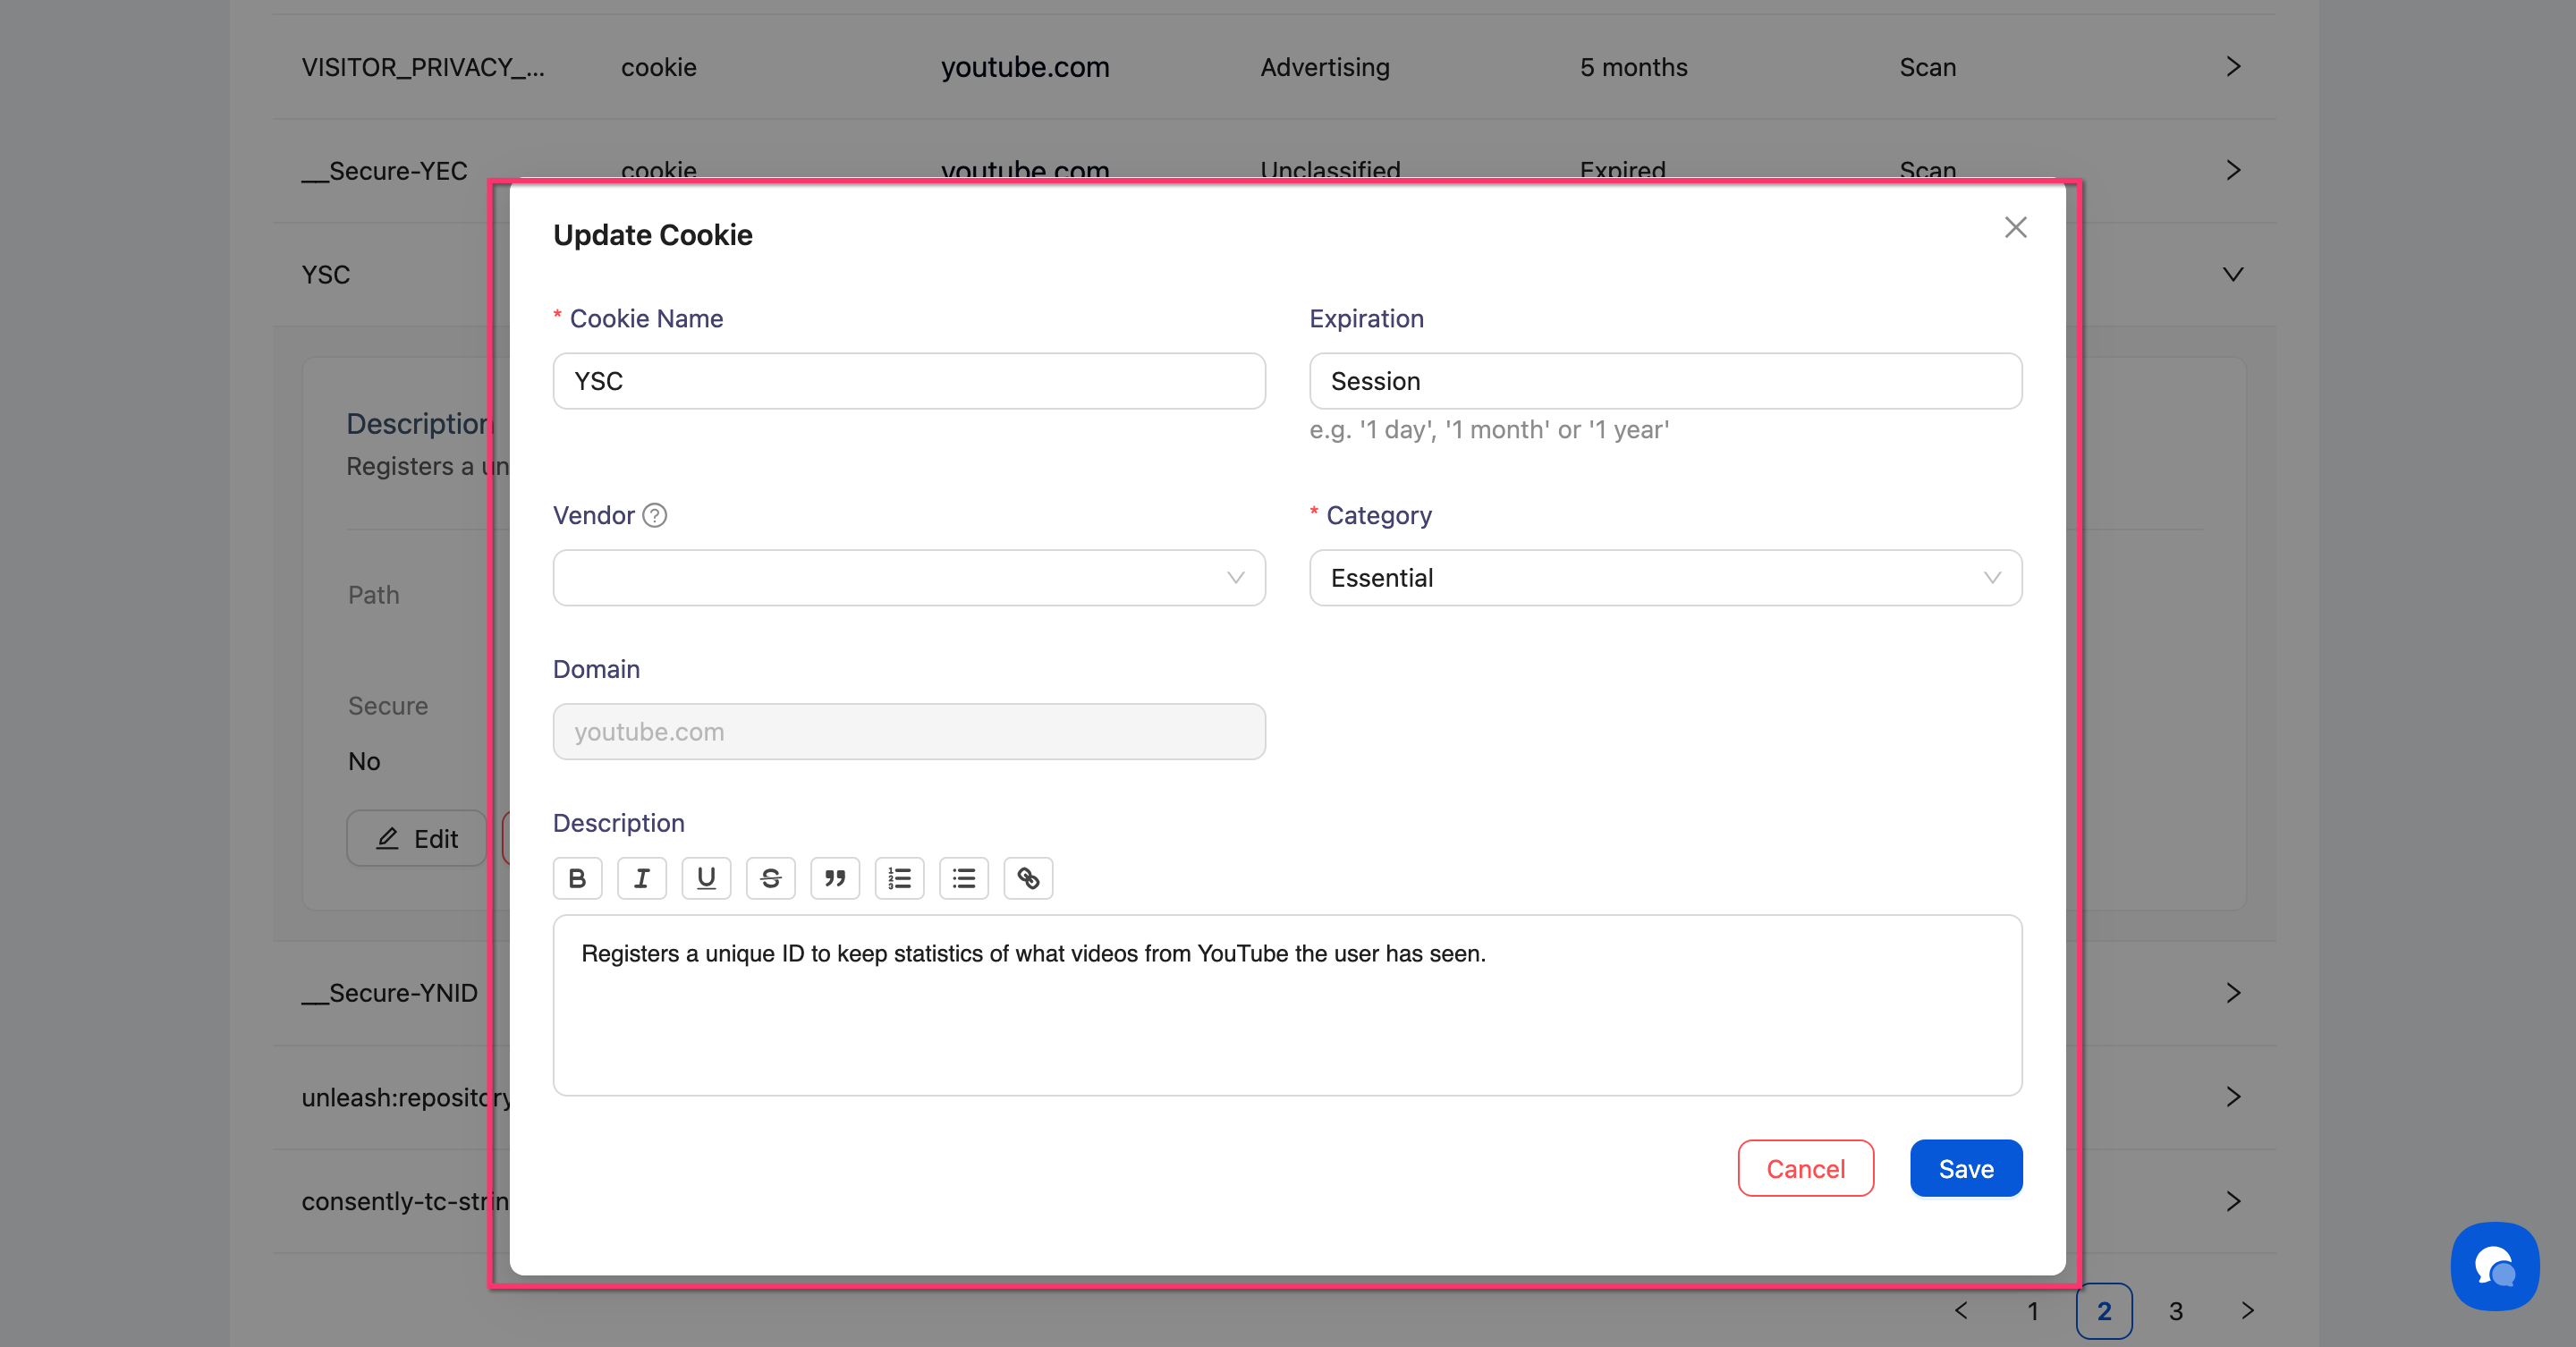
Step 4: Change the category
Click the Category dropdown and select the target category from the list: Analytics, Essential, Advertising, Performance, Social, or Unclassified.
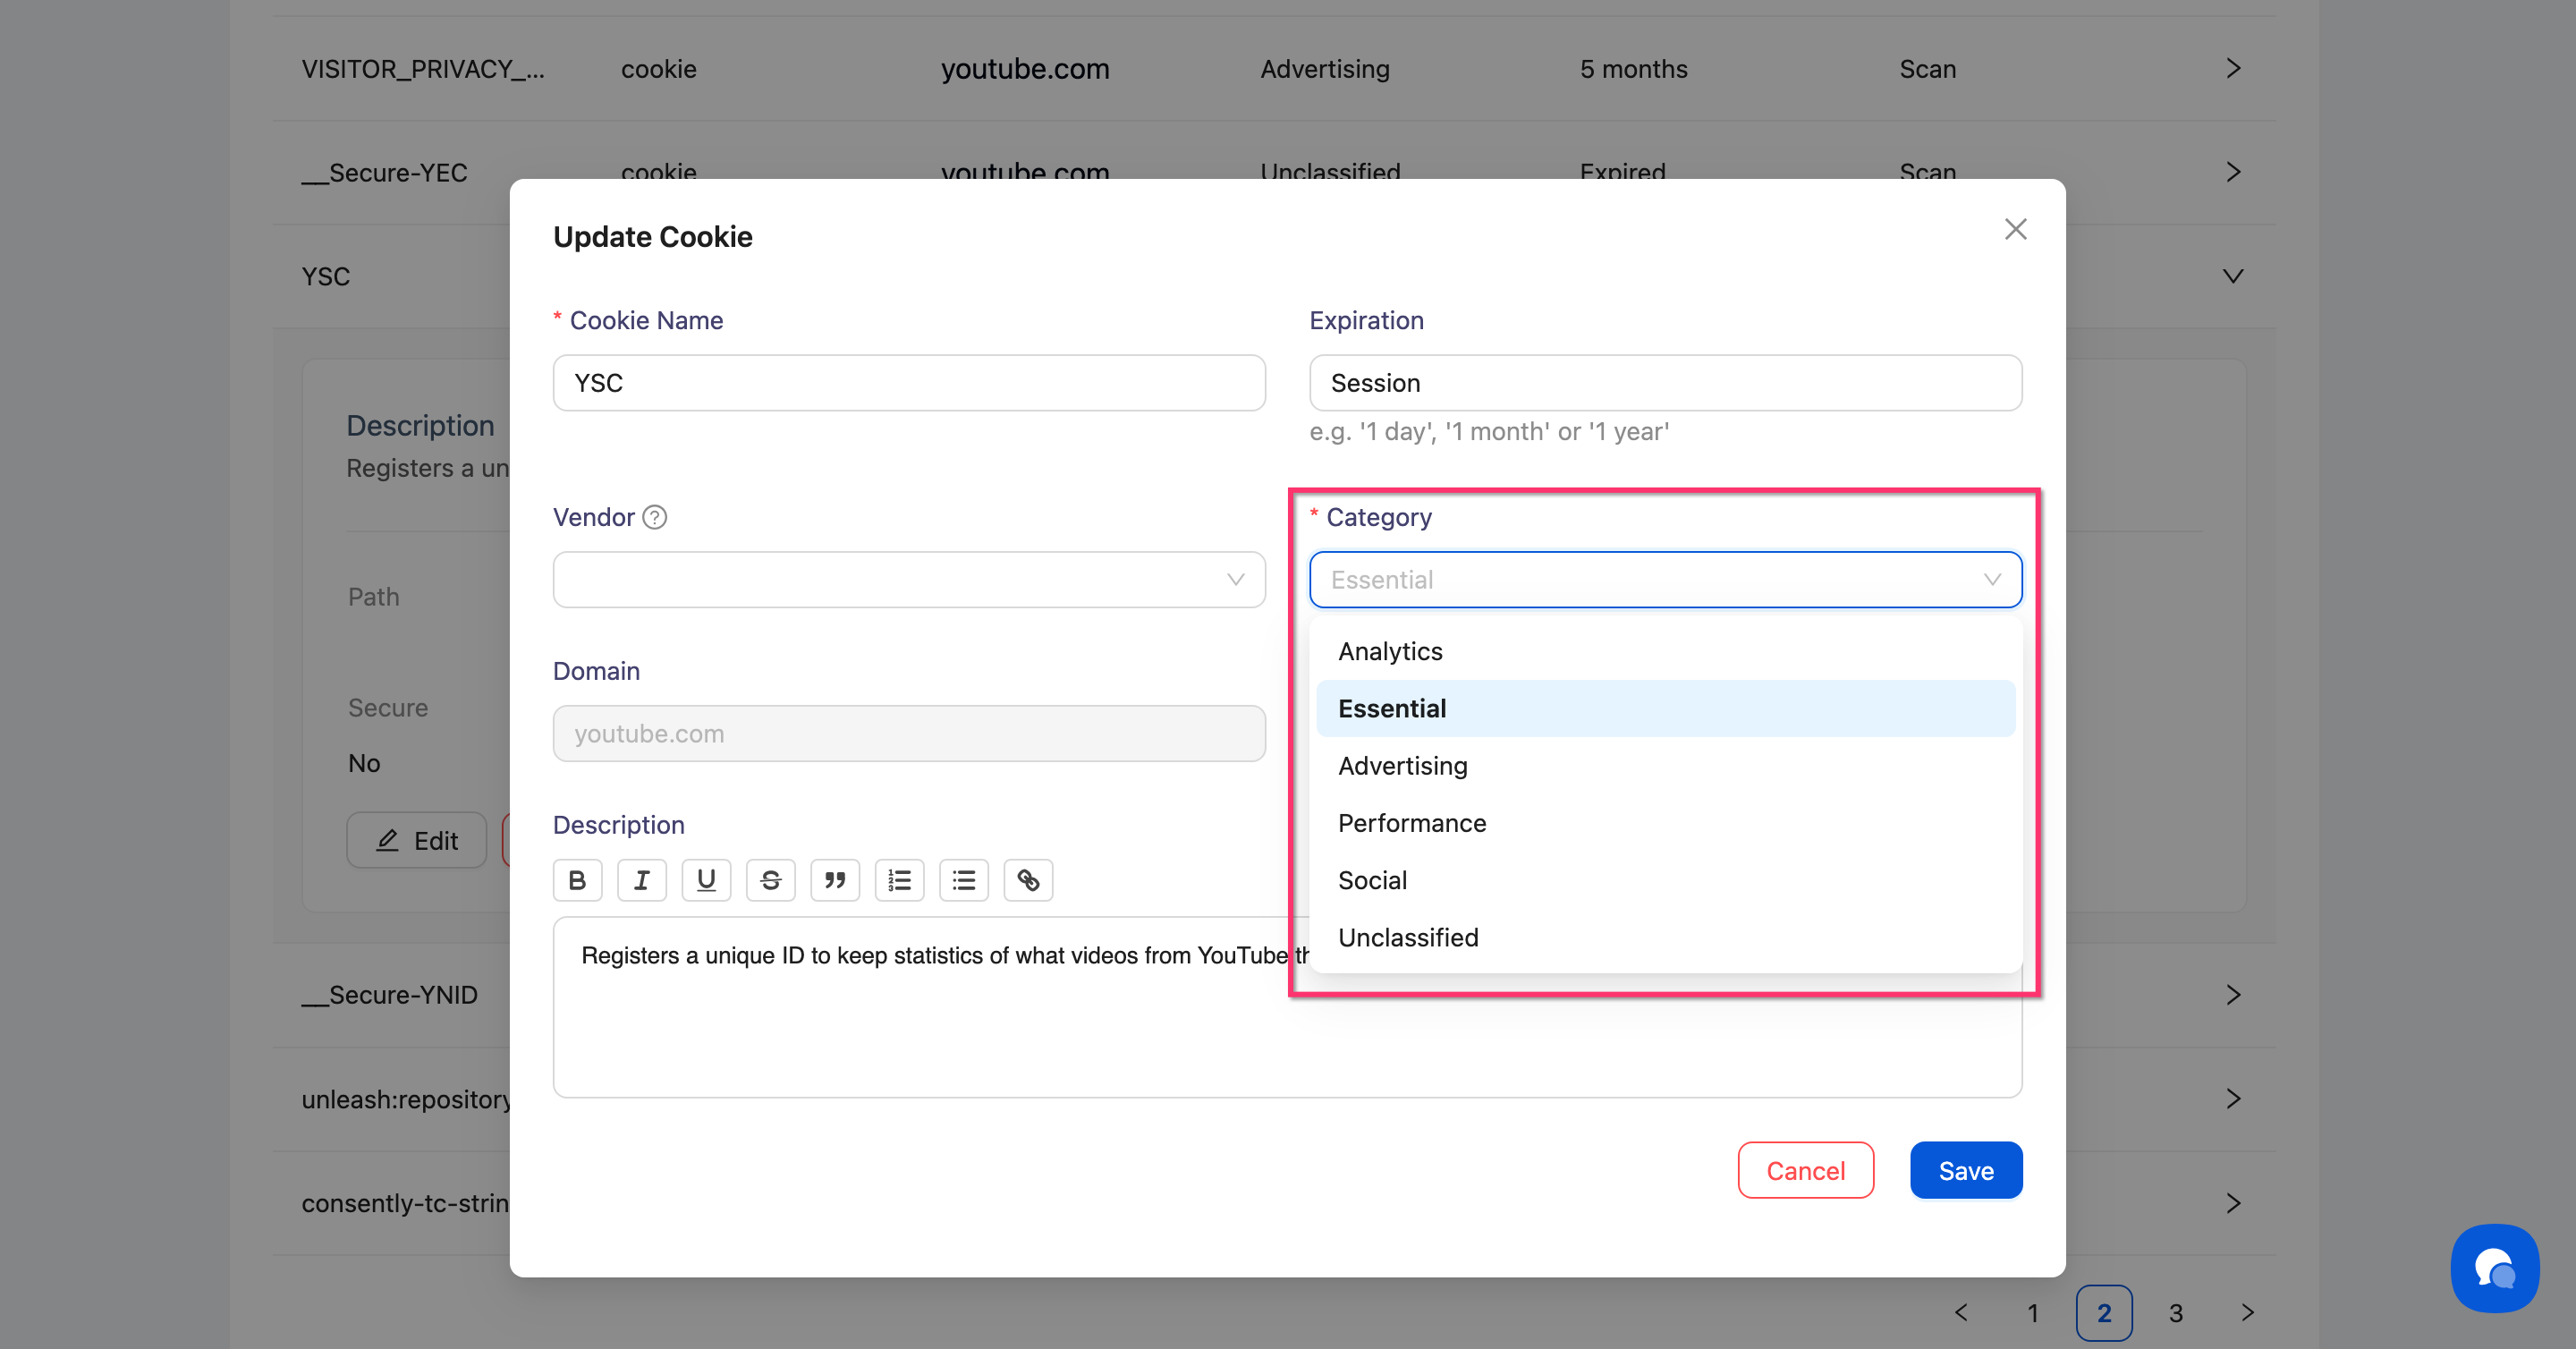
Step 5: Save the change
Click Save to apply the new category assignment.
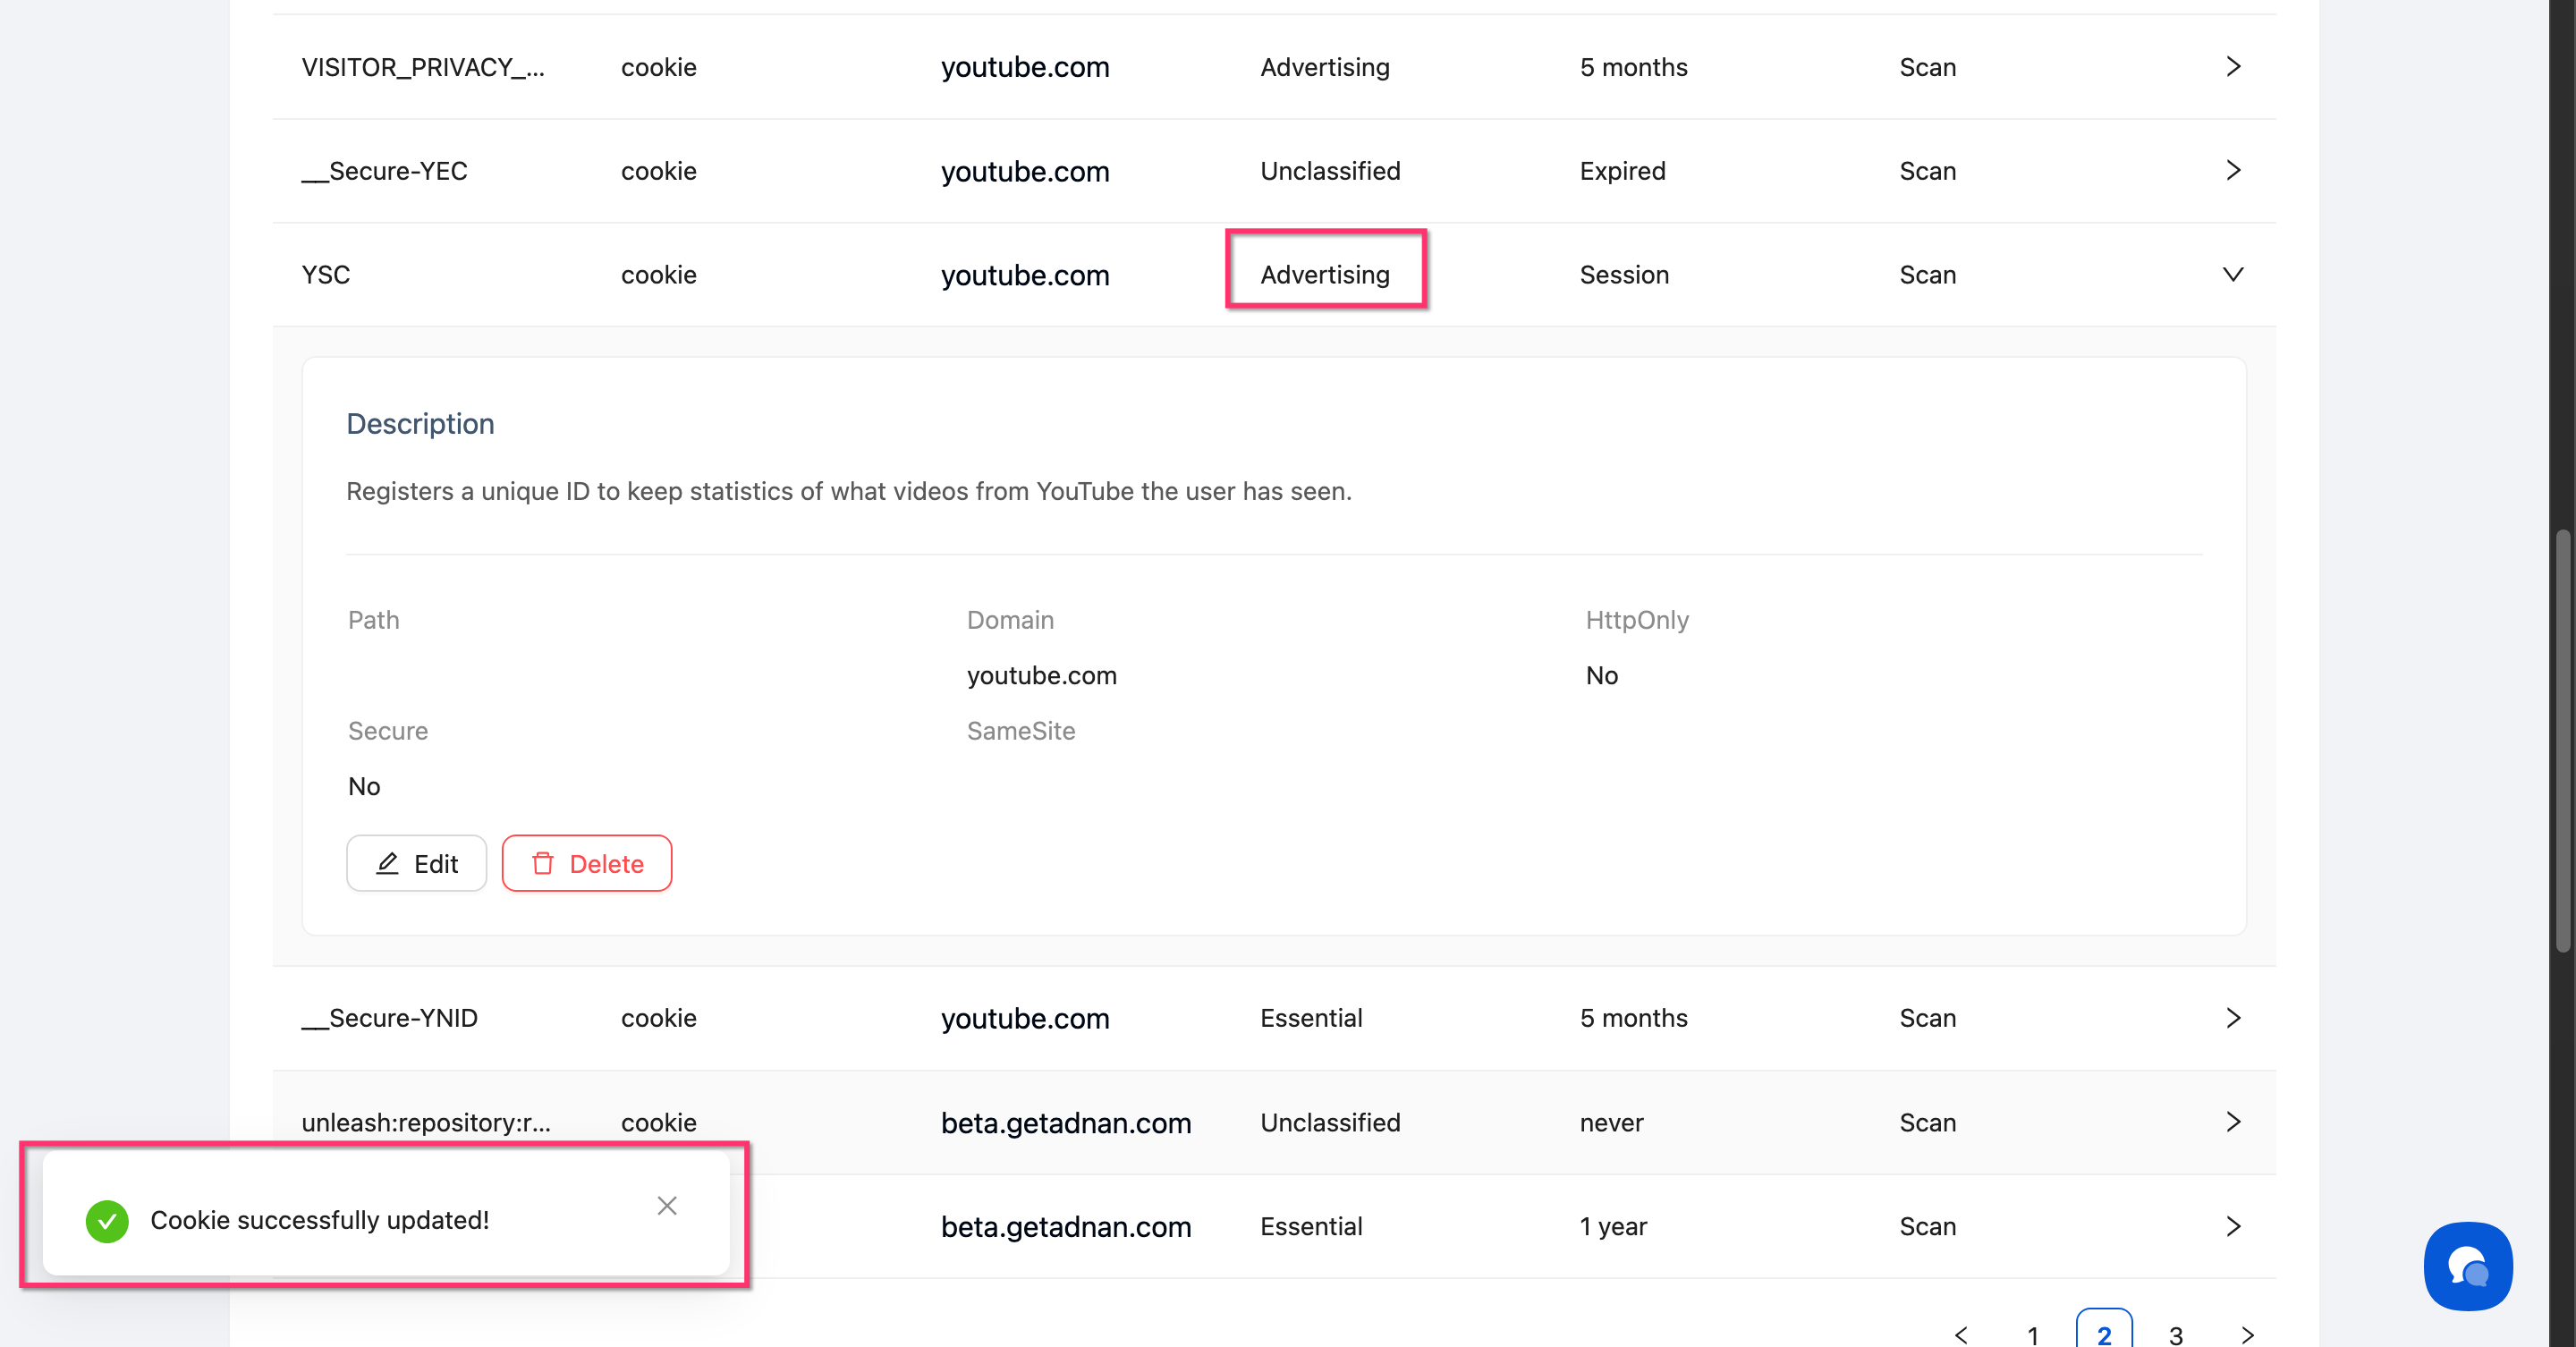
Done!
The cookie immediately appears under its new category.
✅ Success indicator: A "Cookie successfully updated!" notification appears at the bottom of the screen.
What's Next
Now that your categories are configured, you should:
Troubleshooting
The Categories button is not visible
Solution: Make sure you are on the Cookies & Scanner page for a specific site, not on the global Sites list. If the button is still missing, refresh the page.
A hidden category still appears in the preference center
Why this happens: Changes may take a moment to propagate, or a cached version of the banner is loading.
Solution:
Confirm the orange Hidden badge is showing on the category card
Clear your browser cache and reload your website
If the issue persists, republish your banner to force an update
Category settings aren't saving
Solution:
Complete your changes in the edit modal
Click Save (not Cancel)
Wait for the confirmation before closing the modal
If the issue persists, clear your browser cache and try again
Related Pages
Cookie Management Best Practices — Tips for accurate categorization and regular maintenance