

TL;DR: Cookies & Scanner → Scan Now → Enter URLs → Start scan. Your website's cookies are automatically detected and organized by category, with results sent to your email when complete.
Overview
Cookie scanning automatically detects and catalogs all cookies used on your website. Consently crawls your site to find cookies across multiple pages, categorizes them, and provides a detailed report showing what tracking technologies are active.
Before You Begin
Make sure you have:
A sitemap.xml file on your website (recommended for comprehensive scanning)
Access to the email address associated with your Consently account
Time required: 2-10 minutes, depending on website size
How to Run a Cookie Scan
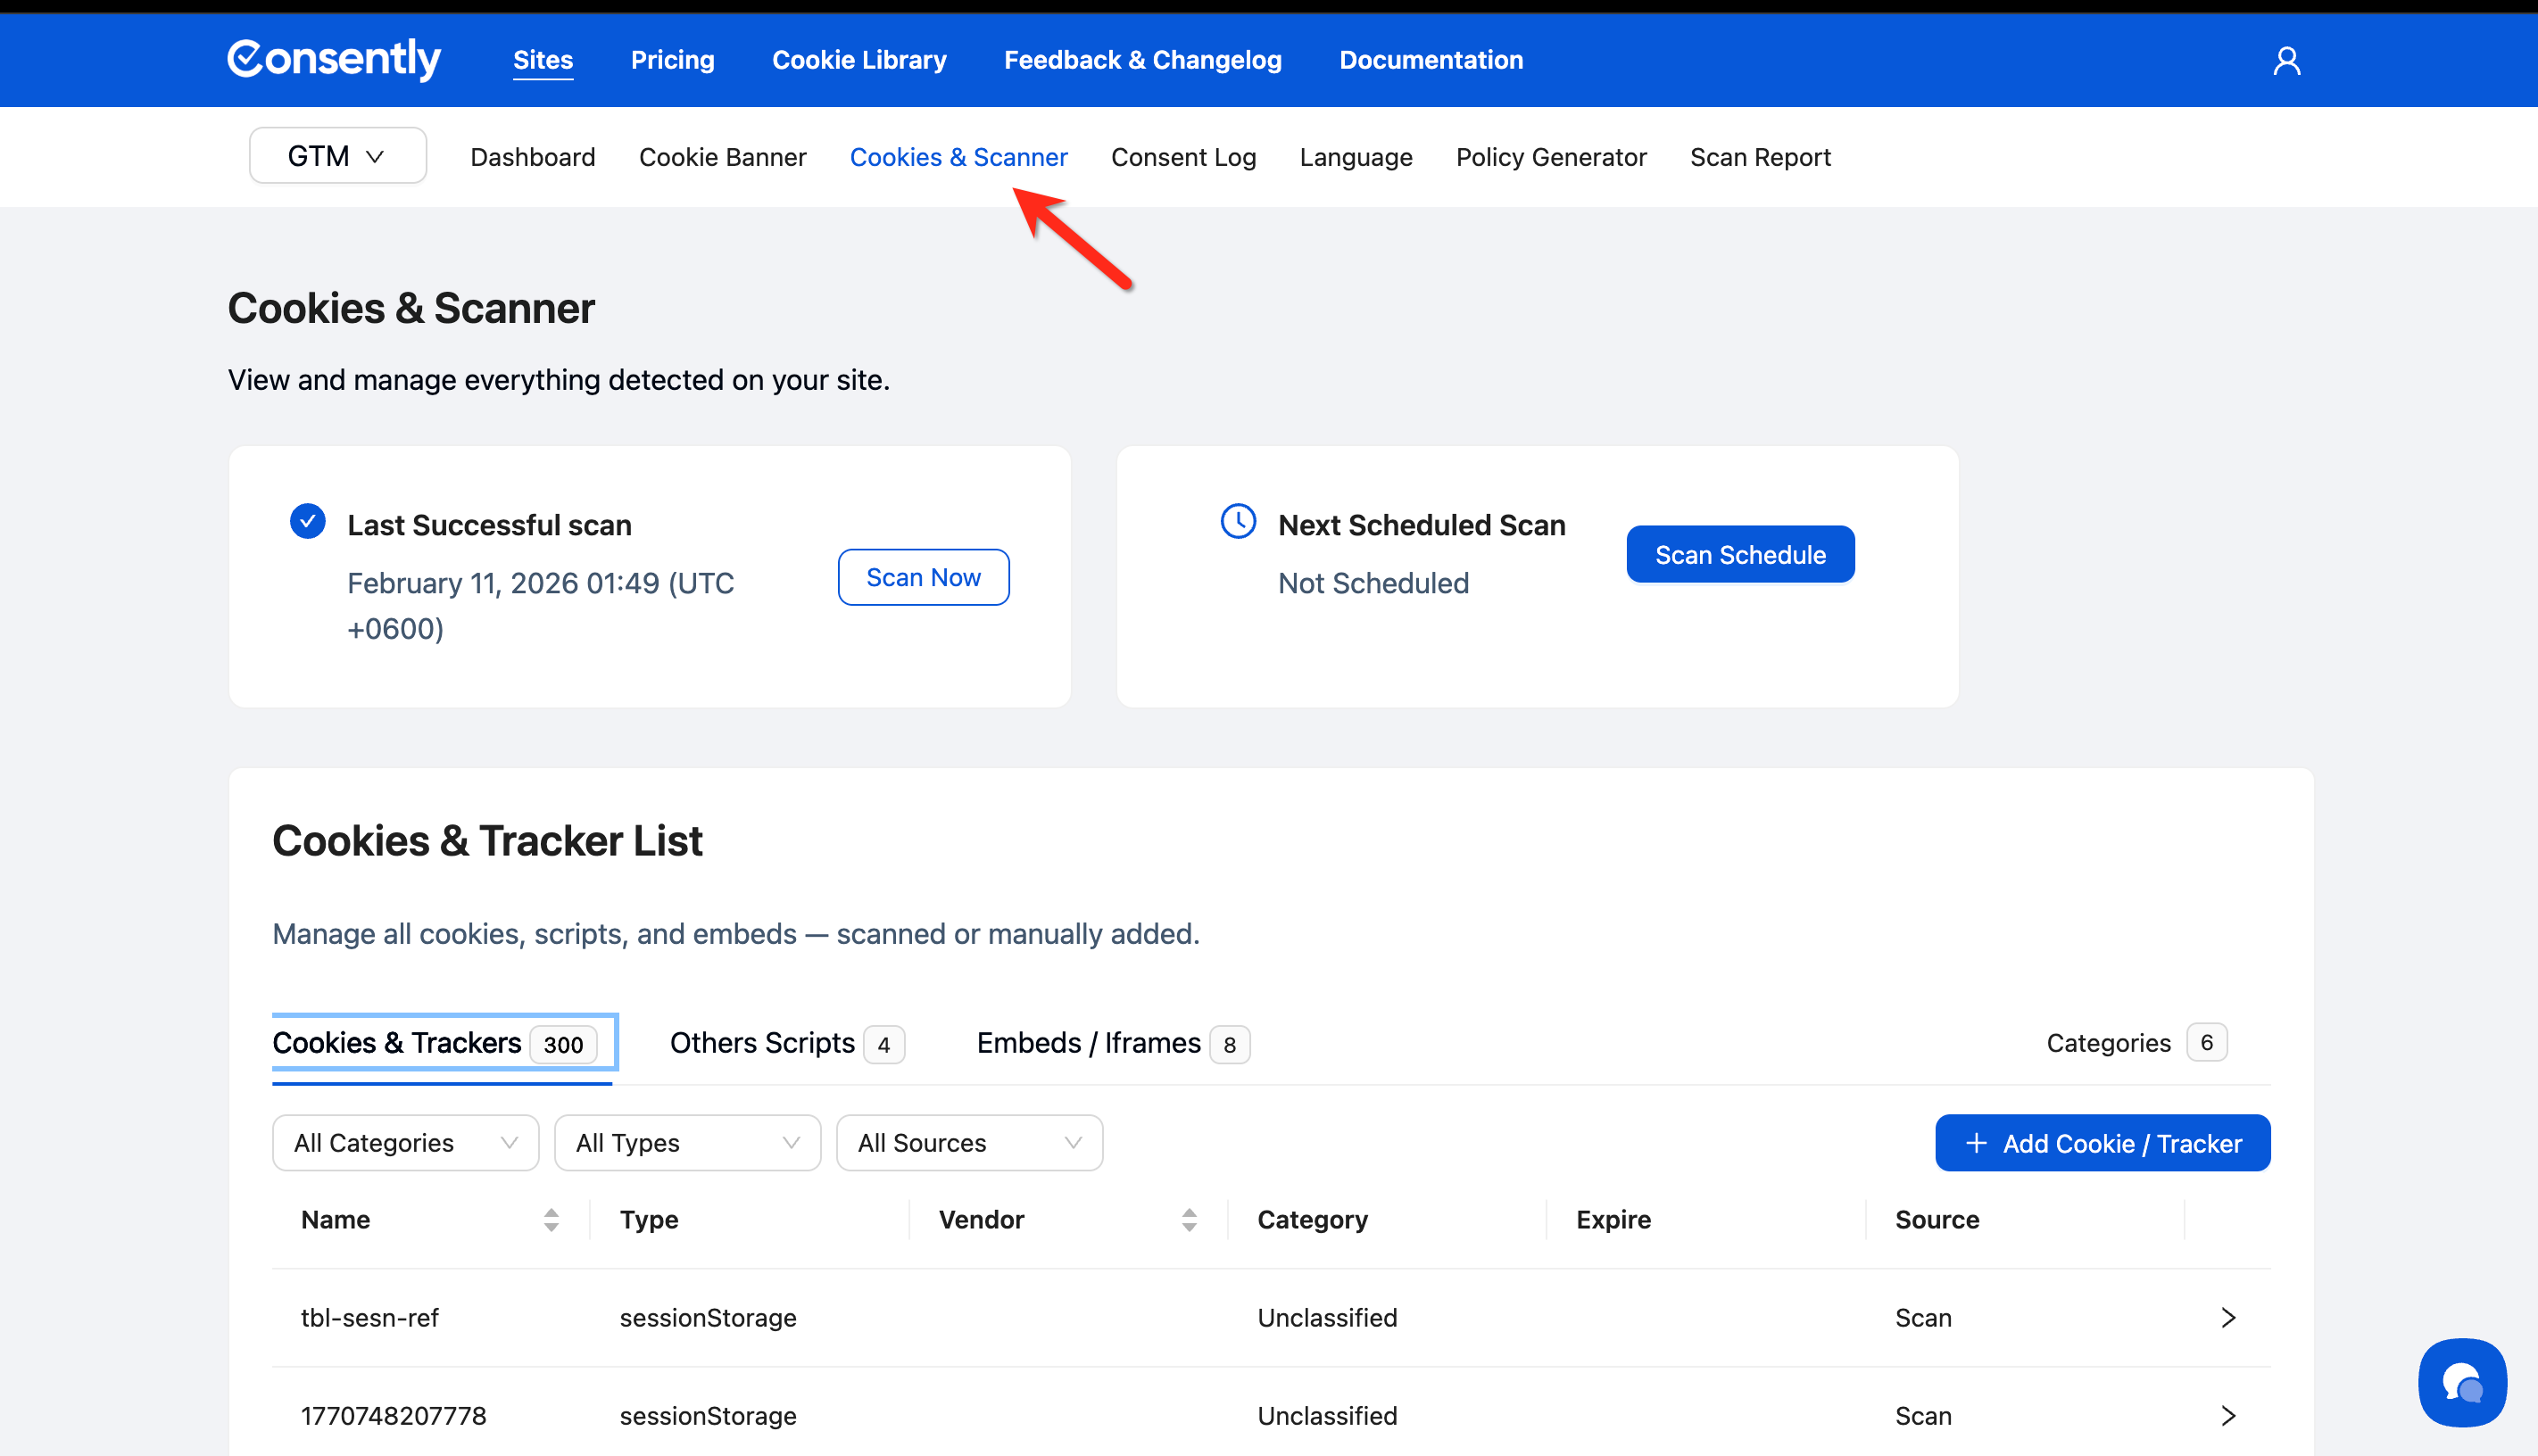
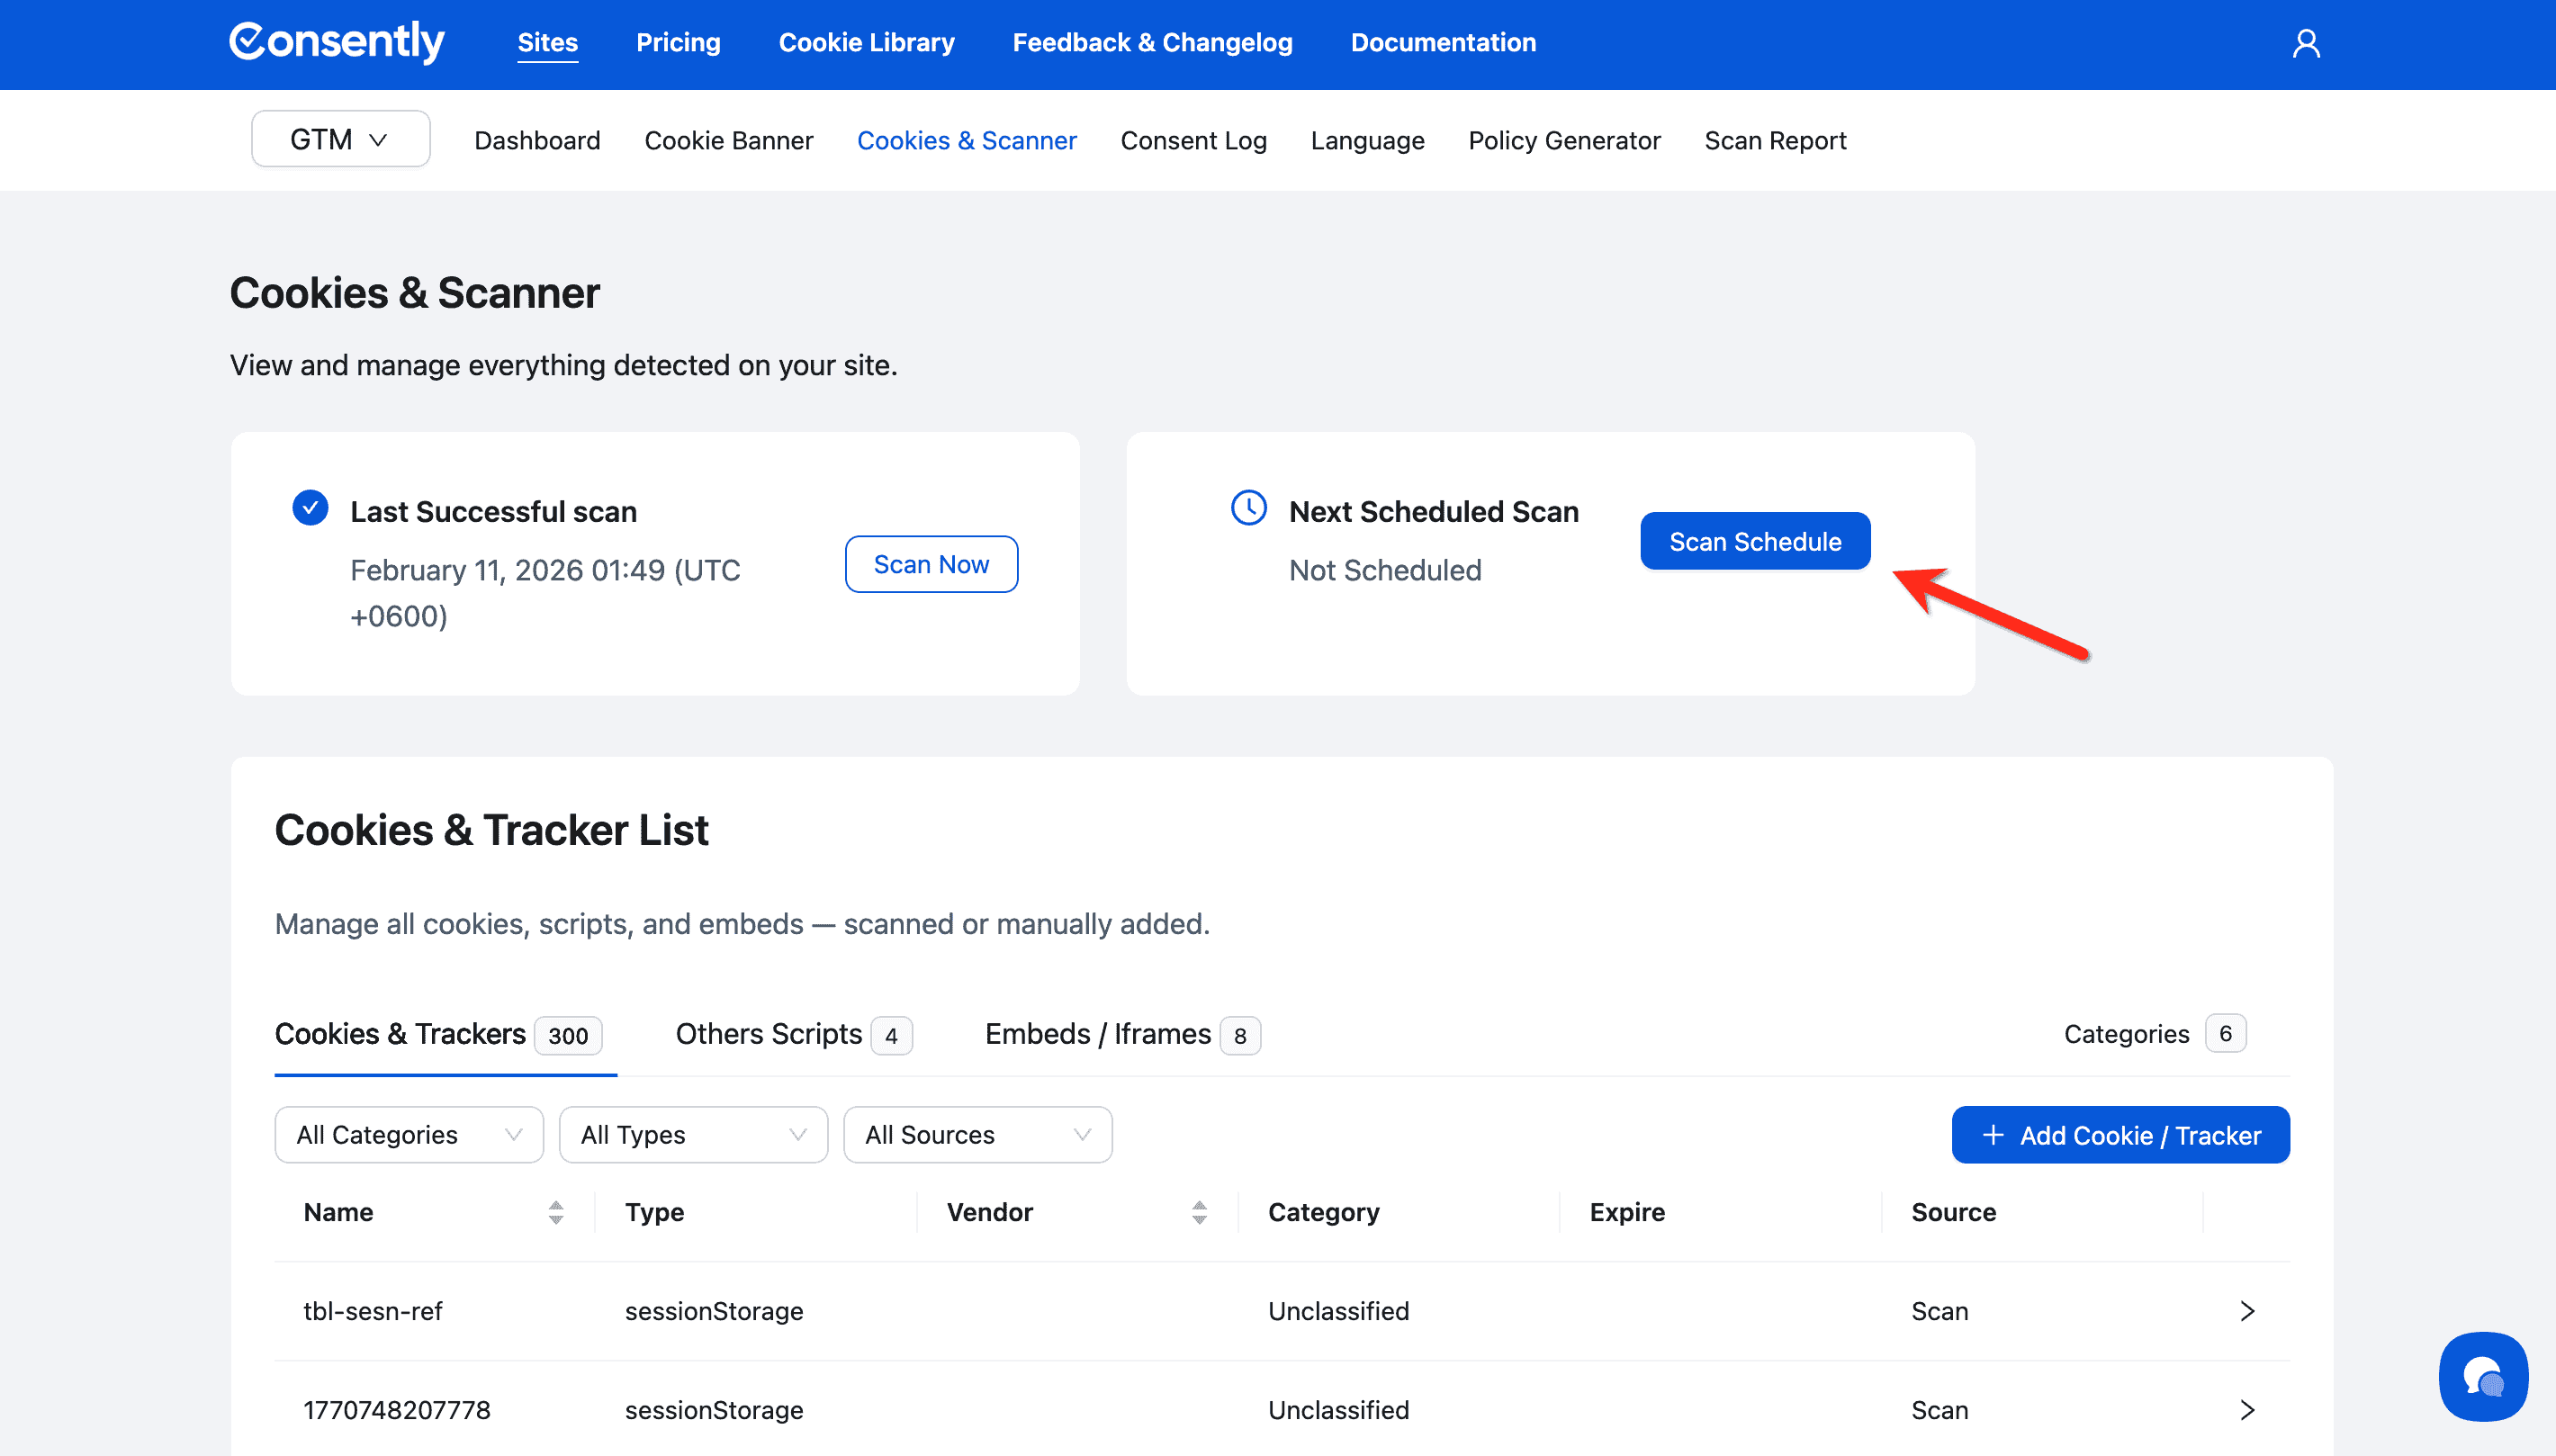
Step 1: Navigate to Cookies & Scanner
Click Cookies & Scanner in the top navigation menu.
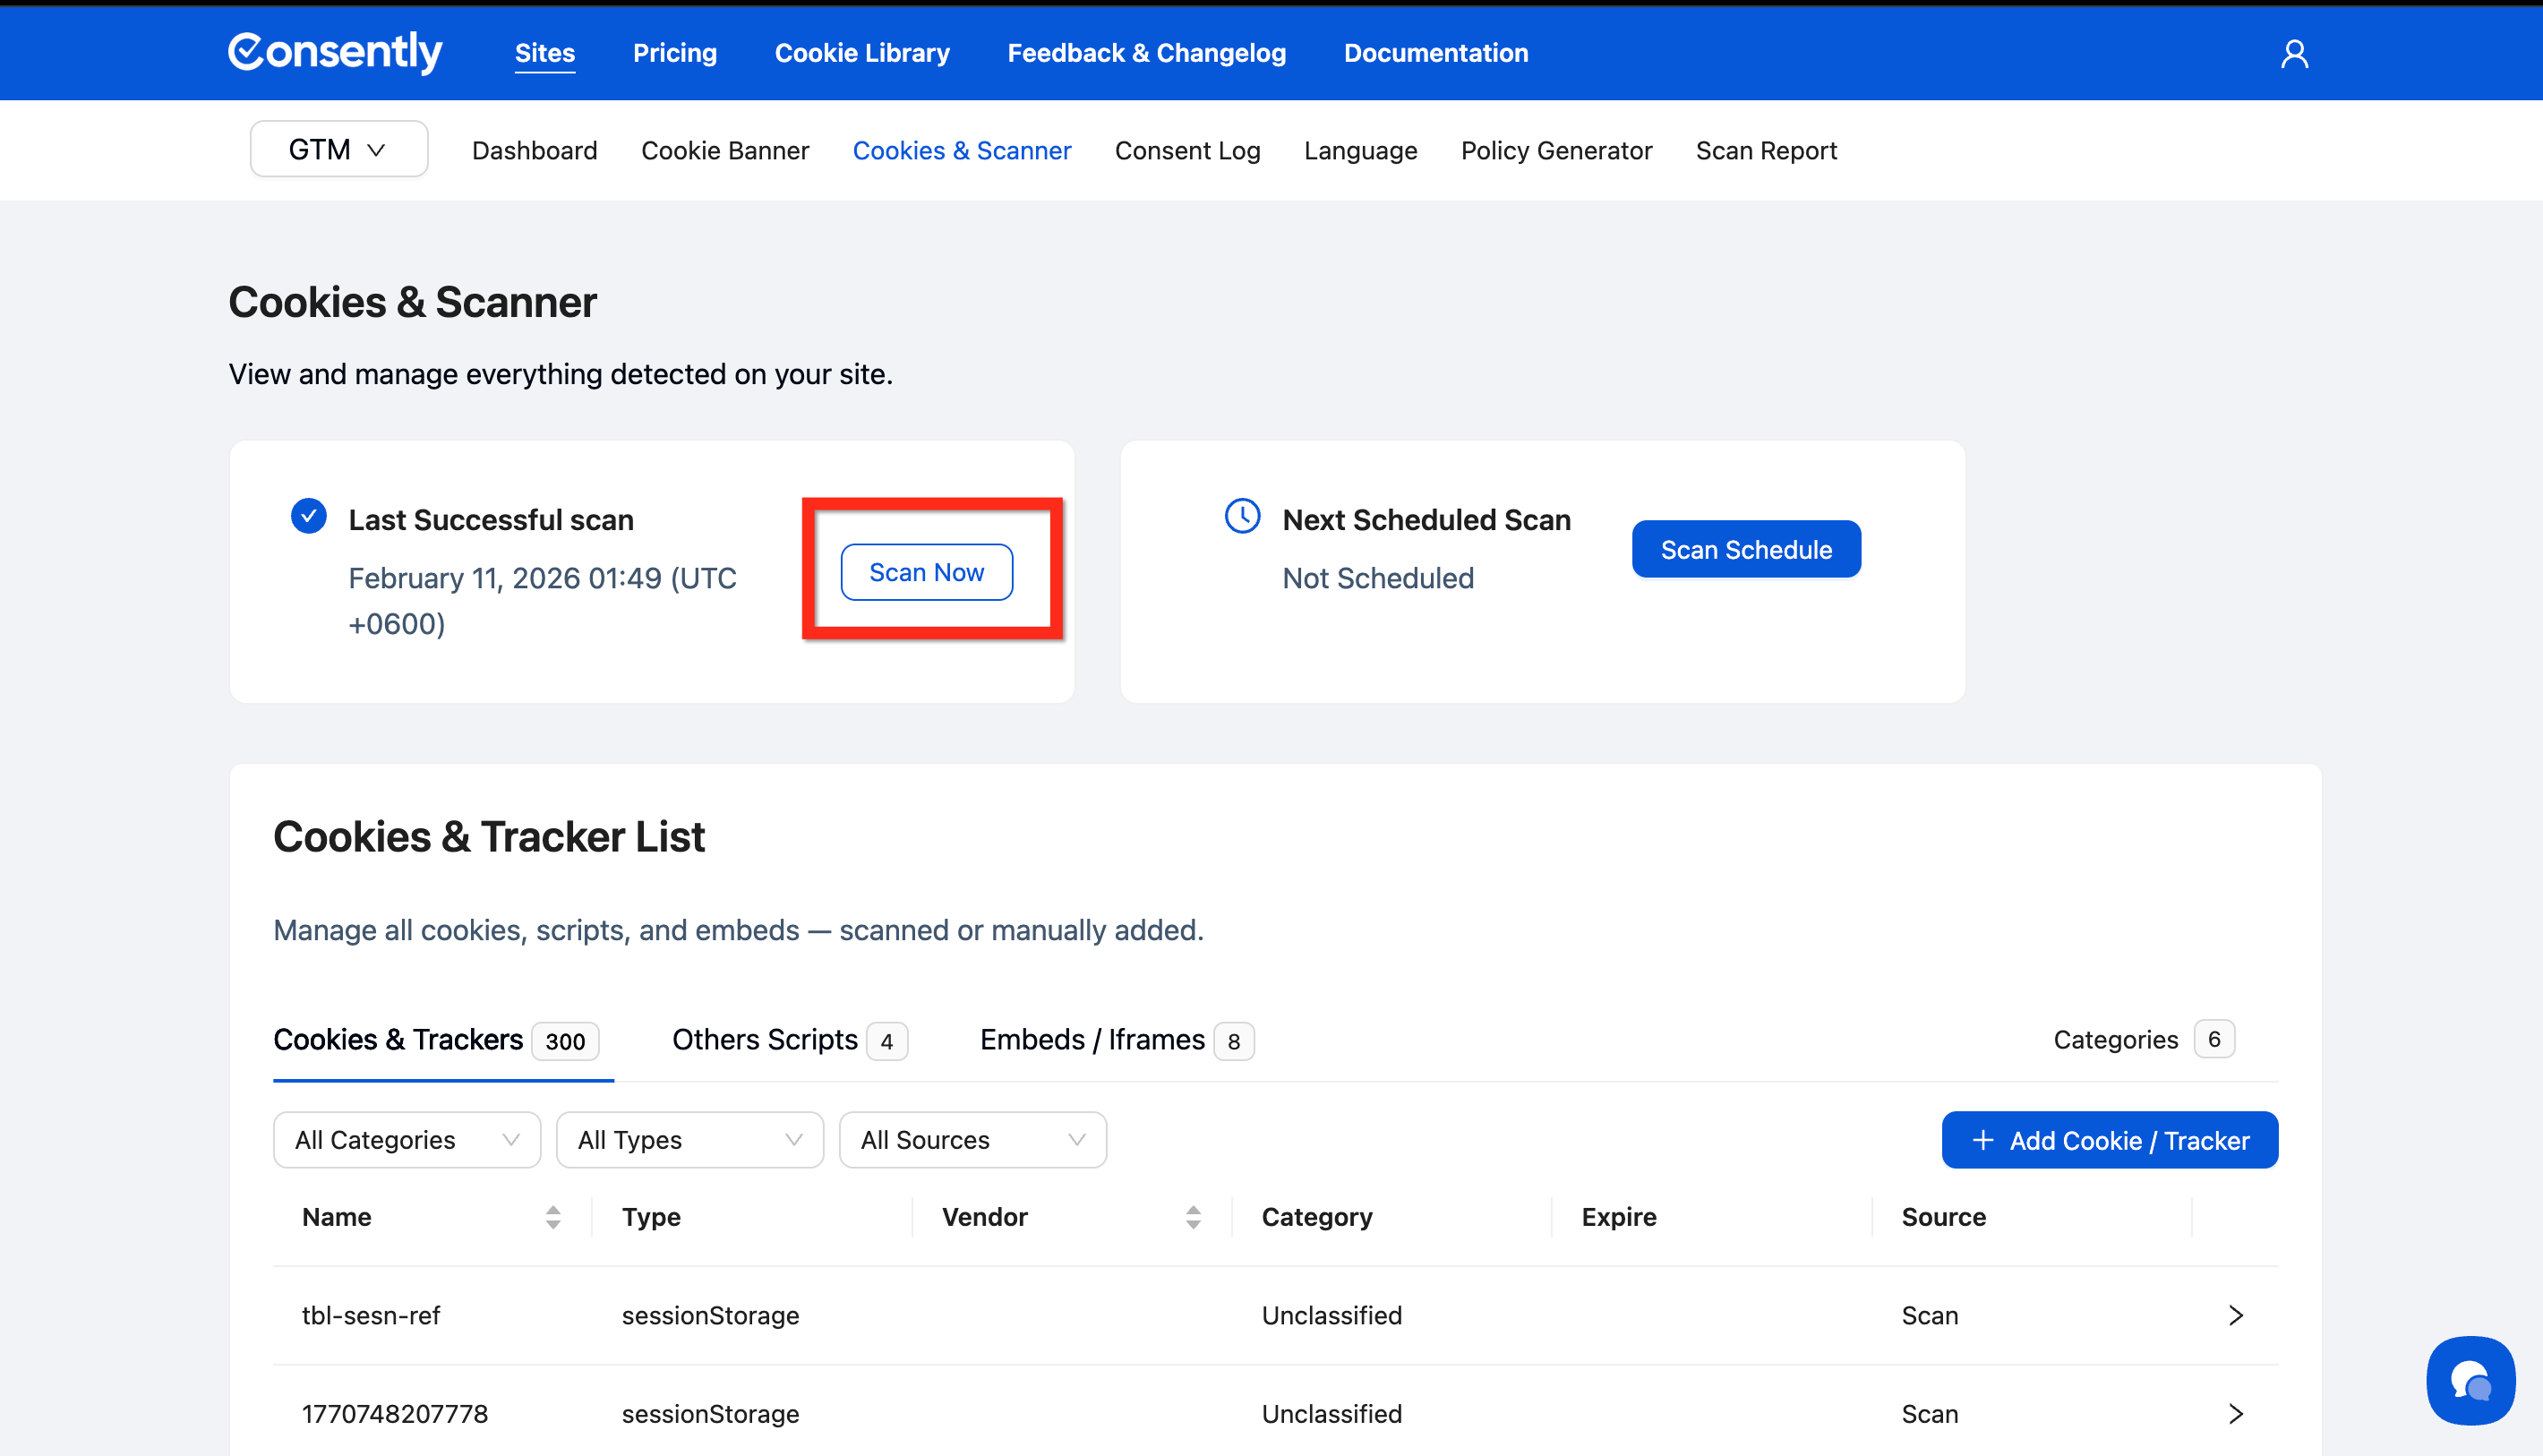
Step 2: Start a new scan
Click the Scan Now button in the Last Successful scan section.
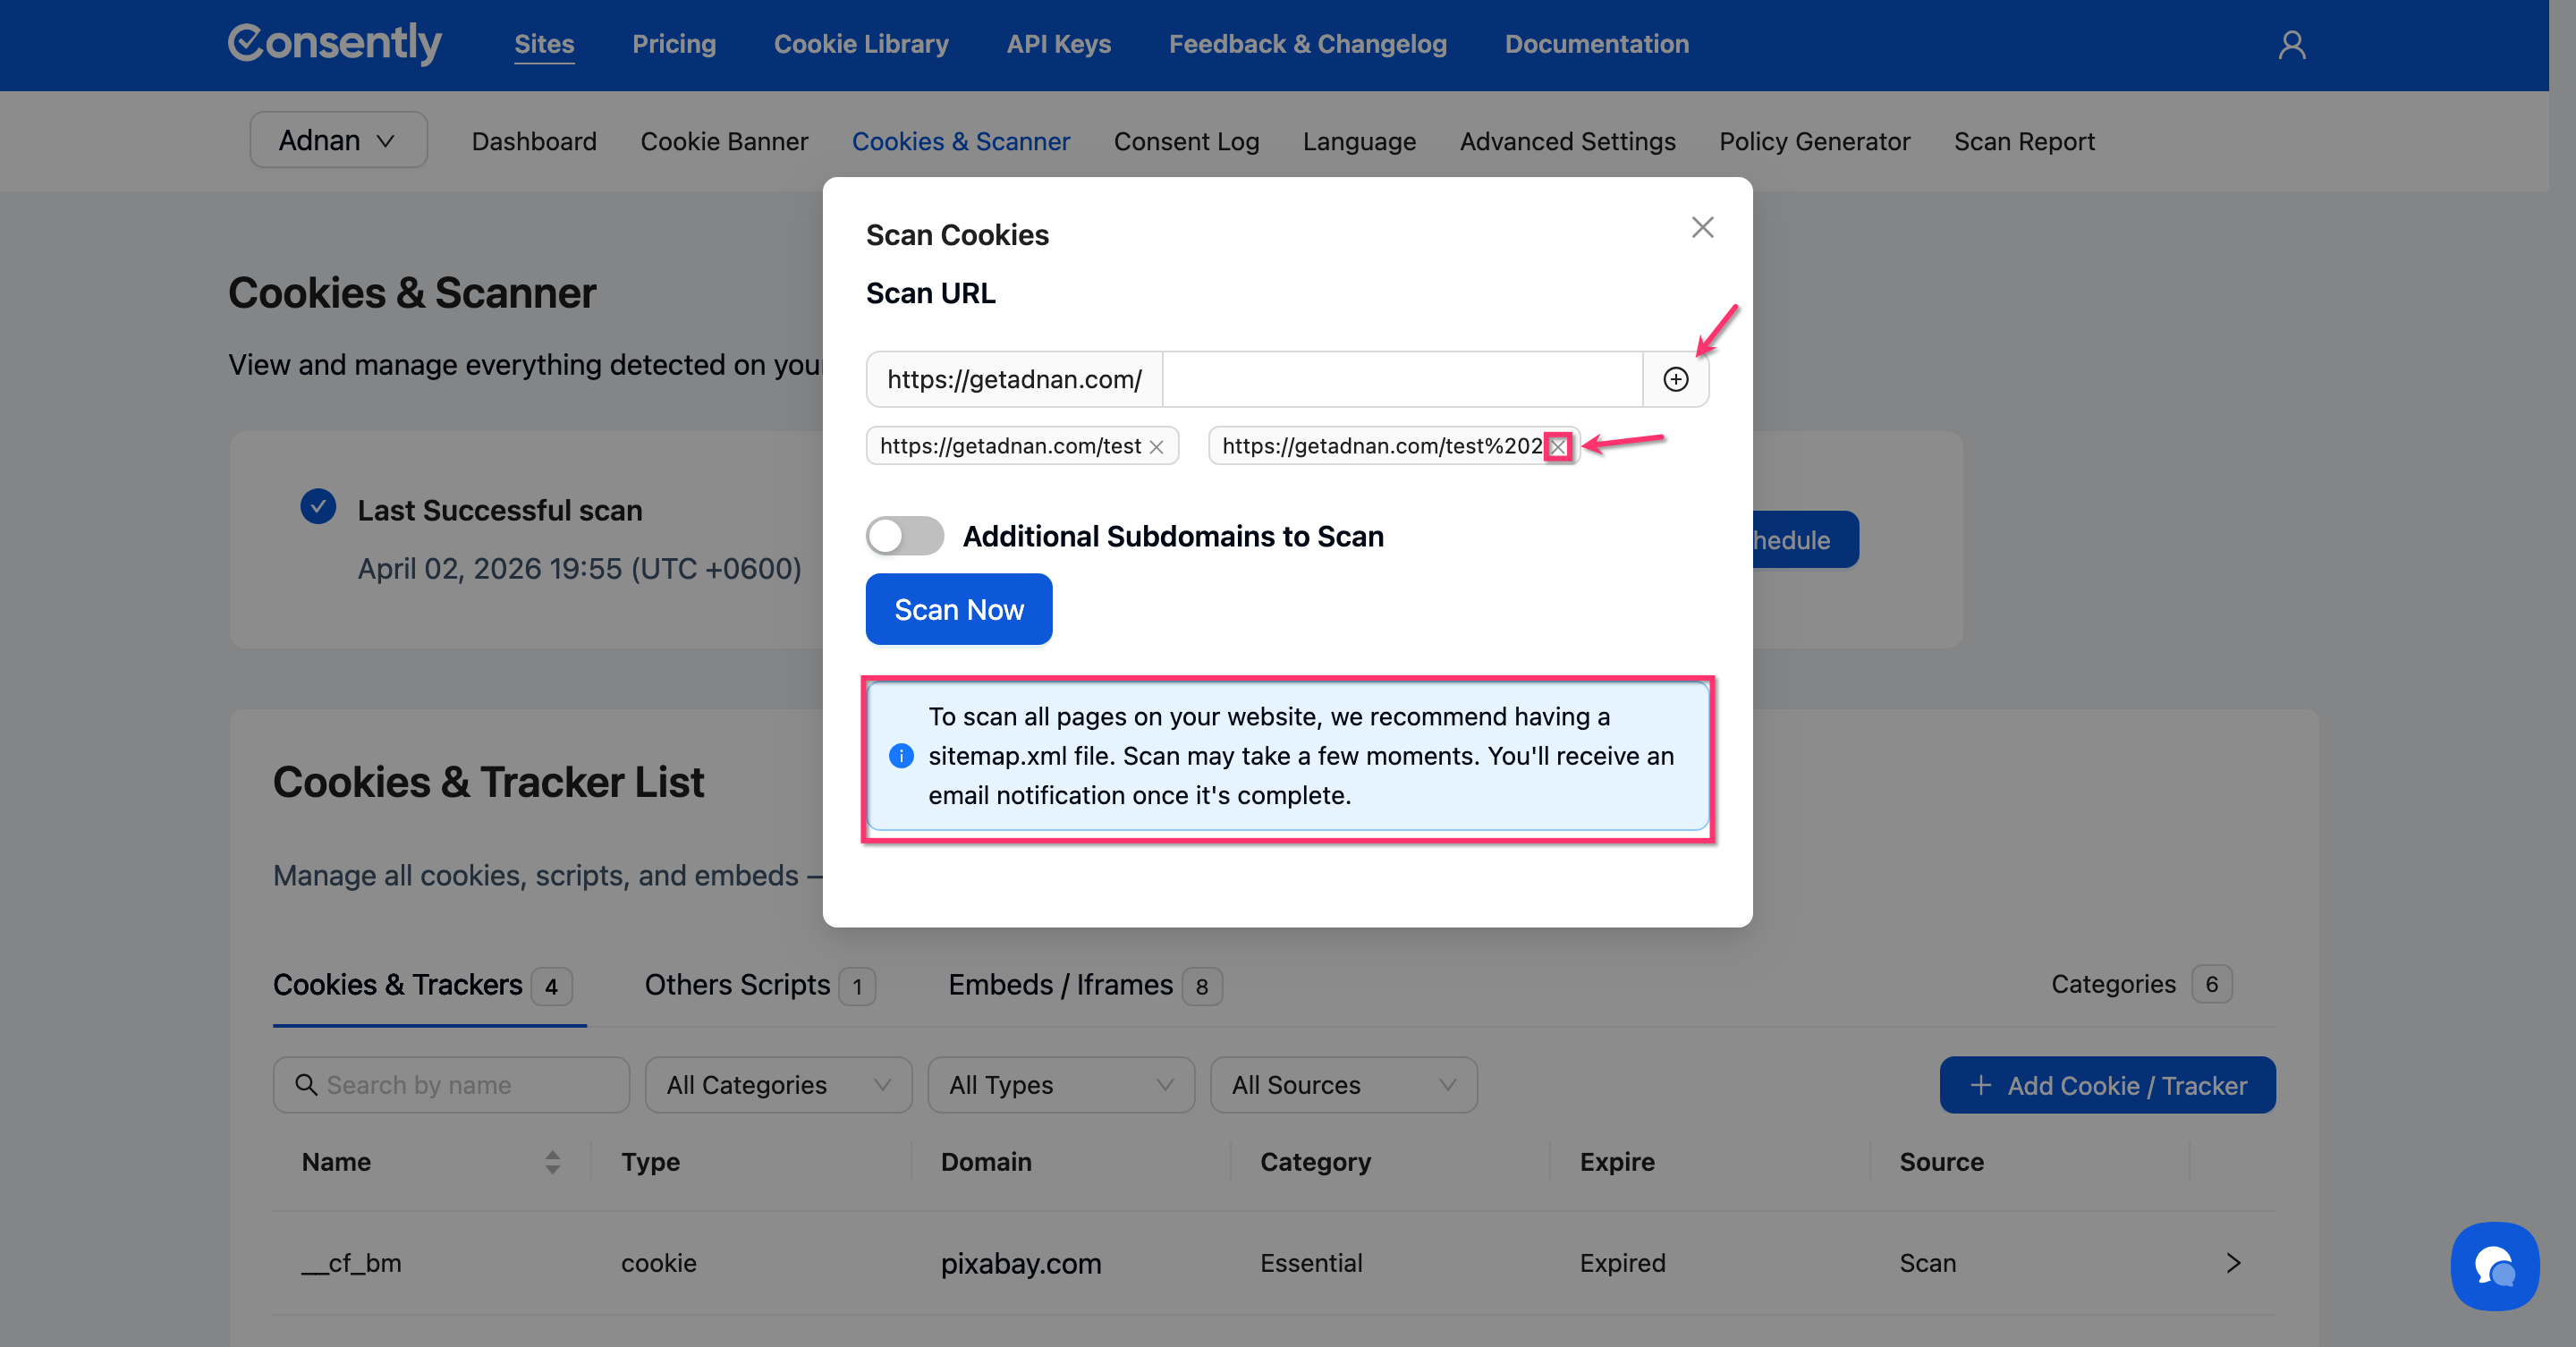
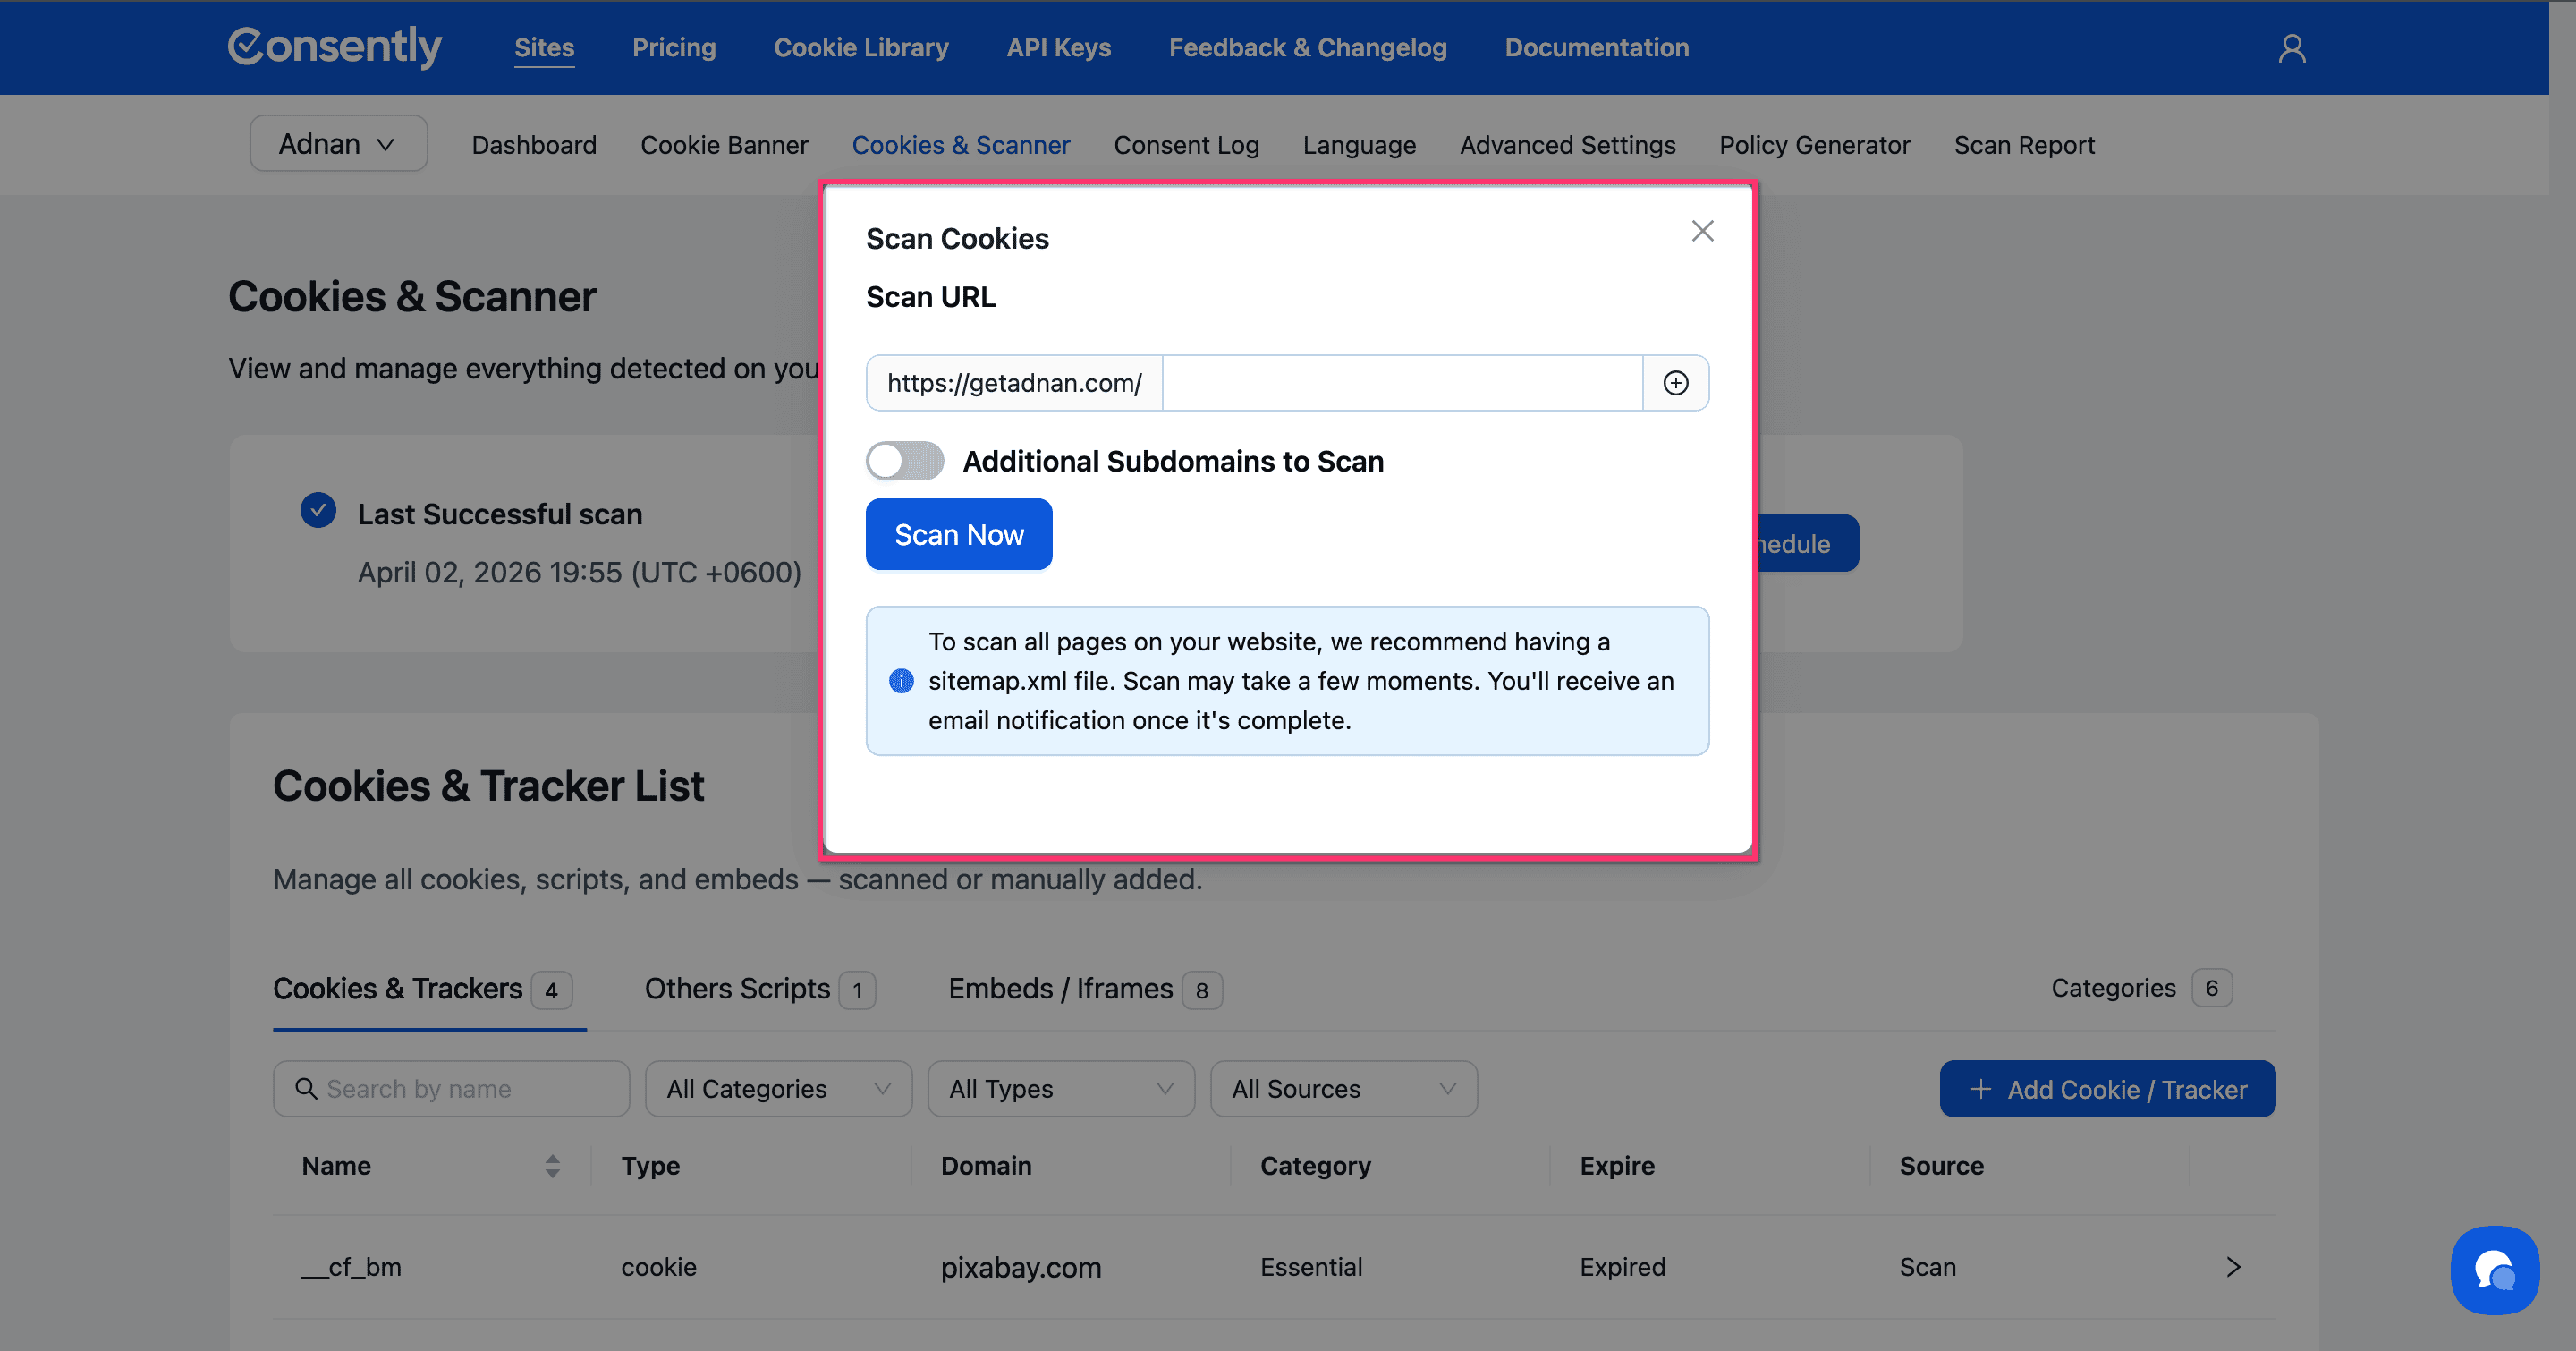
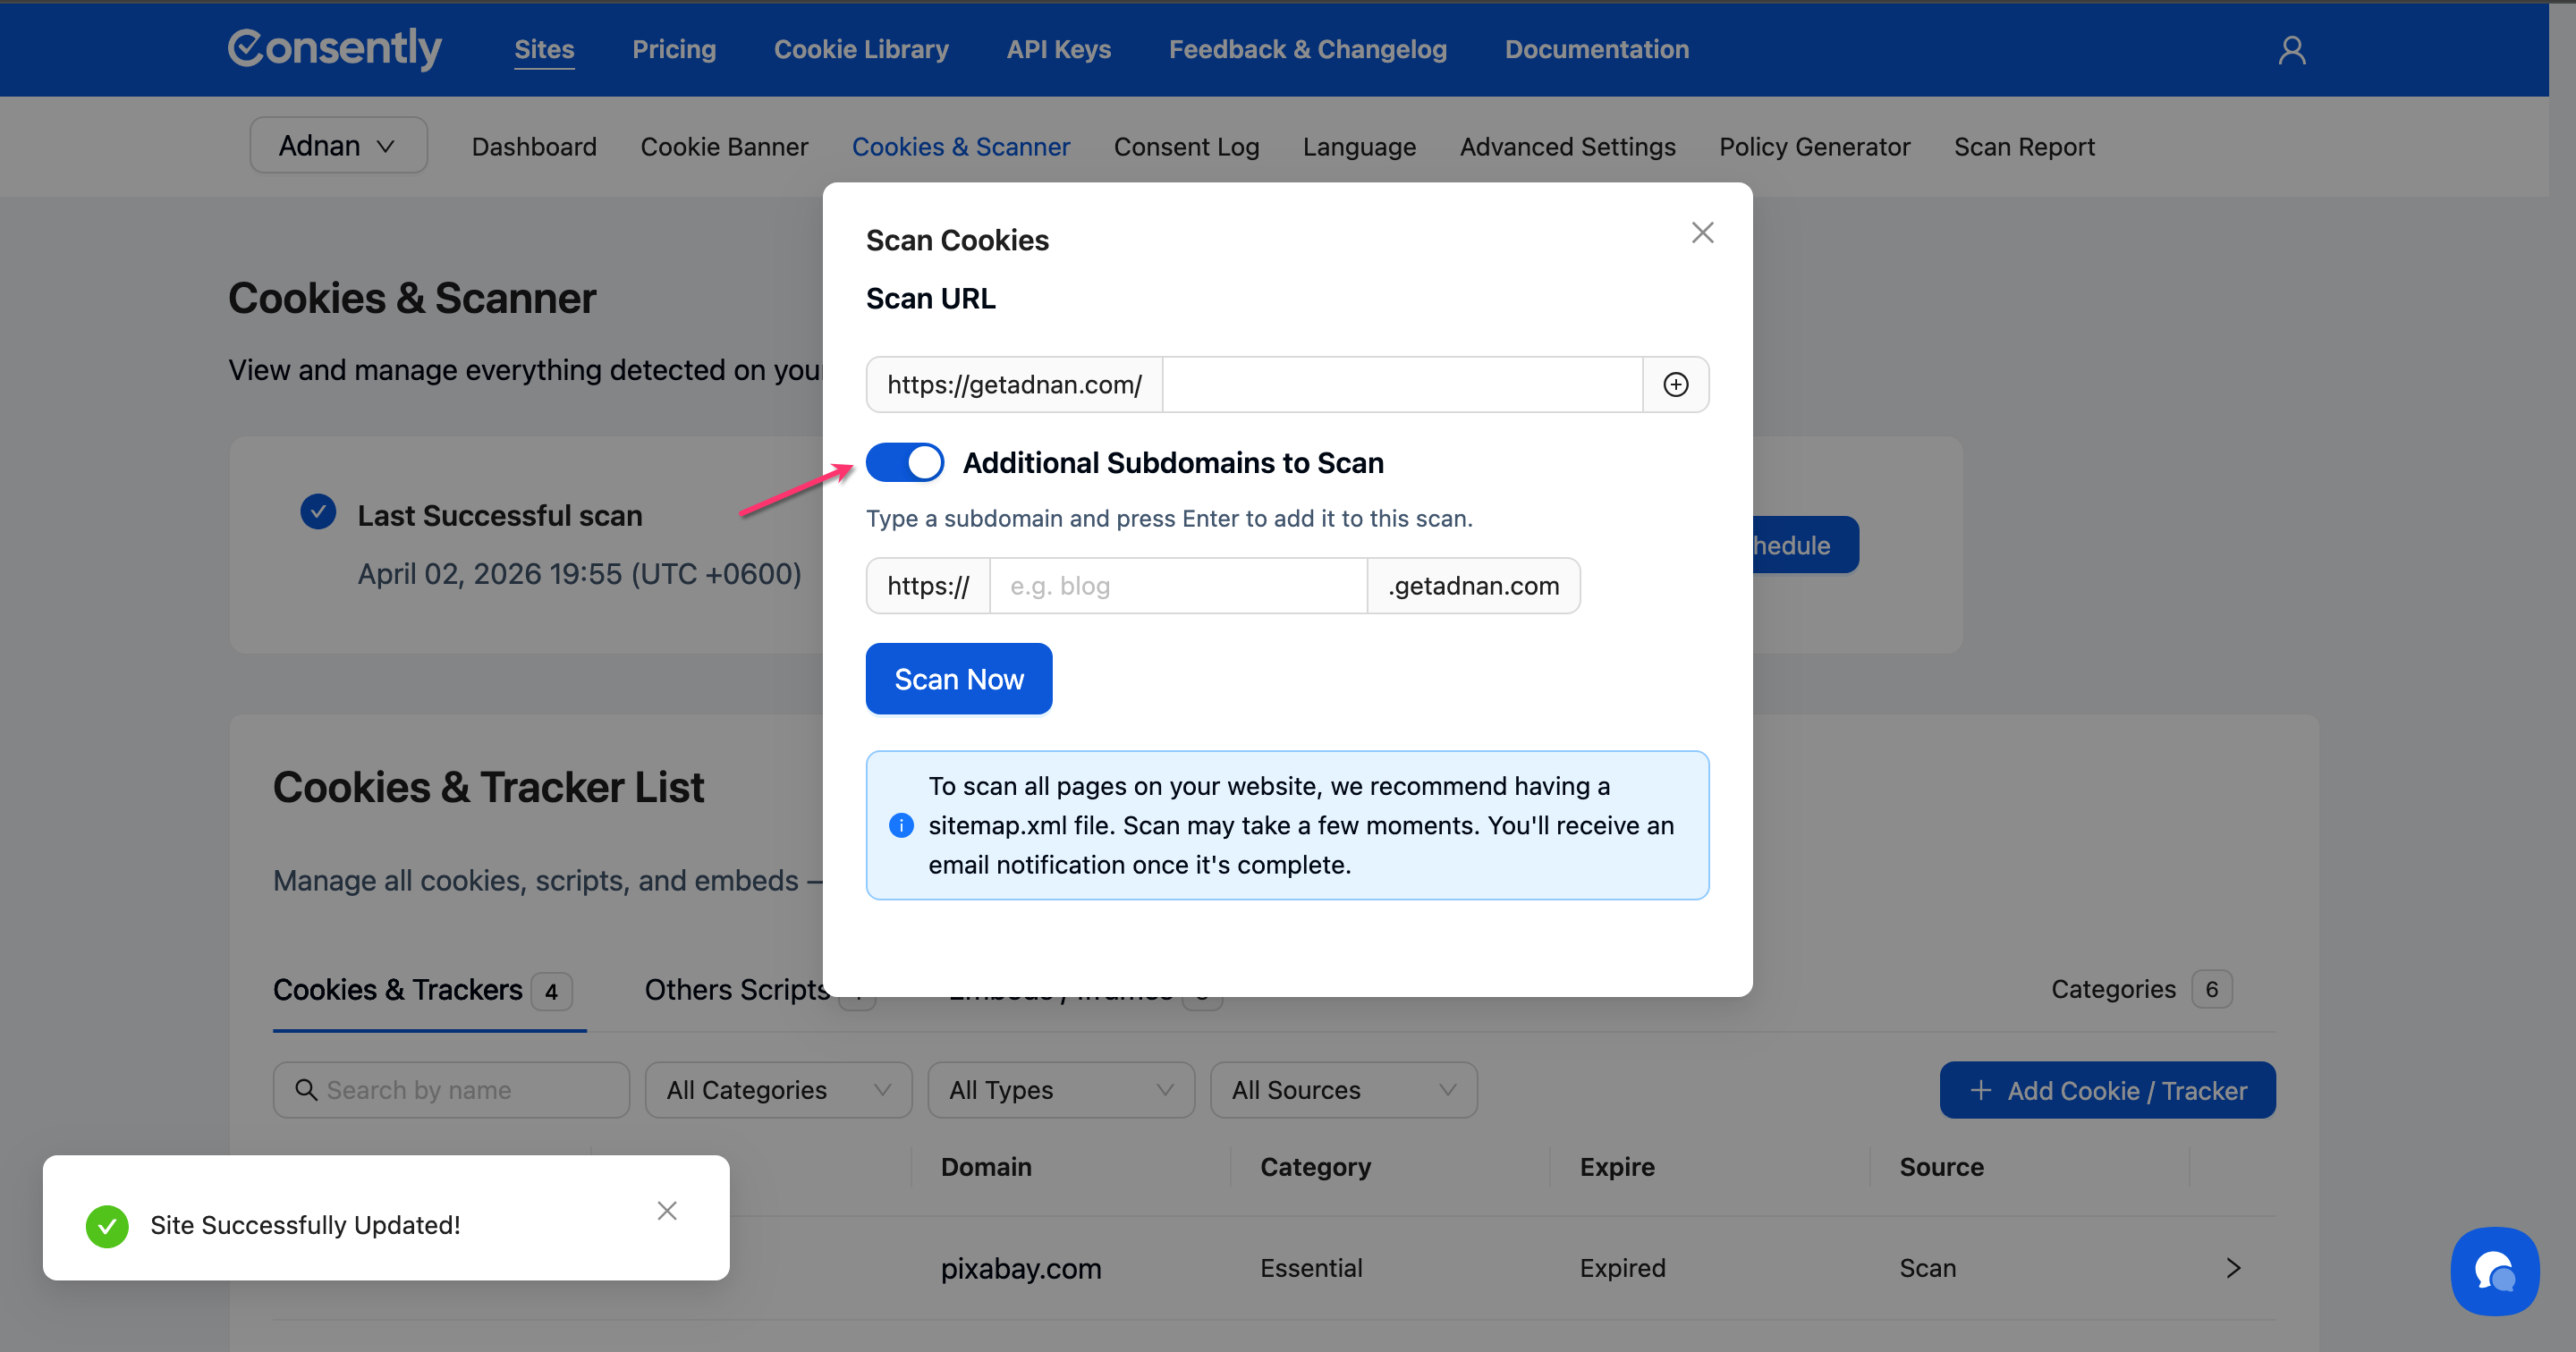
Step 3: Enter your scan URLs
In the Scan Cookies modal, enter the URLs you want to scan. You can add multiple URLs by clicking the + icon.
Note: If you want to scan your entire website, just use your root domain https://example.com/ There is no need to manually add other pages.
💡 Tip: For the most comprehensive scan, make sure you have a sitemap.xml file—our scanner will use it to crawl all your pages automatically.
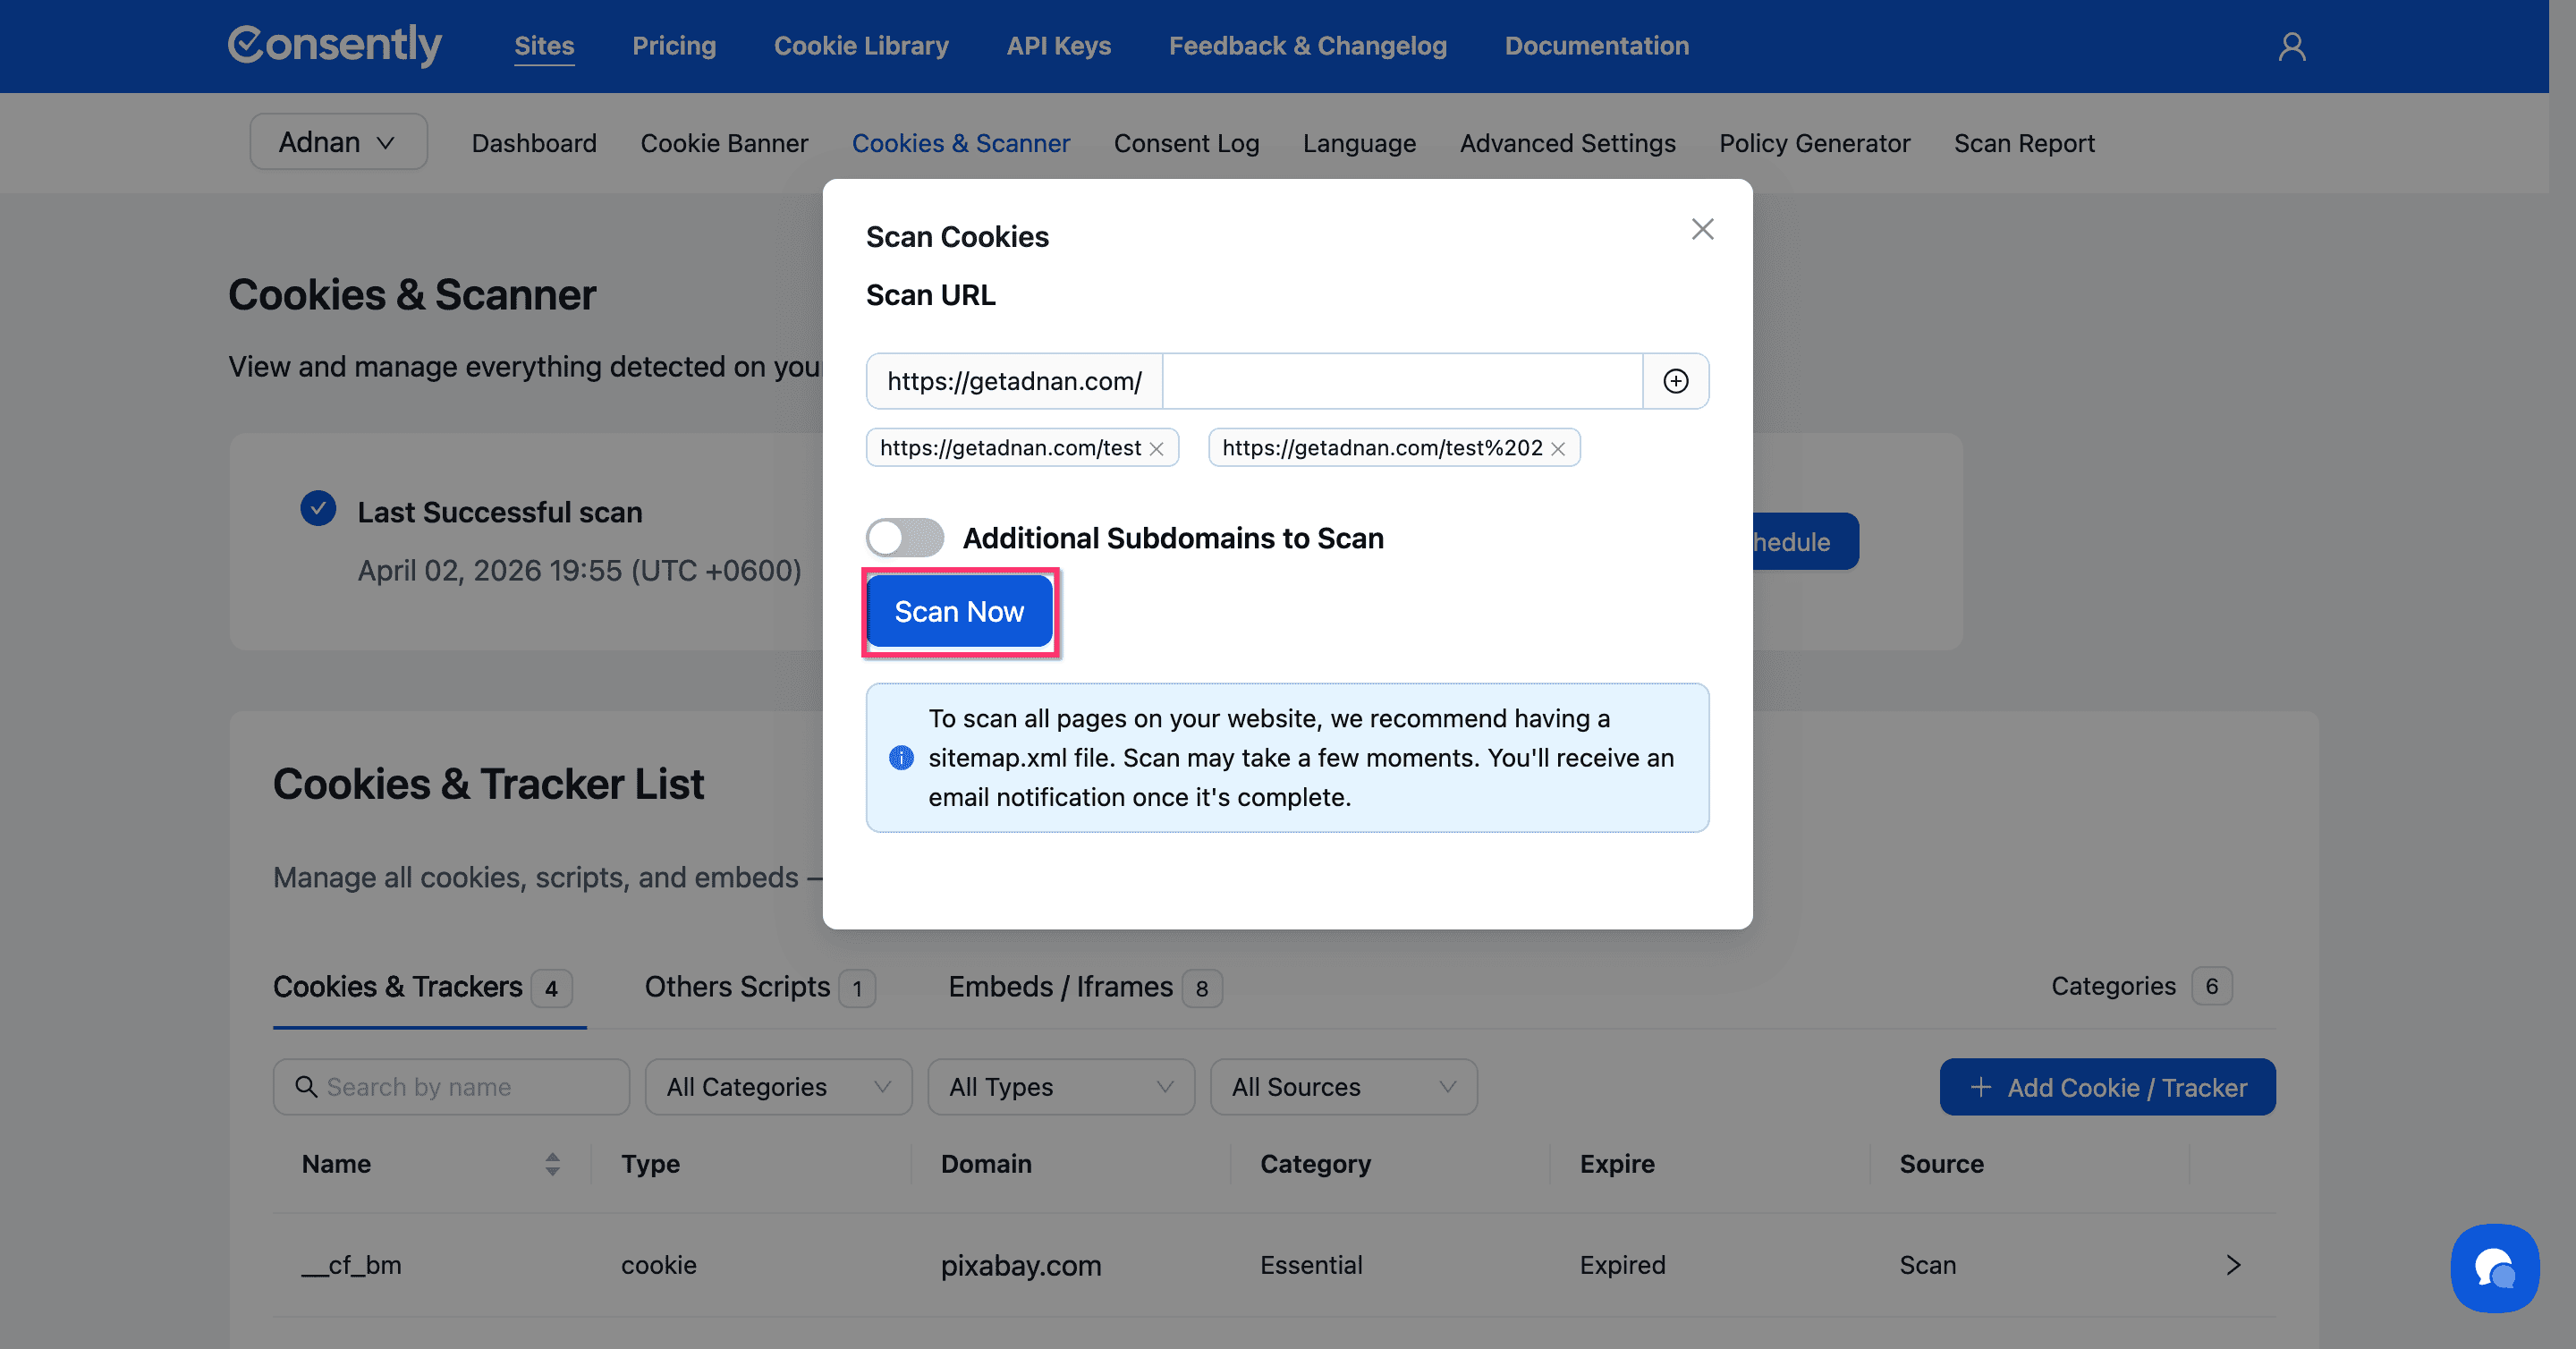
Step 4: Submit the scan request
Click Scan Now to start scanning.
⚠️ Important: Your scan request enters a queue and may take several minutes to hours to depending on how larger the website. You'll receive an email notification once the scan finishes—no need to keep this page open.
Done!
Your scan is now in progress. You'll receive a detailed scan report via email when it completes.
✅ Success indicator: You'll see a confirmation that your scan has started, and the Last Successful scan section will update once complete.
Understanding Your Scan Results
Accessing the scan report
When your scan completes, you'll receive an email with the subject "Your scan report is ready - Site Name" containing a summary of findings.
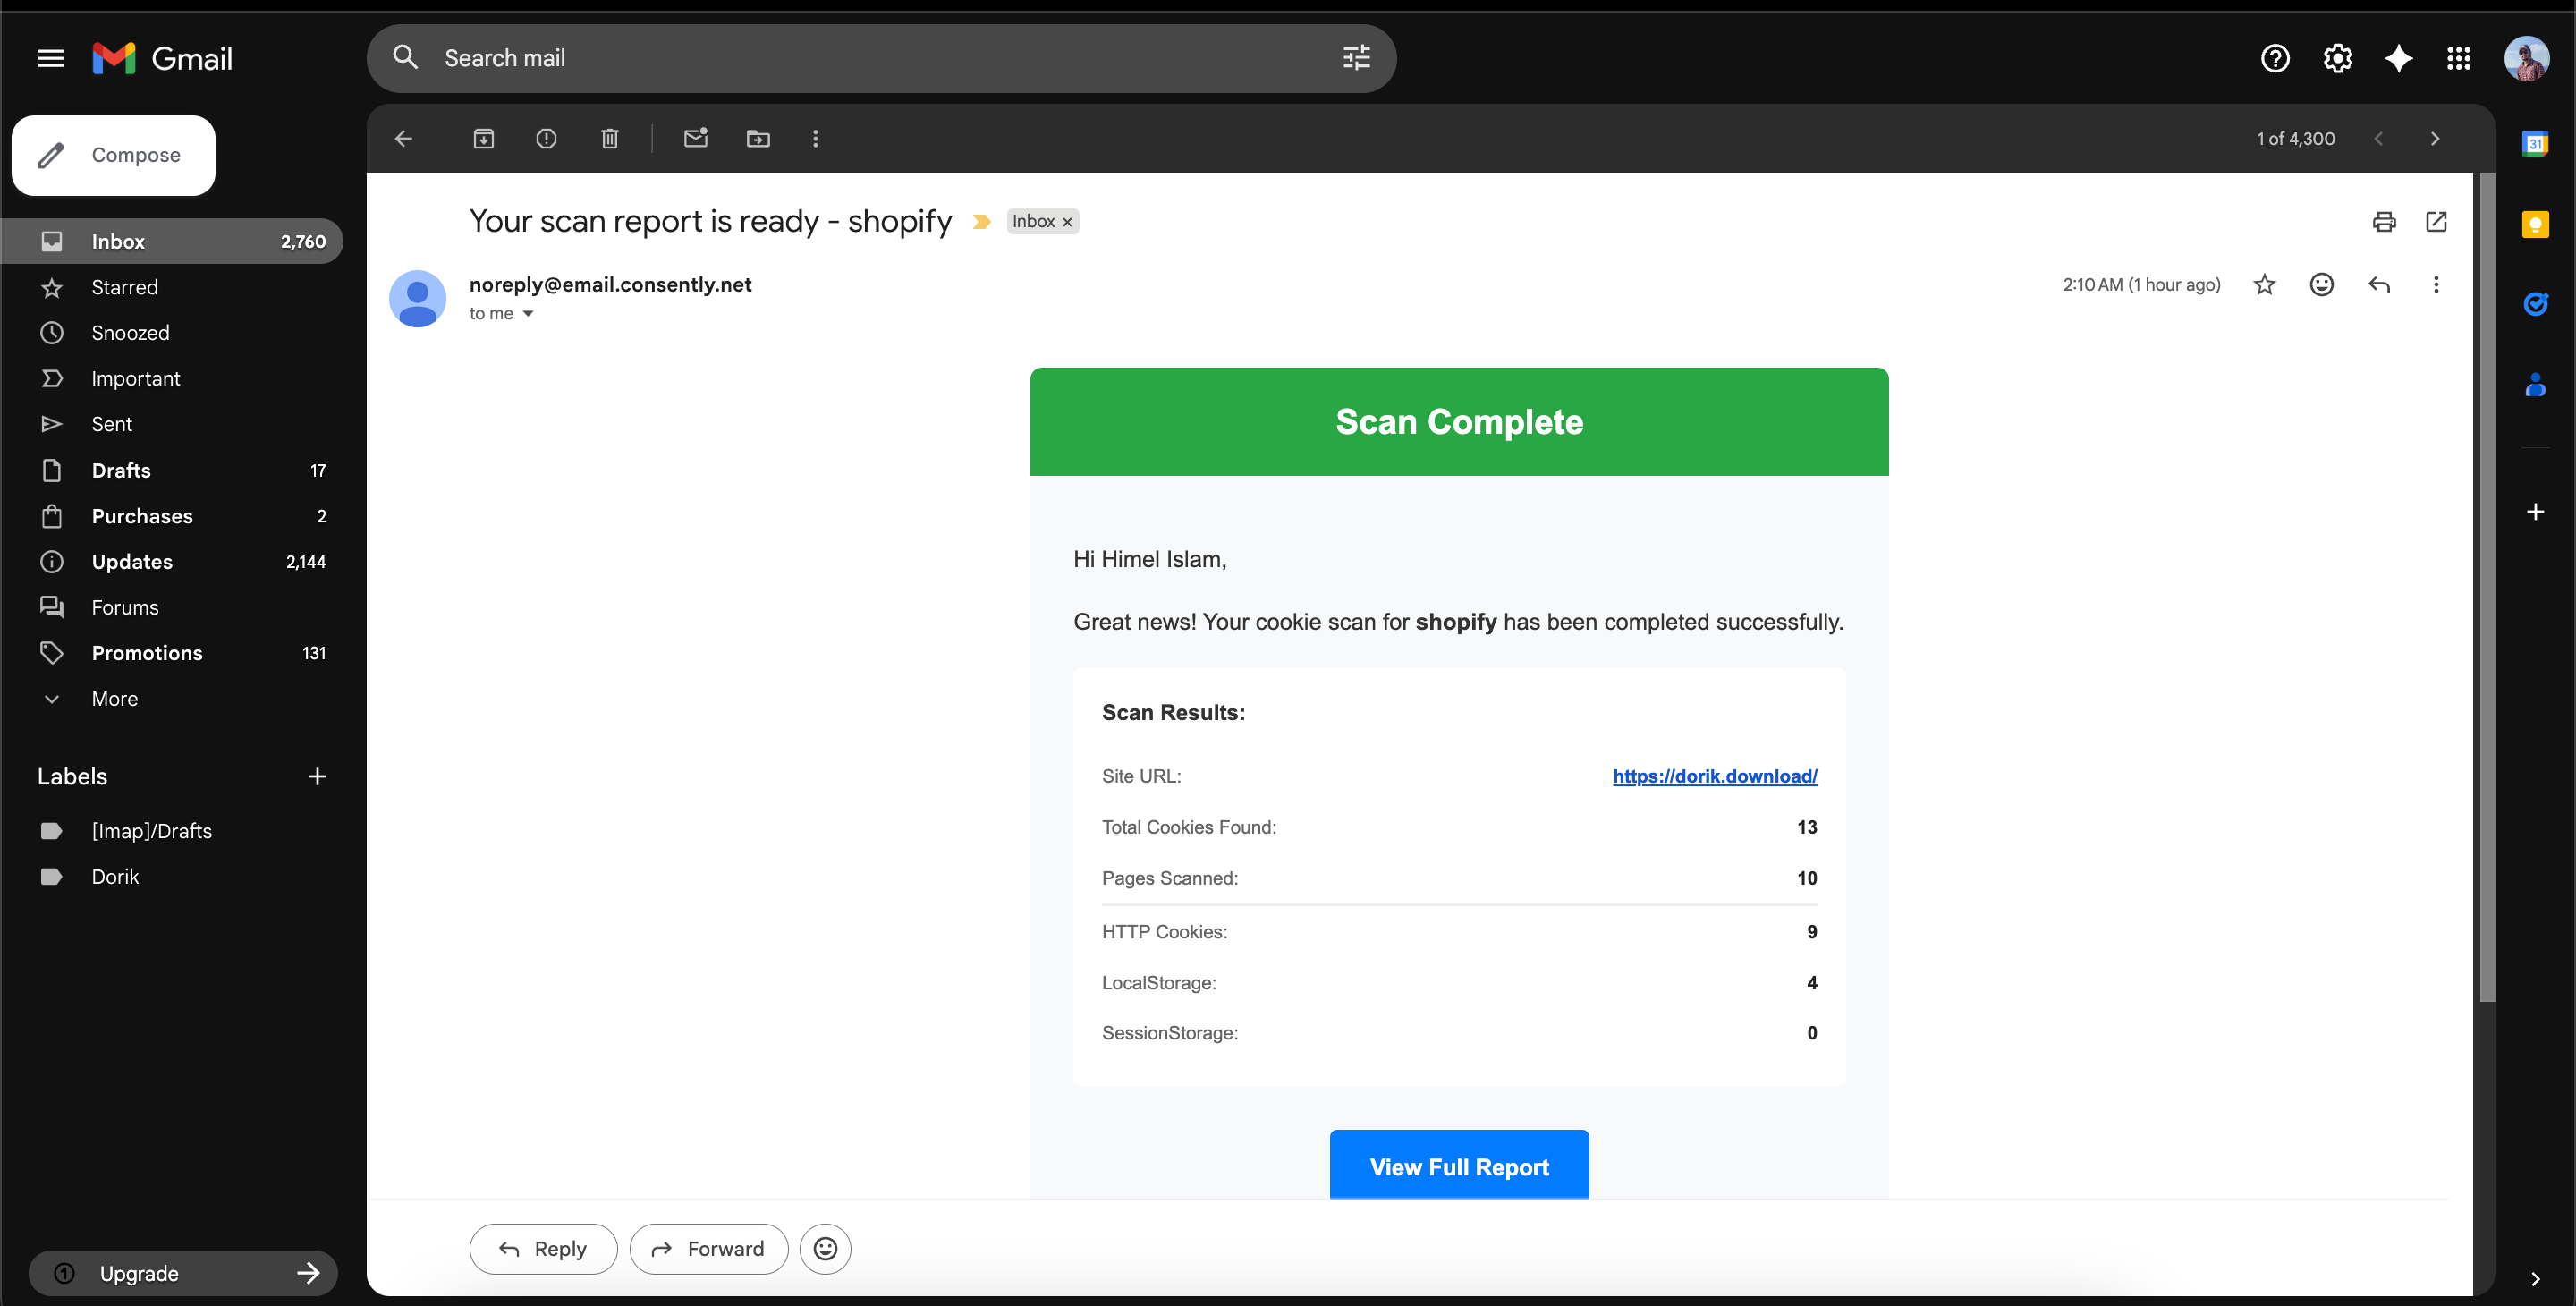
Viewing detailed results
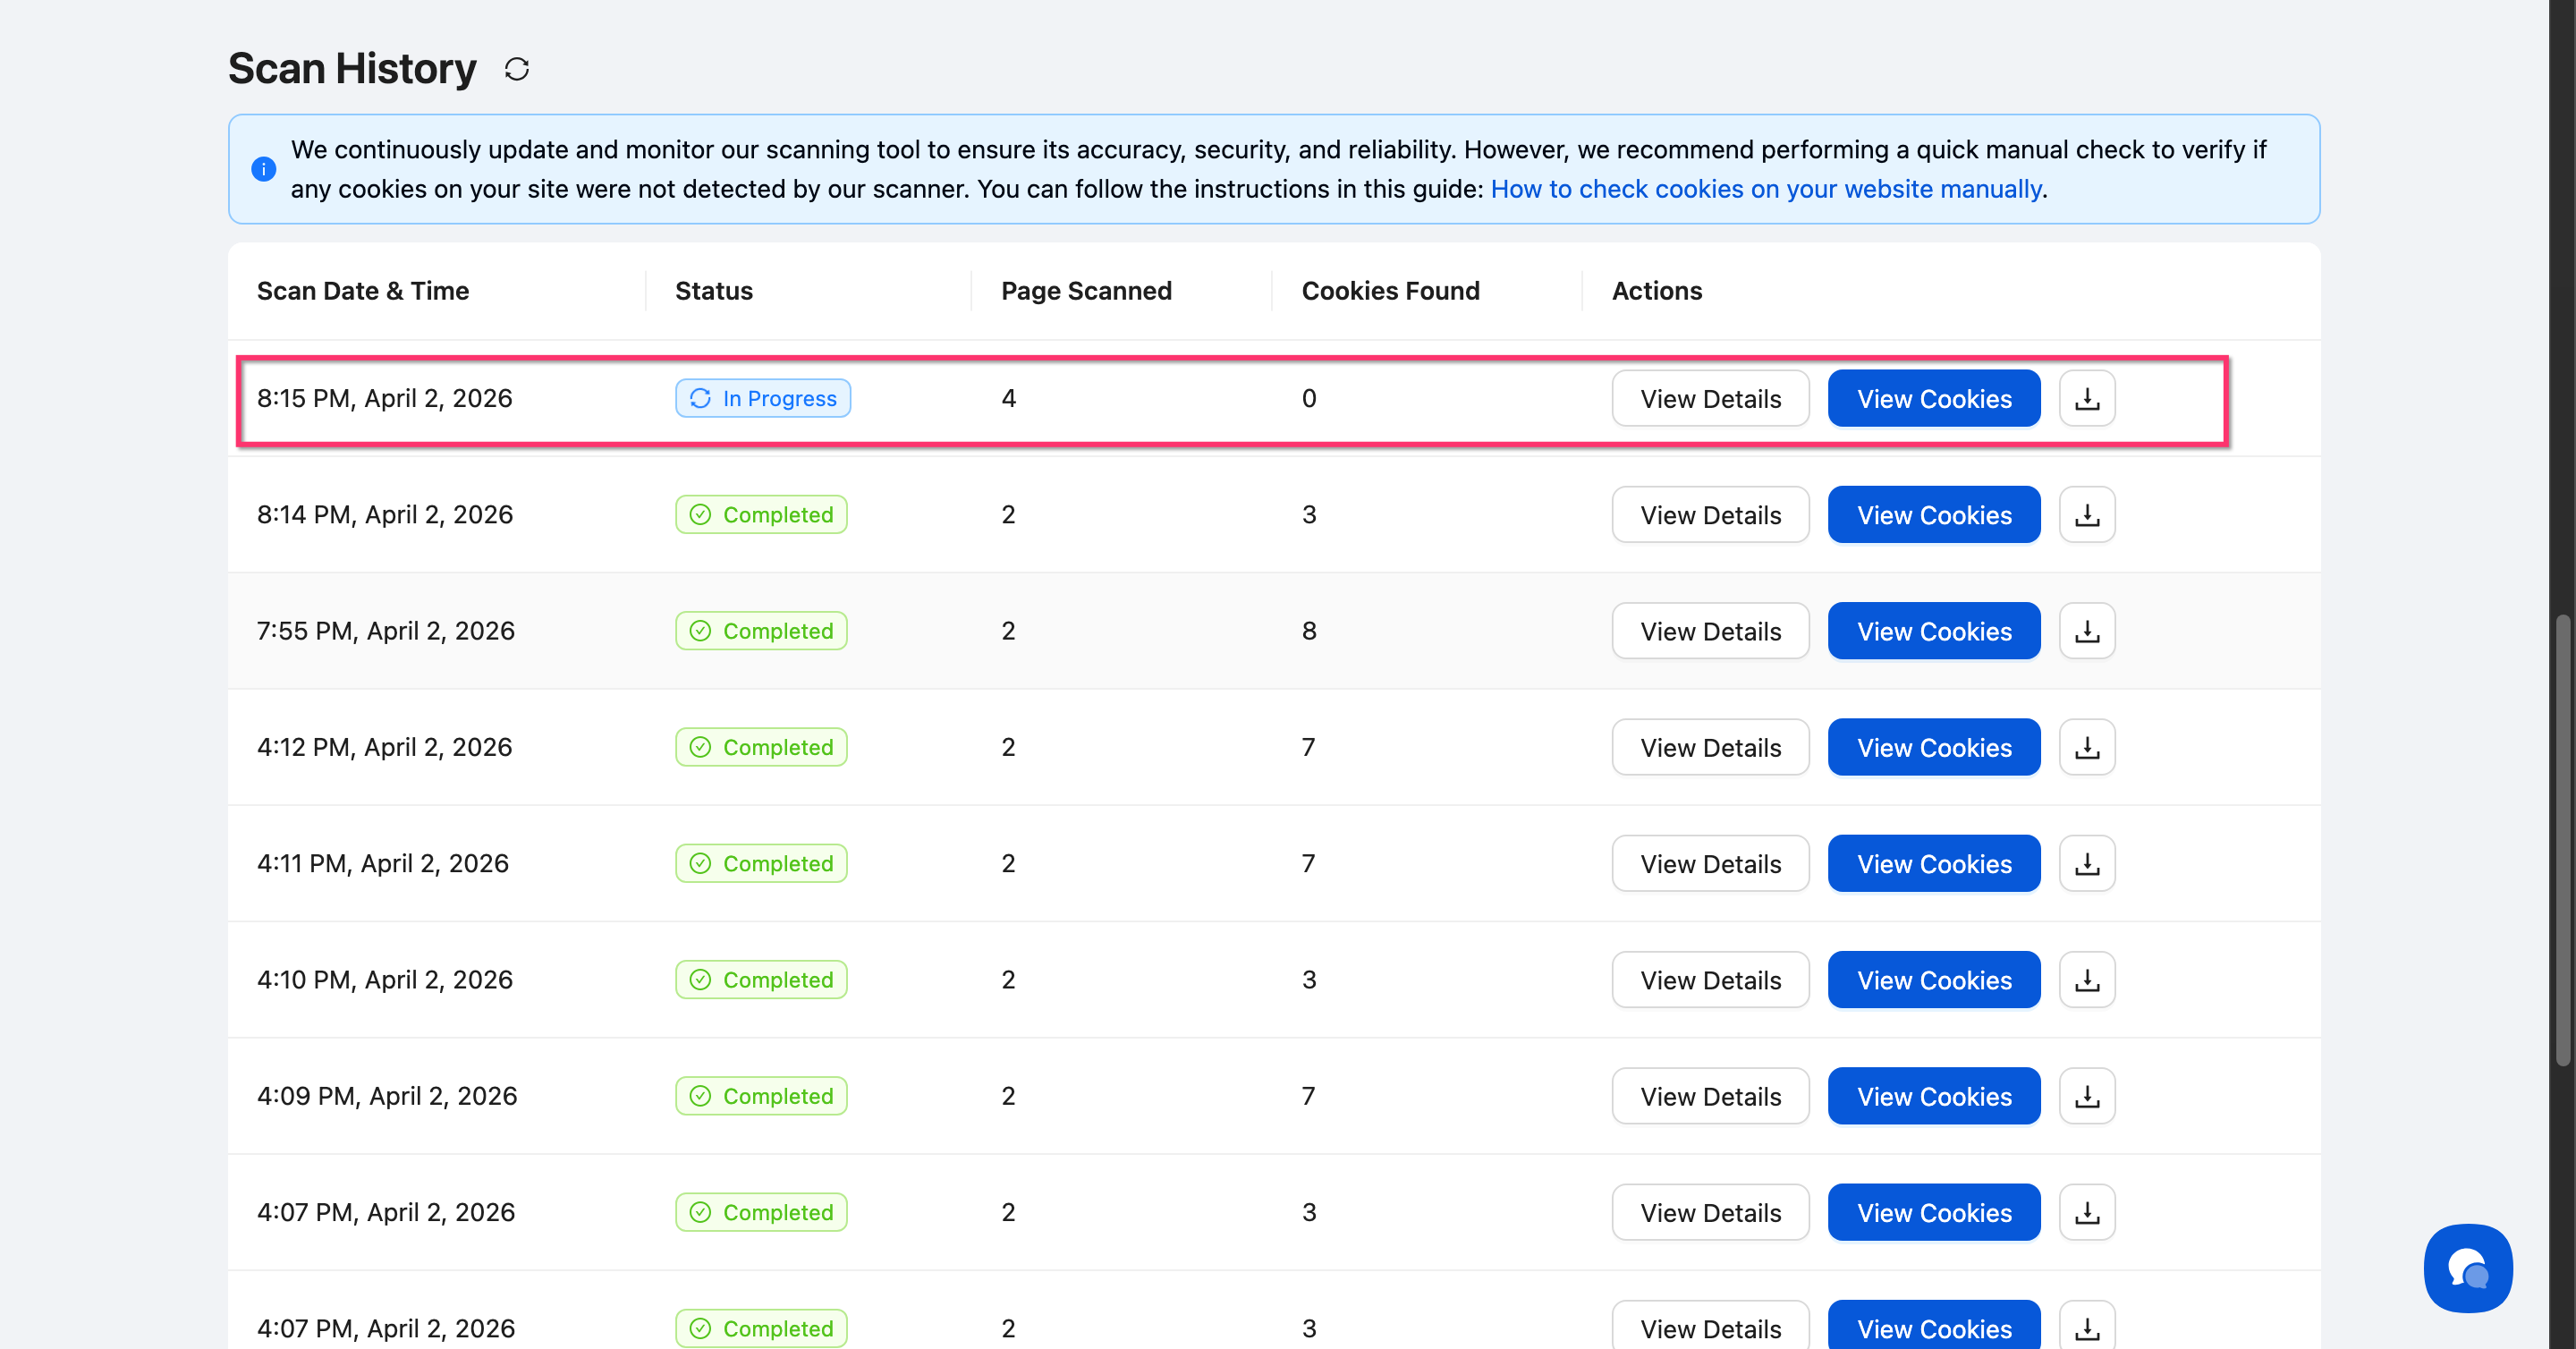
Click View Full Report in the email or navigate to Cookies & Scanner → Scan History → View Details to see all detected cookies.
The scan results page shows:
Scan Information: Status, total cookies, script and iframes found, and pages discovered
Cookies by Category: Breakdown showing Essential, Analytics, Performance, Advertising, and Unclassified cookies
Scan Result: Detailed table with cookie names, categories, domains, platforms, storage types, expiration dates, descriptions, other scripts and embed/iframes.

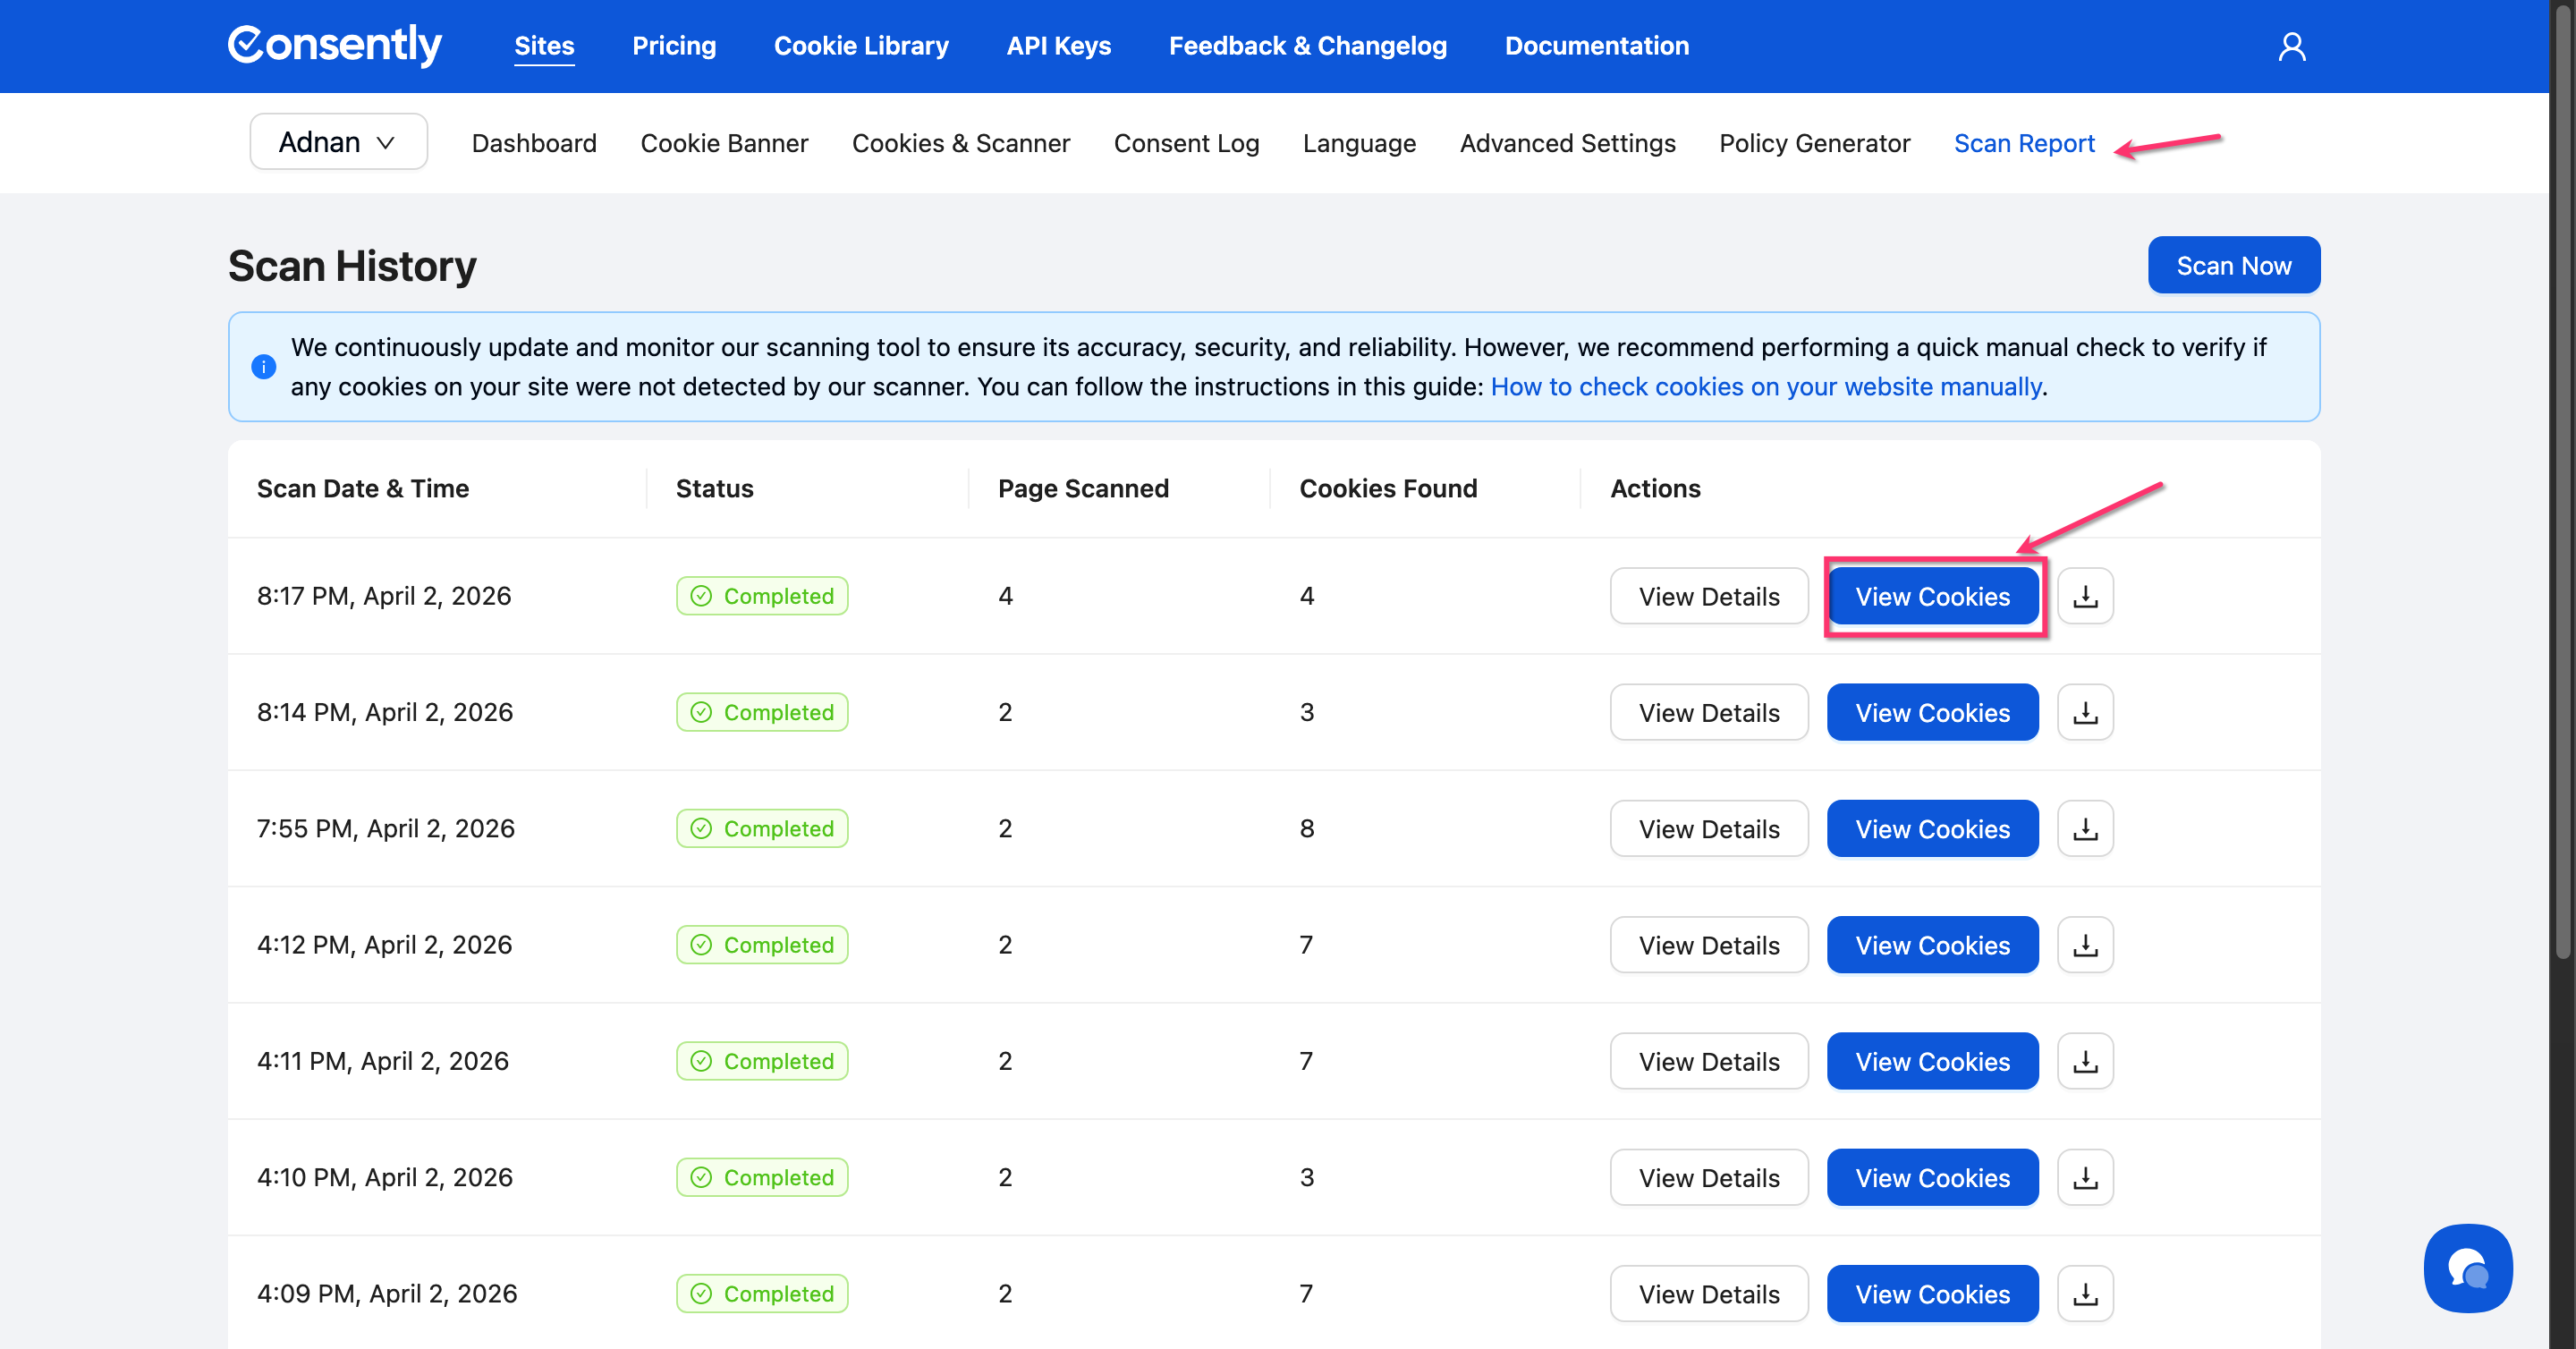
Adding cookies to your manager
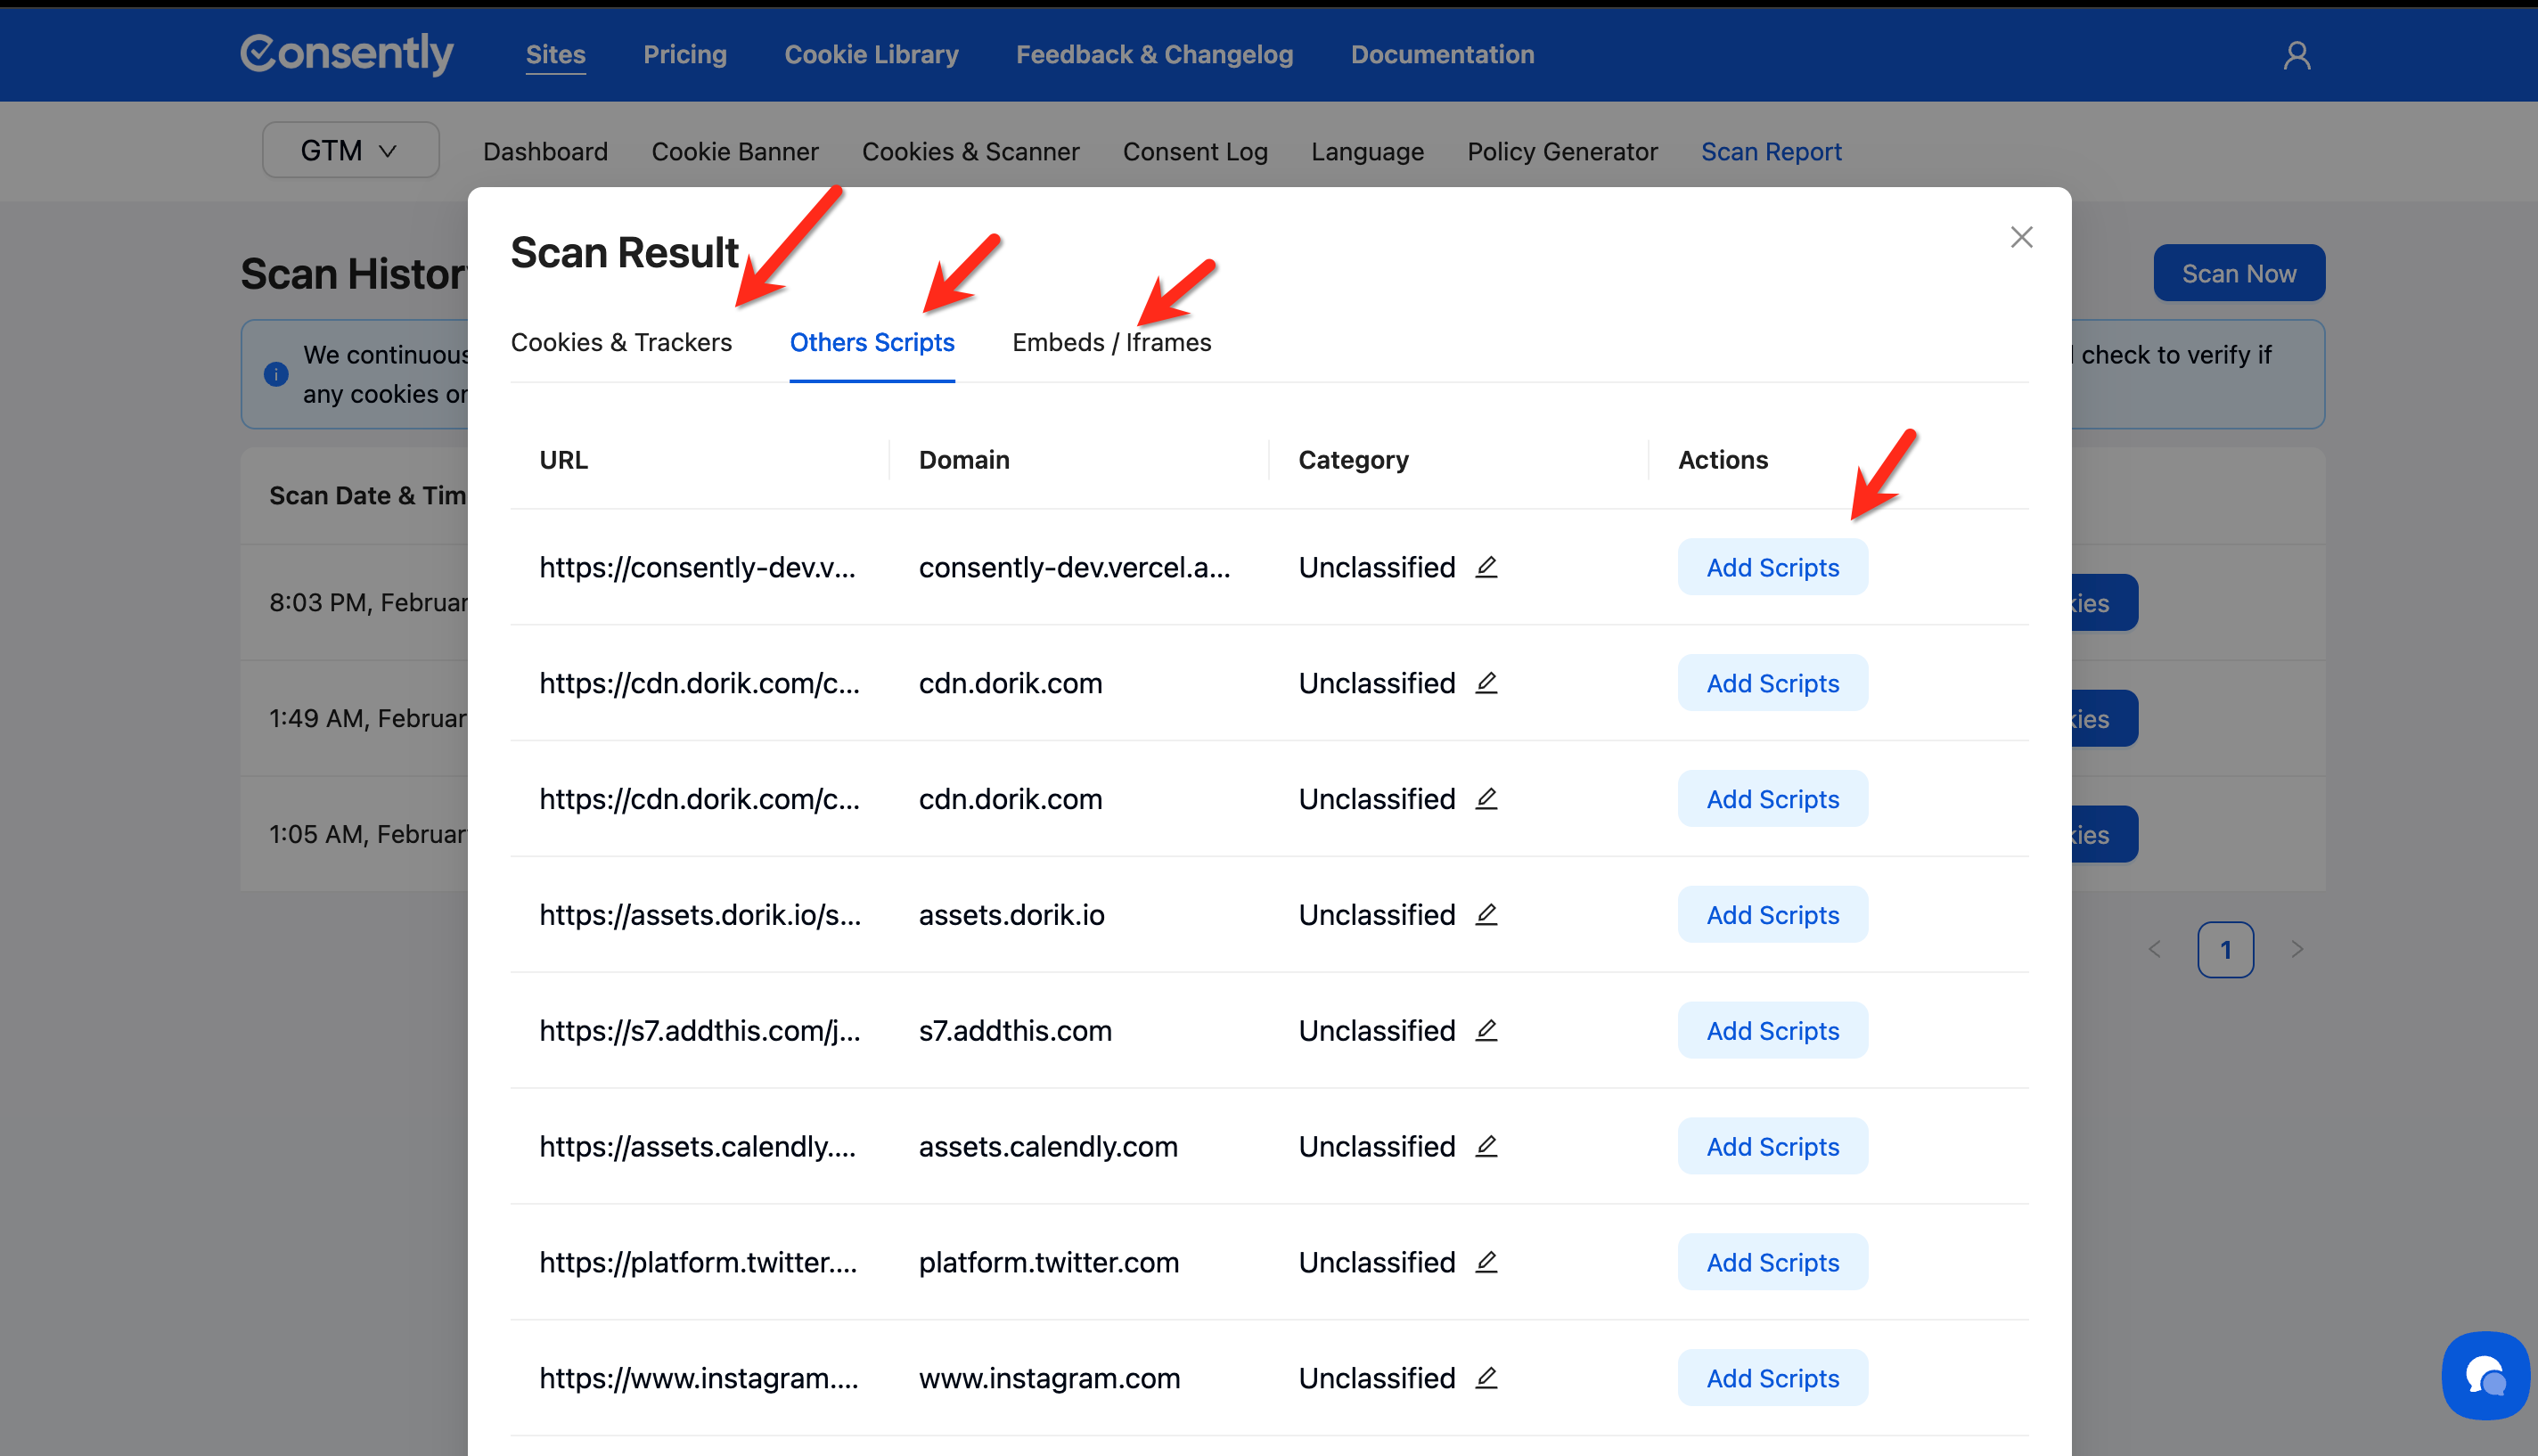
From the scan results, you can add newly detected cookies directly to your cookie categories:
Click Scan Report > View Cookies
Select Cookies & Trackers, Others Scripts, Embeds / Iframes
Review each cookie, script, and iframe in the Scan result table
Click Add Cookie, Script or Iframe to include in your consent banner
How to Schedule Automatic Scans
Step 1: Access scan settings
Click the Scan Schedule button in the “Next Scheduled Scan” card.
Step 2: Choose scan frequency
Select your preferred schedule:
Once — Single scan execution
Weekly — Runs every week.
Monthly — Runs every month
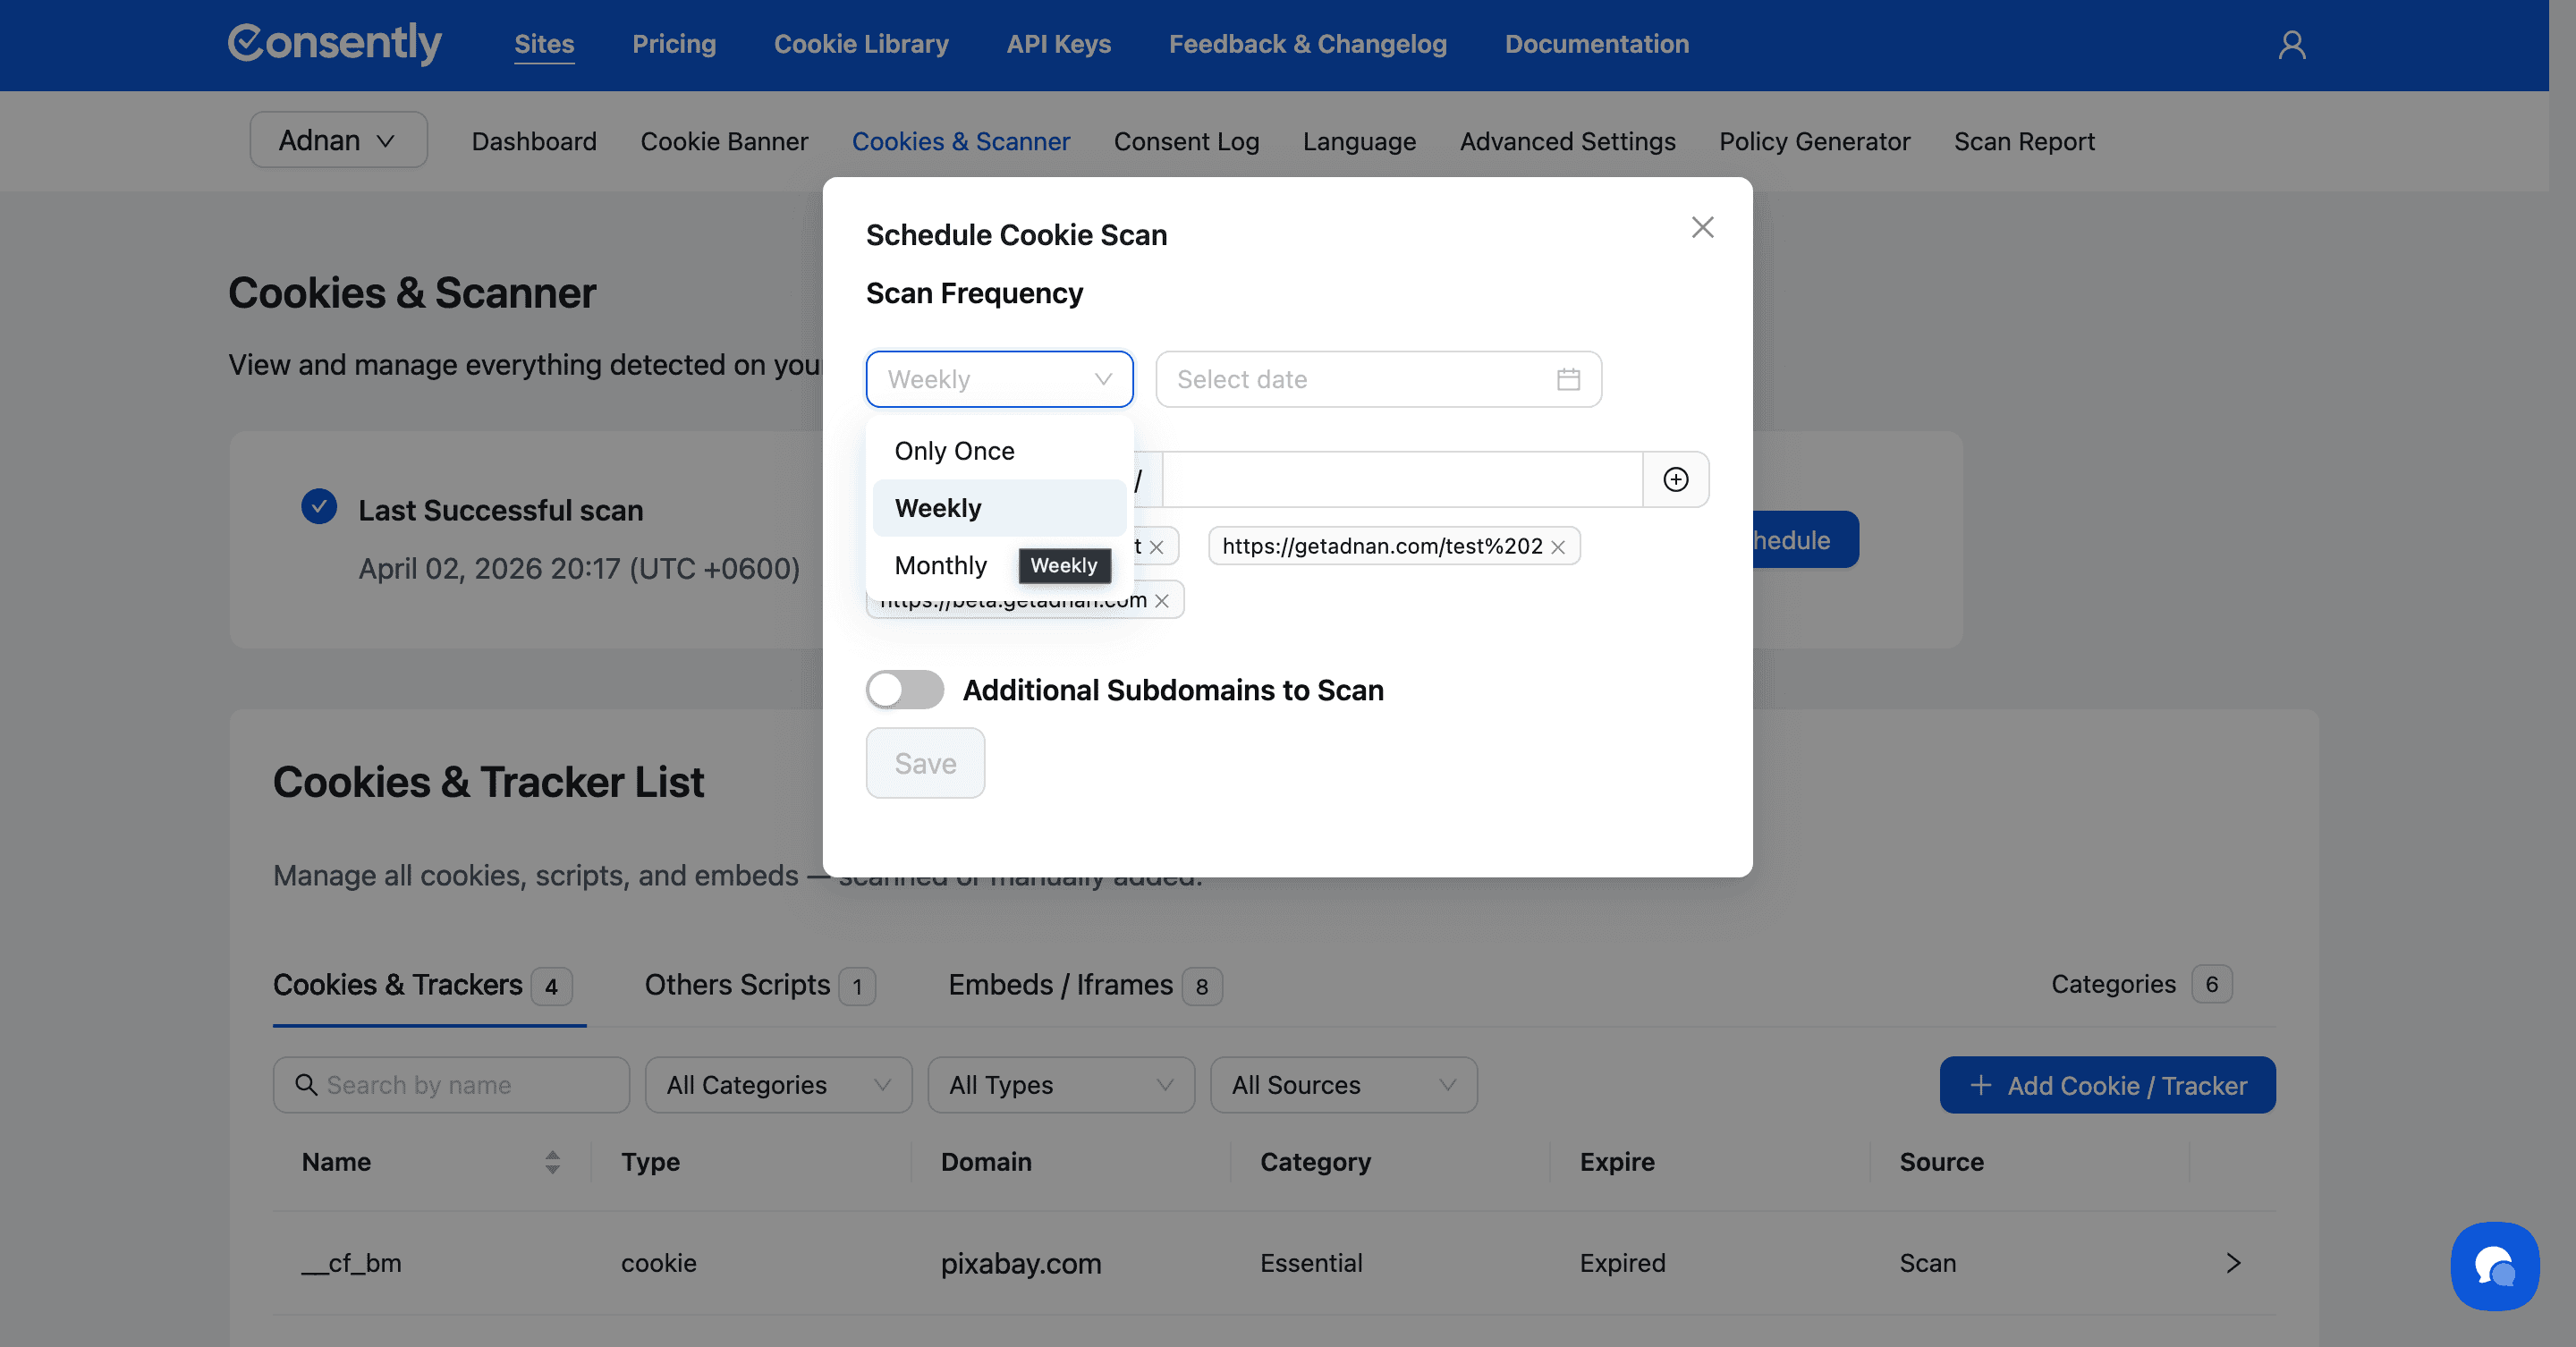
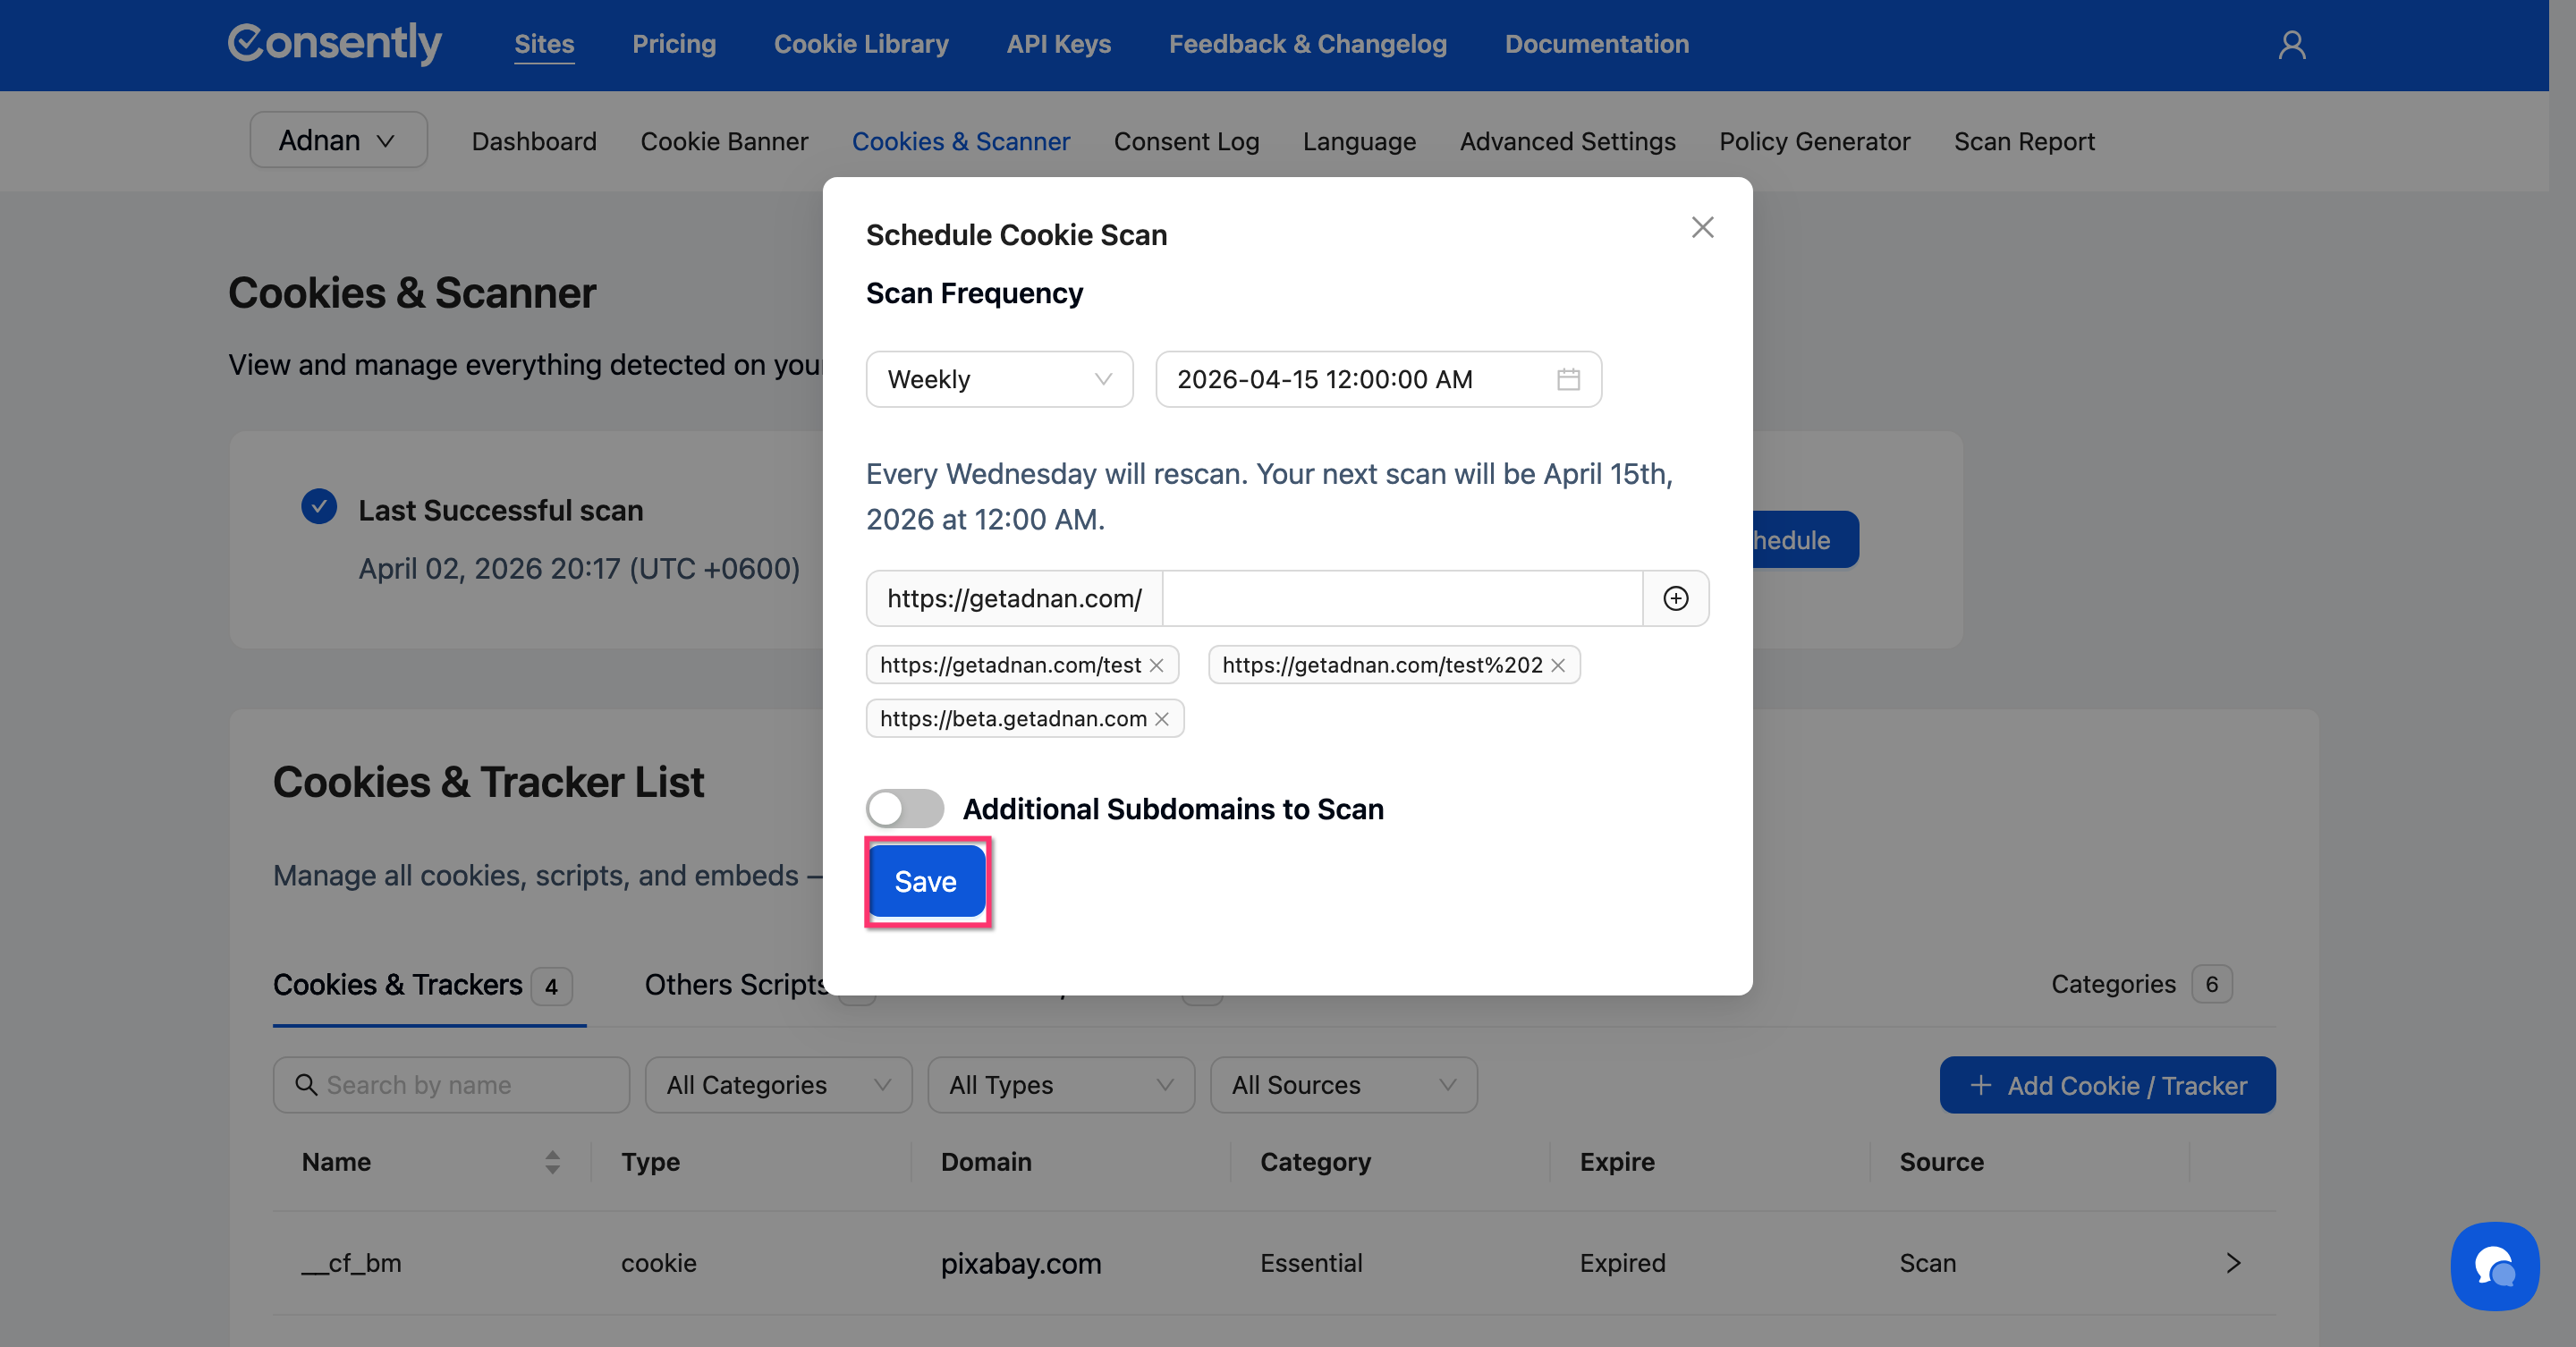
Step 3: Save your schedule
Click Save to activate the schedule.
Done!
Your next scheduled scan appears in the “Next Scheduled Scan” card.
How to Scan Subdomains
If your website uses subdomains (e.g., blog.example.com, shop.example.com), you can include them in the same scan.
Step 1: Open the Scan Cookies modal
Follow Steps 1–3 from the " How to Run a Cookie Scan section above to open the modal.
Step 2: Enable subdomain scanning
Toggle on Additional Subdomains to Scan. An input field appears with your root domain pre-filled as a suffix.
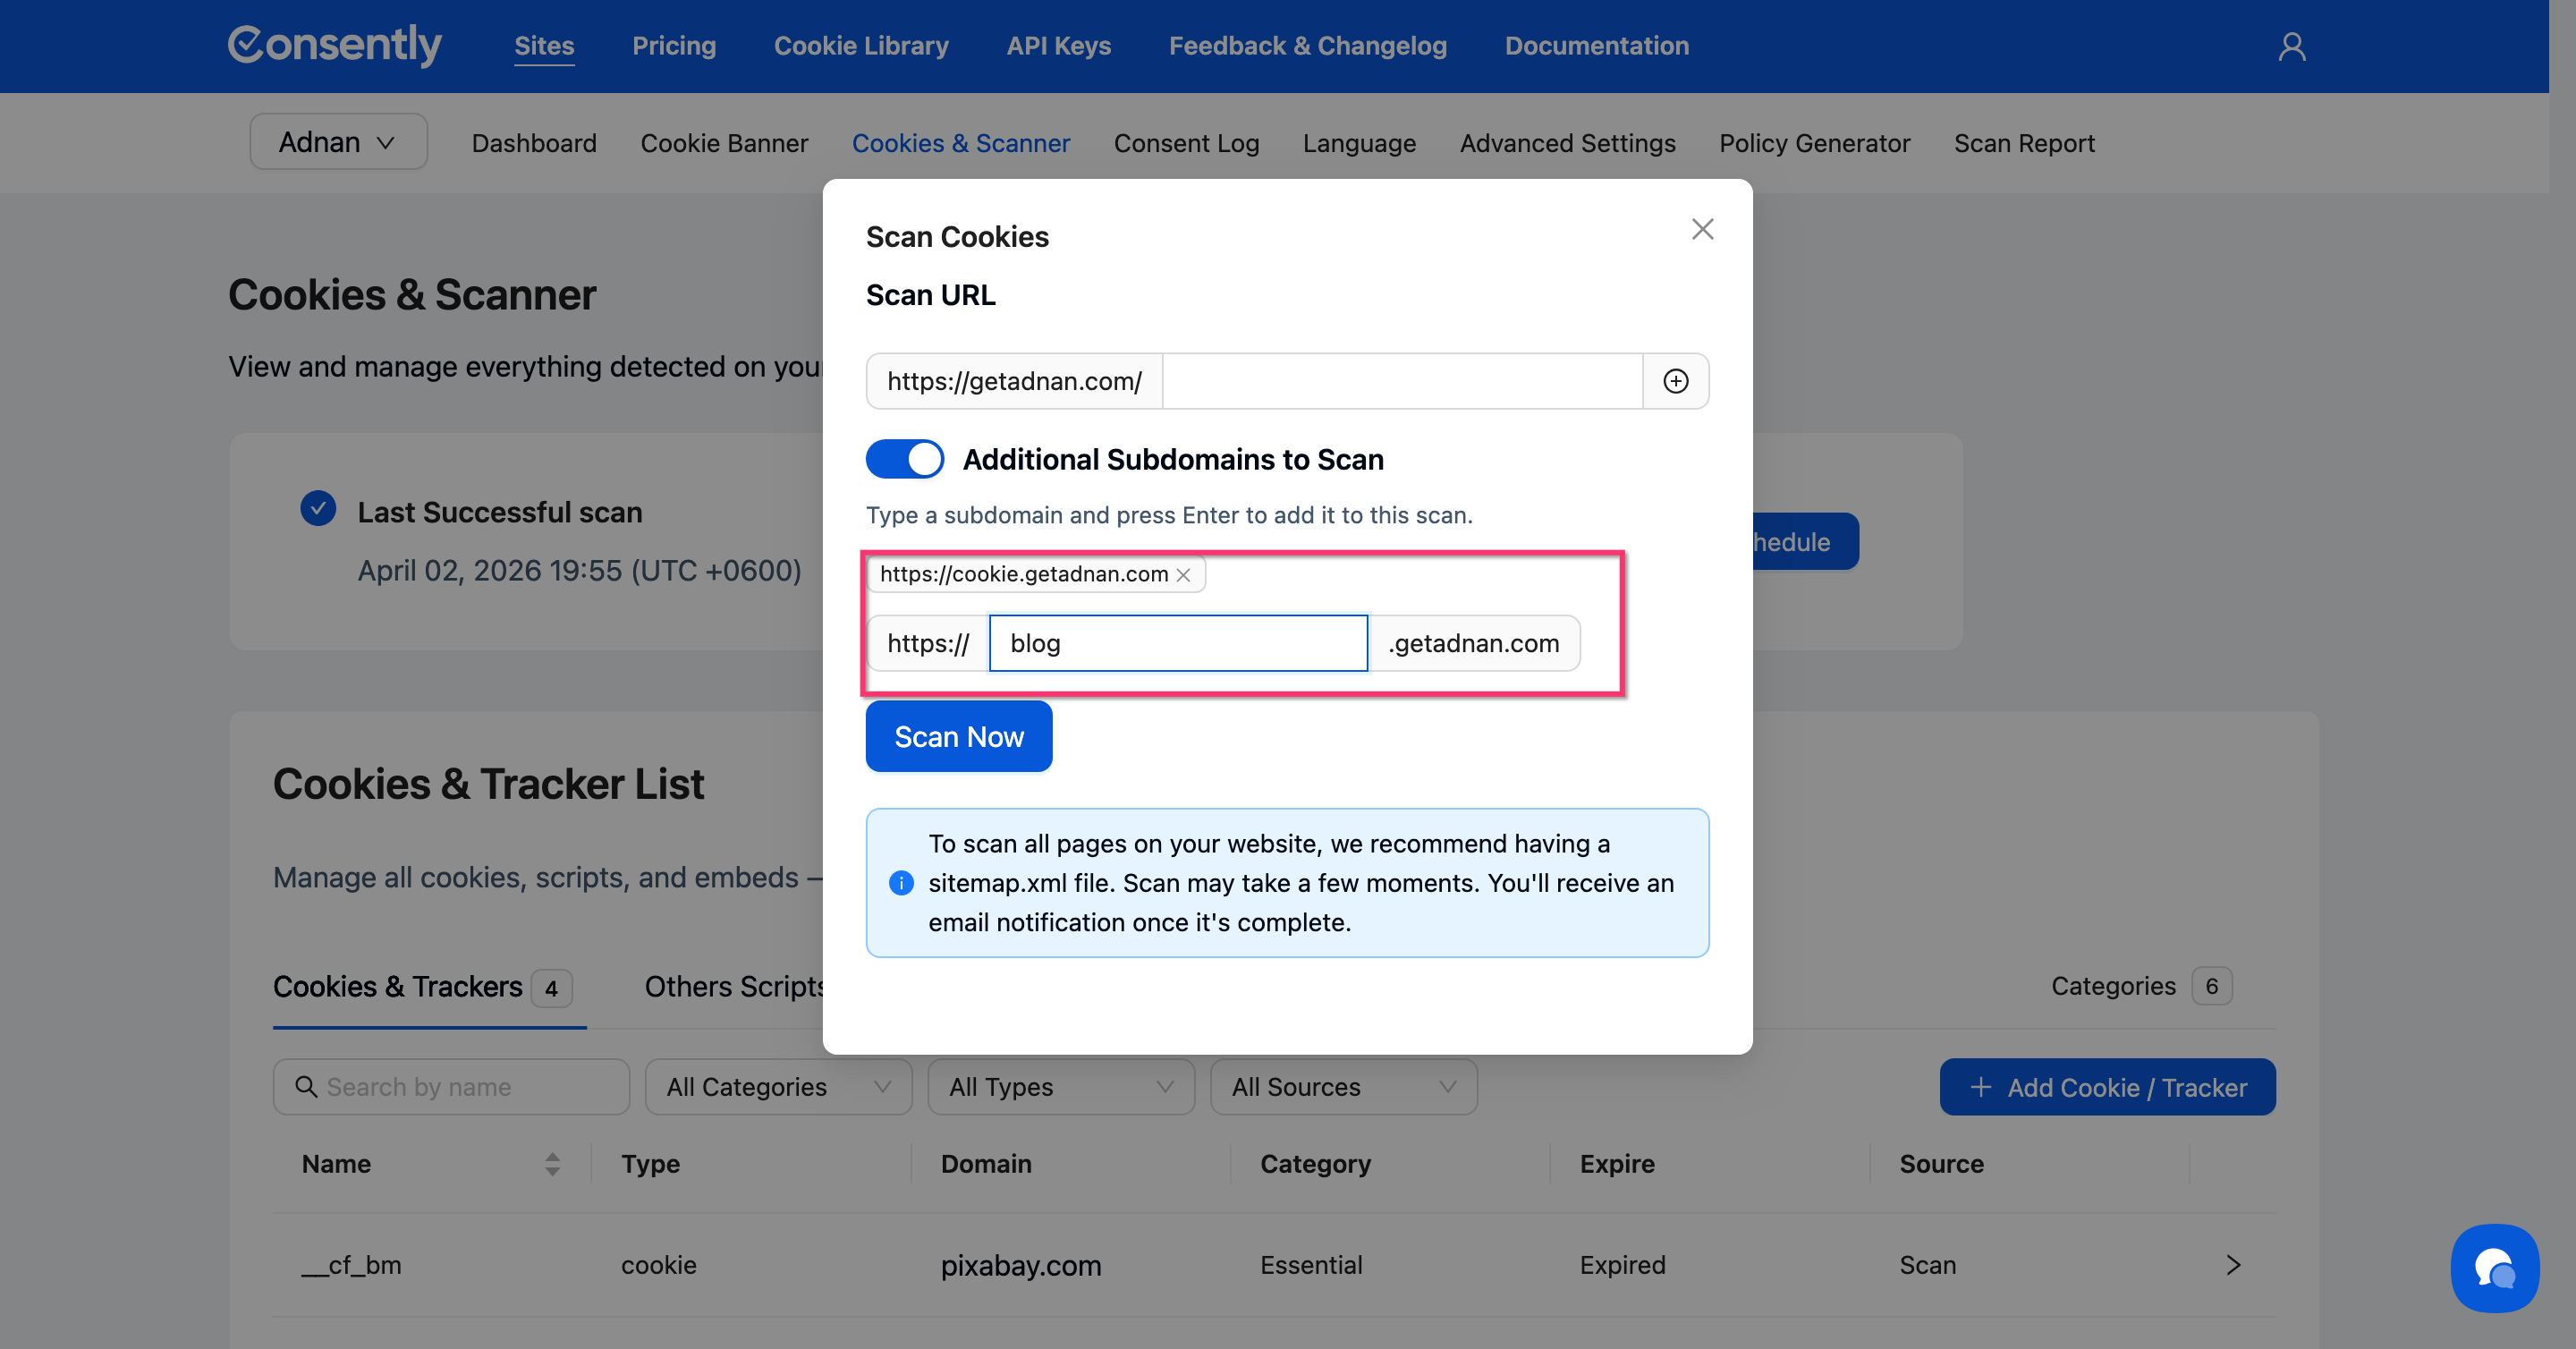
Step 3: Add your subdomains
Type a subdomain prefix (e.g., blog) into the input field and press Enter to add it. The full subdomain (e.g., https://blog.example.com) appears as a tag. Repeat for each subdomain you want to include.
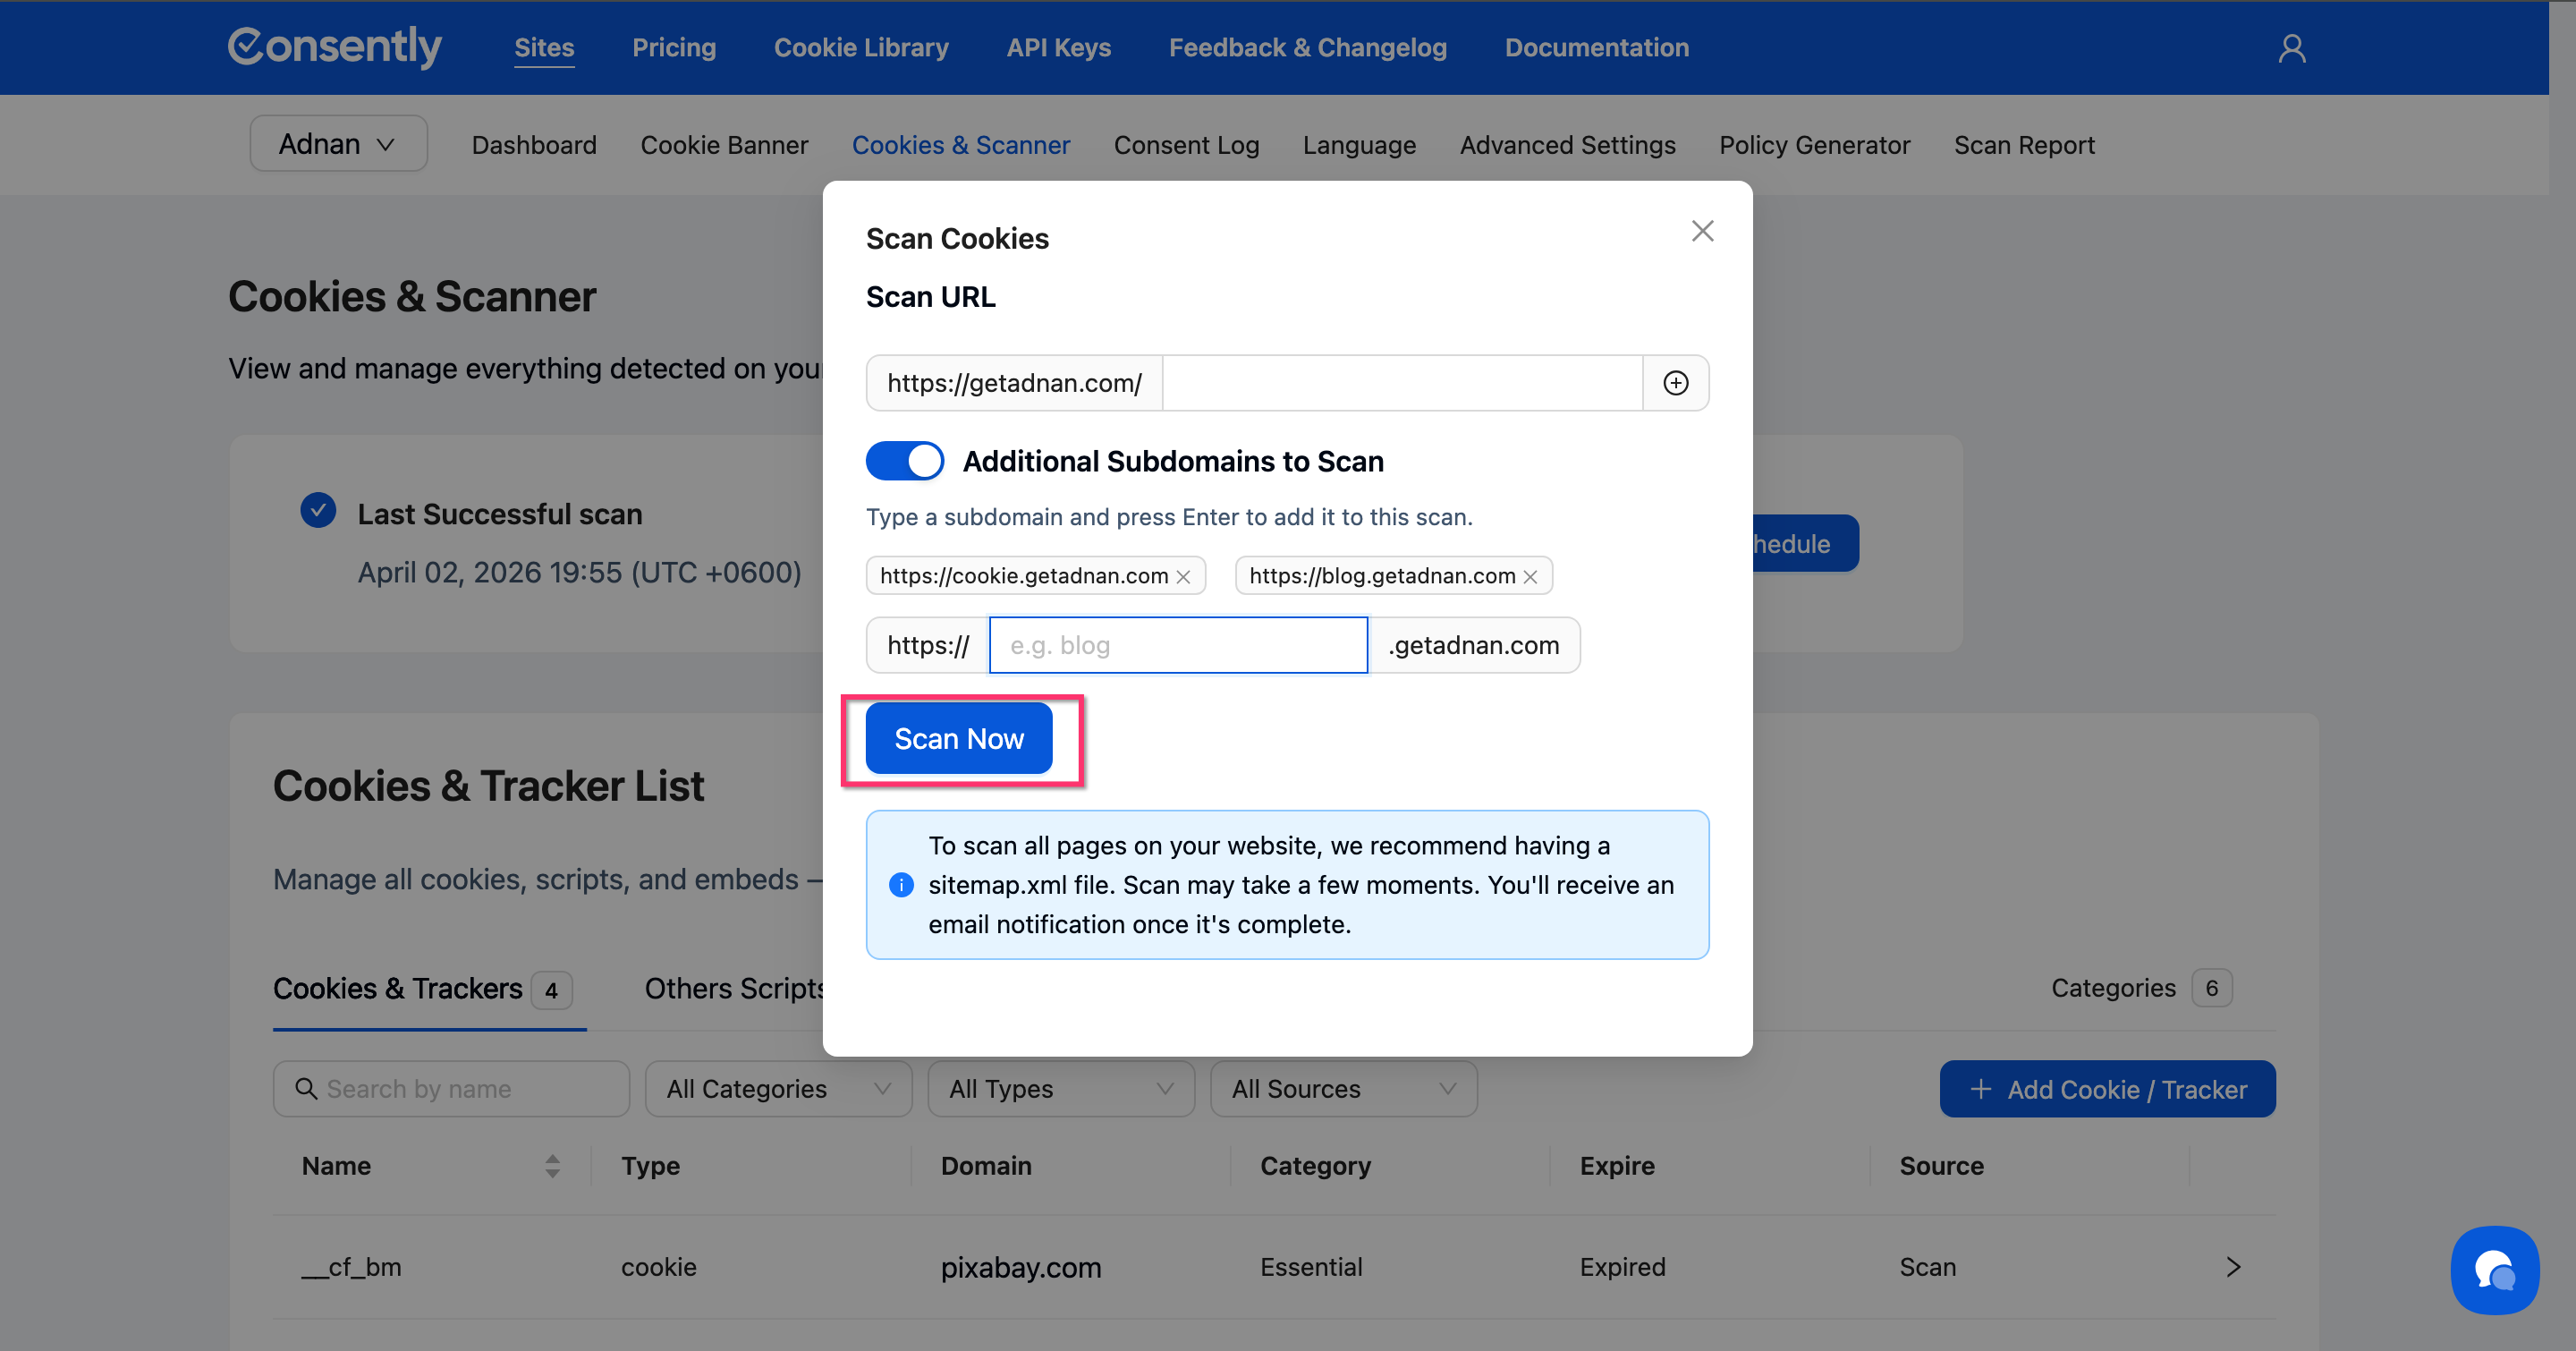
Step 4: Start the scan
Click Scan Now to begin scanning your root domain and all added subdomains.
Done!
The scanner crawls your root domain and each subdomain you added.
How to Export Scan Results
You can export any completed scan as a CSV file for auditing, reporting, or sharing with your team.
Step 1: Open Scan History
Navigate to Cookies & Scanner and scroll down to the Scan History table.
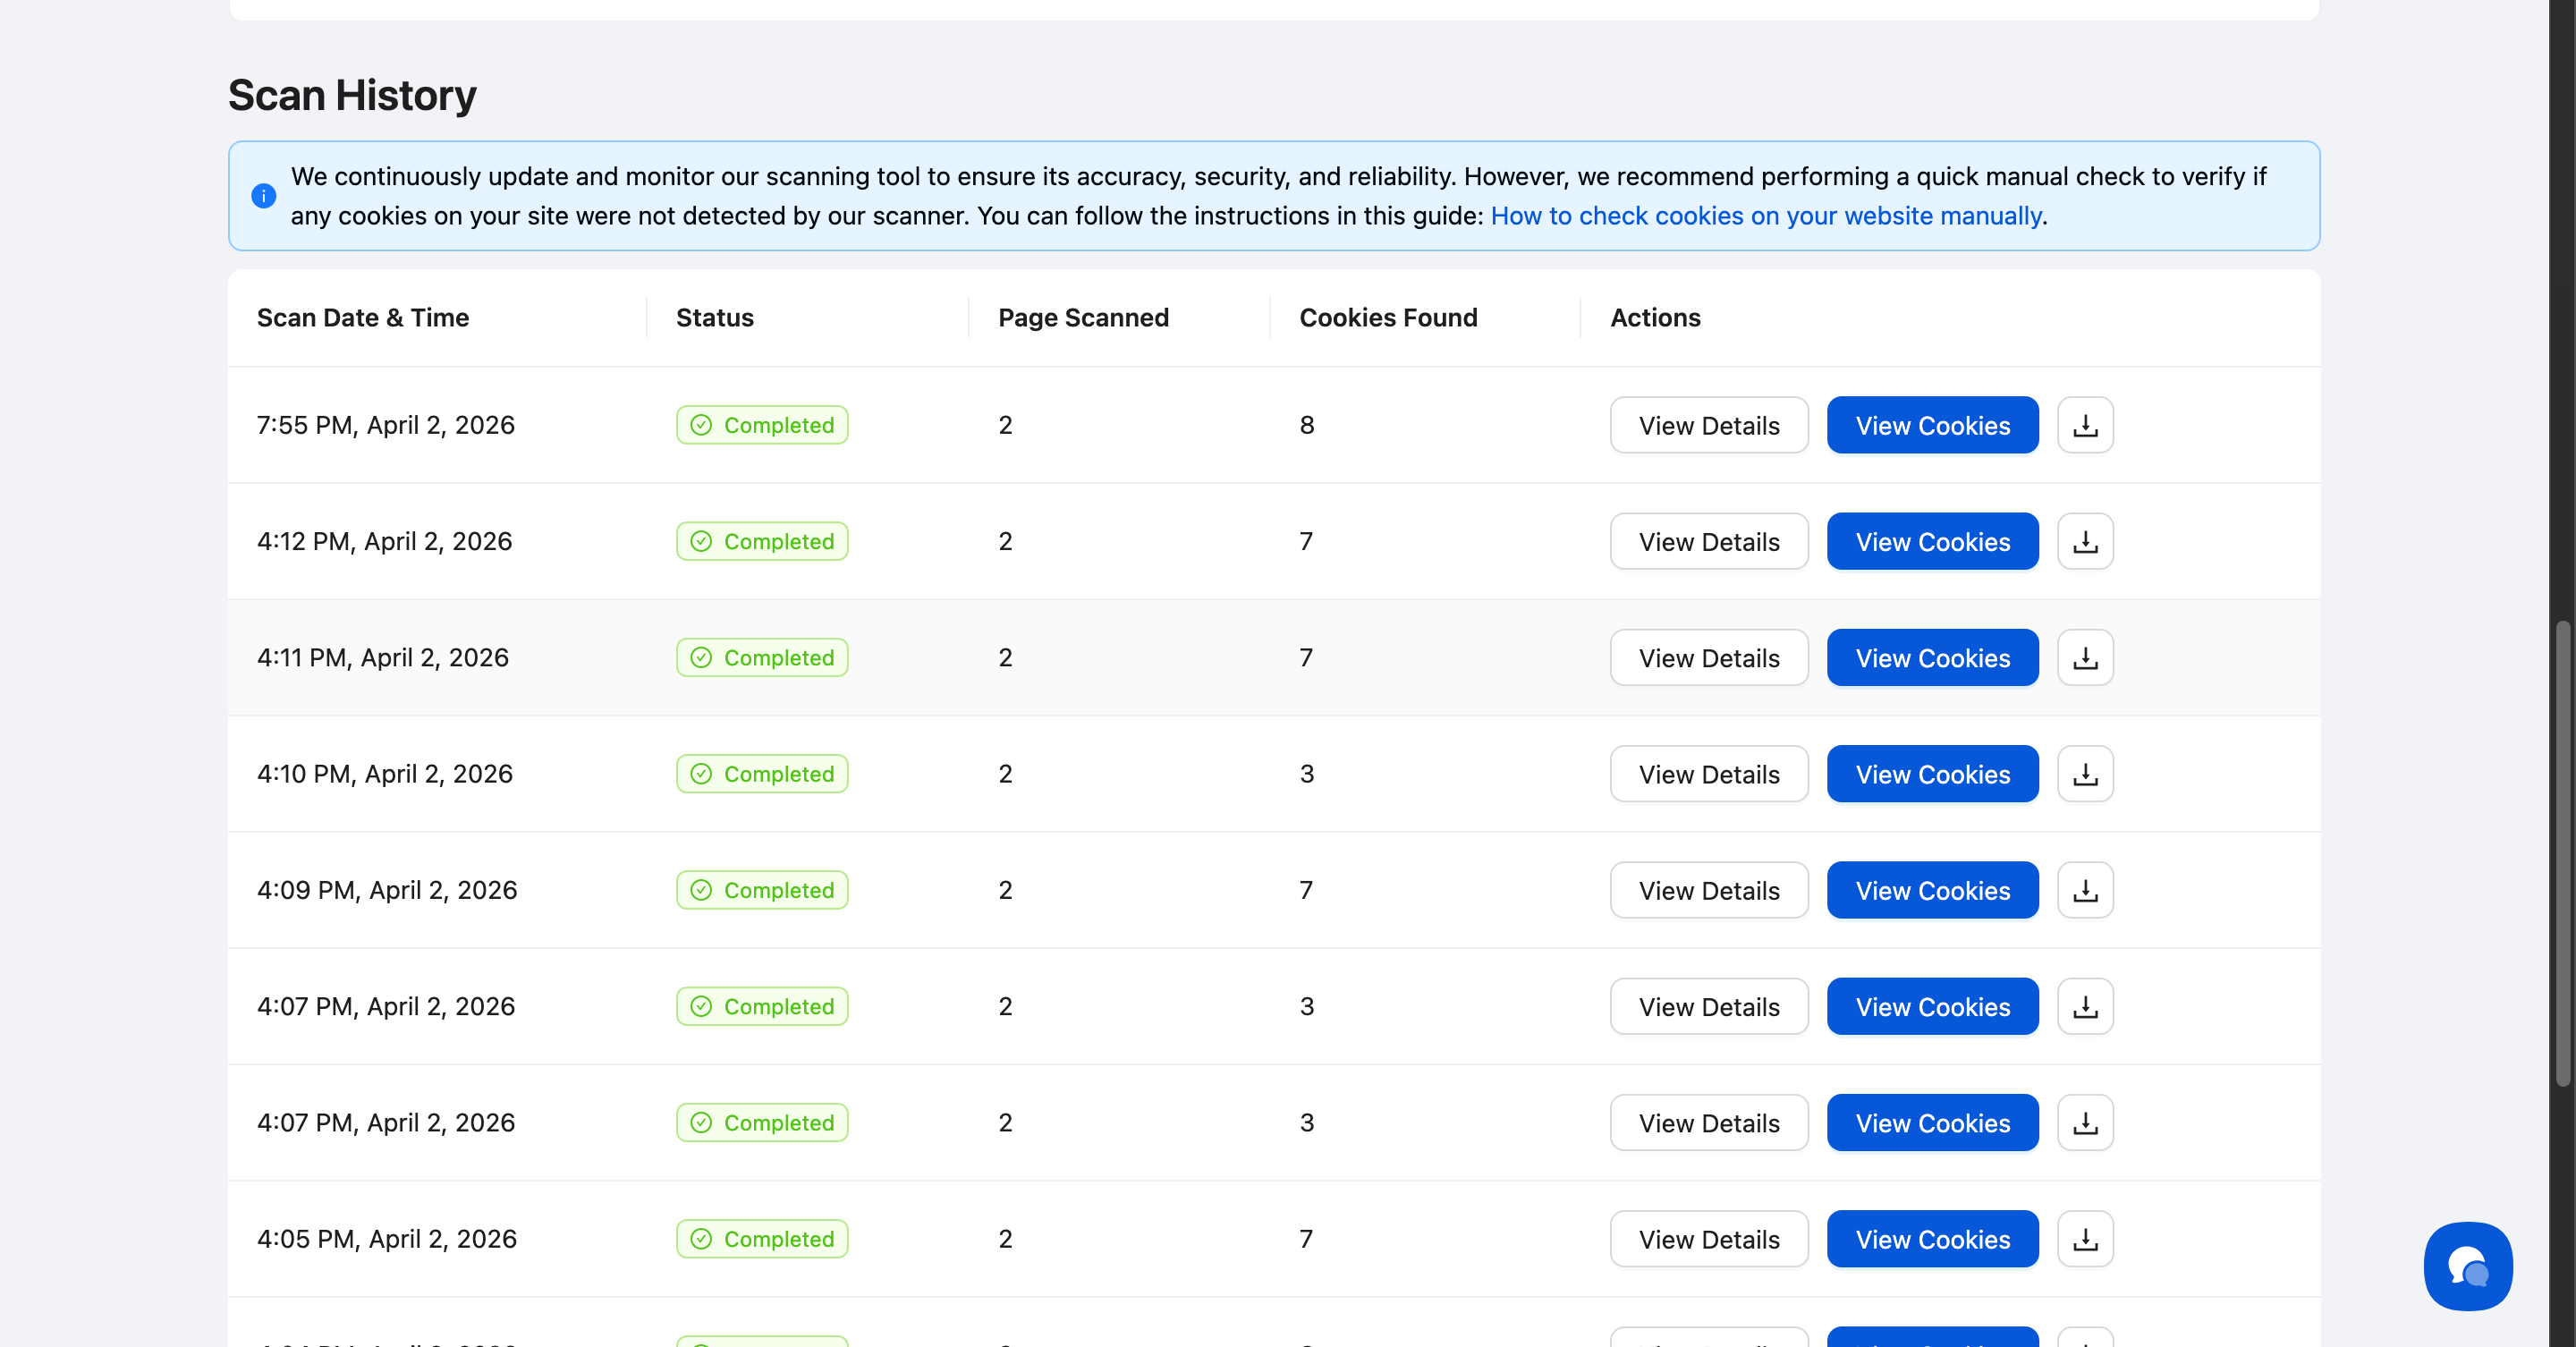
Step 2: Download the CSV
In the Actions column of the scan you want to export, click the download icon (Export CSV). The file downloads immediately to your browser.
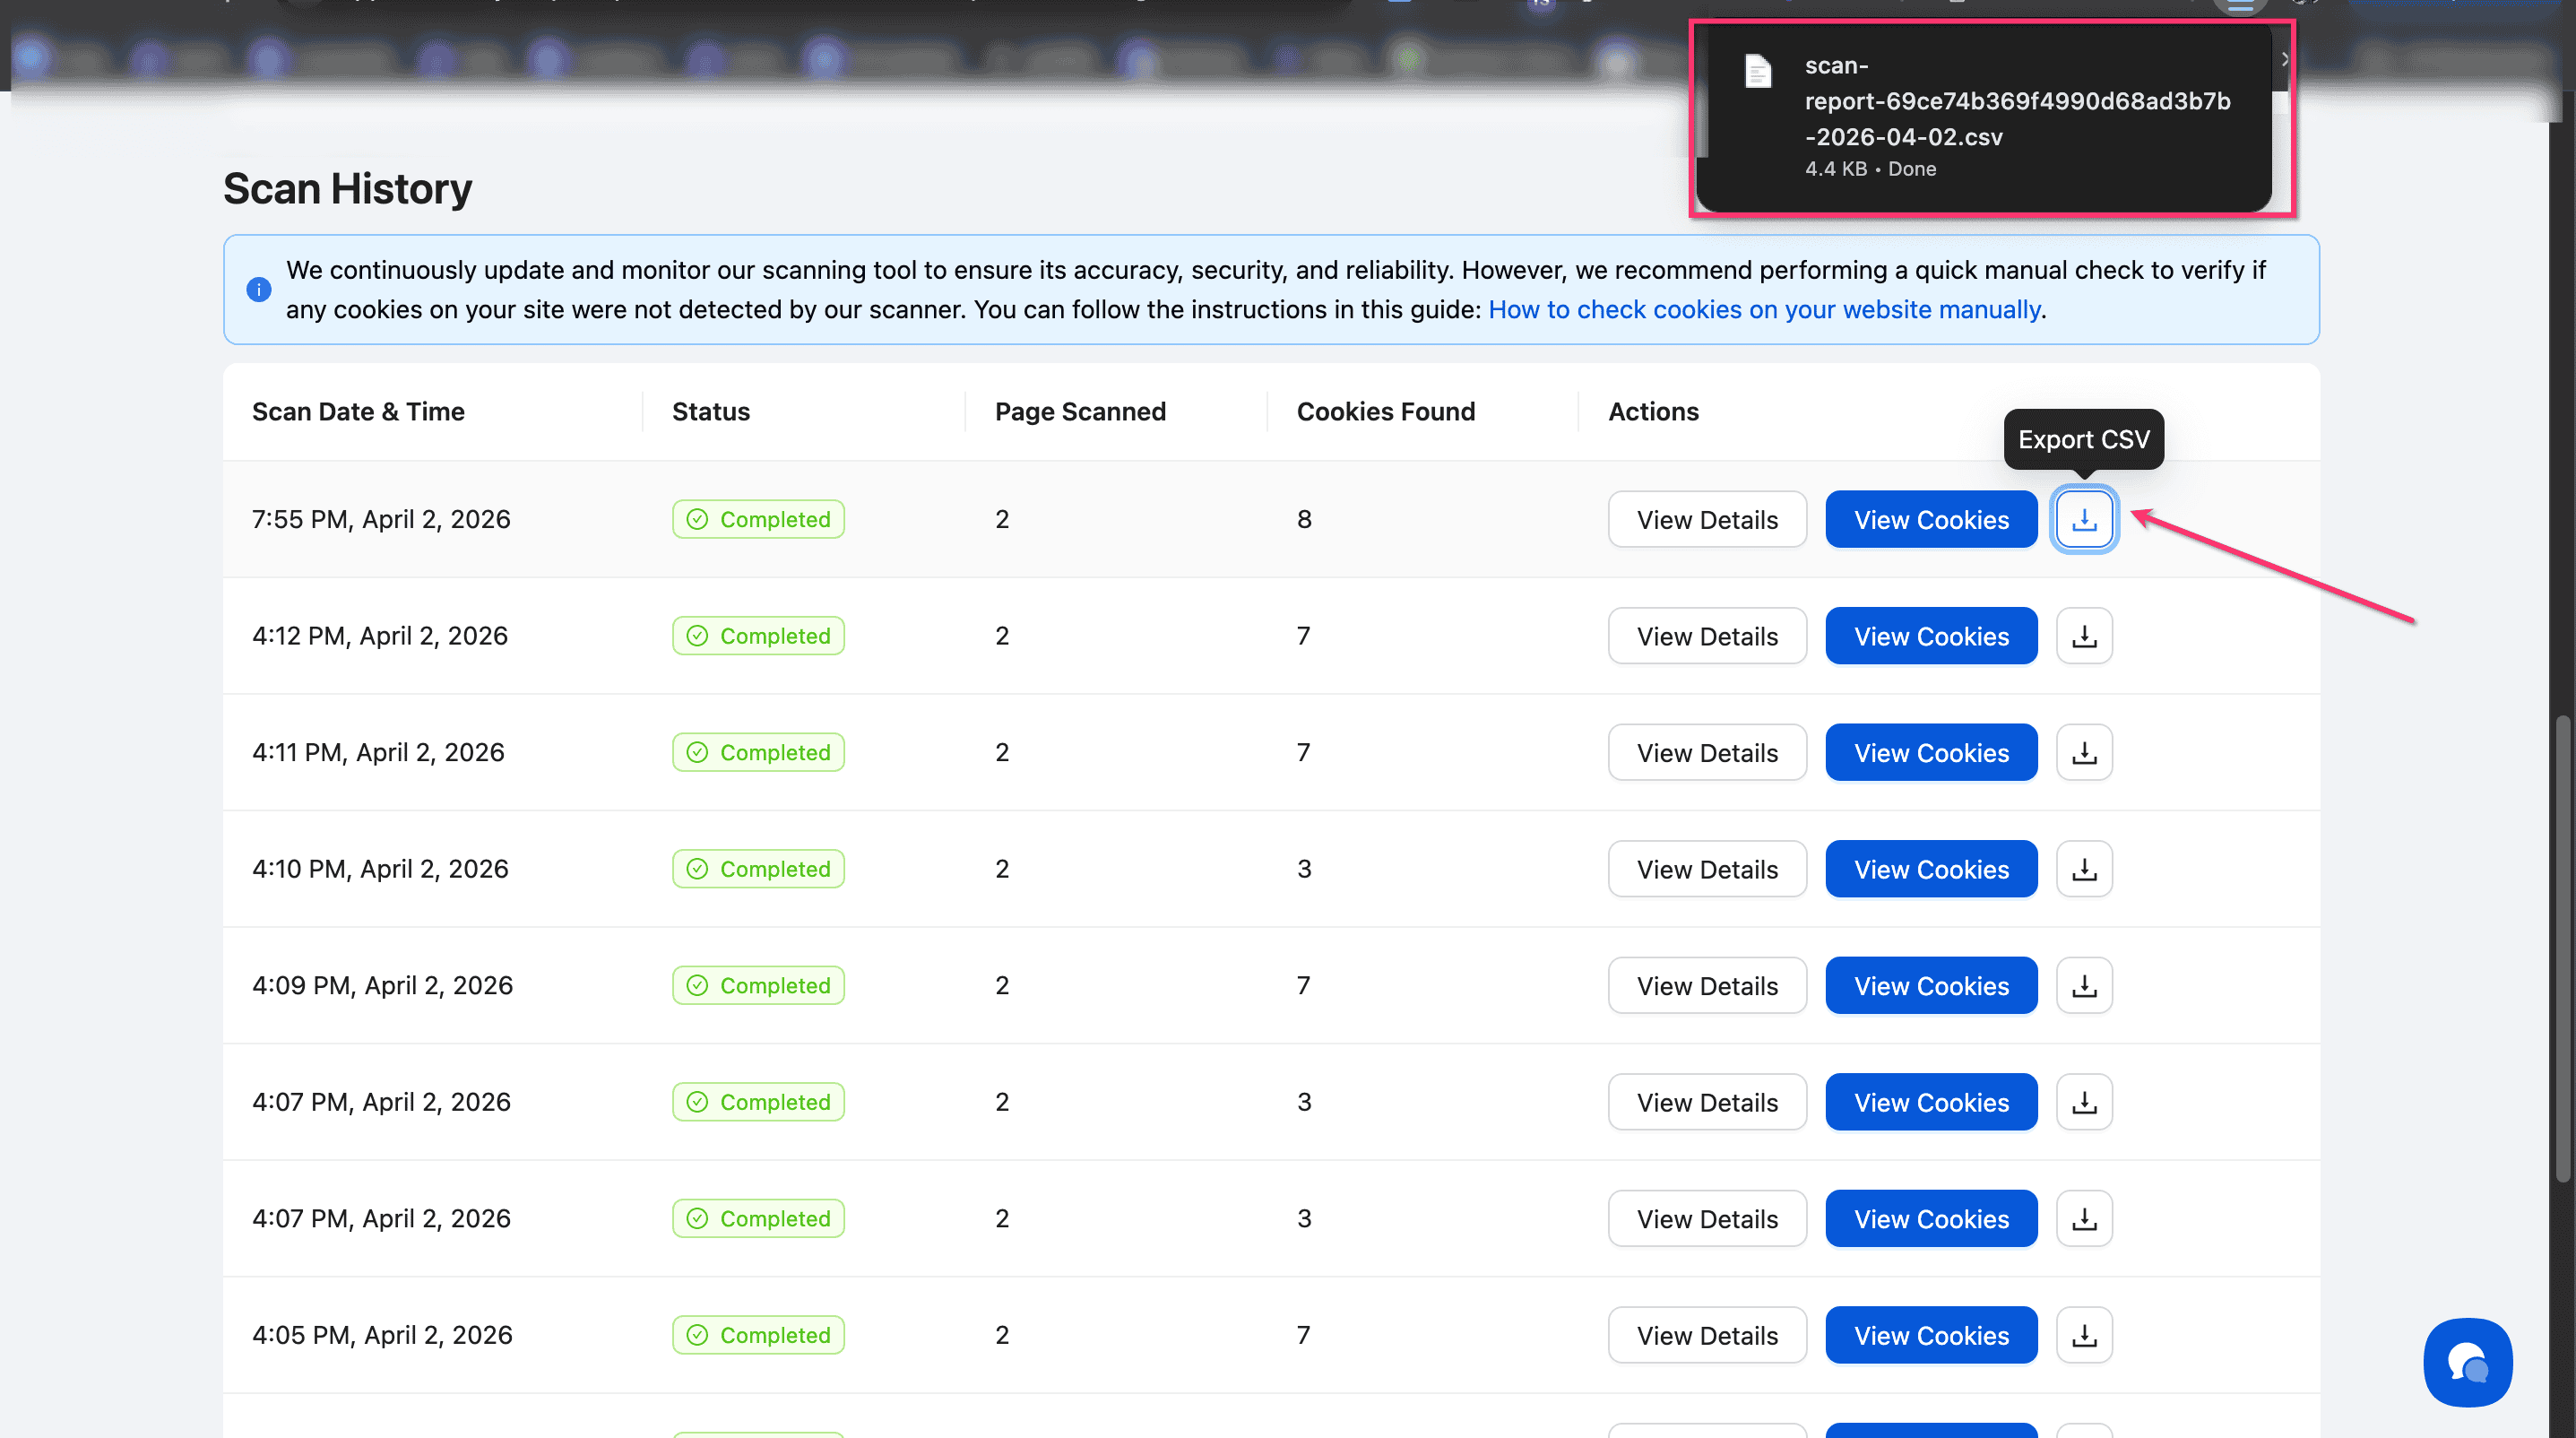
Done!
The exported file is named scan-report-[ID]-[date].csv and contains a detailed scan report.
What's Next
Now that you've scanned your cookies, you should:
Troubleshooting
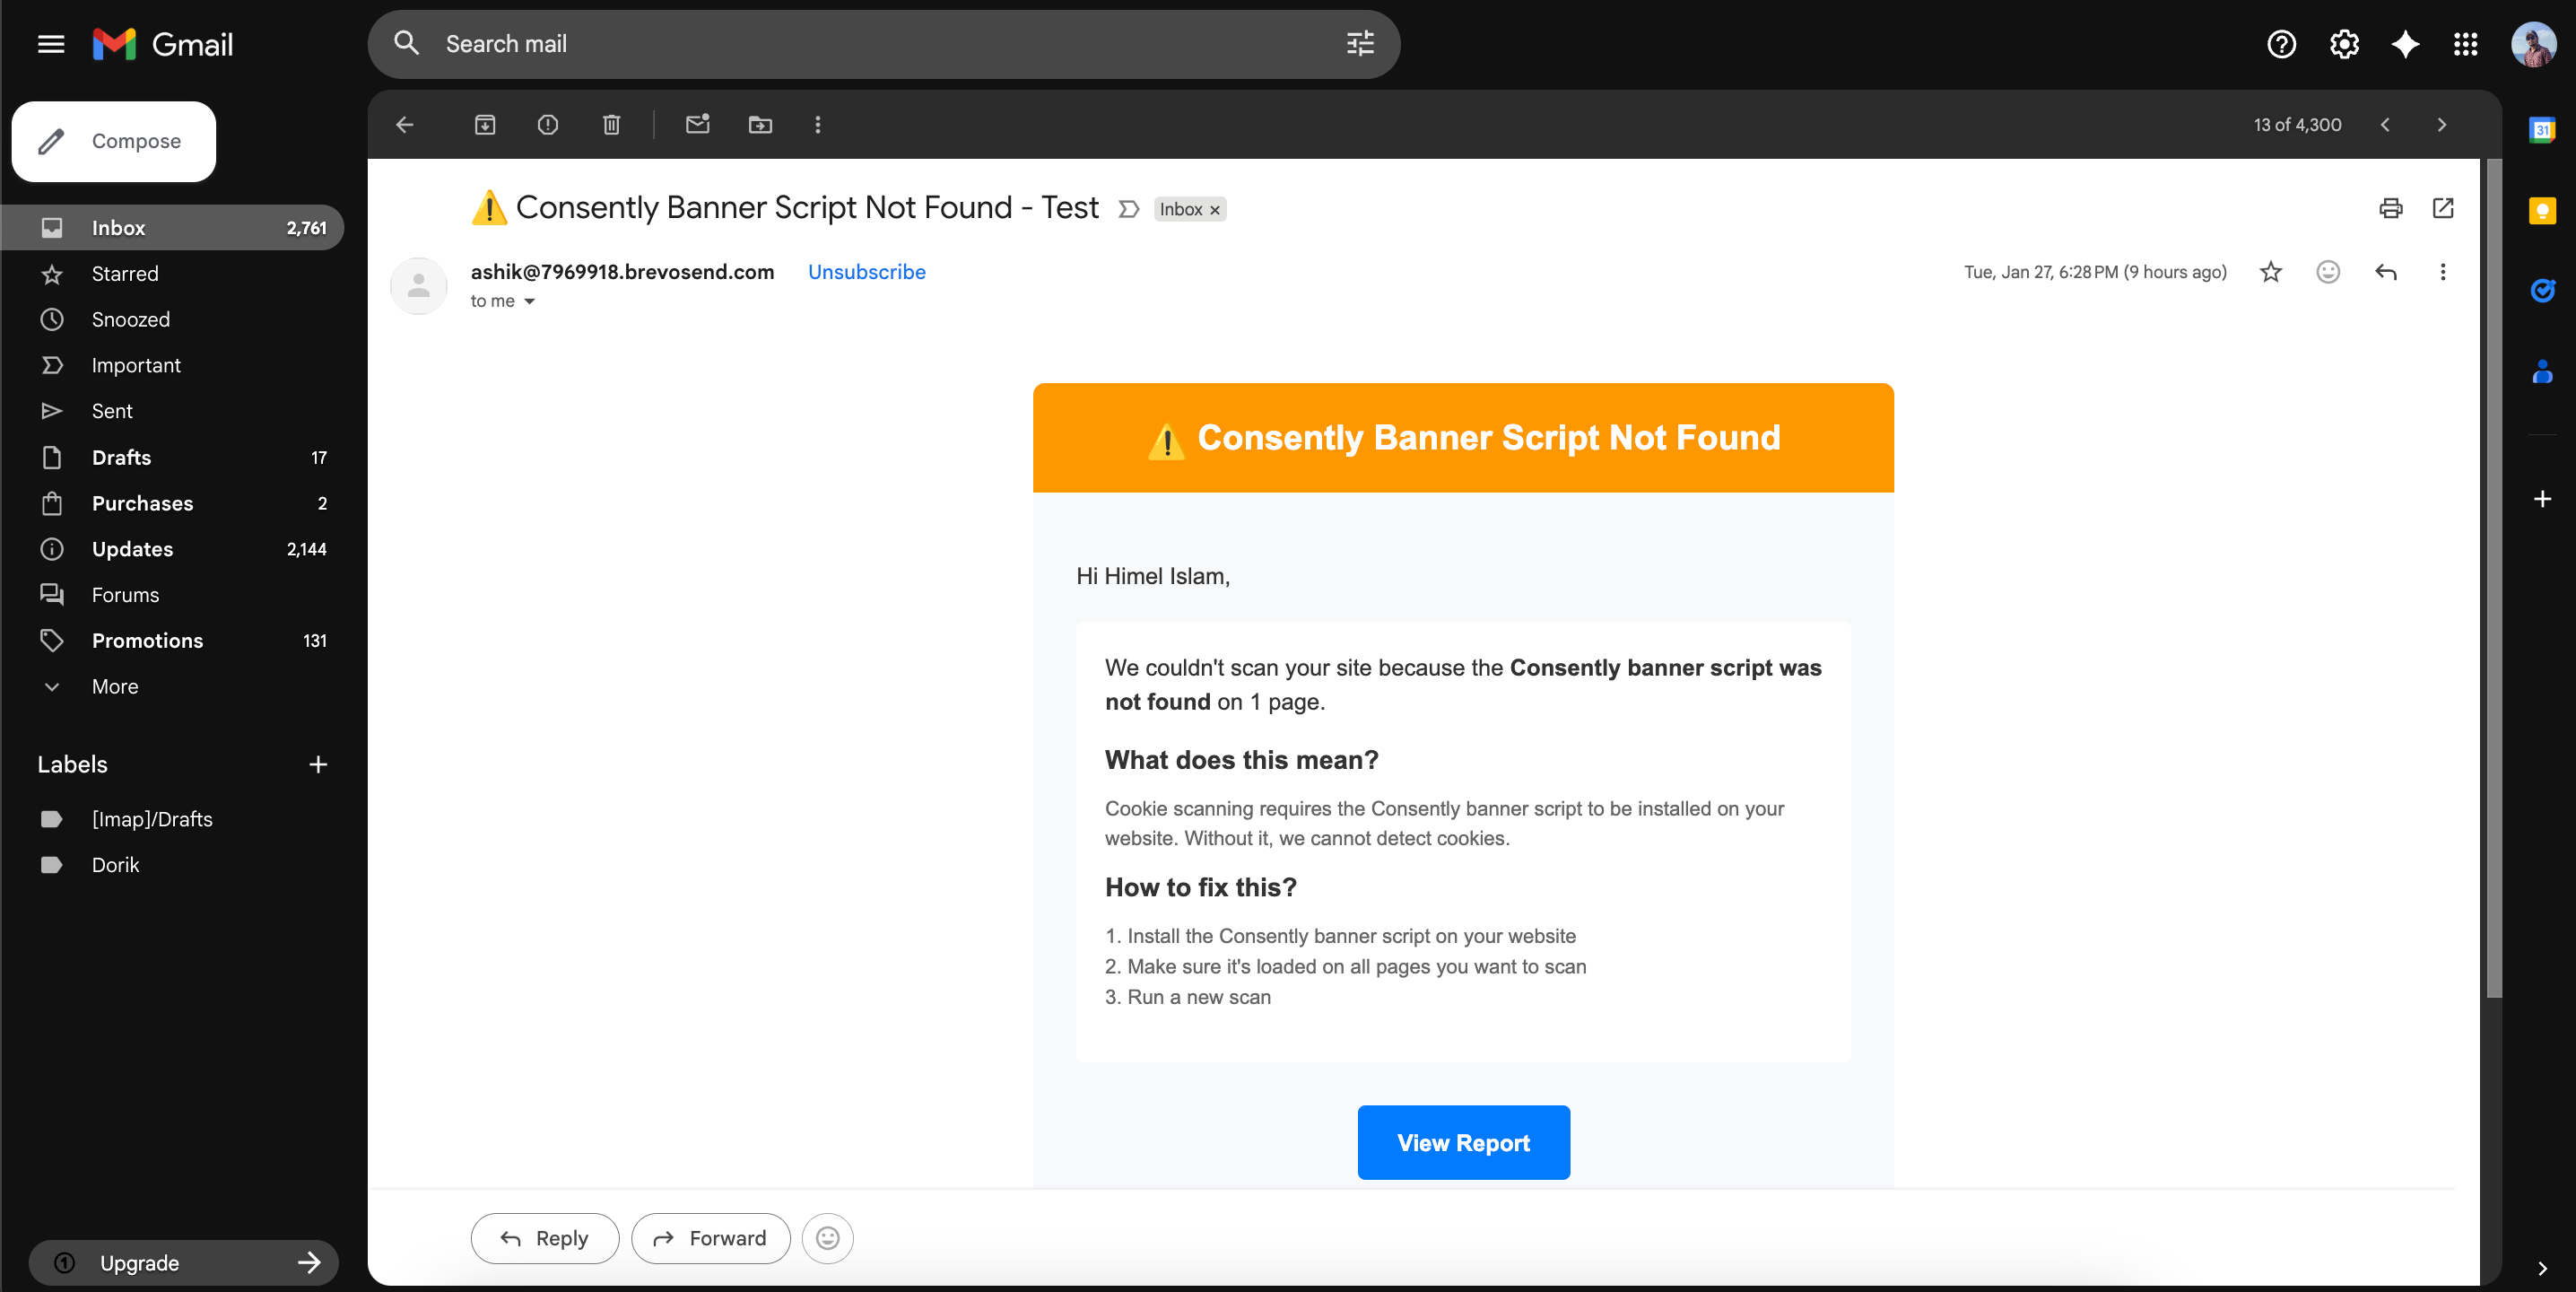
The scan failed or found no cookies
Why this happens: The Consently script must be installed in your website's header for the scanner to detect cookies.
Solution:
Verify the Consently script is present in your website's
<head>sectionCheck that the script is loading on all pages you want to scan
Clear your browser cache and try scanning again
If the issue persists, check the scan error message in your email notification
The scan didn't find all my website pages
Why this happens: Without a sitemap.xml file, the scanner can only find pages linked from the URLs you provided.
Solution:
Create a sitemap.xml file for your website (most CMS platforms generate this automatically)
Ensure your sitemap is accessible at `
https://yoursite.com/sitemap.xml`Run the scan again—the scanner will automatically use your sitemap to discover all pages
Some cookies are showing as "Unclassified"
Solution: Unclassified cookies need manual categorization. Review each cookie's purpose and assign it to the appropriate category (Essential, Analytics, Performance, Advertising, or Social) in the Managing Cookies section.
I need to manually verify cookies
Solution: While automated scanning is reliable, we recommend performing manual checks periodically. Follow the instructions in How to check cookies on your website manually to verify that the scanner caught everything.
Related Pages
Scan History — View all past scan results and track changes over time
Cookie Categories — Learn about different cookie types and how to organize them