

TL;DR: Shopify Admin → Online Store → Themes → Actions → Edit Code → Layout/theme.liquid → Paste Consently script before </head> → Save. The banner loads on all pages of your Shopify store.Overview
Shopify stores require adding the Consently script directly to your theme's liquid template files. This ensures the consent banner appears across all pages, including product pages, collections, cart, and checkout (where Shopify allows custom code).
Before You Begin
Make sure you have:
Admin access to your Shopify store
Basic familiarity with the Shopify admin interface
Time required: About 5 minutes
How to Install Consently on Shopify
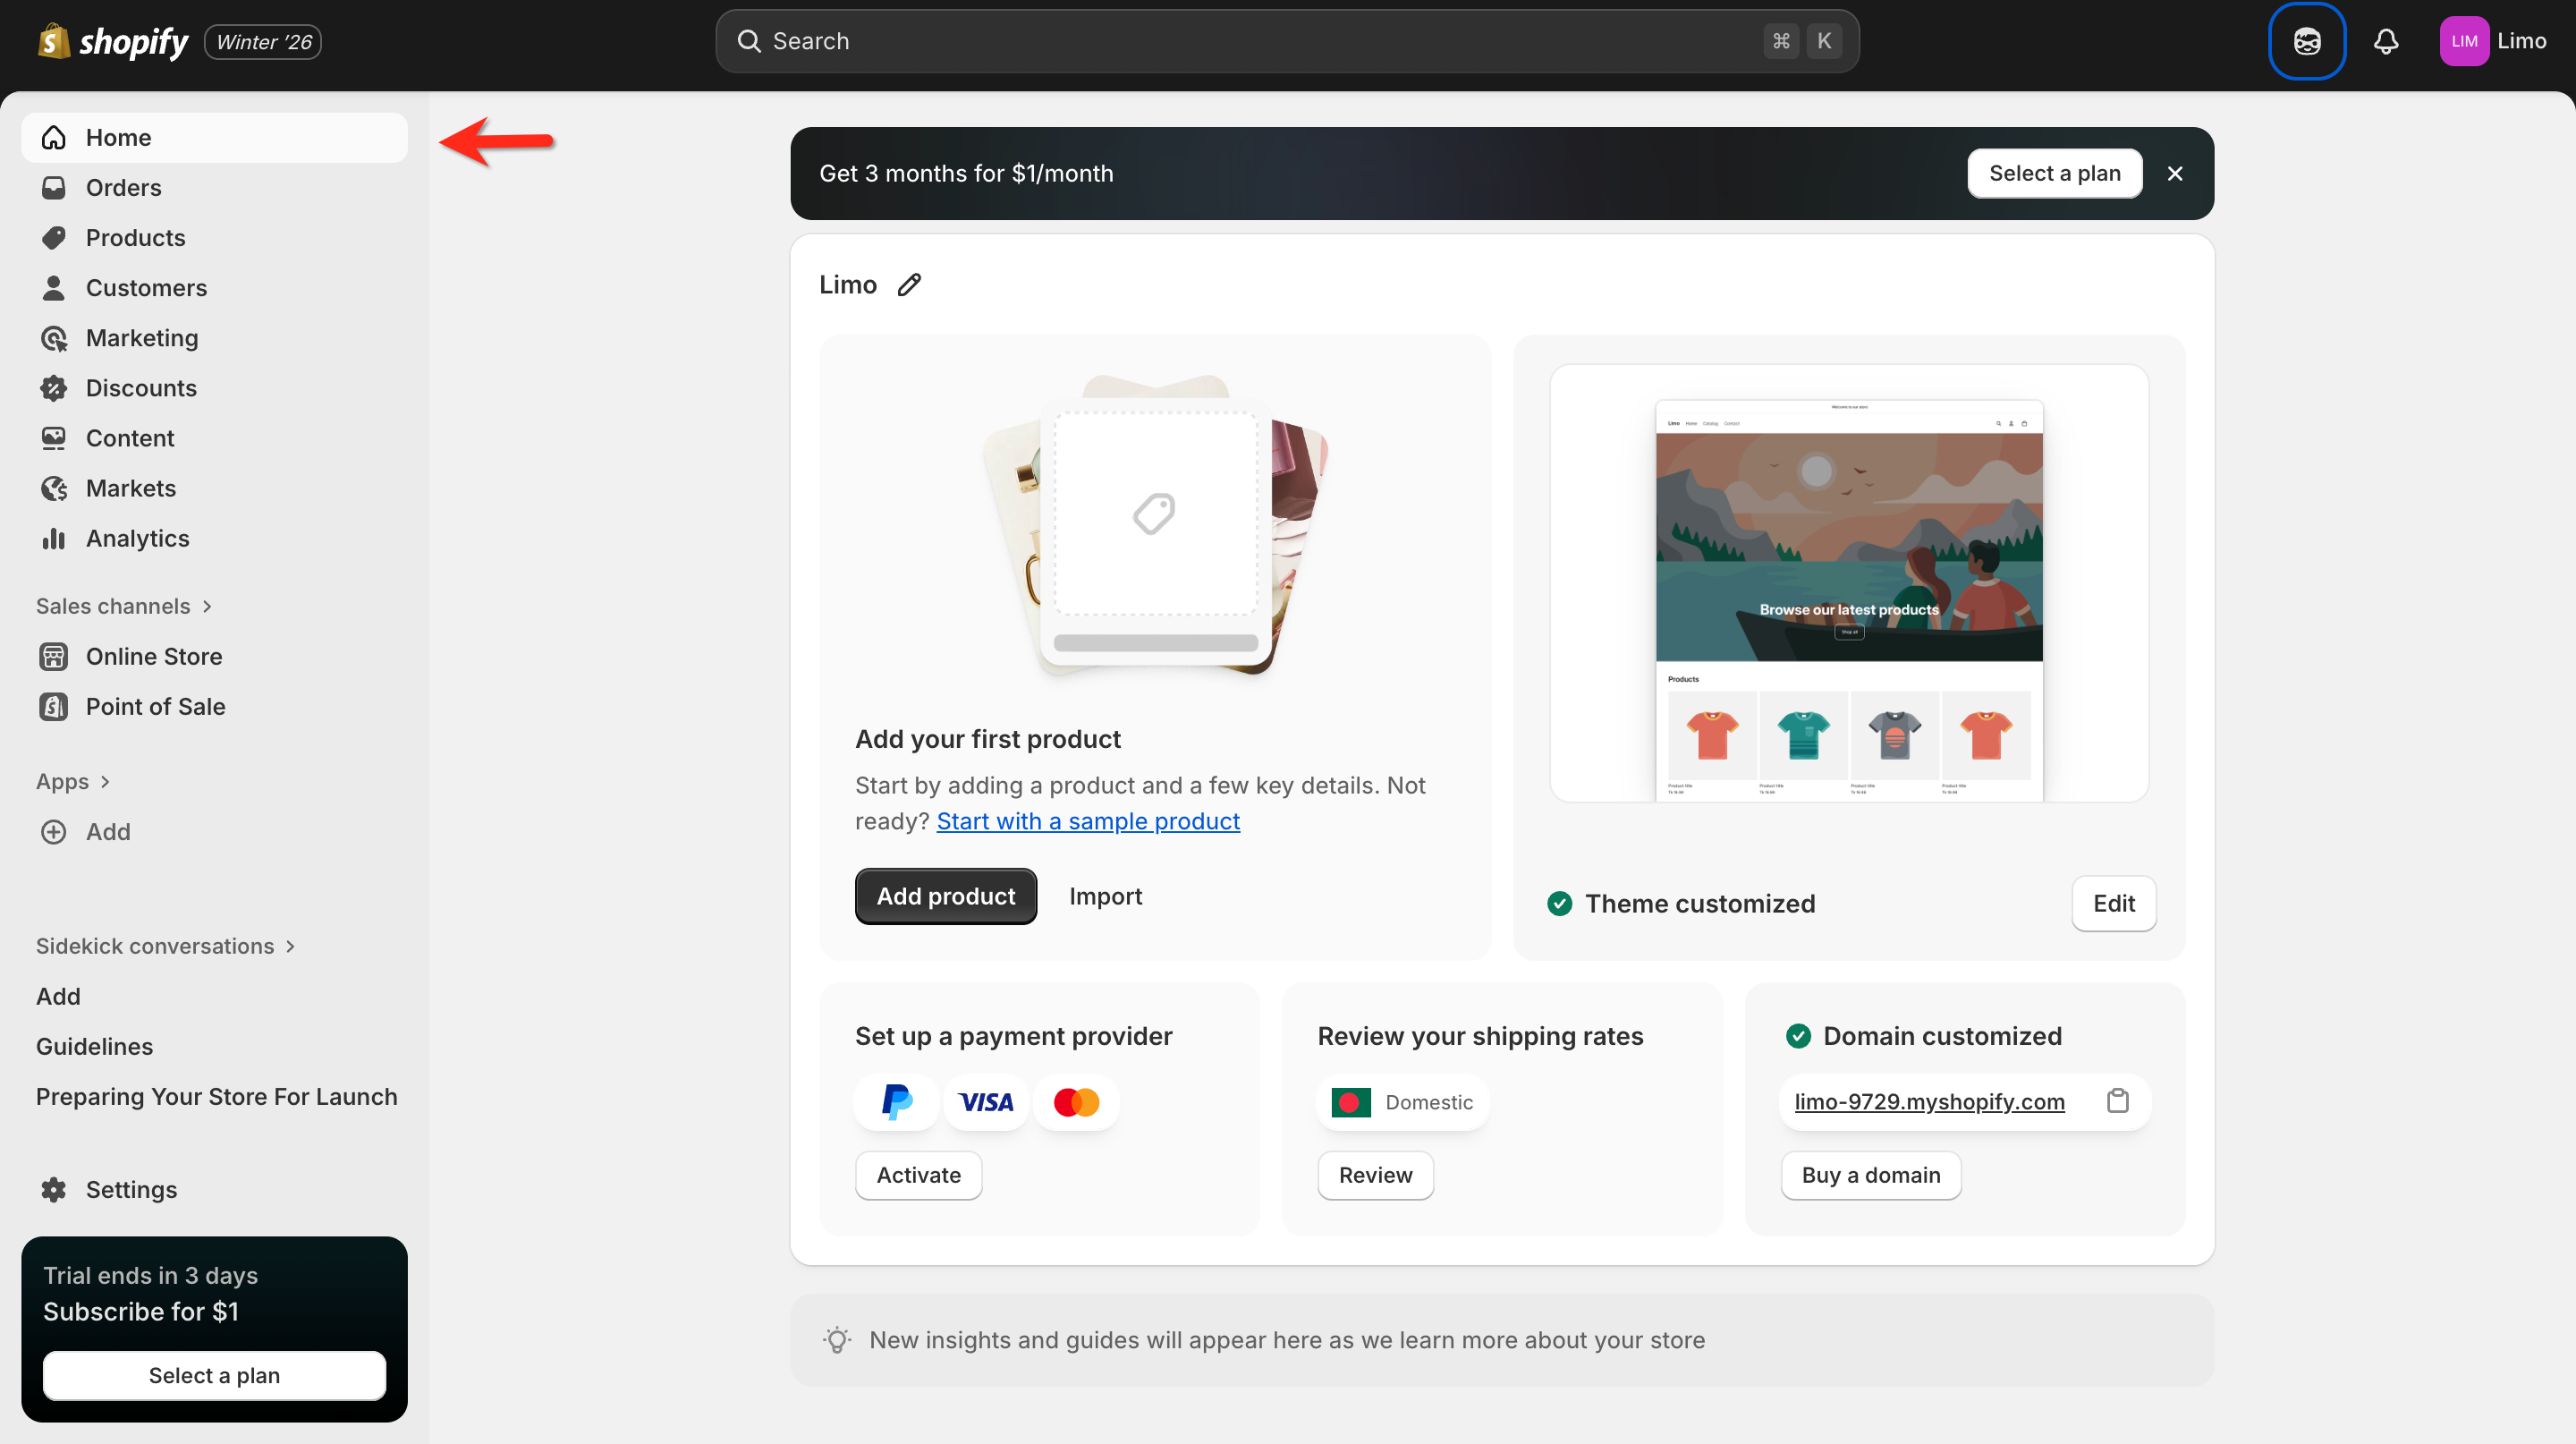
Step 1: Access your Shopify admin
Log in to your Shopify store admin panel at yourstore.myshopify.com/admin.
Step 2: Navigate to theme files
Click Online Store in the left sidebar, then click Themes.
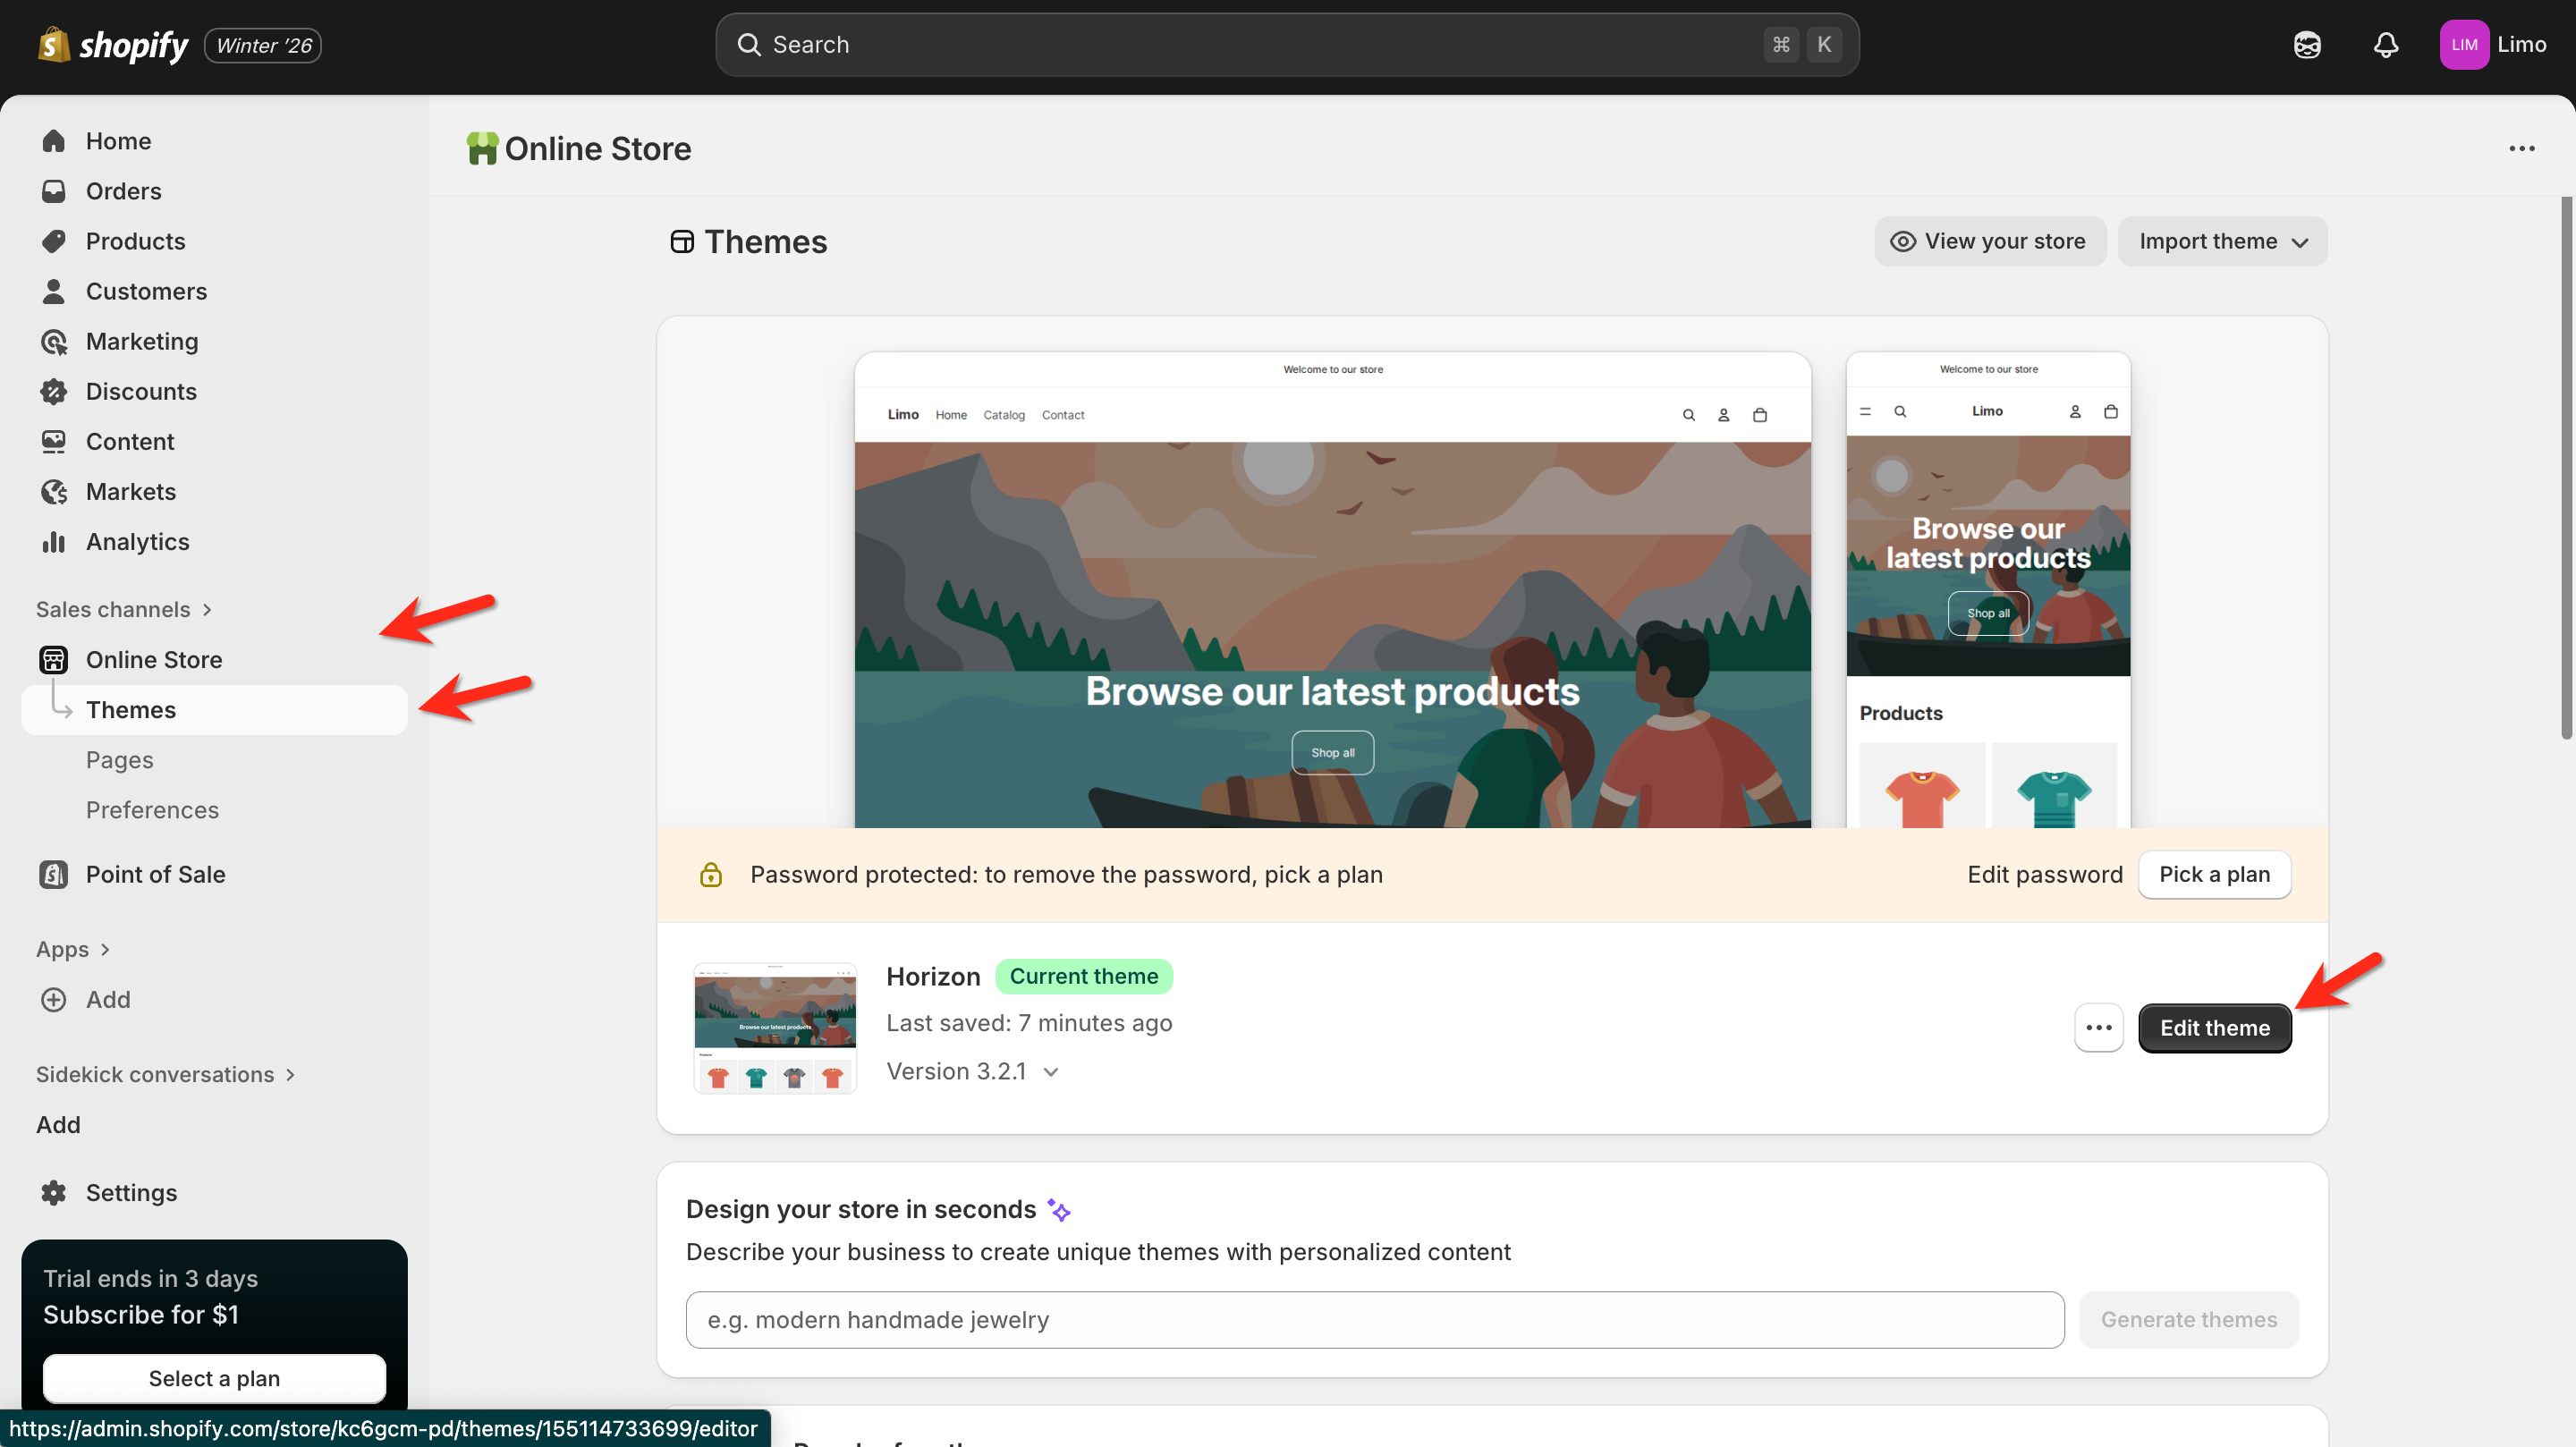
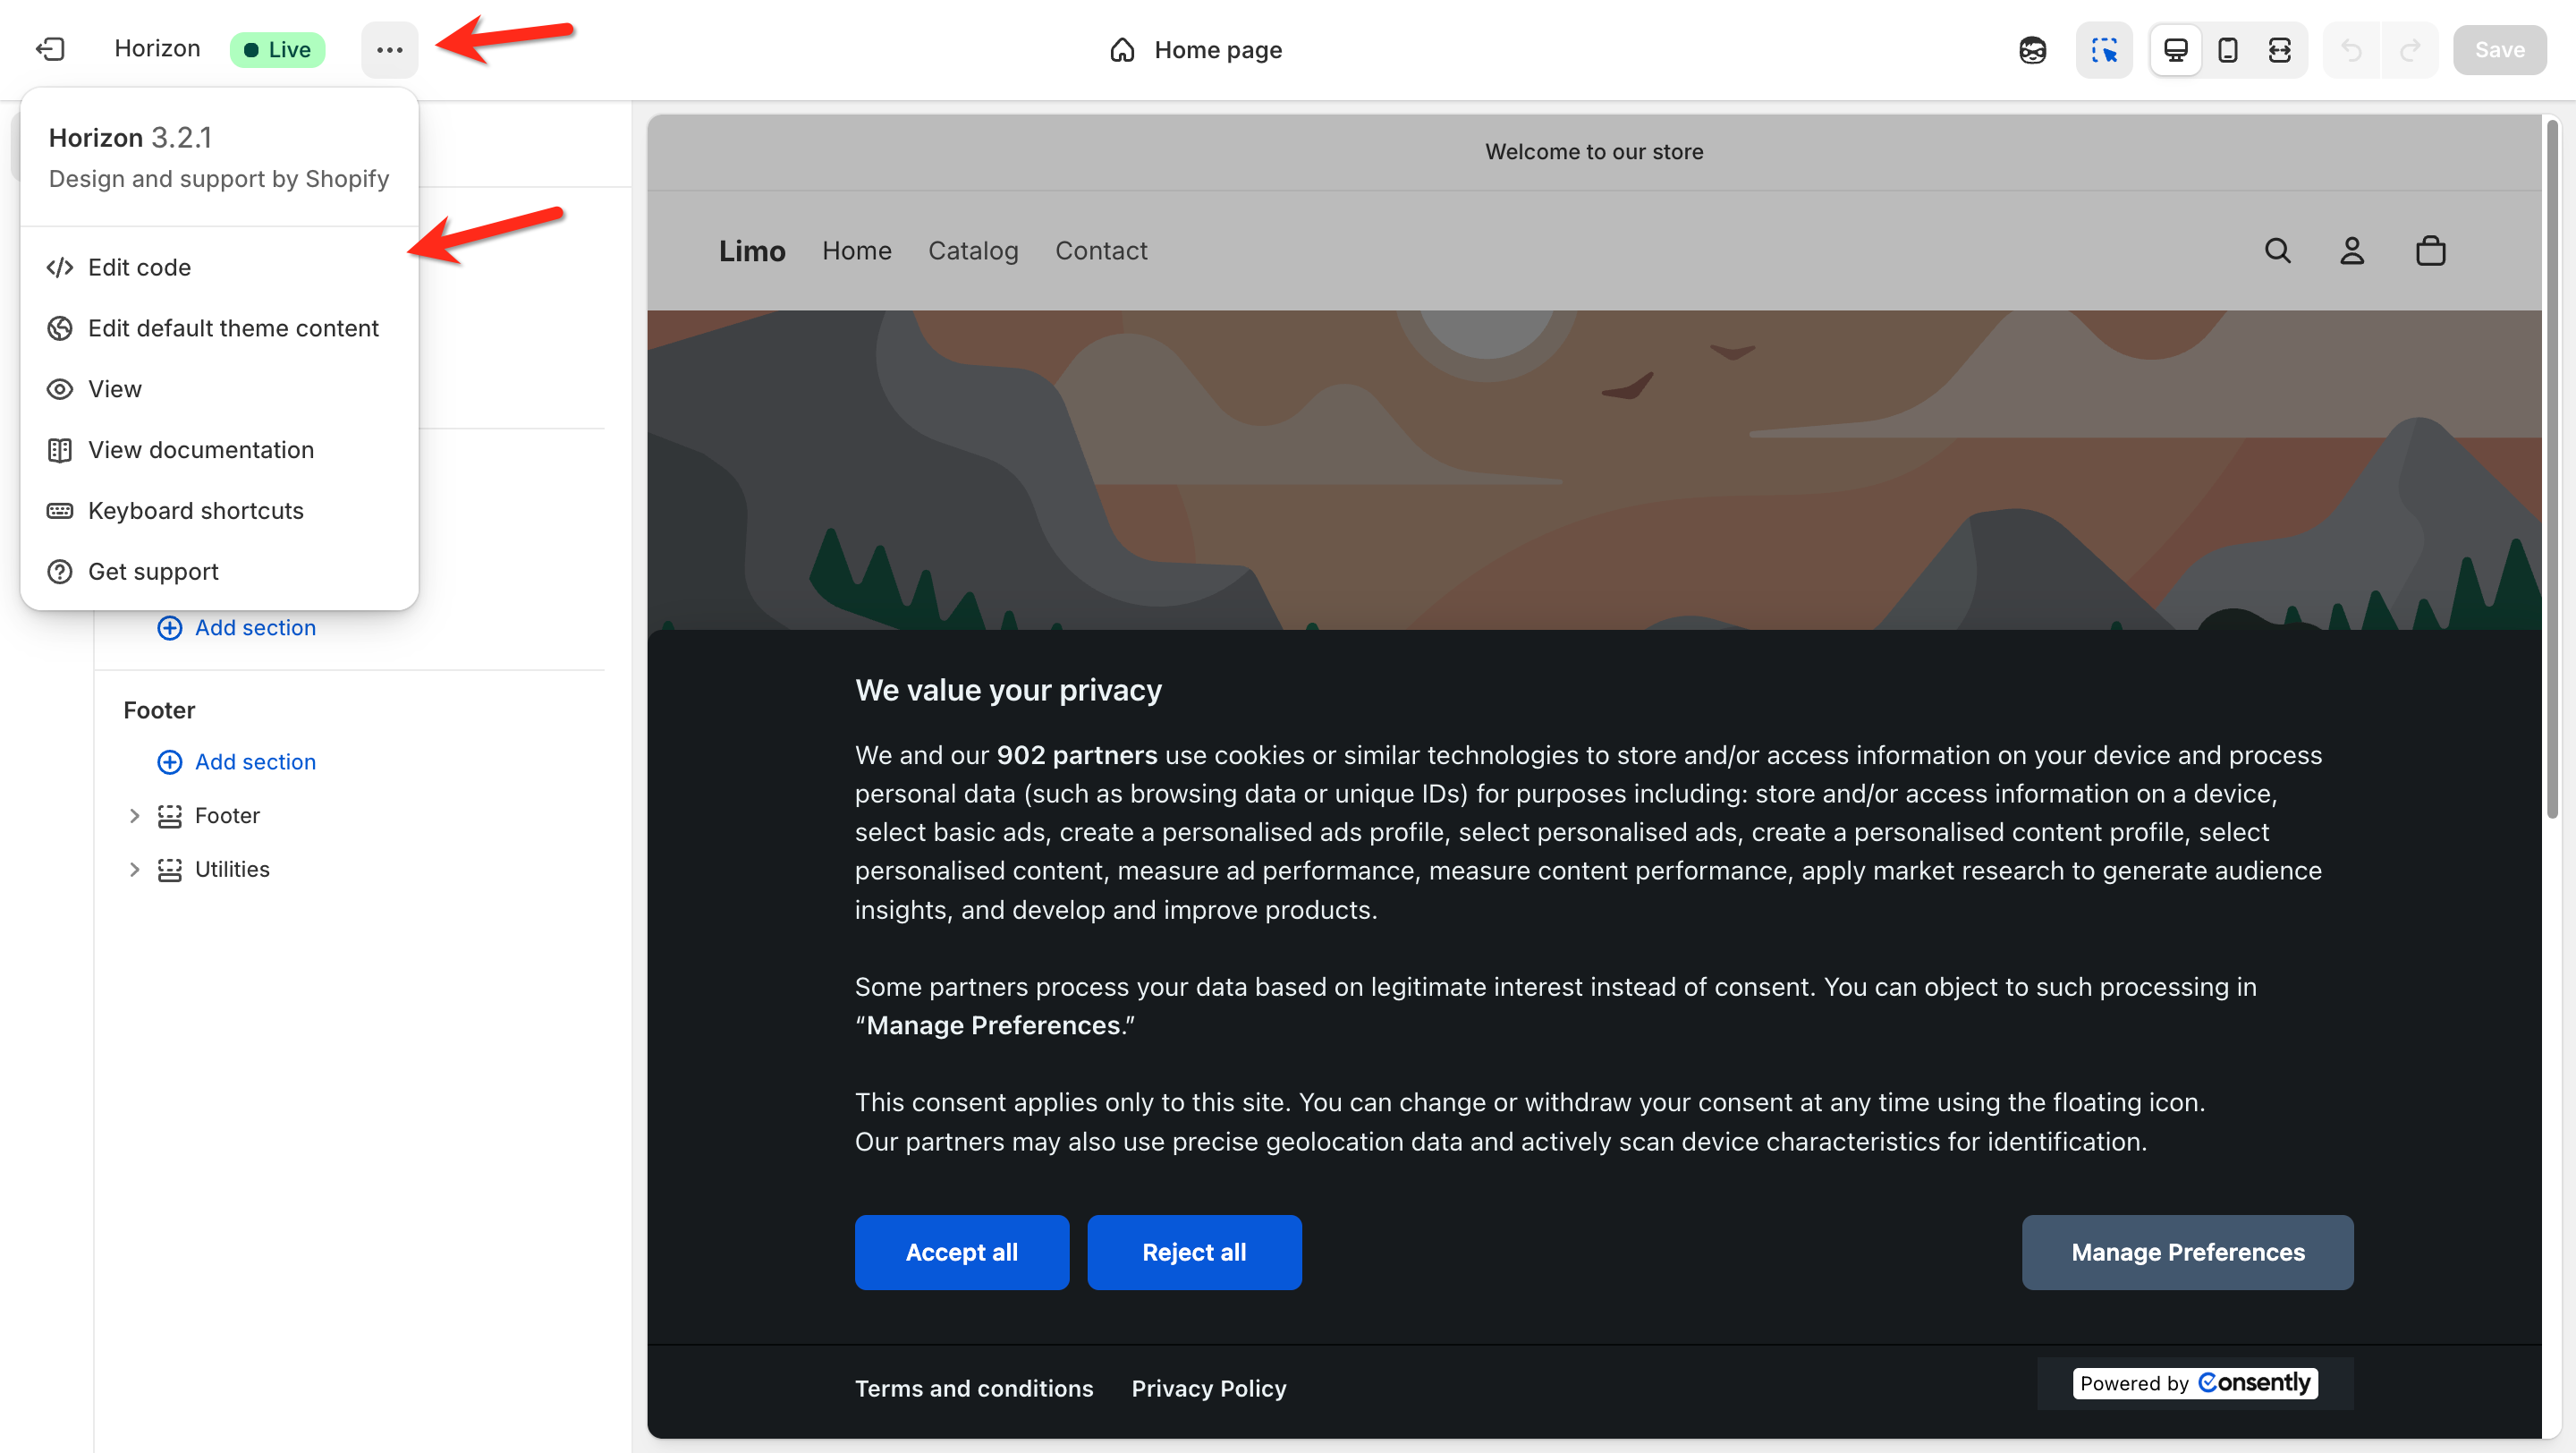
Step 3: Open the code editor
Find your active theme (usually labeled "Current theme") and click the Actions dropdown button, then select Edit code.
💡 Tip: If you're working on a theme that isn't live yet, you can edit that theme's code instead. Changes won't affect your live store until you publish the theme.
Step 4: Locate the theme.liquid file
In the code editor's left sidebar, look under the Layout section and click theme.liquid. This is the master template file that controls your entire store's structure.
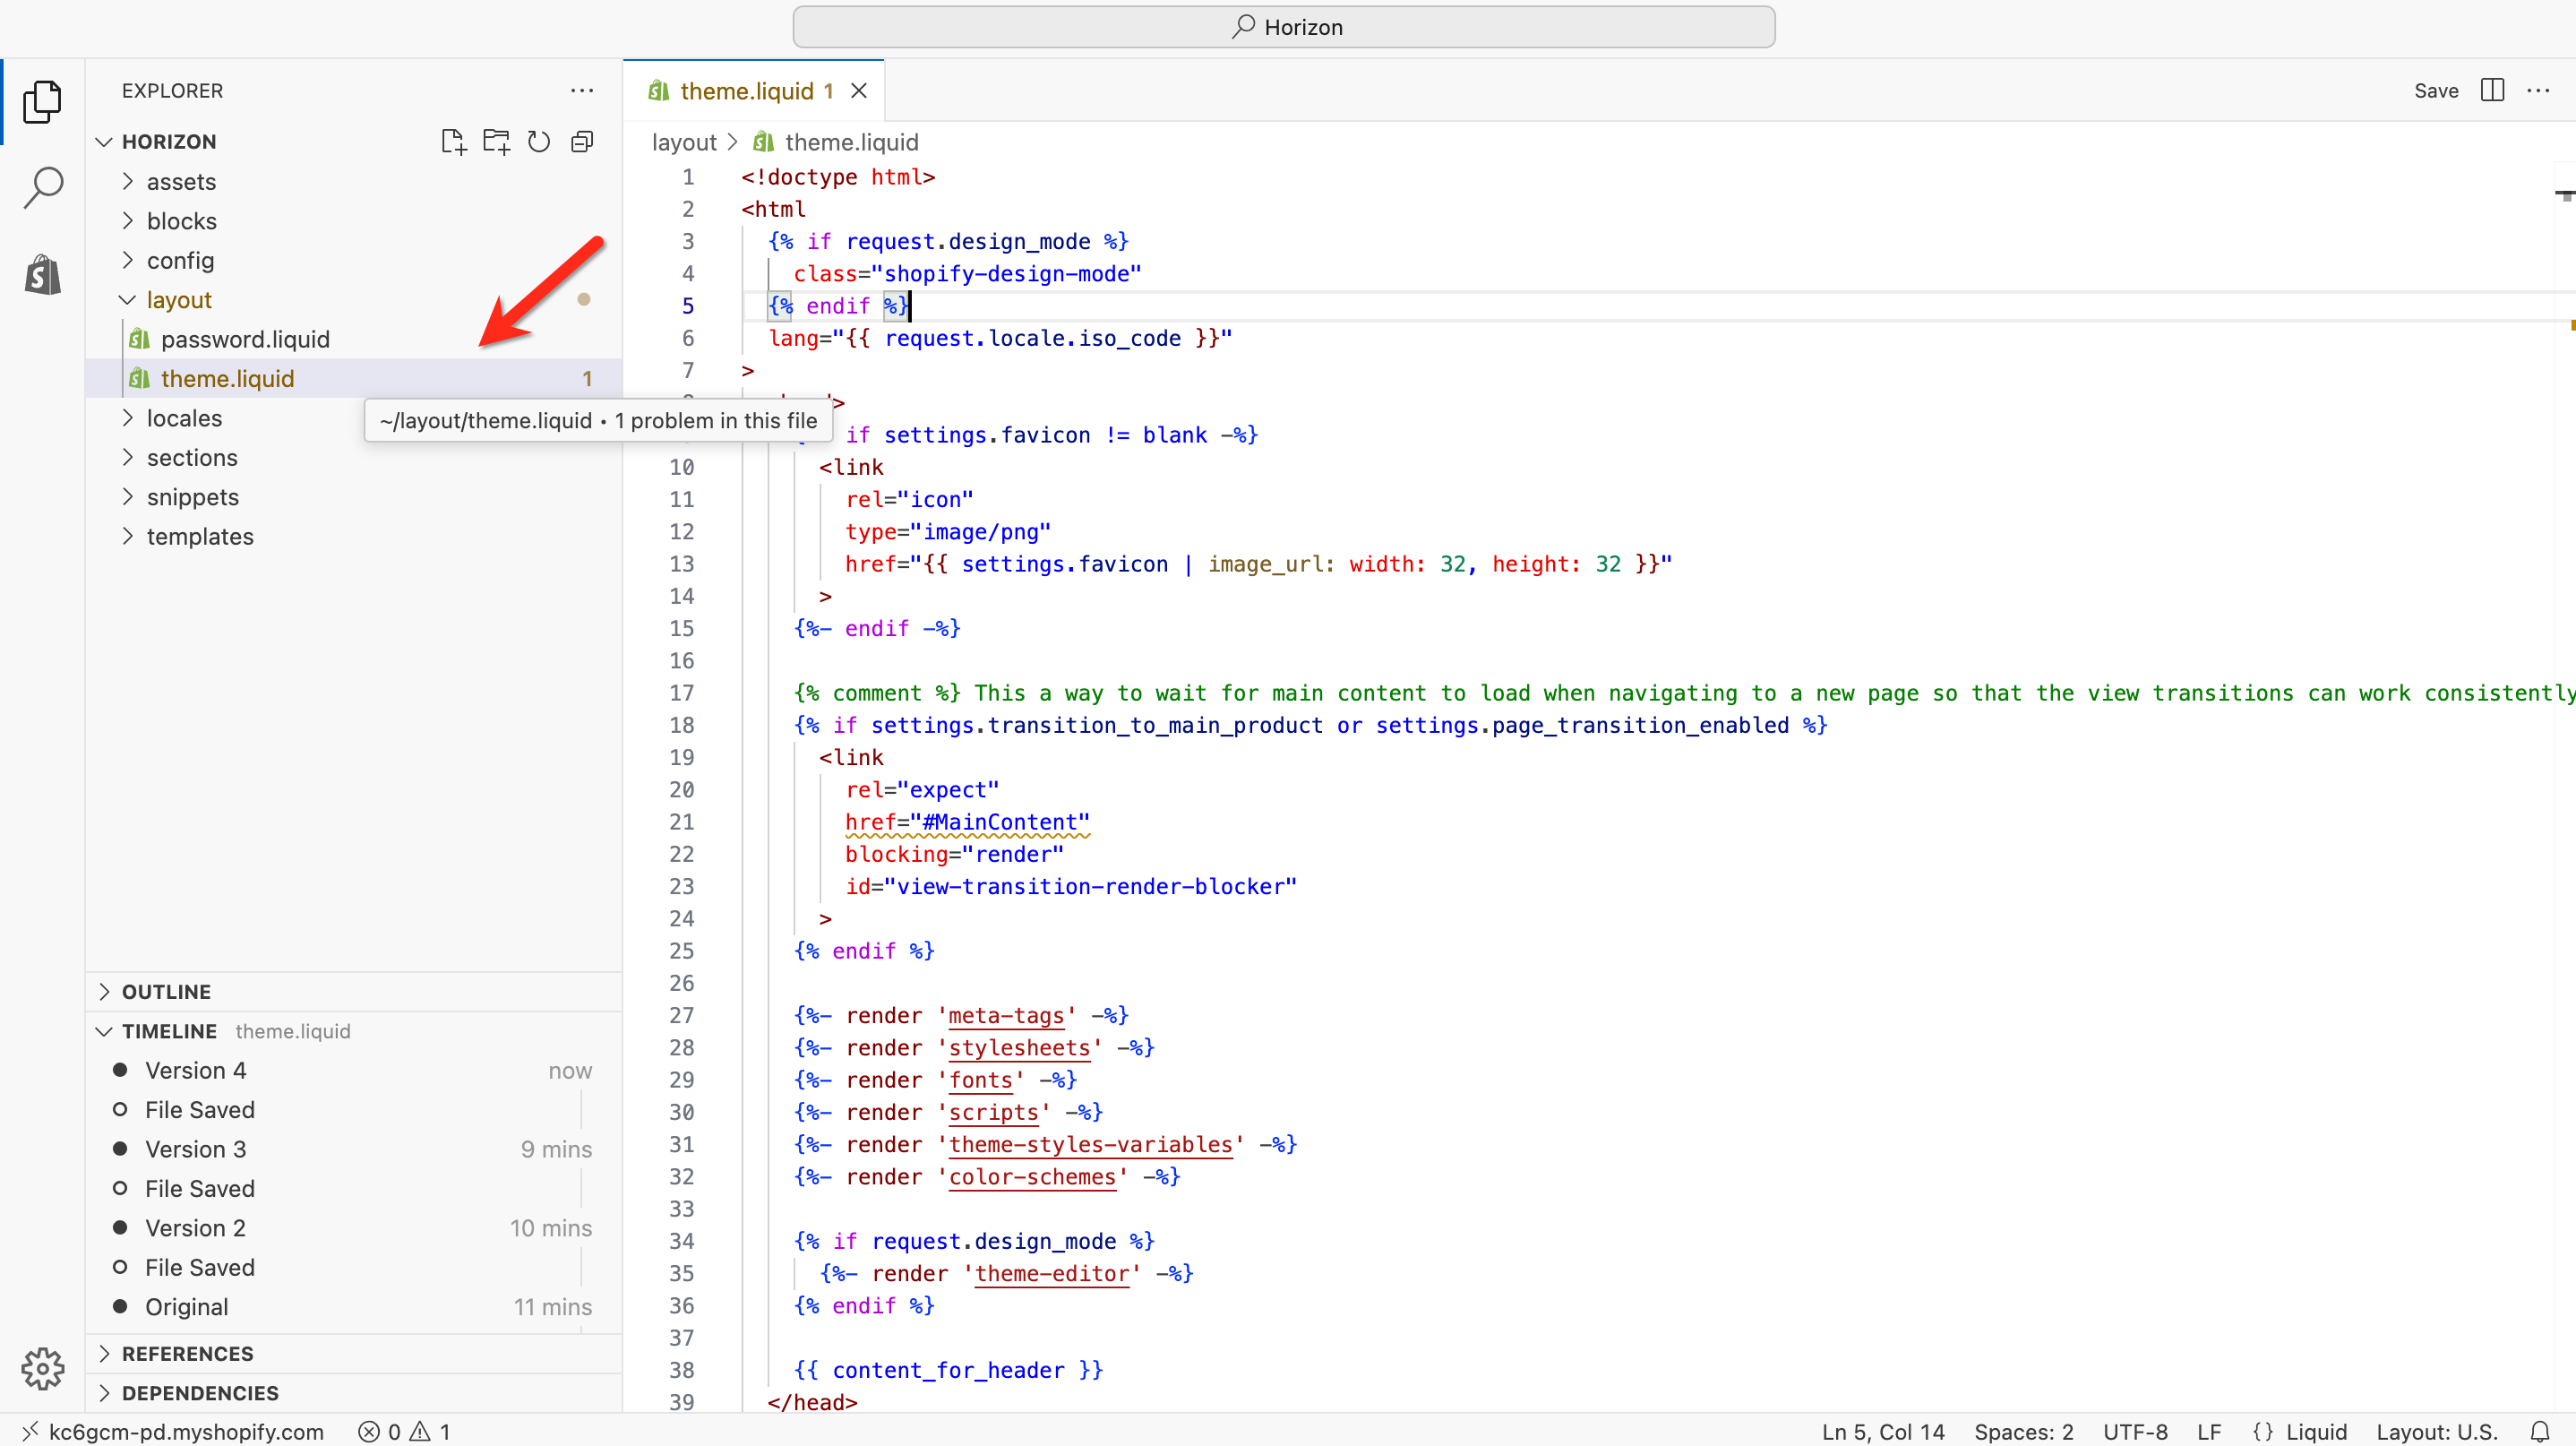
Step 5: Find the closing head tag
Use your browser's search function (Ctrl+F or Cmd+F) to search for </head> in the theme.liquid file. This closing tag typically appears in the first 50-100 lines of the file.
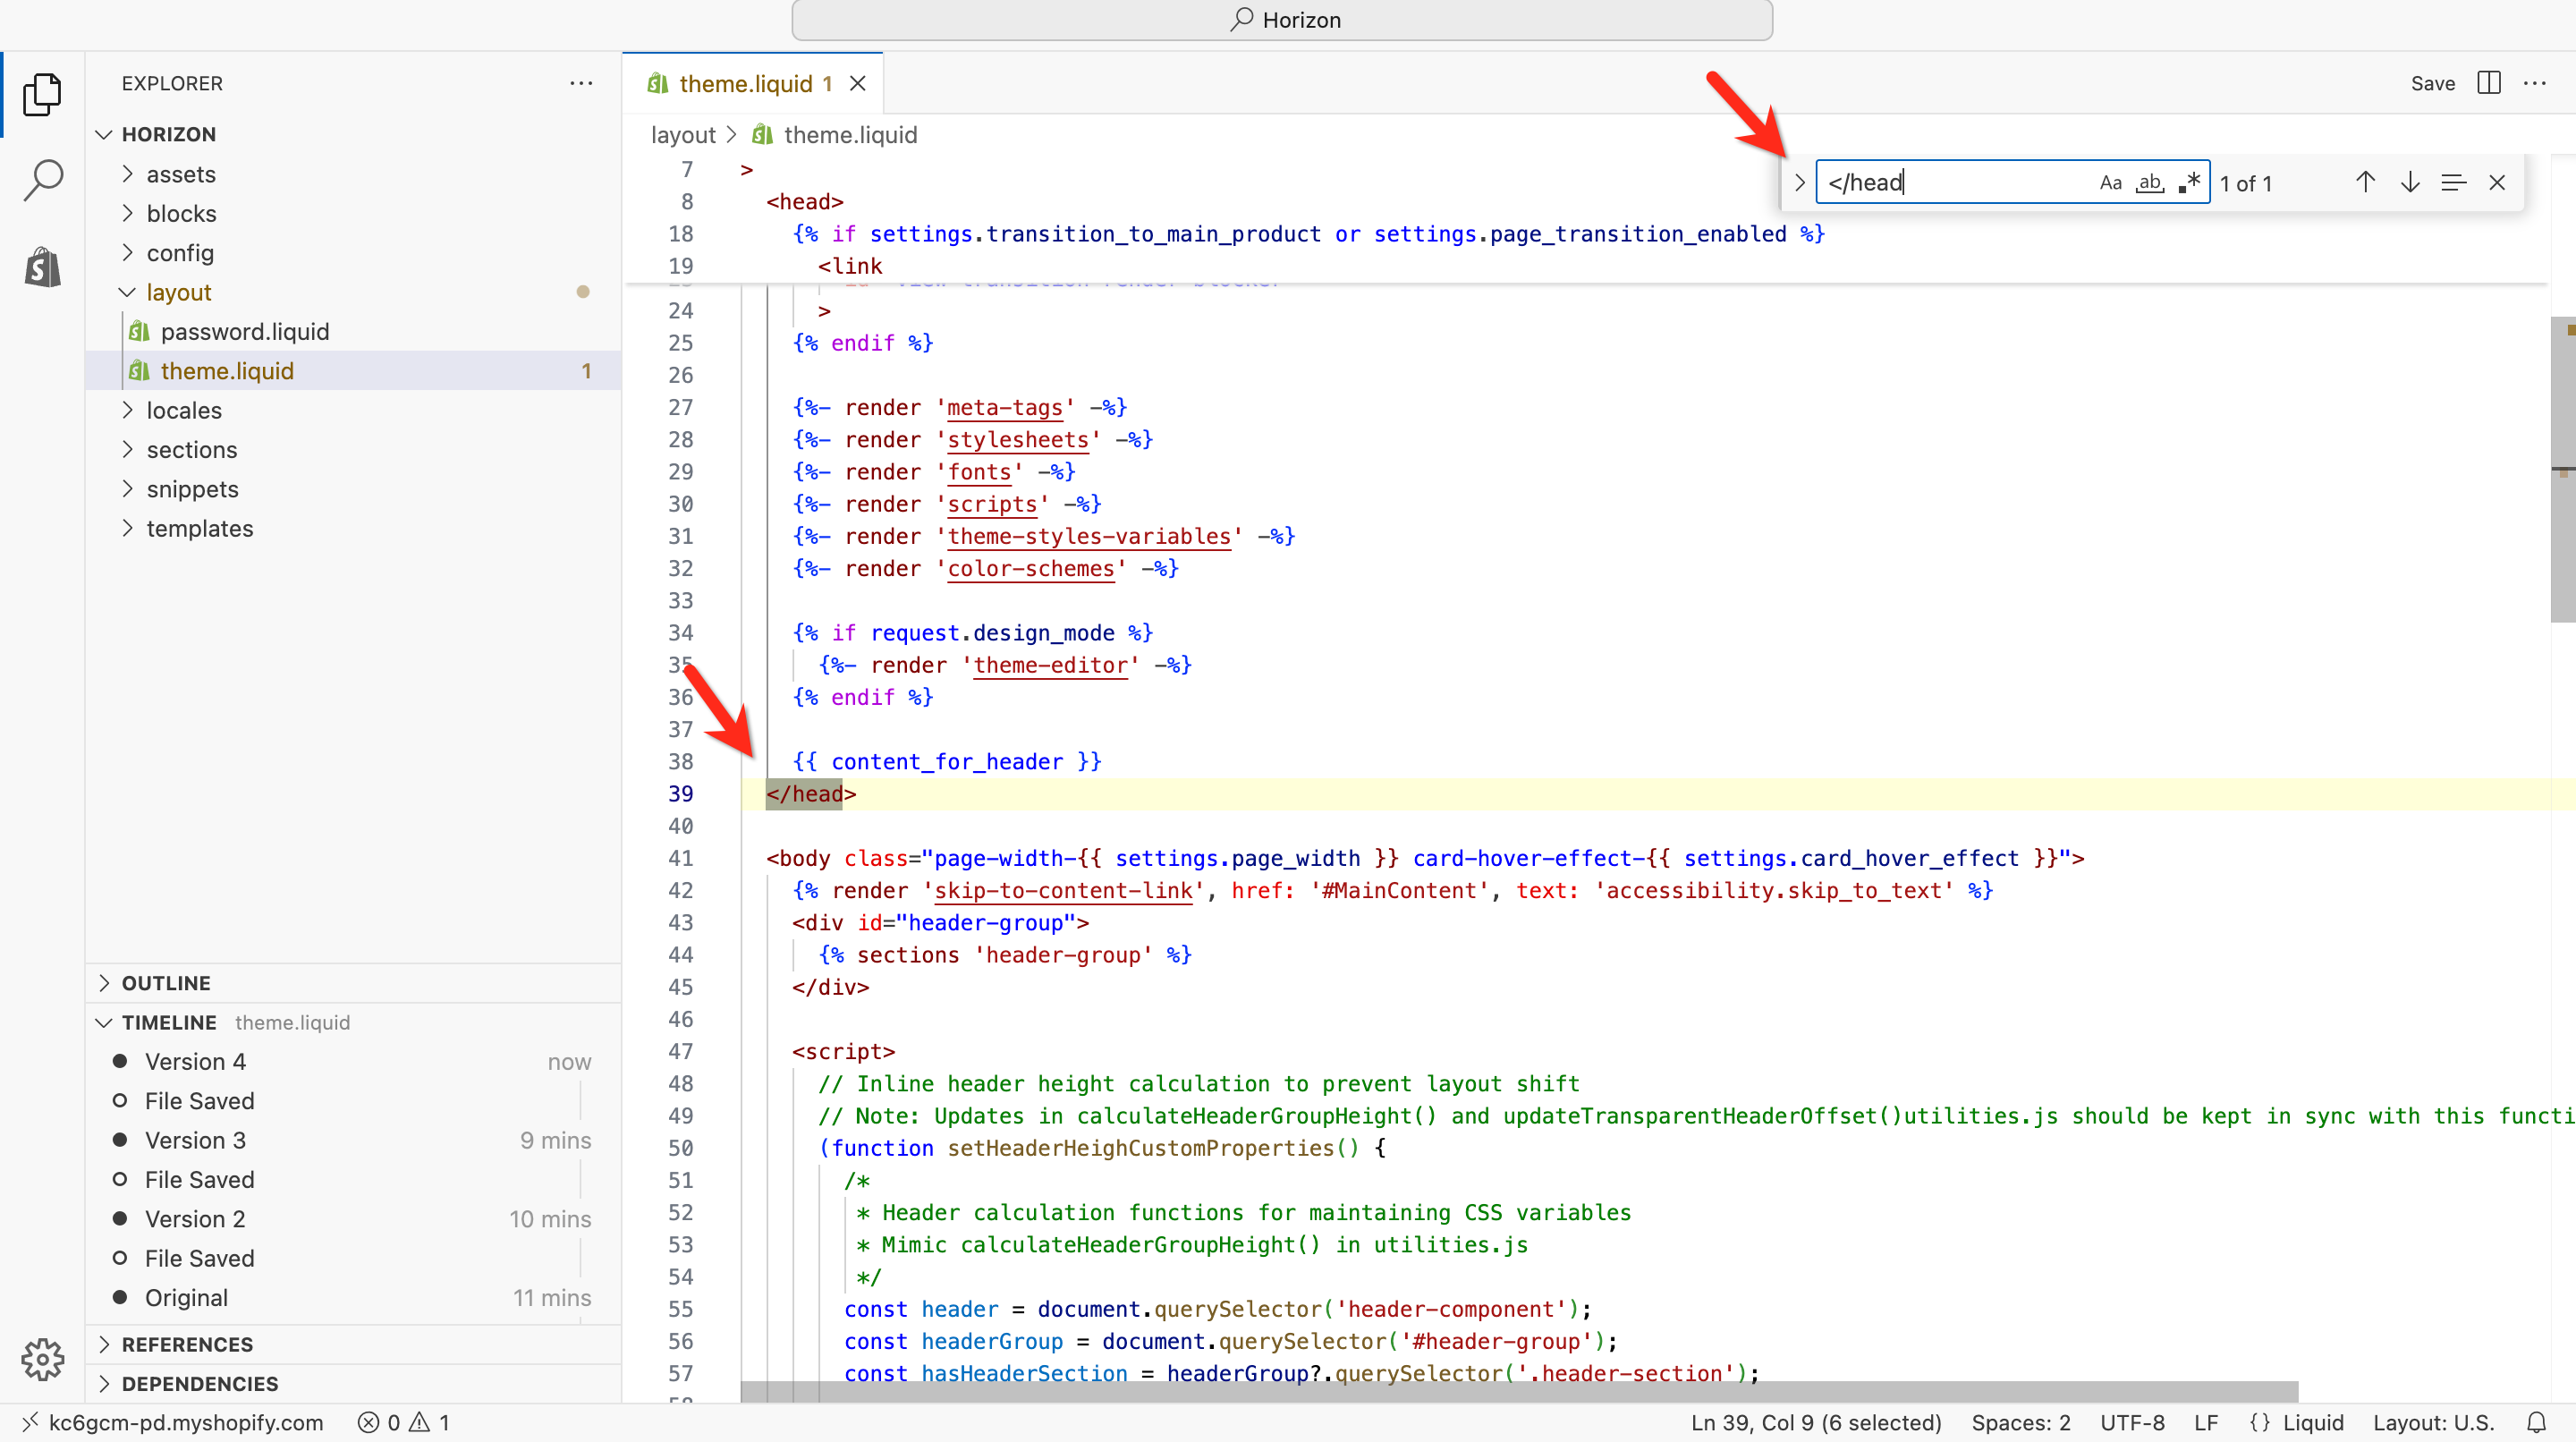
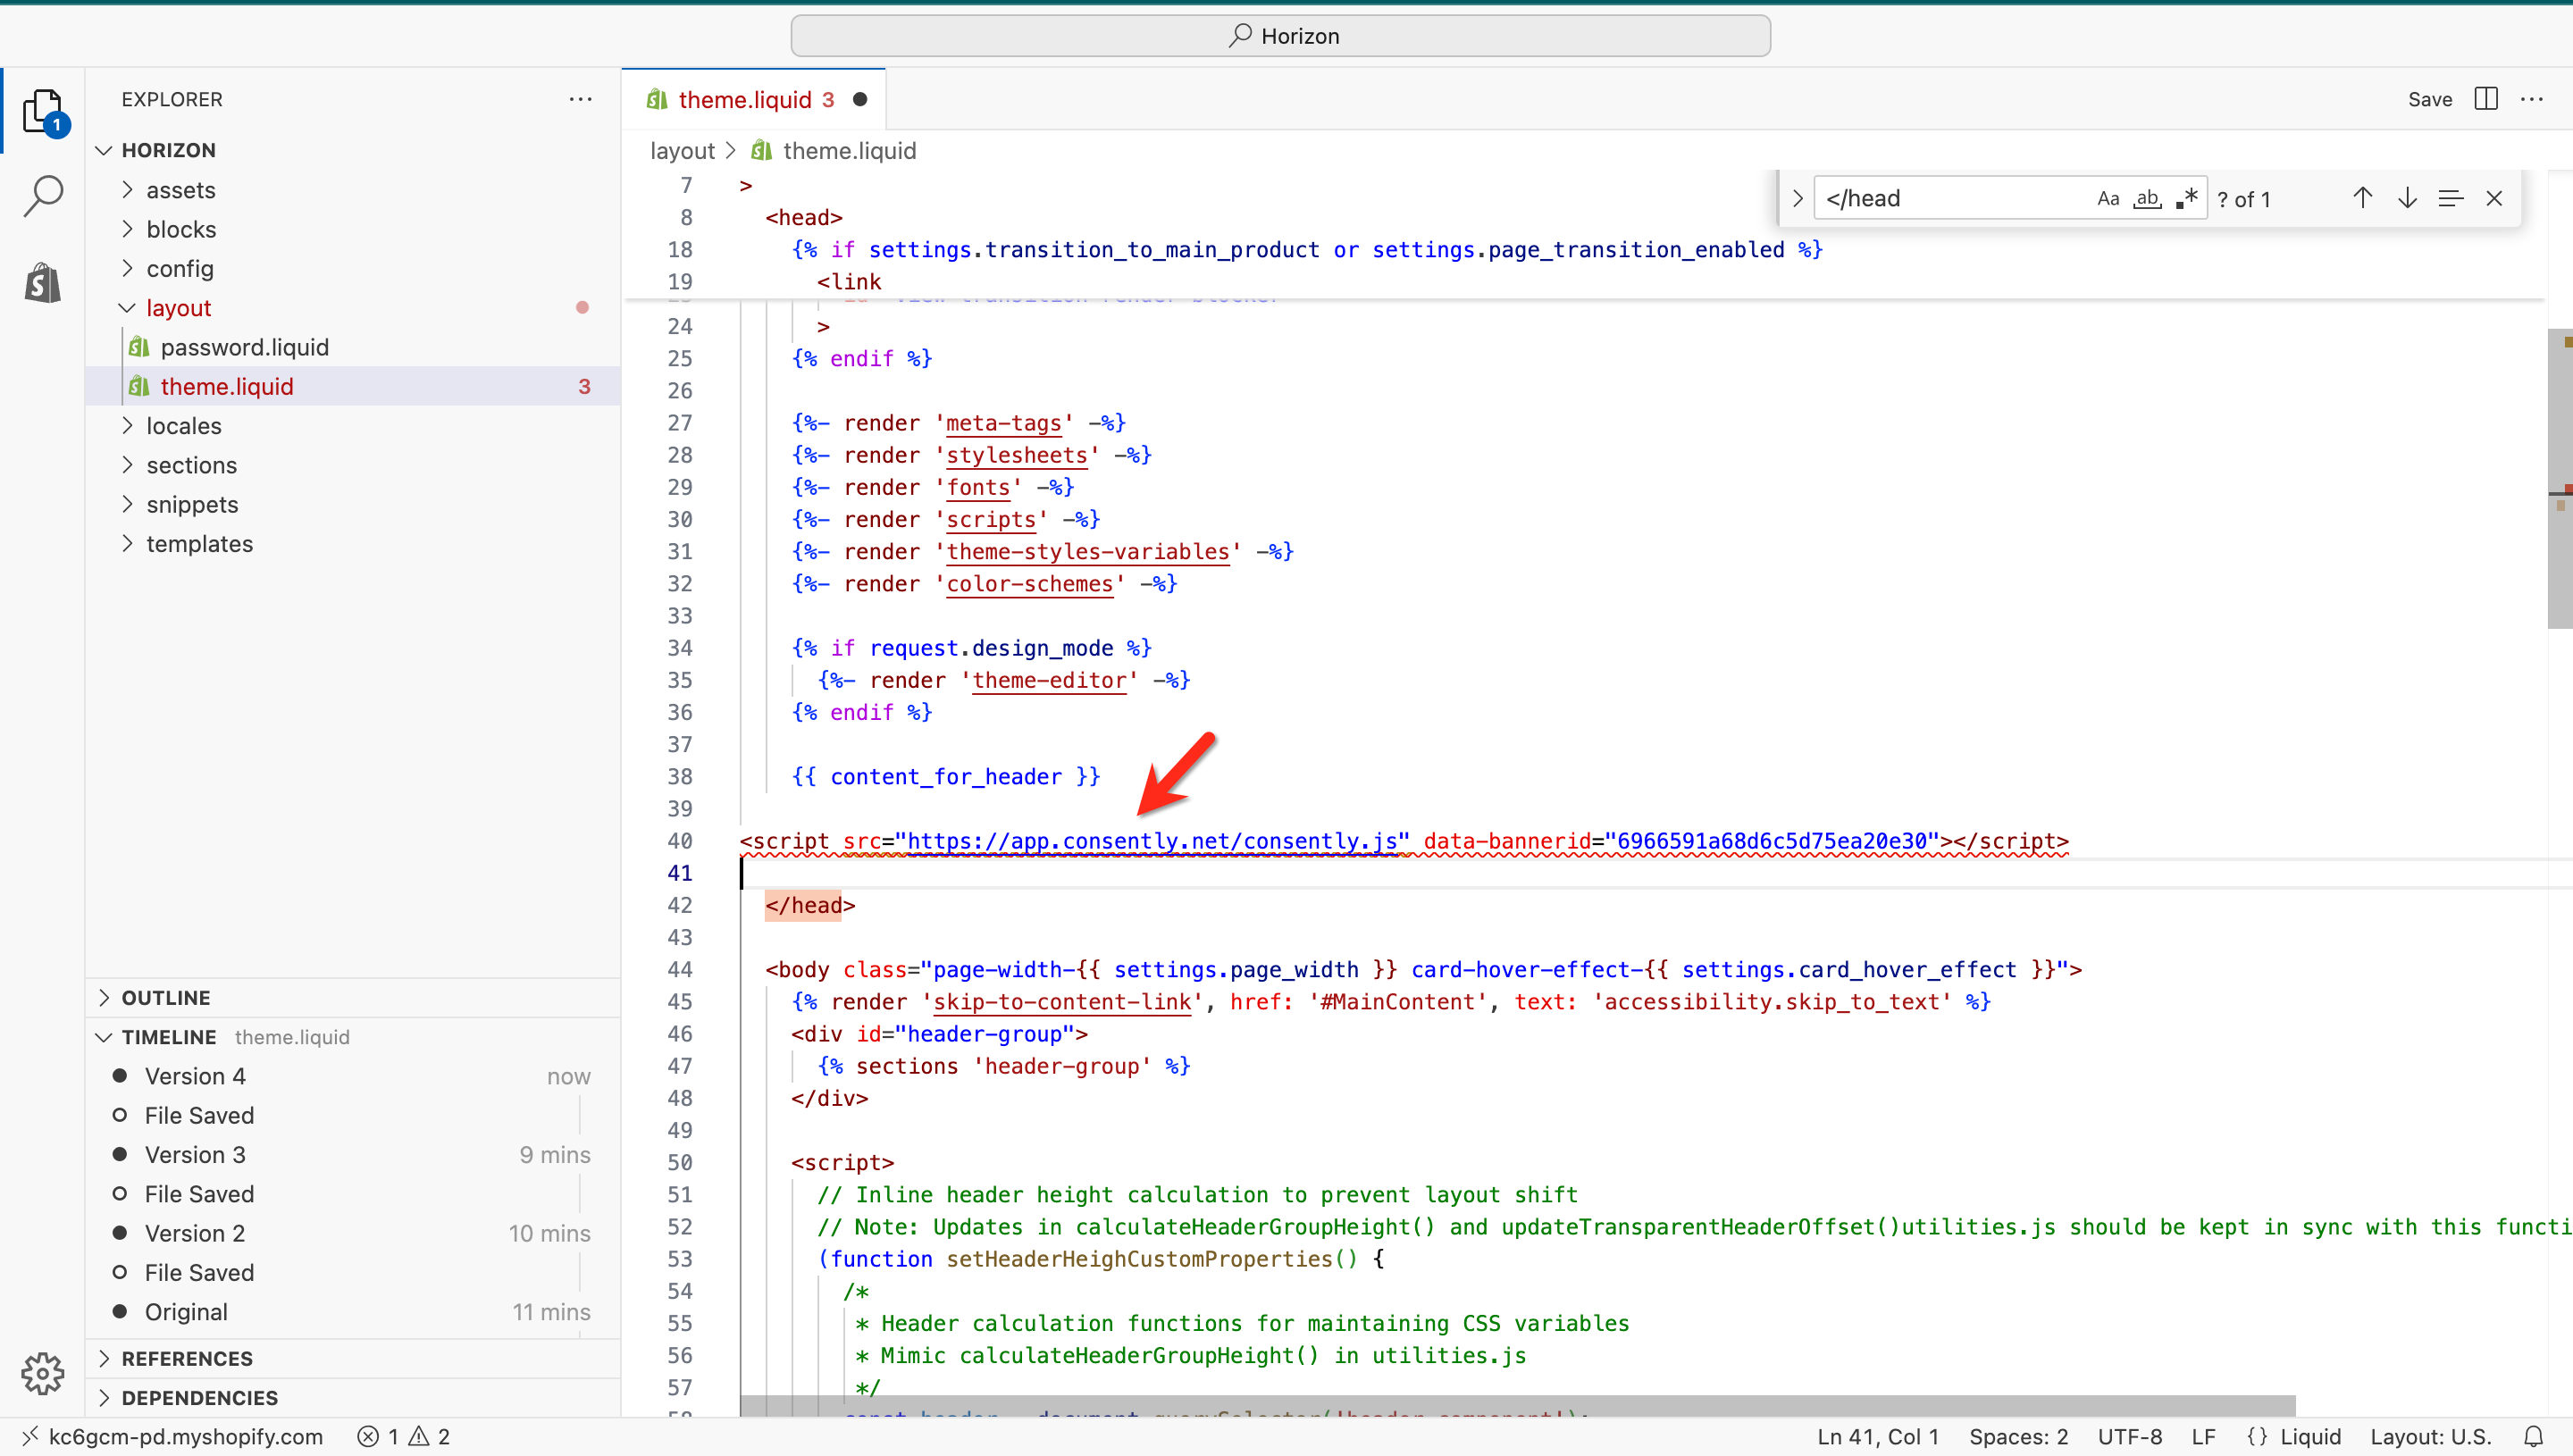
Step 6: Paste the Consently script
Position your cursor on a new line immediately before the </head> tag, then paste your Consently embed script.
The code should look like this:
  <!-- Start Consently Banner -->
  <script src="https://app.consently.net/consently.js" data-bannerid="YOUR_BANNER_ID"></script>
  <!-- End Consently Banner -->
</head>
⚠️ Important: The script must be placed BEFORE the closing</head>tag, not after it. Placement after</head>or inside<body>can cause delayed loading or blocking issues.
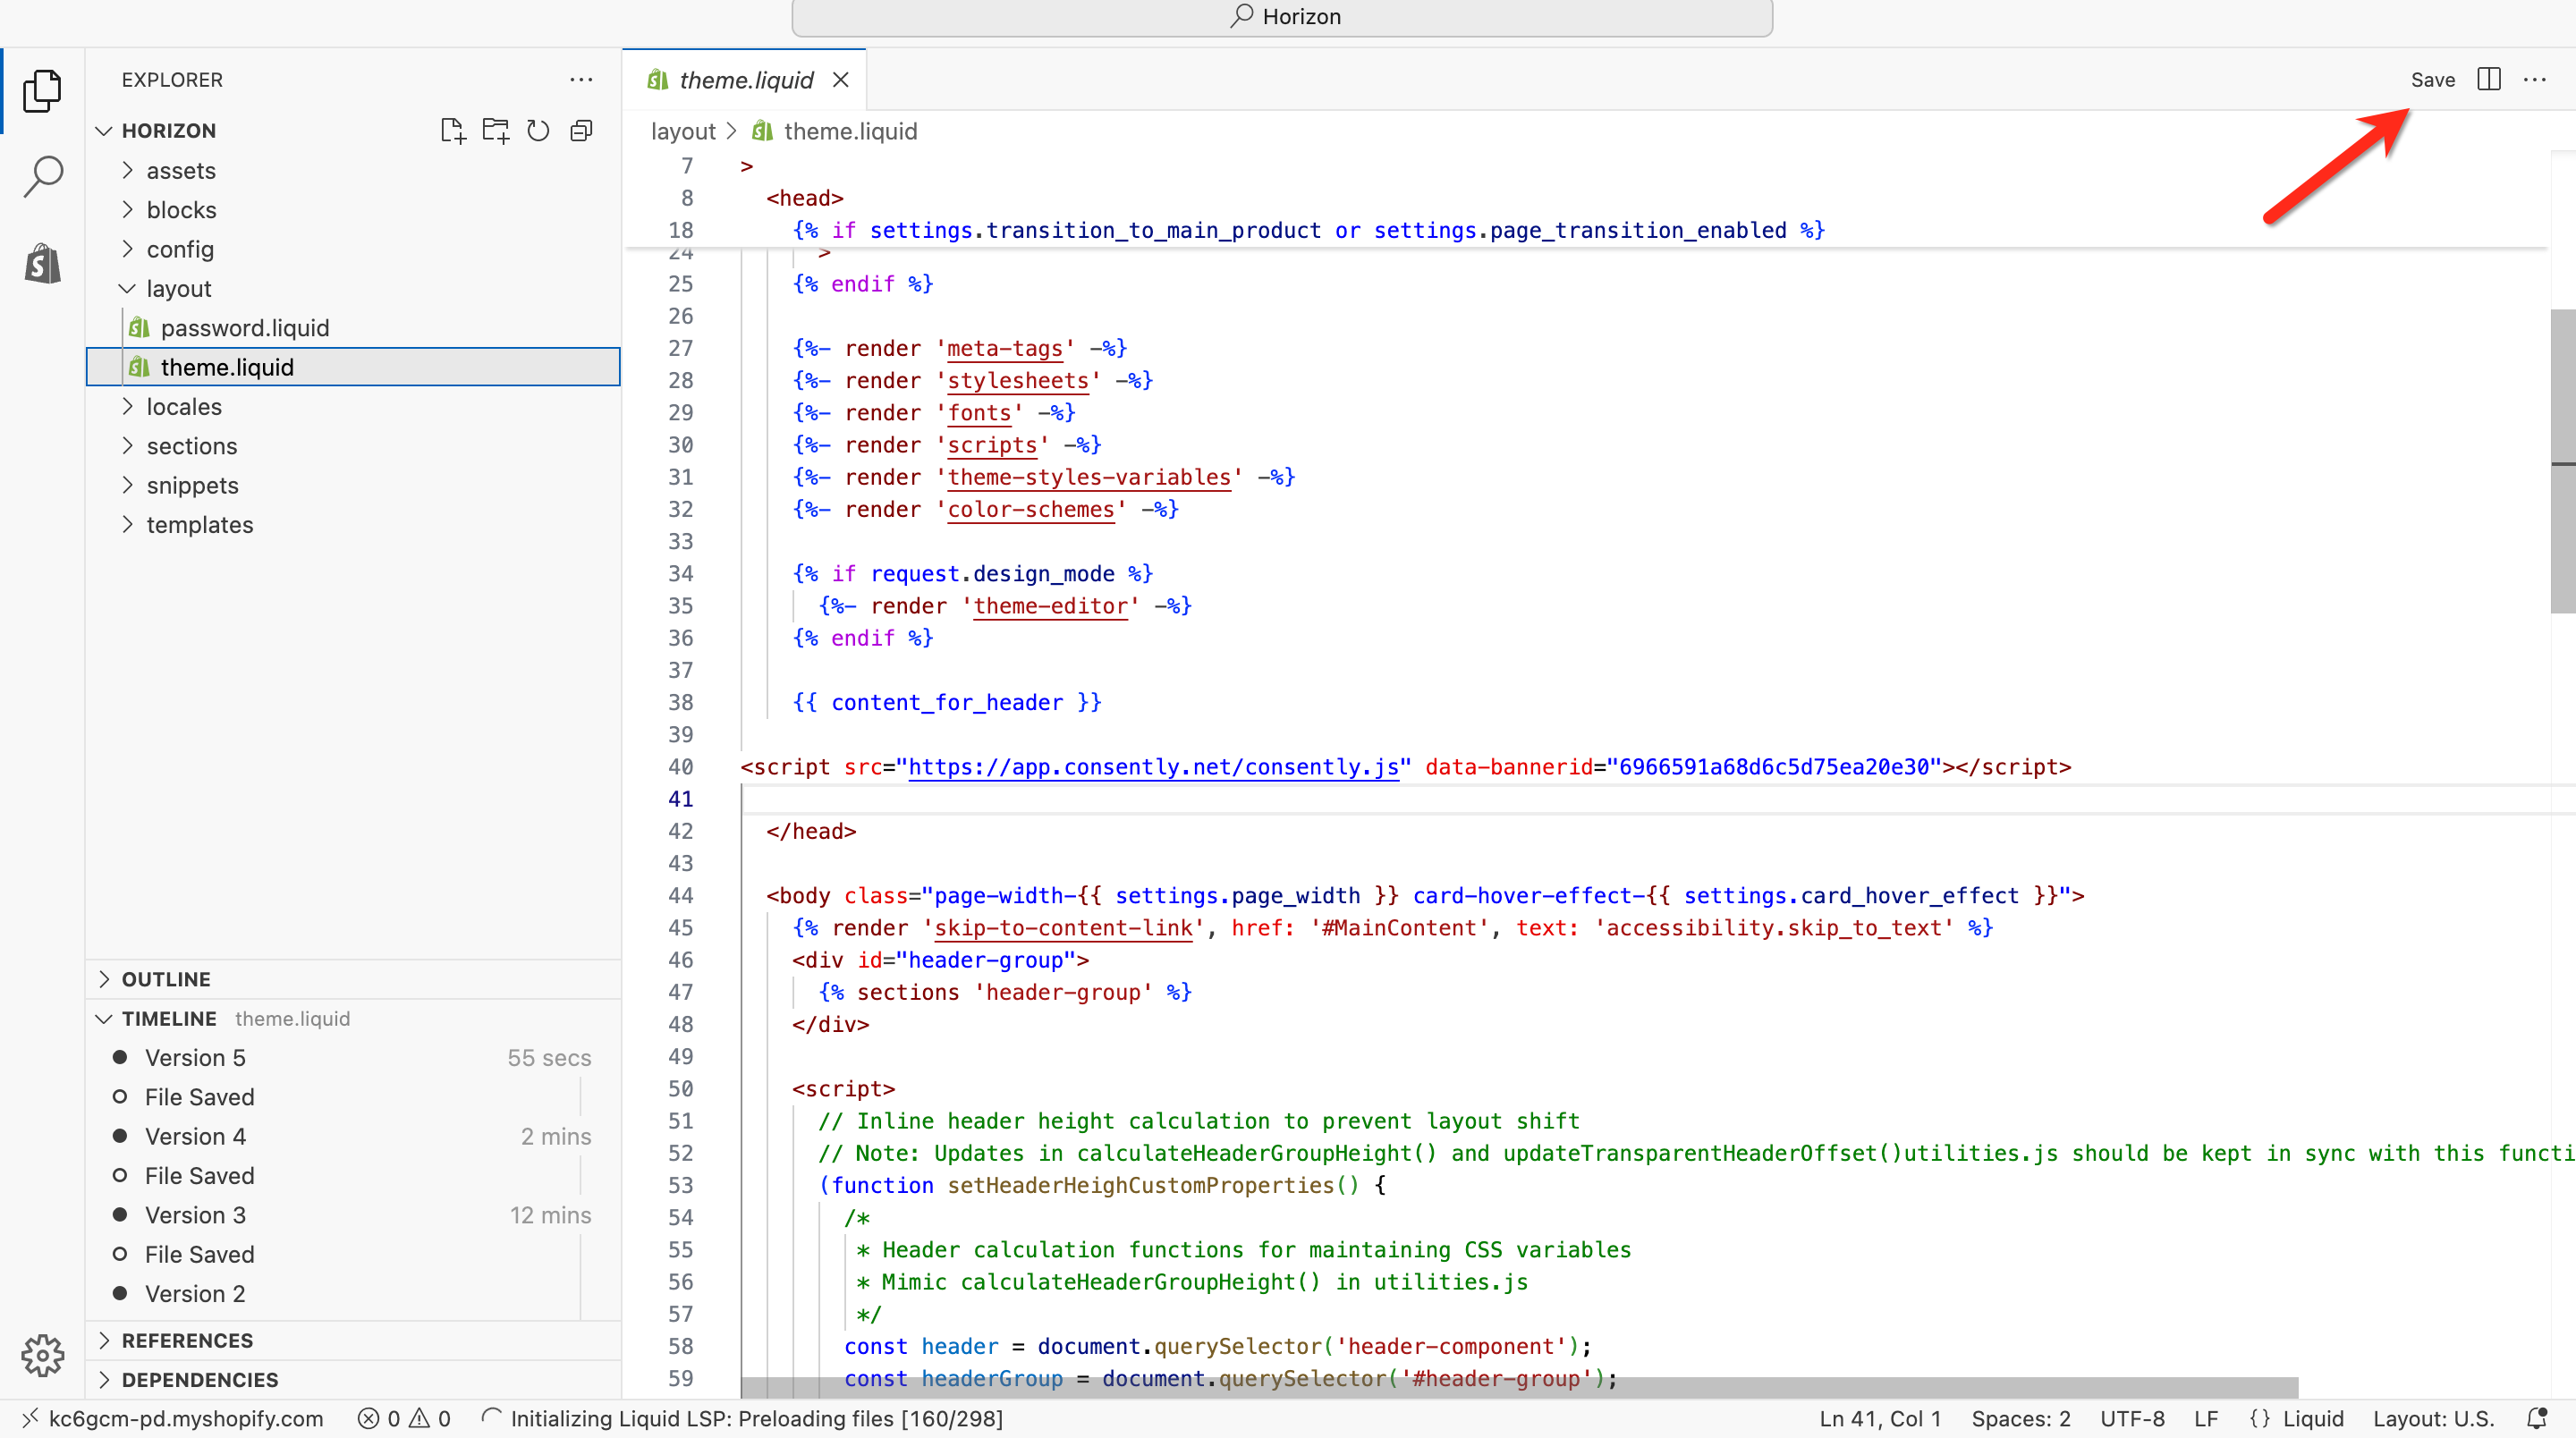
Step 7: Save the file
Click the green Save button in the top-right corner of the code editor to save your changes.
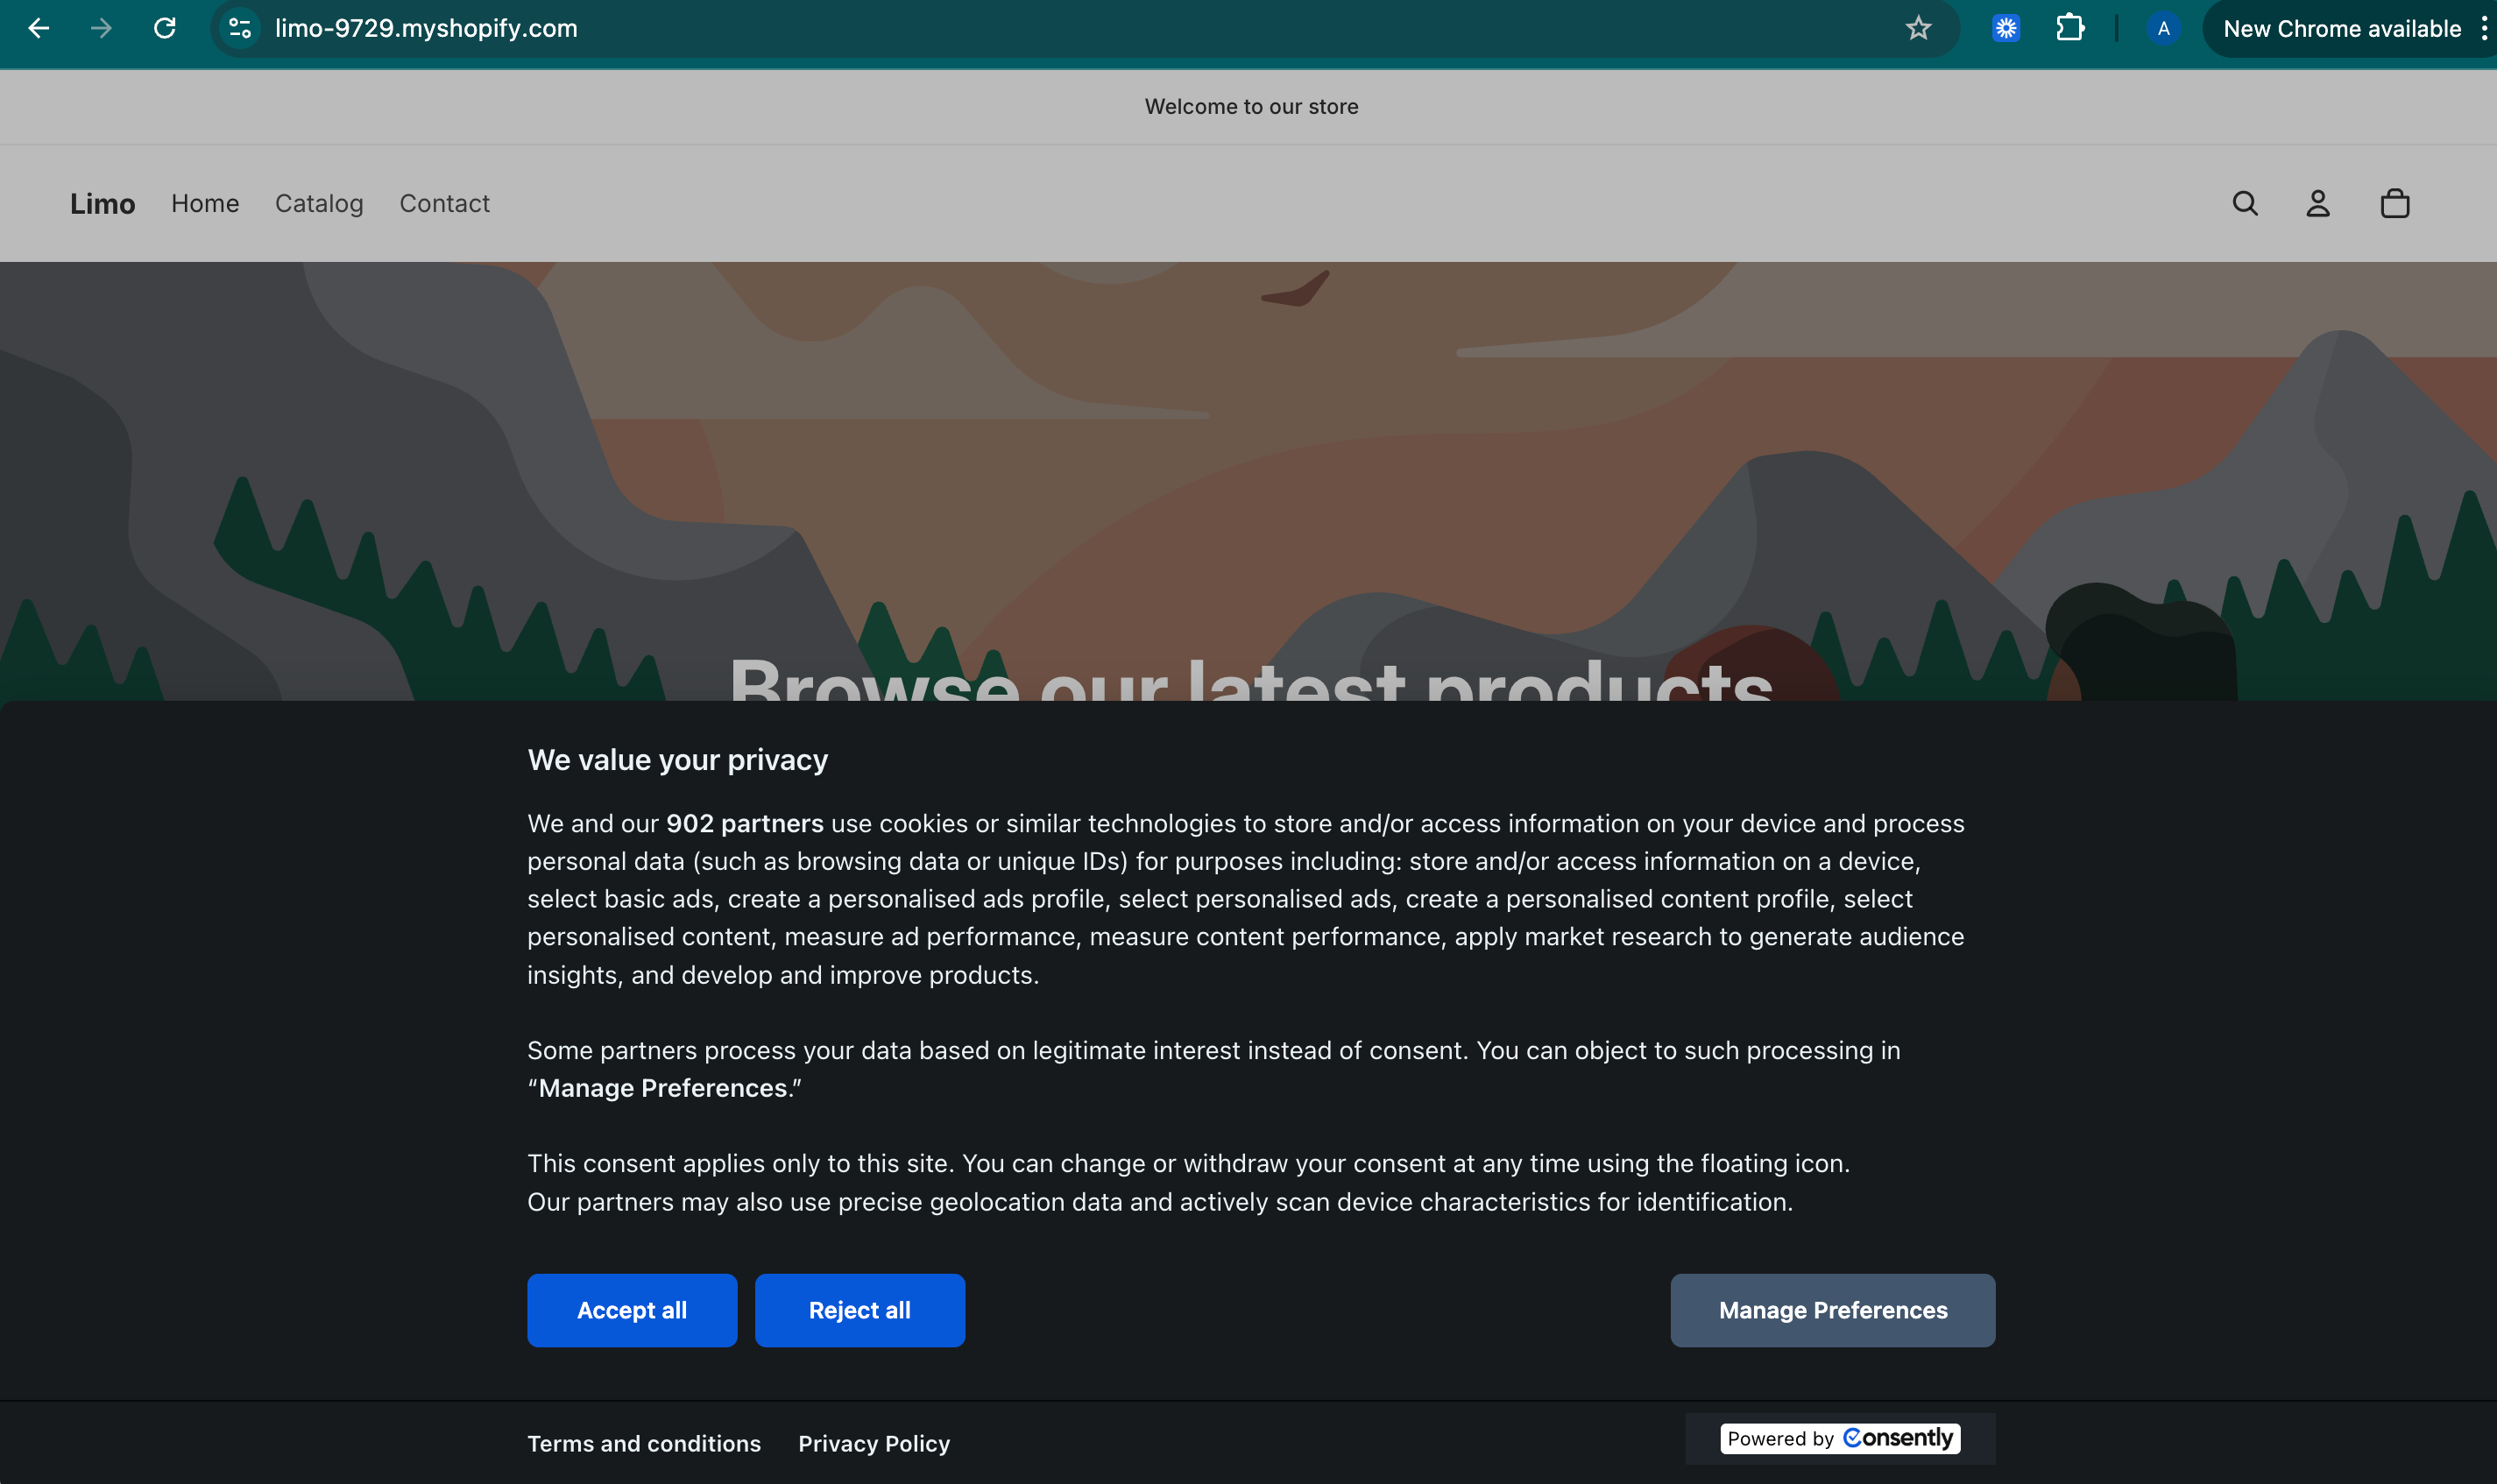
Step 8: Visit your storefront
Open your Shopify store in a new incognito/private browser window to verify the consent banner appears immediately when the page loads.
Done!
Your Consently banner is now live on your Shopify store.
✅ Success indicator: The consent banner appears on all pages of your storefront, including the homepage, product pages, collections, and cart.
Shopify-Specific Considerations
Theme Updates and Customizations
Shopify themes receive updates from developers to fix bugs and add features. When you update your theme, customizations in theme.liquid may be overwritten.
Best practices to prevent loss:
Duplicate your theme before updating — Shopify Admin → Online Store → Themes → Actions → Duplicate. This creates a backup with your Consently script intact
Document your changes — Keep a copy of the exact line where you placed the Consently script, so you can quickly re-add it after updates
Check after updates — Always test your store after applying theme updates to confirm the banner still appears
Checkout Page Limitations
Shopify restricts custom code on checkout pages for Shopify Payments security compliance. The Consently banner will appear on all pages up to checkout, but may not display on the final payment page depending on your Shopify plan.
How this affects compliance:
The banner appears on the cart page before customers proceed to checkout
Consent is collected before visitors enter the checkout flow
This meets most privacy law requirements, as consent is obtained before critical tracking occurs
For Shopify Plus merchants: Shopify Plus allows checkout.liquid customization, enabling the banner on all checkout steps. Contact Consently support for guidance on Plus checkout implementation.
App Alternative
Currently, Consently does not offer a Shopify App installation method. Direct theme file editing (as described above) is the only supported installation approach for Shopify stores. This method provides:
Faster load times (no app overhead)
Complete control over placement
Compatibility with all Shopify plans
Version Control and Theme Backups
Shopify doesn't provide built-in version control for theme files, so it's crucial to create backups before making changes.
How to Create a Theme Backup
Navigate to Online Store → Themes
Find your current theme and click Actions → Duplicate
Shopify creates a copy labeled "Copy of [Theme Name]"
This backup preserves all customizations, including the Consently script

When to Create Backups
Before installing Consently (as a precaution)
Before updating your theme
Before making any other significant theme modifications
Monthly (as a general best practice)
Restoring from Backup
If something goes wrong after editing the theme.liquid:
Go to Online Store → Themes
Find your backup theme
Click Actions → Publish
Your store reverts to the backup version with the Consently script removed
You can then try the installation again
What's Next
Now that Consently is installed on your Shopify store, you should:
Test your installation to verify the banner loads correctly and blocks cookies
Customize your banner content to match your store's branding
Troubleshooting
The banner doesn't appear on my storefront
Why this happens: The script may not have been saved correctly, placed in the wrong location, or the banner may not have been published in Consently.
Solution:
Return to Online Store → Themes → Actions → Edit code → theme.liquid
Verify the Consently script appears immediately before
</head>Confirm you clicked Save after pasting the script
Check that your banner is published in the Consently dashboard
Clear your browser cache or test in an incognito window
The banner appears on some pages but not others
Why this happens: Shopify may use different template files for specific pages (collections, product pages, blog posts).
Solution: The theme.liquid file controls all pages by default, so this issue is rare. If it occurs:
Verify the script is in Layout/theme.liquid, not in a specific template like Templates/product.liquid
Check if your theme uses a custom layout for certain pages—search for
layout: alternateit in your theme filesIf alternate layouts exist, add the Consently script to those layout files as well
The script disappeared after a theme update
Why this happens: Theme updates replace theme.liquid with the developer's latest version, removing customizations.
Solution:
Navigate back to Online Store → Themes → Actions → Edit code → theme.liquid
Re-add the Consently script before
</head>Click Save
For future updates, duplicate your theme first to preserve a backup
I see the code, but the banner still doesn't work
Why this happens: JavaScript errors or conflicts with other Shopify apps may prevent the banner from initializing.
Solution:
Open your store's homepage and press
F12to open browser developer toolsClick the Console tab and look for error messages mentioning
consently.jsIf you see errors, take a screenshot and contact Consently support
Temporarily disable other Shopify apps one at a time to identify conflicts
The banner covers my store's header or navigation
Why this happens: The banner's position may overlap with your theme's layout.
Solution:
Go to your Consently dashboard → Cookie Banner → Layout
Change the Position setting (try Bottom instead of Top, or vice versa)
Adjust the Display Style (Bar, Box, Popup, or Full-screen)
Enable Disable Website Interaction if you want an overlay background that prevents clicks until consent is given
Related Pages
Direct HTML Installation — Core concepts for script placement
Banner Layout & Positioning — Adjust banner appearance