

TL;DR: Consently's default GDPR template already satisfies all three Google requirements. If you've customized your banner content, navigate to Cookie Banner → Content tab and verify your description text, Google privacy link, and Accept All button are present and correctly configured.
Overview
Google requires consent banners from certified CMPs to meet three specific criteria before they pass a compliance audit. Failing any one of them can block your site from Google's advertising and analytics programs. This page explains each requirement, how Consently's GDPR template satisfies them by default, and what to check if you've modified your banner content.
Before You Begin
Make sure you have:
Chosen the GDPR consent template for your site
Access to the Cookie Banner section of your site dashboard
Time required: 5–10 minutes to verify; 2–3 minutes to fix any individual requirement
Google's Three Required Banner Elements
Google mandates that any banner from a certified CMP must include all three of the following:
Requirement | What Google checks |
|---|---|
Data collection explanation | Banner body explains data is used for personalization and analytics |
Google Privacy Policy link | Visible link to Google's privacy policy in the banner or an expandable section |
Affirmative consent button | An Accept All or Yes button that is at least as prominent as any decline option. No pre-checked boxes. |
⚠️ Important: All three requirements must be satisfied simultaneously. A banner that passes two out of three will still fail a Google audit.
Please note that our default banner is already designed to include and support all three of these requirements.
Requirement 1: Data Collection Explanation
Your banner's description text must explicitly state that data is collected for personalization and analytics purposes. A vague or generic description does not satisfy this requirement.
Compliant example:
"We and our partners collect data to personalize your experience and measure ad effectiveness."
Non-compliant example:
"This site uses cookies." ← Fails: does not mention personalization or analytics purposes.
How to verify in Consently
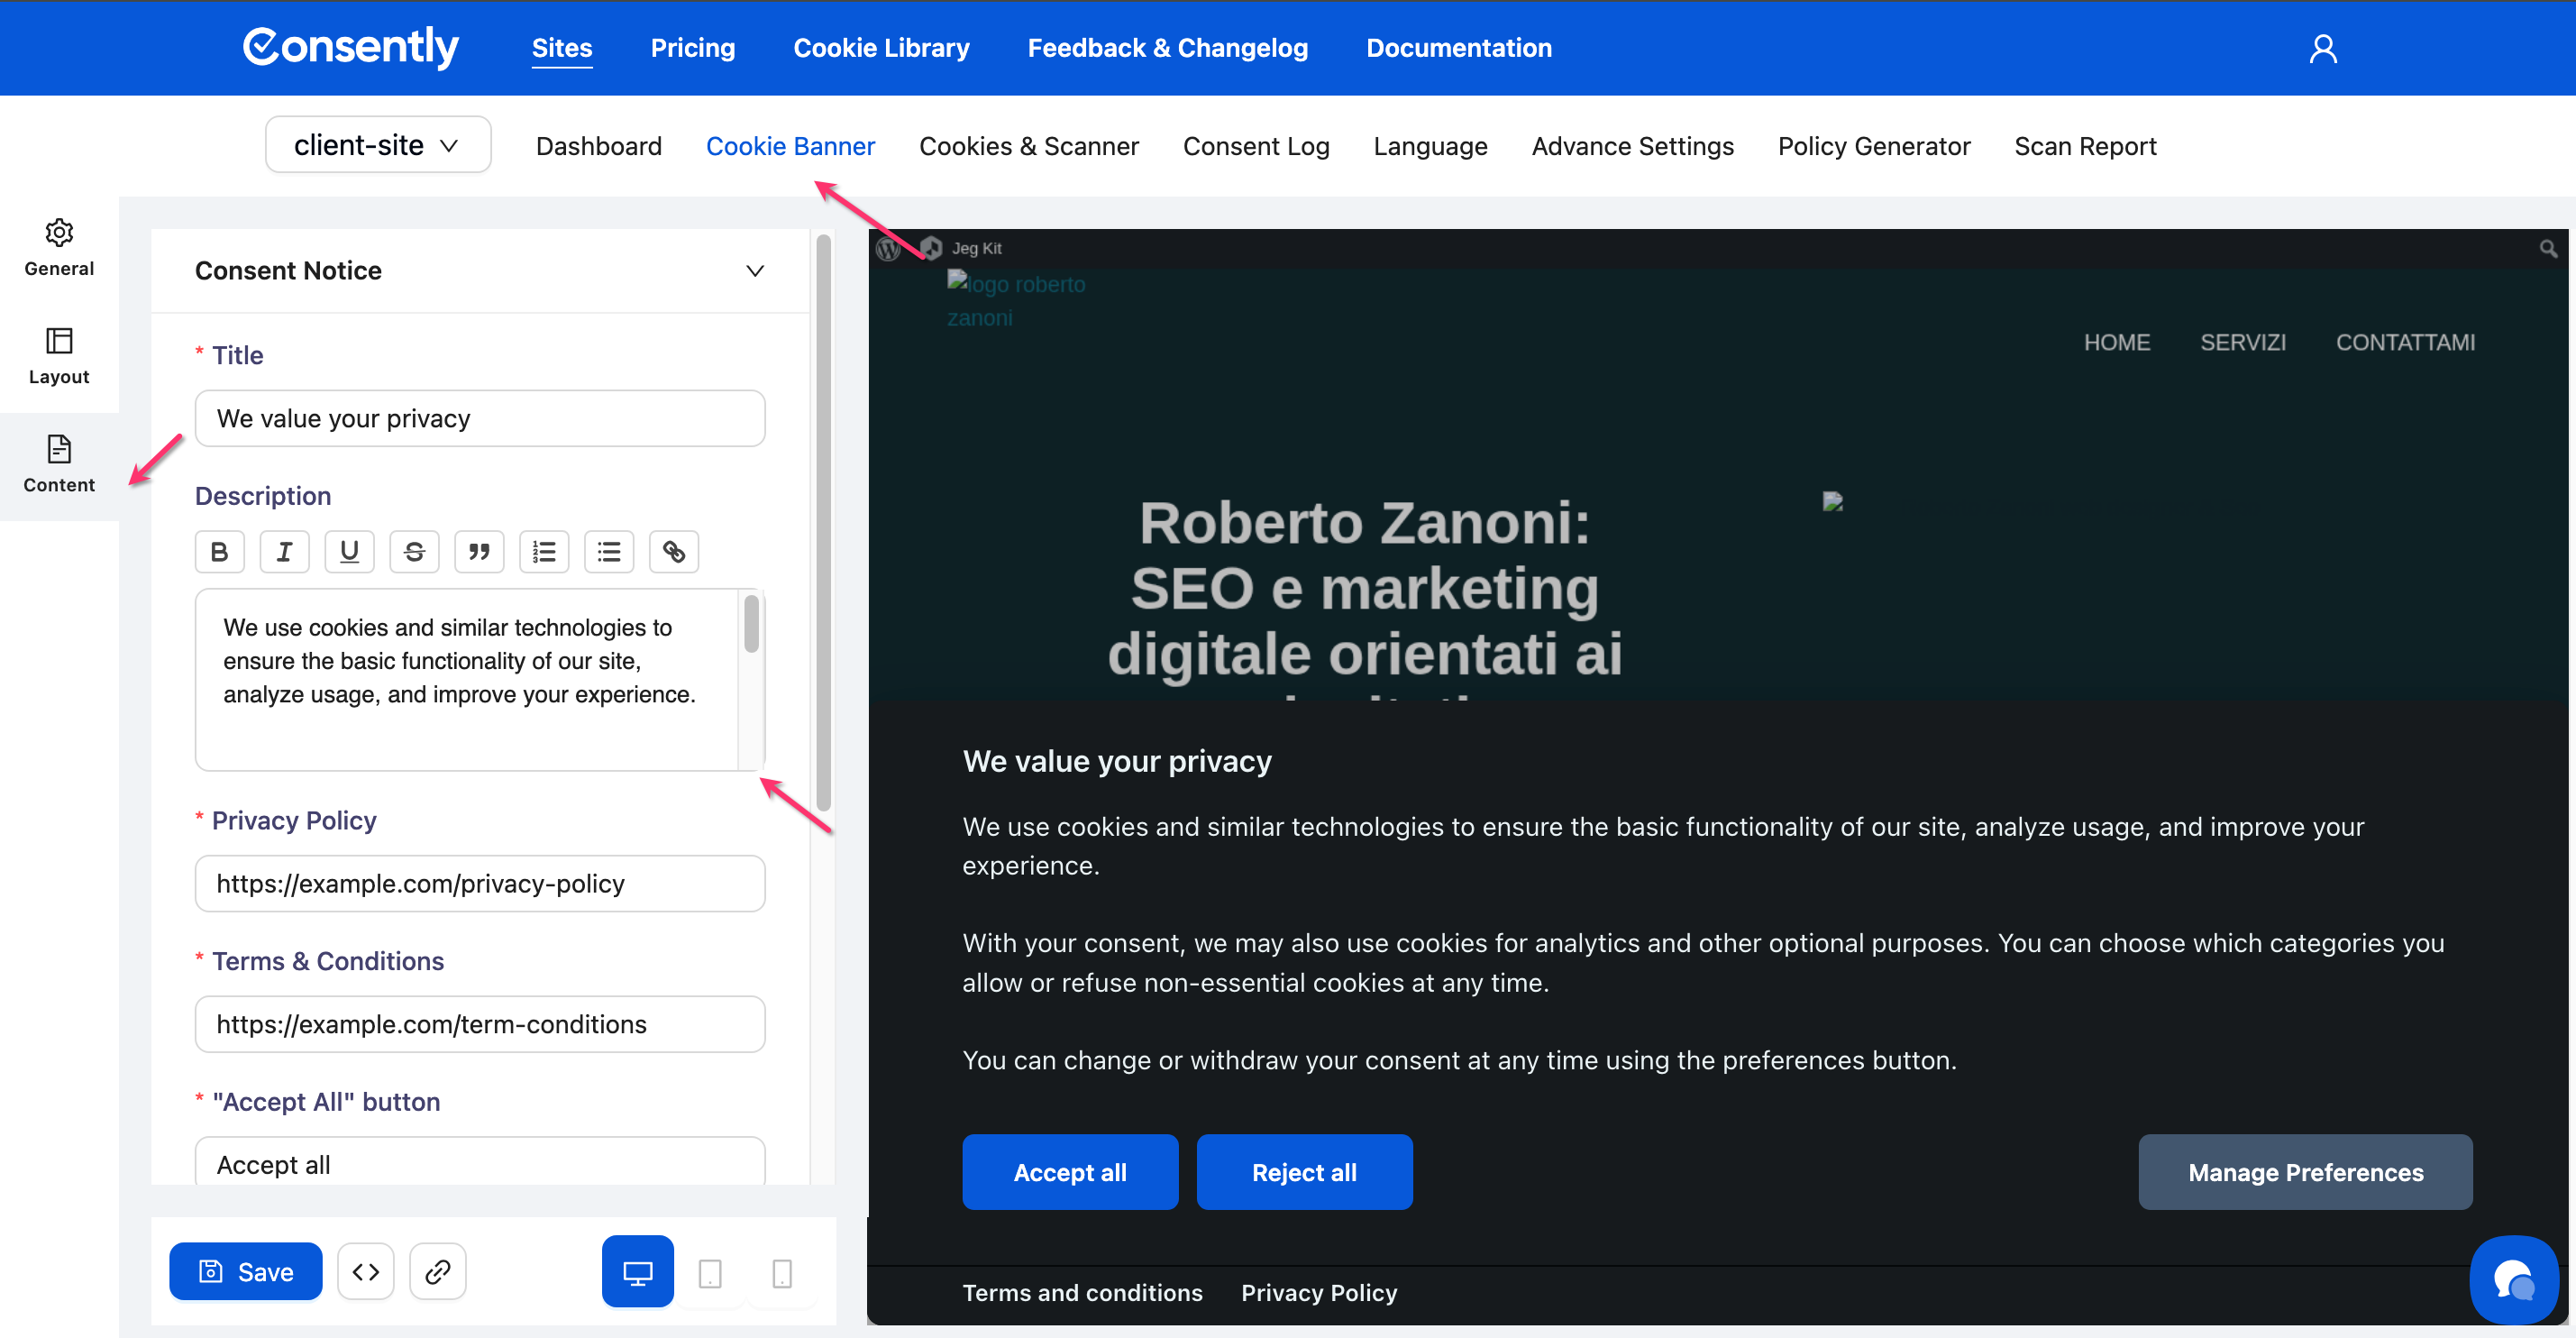
Navigate to Cookie Banner → Content tab → Consent Notice section → Description field. Confirm your description includes the purposes of data collection.
How to fix it
Click inside the Description field and update your text to include clear purpose language. Use the rich text editor to add or modify the description. Full editing instructions are in Customizing Banner Content.
Requirement 2: Google Privacy Policy Link
Your banner must include a visible, clickable link to Google's privacy policy: https://business.safety.google/privacy
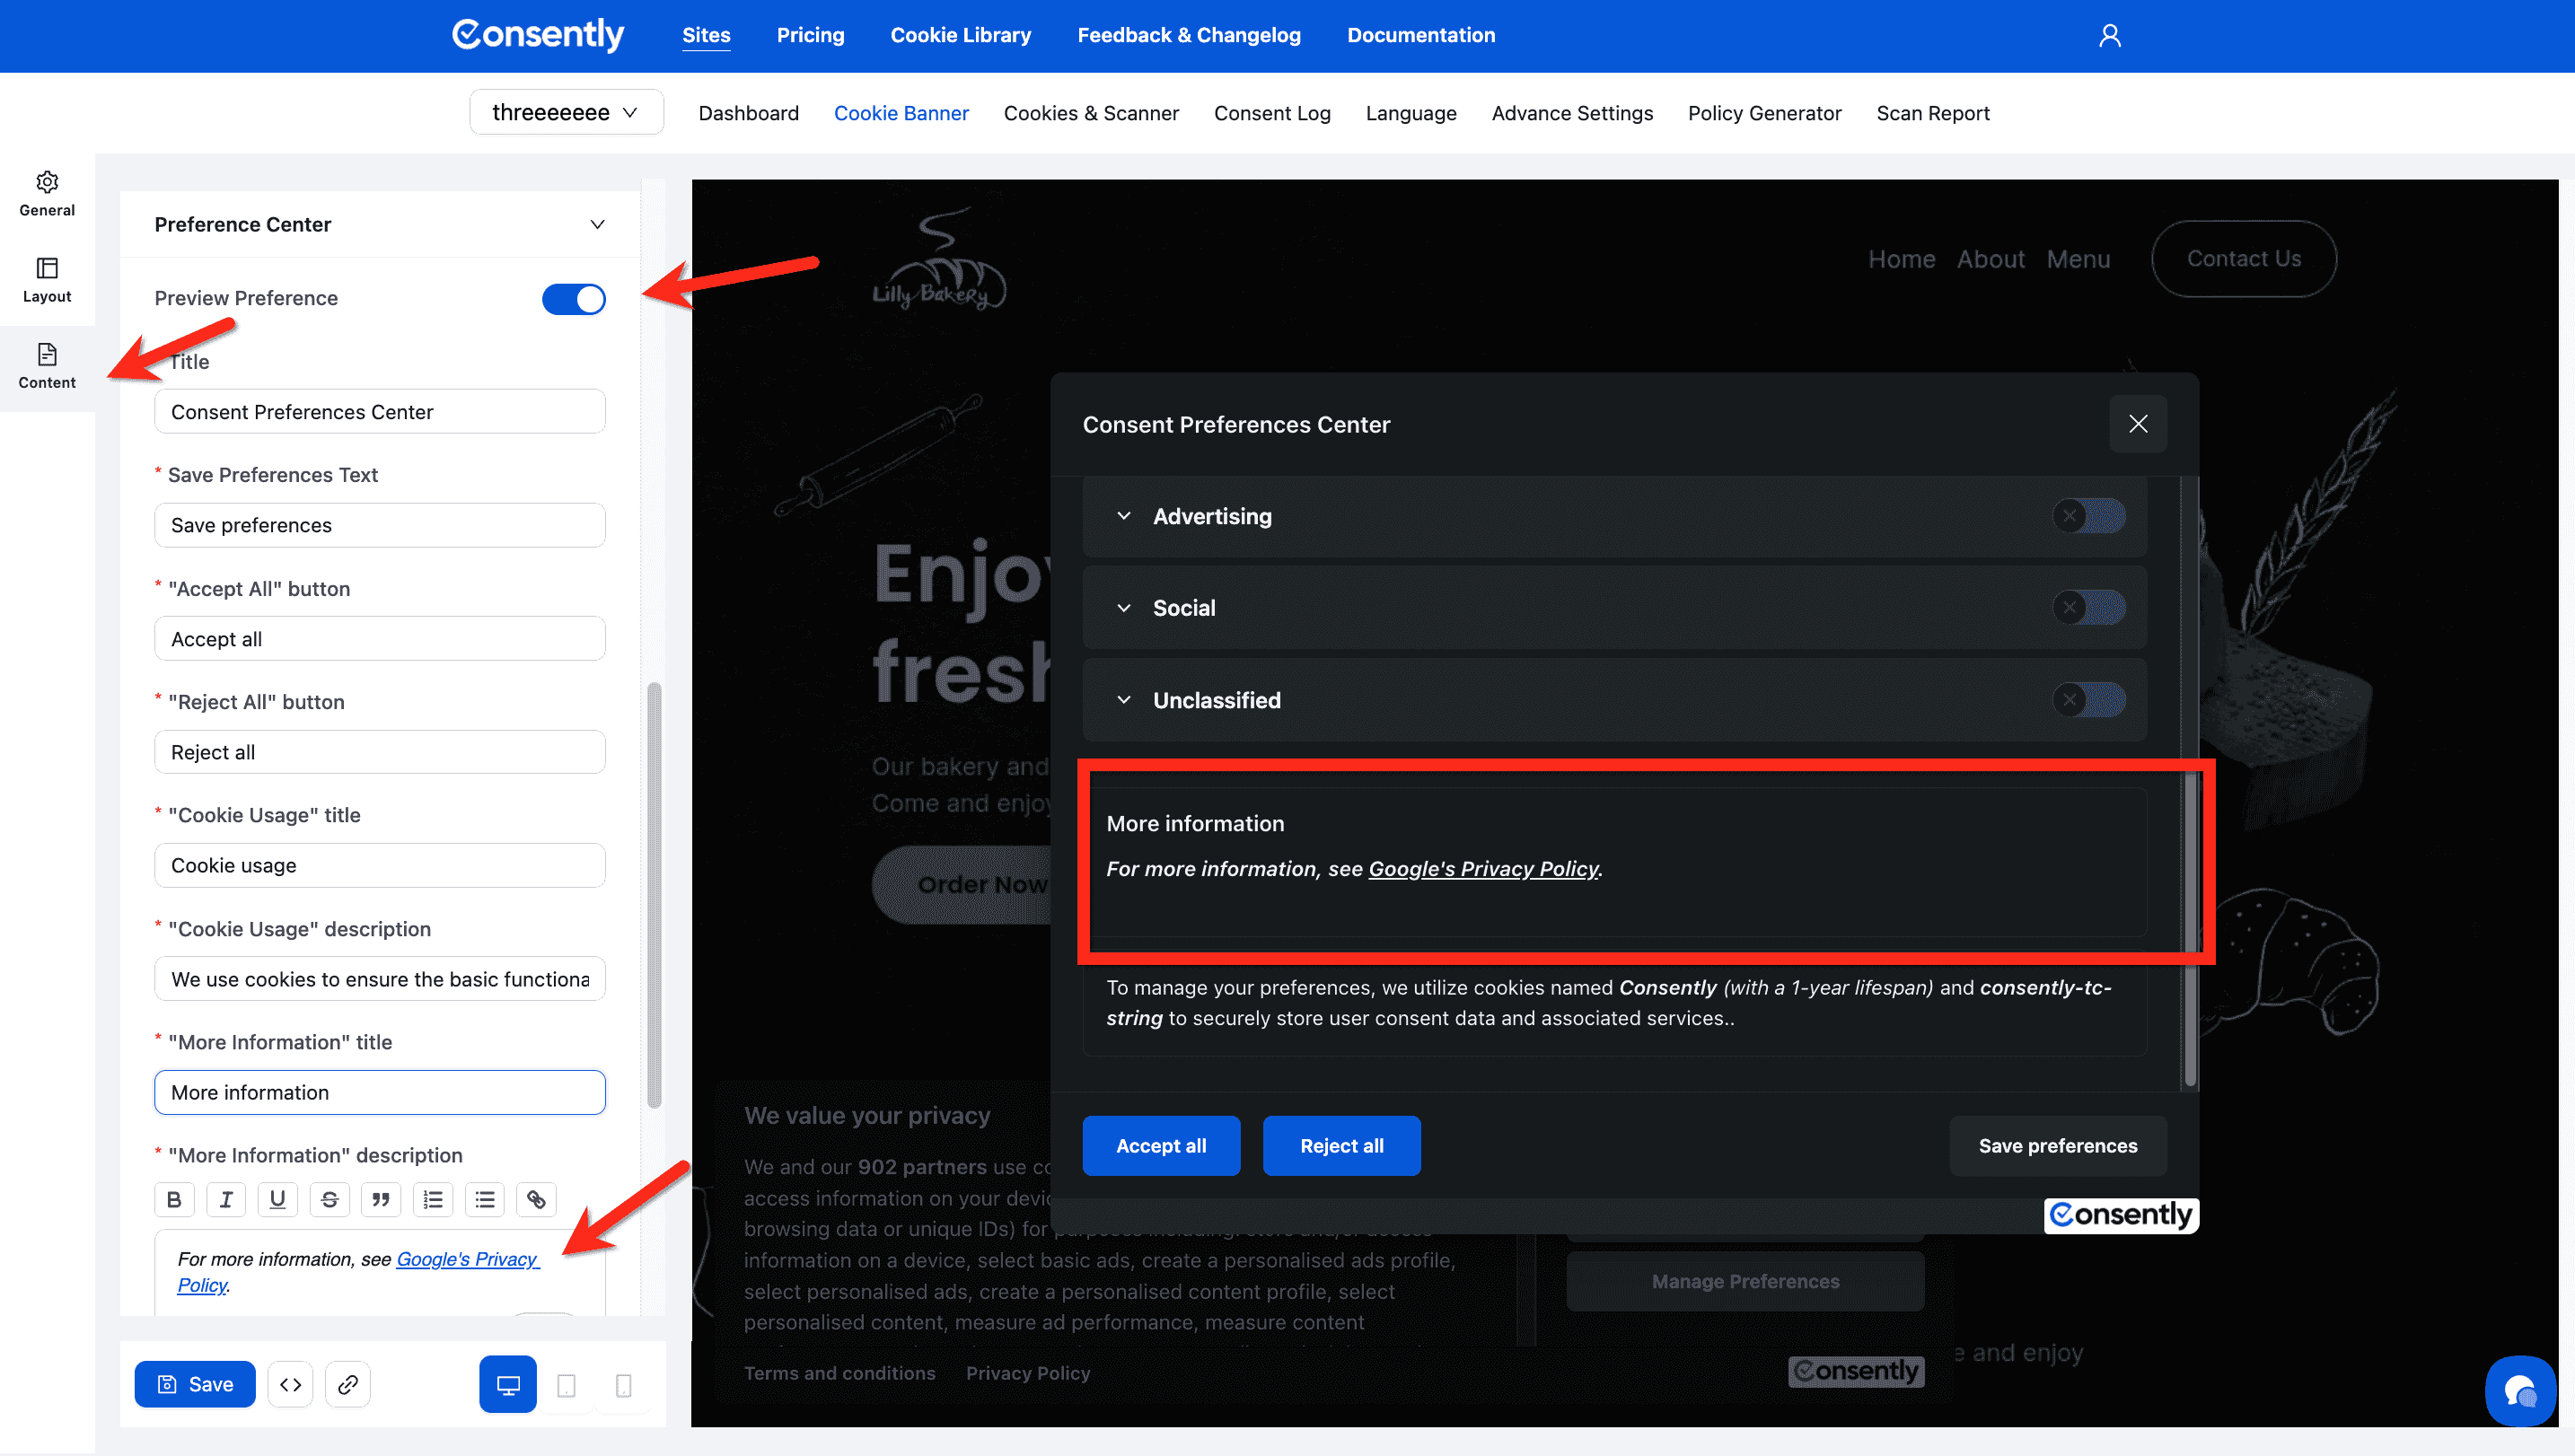
This link must appear in the banner body or in an expandable section (such as your Preference Center). Placing it only on a separate privacy policy page does not satisfy this requirement—it must be accessible directly from the banner itself.
Compliant example:
"...For more information, see Google's Privacy Policy." ← The link is embedded in the banner description.
Non-compliant example:
Banner description contains no Google privacy link. A link exists on the site's Privacy Policy page but is not visible from the banner. ← Fails: not accessible from the banner itself.
How to verify in Consently
Navigate to Cookie Banner → Content tab → Consent Notice section → Description field. Look for a hyperlink pointing to https://business.safety.google/privacy.
How to fix it
Click inside the Description field in the rich text editor
Place your cursor at the appropriate point in your text—typically at the end of your description
Highlight the anchor text (e.g., "Google's Privacy Policy") and click the link icon in the editor toolbar
Enter
https://business.safety.google/privacyas the URL and save
Requirement 3: Affirmative Consent Button
Your banner must include an Accept All or Yes button that is at least as visually prominent as any decline or reject option. Pre-checked boxes are not an acceptable substitute for an explicit button.
Compliant example:
Banner shows Accept All and Reject All buttons side by side at equal size with equal visual weight. ← Passes: explicit buttons, equal prominence.
Non-compliant examples:
Accept All button is large and brightly colored; Reject All is styled as a small grey text link. ← Fails: unequal prominence.
Banner uses pre-checked category checkboxes with a Save button but no Accept All button. ← Fails: pre-checked consent is not affirmative consent.
No Accept All button—only Manage Preferences and Close. ← Fails: no affirmative consent path.
How to verify in Consently
Navigate to Cookie Banner → Layout tab and confirm the Accept All button is enabled. Then navigate to the Design tab and check that your Accept All and Reject All button styling values are equivalent in size, weight, and visual contrast.
See Designing Your Banner for the full button styling reference.
How to fix it
If your Accept All button is visually de-emphasized compared to Reject All, update both buttons to use matching background colors, text sizes, and border styles in the Design tab. The goal is that a visitor cannot tell which button is the "preferred" choice based on visual styling alone.
Consently's Default GDPR Template
Consently's GDPR template satisfies all three Google requirements out of the box:
Requirement | Default GDPR template status |
|---|---|
Data collection explanation | ✅ Default description includes purpose language for analytics and personalization |
Google Privacy Policy link | ✅ Google's privacy link is pre-inserted in the description |
Affirmative consent button | ✅ Accept All and Reject All buttons are rendered at equal prominence by default |
💡 Tip: If you started from the GDPR template and haven't heavily customized your description text, your banner is likely already compliant. Use Preview Modes to visually review your banner across desktop and mobile before publishing.
If you reset or replaced your banner description, you may have removed the default Google privacy link. Run through the three verification steps above to confirm all requirements are still in place.
Google Compliance Checklist
Before publishing your banner, confirm the following:
Banner description mentions data is used for personalization and analytics
A visible hyperlink to
https://business.safety.google/privacyis present in the banner body or Preference CenterAn Accept All button exists and is at least as prominent as any reject or decline option
No cookie categories are pre-checked
Banner is active and embedded on your live site
What's Next
Now that your banner meets Google's requirements, you should:
Publish Your Banner — Make your verified banner live on your site
Google Consent Mode v2 — Ensure consent signals are being passed correctly to Google Analytics and Google Ads
Troubleshooting
My banner passed internal review but Google flagged it in their audit
Why this happens: Google's automated audit checks the live rendered banner on your website, not the Consently preview. If your embed script isn't installed or your banner isn't publishing correctly, Google sees no banner at all.
Solution:
Confirm your embed script is installed and active — see Embedding the Banner Script
Verify the banner is live by visiting your website in a private/incognito browser window
Re-run the Google compliance check after confirming the banner is visible
The Google privacy link works in preview but shows a broken URL on the live site
Why this happens: The URL may have been entered with a typo, or your CMS may be stripping or encoding the link on publish.
Solution:
Navigate to Cookie Banner → Content → Description field
Click on the Google privacy link in the rich text editor and confirm the URL reads exactly
https://business.safety.google/privacyDelete and re-enter the link if needed, then republish
Related Pages
Certifications — Consently's Google CMP certification and what it means for your audit eligibility
Basic vs. Advanced Google Consent Mode — Choosing how Google tags behave before and after consent