

TL;DR: For single page → Page editor → Settings → Tracking code → Paste in Header → Save. For entire funnel → Profile → Settings → Sales funnels → Tracking code → Paste → Save.
Overview
Systeme.io offers two ways to install the Consently script: on a single page or across all pages in a sales funnel. The script loads automatically on every page where it's installed, displaying your consent banner to visitors.
Before You Begin
Make sure you have:
Access to your systeme.io account with editor permissions
Your page or sales funnel created in systeme.io
Time required: 2 minutes
How to Install on a Single Page
Use this method when you only want the consent banner on one specific page.
Step 1: Open your page editor
Navigate to the page where you want to add the consent banner and open it in the systeme.io editor.
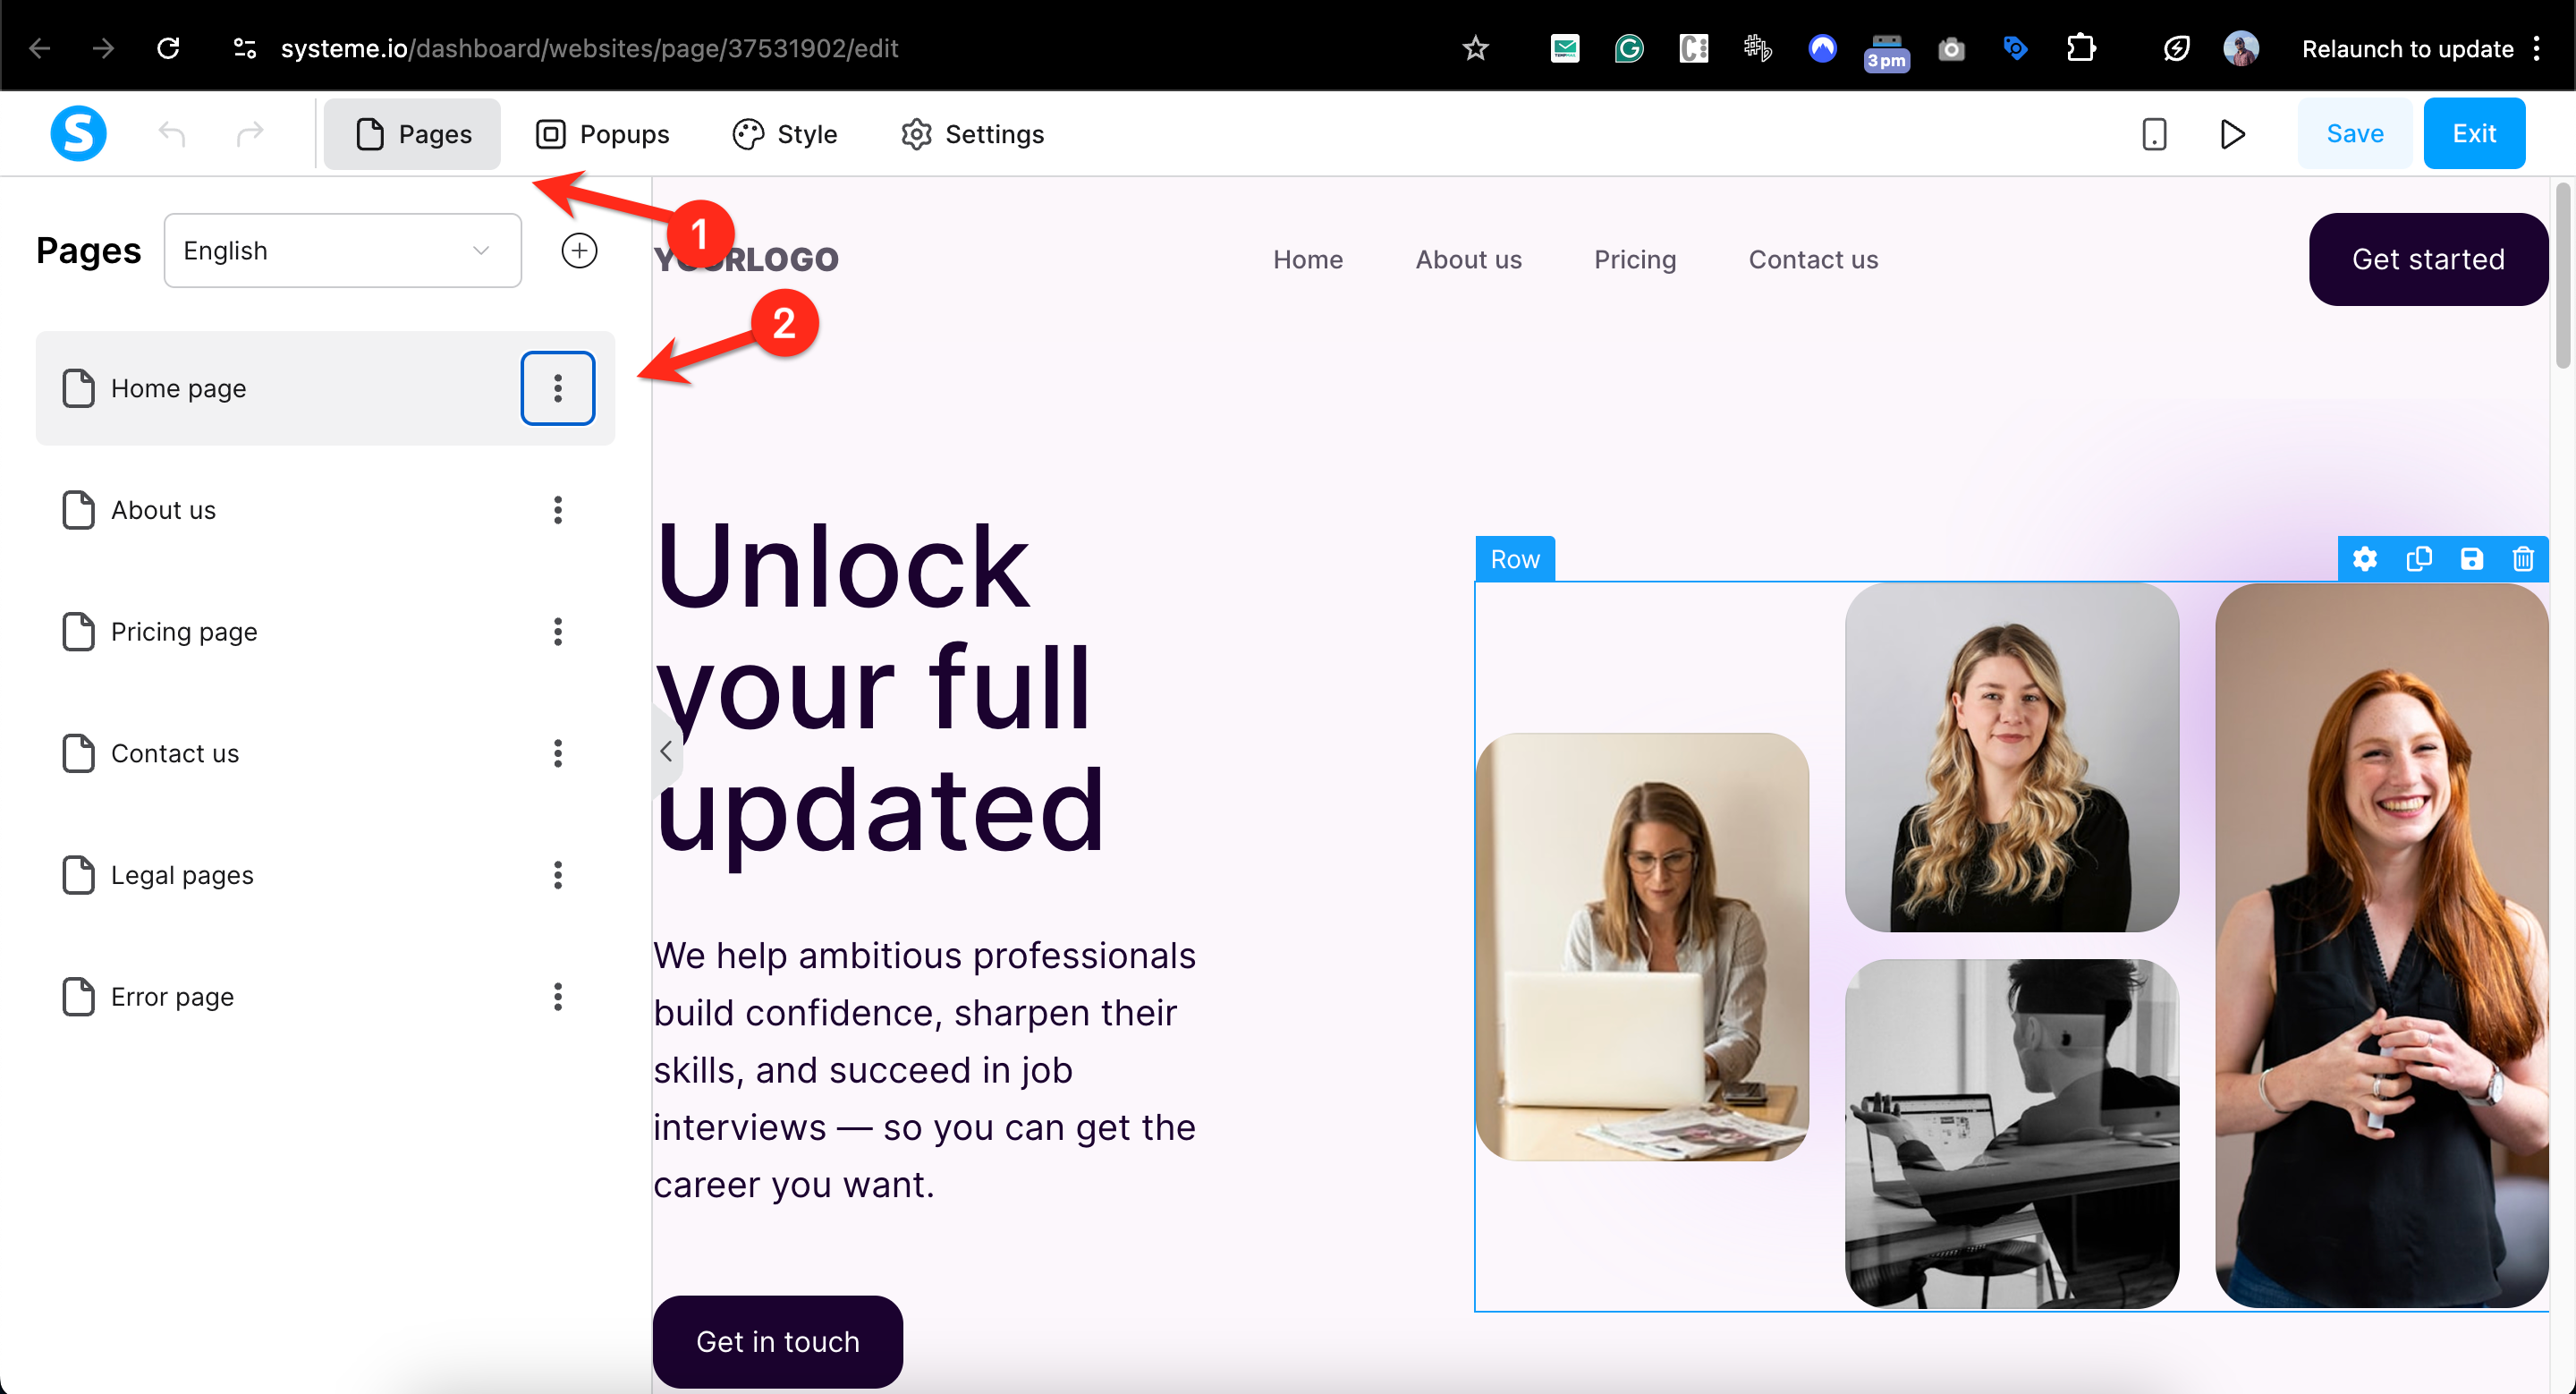
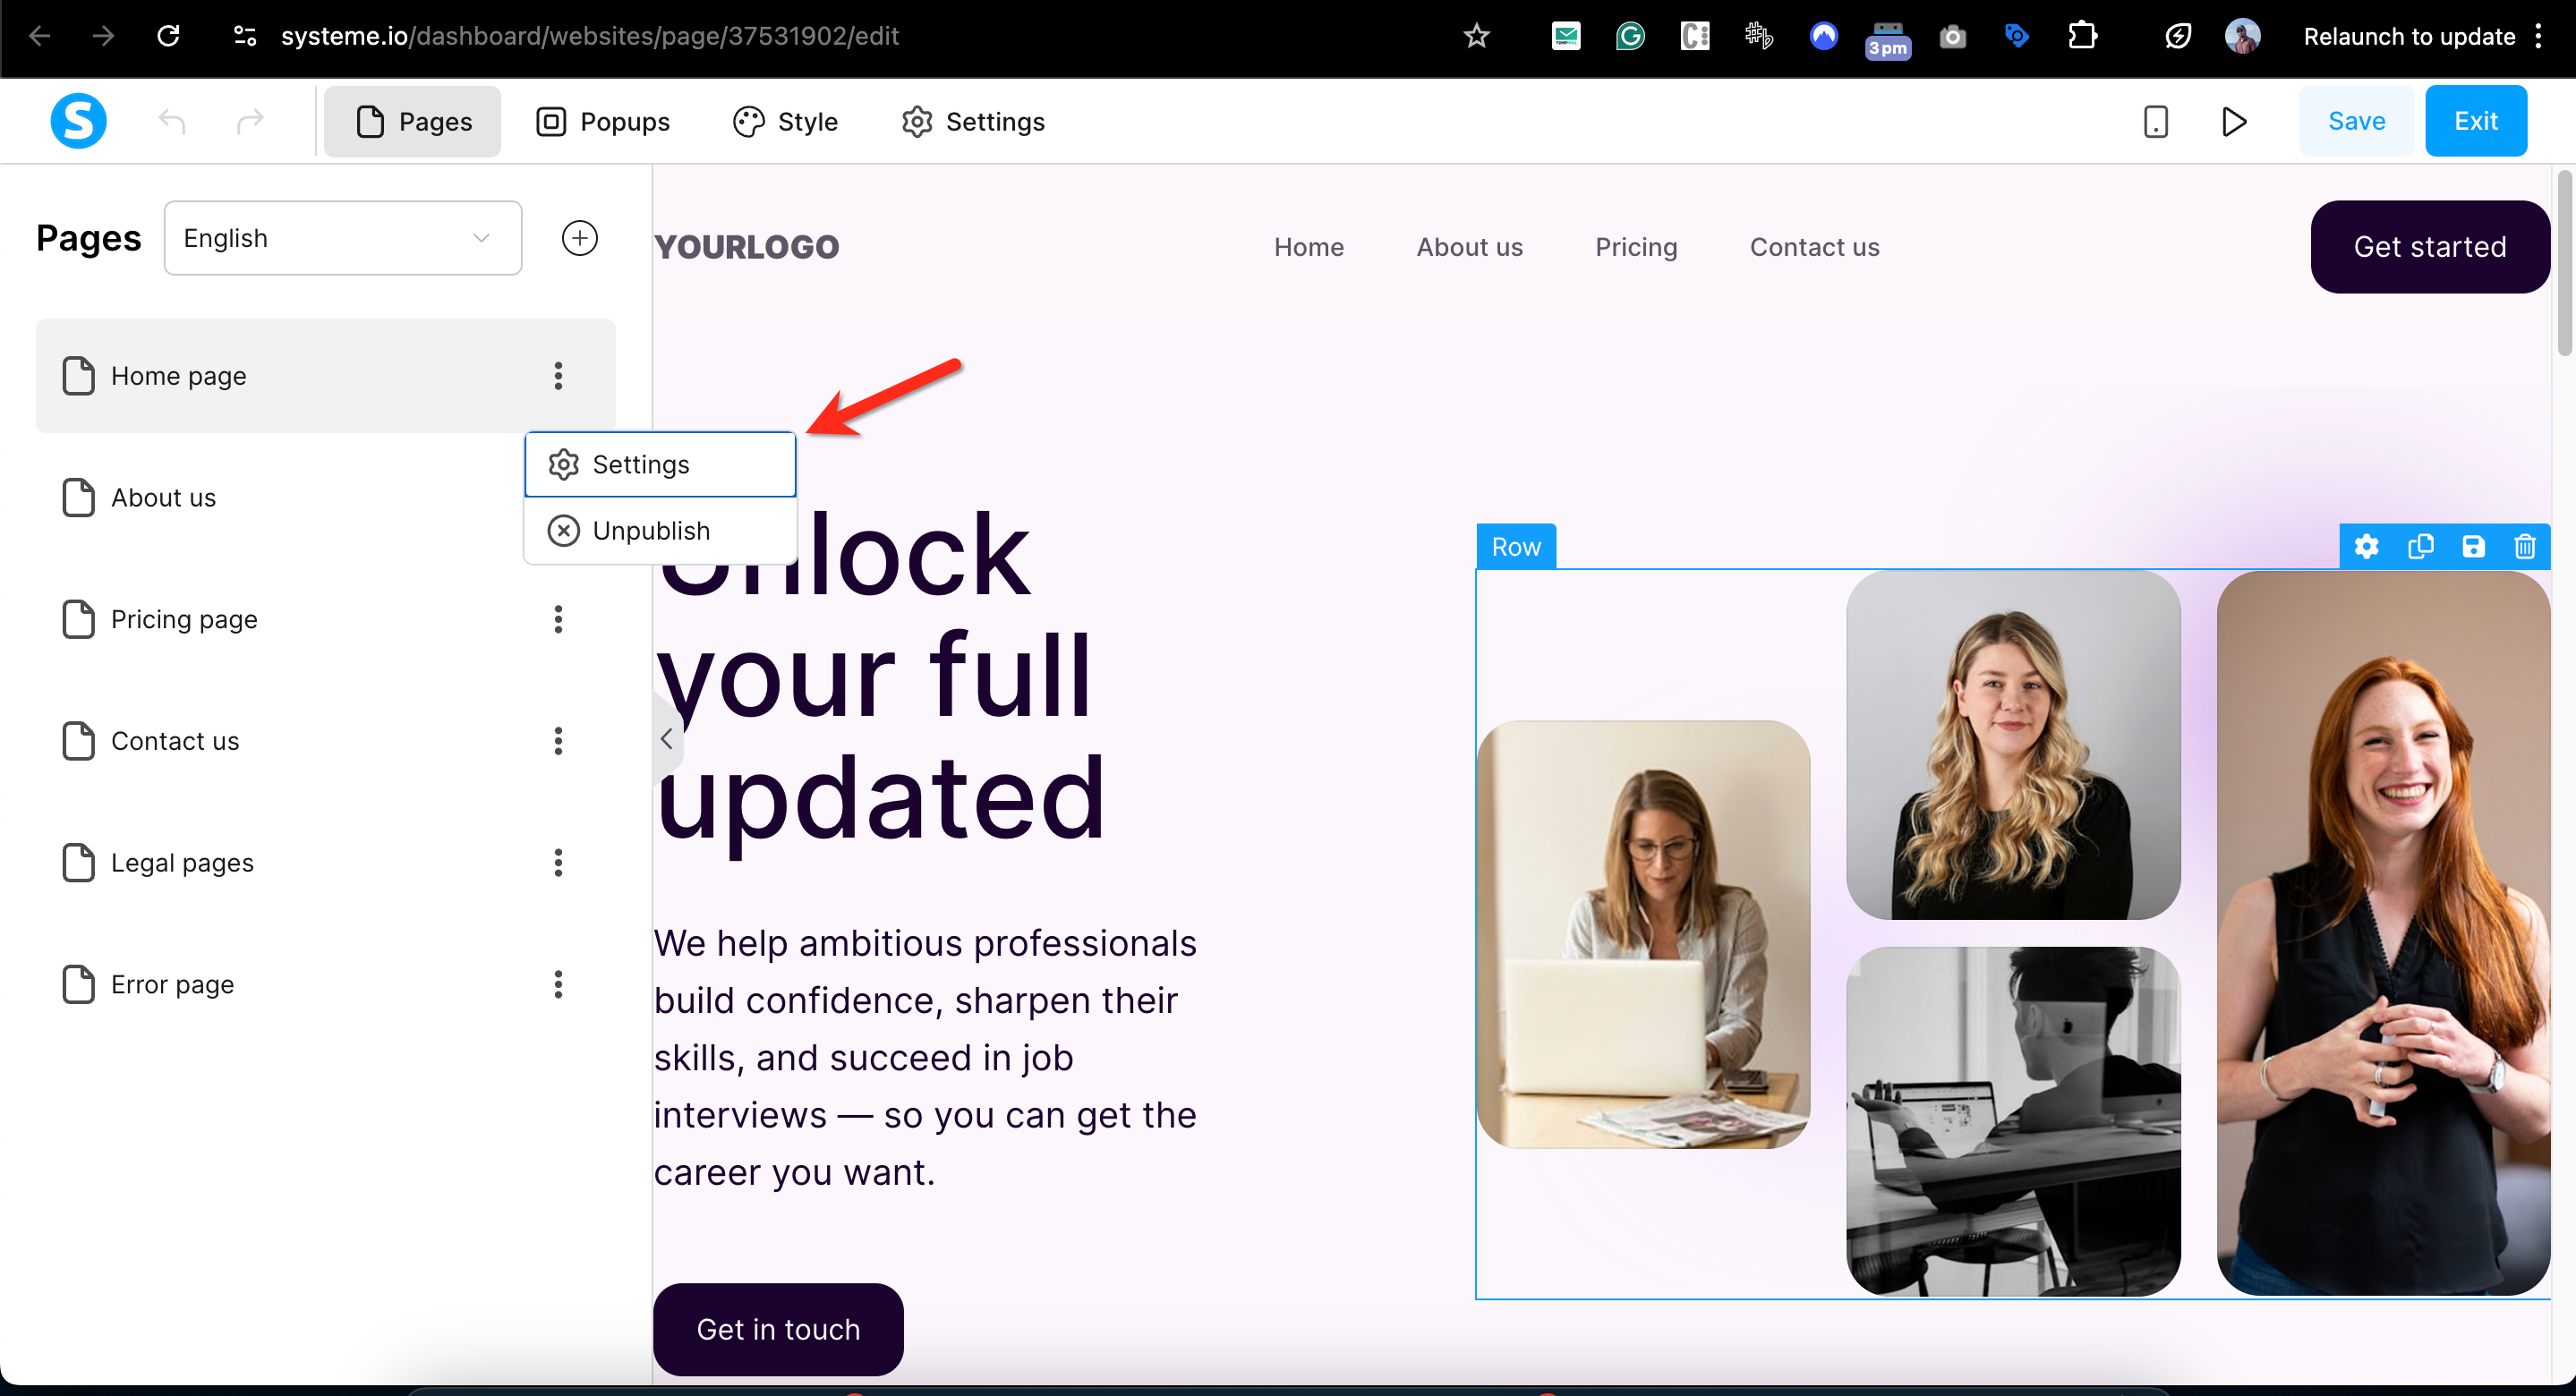
Step 2: Access page settings
Click Settings in the top left corner of the editor.
Step 3: Find the Tracking code section
Scroll down in the Settings panel until you see the Advanced > Tracking code section.
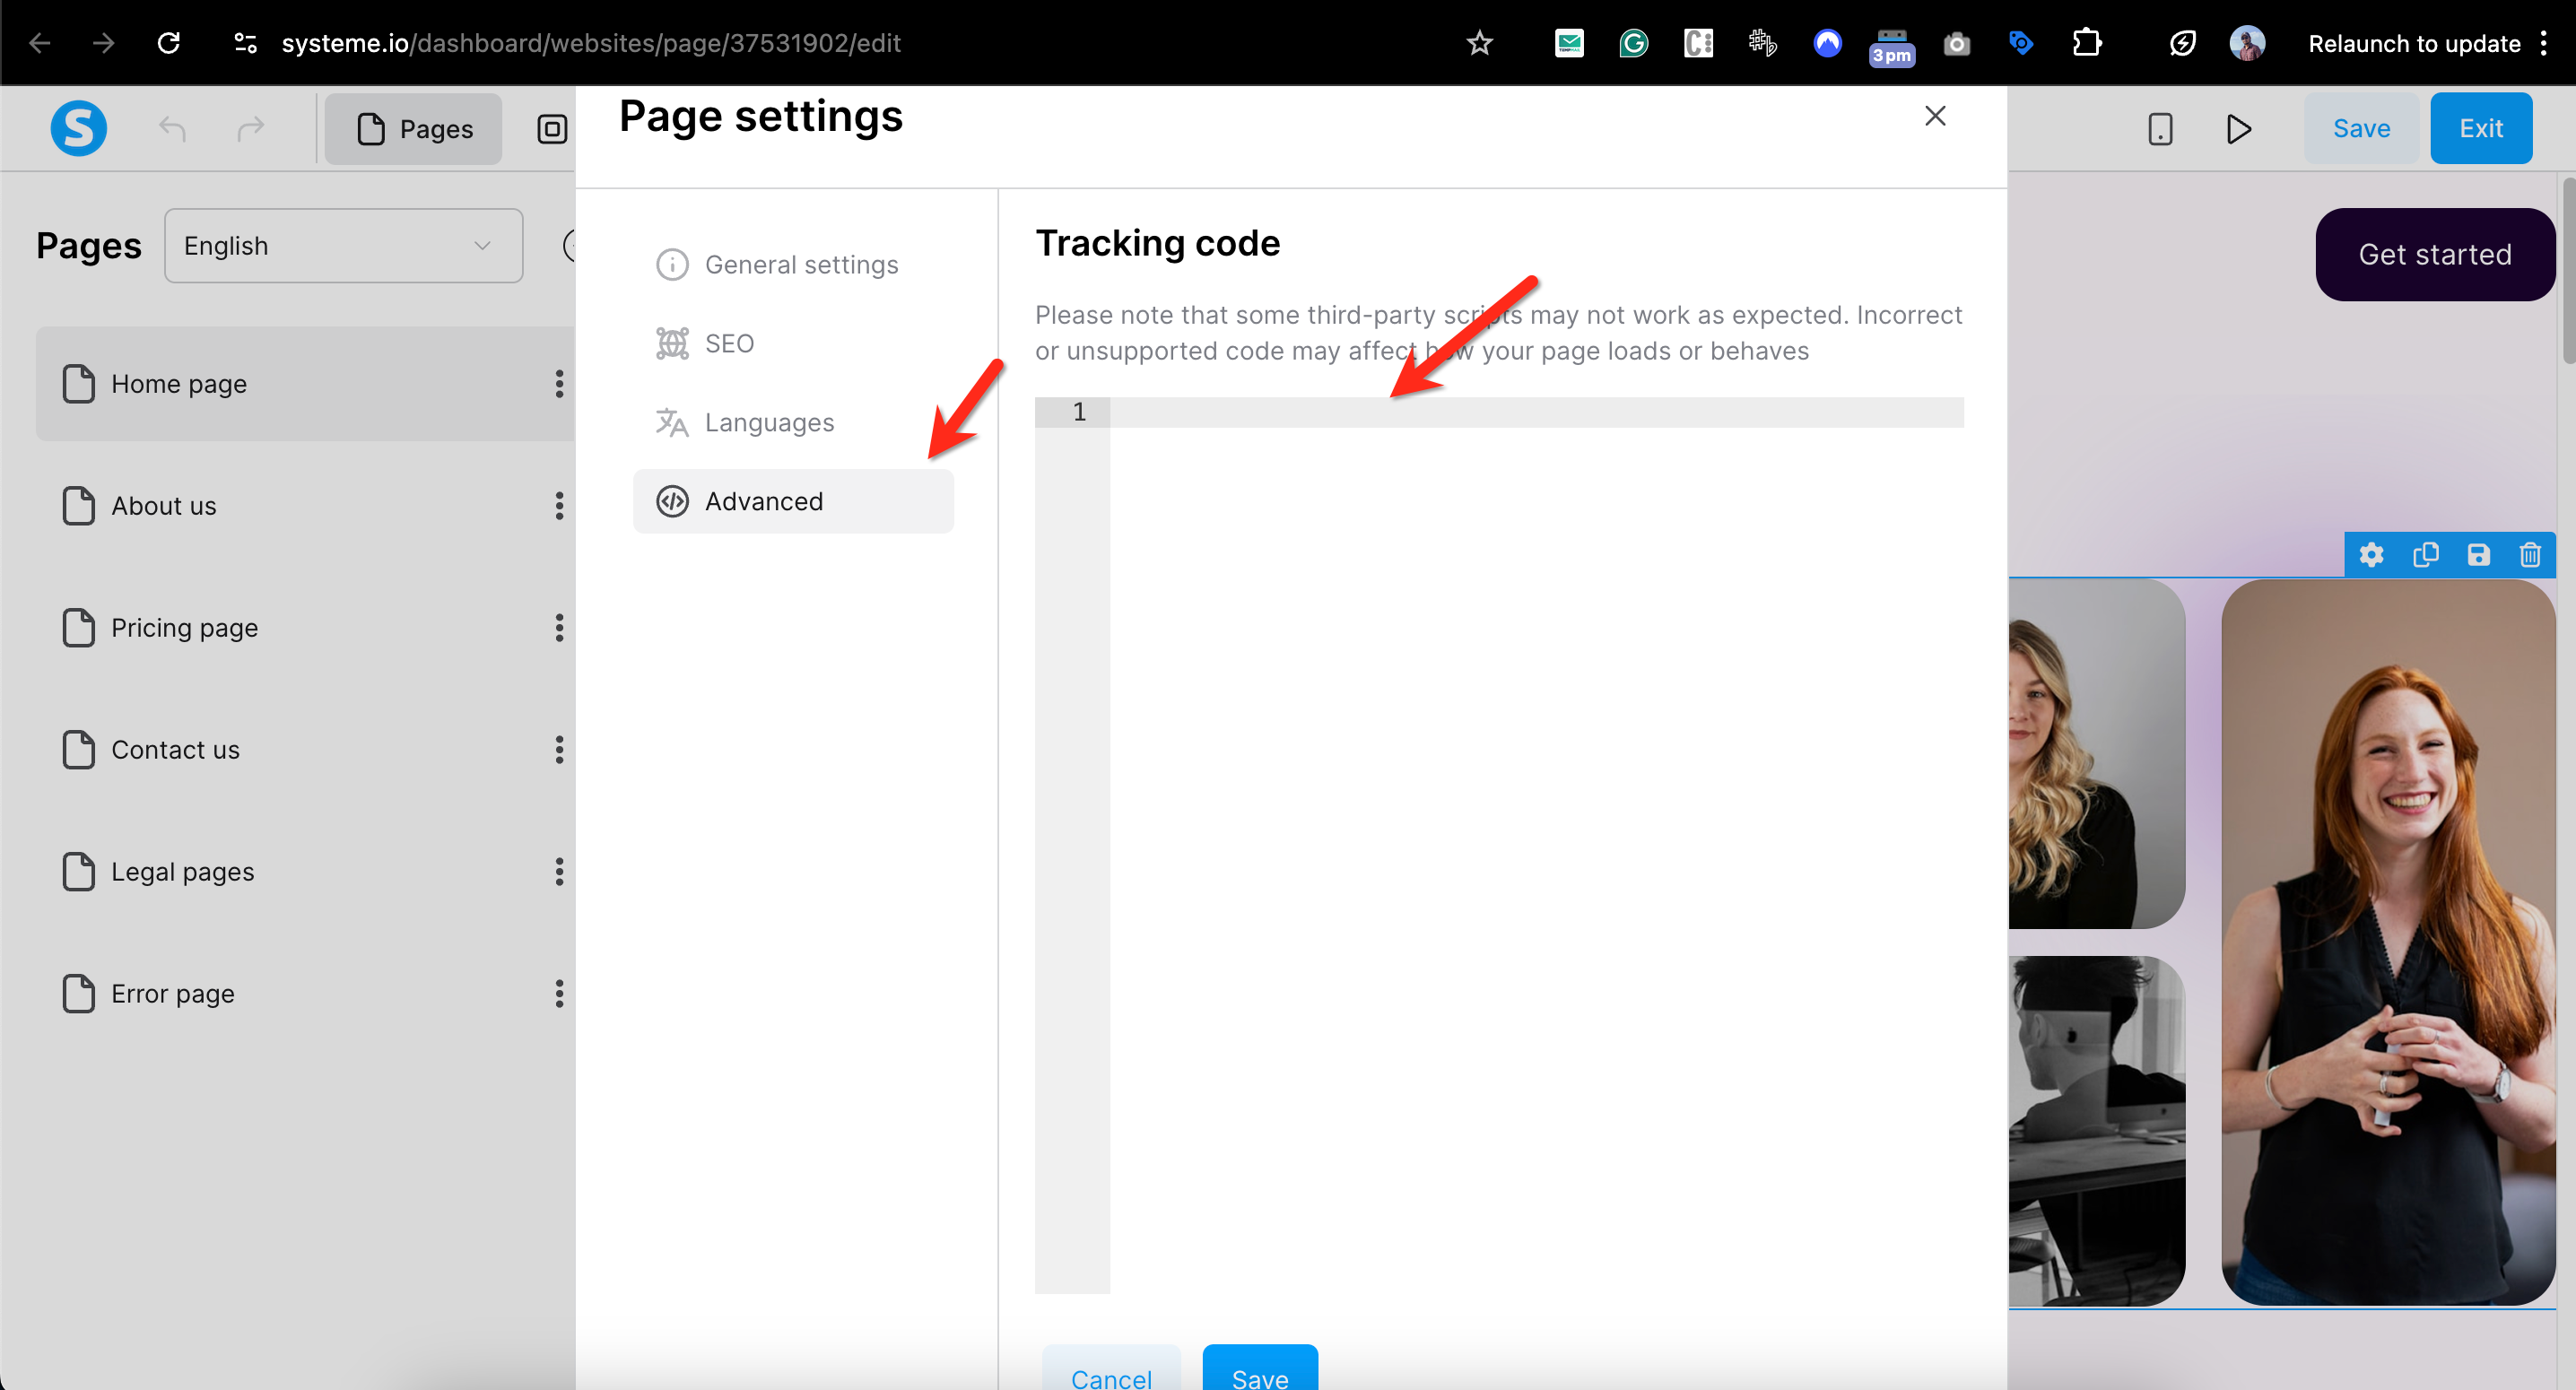
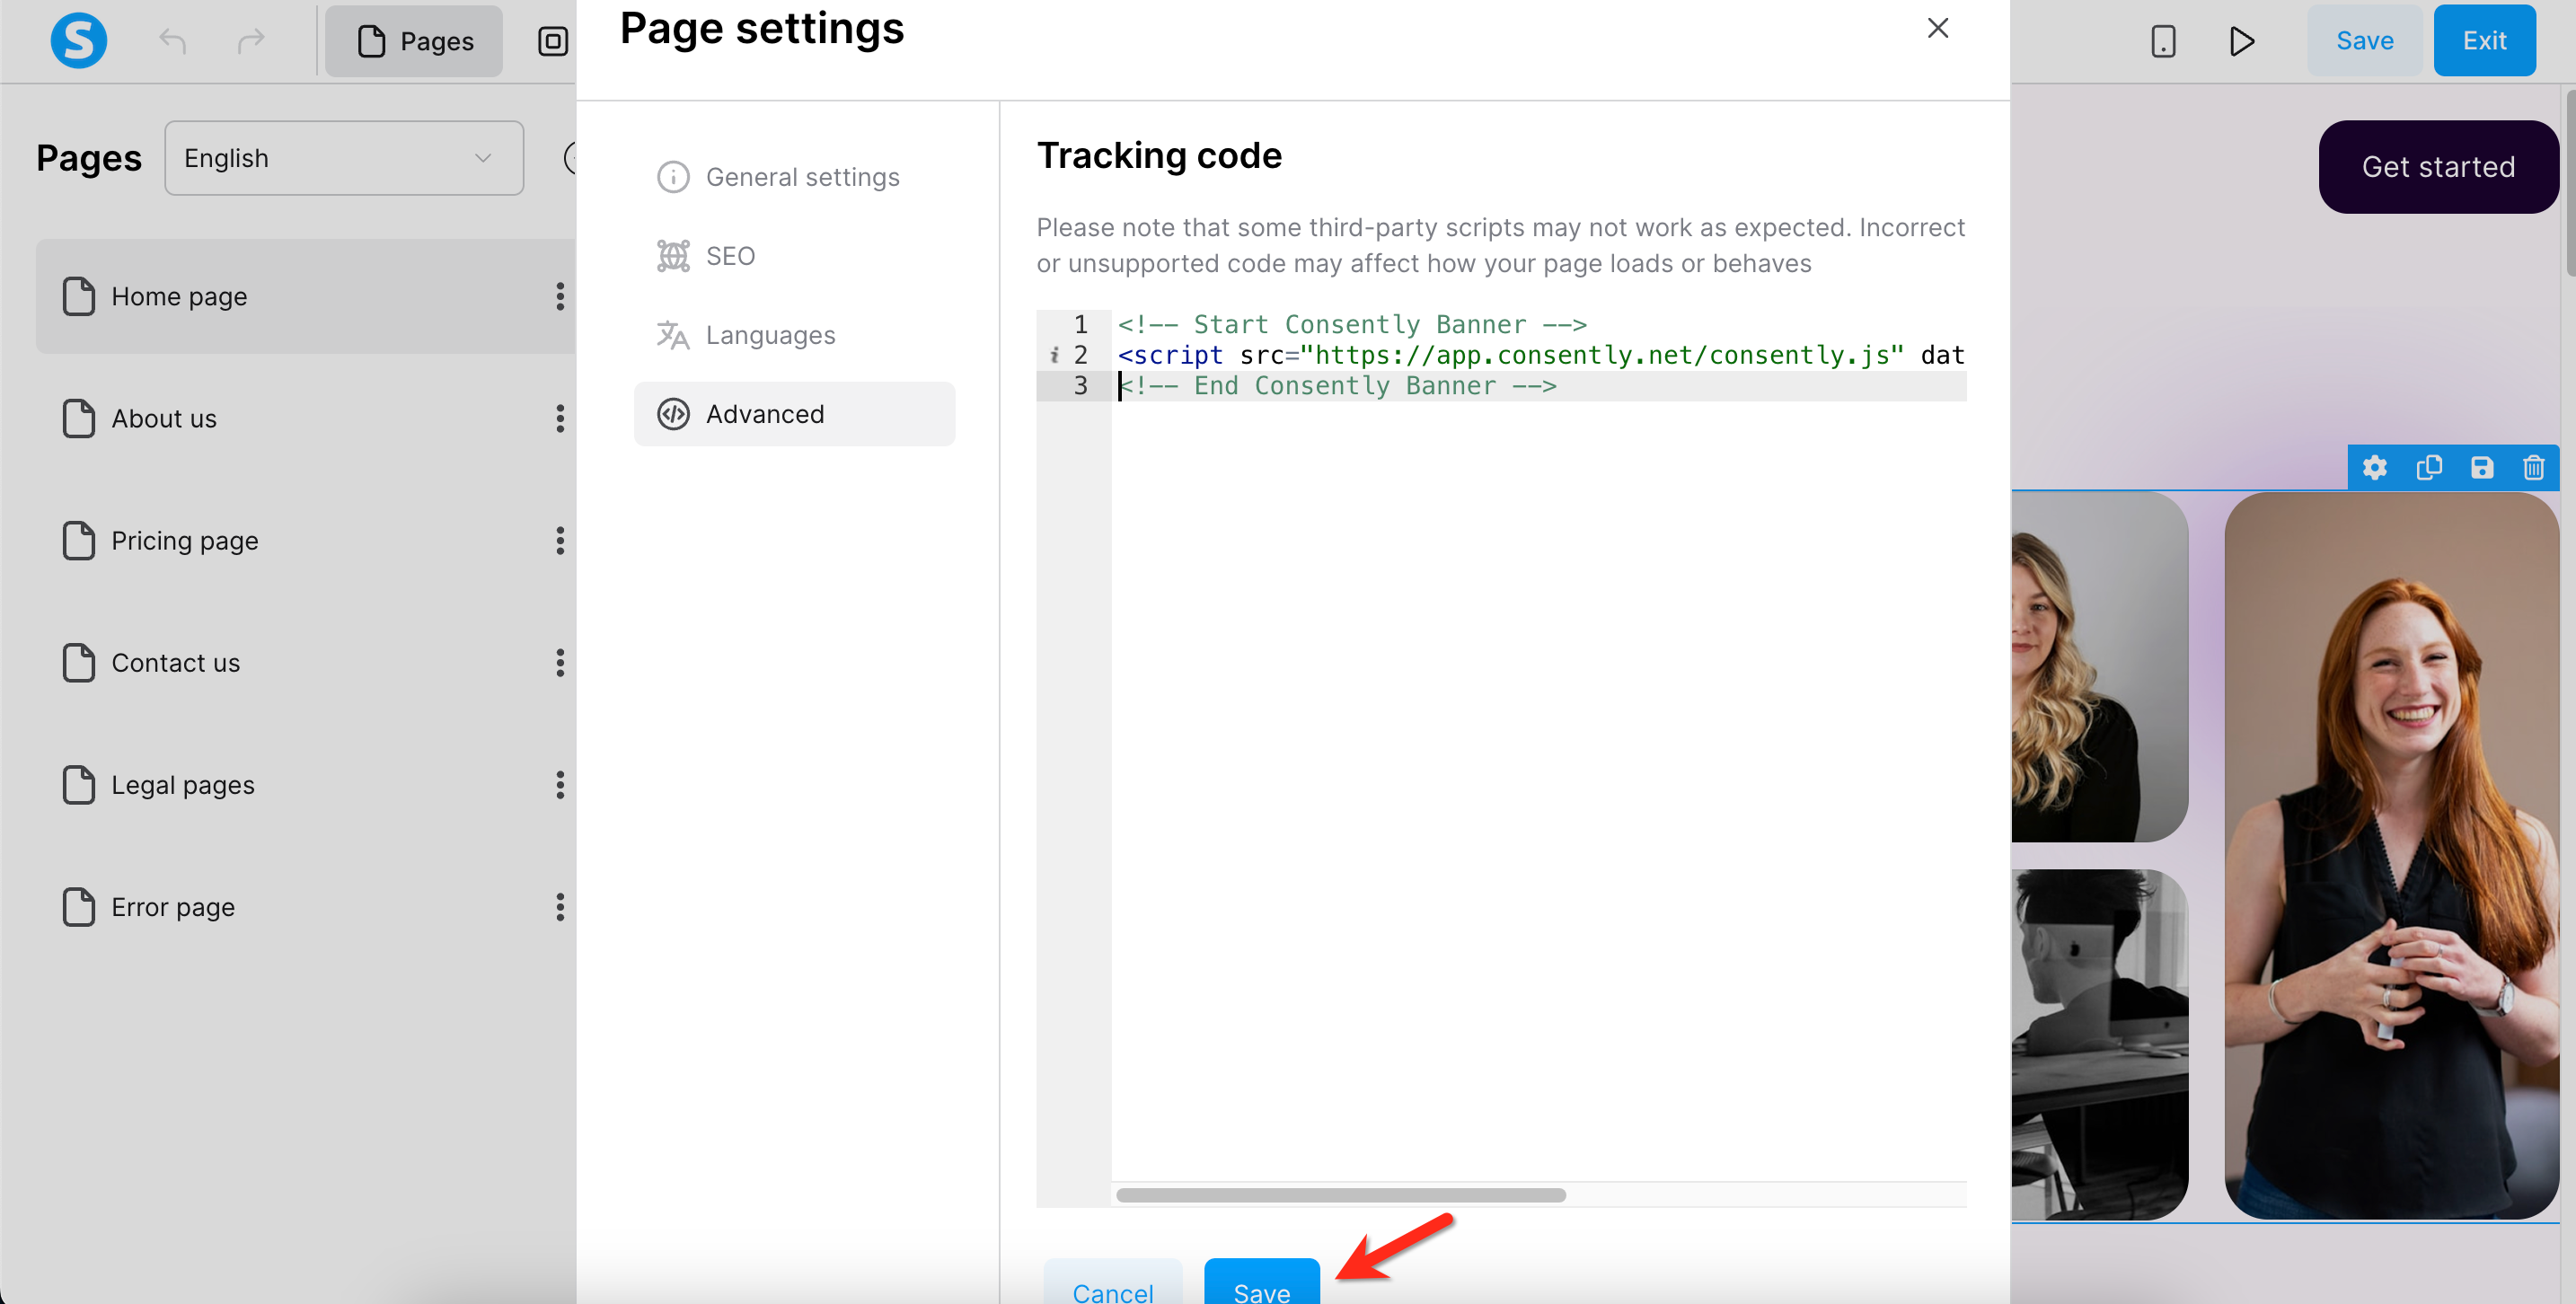
Step 4: Paste your Consently script
Paste your Consently embed script into the Header field within the Tracking code section.
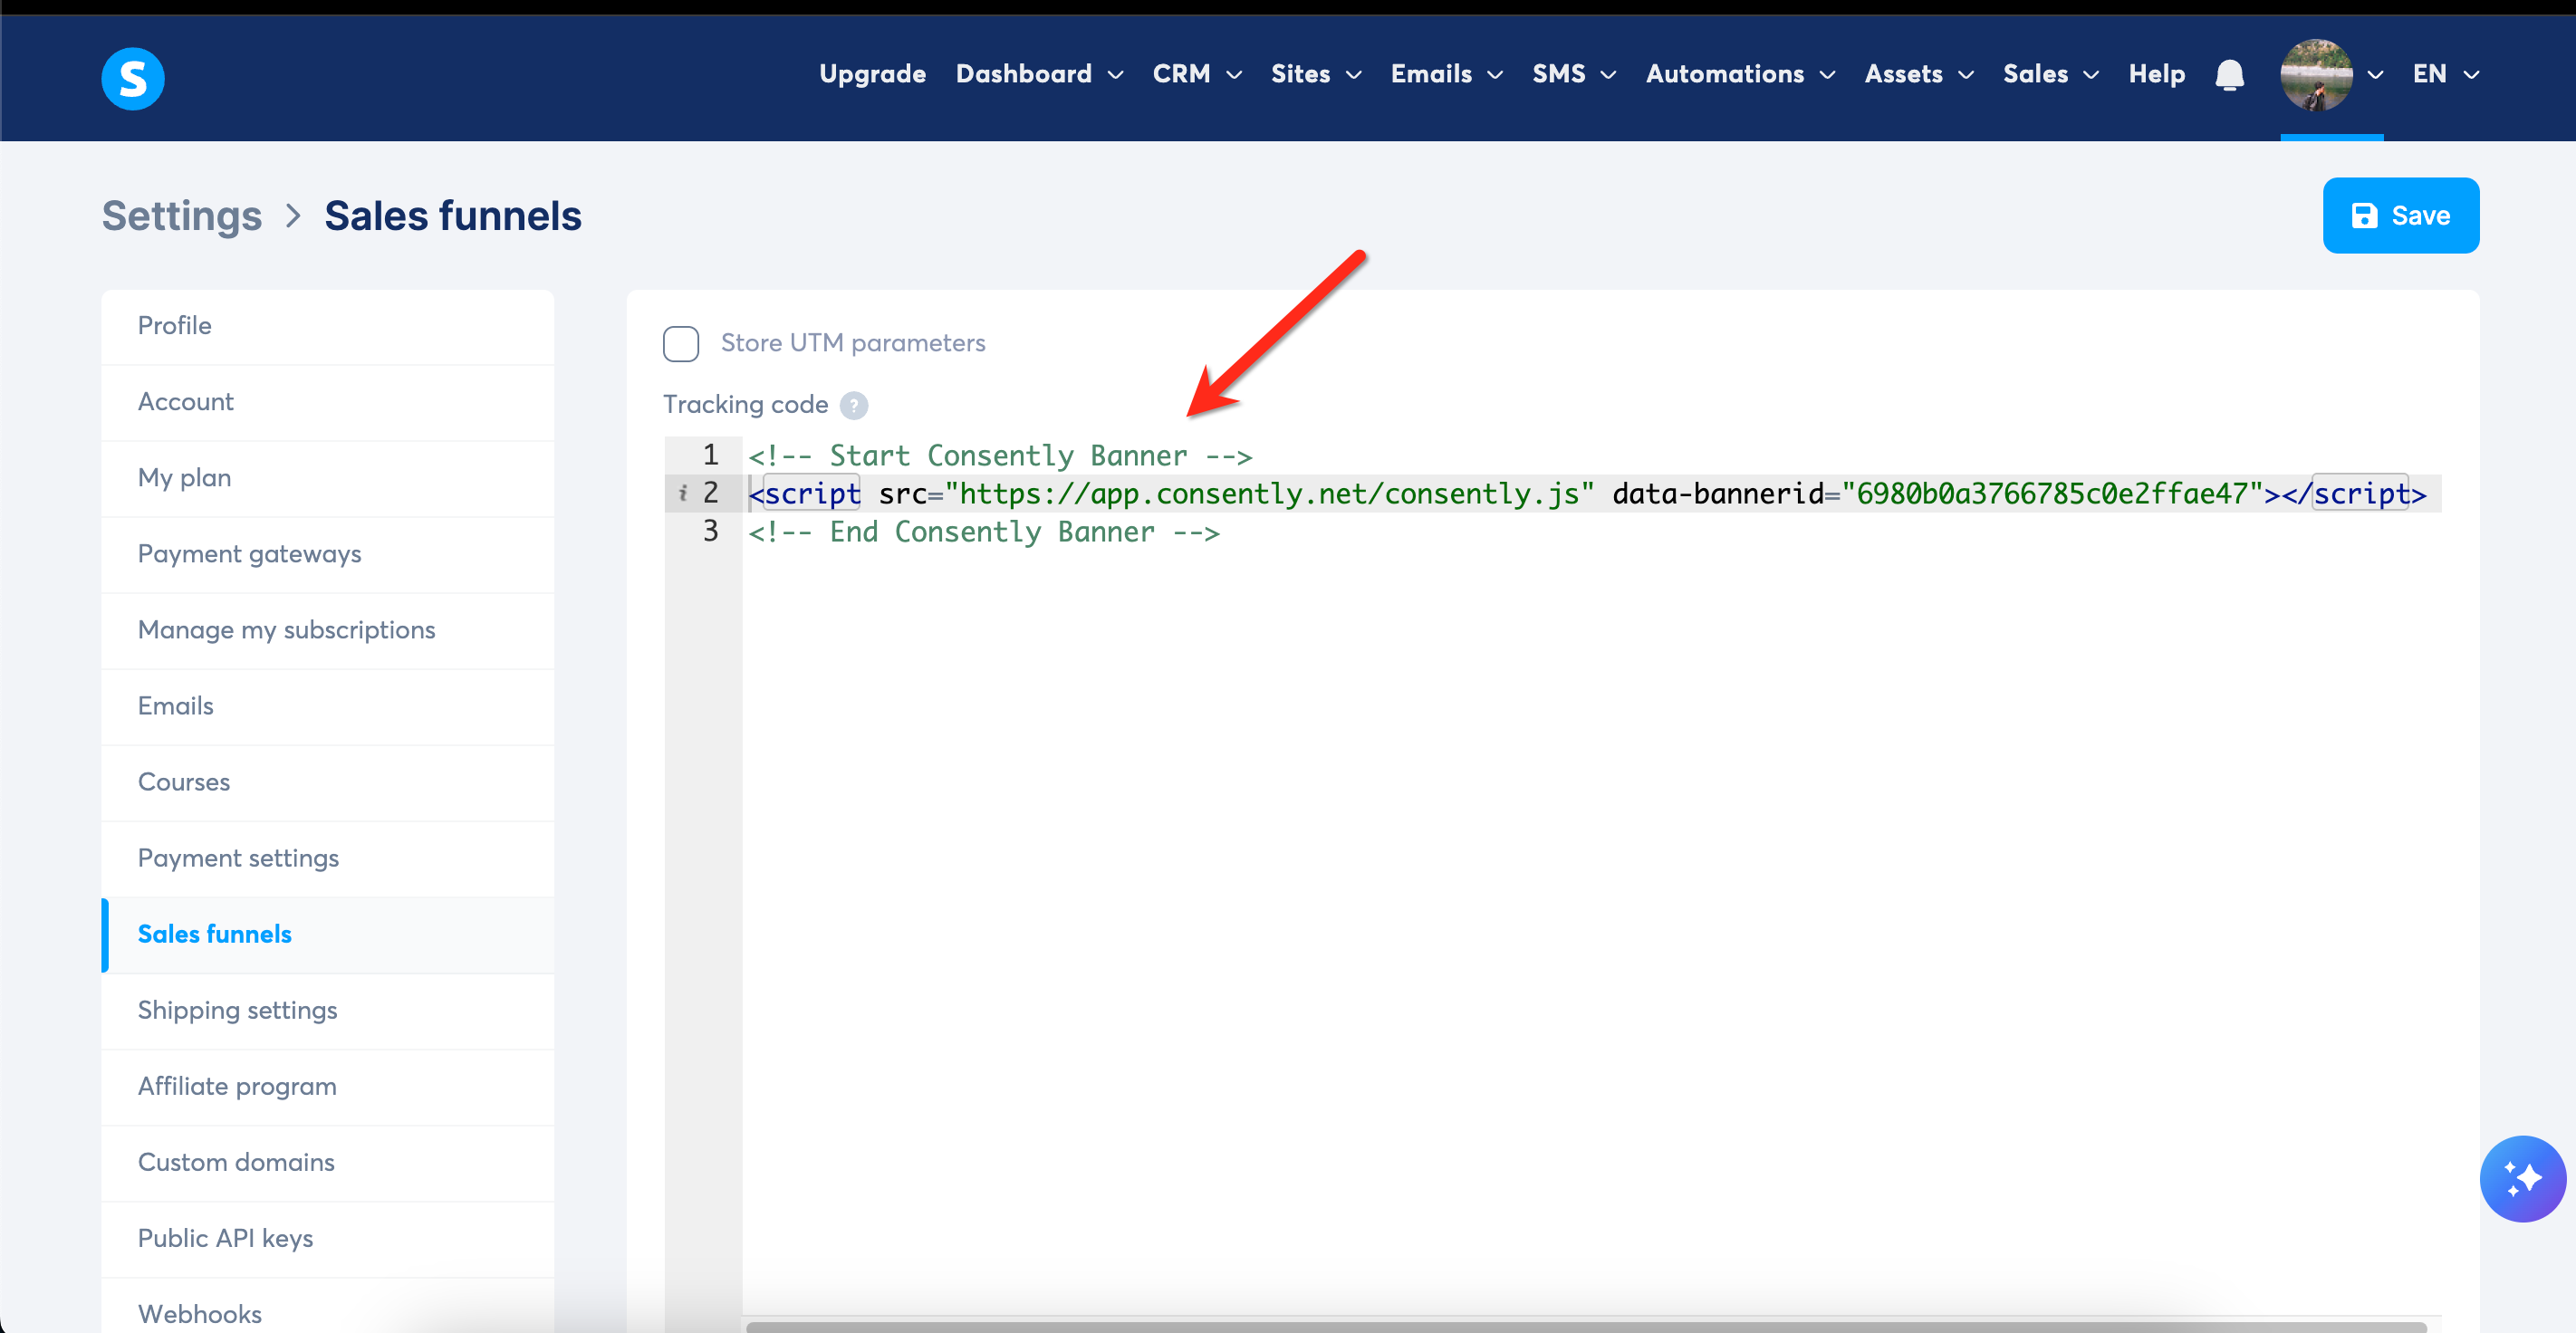
💡 Tip: Make sure you paste the complete script including the opening<!-- Start Consently Banner -->and closing<!-- End Consently Banner -->comments.

Step 5: Save your changes
Click Save to apply the changes to your page.
Done!
Your consent banner is now installed on this page and will appear when visitors access it.
✅ Success indicator: Visit your published page to see the banner display.
How to Install on All Pages of a Sales Funnel
Use this method when you want the consent banner to appear on every page within a sales funnel.
Step 1: Access your account settings
Click your profile picture in the top right corner, then select Settings from the dropdown menu.
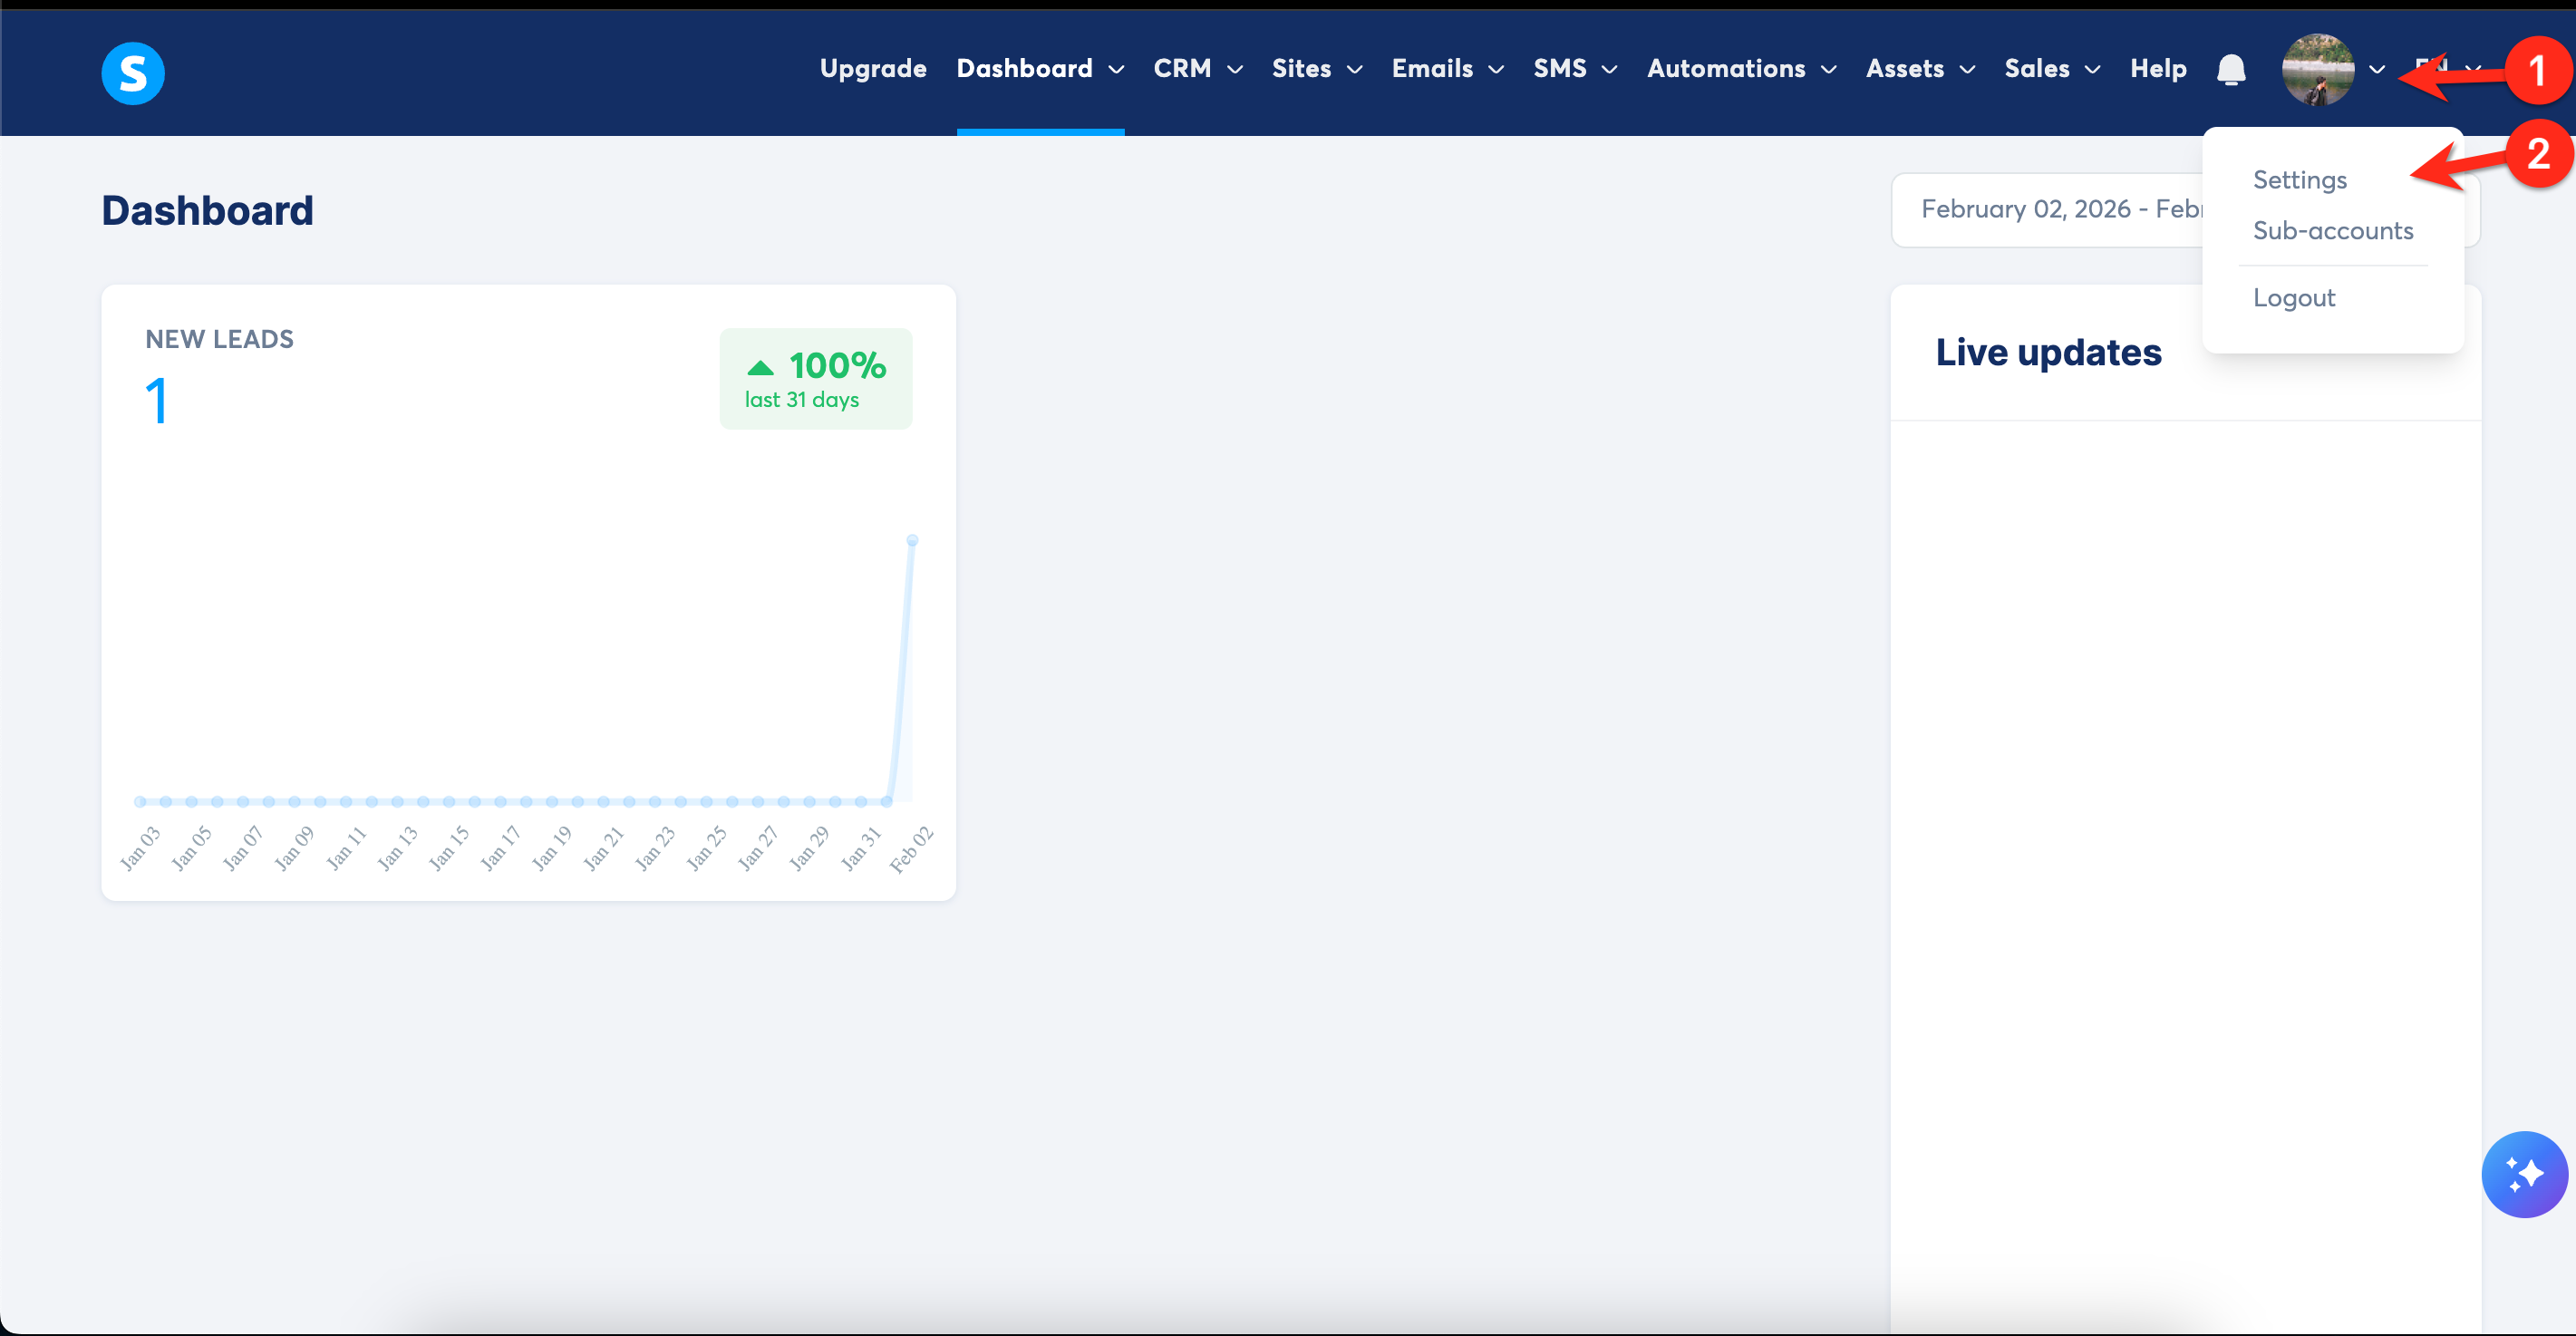
Step 2: Navigate to Sales funnels
In the left sidebar menu, click Sales funnels.
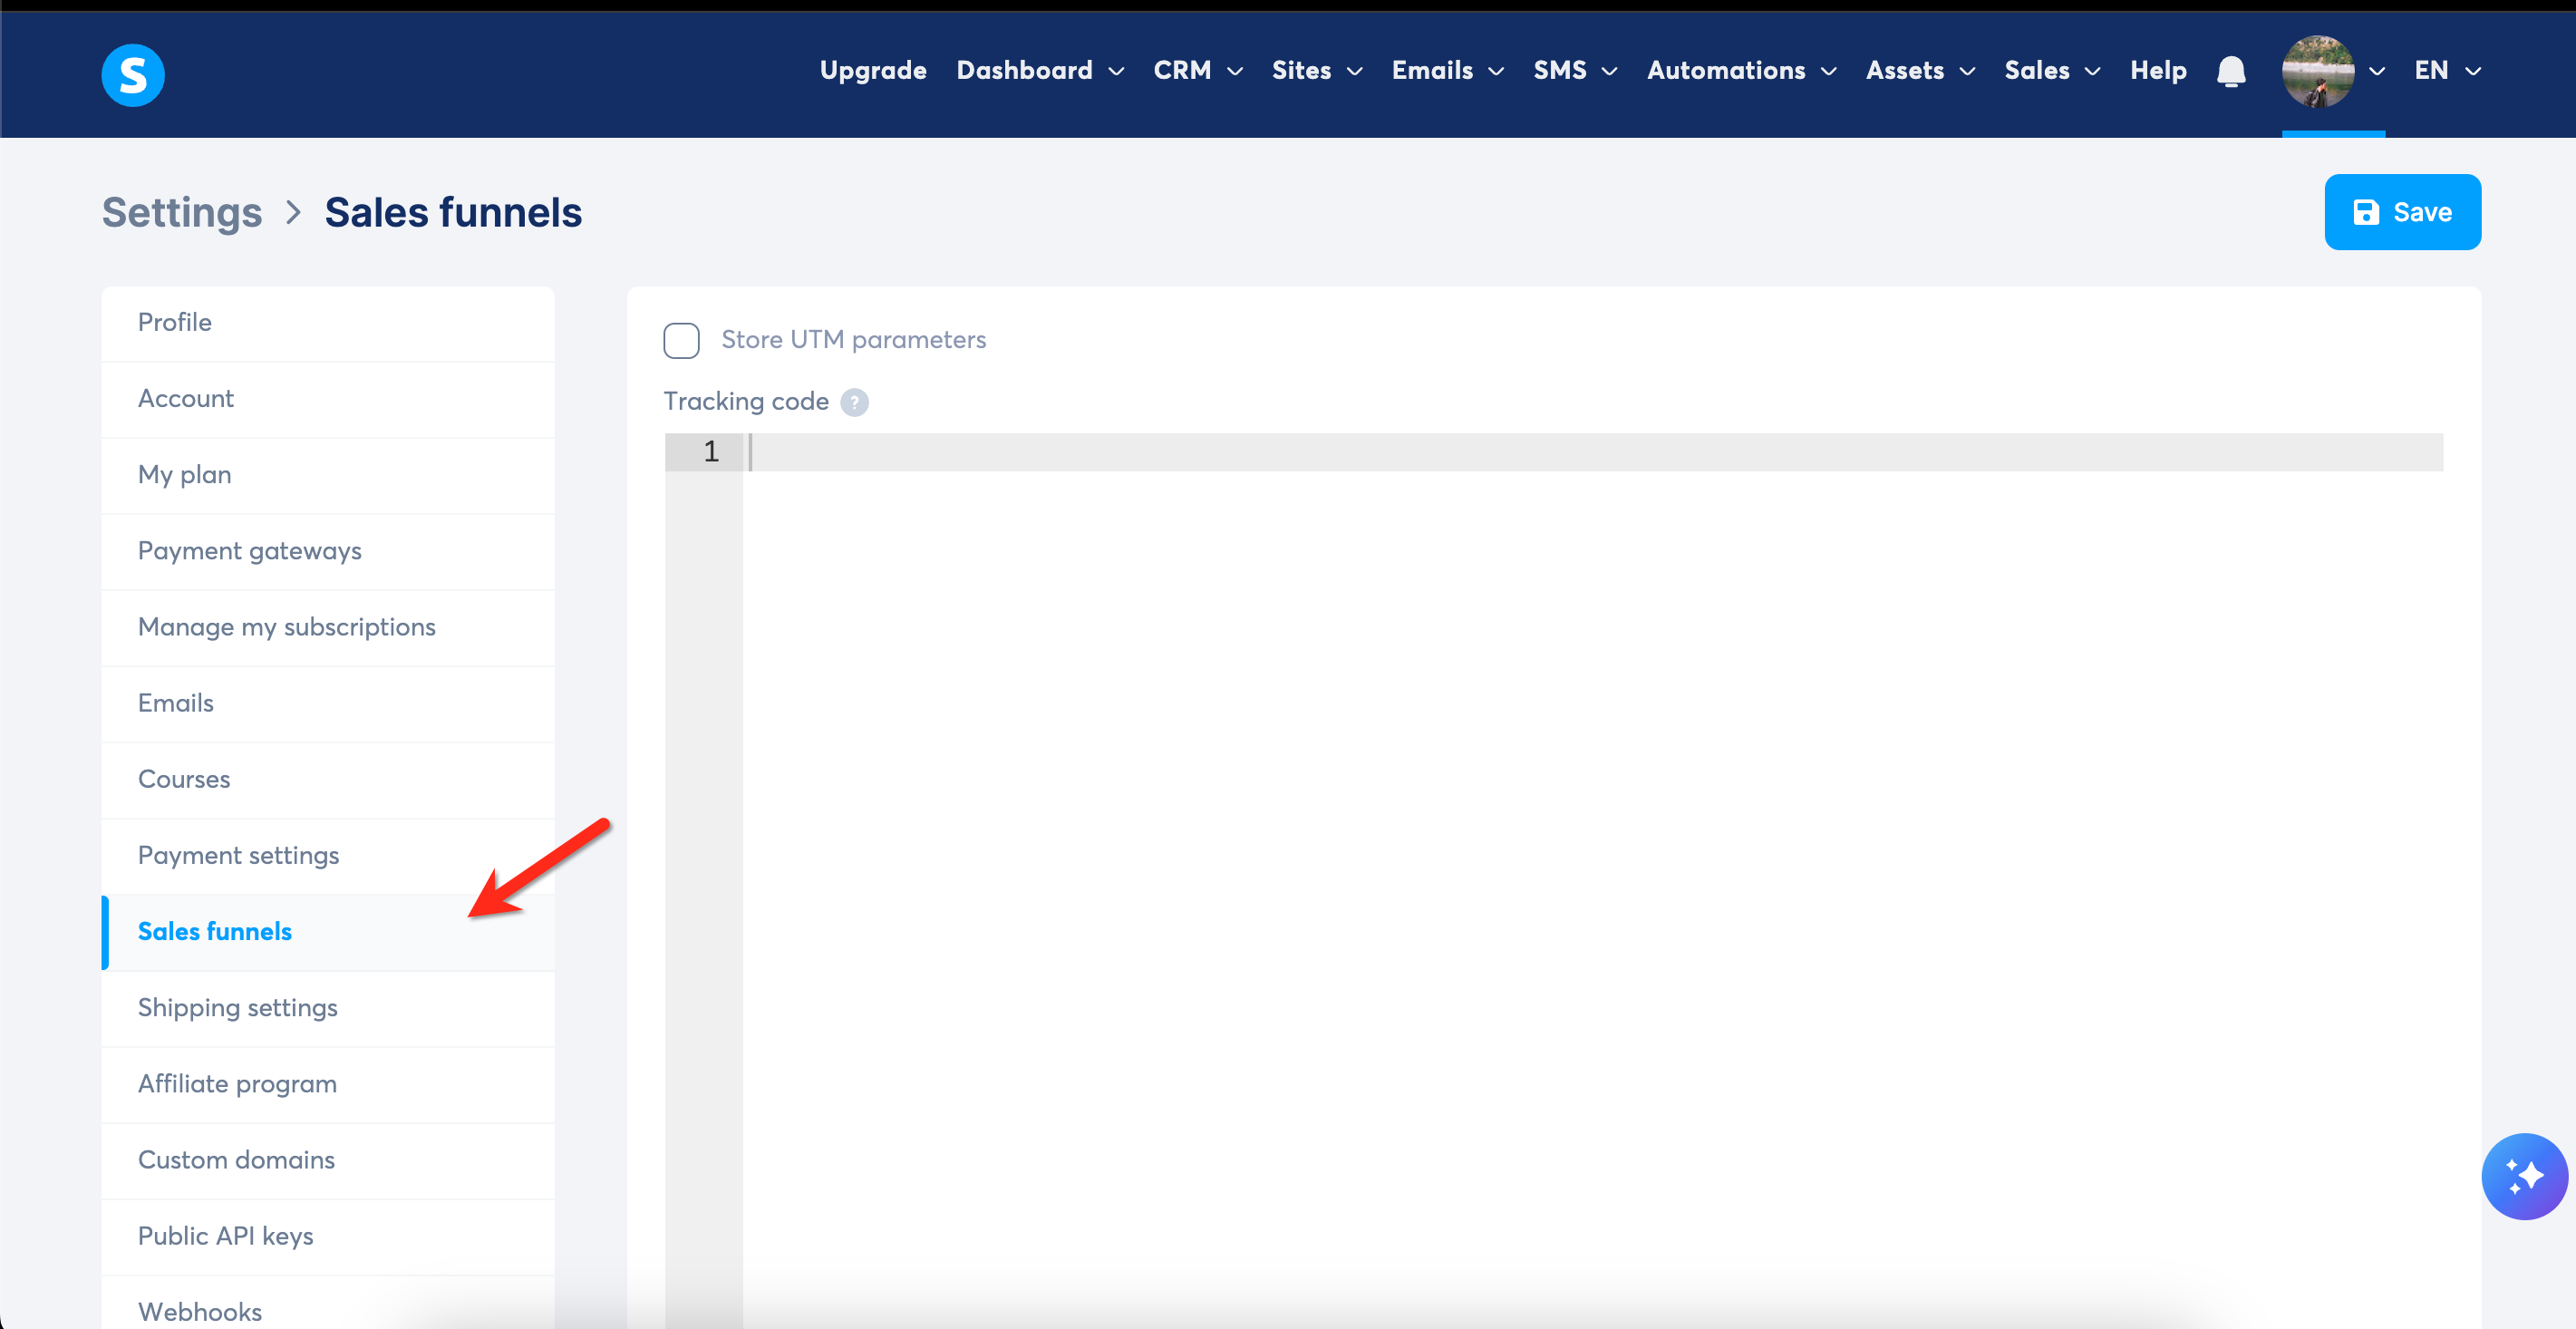
Step 3: Add the tracking code
Locate the Tracking code box and paste your Consently embed script into it.
💡 Tip: This script will automatically be added to every page in your sales funnel, so you only need to do this once per funnel.
Step 4: Save your changes
Click Save to apply the script to all funnel pages.

Done!
Your consent banner is now installed on all pages within your sales funnel.
✅ Success indicator: Visit any page in your funnel to verify the banner appears correctly.
What's Next
Now that you've installed the script, you should:
Troubleshooting
The banner isn't appearing on my page
Why this happens: The page may not have been saved properly, or there could be a caching issue.
Solution:
Go back to the Tracking code section and verify the script is still there
Click Save again to ensure changes are applied
Clear your browser cache and reload the page
Try viewing the page in an incognito/private browser window
Make sure the page is published, not just saved as a draft
The banner appears multiple times
Why this happens: The script may be installed both at the page level and funnel level, causing it to load twice.
Solution:
Check if the script is in both the single-page Tracking code AND the Sales funnel Tracking code
Remove the script from one location—keep it in the Sales funnel settings if you want it on all pages, or remove it from there if you only want it on specific pages
Save your changes and refresh the page
The script was removed when I updated my page
Solution: Some systeme.io templates may override custom tracking code during updates. After any major page changes or template updates, verify the script is still present in the Tracking code section and re-add it if necessary.
Related Pages
Direct HTML Installation — Understanding the core script installation method
Platform Compatibility — Overview of installation across different platforms