

TL;DR: Wix Settings → Custom Code → + Add Custom Code → Paste script in Header → All Pages → Apply → Publish. The consent banner loads automatically across your entire Wix site.
Overview
Wix allows custom code through its built-in Custom Code feature available on Business and eCommerce plans. You'll paste the Consently script in the header section to load the consent banner on all pages.
Before You Begin
Make sure you have:
Access to your Wix site dashboard
A Wix Business or eCommerce plan (required for Custom Code feature)
Time required: About 3 minutes
How to Install on Wix
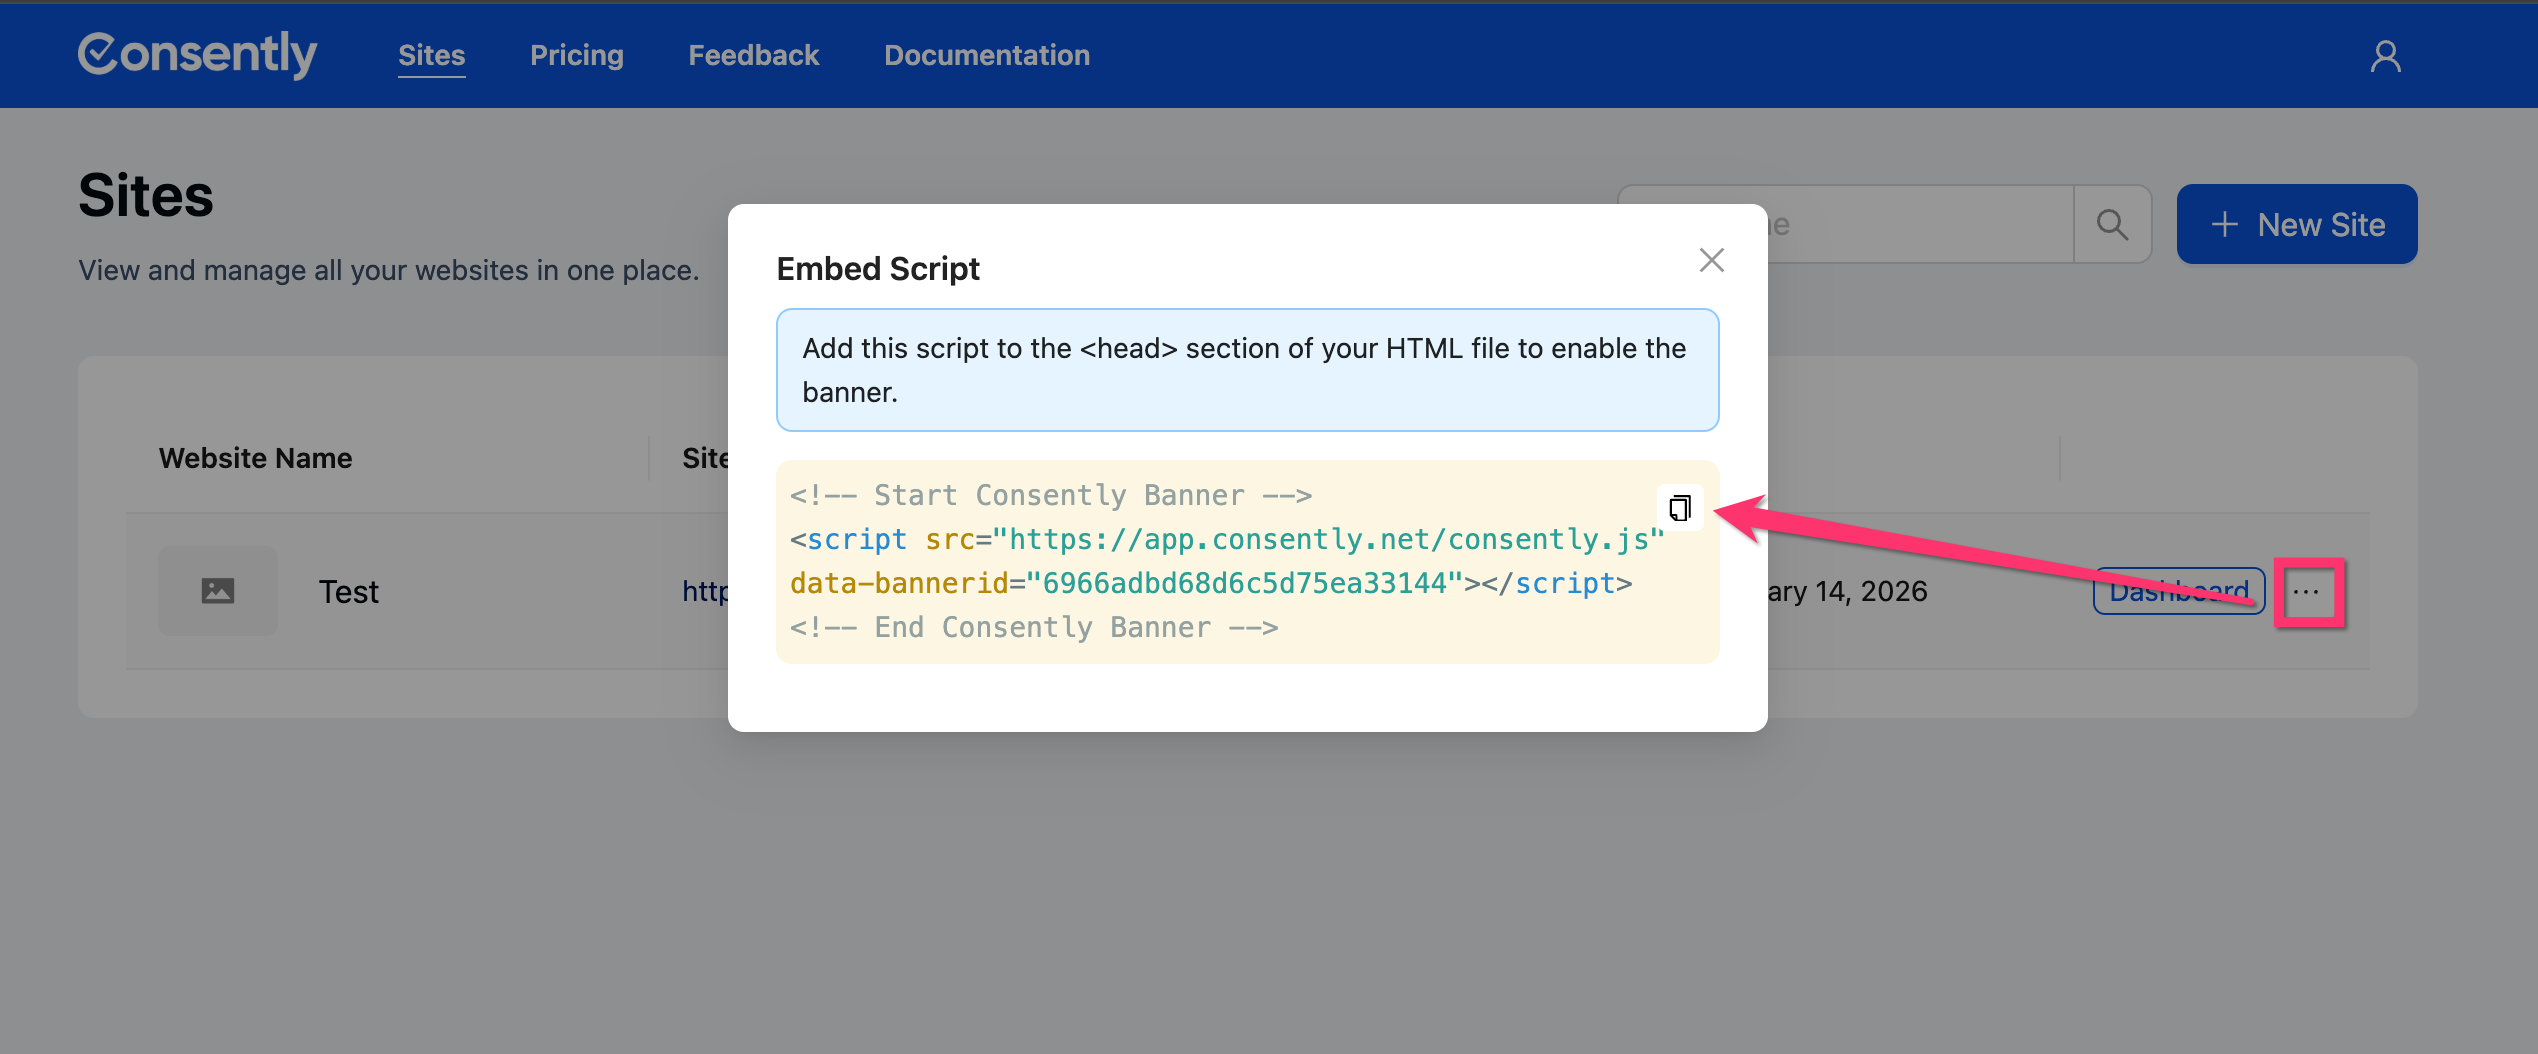
Step 1: Get your embed script
Copy your Consently embed script by following the instructions in Direct HTML Installation.
Step 2: Access Wix site settings
Log in to your Wix account, open the site where you want to add Consently, then click Settings in the left sidebar.
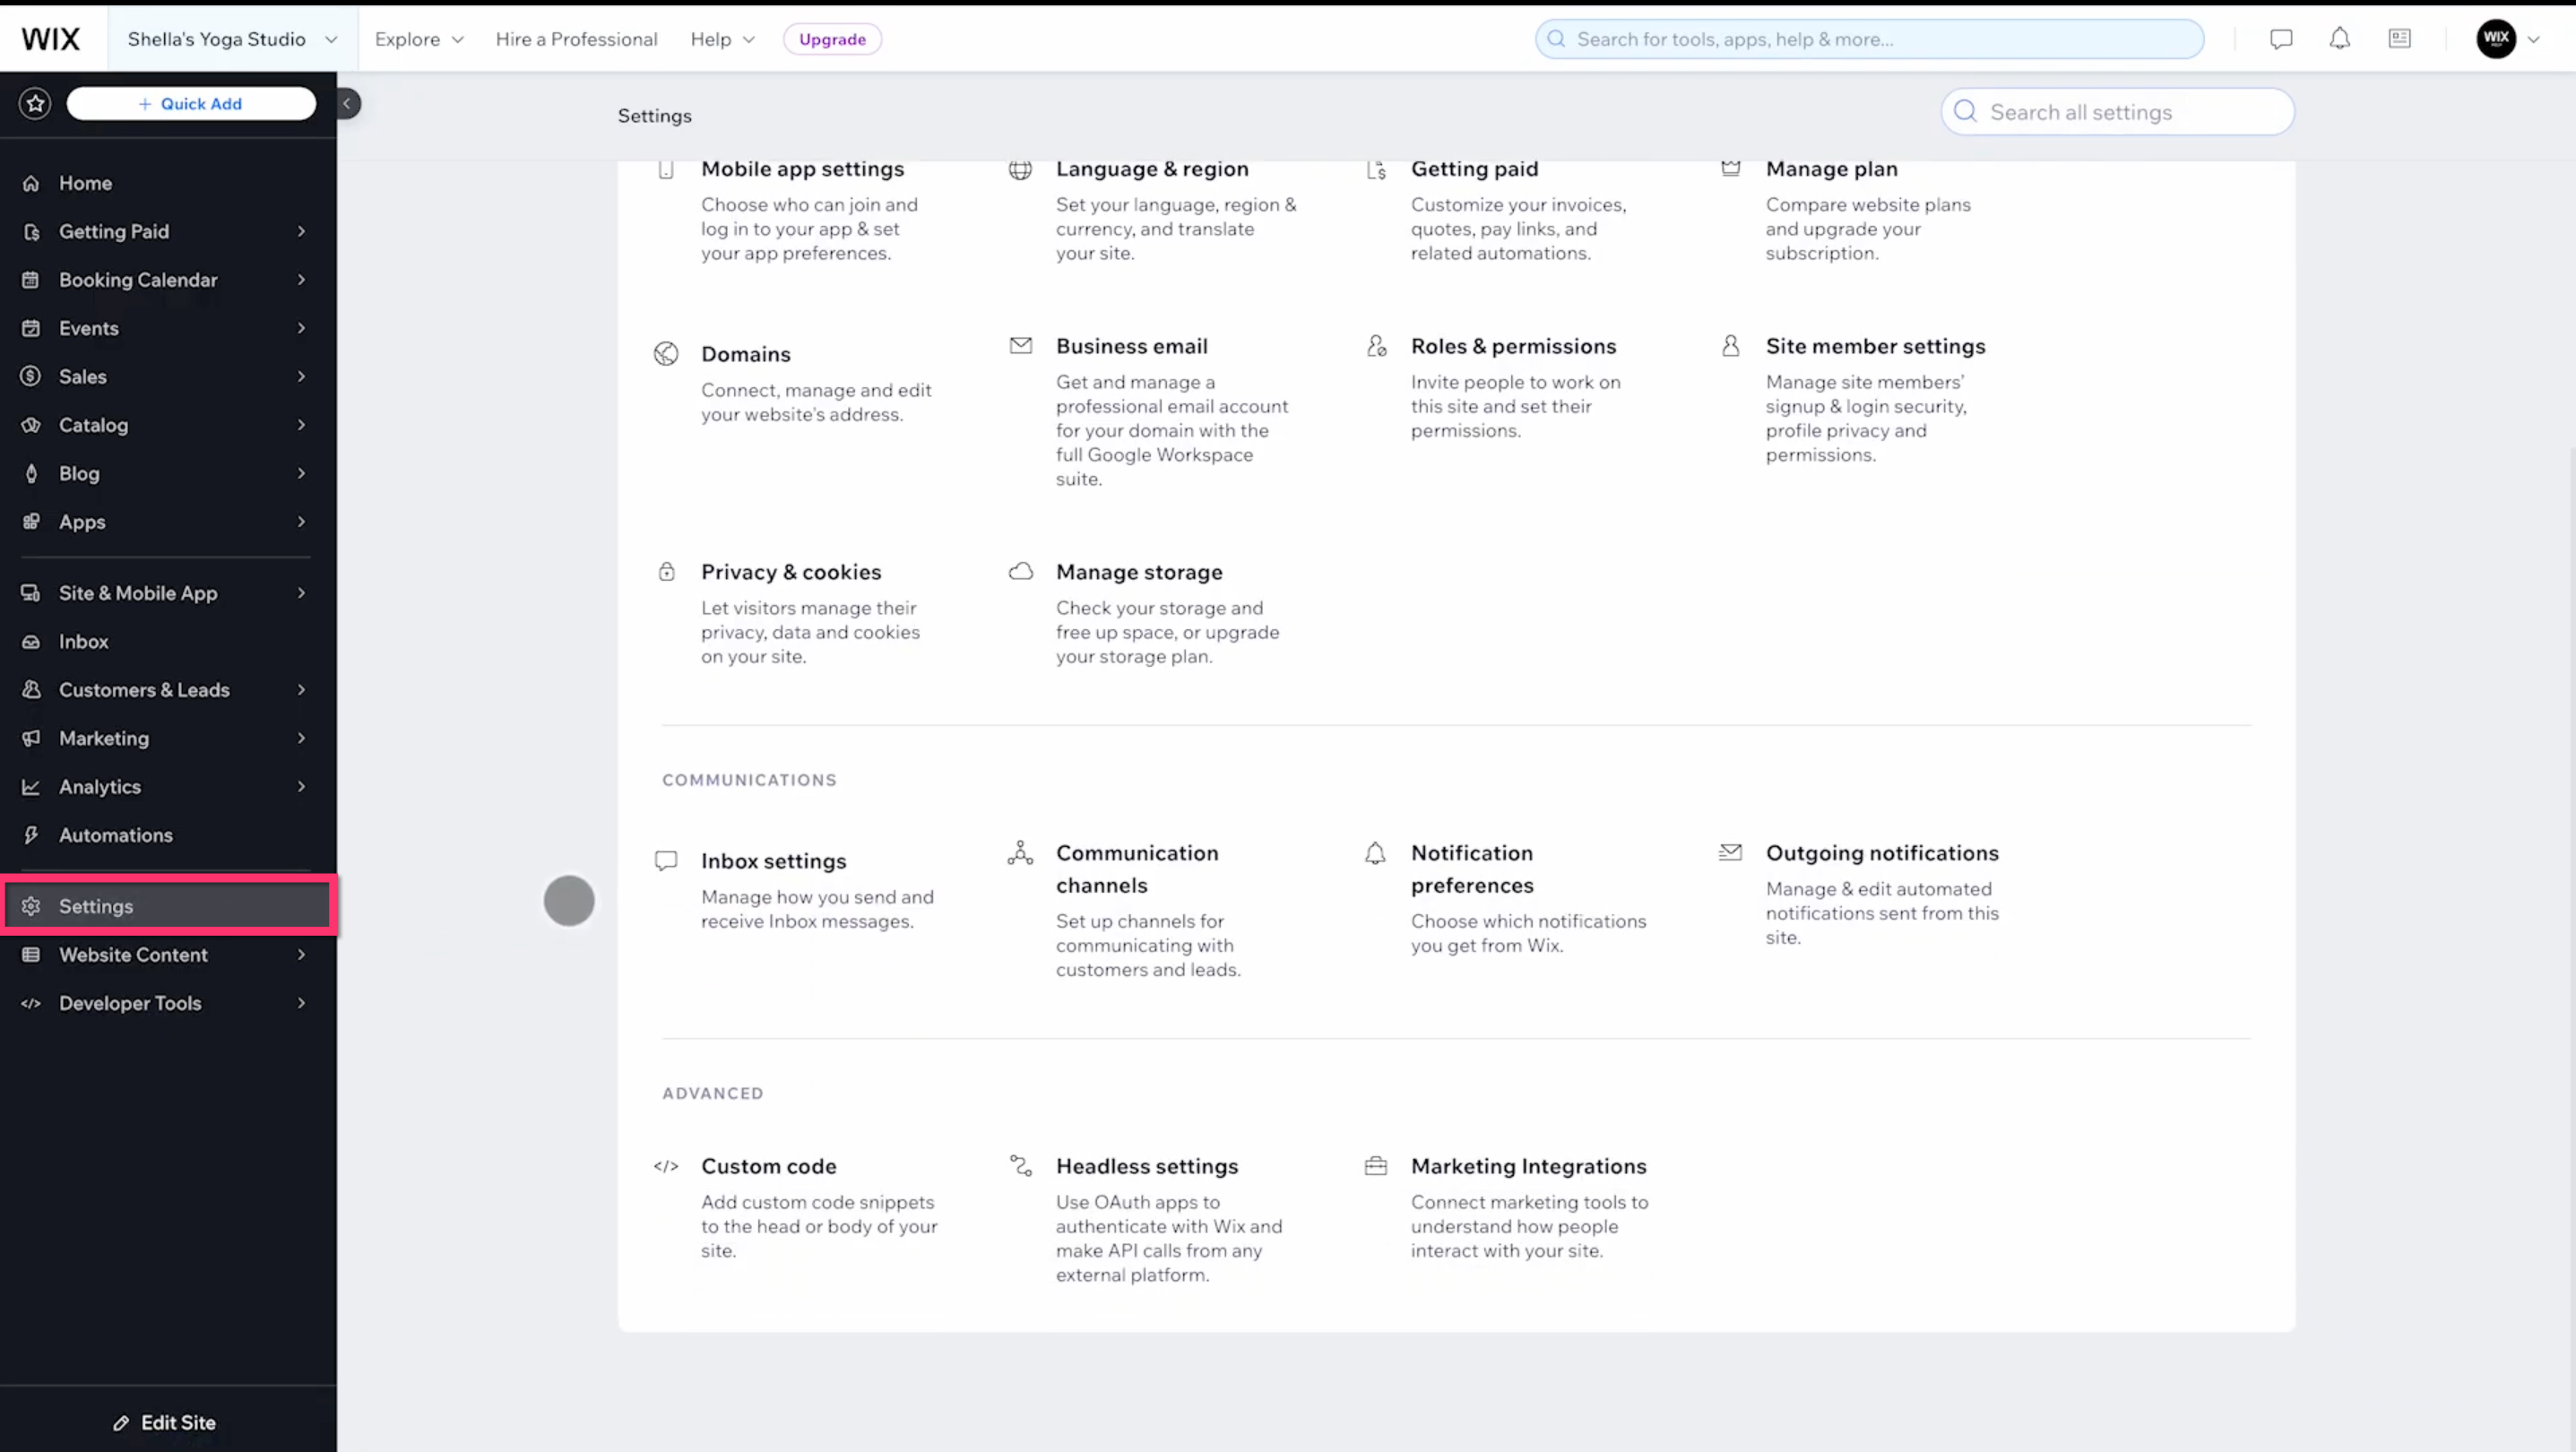
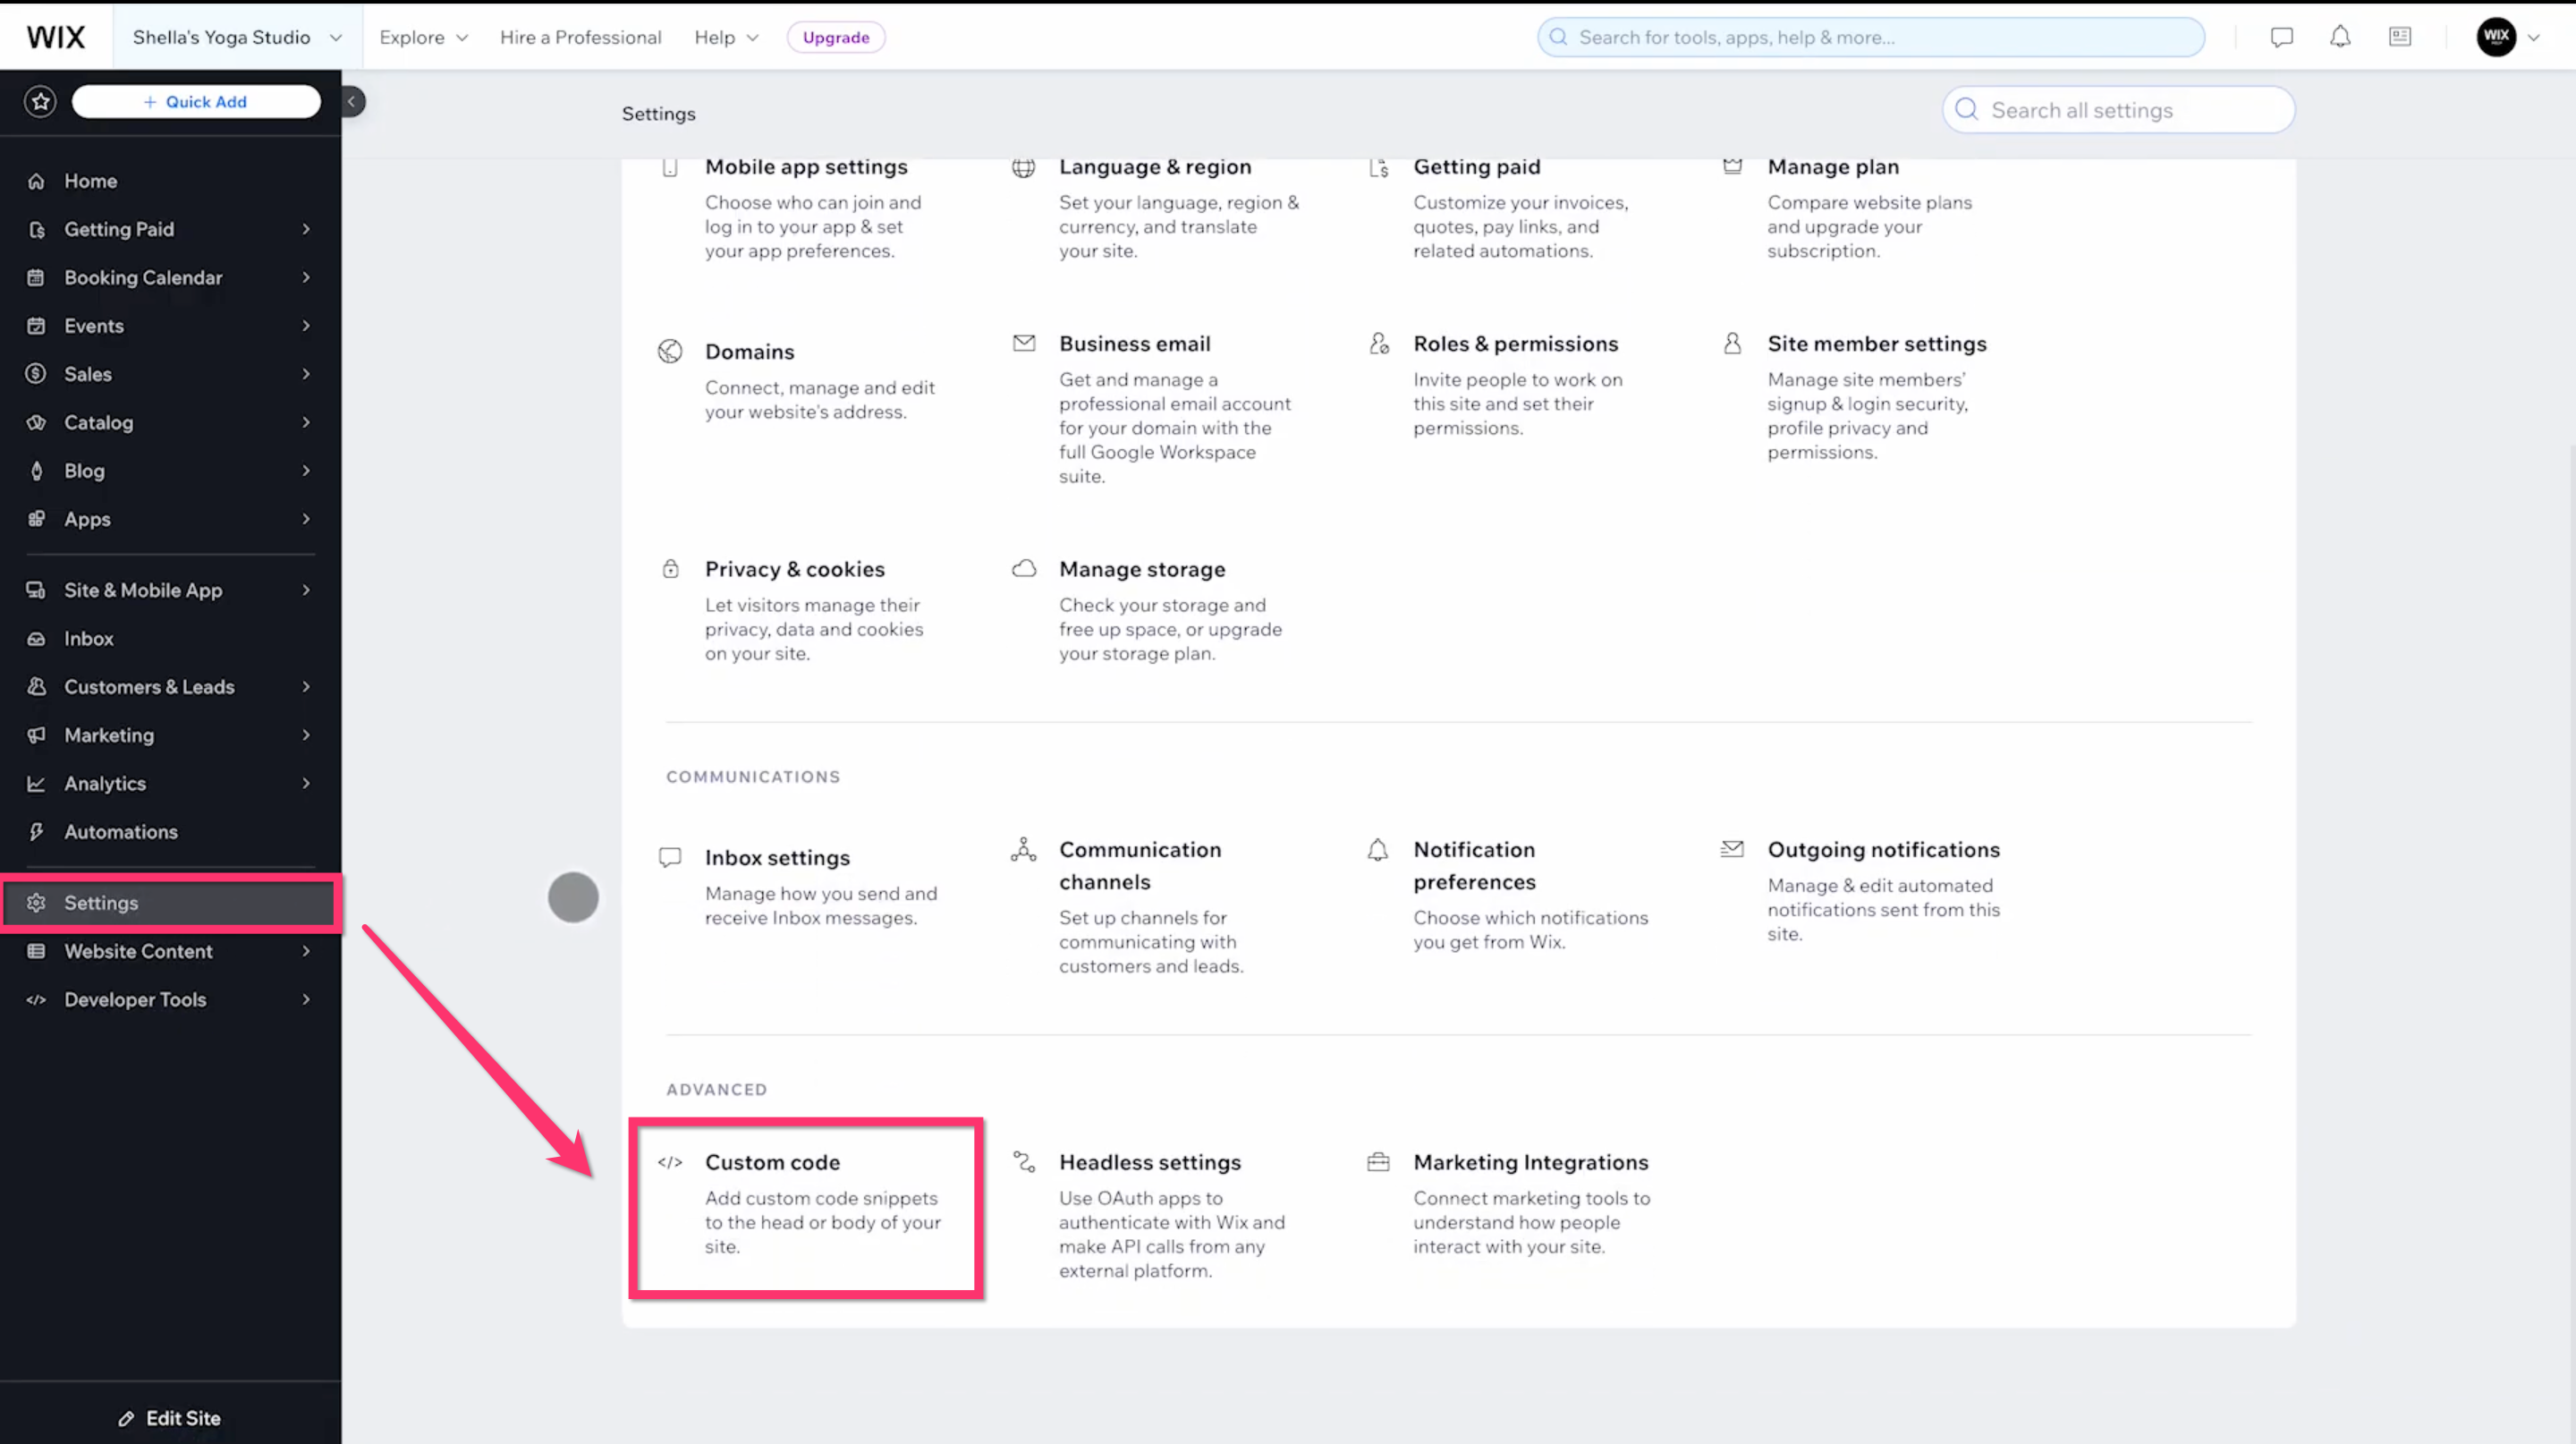
Step 3: Navigate to Custom Code
On the Settings page, scroll down to Advanced, then click Custom Code.
Step 4: Add new custom code
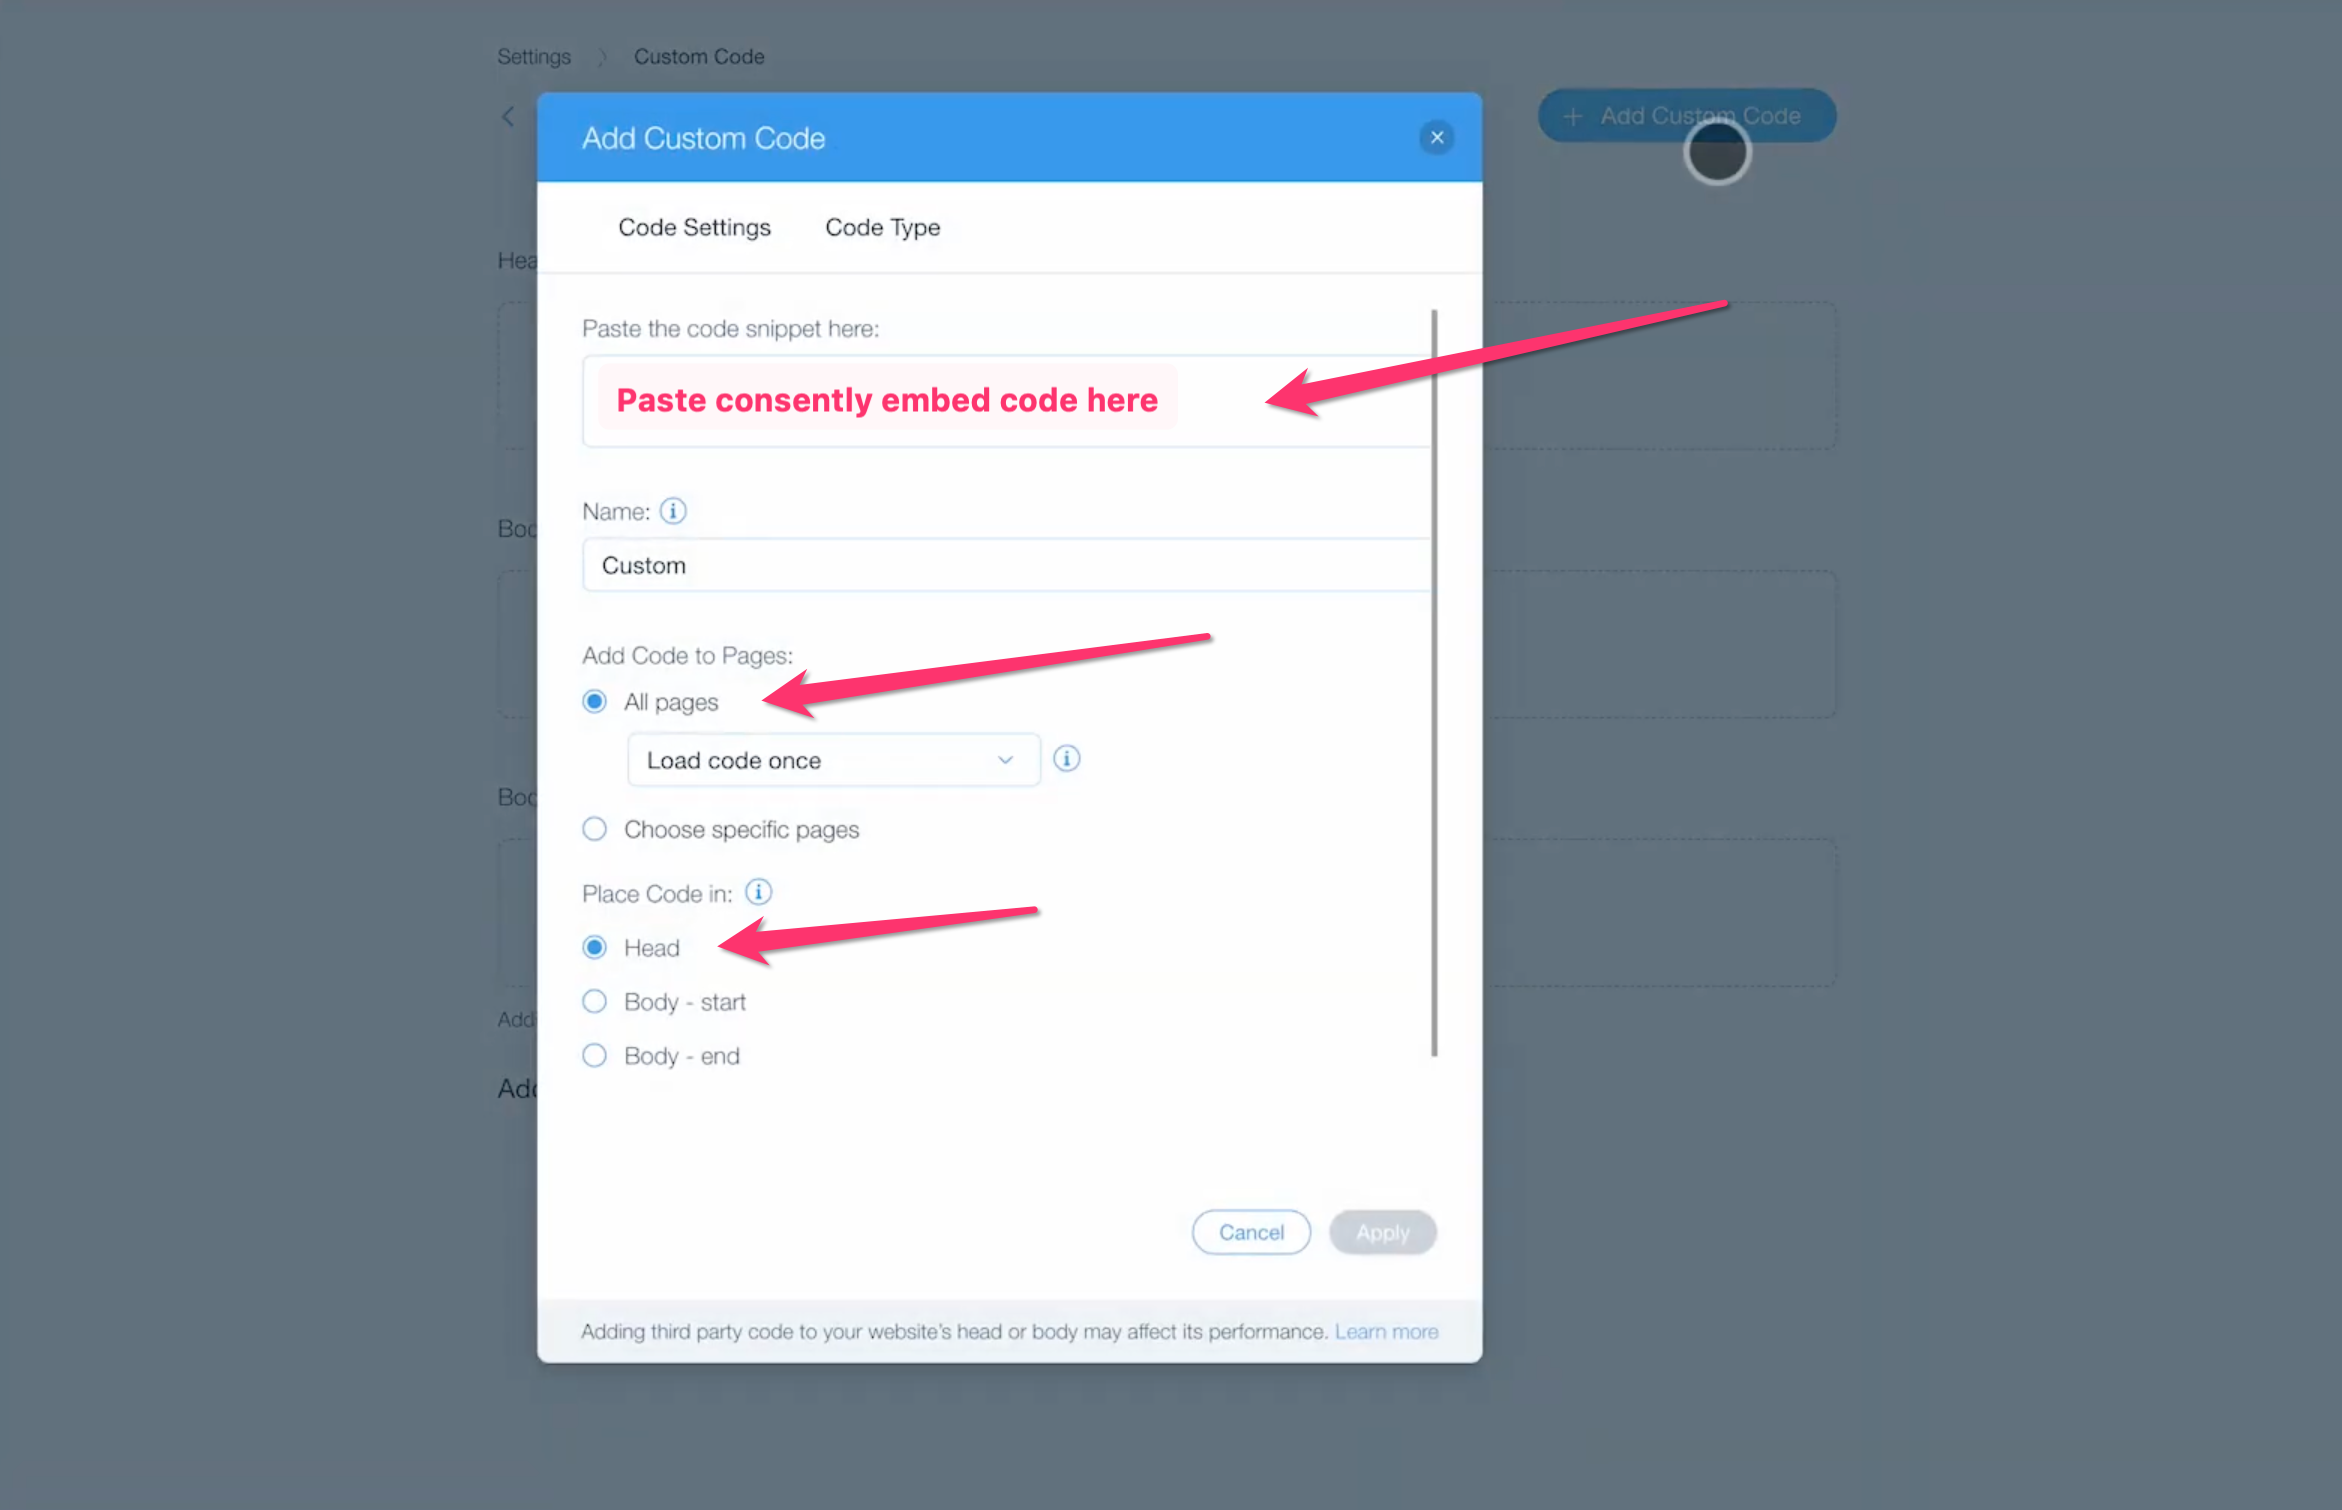
Click + Add Custom Code in the top right corner.
The embed code should look like this:
  <!-- Start Consently Banner -->
  <script src="https://app.consently.net/consently.js" data-bannerid="YOUR_BANNER_ID"></script>
  <!-- End Consently Banner -->
</head>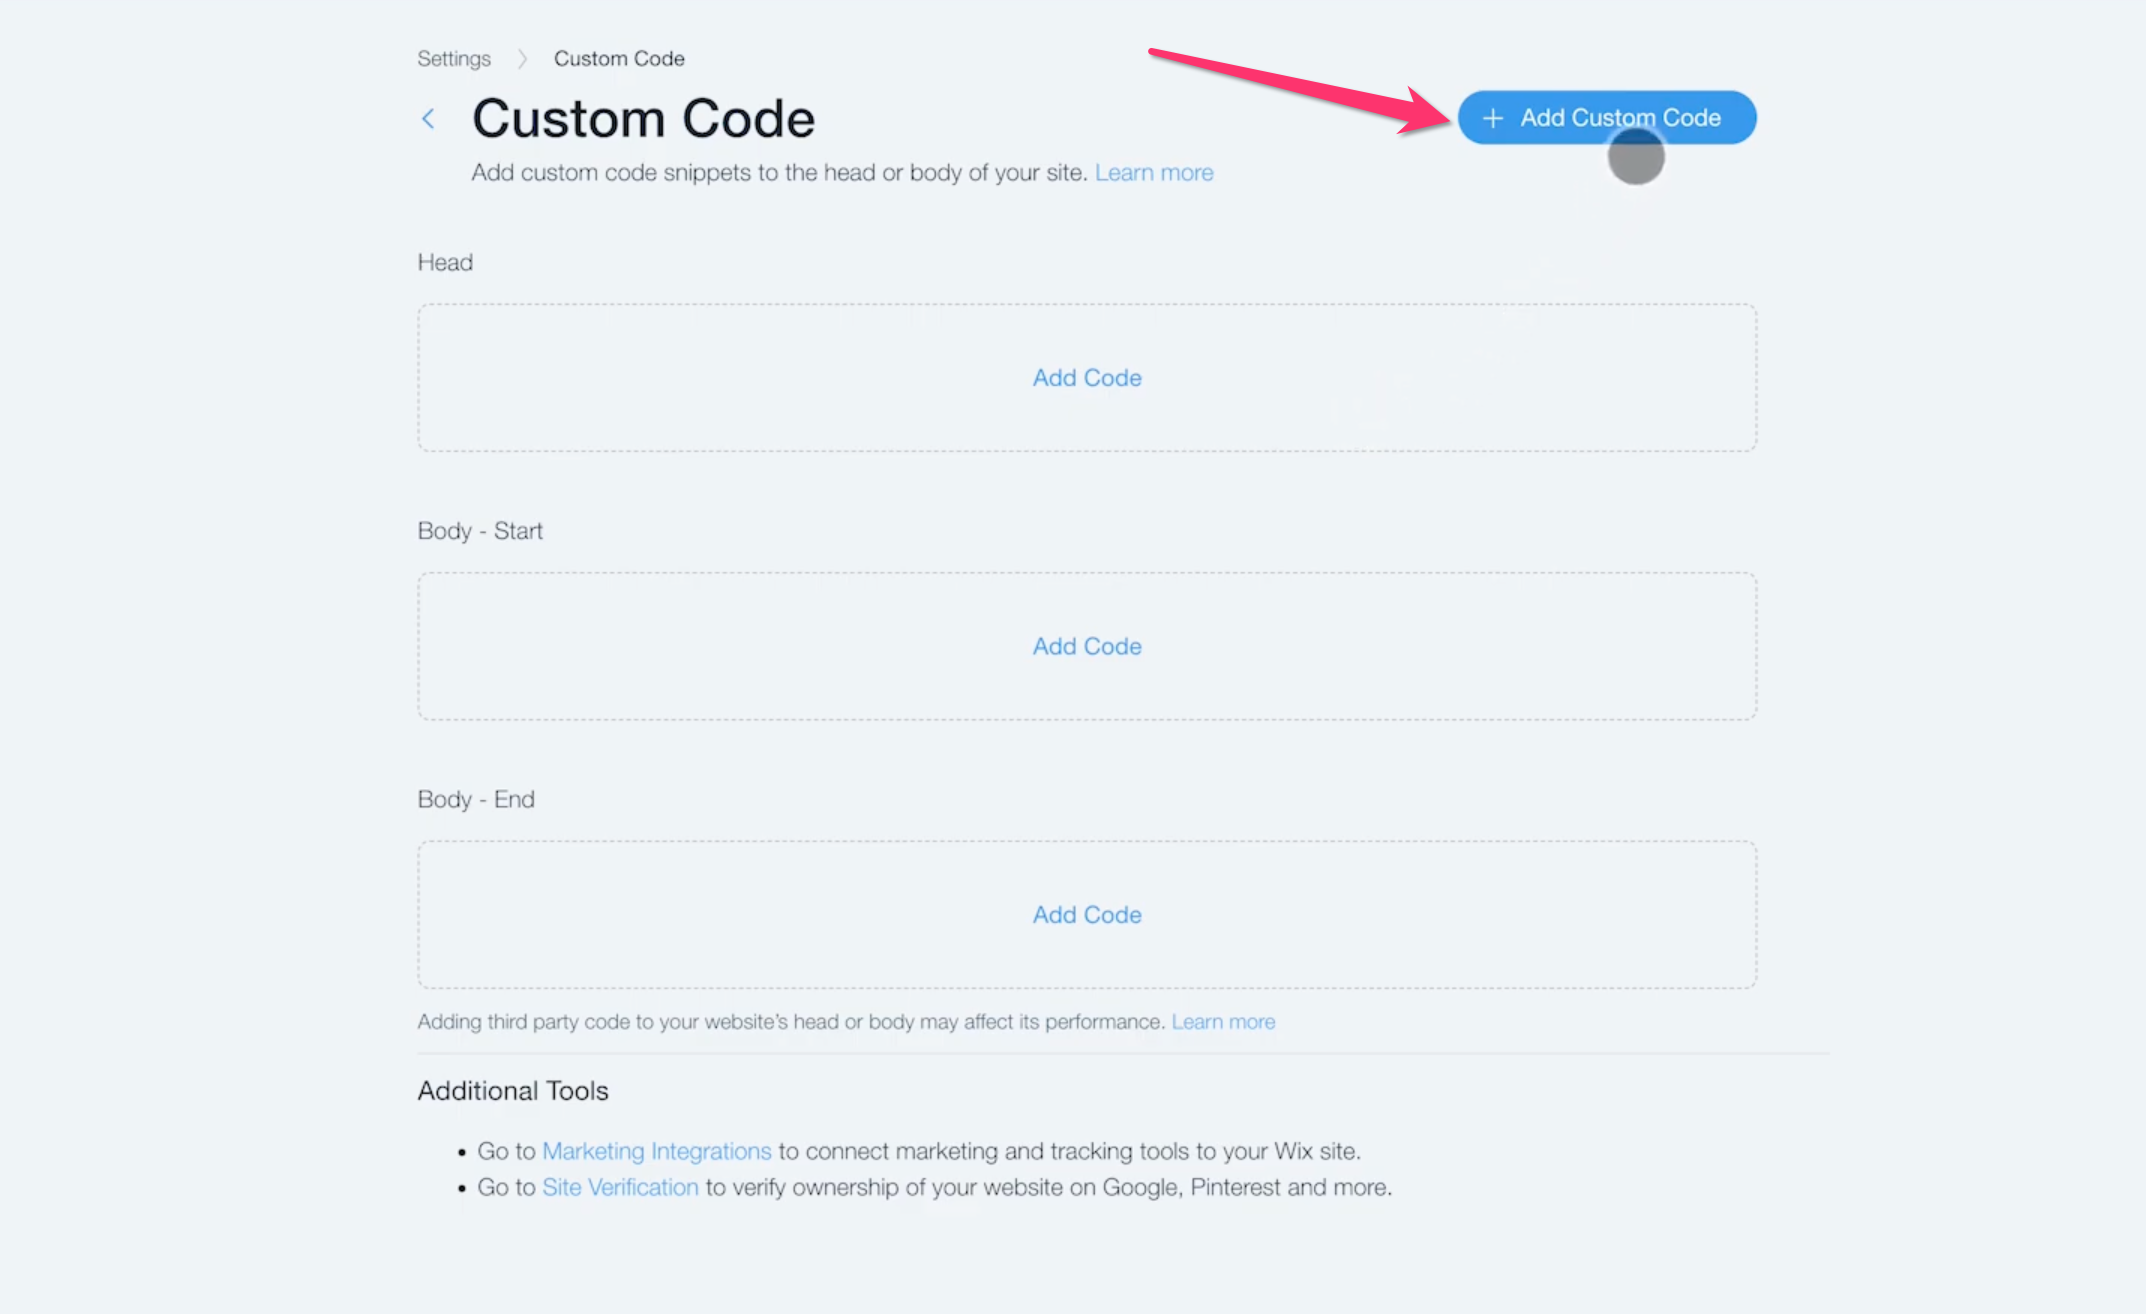
Step 5: Configure the code snippet
In the Add Custom Code panel:
Paste your Consently embed script in the Paste the code snippet here field
Name your code: Enter Consently Banner Code.
Add Code to Pages: Select All pages
Place Code in: Select Head
Load code once: Leave unchecked
💡 Tip: Placing code in the Head ensures the banner loads before page content, which is essential for proper cookie blocking.
Step 6: Apply and publish
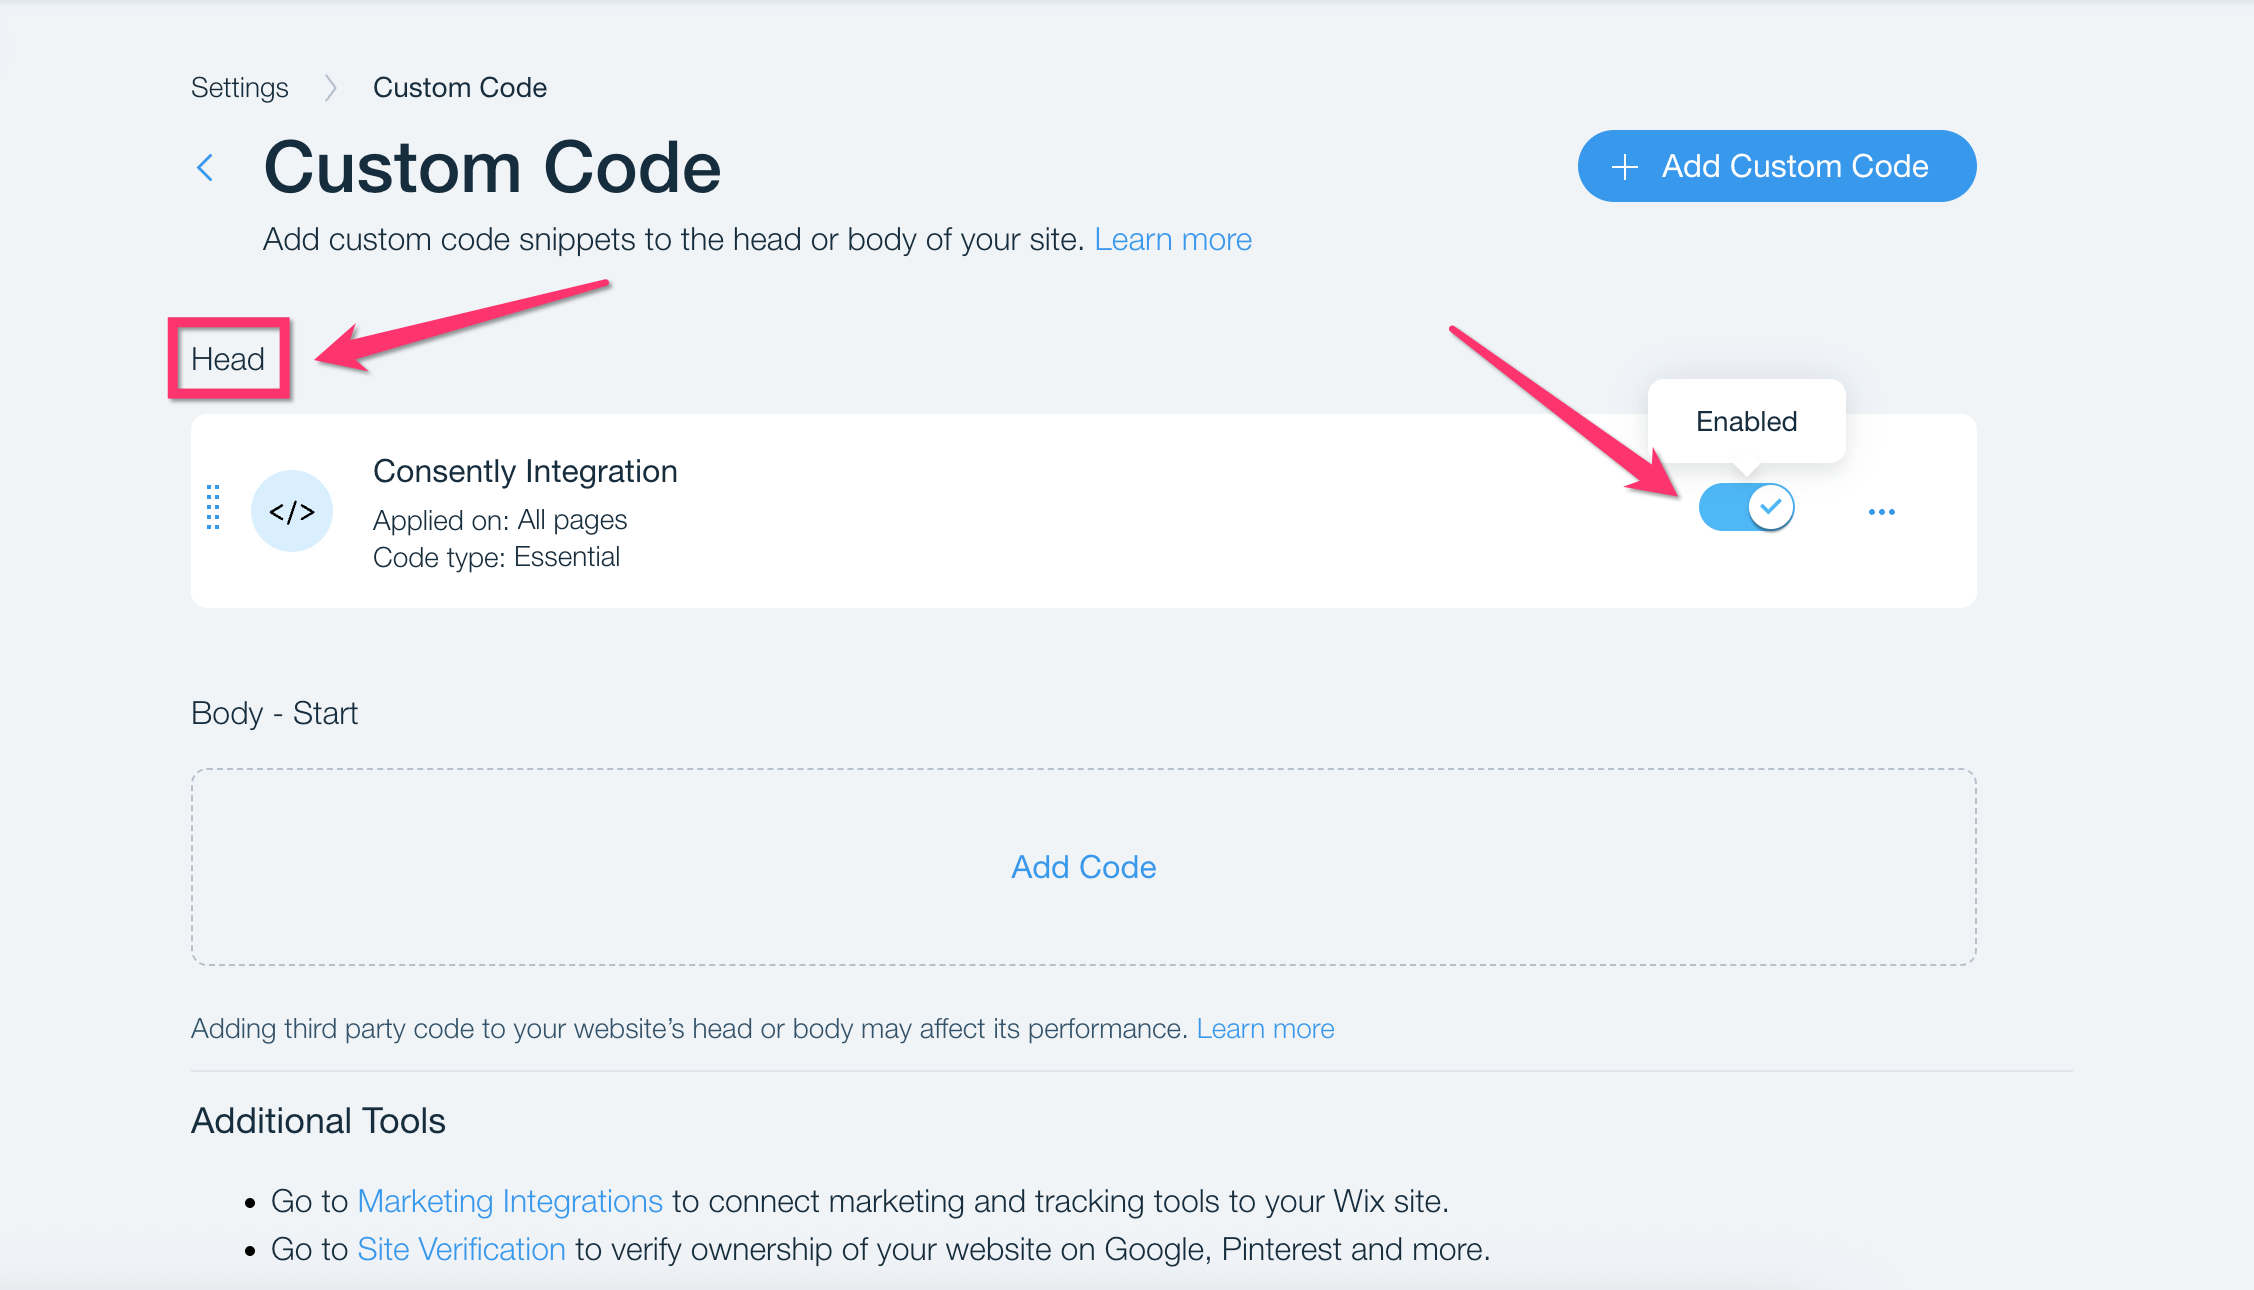
Click Apply to save the custom code
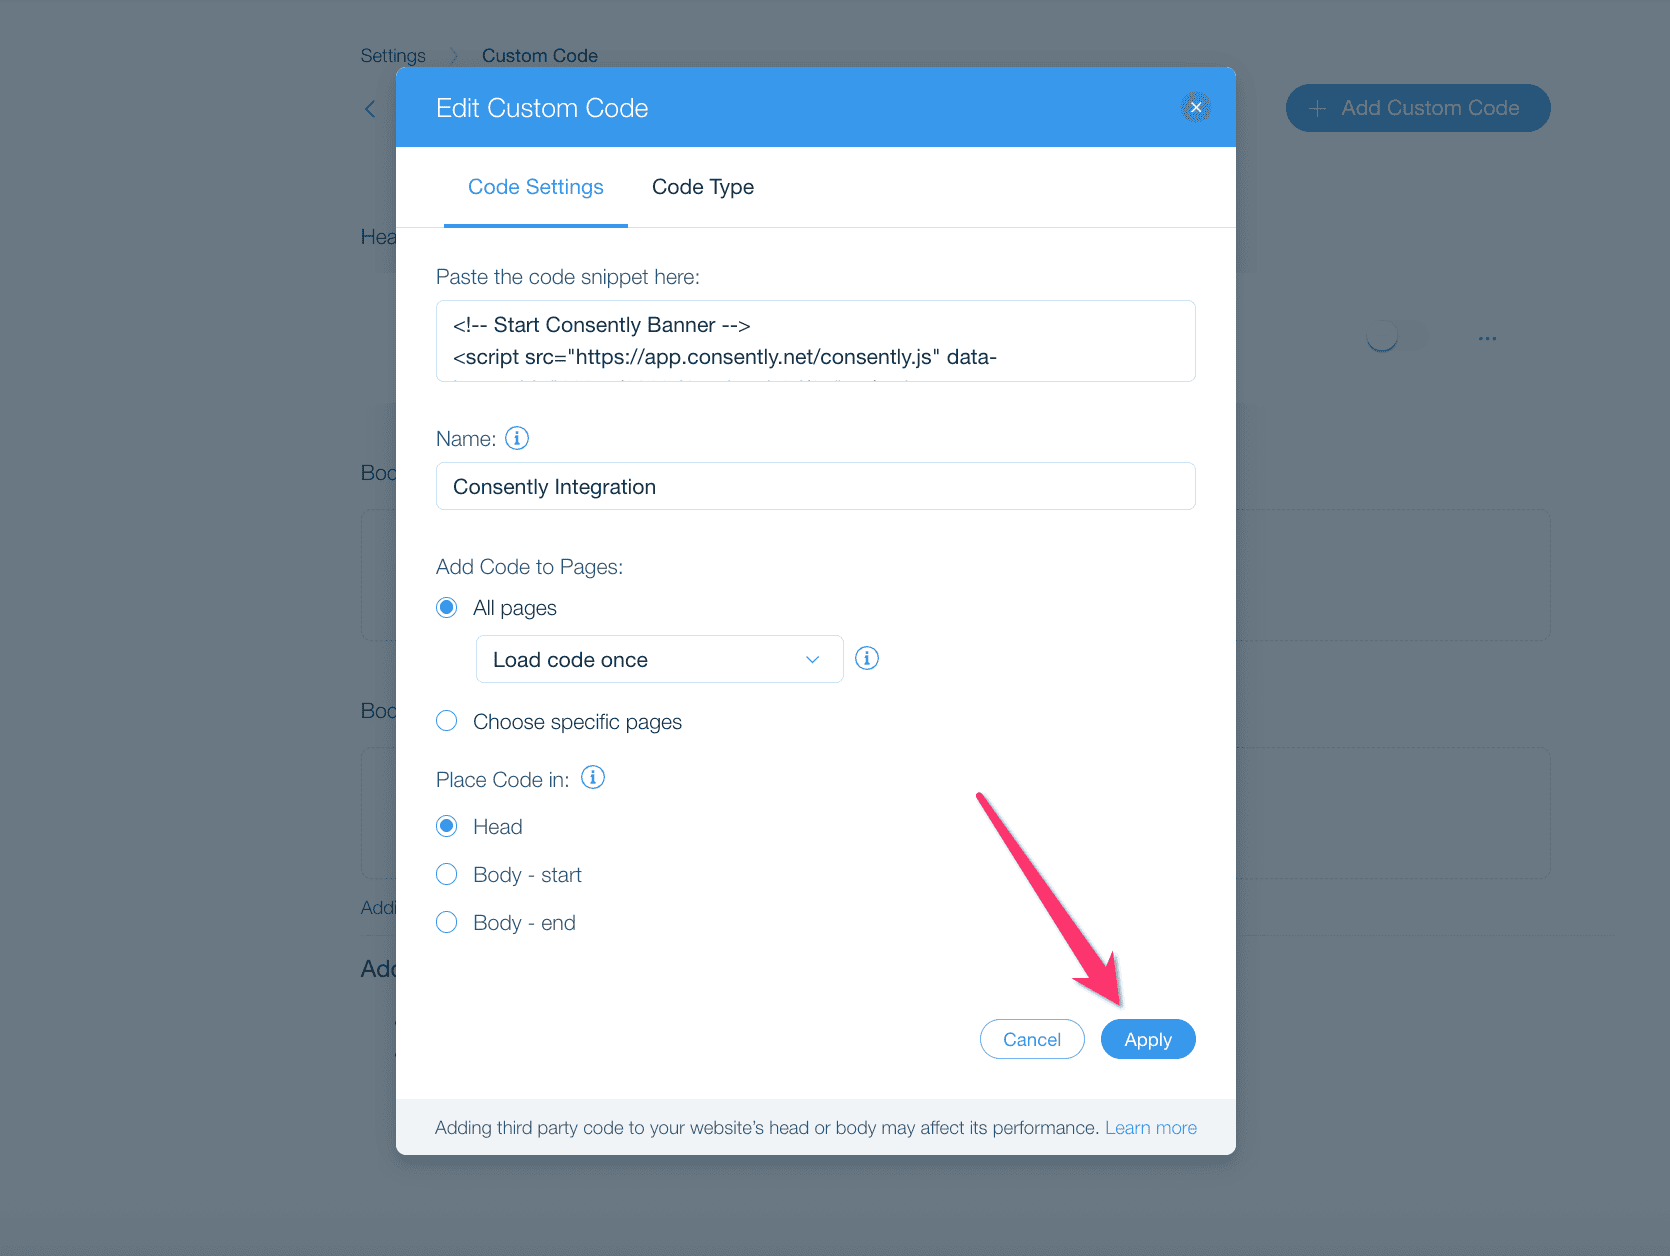
Make sure the custom code is showing under Head, and it's enabled
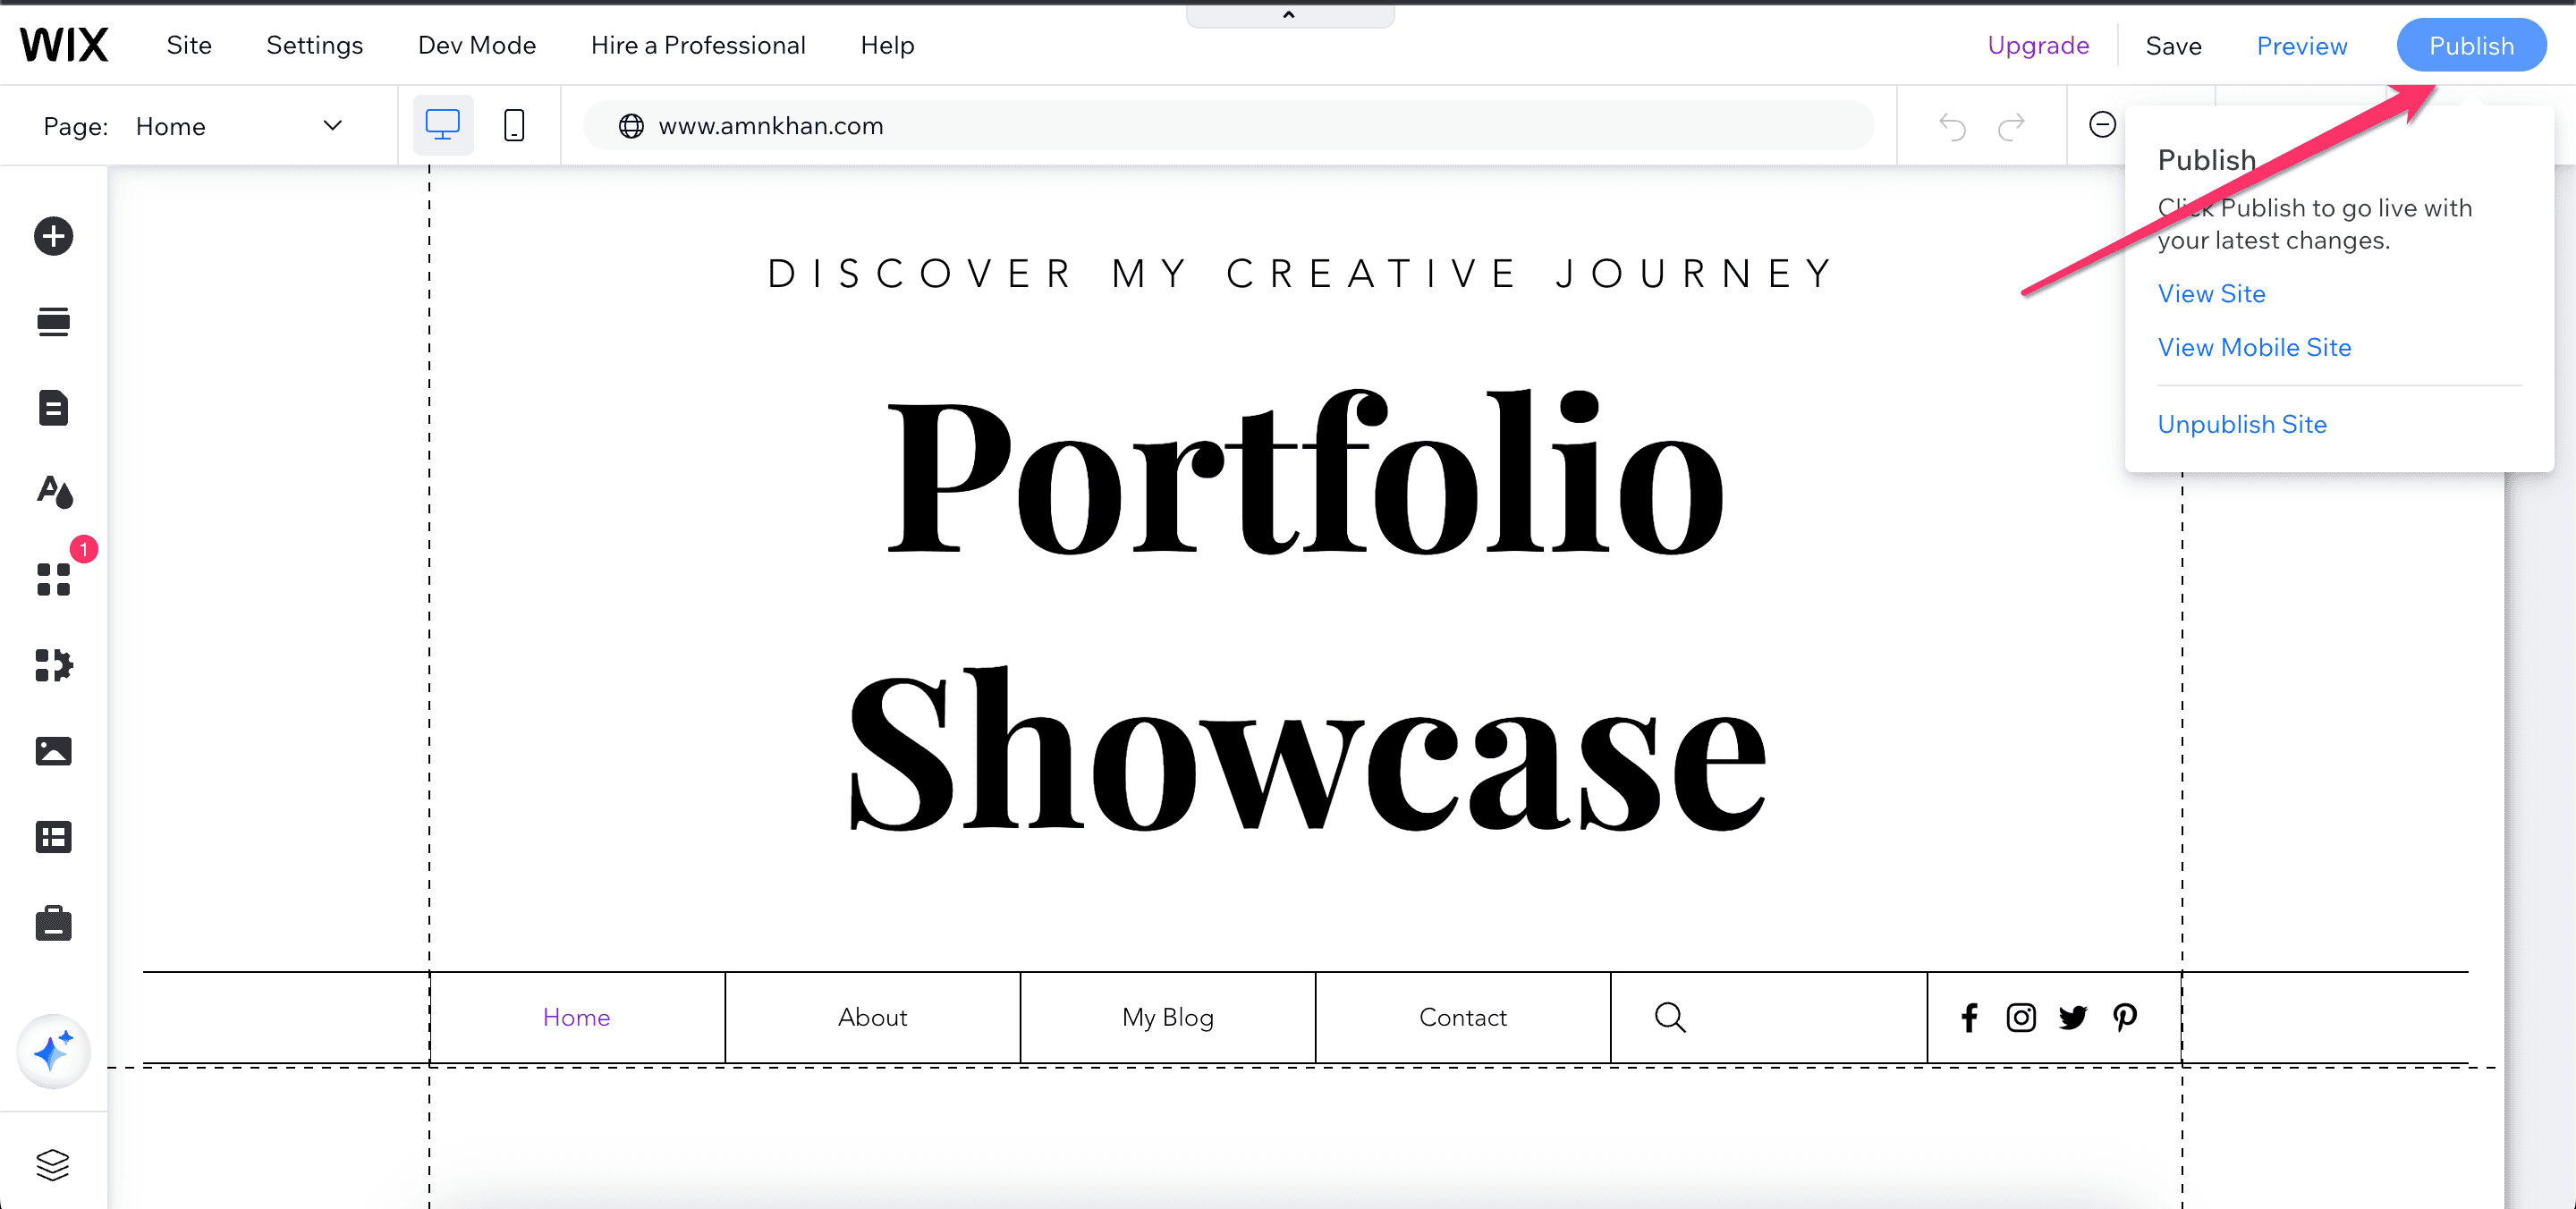
Then go back to the website editor and click Publish in the top-right corner to publish your changes.
Finally, check the live version of your website. The Consently banner should be visible.

Done!
Your cookie consent banner is now active on your Wix site.
✅ Success indicator: Visit your published site in a new incognito window to see the consent banner appear immediately.
What's Next
Now that you've installed the script:
Troubleshooting
The banner doesn't appear after publishing
Why this happens: Wix aggressively caches content, and changes can take a few minutes to propagate.
Solution:
Wait 2-3 minutes after publishing
Clear your browser cache completely
Try viewing your site in an incognito/private browsing window
Check that the script appears in your page source (right-click → View Page Source and search for "consently")
I don't see the Custom Code option
Why this happens: Custom Code is only available on Wix Business and eCommerce plans.
Solution: Upgrade your Wix plan to Business or eCommerce. Free, Connect Domain, and Combo plans don't support custom code. You can upgrade in your Wix dashboard under Settings → Billing & Payments.
The banner appears multiple times on the same page
Why this happens: The Consently code was added in multiple locations or saved multiple times.
Solution:
Go to Settings → Custom Code in Wix
Look for duplicate "Consently" entries
Delete all but one entry
Click Apply, then Publish your site
The code appears as text on my page
Why this happens: The code was pasted into a Wix text element rather than the Custom Code section.
Solution: Remove the code from any text elements on your page, then follow the installation steps above to add it properly via Settings → Custom Code.
Related Pages
Platform Compatibility — Check requirements for different platforms
Google Tag Manager Installation — Alternative installation method if you use GTM
Installing on Squarespace — Installation guide for another popular website builder