

TL;DR: Dashboard → Cookie Manager → Cookie List → Select any Category → + Add Cookie or edit existing cookies. Add, edit, and delete cookies to keep your cookie list accurate and up-to-date.
Overview
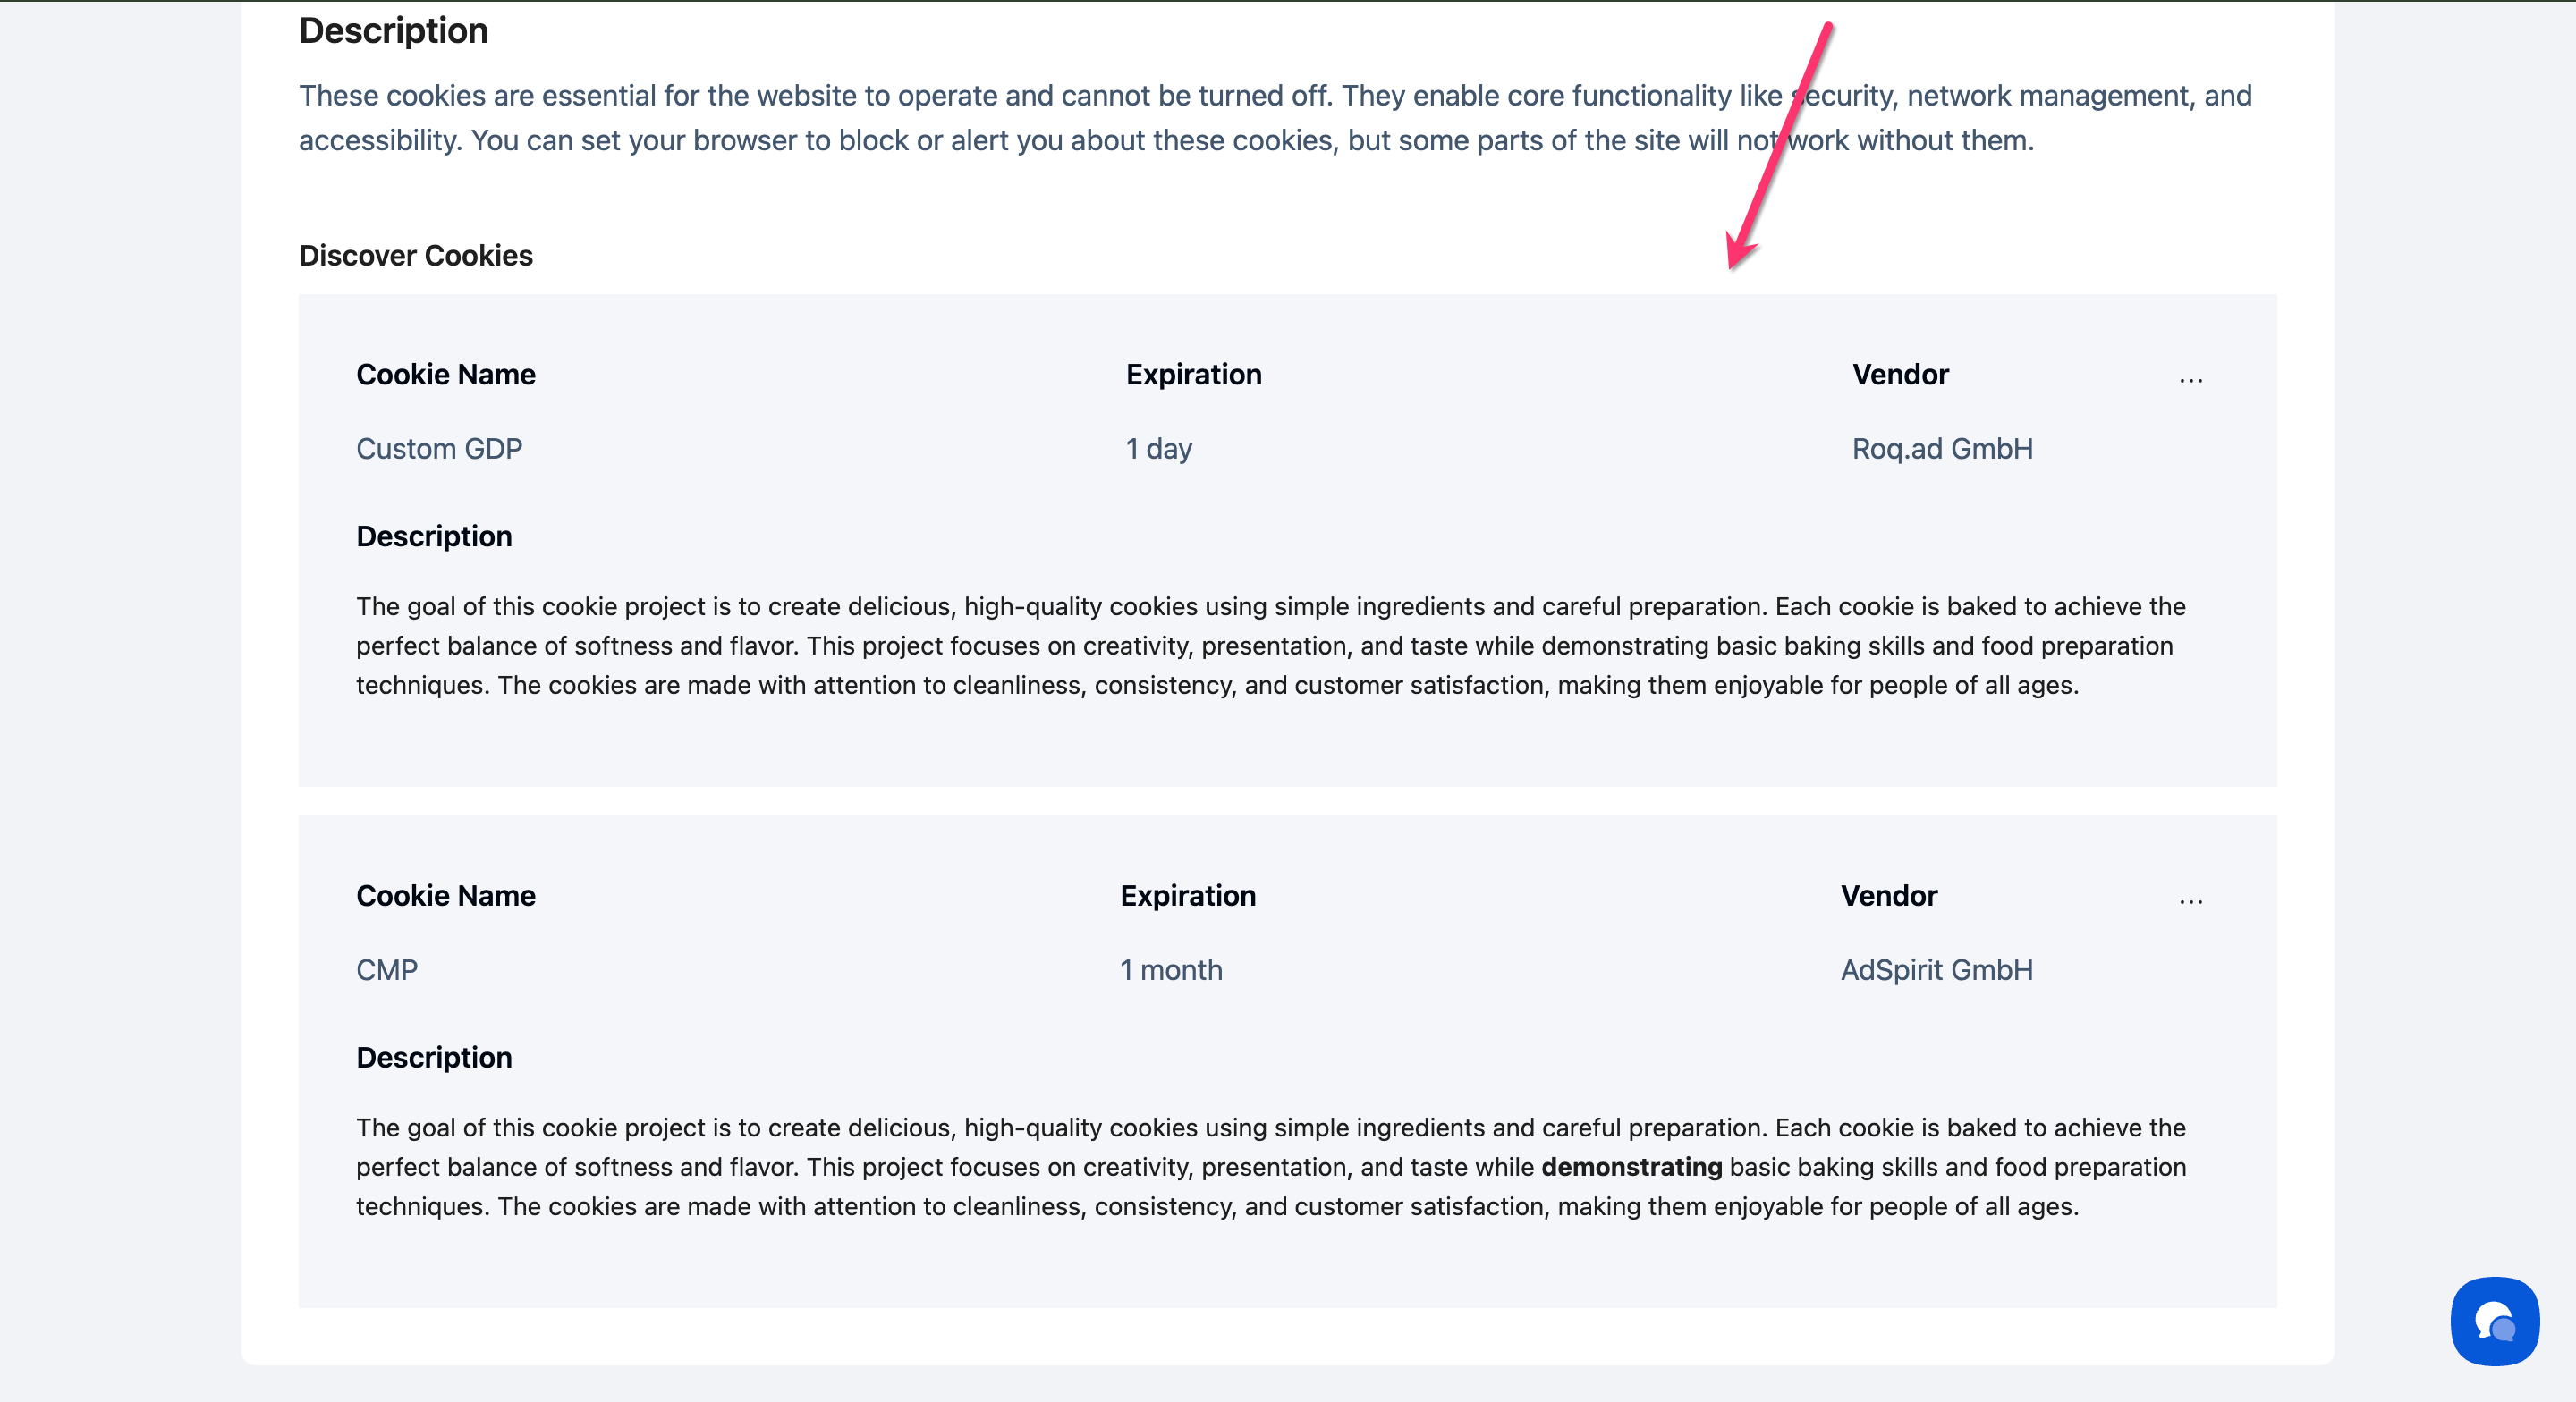
The Cookie Manager lets you manually add, edit, and organize cookies detected on your website. While cookie scanning finds most cookies automatically, you may need to add cookies manually or edit their details for accuracy and compliance.
Before You Begin
Make sure you have:
Access to your Cookie Manager page
Information about the cookies you want to add (name, vendor, purpose)
Time required: About 2-5 minutes per cookie
How to Add a Cookie
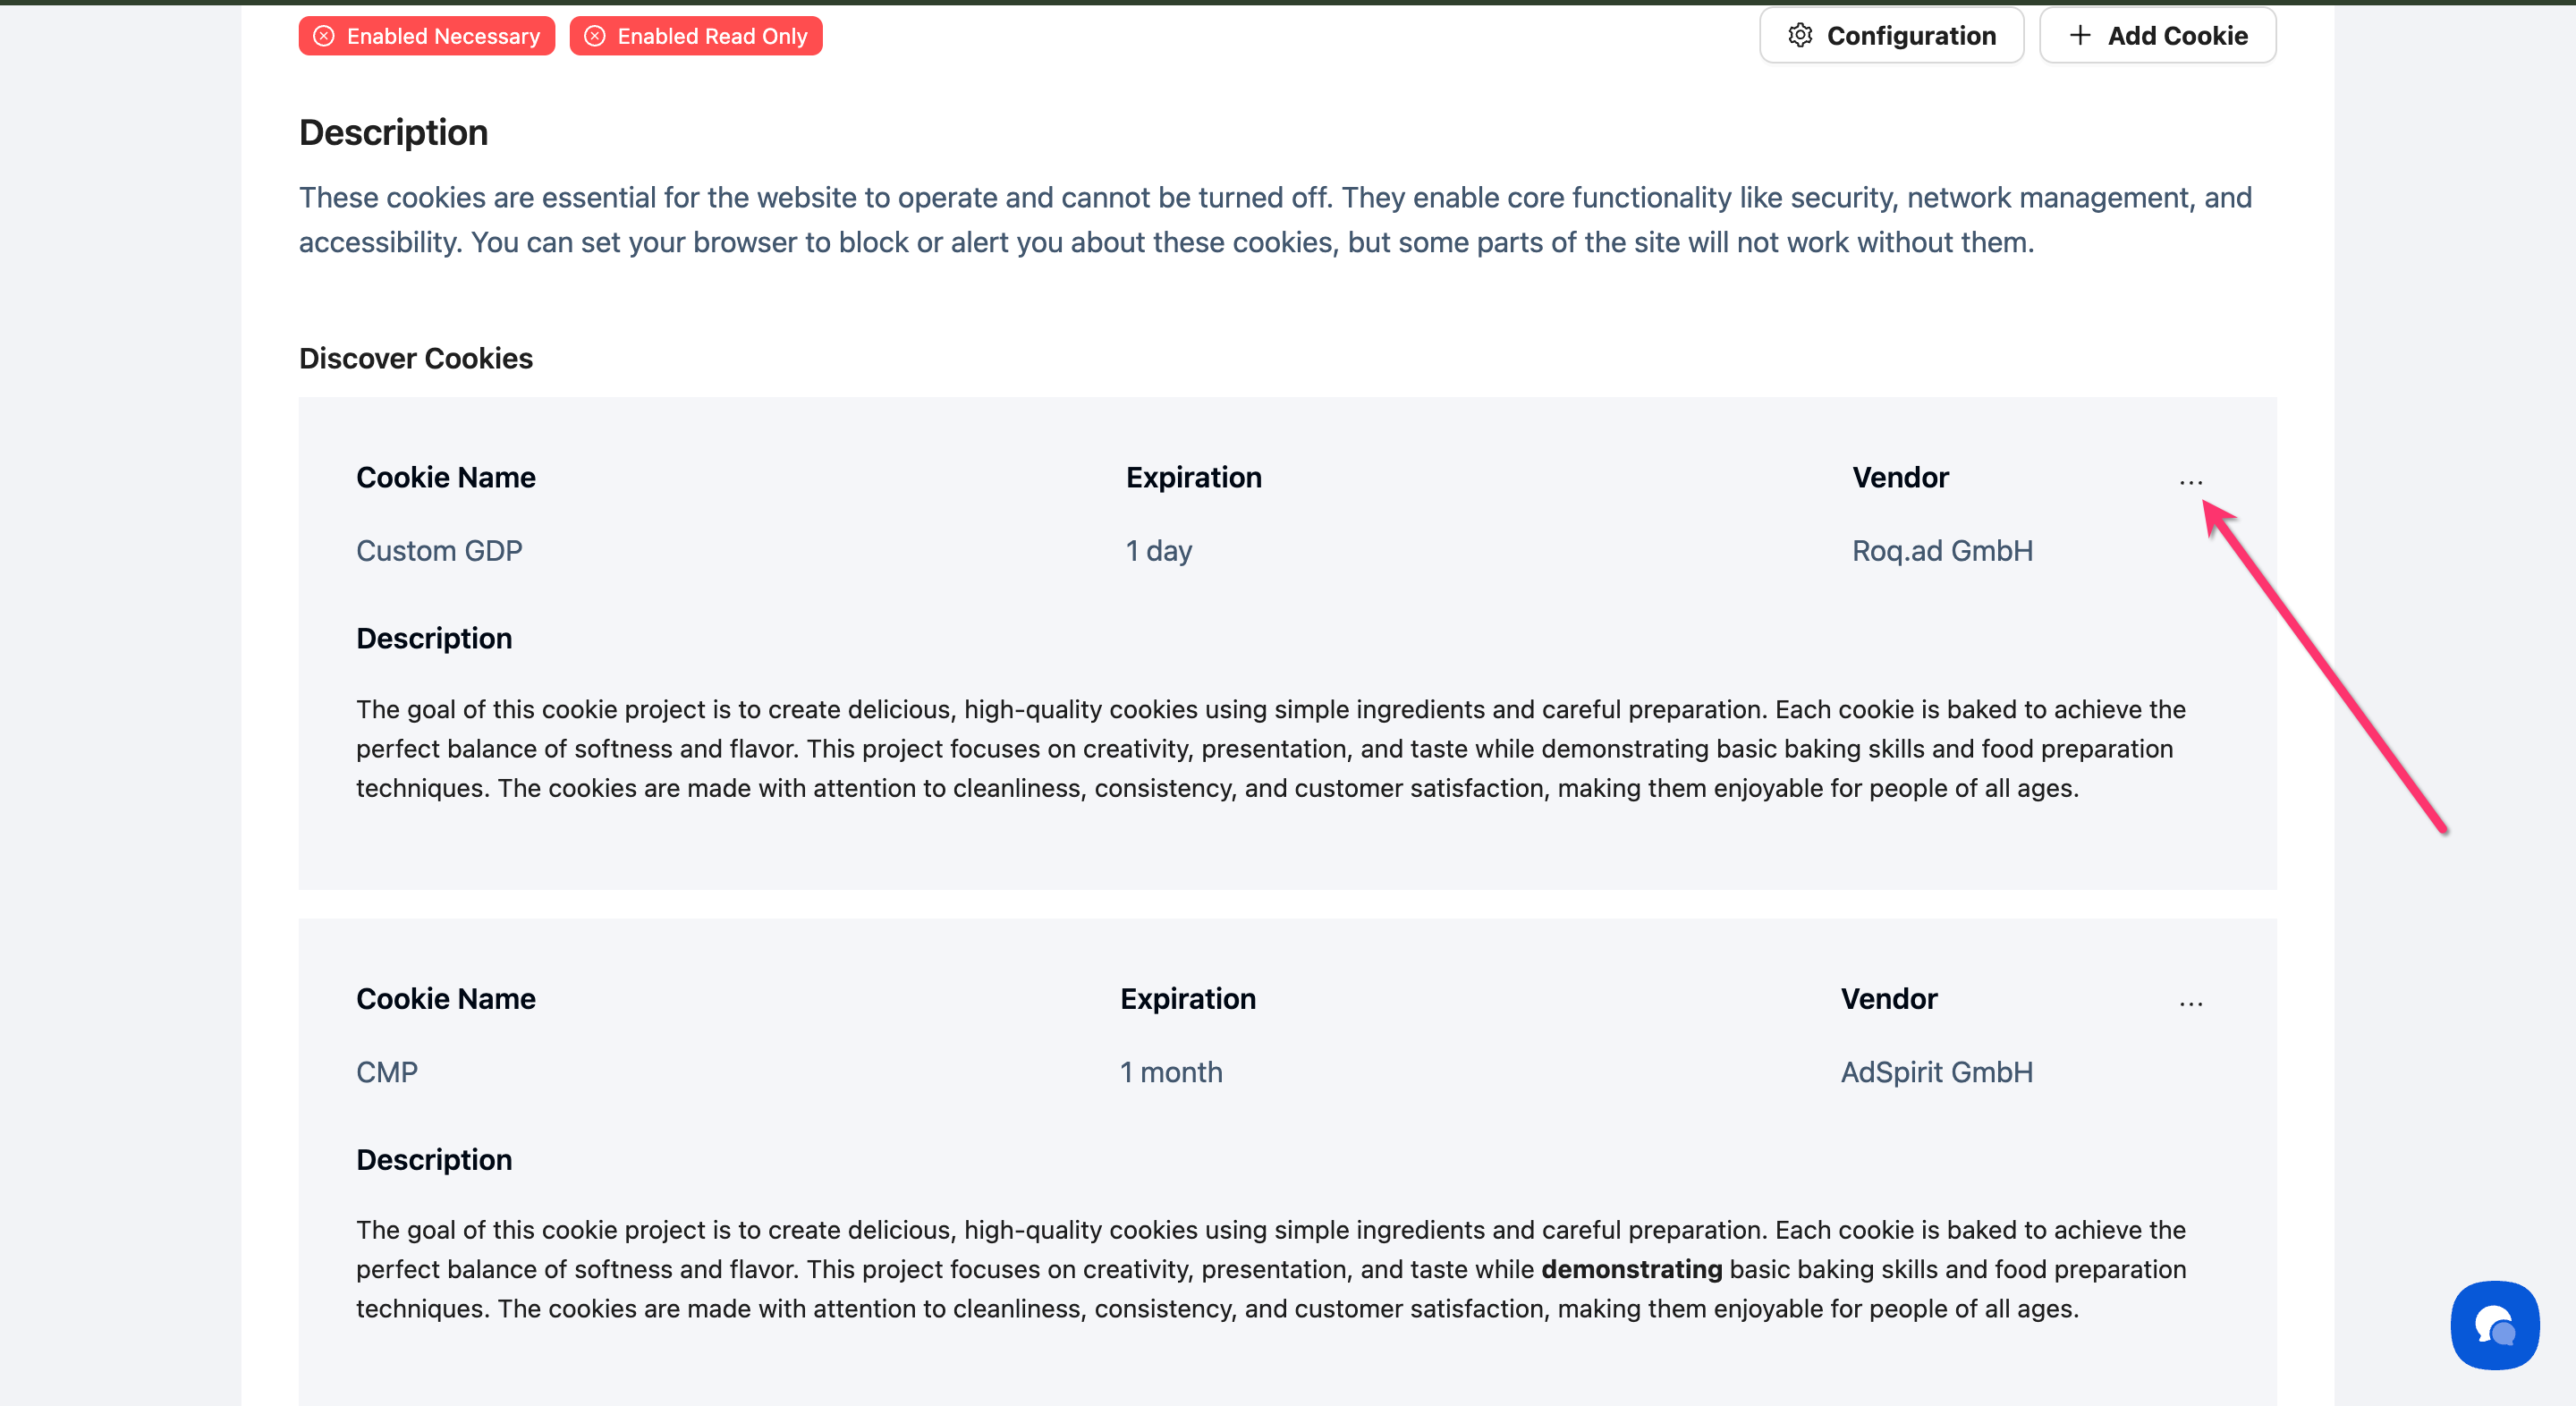
Step 1: Select the cookie category
Navigate to Cookie Manager and click the category tab where you want to add the cookie (Essential, Analytics, Performance, Advertising, Social, or Unclassified).
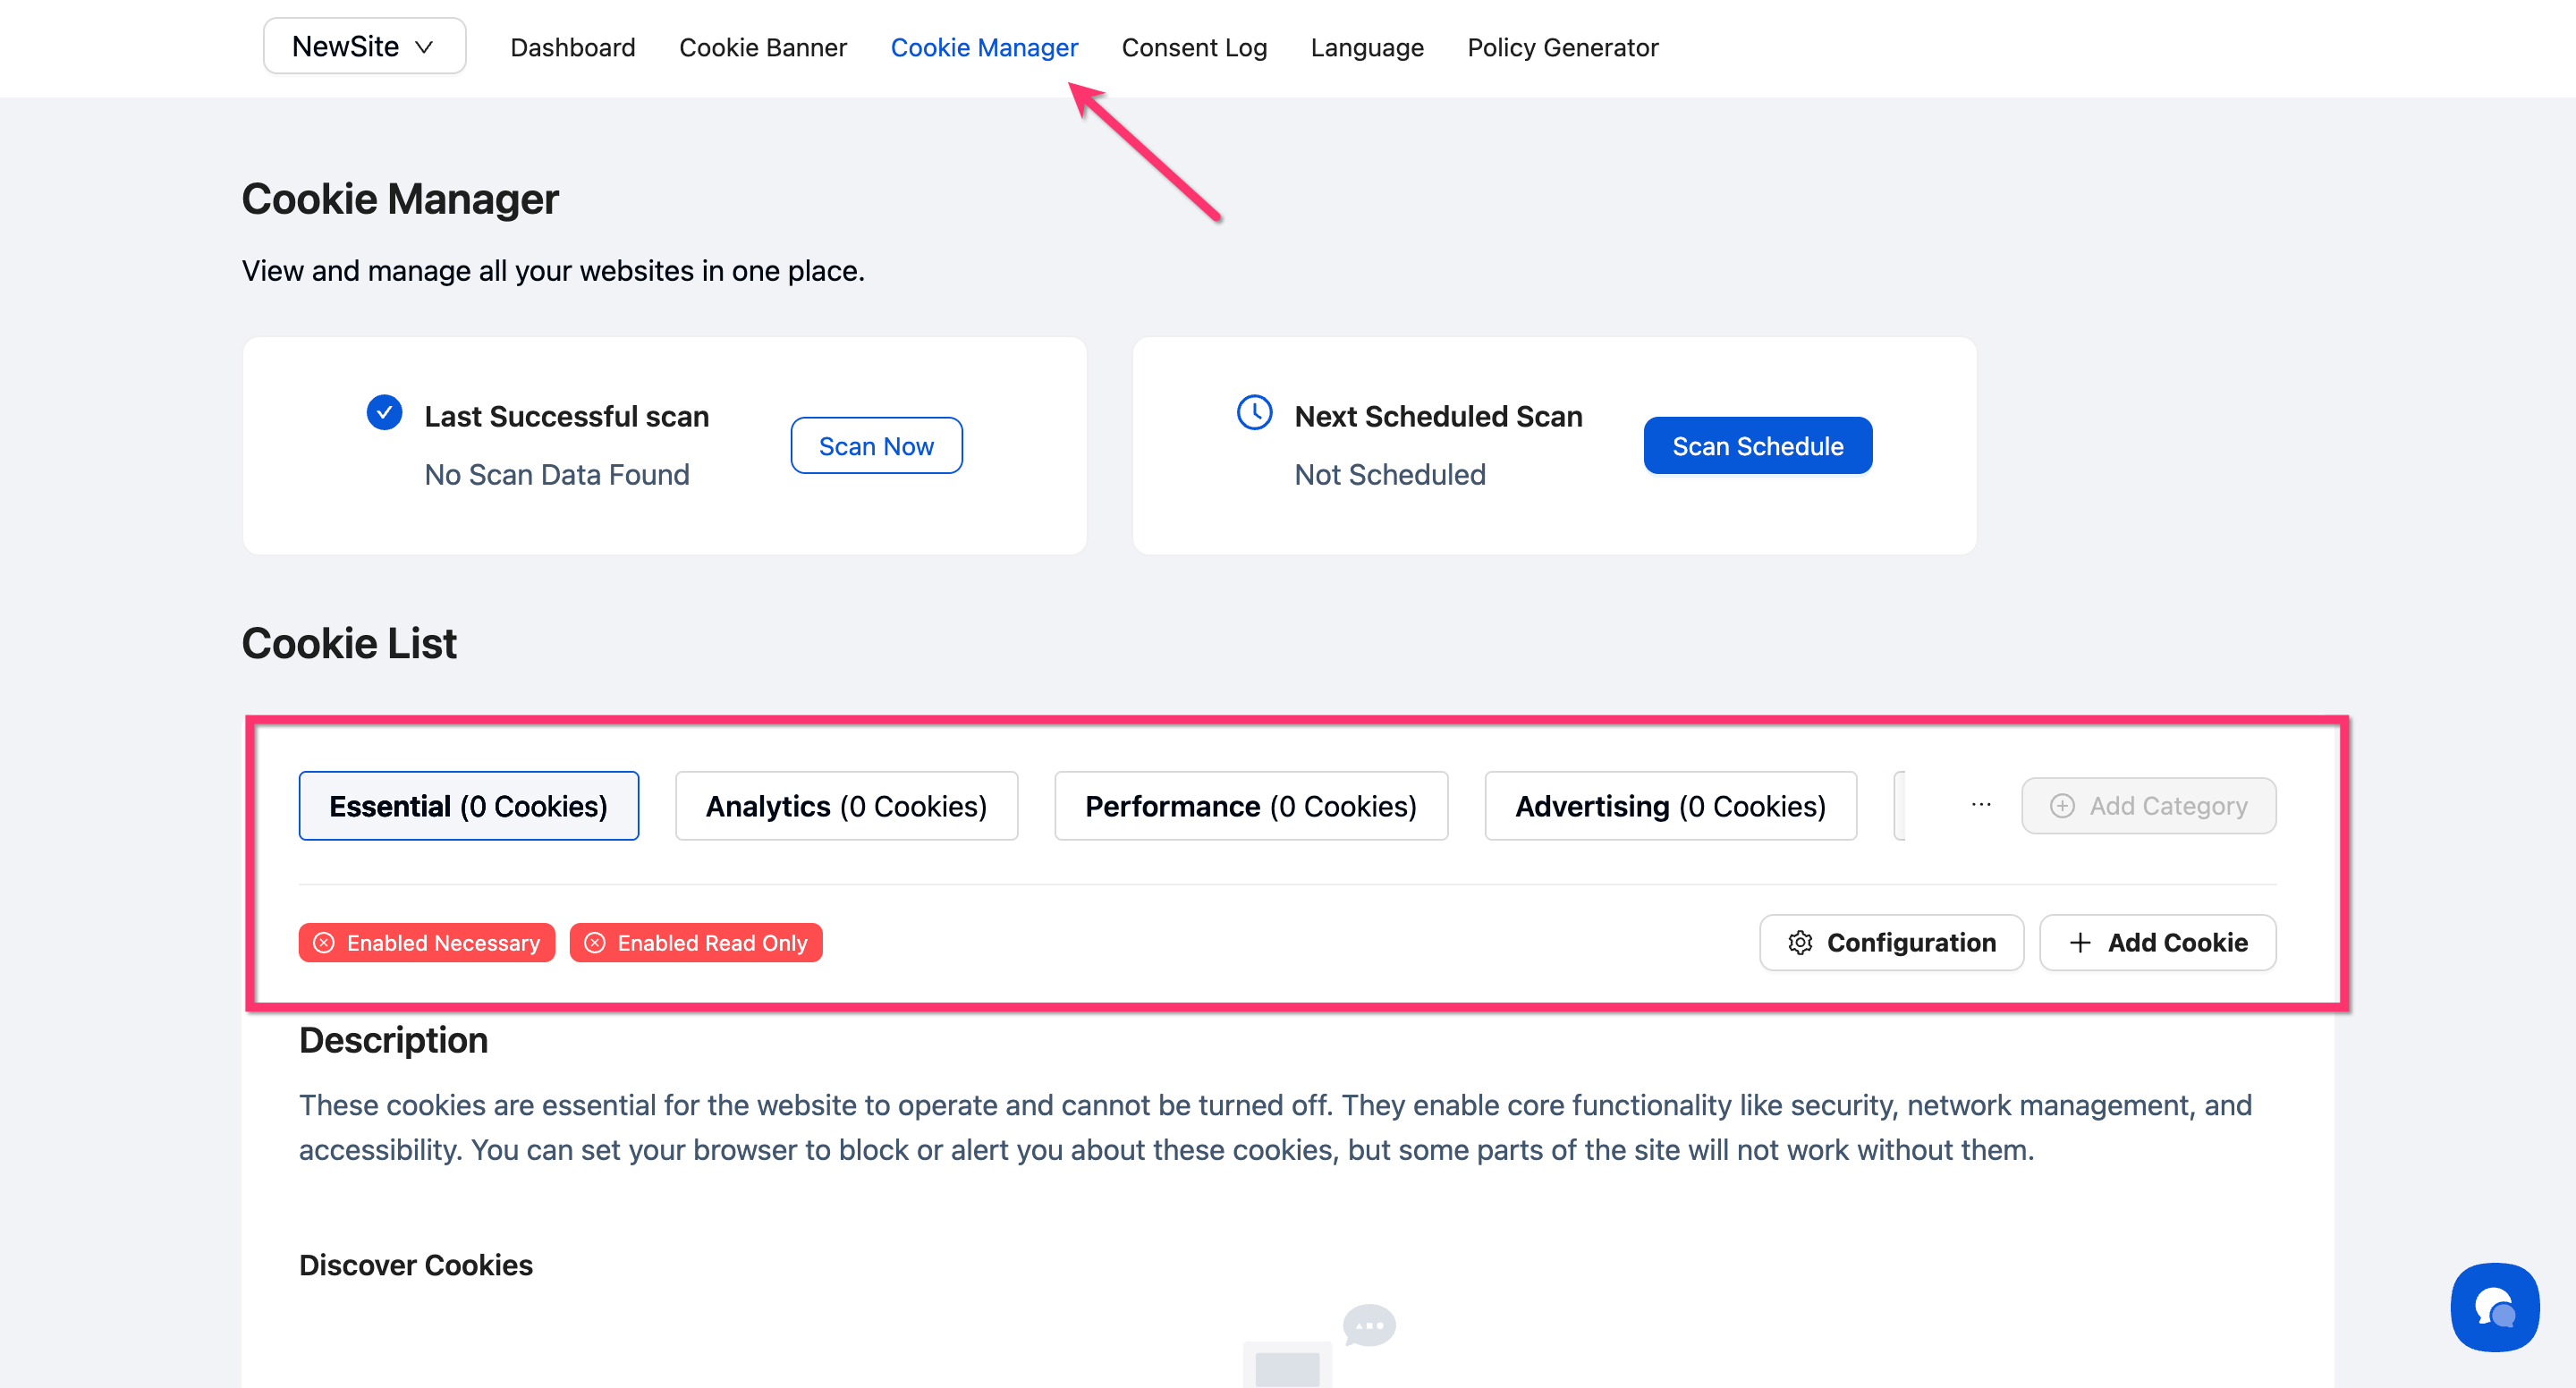
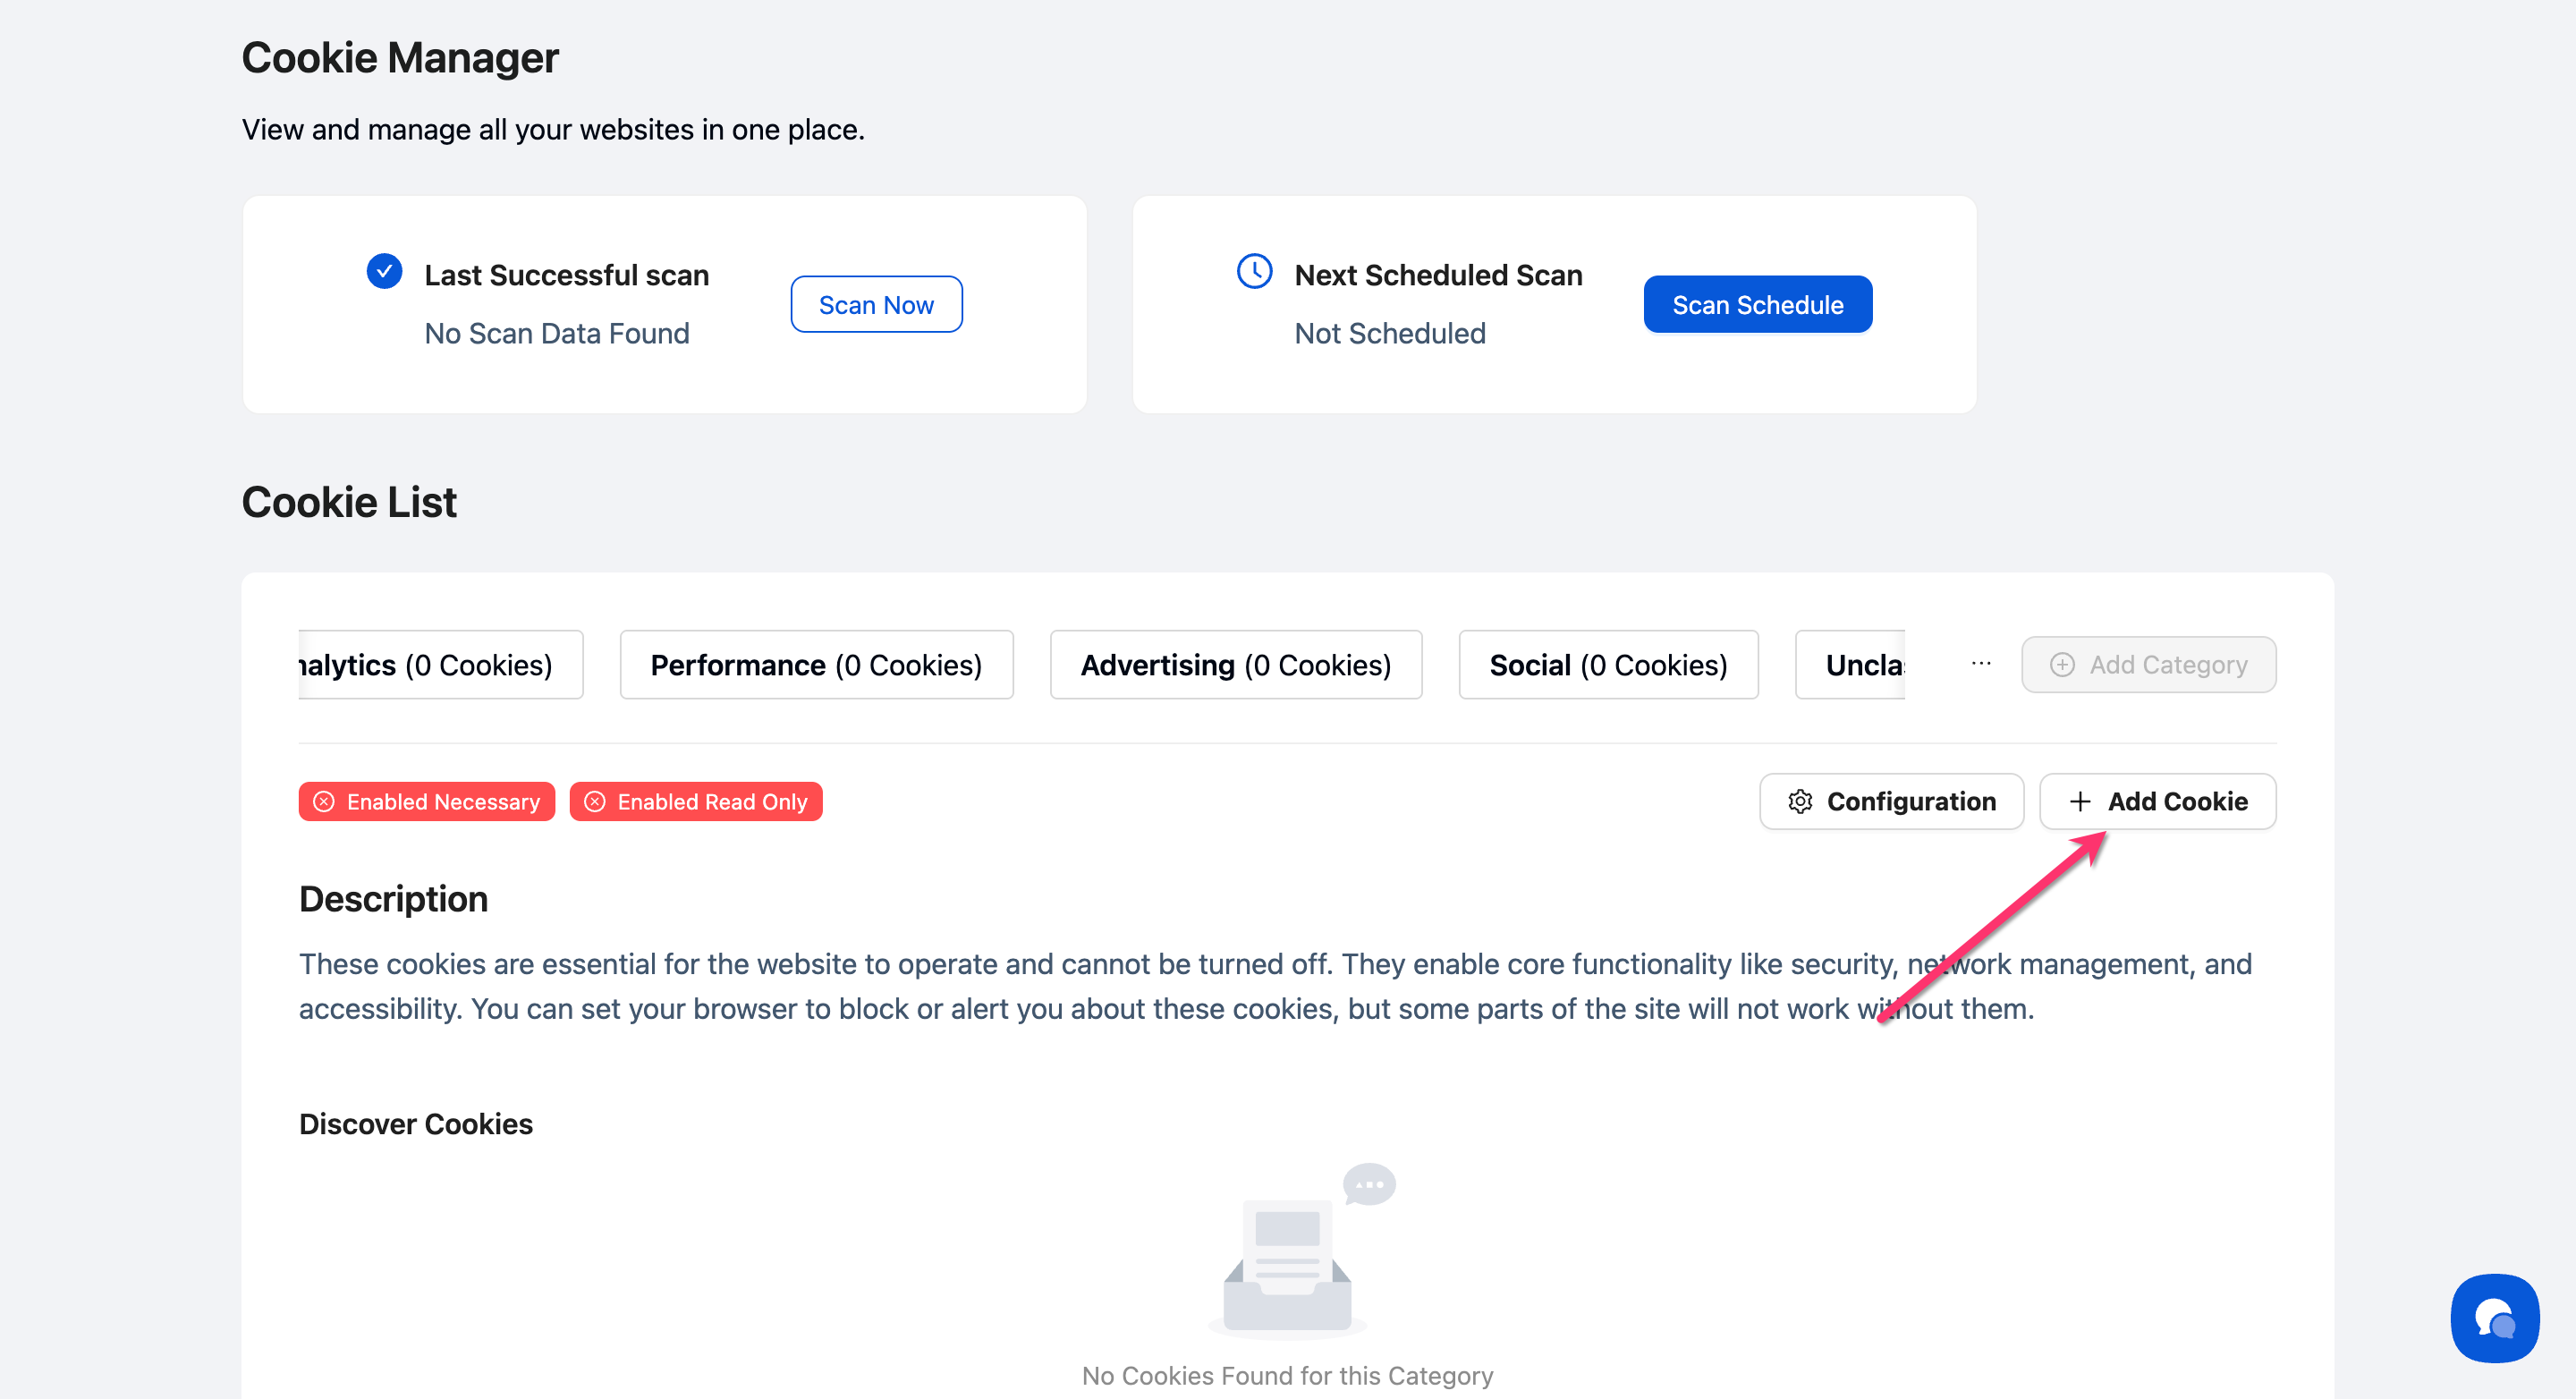
Step 2: Open the Add Cookie modal
Click the + Add Cookie button in the top-right corner of the cookie list.
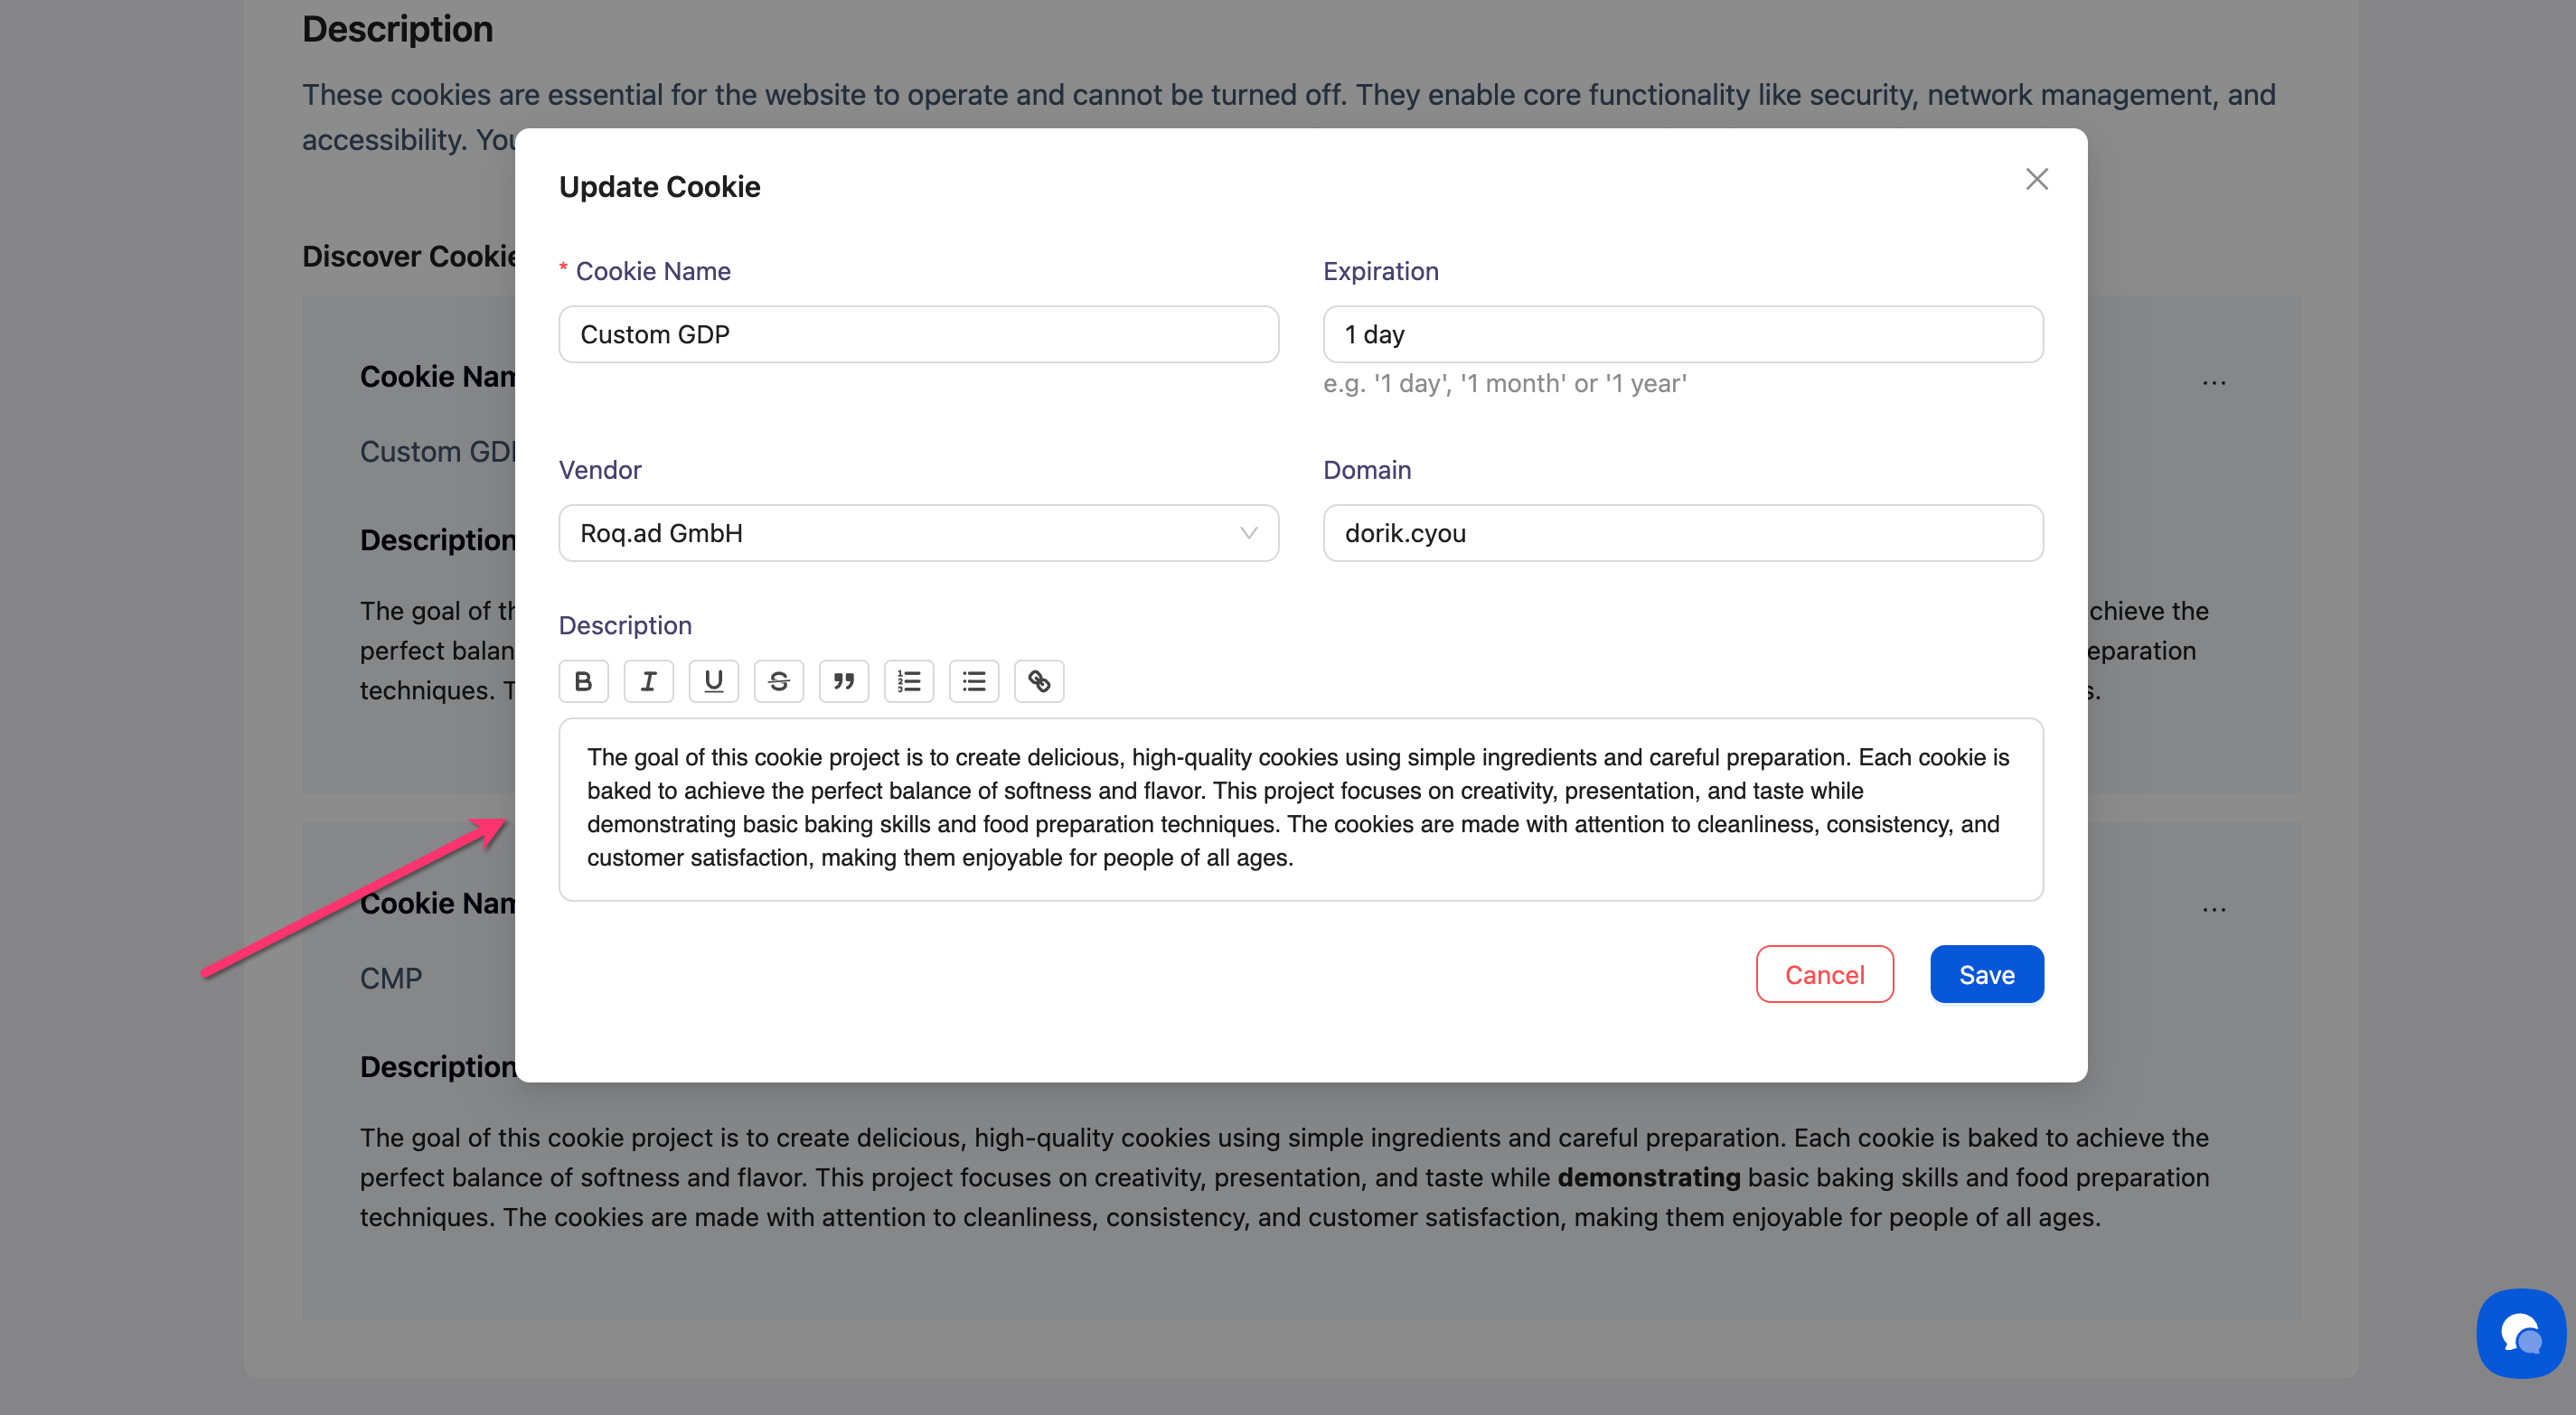
Step 3: Enter the cookie name
Type the exact cookie name in the Cookie Name field. This should match the cookie's technical name as it appears in your website's code.
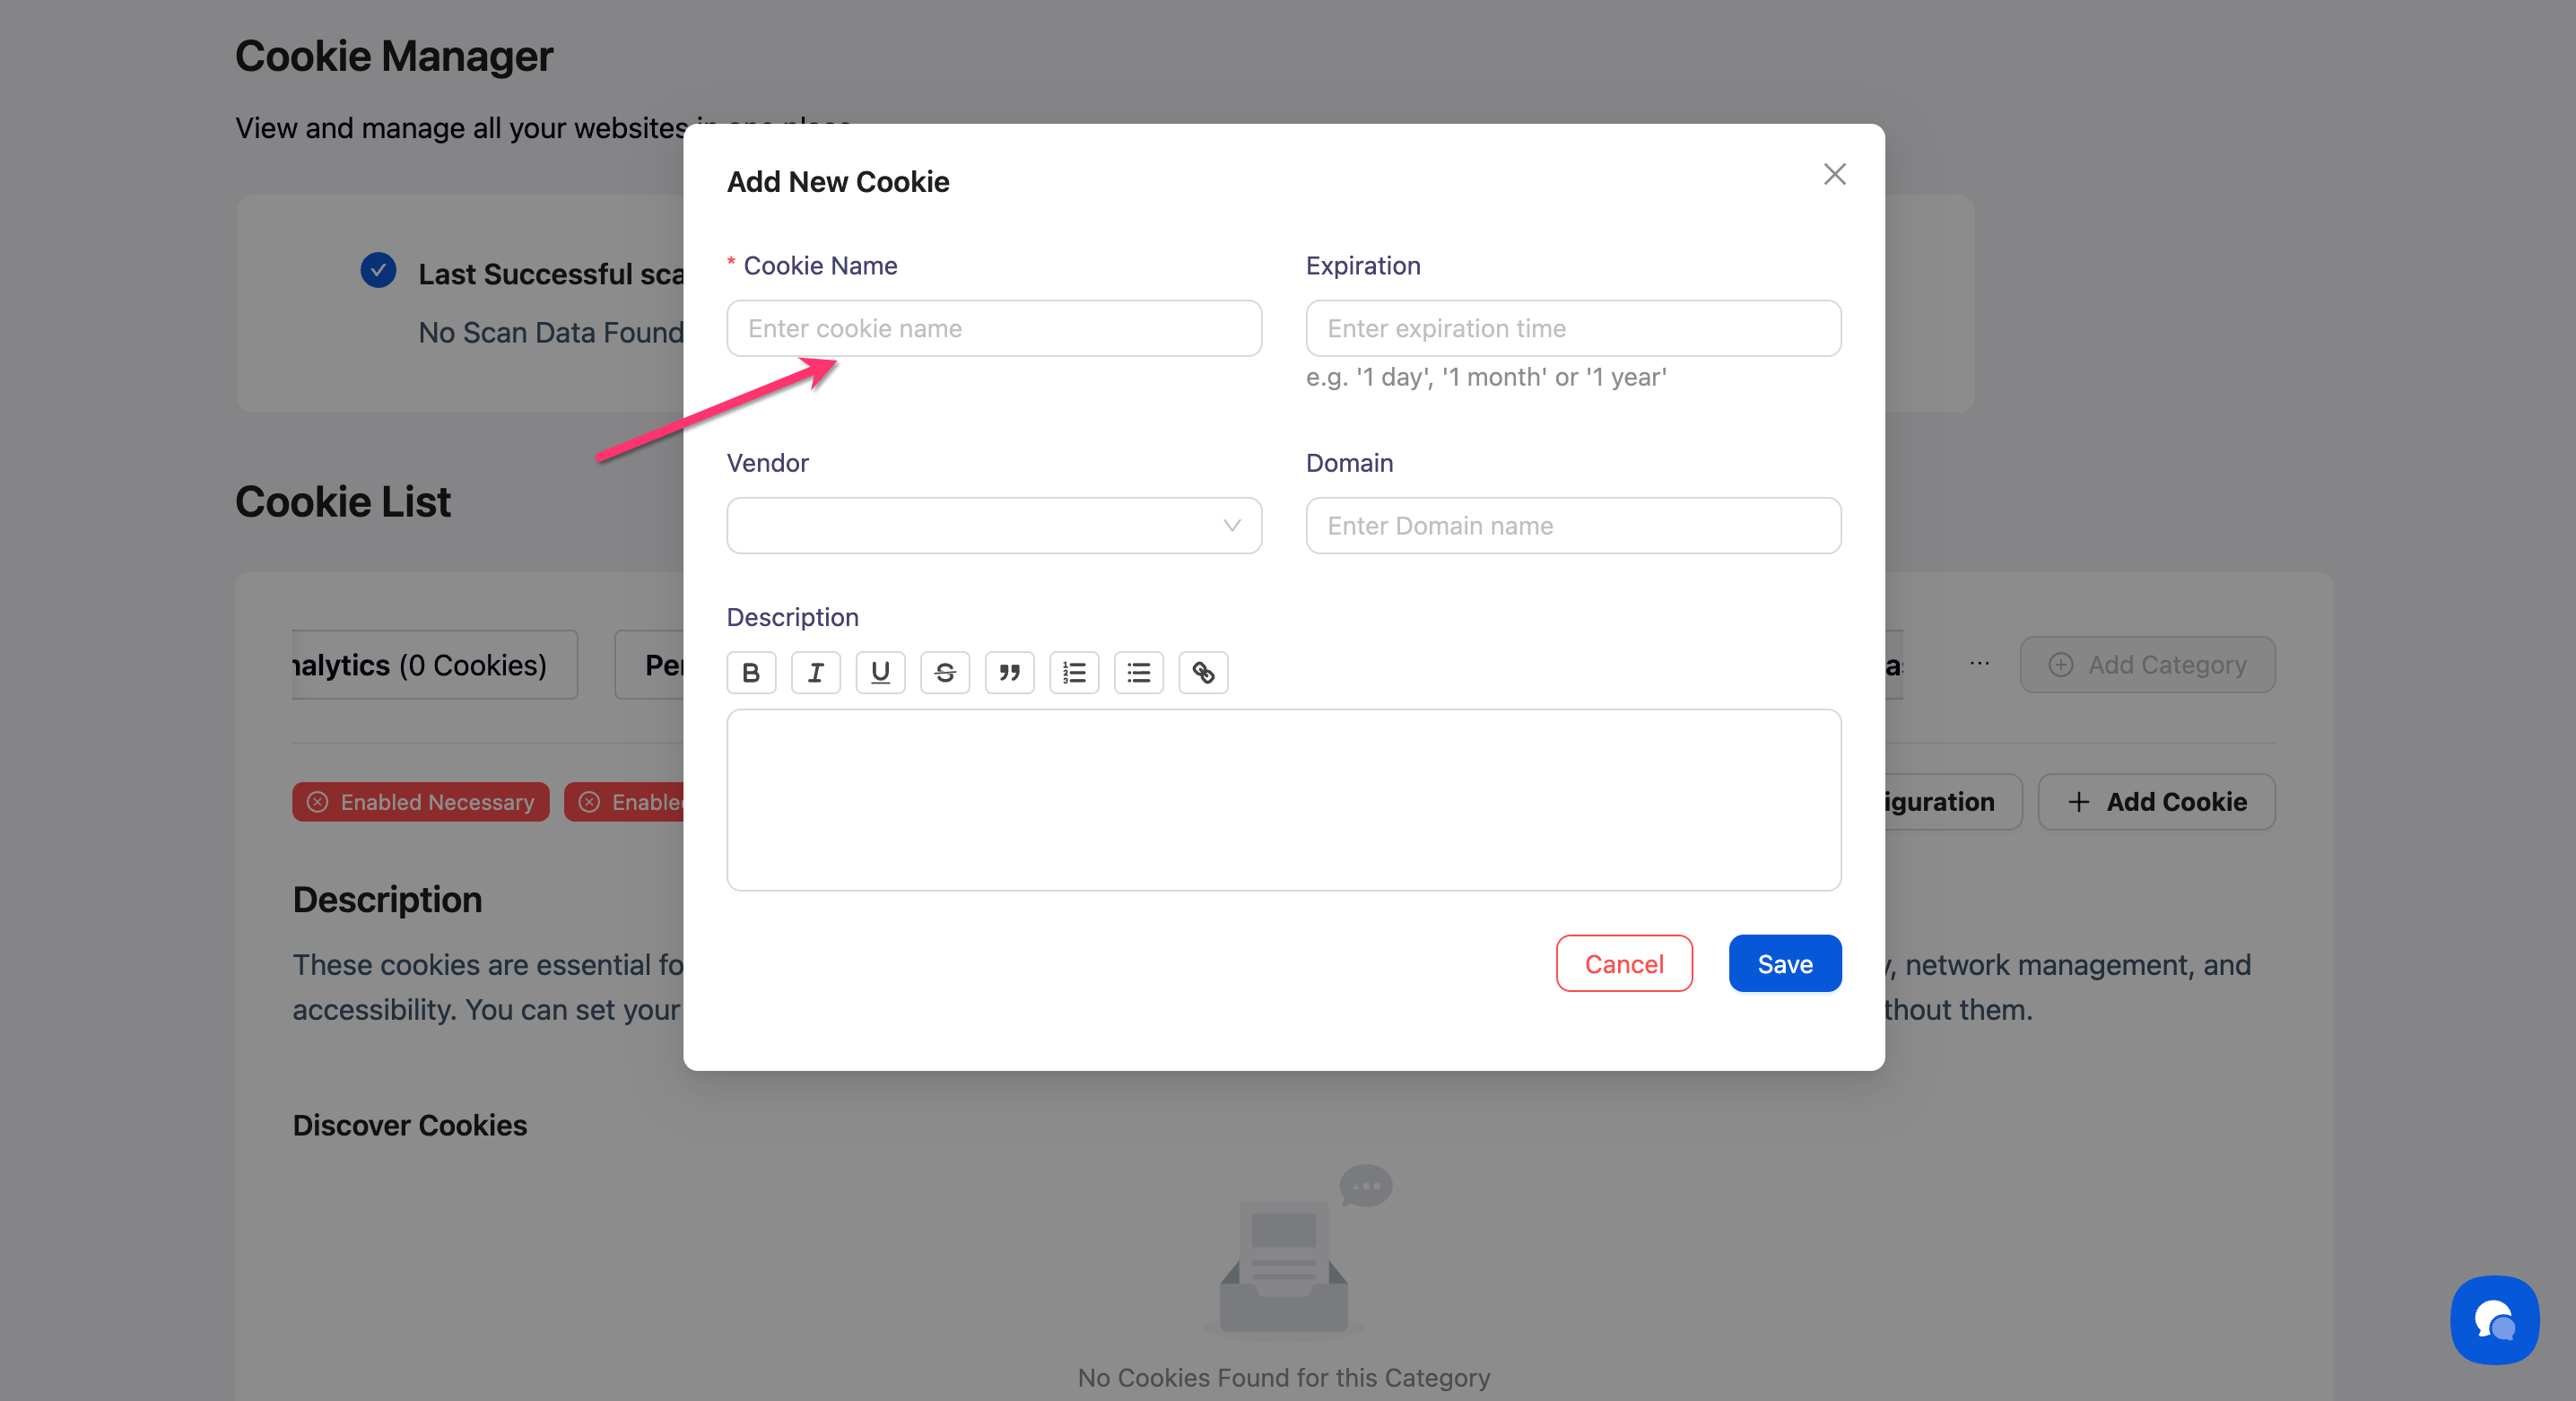
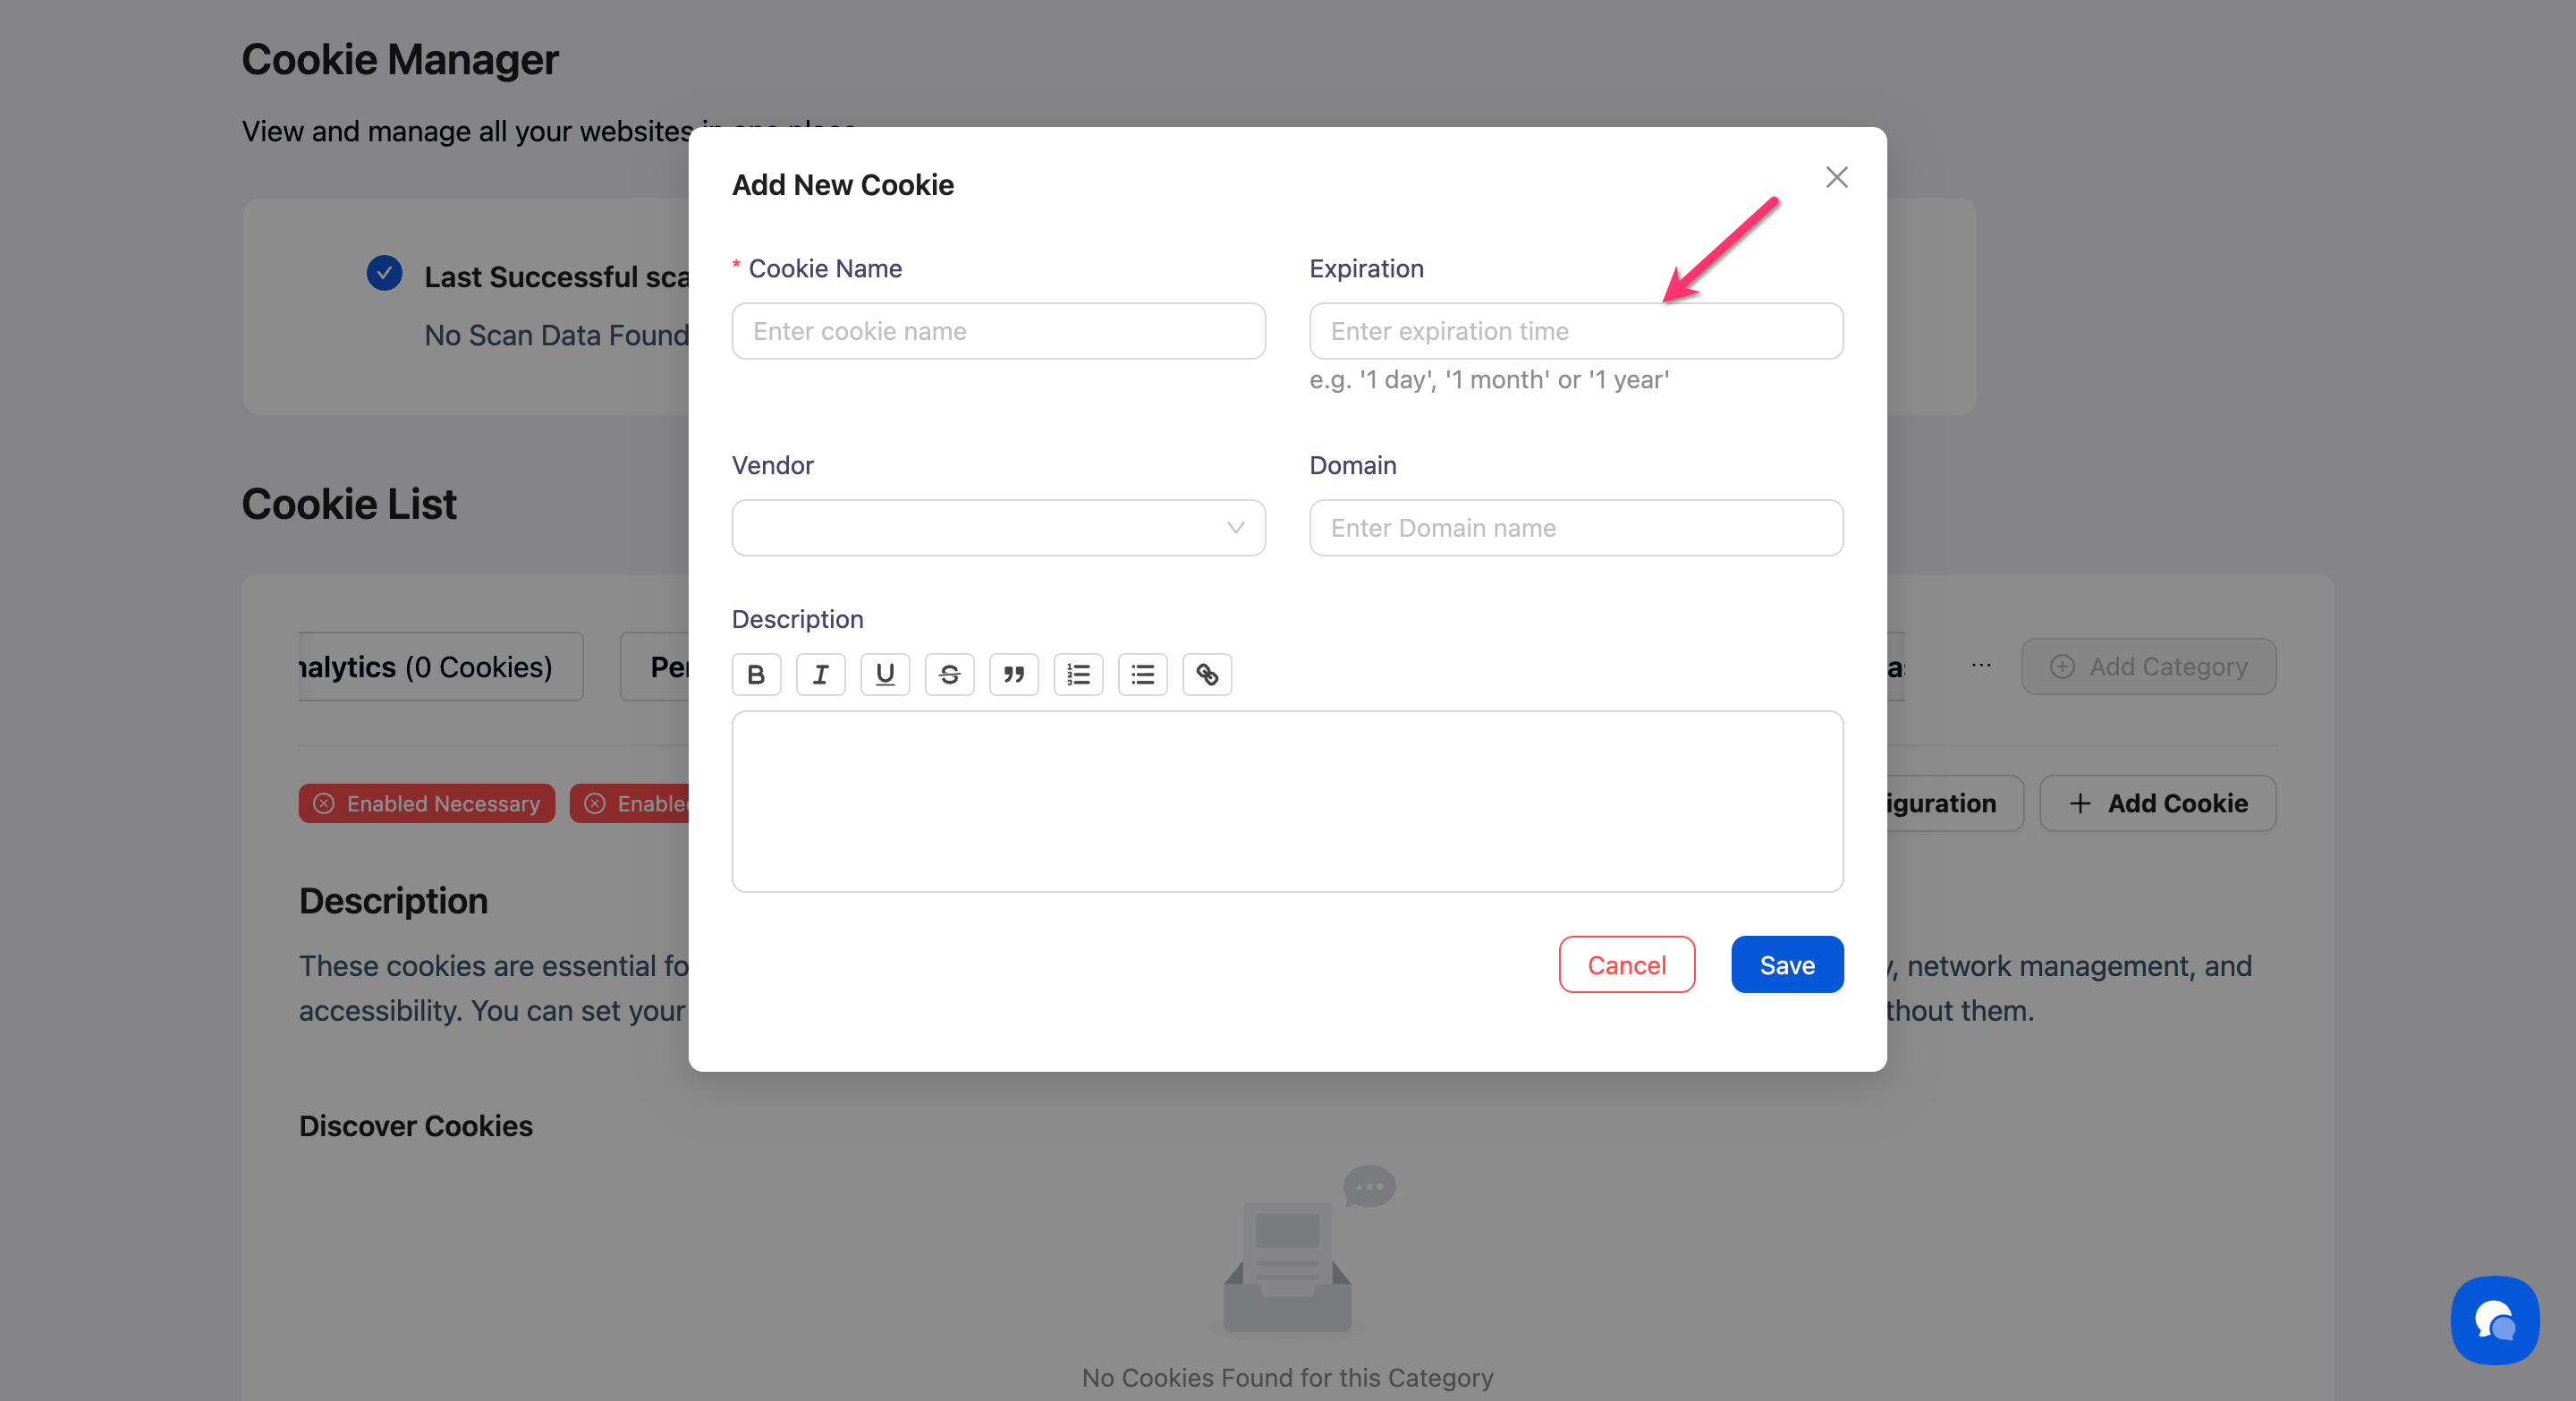
Step 4: Set the expiration
Select the cookie's lifespan from the Expiration dropdown. Available options are:
1 day
1 month
1 year
💡 Tip: Choose the option that most closely matches your cookie's actual expiration time.
Step 5: Select the vendor (optional)
Choose the cookie's vendor from the Vendor dropdown if applicable. Common vendors include Google, Facebook, or your own company name.
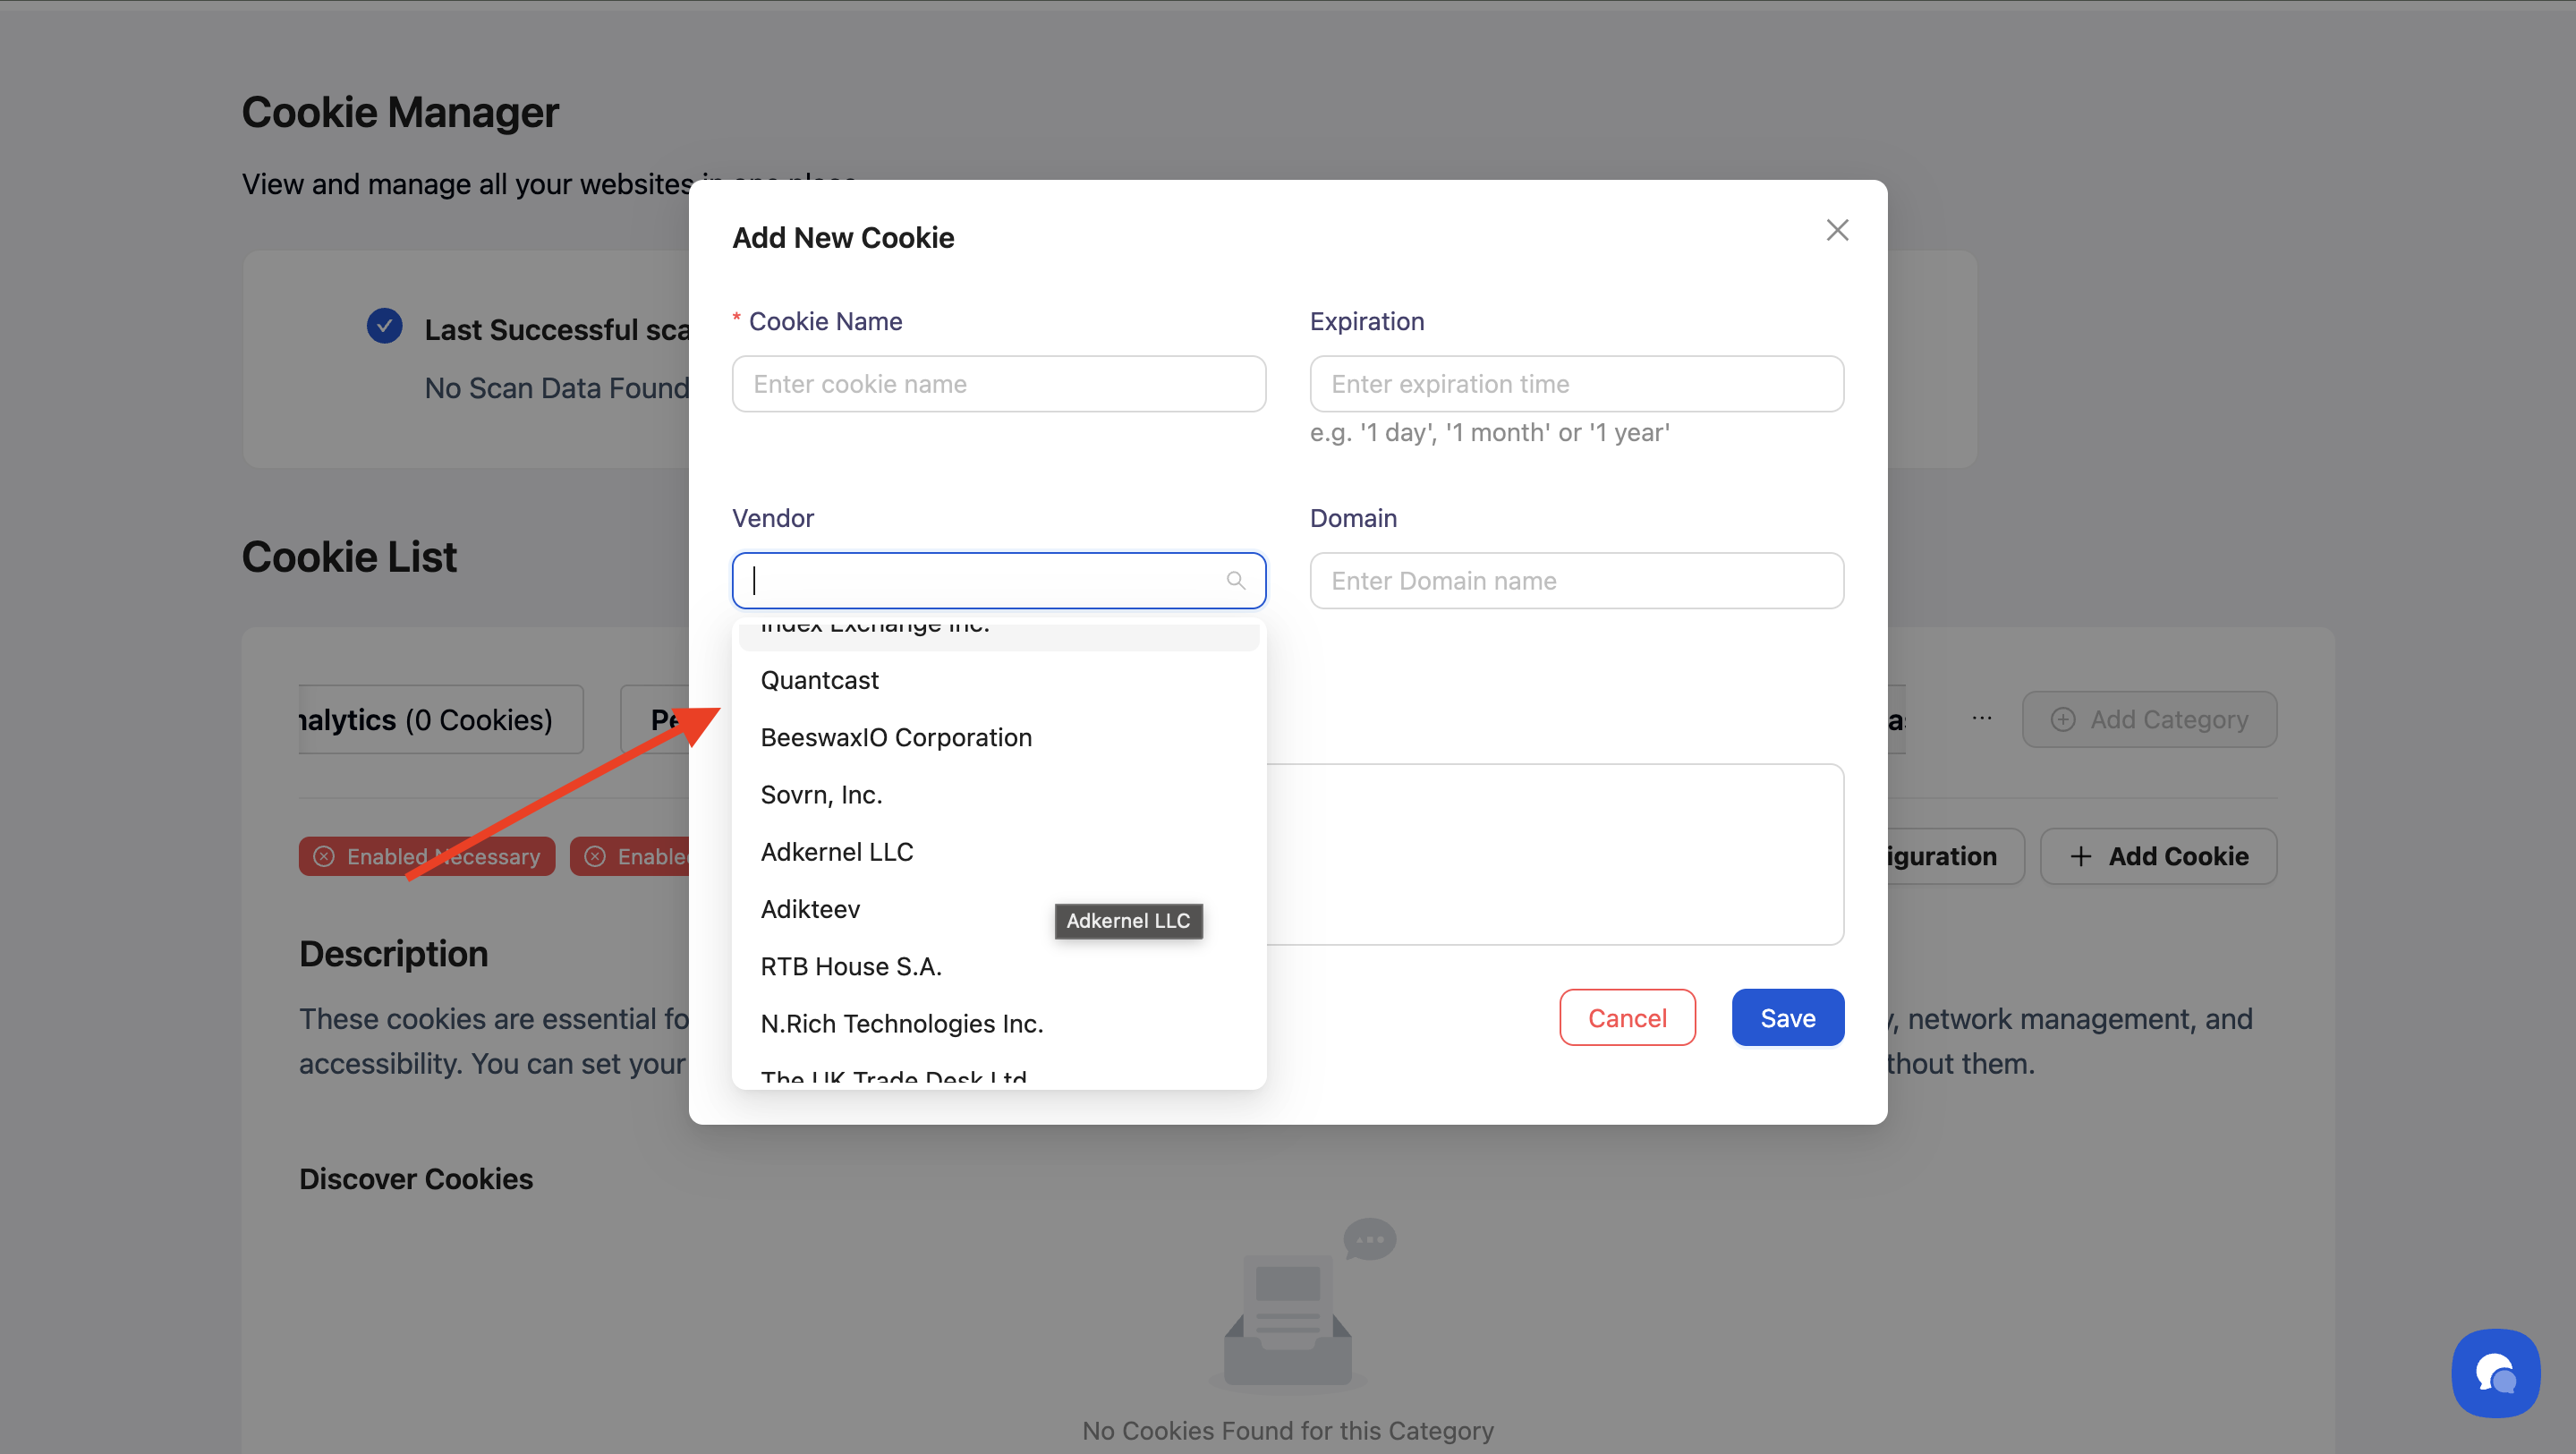
Step 6: Add the domain (optional)
Enter the domain where the cookie is set (e.g., example.com or .example.com).
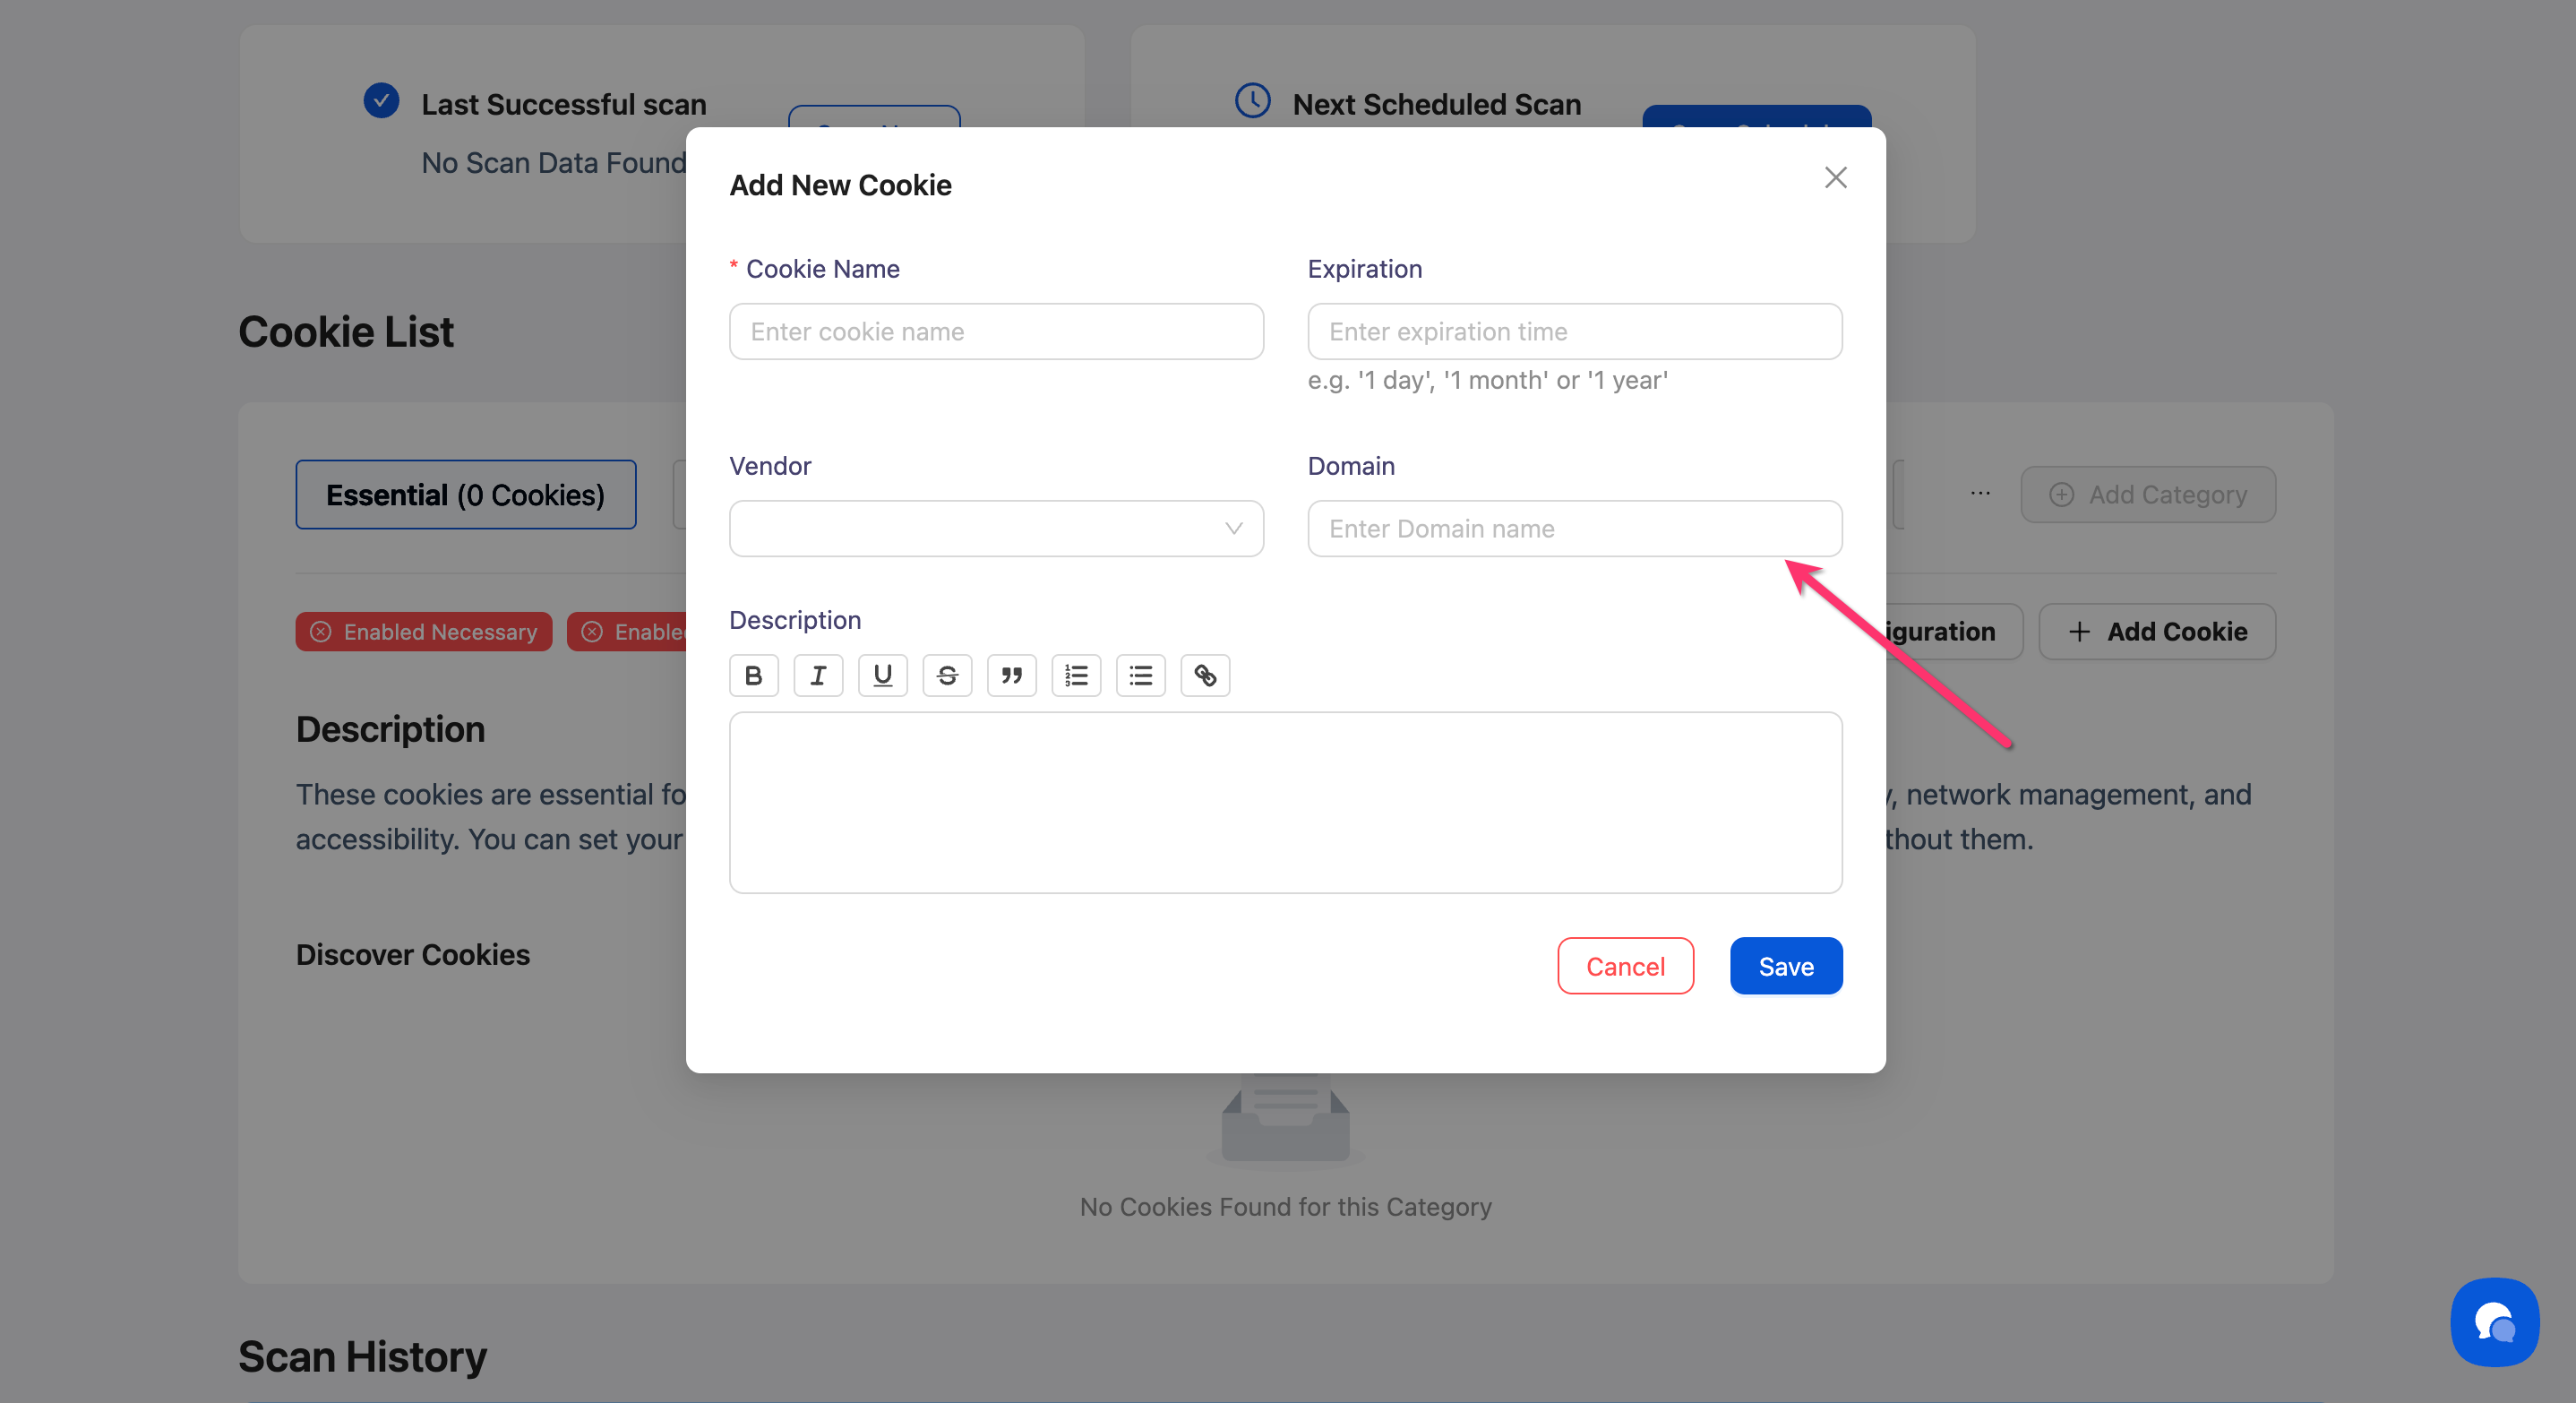
Step 7: Write a description
Use the rich text editor to explain what the cookie does in plain language. This description appears in your Preference Center to help visitors understand the cookie's purpose.
💡 Tip: Write clear, user-friendly descriptions like "Remembers your language preference" rather than technical jargon.
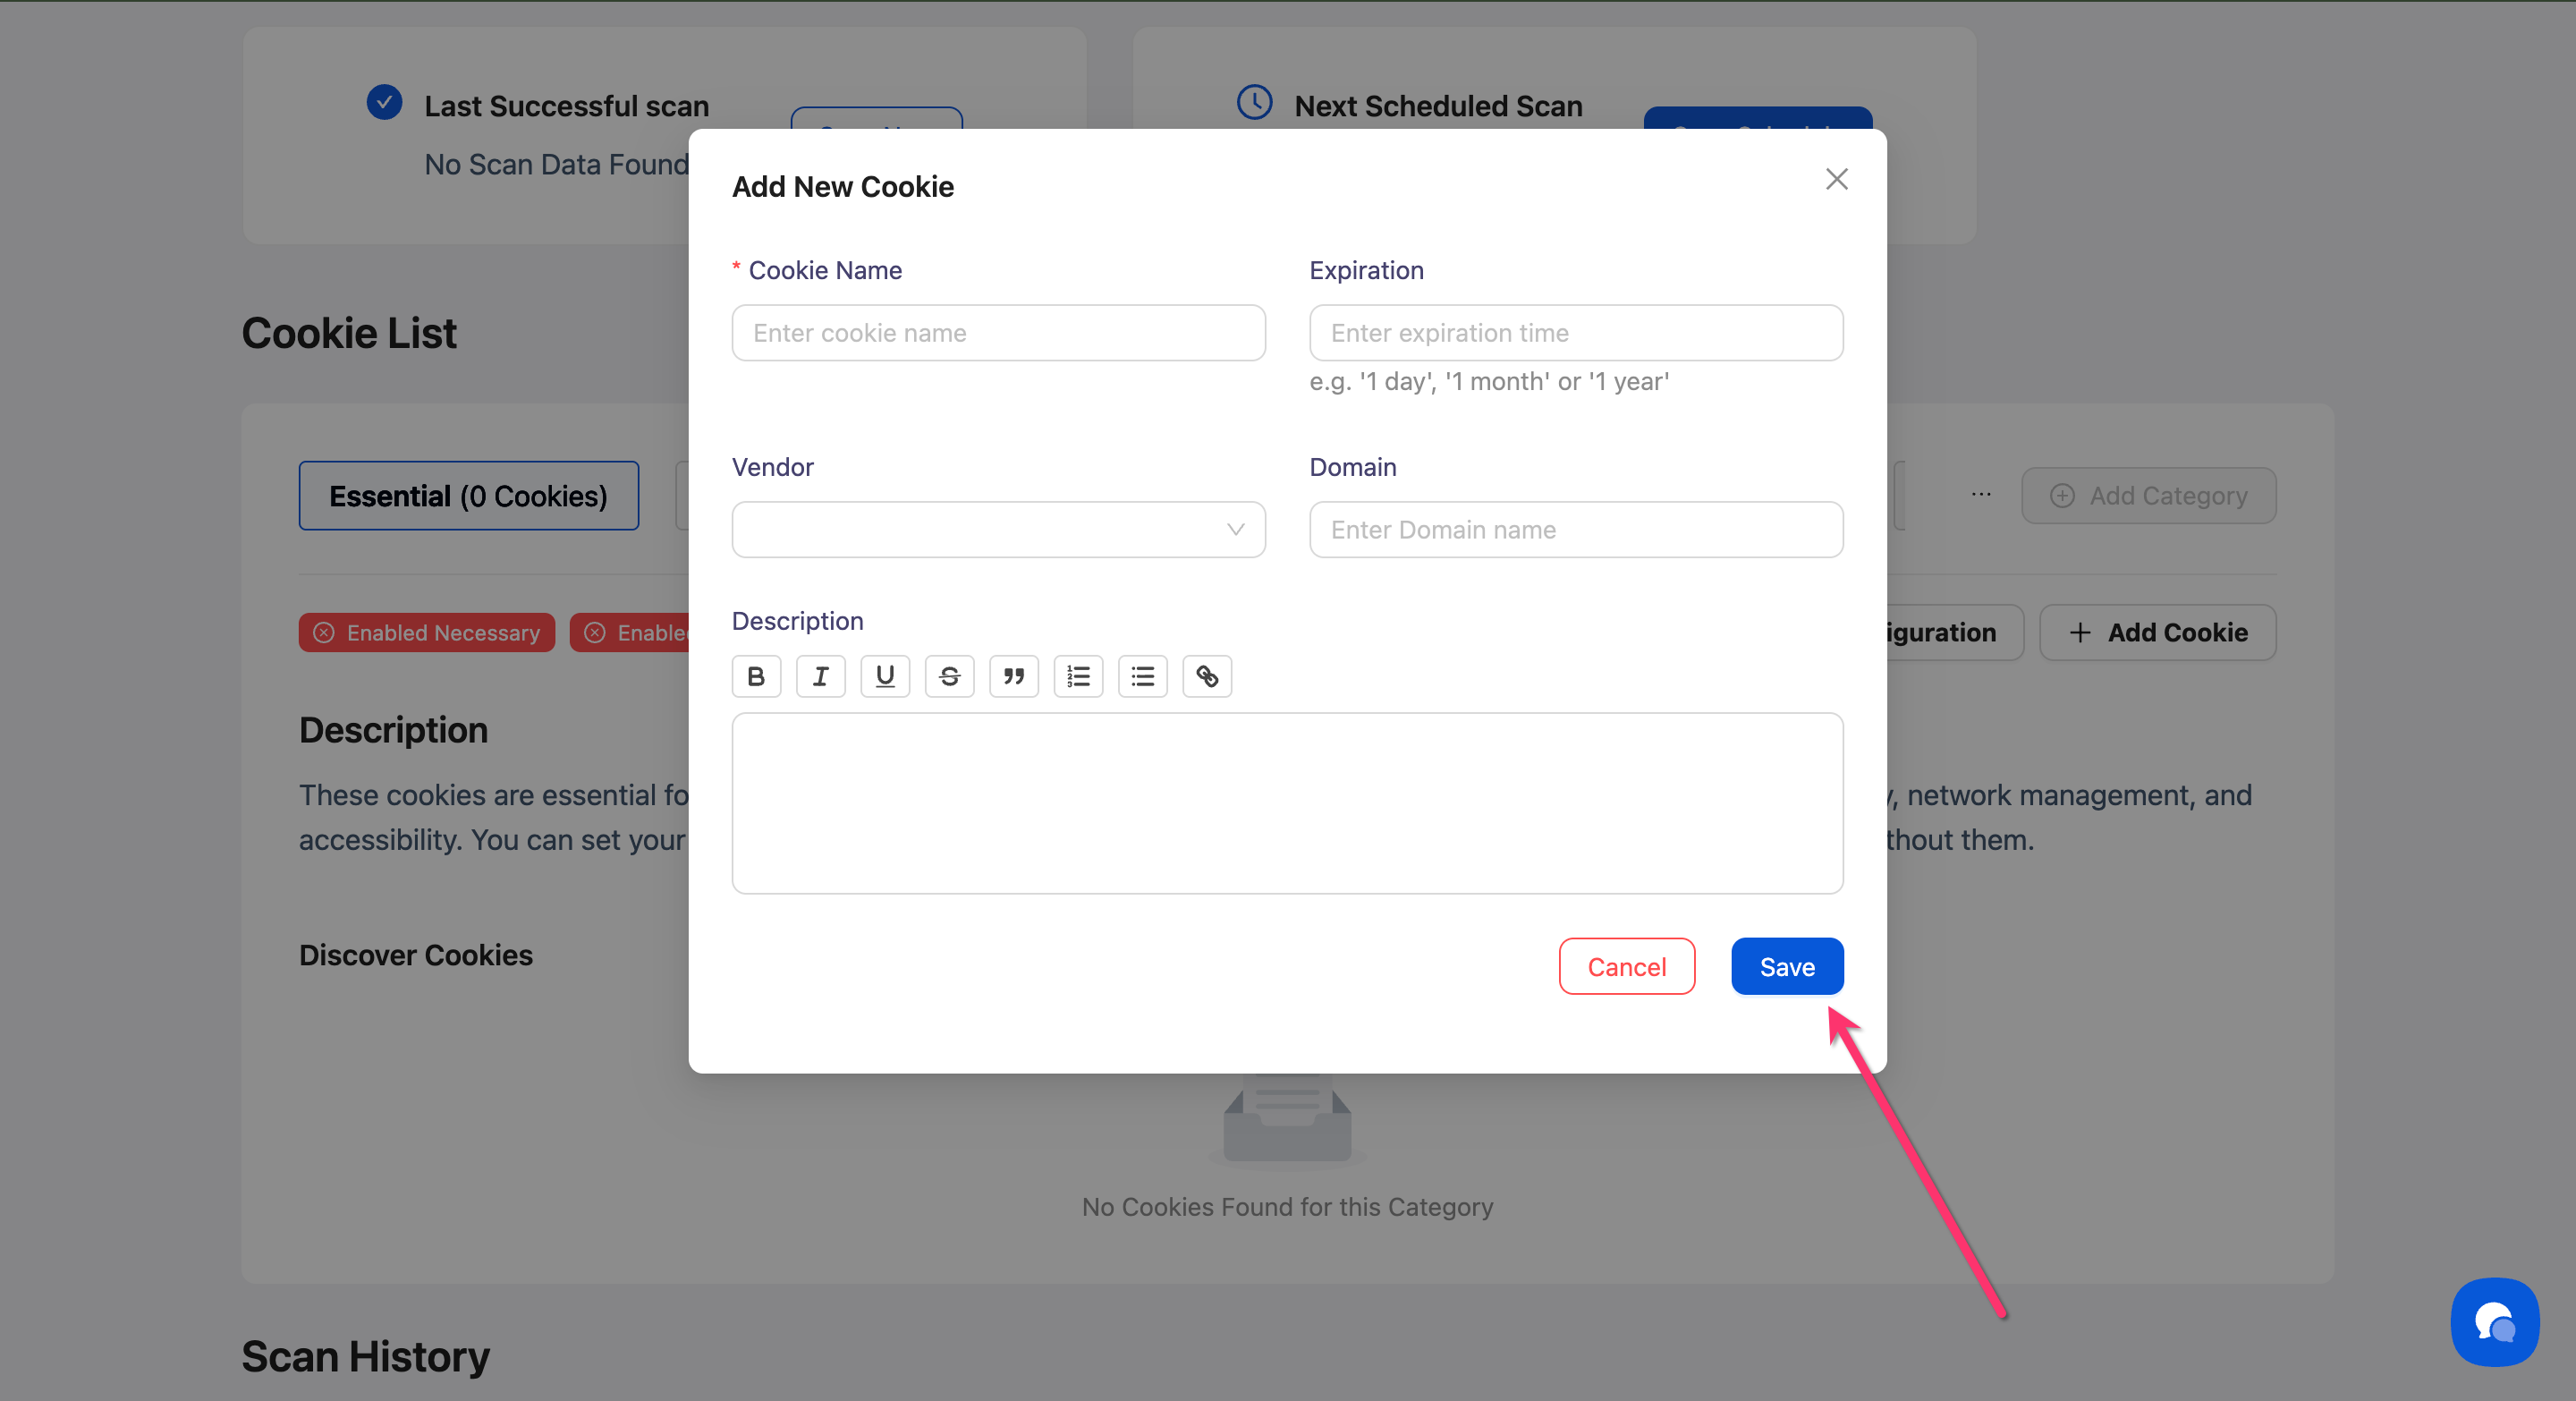
Step 8: Save the cookie
Click Save to add the cookie to your selected category.
Done!
Your cookie now appears in the cookie list for the selected category.
✅ Success indicator: The cookie appears in the category tab you selected.
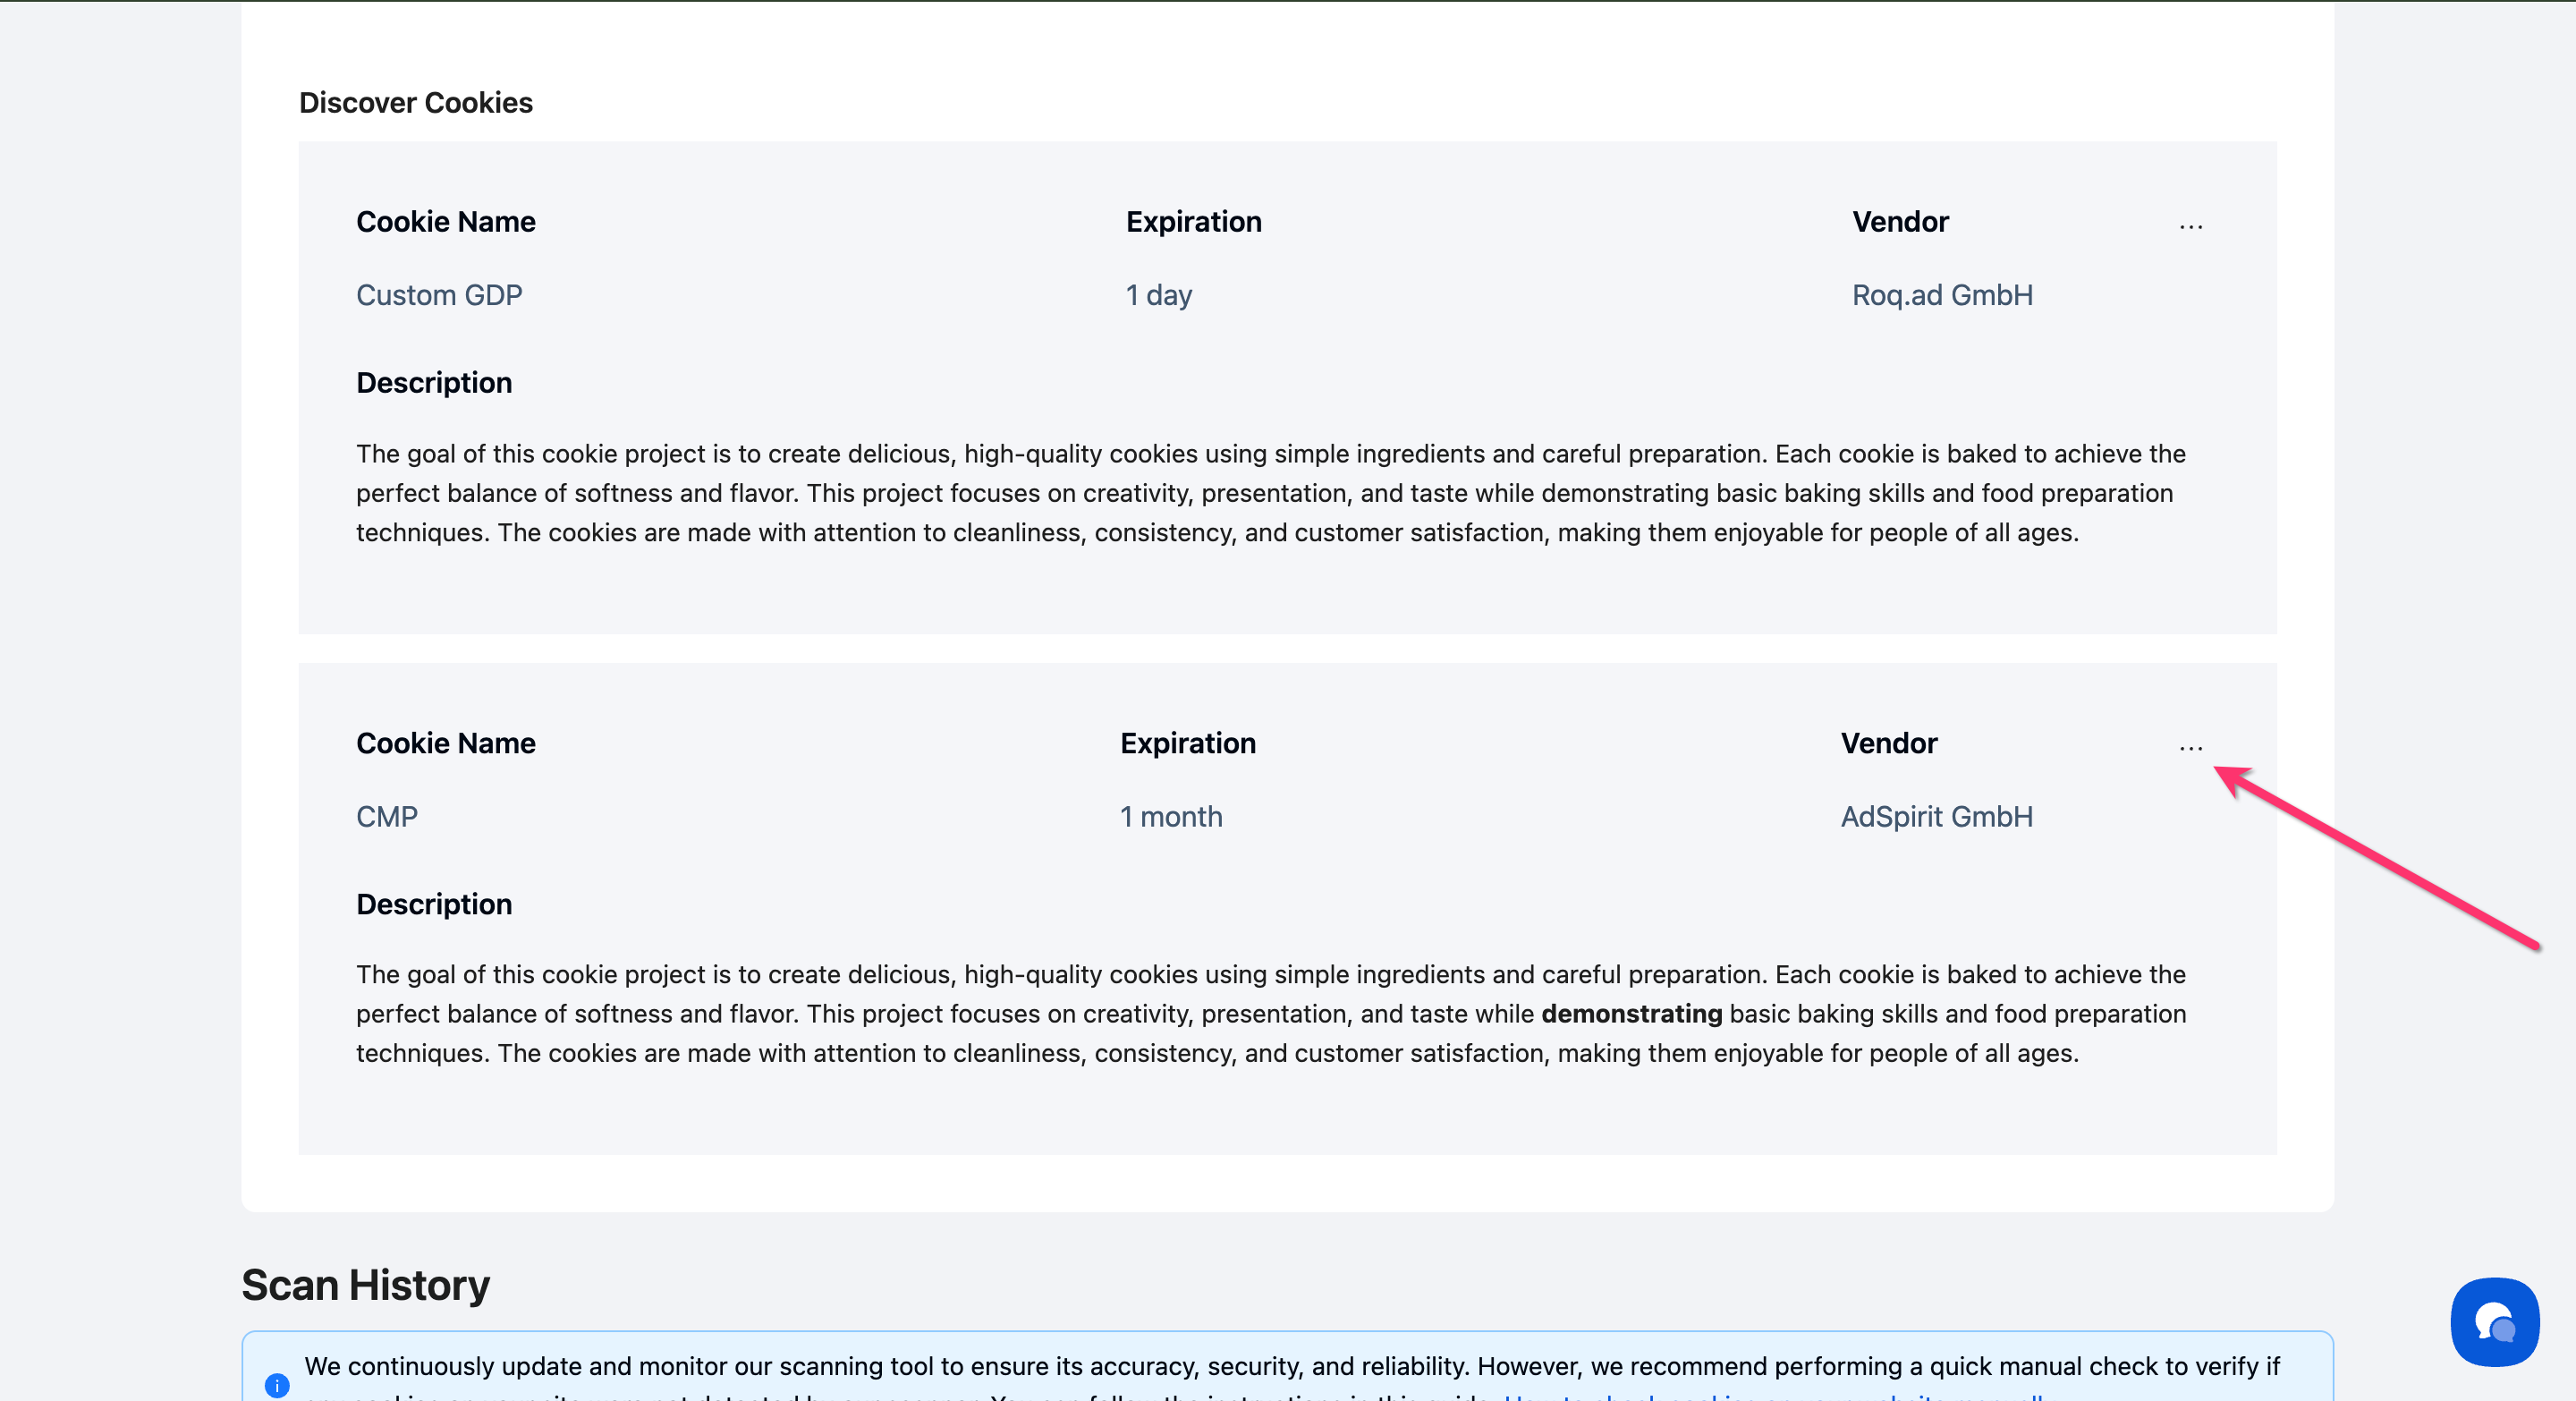
How to Edit Cookie Details
Step 1: Locate the cookie
Navigate to the category tab containing the cookie you want to edit.
Step 2: Open the cookie
Click on the cookie entry to open the edit modal.
Step 3: Update the information
Modify any field (name, expiration, vendor, domain, or description) as needed.
Step 4: Save your changes
Click Save to update the cookie information.
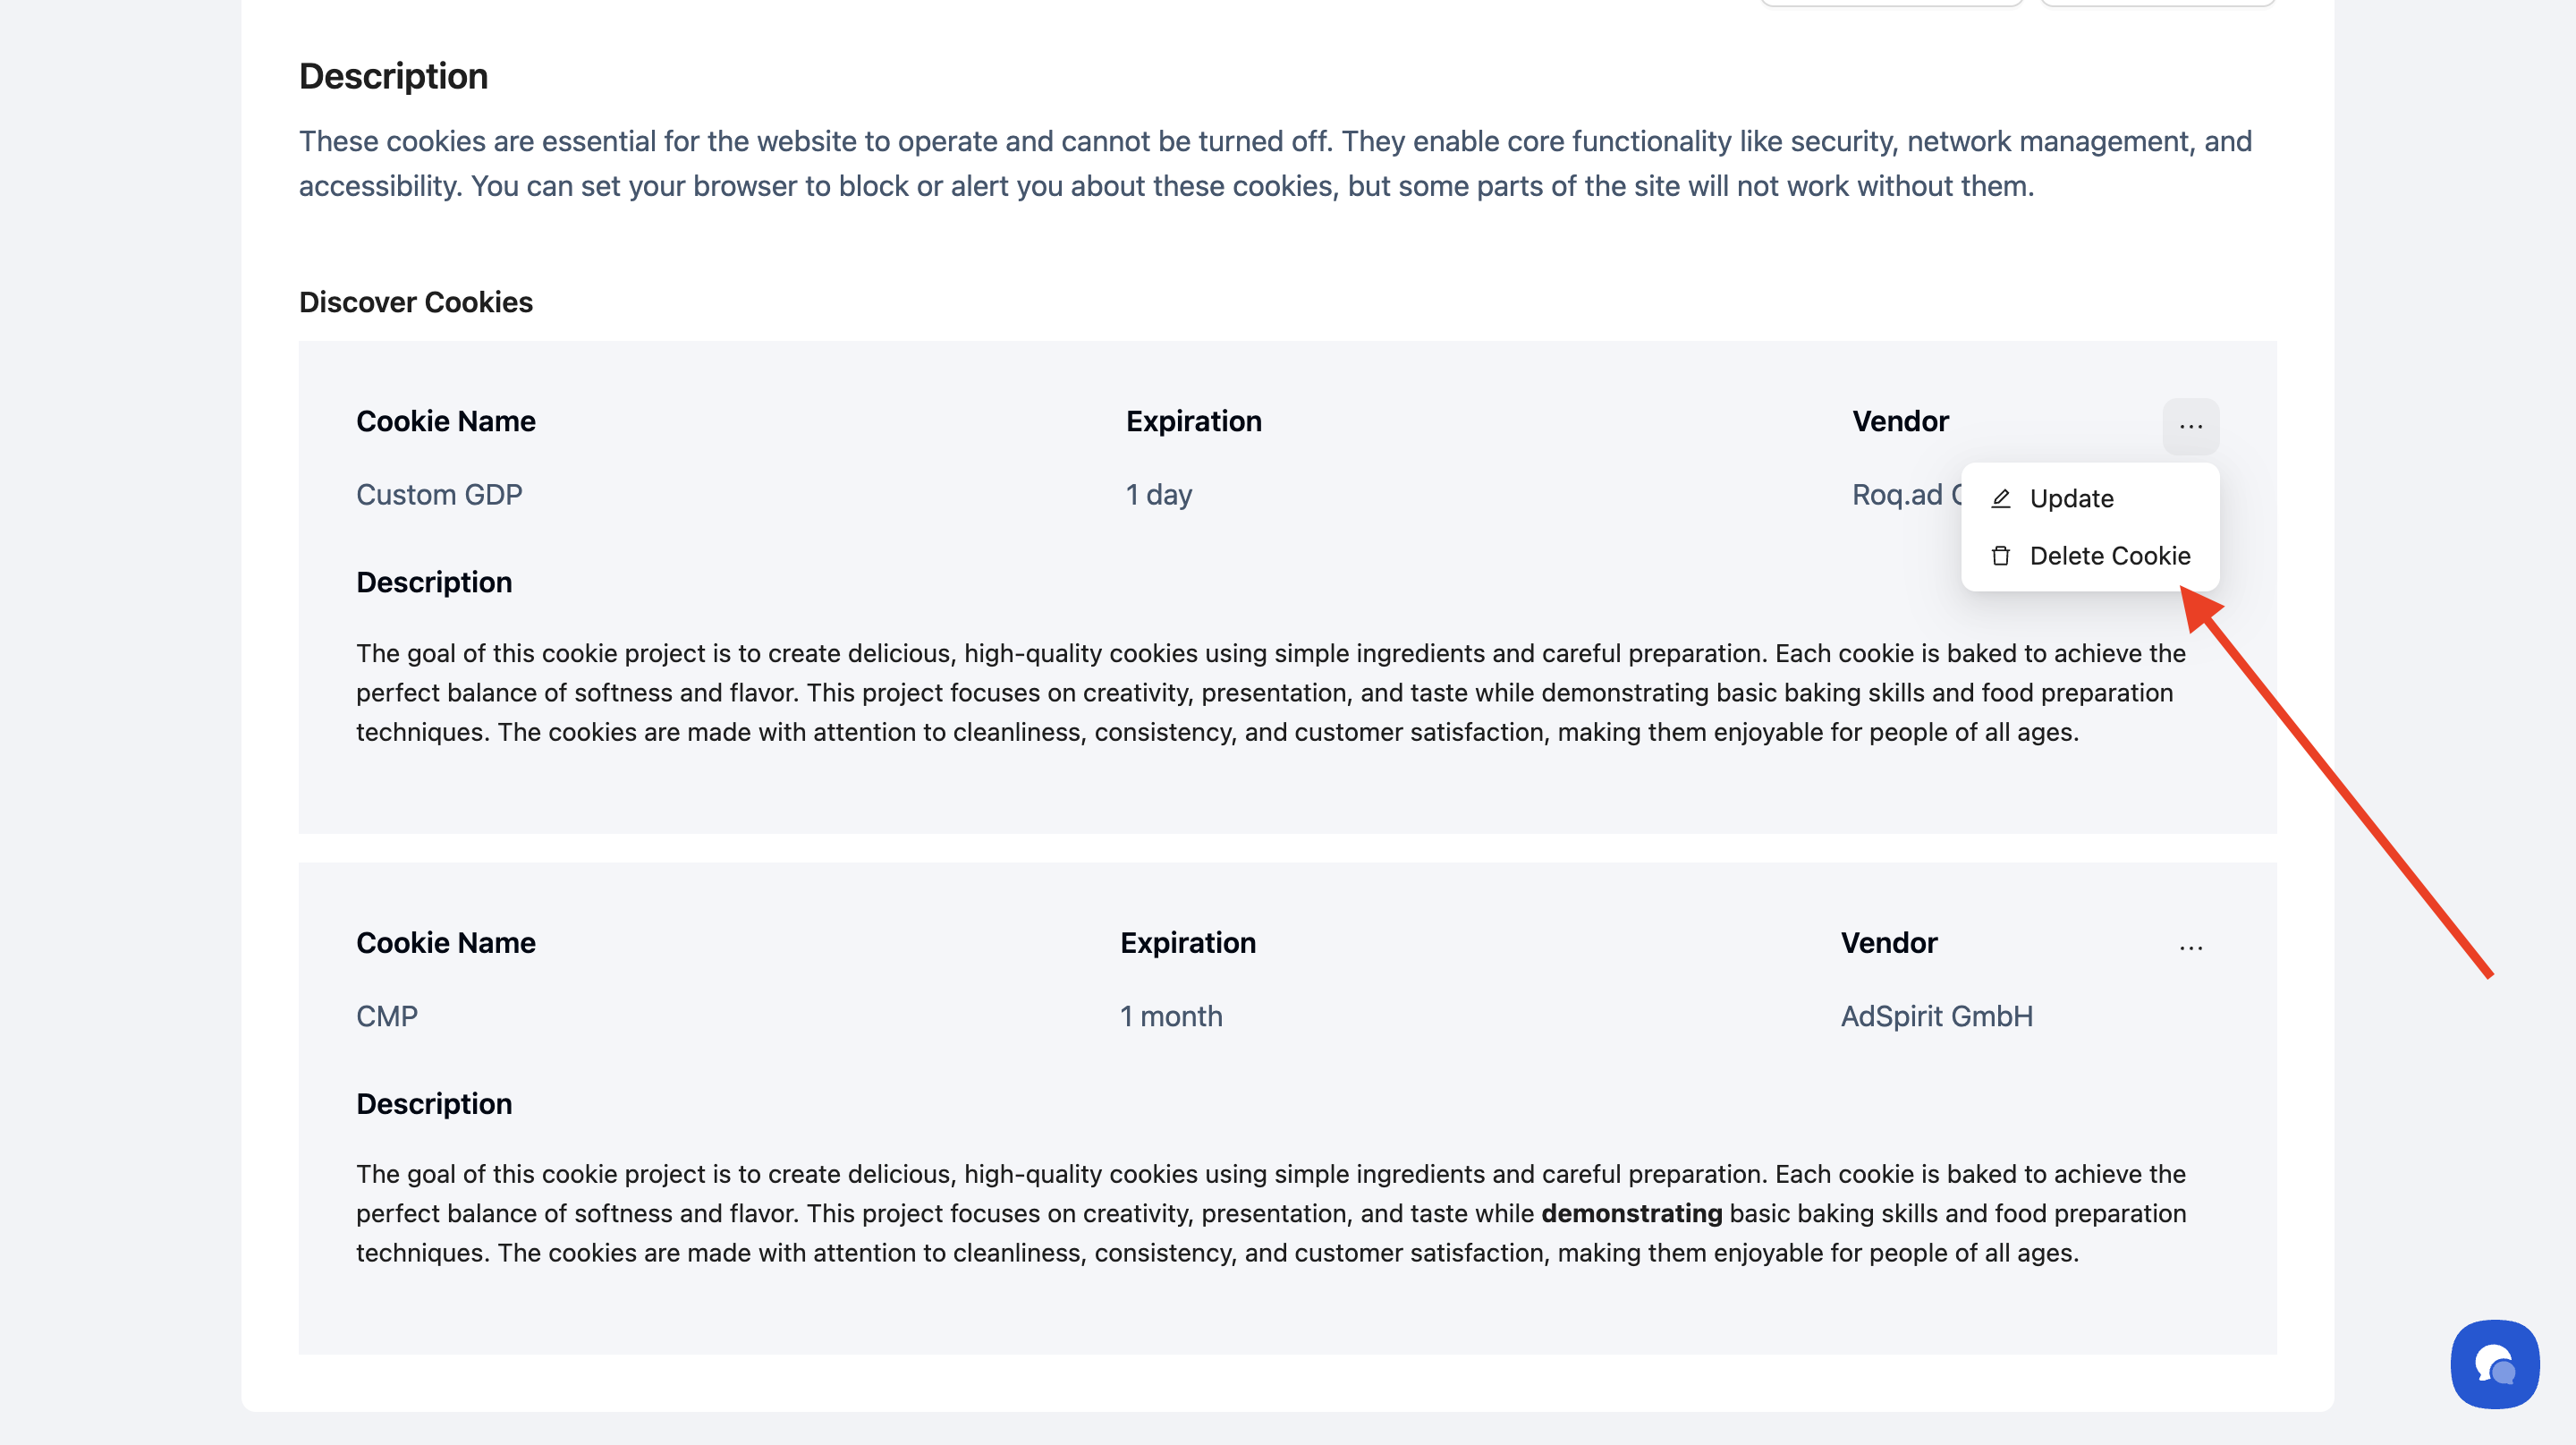
How to Delete a Cookie
Step 1: Find the cookie
Navigate to the category tab containing the cookie you want to remove.
Step 2: Open the cookie
Click on the cookie entry to open the edit modal.
Step 3: Delete the cookie
Click the Delete button (typically red or with a trash icon) in the modal.
⚠️ Important: Deleting a cookie from Consently doesn't remove it from your website—it only removes it from your consent banner's cookie list.
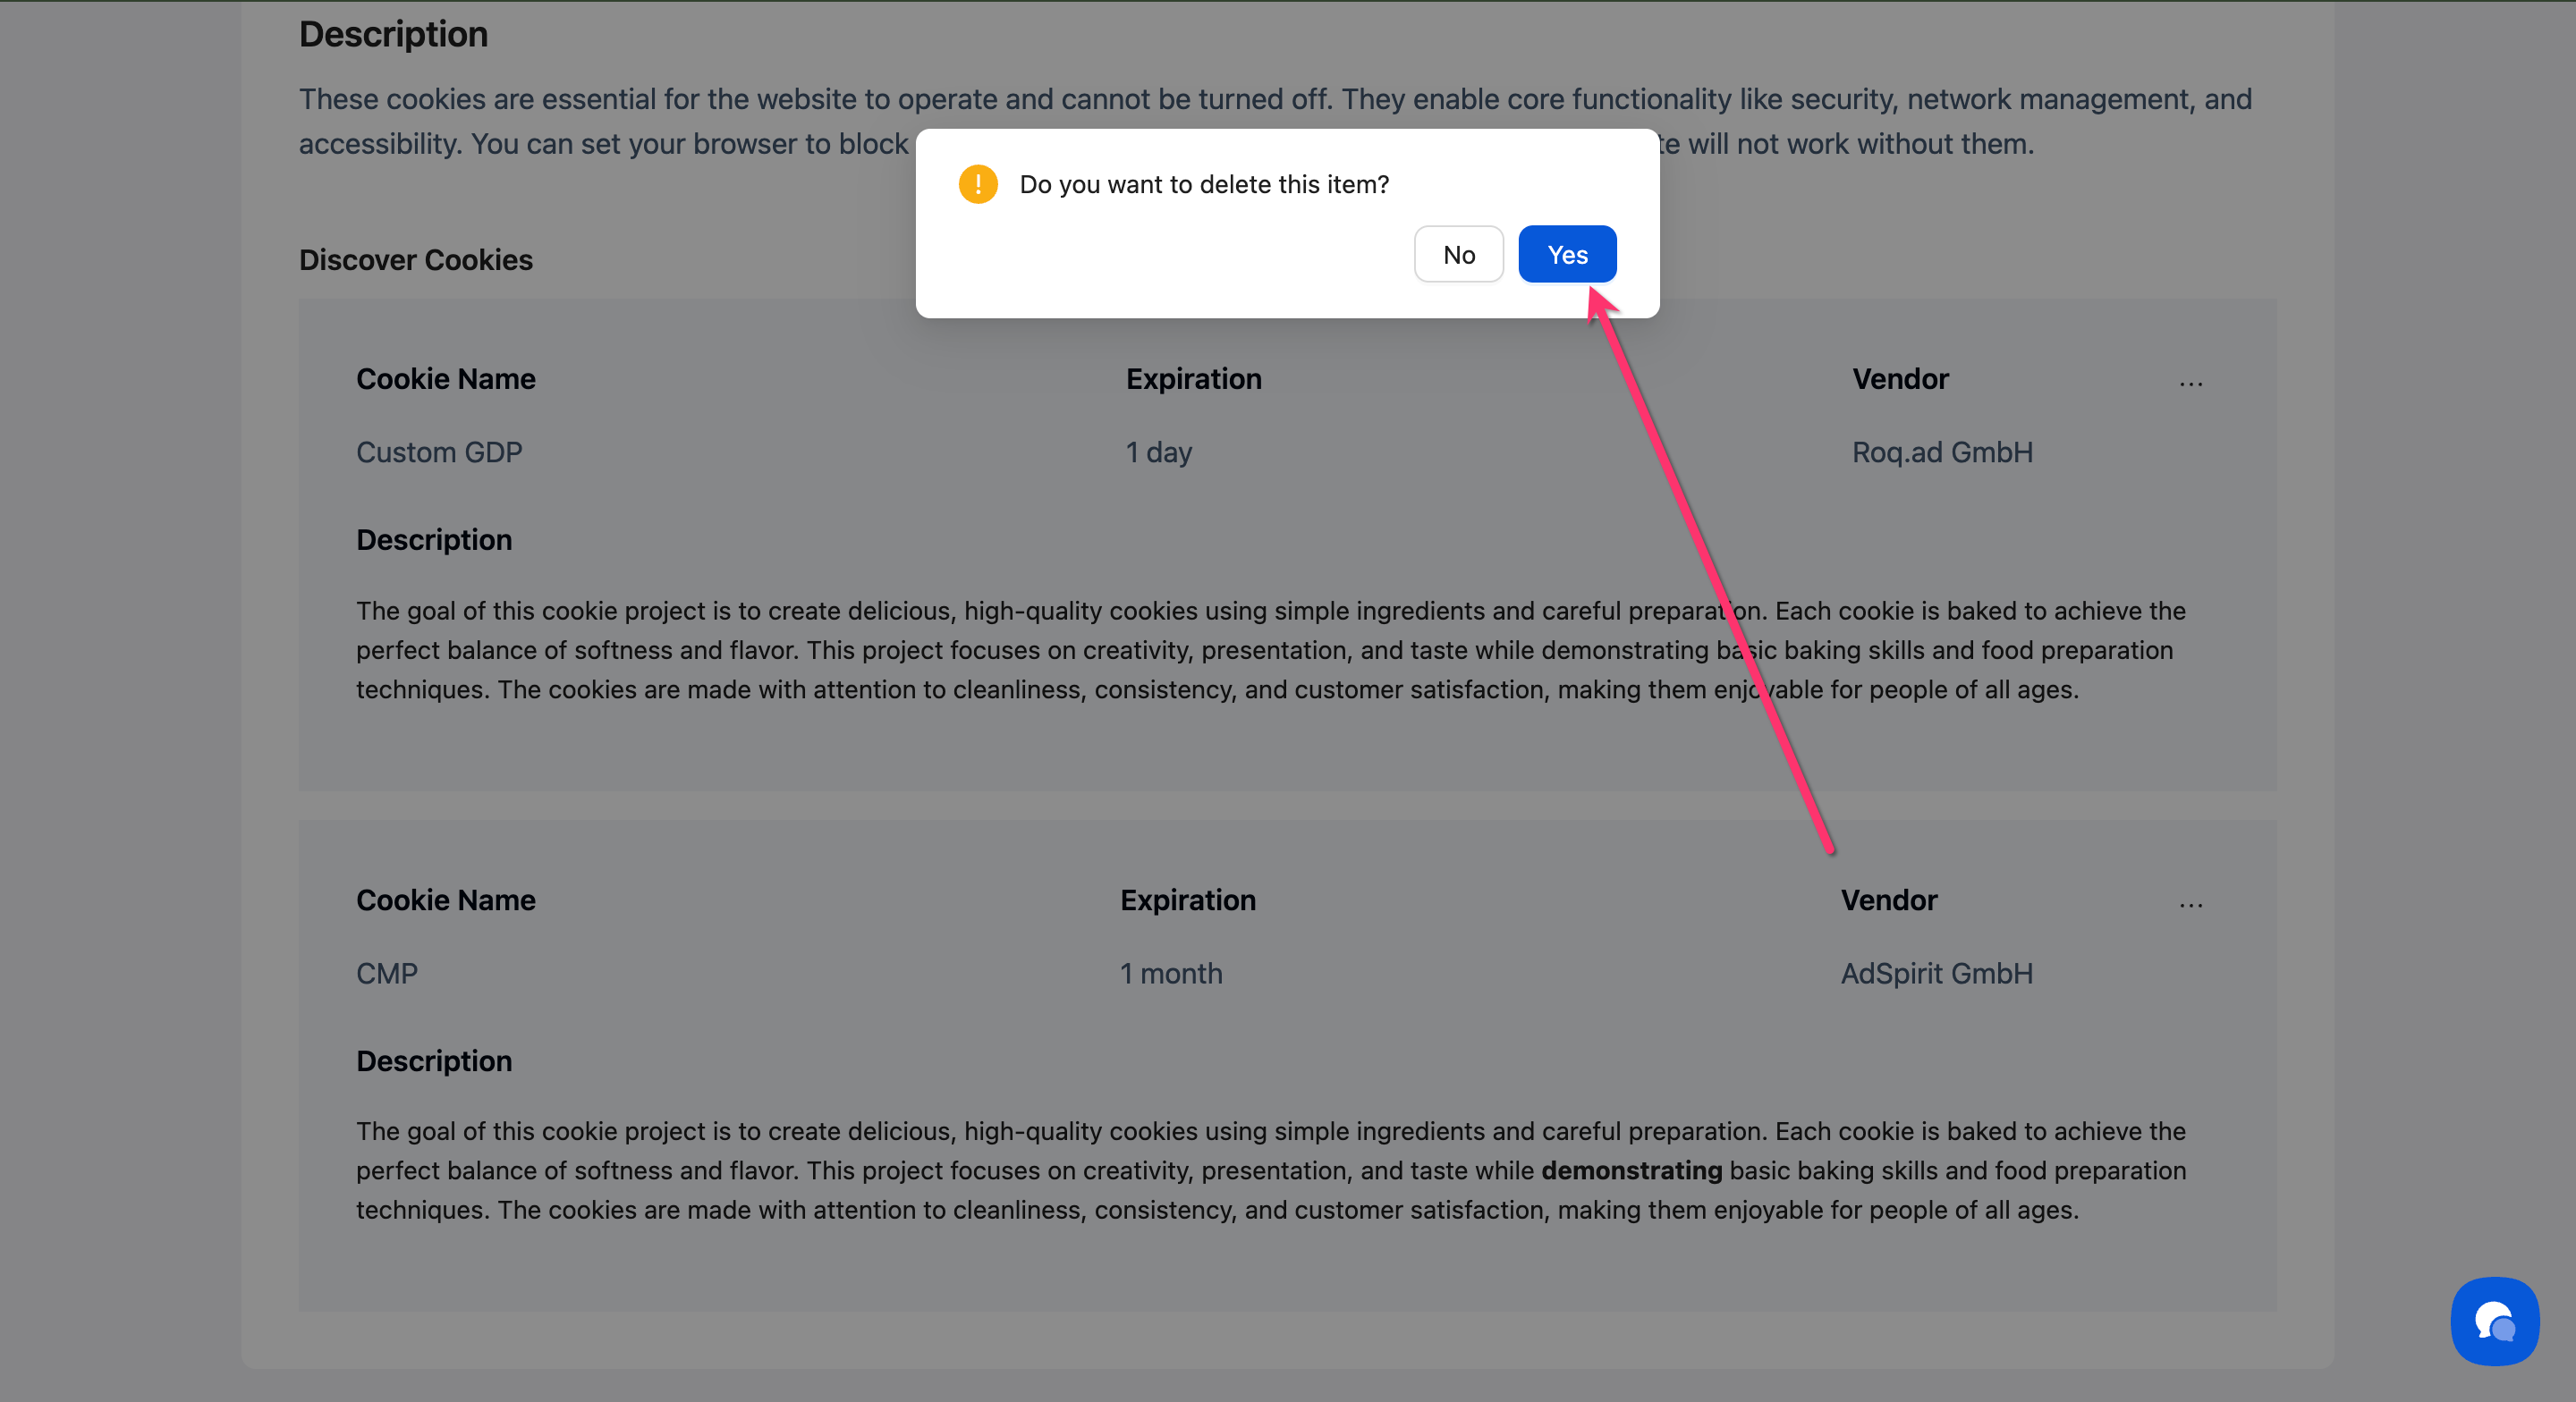
Step 4: Confirm deletion
Confirm the action when prompted.
Understanding Cookie Categories
Cookies are organized into six categories that determine how they're presented to visitors. Each category affects how the cookie is blocked or allowed based on visitor consent.
What's Next
Now that you've added or edited your cookies, you should:
Configure cookie category settings to control blocking behavior
Preview your Preference Center to see how cookies display to visitors
Troubleshooting
I can't find the cookie I just added
Solution:
Check that you're viewing the correct category tab
Try refreshing the page
Verify the cookie was saved by checking the total cookie count for that category
The expiration time I need isn't available
Why this happens: Consently offers three preset expiration options (1 day, 1 month, 1 year) to simplify cookie management.
Solution: Choose the closest option. The expiration shown in your Preference Center is informational—the actual cookie expiration is controlled by your website's code.
Changes aren't appearing on my website
Solution: Cookie list changes appear immediately in your Preference Center. If you don't see updates:
Clear your browser cache
Check that you've published your banner after making changes
Verify you're testing on the correct website
Related Pages
Cookie Auto-Blocking — How consent controls cookie loading
Cookie Scanning — Automatically detect cookies on your site